11. MP MIDI App and plugins
All about the MP MIDI app/plugins and guides for Cubase, Bitwig Studio and Logic Pro control surfaces.
- 1. The MP MIDI Controller Application
- 2. MIDI Remote Control Surface for Cubase - Nuendo v13 and later
- 3. Using 2 MP Controllers at the same time
- 4. Controlling Bitwig Studio native devices via the MP MIDI app
- 5. MP MIDI App - September 2024 Update
- 6. Windows - MP MIDI App - Sending keyboard keys
- 7. Windows - MP MIDI App - Using the joker encoder
- 8. Mac OS - MP MIDI App - Sending keyboard keys
- 9. Mac OS Permissions to send keyboard keys via the MP MIDI app
- 10. MacOS - MP MIDI App - Using the joker encoder
- 11. Controlling DaVinci Resolve with MIDIGrade software
- 12. Mixer Mode in the MP MIDI app
- 13. MIDI Ports on Windows
- 14. Using 2 MP Controllers at the same time
- 15. Controlling Logic Pro with the MP Controller Control Surface
- 16. Blocking C1-xMP1 MIDI Input CC Messages in Logic Pro
- 17. Controlling external hardware via NRPN using the MP MIDI app
1. The MP MIDI Controller Application
The MP MIDI Controller app/plugin (VST3/AU/AAX and standalone application for Mac and Windows) transforms the MP Controller to a flexible, comprehensive midi controller.
Current version: v1.0-fa4687e--H2025-11-03--B2025-11-04
Mac Users: The latest version requires macOS 13.3 Ventura or higher.
Cubase preset version: v1.4 - Sept-04-2025
The app features 32 encoders and 32 buttons on each page and there are 32 pages. That is a total of 1024 midi encoders and buttons ready to be used.
This software acts as a generic standard MIDI control for sending/receiving CC and Notes. Furthermore, it offers many more advantages than other hardware controllers because it can be programmed on the fly as you work.
Here is a video overview of the MIDI app: https://youtu.be/7miAnnNMvmA
Please note that this is not a DAW specific guide on how to setup MIDI controlling in your preferred DAW.
This guide only serves to introduce and explain the capabilities of the MP MIDI app/plugins.
For setting up MIDI controlling in your preferred DAW, see the documentation/guides for your preferred DAW
Mixer Mode
In the November 2024 update we have introduced the Mixer Mode view. See the documentation here
The guide and midi remote script for Cubase can be found here
The March 2026 update can now use NRPN to control external hardware. See here for more information

Installation
The installer will install the standalone application and the VST3/AU/AAX plugins and create the necessary folders under /MP/Host. After installation you can just run the app or load the plugin in your DAW.
Only one instance should be run at any given time. Either the standalone app or the plugin. Do not run both.
The standalone app is installed in the Applications folder on the Mac and in Program Files on Windows.
In Windows, a desktop shortcut is also created.

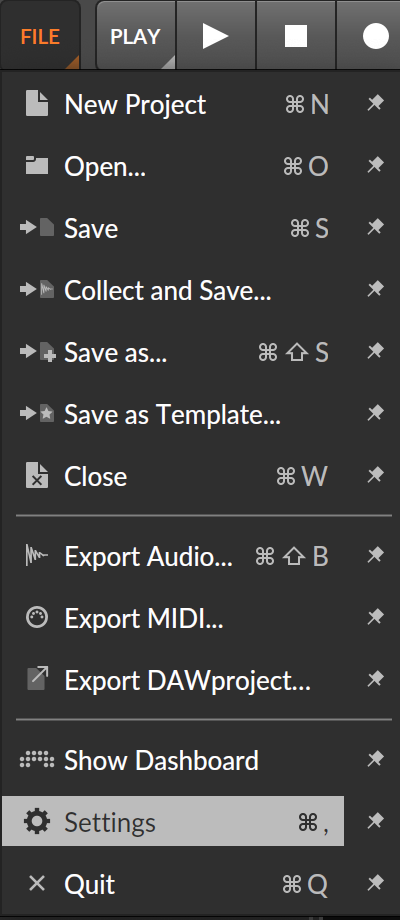
Opening, closing and quitting the standalone app
First run the app as usual. It will show a small icon on the taskbar on Windows, top bar on MacOS.
Then to open the app Window on the MP Controller, you need to click on the small icon, on Windows taskbar  The same applies to the Mac, the app icon appears on the top bar.
To close the app window click on the taskbar/topbar icon or click on the "Close Window" button on the application.
To quit the application you need to right click on the taskbar/topbar icon and choose Quit.
A pop up window will appear asking to confirm if you want to quit (both on Mac and Windows)

MIDI Ports
The MIDI device of the MP Controller app will be displayed in Mac OS and Windows as "MP MIDI" (not as c1-xMP1).
You can use the MP MIDI Controller app/plugin as a standard midi controller to control any DAW, software or hardware that sends and receives midi.
The "MP MIDI" is a virtual port and it receives sends midi only to the c1-xMP1.

Setup MIDI on Mac
On the Mac, once you run the MP MIDI app or plugin, it will create a virtual MIDI port named MP MIDI.
The MP MIDI port can be selected in your DAW for IN and OUT, to send and receive MIDI.
On the Mac, clicking on the MIDI router button will show up the available MIDI IN and OUT ports.
No routing is necessary on the MIDI router to use the MP MIDI app/plugin with your DAW.

Setup MIDI on Windows
See this article

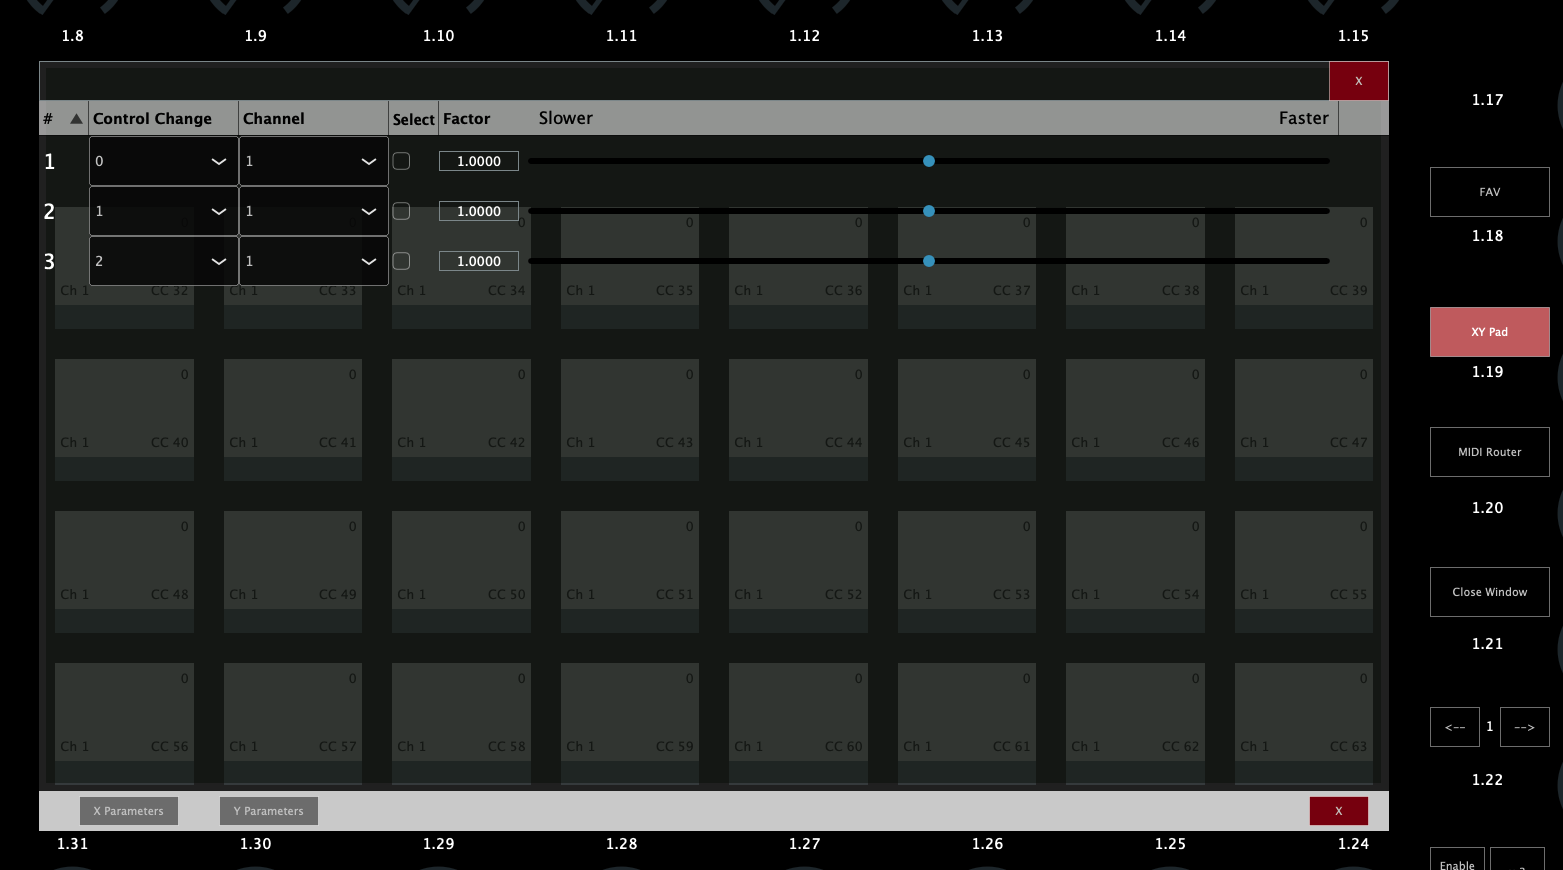
XY Pad
The MP MIDI app also features an XY pad which can control 3 CC on each axis

Using the Plugin Panel
The plugin panel was added in the July 2024 update and it can be used to switch plugins on the MP Host and switch on the Ableton Control Surface (Ableton MPH). The Plugin Panel Feature is only available when running the MP MIDI plugin (not the standalone application) and/or Ableton MPH plugin (not the standalone application).


MIDI CC on encoders and buttons
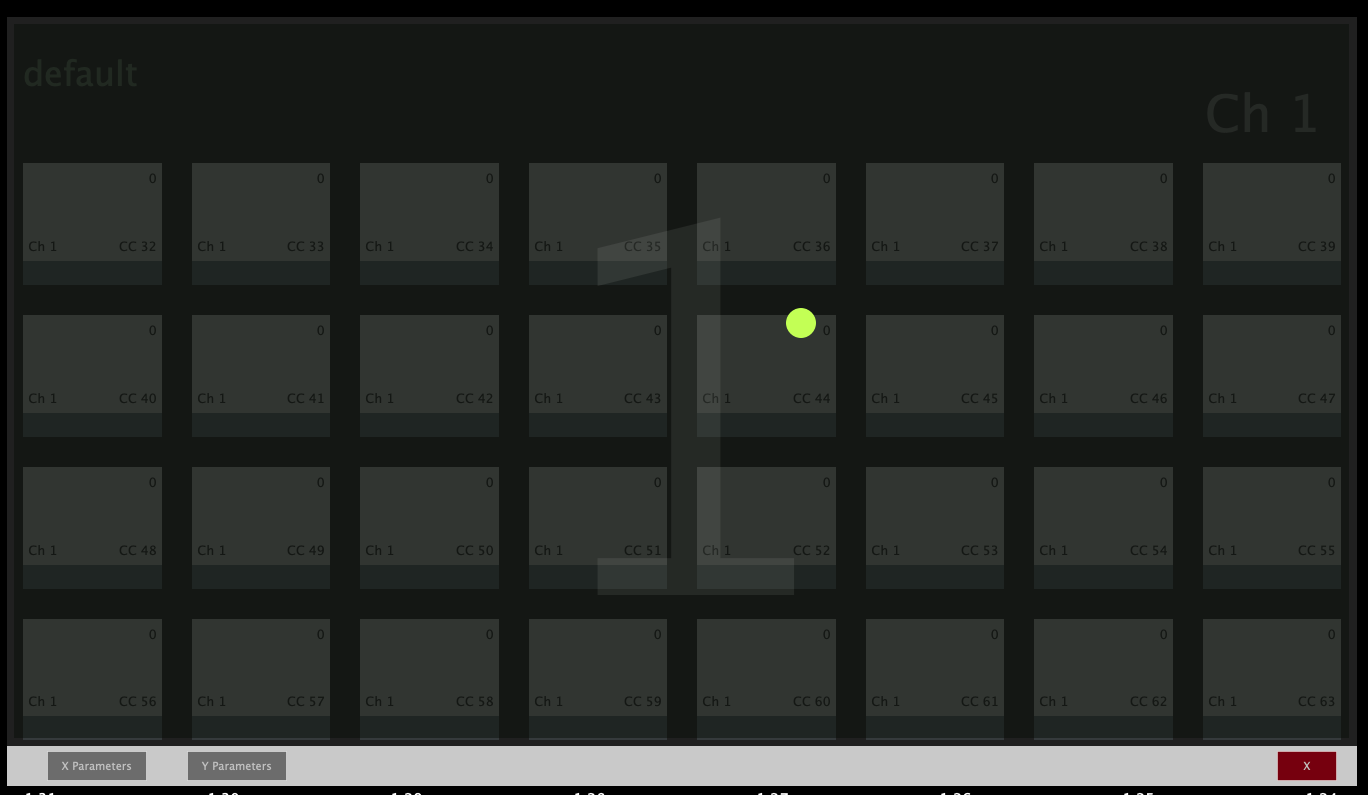
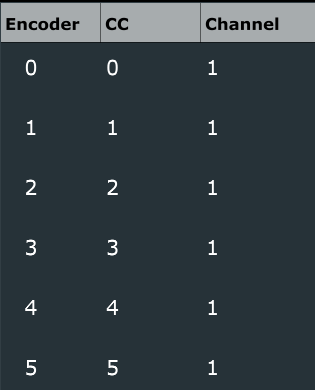
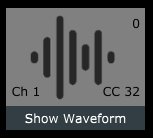
The app creates a default preset where the encoders are assigned from midi Channel 1, CC 0 to 31 and buttons CC 32 to 63 on the first page.
On the second page, the encoders are assigned from midi Channel 1, CC 64 to 95 and buttons CC 96 to 127.
The same pattern repeats for all 16 midi channels, so every 2 pages, the channel number increases by 1 and the default CC assigned to buttons and encoders are the same as pages 1 and 2.
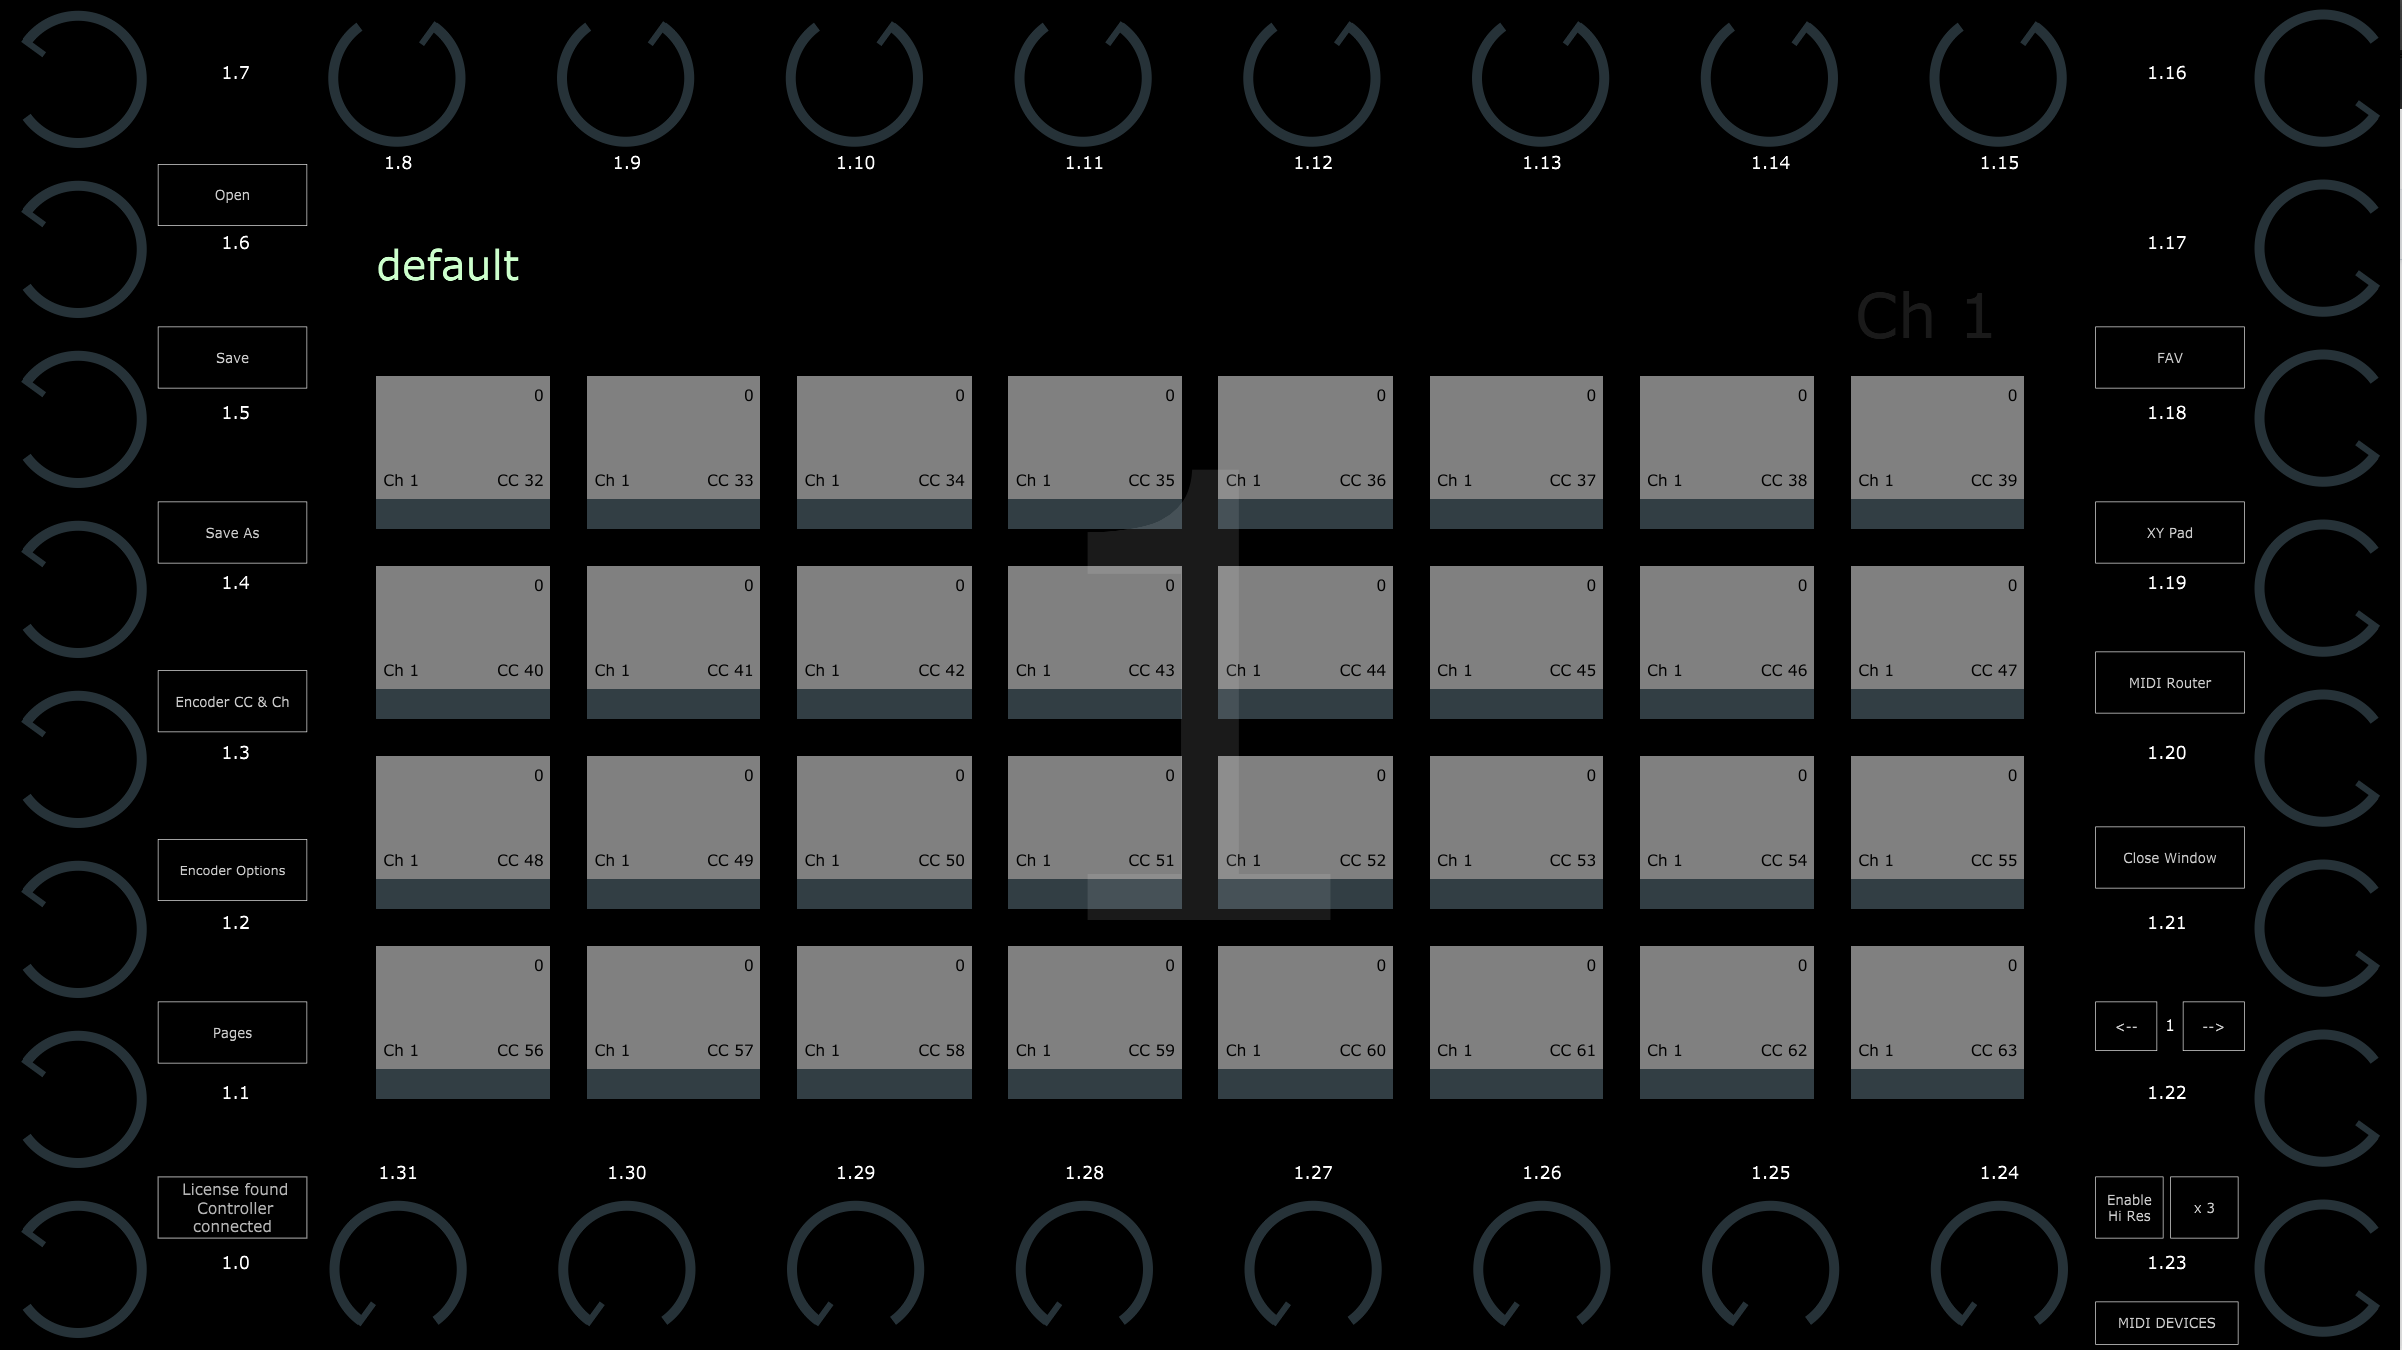
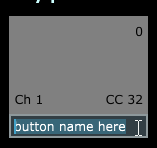
Each encoder has a default label: Channel.CC. For example, 1.31 means Channel 1, CC 31
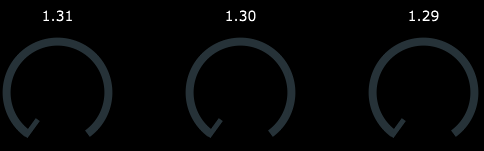
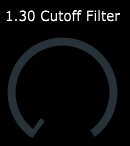
When you double click on an encoder label area it opens a text box to type in the label you want for the encoder.
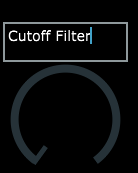
and it will appear as

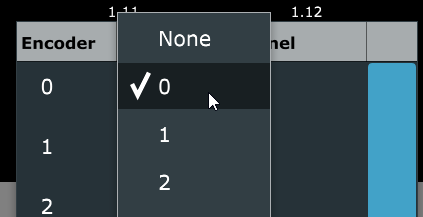
The Encoder CC & Ch button
displays the list of CC ids assigned to each encoder on the currently selected page. We can change the CC and Channel for each encoder from that list.
The March 2026 update can now use NRPN to control external hardware. See here for more information

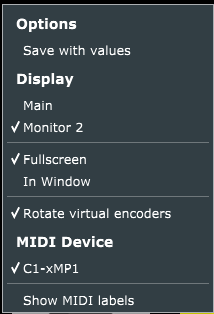
Right Click Menu options
1. The right click menu on the area allows to select an option to save the CC values of the buttons and encoders.
If this is selected the presets saved will include the current values of the encoders and buttons.
3. Selecting Fullscreen or Window Mode of the app window)
4. You can choose to have the virtual encoders rotated as the bottom row of encoders.
5. This will display the Channel.CC on each encoder and button.

Encoder Options
Right click and choose Encoder Options form the menu to show the encoder options for each encoder.
The encoder options are described here
The S checkbox option
Additionally, there is an Sync option in the MP MIDI App.
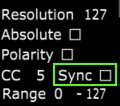
This is checked (enabled) by default on all encoders and it will sync encoders with the same CC id and channel.
When you have multiple encoders with the same CC id and channel they will be synced when you turn one of them.
This is useful when you set encoders with the same CC ids and channel on multiple pages.
To set the CC id and channel on an encoder use the "Encoder CC & Ch" button.

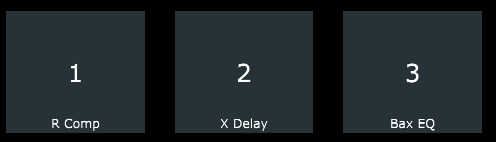
Pages
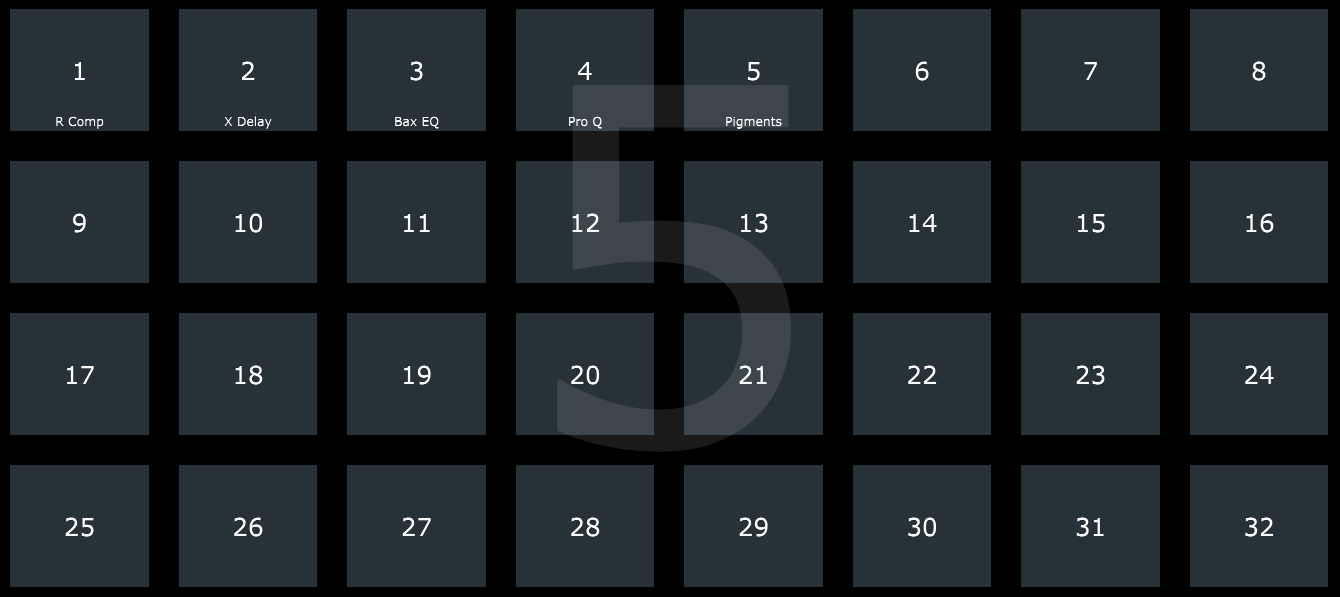
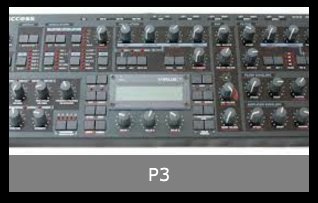
The title of a page is displayed at the bottom of each page button
When you right click on a page button, the options menu appears on top.
Here you can set a CC message to be sent when clicking on a page button. This is useful because you can assign it to your DAW to perform a certain action upon changing a page on the controller, like open a audio effect device or instrument.
Page Title
Each page has a title which can be written under the Preset name by double clicking under the preset name. The page title will appear on the page button of each page.


Presets
A preset file when saved will carry all the changes made within the application, except the current CC values of the encoders and buttons. This includes CC ids, background images on buttons and on the pages, colors of encoders, names assigned on encoders, buttons and the favorites.
Presets can be saved with the Save and Save As buttons. The can be recalled via the Open button or via the Favorites button (if these presets have been assigned to Favorites).
Choosing the option Save with values, will save the current values of the encoders and buttons from all pages.


Favorites
Clicking on the Favorites button will open the Favorites page
Here you have a total of 16 buttons to name them as you wish for different categories.
Right click on a button and it will allow you to type a name
Right click on a preset button and it will preset the following options:
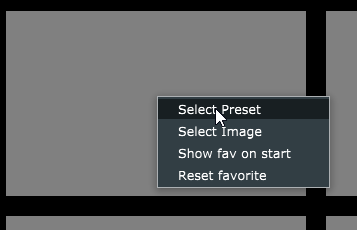
You can select a preset to be loaded when clicking on the button.
Select an image to appear on the button
(image files will be copied automatically in the MP\Host\MP MIDI Presets\Images folder)
Select to show the Favorites page when the app starts.
Reset the favorite.

Encoder Options and Hi Res
The encoder options offer the same options as in the MPH. For all the options and the Hi Res buttons see the article here

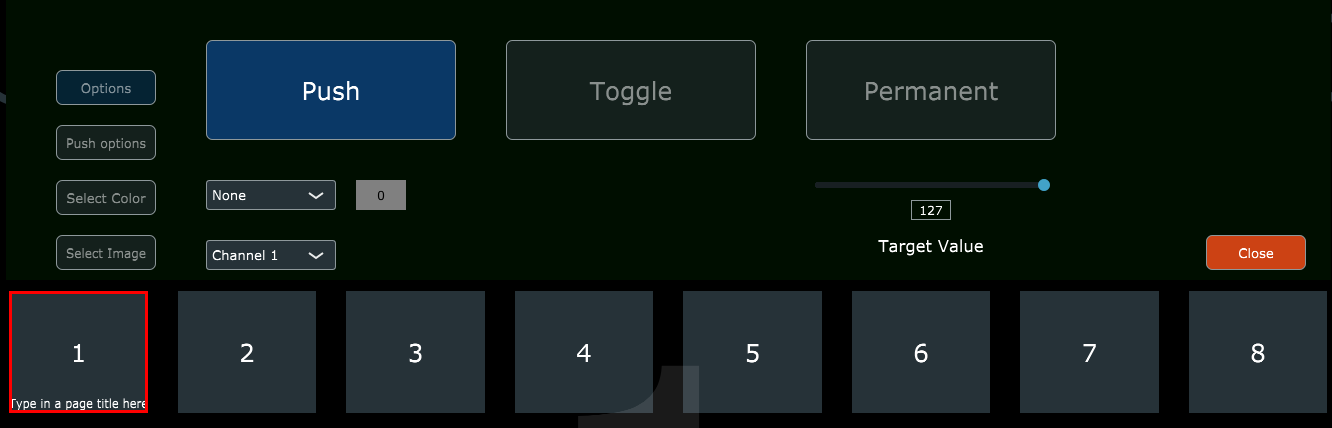
Button and Options
Right clicking twice in the bottom row on a button allows to type in a name for the button.
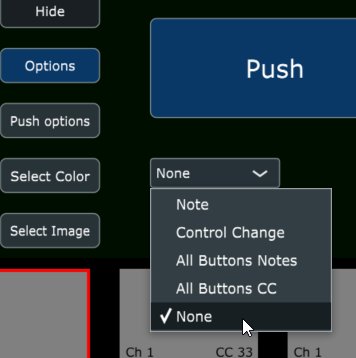
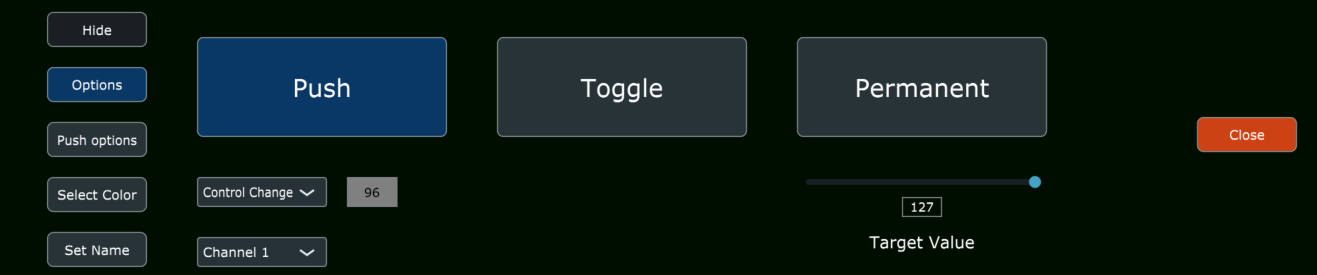
Right click on any button and the button options will appear on the area on top of the buttons.
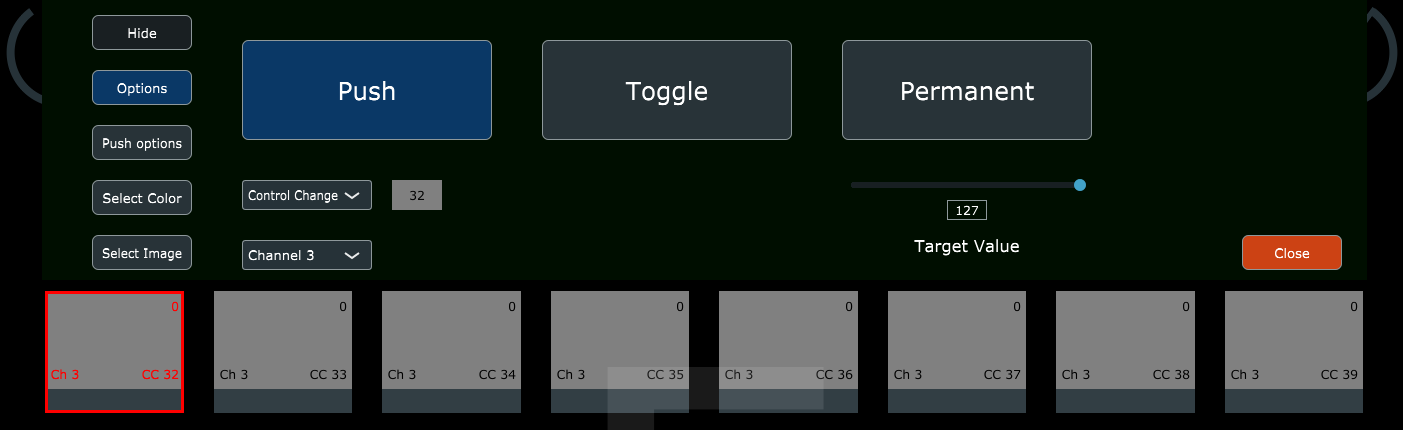
The main option buttons on the left:
- Show/Hide: shows and hides the selected button.
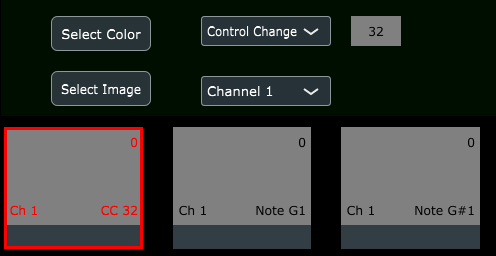
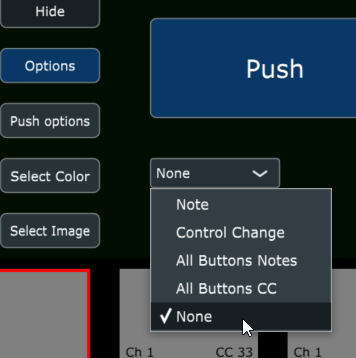
- Options: displays the 3 options to select the button type.
- Push Options: displays the options when the selected button type is Push.
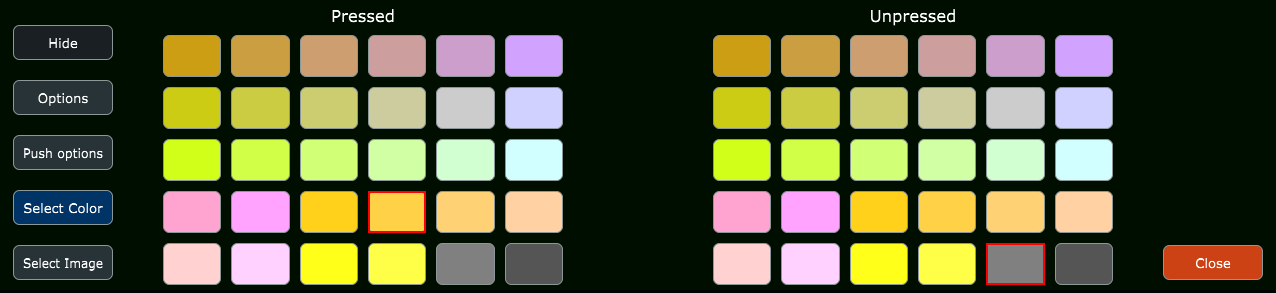
- Select Color: displays 2 color palettes to select button colors for the pressed and non pressed state.
- Select Image: Select an image for the button.
- Close: closes the menu.
While you have the button options menu open, you may right click on another button and it will show the options of that button.
Push (default) - This is a momentary button type that when released will return to the non-pressed state.
Here we can assign a Channel, CC id and a CC value for that button.
You can also set the selected button to play a note or set all the buttons of that page to play notes.
The following options are available:
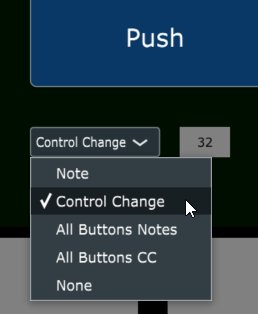
Selecting Note will set the selected button to play a note when pressed. When this option is selected, the following options appear. The middle is the note selection dropdown and the right is the octave selection dropdown.

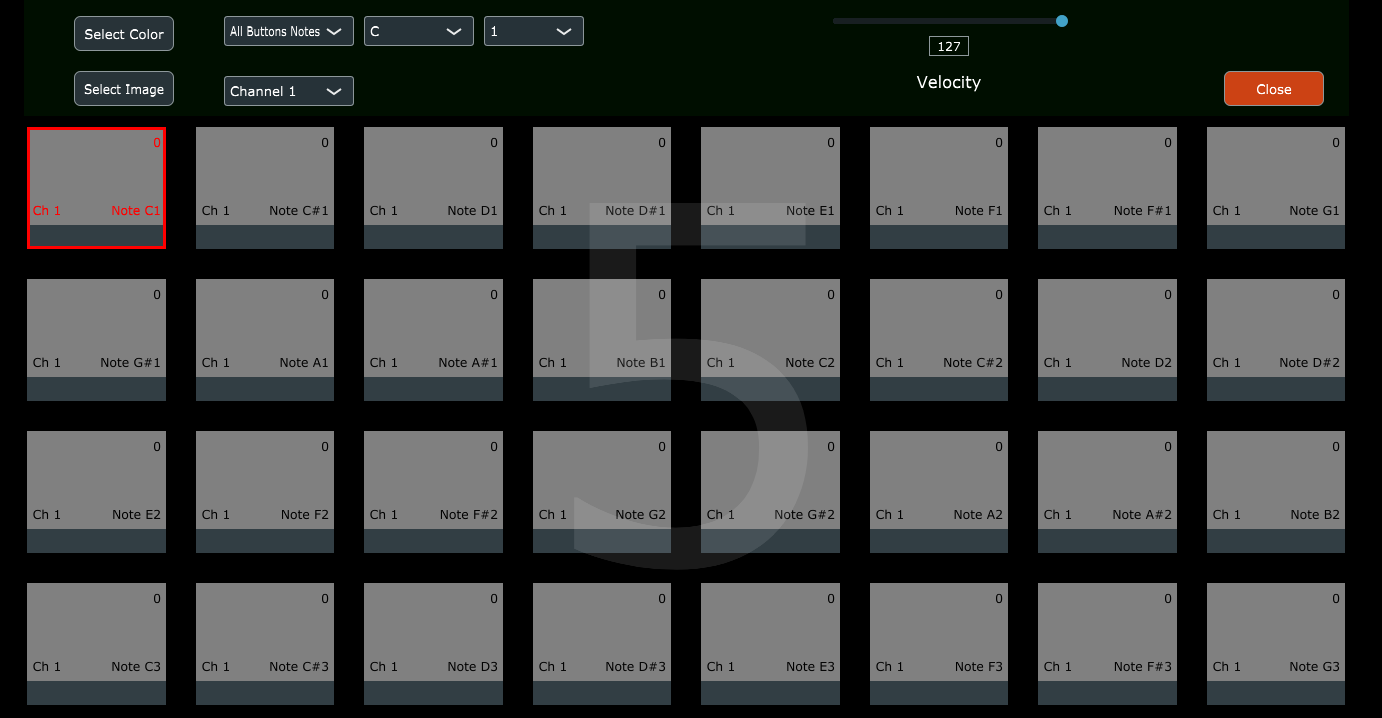
When closing and reopening the button menu, will allow you to set individual options for each button. So, you may set for instance, one button to send CC messages instead of notes, while all the other buttons still send notes.
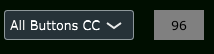
The option All buttons CC will cause all buttons in the page to send CC messages
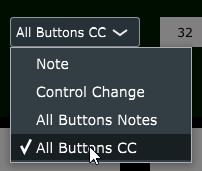
The starting CC for all buttons is set here:
Toggle - This is a permanent type button that when pressed again will go to the non-pressed state.
The default Toggle button type range is 0 for minimum and 100 for maximum.
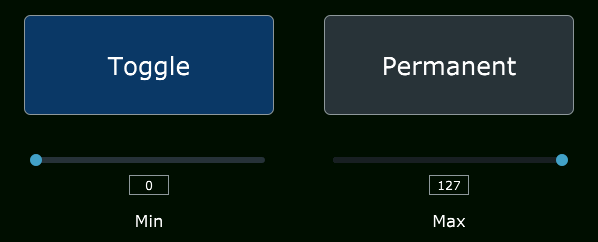
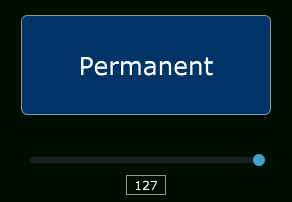
Permanent - This is a permanent type that can only be pressed once. You can set multiple Permanent type buttons on the same parameter to set a specific target value on the controlled parameter. When other Permanent type buttons are pressed will cause the rest of the Permanent values to change state to not pressed.
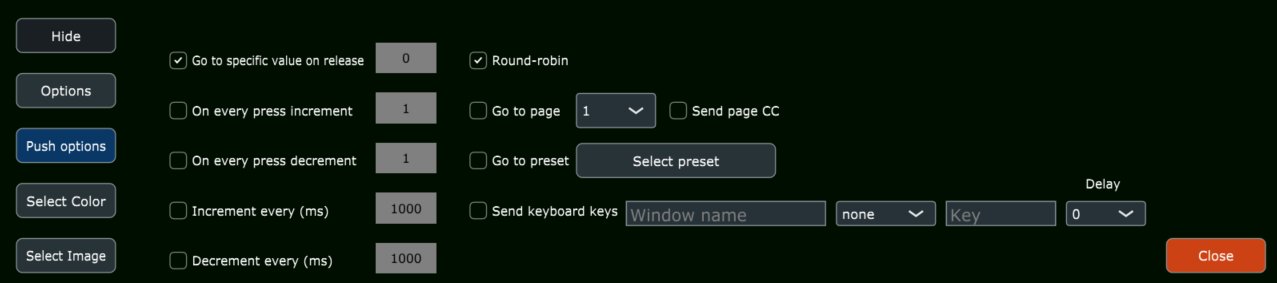
Go to specific value on release - This option will set the parameter to a specific value when the button is released. This option is not available when selecting either of the following 2 options, however it is available to be selected along with the last 2 options.
On every press increment - This option on every press of the button will increase the value by the value set in the box.
On every press decrement - This option on every press of the button will decrease the value by the value set in the box.
Increment every (ms) - This option increase the value of the parameter when the button is kept pressed every miliseconds set. The value of increment is taken from the box set on the option "On every press increment".
Decrement every (ms) - This option decreases the value of the parameter when the button is kept pressed every miliseconds set. The value of increment is taken from the box set on the option "On every press decrement".
Round Robin - This option affects all push options. It will cause the buttons to loop through when reaching 0 or 100.
Go to page - If checked it will open the page selected from the dropdown upon clicking on the button.
Go to preset - If checked it will open the selected preset upon clicking on the button.
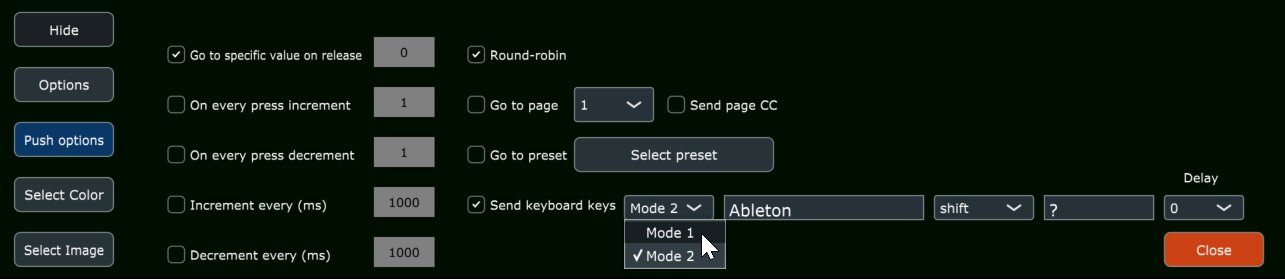
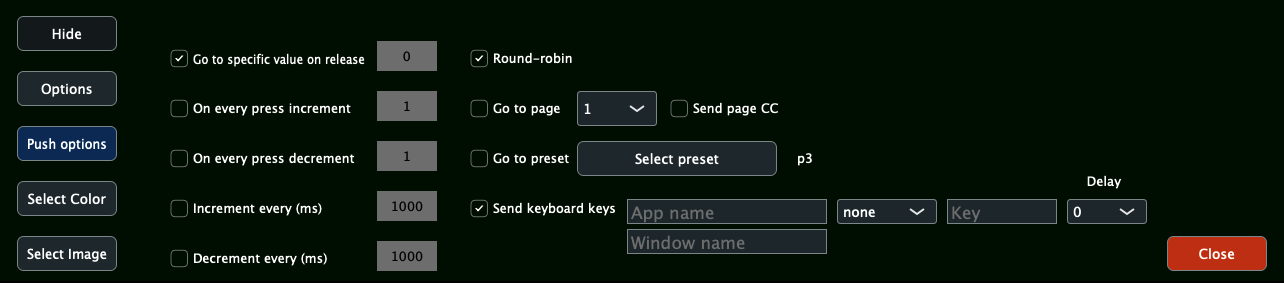
Send Keyboard Keys - (September 2024 Update) It sends keyboard keys to the selected application.
See articles for Windows here and for Mac here
Selecting colors for states on the buttons

With this option you can assign colors to the pressed and non pressed states of buttons.

You can select an image to be displayed on each button via the "Select Image" option on the menu.
These can be png or jpg image files. The size does not matter but to preserve the ratio of the original image choose an image that is square. The image is converted automatically to a smaller image and copied in the
MP\Host\MP MIDI Presets\Images folder.
You can have a color and an image set on a button. If you use a png image with transparency then the colors you have set for pressed/un pressed states will be visible. The images are set with partial opacity so the colors set on the button are still visible.
You can get png icon images for free from many sites.
You can use the "Select Image" option and then Remove Image to remove an image from a button.

MIDI Router
The MIDI router button will show all the available MIDI ports on your computer.
You can create multiple routings by clicking and dragging lines from and to each port.
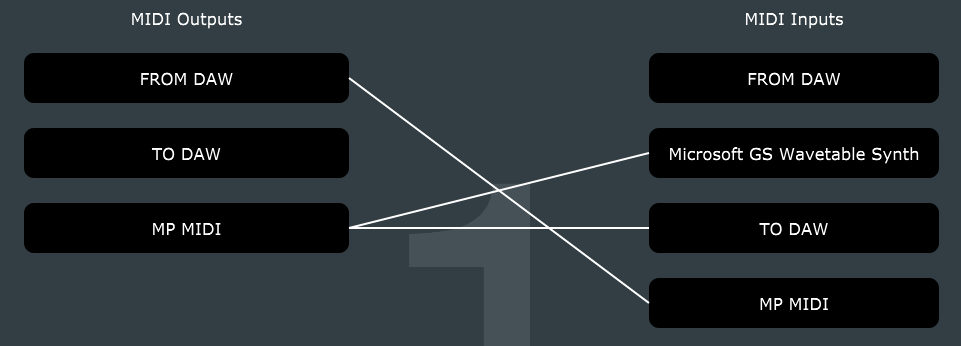
The routings you make will be saved in the preset.

Opening and closing the standalone app with keyboard hotkeys
Windows:
We have created a small executable app for Windows, using the Auto Hot Key, which enables to open and close the standalone application using hotkeys.
You can download the executable from here
You can run it anytime or set it to start automatically with Windows.
Once you run and open the MP MIDI application once, use the following key combinations:
- Win b - to Open the app window
- Win c - to Close the app window
Mac:
We can open and close the main window of the MP MIDI app using hotkeys via Keyboard Maestro or Better Touch Tool
Open the MP MIDI app and click on the top bar icon to open the window.
Create a new category and macro, choose the hot key you want
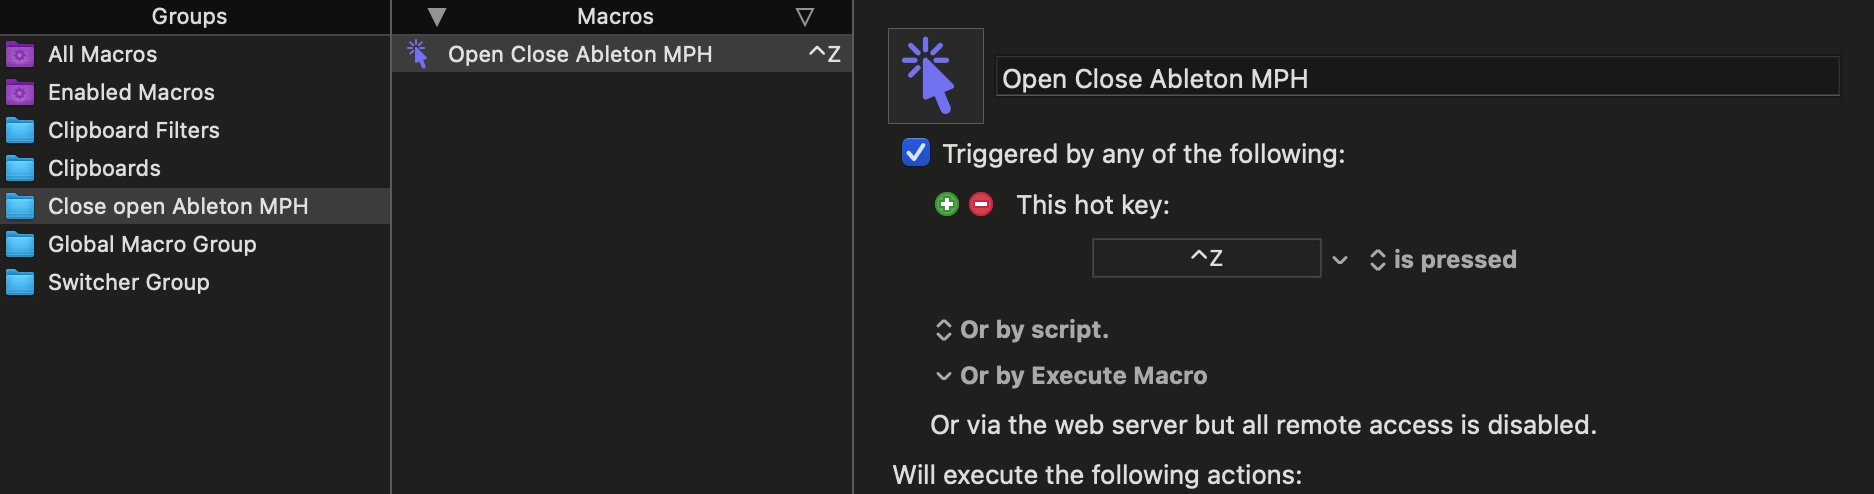
then click record

and click on the top bar icon of the MP MIDI app
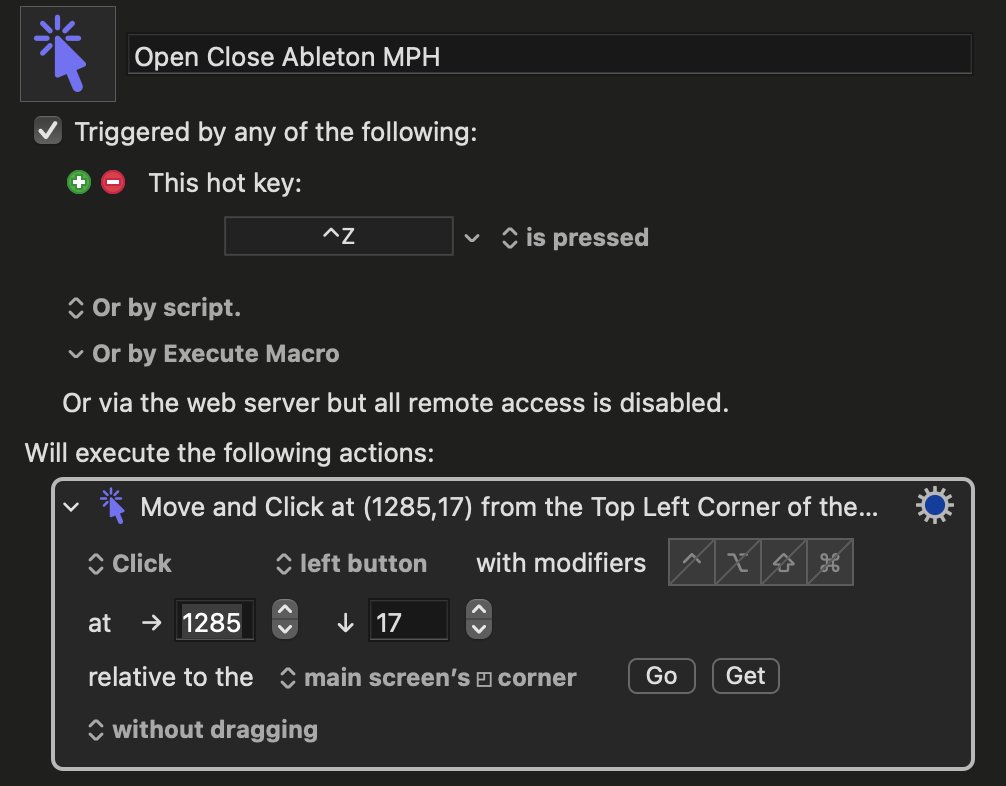
It will show this action
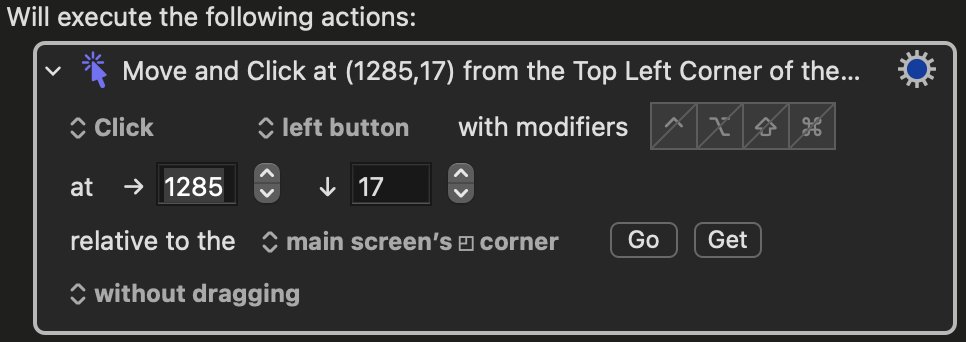
So your macro will look like this
2. MIDI Remote Control Surface for Cubase - Nuendo v13 and later
We have created a MIDI Remote Control Surface for Cubase - Nuendo v13 and latest versions.
The MIDI Remote Script communicates with the MP MIDI app or plugin so you need to install it first.
Here is an overview video of the Control Surface.
Cubase/Nuendo MIDI Remote and MPMIDI preset version: v1.5 - Dec-12-2025
Both available for download from your portal account in the "Software Downloads" section (tab on the left)
It will also work with Cubase v12 but there may be some minor things that don't work quite ok as v12 does not send back all the necessary info via the MIDI remote scripts.
The latest version of the Cubase MIDI Remote script is update: June 13th 2025
Ensure you are using the latest version of the MP MIDI app and the latest version of the Cubase MIDI Remote Script.
All downloads are available in the user portal. This online manual does not carry any software downloads.
To update from a previous version of the MIDI Remote script, delete the existing remote script as shown in the first 2 pages here. Then, import the midi remote script again in Cubase, and follow the setup procedure for your OS, Windows or Mac as shown below.
![]()
MIDI remote control surface is missing every time Cubase is restarted
This is an issue with Cubase 13.0.50 and onwards with MIDI remote scripts using the Cubase MIDI Remote API.
This issue happens with other Remote MIDI scripts, not just the MP MIDI. Upon restarting Cubase, the Control Surface is missing and needs to be added again.
Here is a video that shows how to reproduce the issue, in the video we select a controller from AKAI, just to illustrate it happens with any controller not just the MP MIDI, and the issue is the same on Mac and Windows.
A solution has been posted here: https://forums.steinberg.net/t/midi-remote-controller-disappearing-on-launch/951248/50?u=m_p and we have copied it here
![]()
How to download and install
Download the MP MIDI App installer for Mac/Windows from your account.
On Windows, first install the free loopMIDI as explained in the MP MIDI App Guide or other virtual MIDI port creation software like LoopBe30.
Windows Users: See this article about the new Windows 11 MIDI services.
On the Mac, the virtual MP MIDI ports are created by the MP MIDI app/plugin. These ports can be used for MIDI In and Out. In order for Cubase to see the MP MIDI virtual ports, you need to run the MP MIDI app or VST3 plugin.
Download the MIDI Remote Script and the Cubase.xml preset for the MP MIDI App from the User Portal.
Copy the Cubase.xml preset in the MP Host folder under the "MP MIDI Presets" folder
You can open the MP Host folder from the MP Host plugin as well. See here
-
Windows folder C:\Users\USER\AppData\Roaming\MP\Host\MP MIDI Presets
-
Mac Folder /Users/USER/Library/Application Support/MP/Host/MP MIDI Presets or
~/Library/Application Support/MP/Host/MP MIDI Presets
and extract the images from the zip file in the "~/MP/Host/MP MIDI Presets/Images" folder.
For Windows, follow this guide to continue the set up process.
For MacOS, follow this guide to continue the setup process.
![]()
How it works
The MP MIDI app sends CC messages to Cubase and the Cubase MIDI remote script replies with CC messages and SysEx messages. The SysEx messages include the following:
-
Page numbers (when a page changes from Cubase)
-
Device names
-
Name and Color of selected track
-
Names of parameters
-
CC ids of parameters
The MIDI remote script comprises of 6 pre-assigned pages shown in the MIDI Remote section in Cubase and 2 free pages.
You can change pages from this section
and you can also change to another pages from the MP MIDI app from the controller.
![]()
Limitations
The MIDI Remote Script offered by Cubase allows users to create custom pages with functionality not available in the Controller Editor in Cubase. This functionality comes with some limitations and we have designed the control surface with these limitations in mind.
You can modify the midi remote script which is written in Javascript and change the CC ids of buttons and encoders if you want to change it.
Known limitations of the MIDI remote script:
Page 1: The Quick Controls should always be in the bottom row of encoders (or if you want to replace them with other encoders just use the same CC ids).
When you are in page 1 and have a device selected for Quick Controls, then you change page and go back to page 1, the device is no longer selected for Quick Controls and needs to be selected.
Page 2. Opening the Mix Console from page 1 using the mixer button, if the mixer is already open it will close it. Unfortunately, this is a limitation of the script. Press F3 on the keyboard to open the Mix Console.
Page 3. There is no way to activate the slots of the Channel Strip via the MIDI remote script. You have to activate them on Cubase.
Page 4-6. If you are on a track and have a device selected. Then you change a page, change track, select another device and you go back to page 4, you need to click on the Cubase main window for Cubase to send the update information to the controller and bring the control over the device selected last.
In all 7-8 pages, you cannot rename the parameter names on buttons and encoders because these are being received from the Cubase MIDI remote script.
![]()
Pages in the MIDI Remote Script
Page 1 - Home - Quick Controls
Page 2 - Mixer - EQ and Mixer Controls
Page 3 - Channel Strip - Detailed EQ and Strip Effects
Page 4 - Insert FX
Page 5 - Instruments
Page 6 and onwards - User Assignable pages
Page 1 - General Control and Quick Controls
The first page carries a set of buttons pre-assigned to Cubase functions. When a button is pressed or selected it turns yellow. The colors can be customized from the button menu using right click.
The track name appears on the right side, highlighted with the color of the track from Cubase.
Below the track name there is the name of the device selected that has the QC focus.
On the left top there is the name of the preset and below the title of the page.
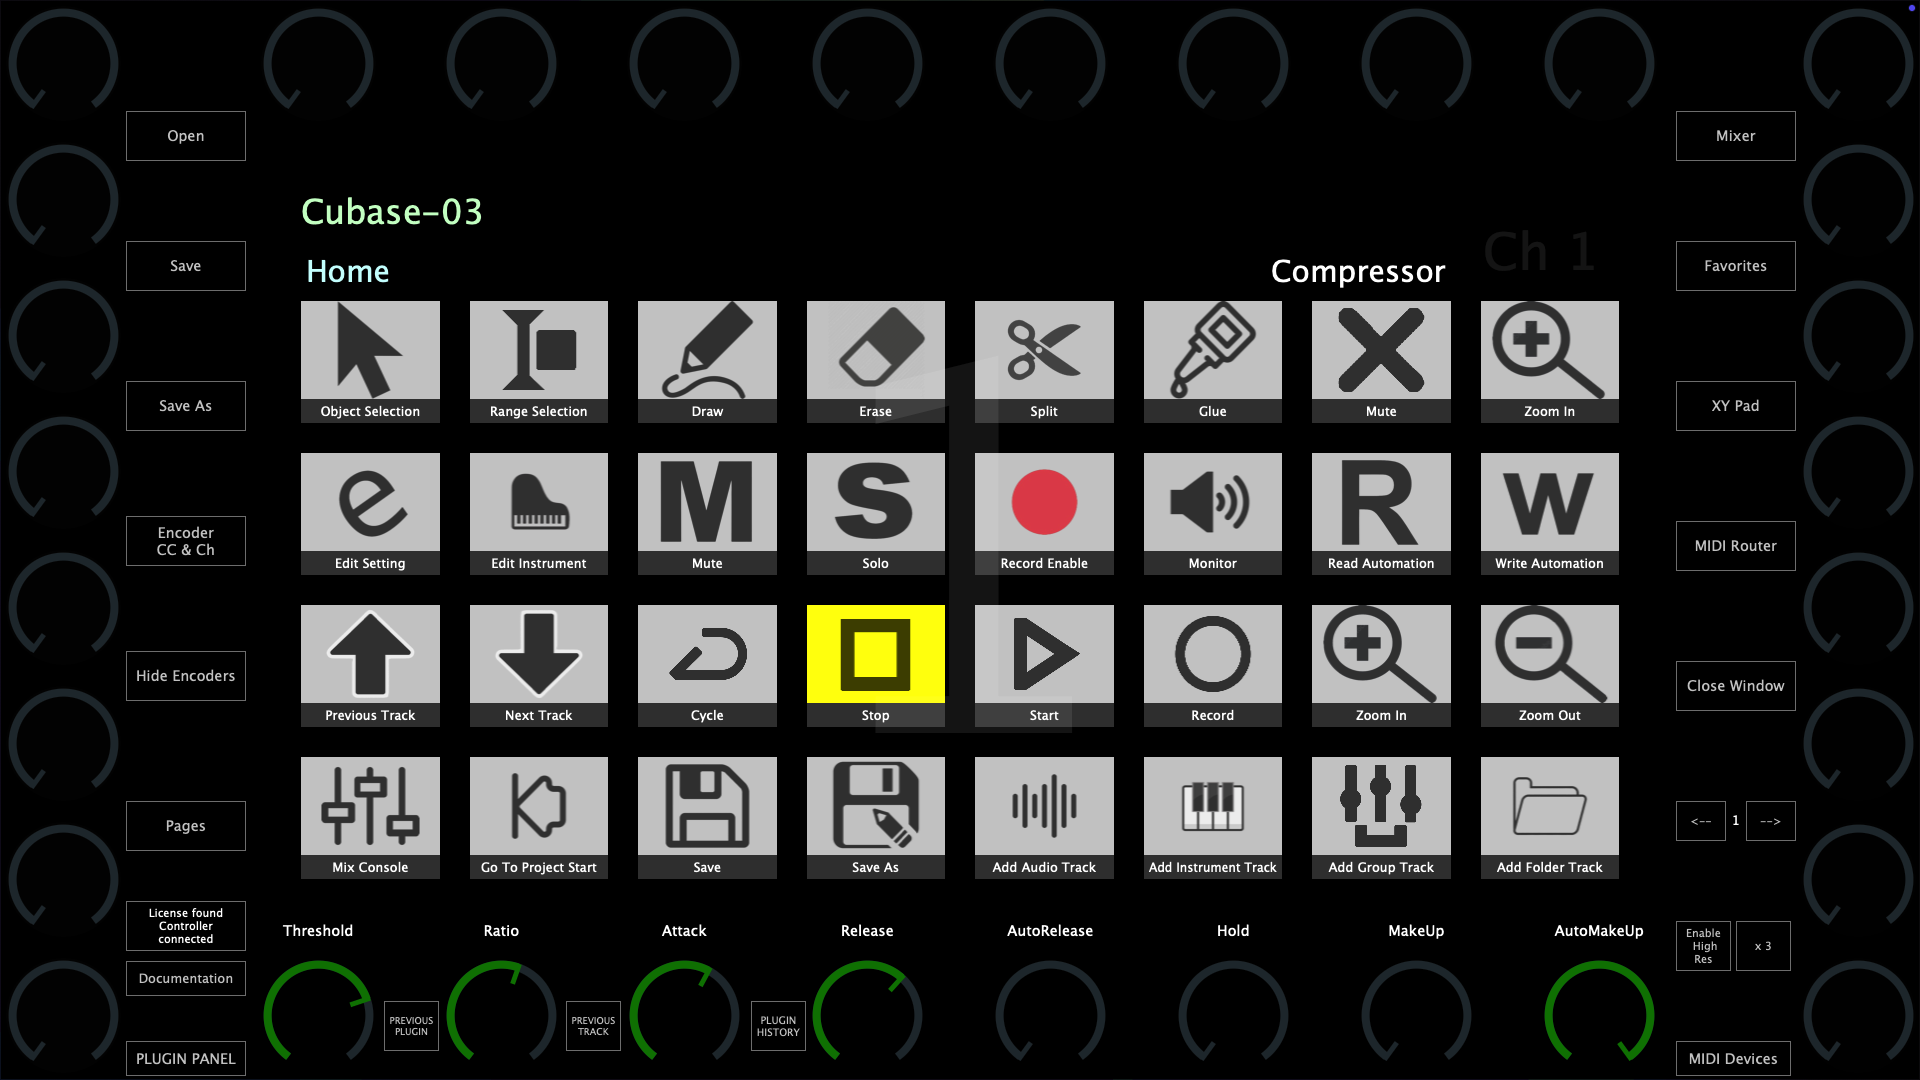
The bottom row of encoders are assigned to the 8 Quick Controls of Cubase (QC). You can change the assignments of Quick Controls in Cubase per device:
Once a device is selected in Cubase that has QC, the bottom row of encoders will sync with the QC parameters and display their names.
The QC section turns blue once a device is selected ![]()
The rest of the encoders can be assigned freely to any parameter in Cubase or a third party plugin using the Learn Parameter function in Cubase.
Page 2 - Mix Console and EQ Control
Page 2 is dedicated to controlling the Mix Console and the EQ.
On the top row of encoders we have mapped the Pan and in the bottom row the volume of each track. The encoders take their colors from Cubase track colors.
On the left and right columns of encoders we have the EQ parameters and their colors are set to group them into bands.
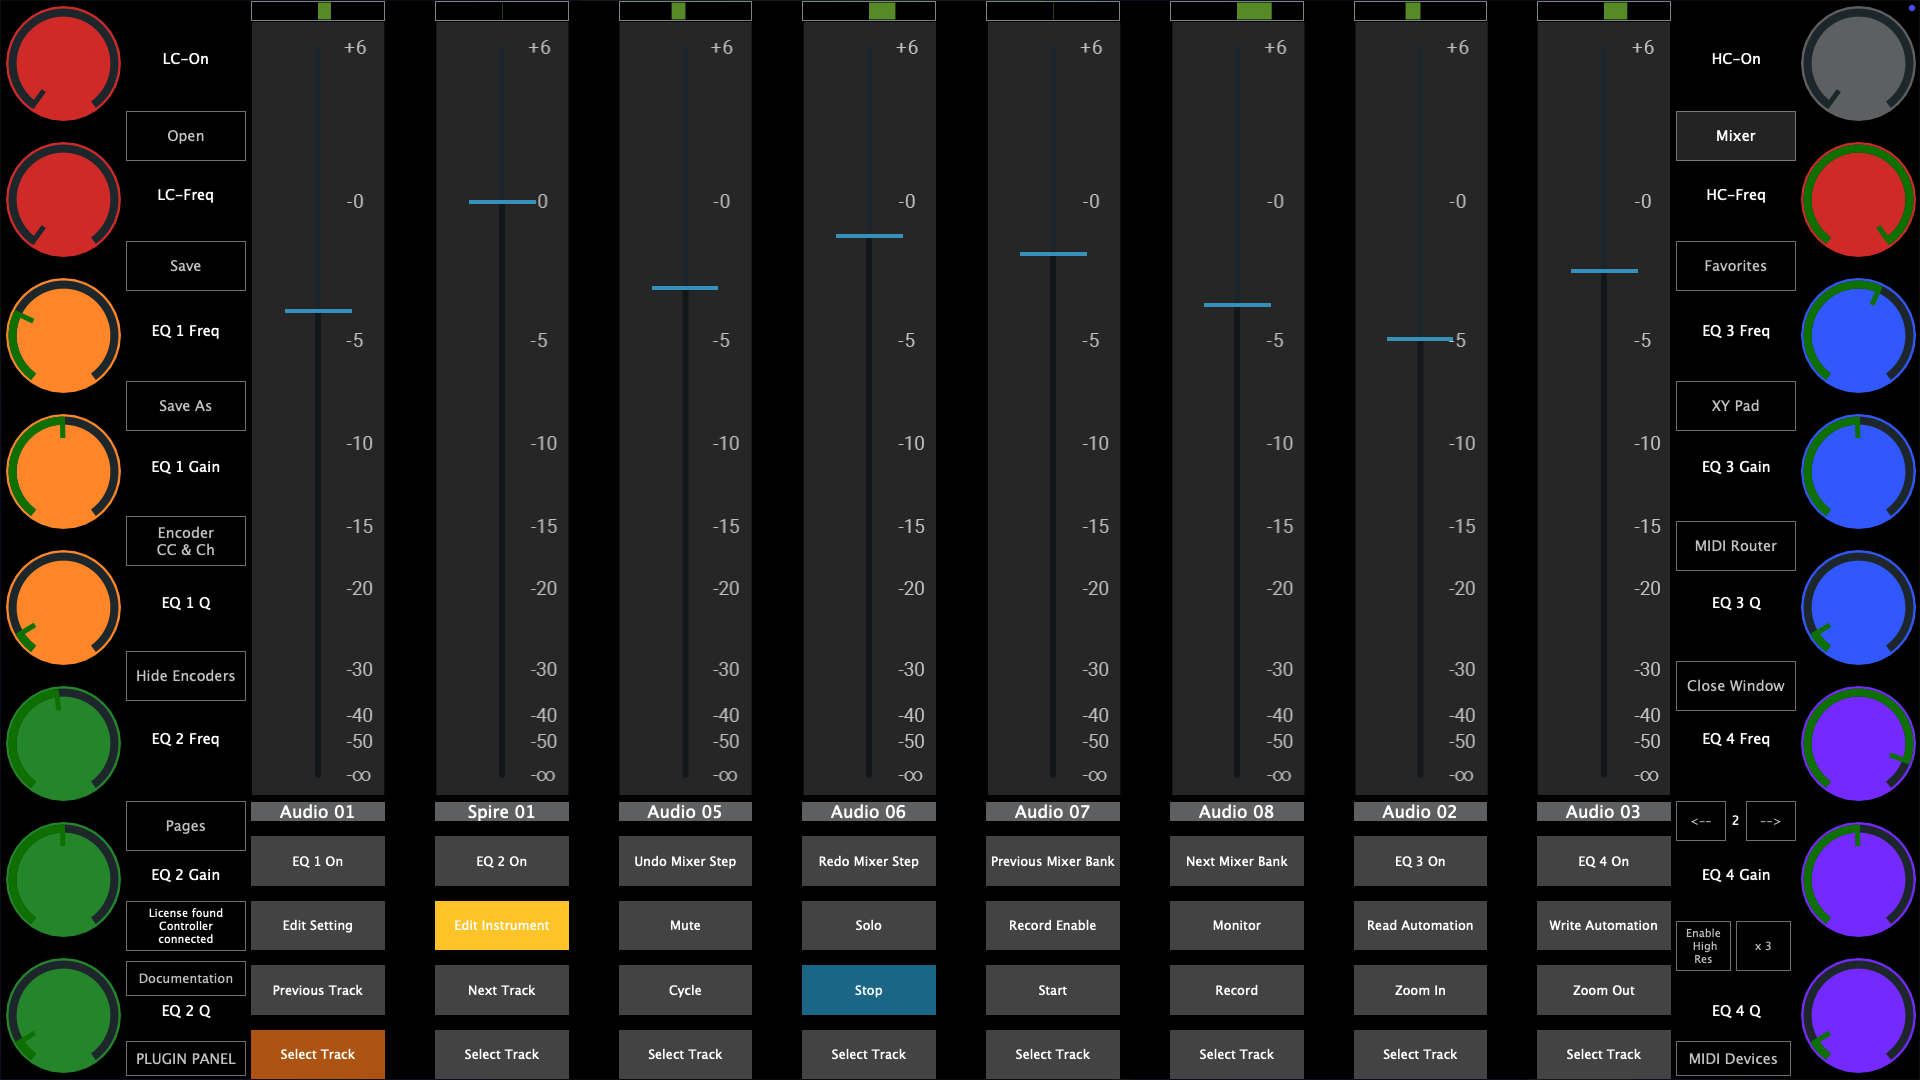
Pressing the Mixer button will hid the mixer view and show this view:
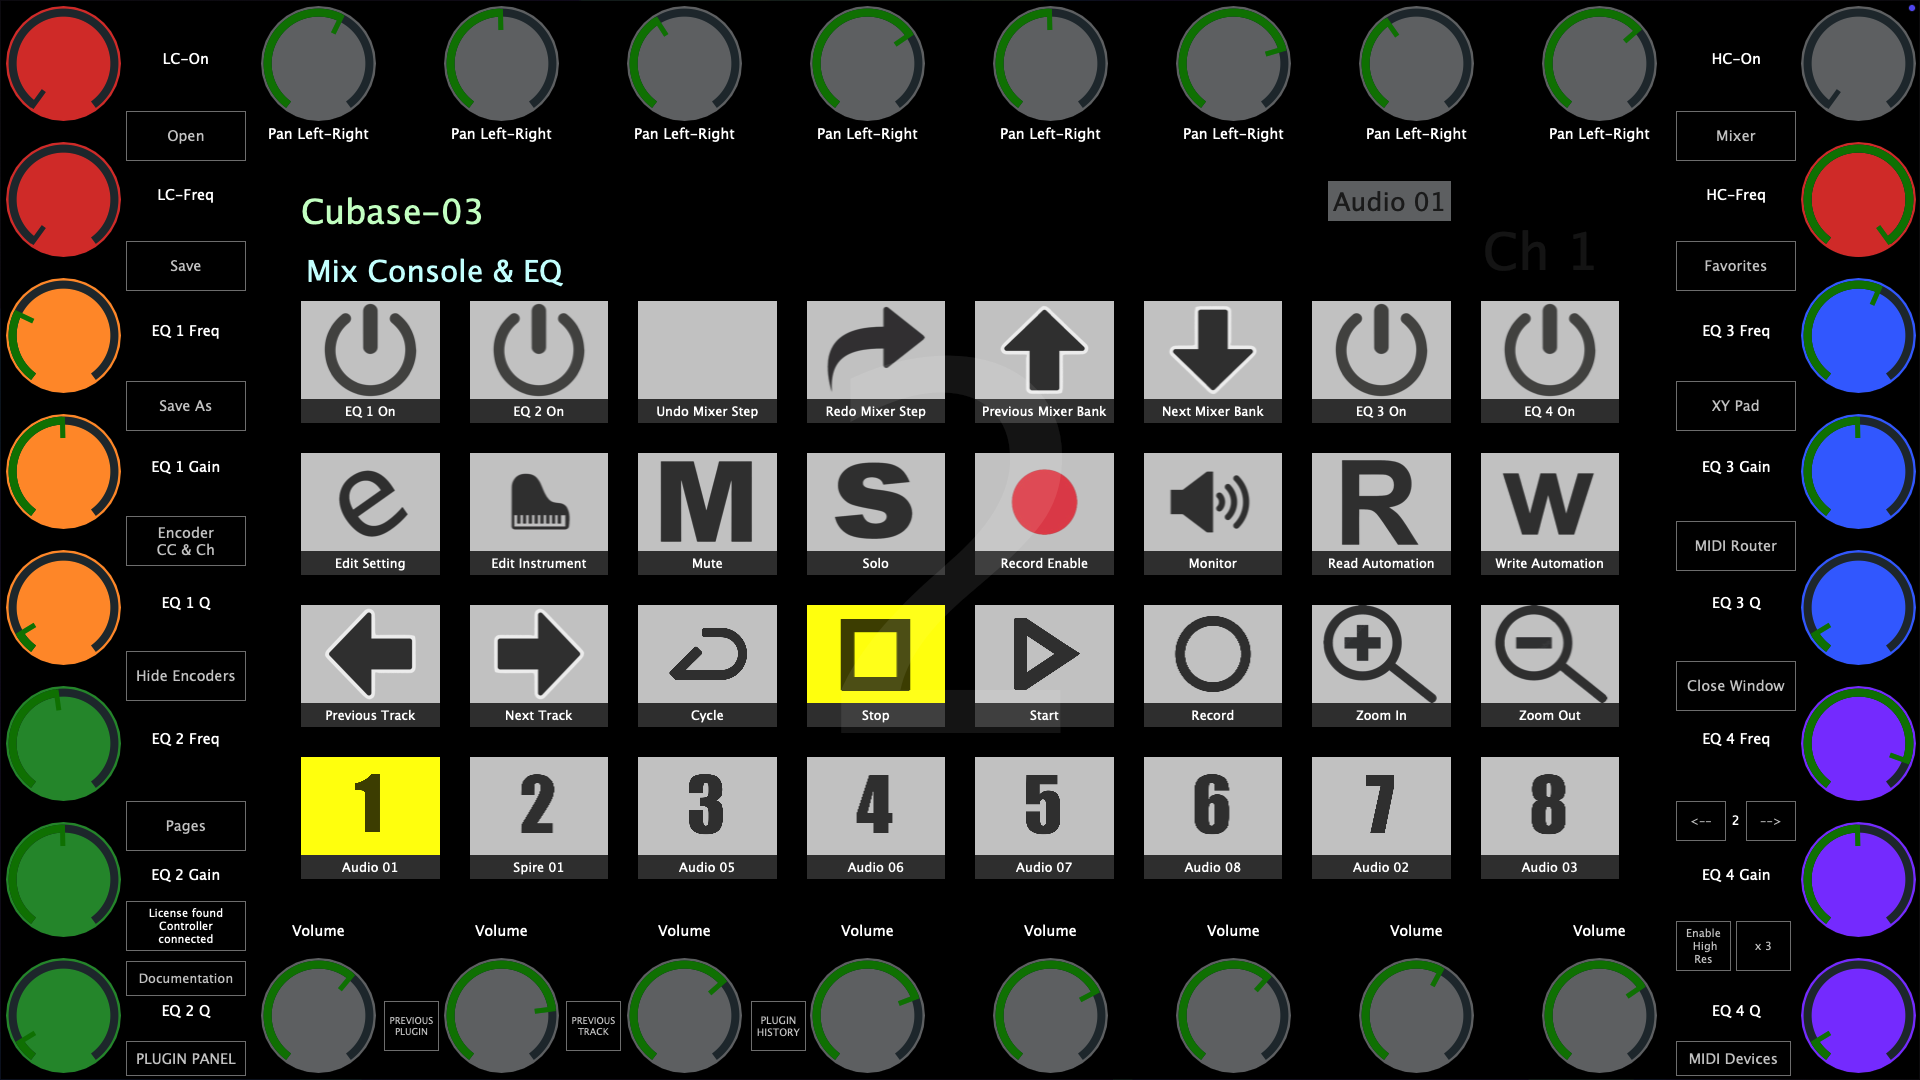
In this page, using the arrows buttons, Previous and Next Mixer Bank, will pass the control on the next 8 tracks.
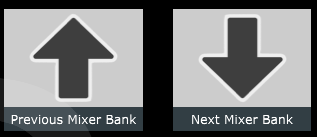
You can also change tracks using the Previous and Next track buttons.
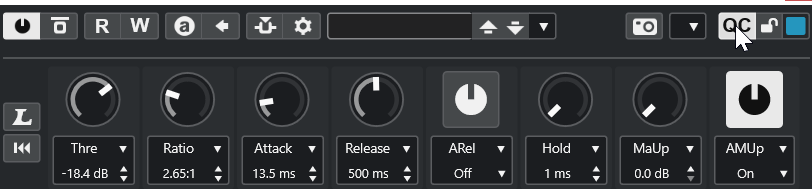
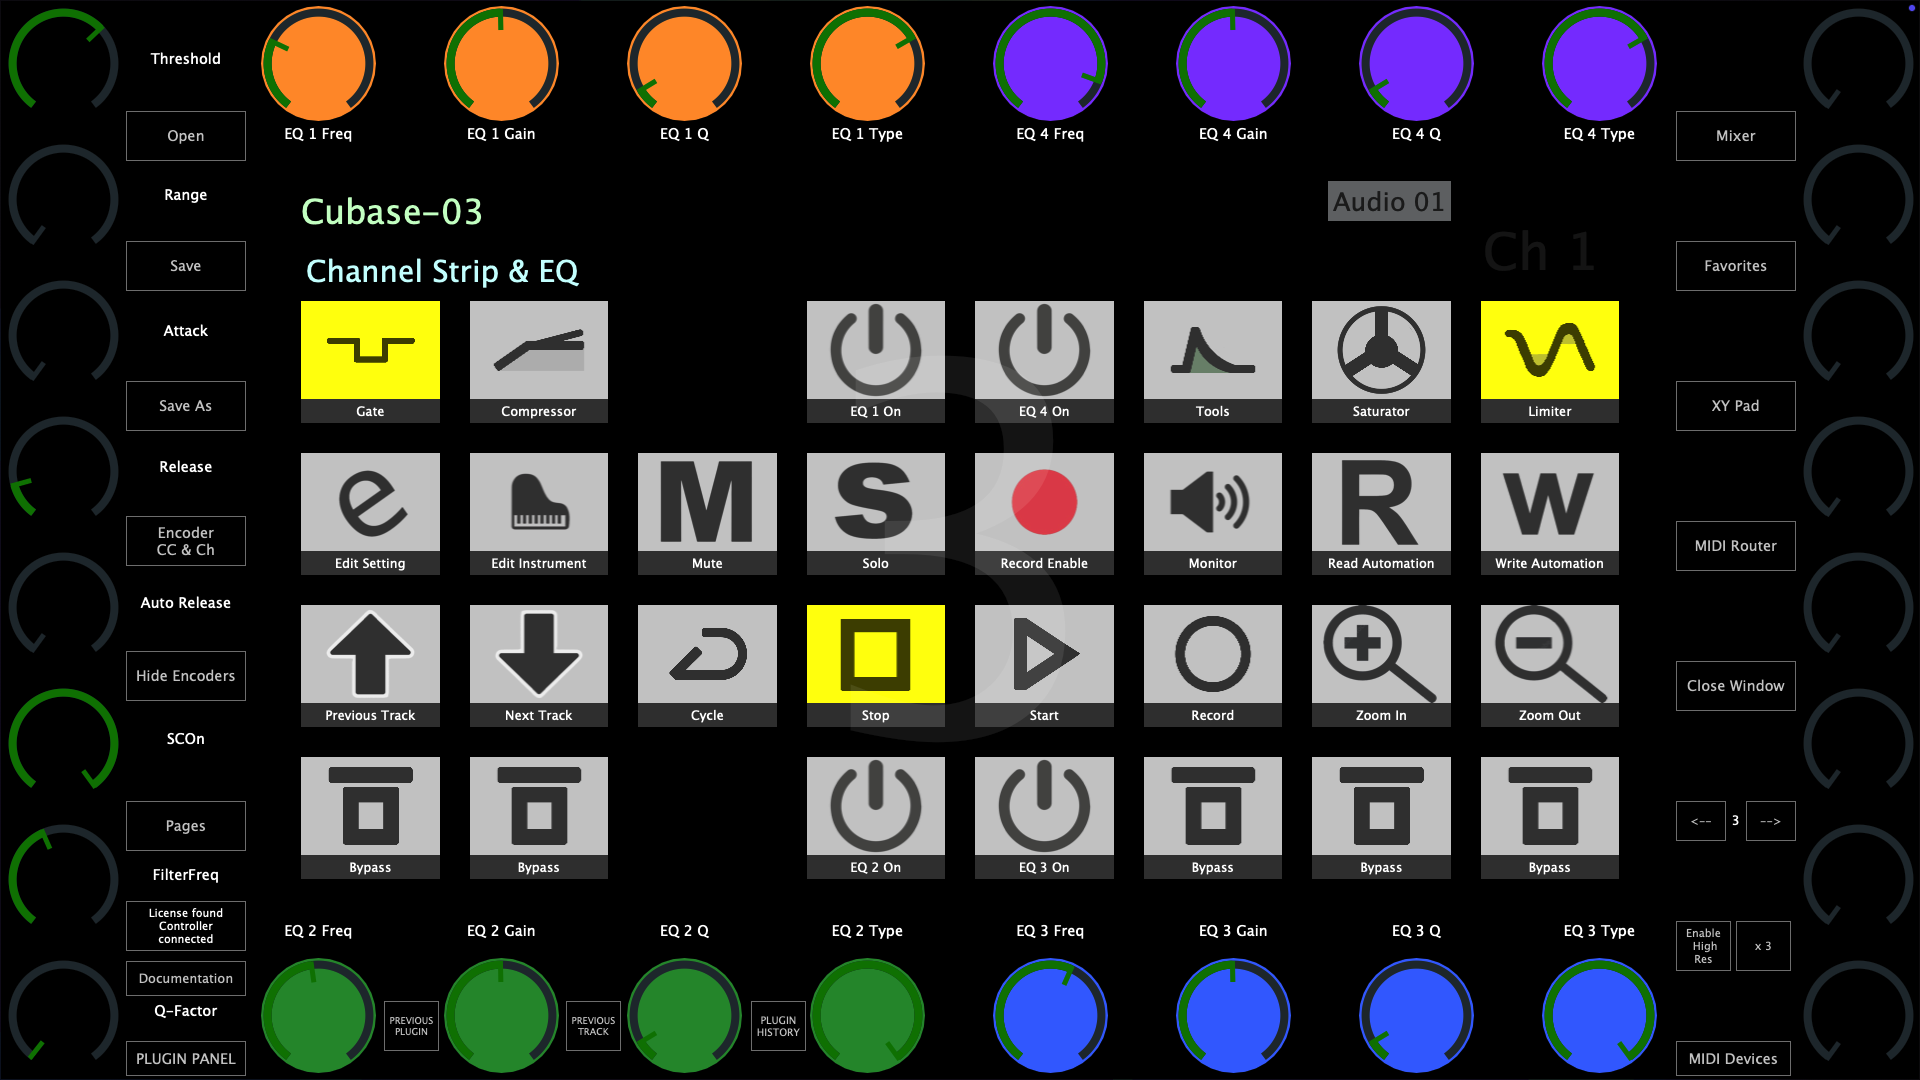
Page 3 - Channel Strip and EQ Control
In this page the top and bottom encoders are assigned to the EQ sections of the Channel Strip.
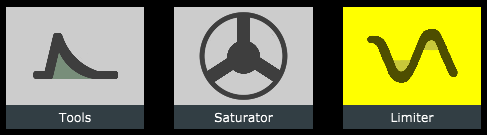
The left column of encoders is assigned to the Noise Gate and the Compressor of the Channel Strip.
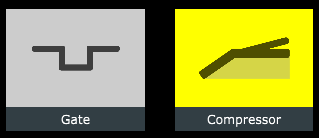
The right column of encoders is assigned to the Tools, Tape and Limiter of the Channel Strip.
Selecting one from the buttons will deselect the rest of buttons and sync the parameter names and values of the controller encoders to the selected slot.
Note that rearranging the order of the slots would not affect the assignments on the MP MIDI app.
Page 4 - Audio Effect Control
This page controls the selected track insert effects device whether this is a Cubase effect device or third party plugin.
Selecting a device will display the name of the device and sync with the encoder names and values with Cubase.
Selecting a different track will display the name of the first device and sync with the encoder names and values with Cubase.
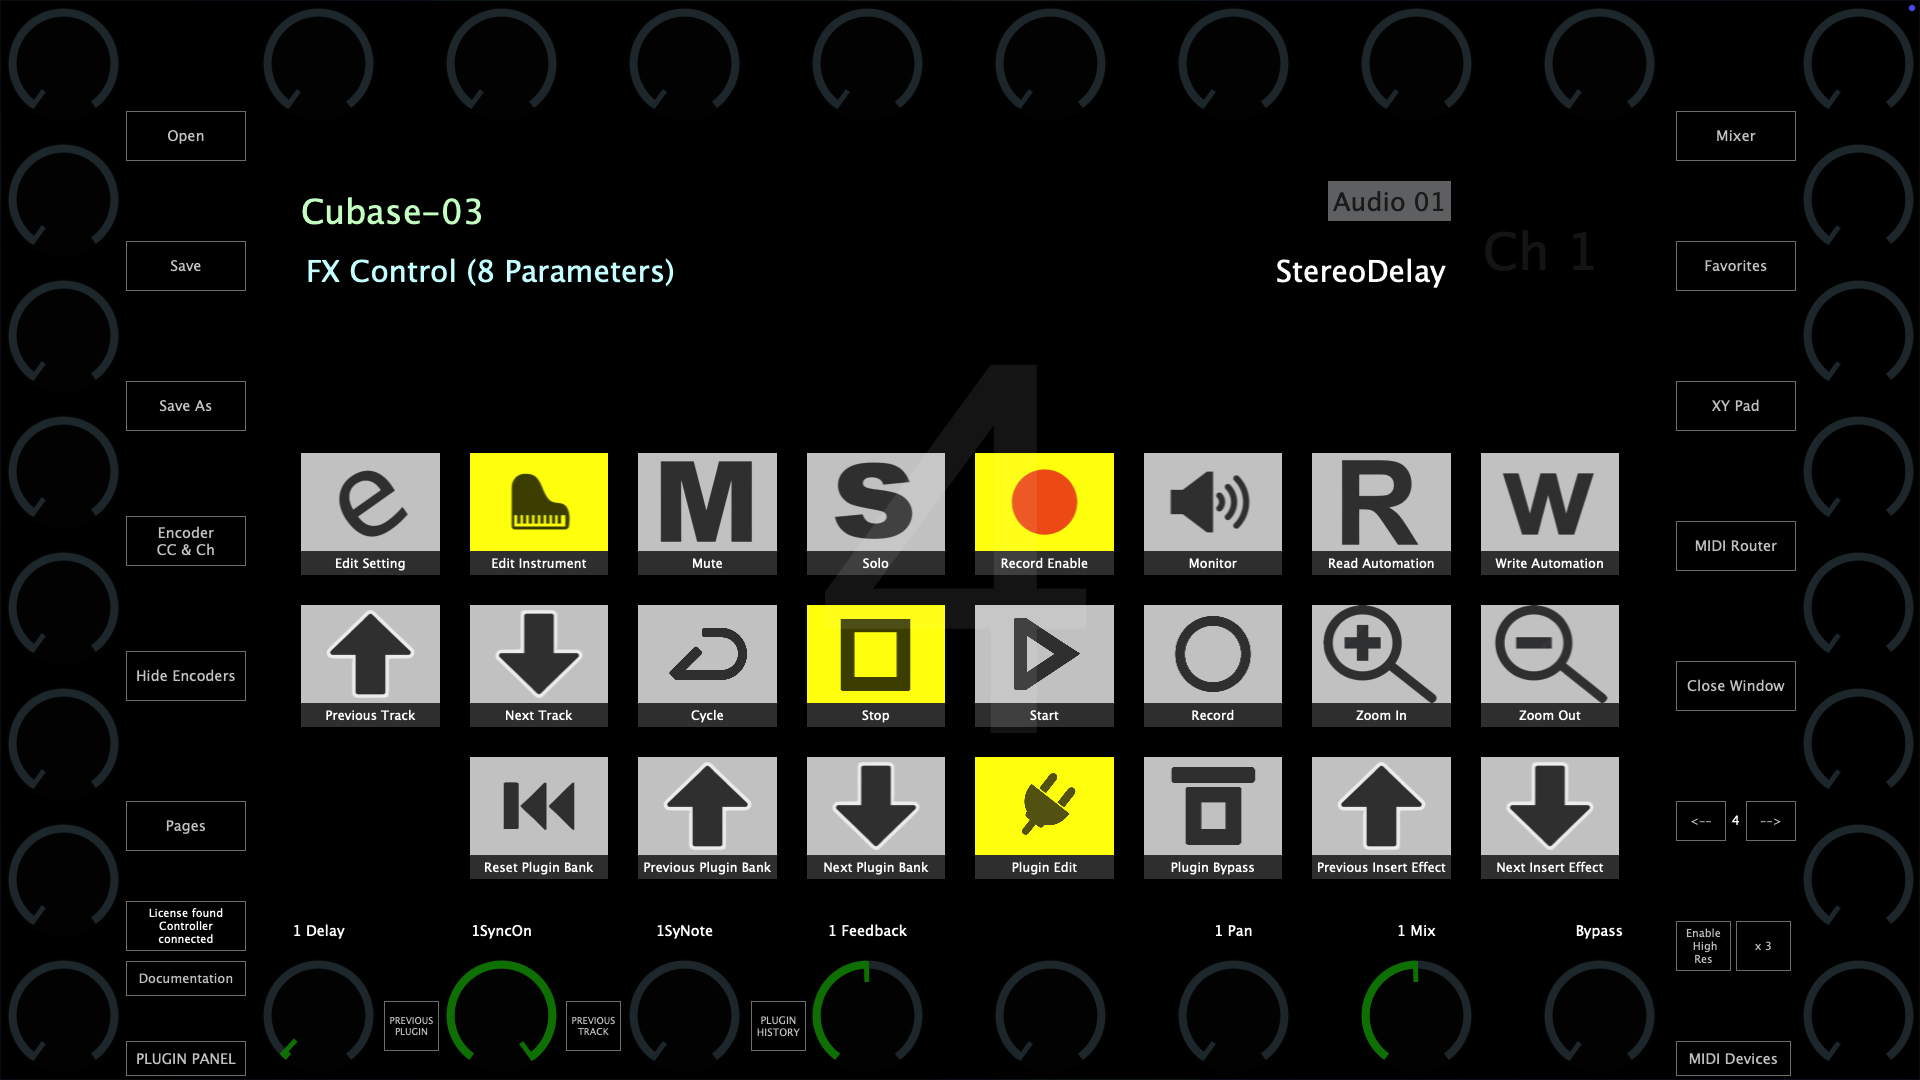
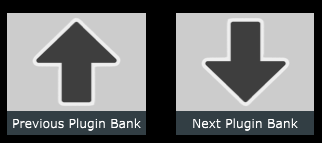
To control the next 32 parameters of the device (if the device has more than 32 parameters) you can use the Bank buttons to select the next bank. To go back to the previous bank select Previous Bank.
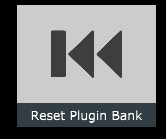
The Reset Plugin Bank button will sync the controller to the first bank of parameters.
Page 5 - Instrument Control
Once you select an Instrument track, the MP MIDI app will sync with the encoder names and values with Cubase.
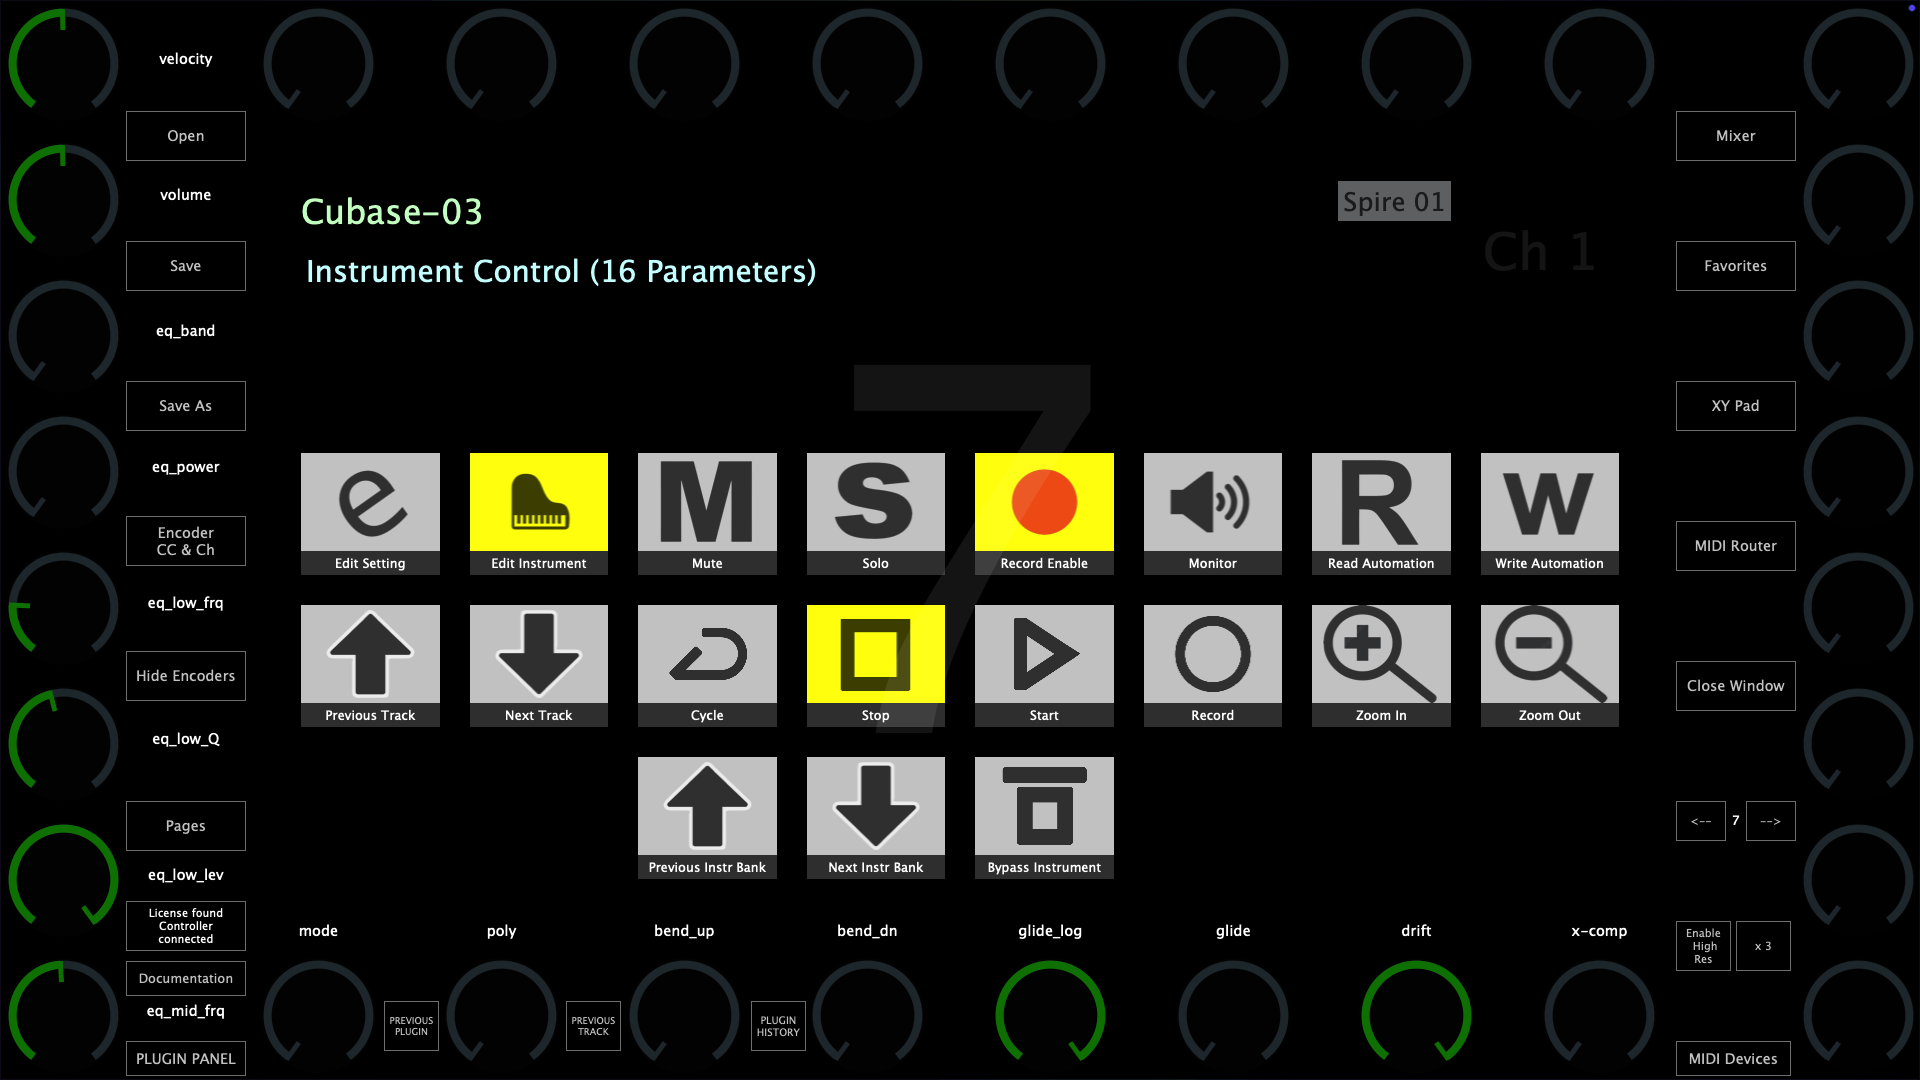
To control the next 32 parameters of the Instrument (if the device has more than 32 parameters) you can use the Bank buttons to select the next bank. To go back to the previous bank select Previous Bank.

The Reset Plugin Bank button will sync the controller to the first bank of parameters.

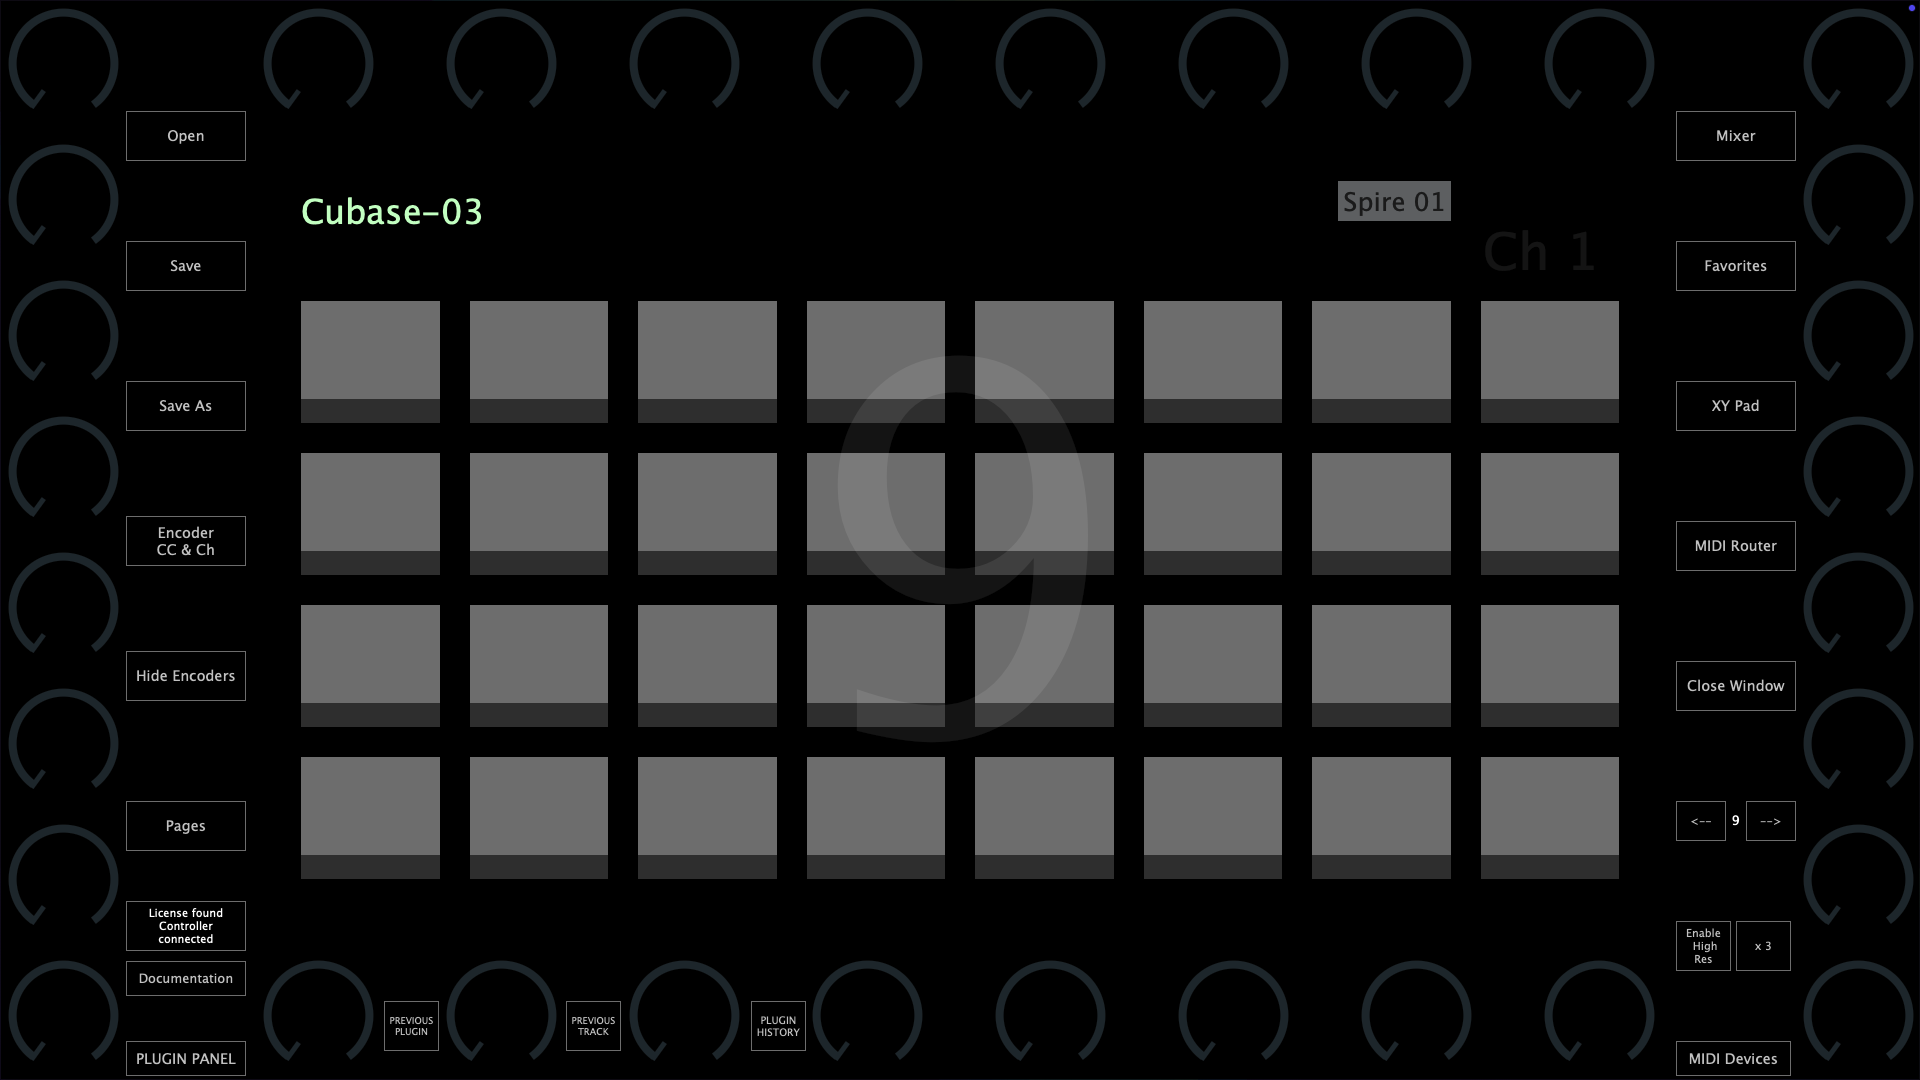
Page 6 and onwards - User Assignable pages
These pages carry some of the most essential buttons and you can use the free buttons and encoders to link anything in Cubase, creating your custom pages.
For example, you can link 32 volume tracks for the Mix Console.
If you want to use the MP MIDI app for other MIDI control purposes, it is also a good idea to use one of the buttons to open up another preset (you can set a button to open a preset via Push Options > Go to Preset) where you will have all pages and buttons available to use for anything. The switch between presets is immediate so it will feel like you are working in the same preset.
Cubase Remote Control Editor (Optional)
You can edit the default assignments of parameters given by Cubase using the Remote Control Editor in Cubase
Note that this is not part of the MP Controller system, and it is a feature in Cubase. This section is provided to get you familiar with the Remote Control Editor in Cubase.
1. Open the Remote Control Editor
-
Load an instrument or effect plugin on a track.
-
In the Inspector (left side of the project window), go to the Track’s “Remote Control” tab.
-
If you don’t see it, enable it via Setup Window Layout.
-
-
Click the “Remote Control Editor” button (little gear-like icon).
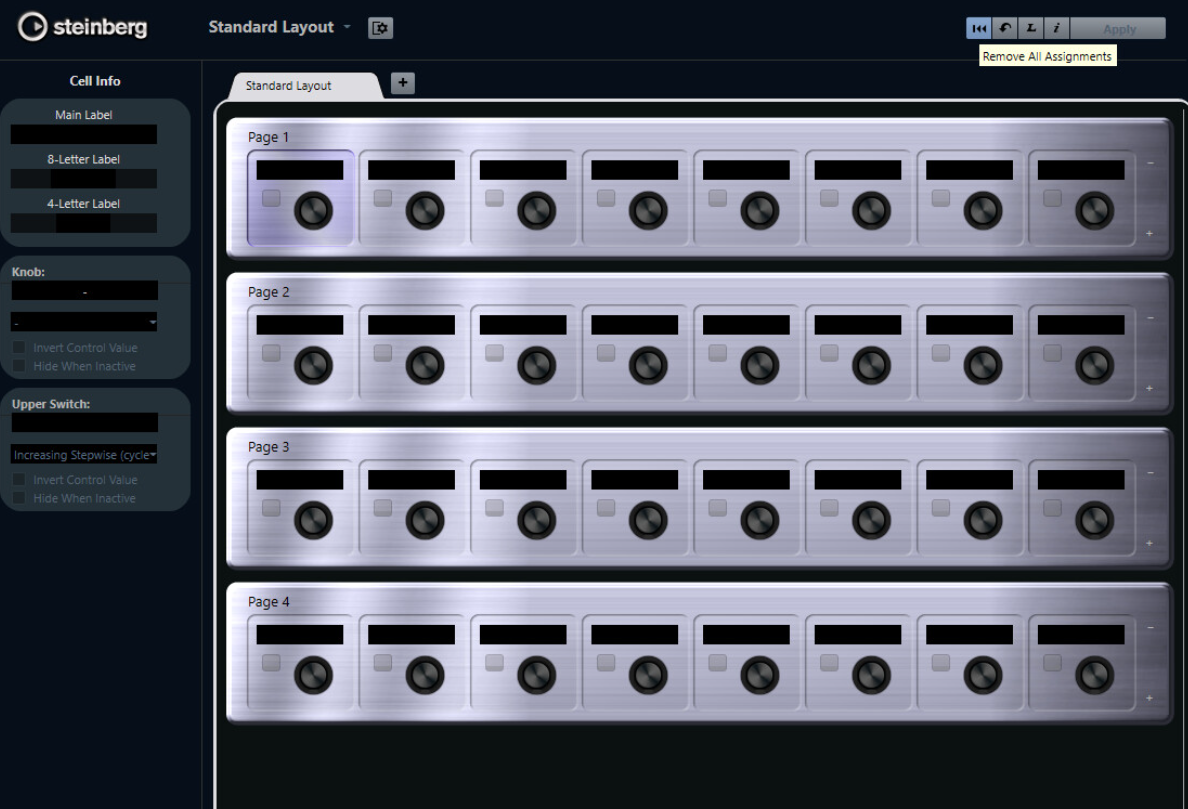
2. Understand the Layout
-
The editor shows pages of 8 slots each (knobs/buttons).
-
These correspond to the controls that can be addressed by the MIDI Remote Control Surface (MP Controller).
-
Each slot can be assigned to a plugin/device parameter.
3. Assign Parameters
Click a slot → choose a parameter from the plugin/device.
You’ll see a parameter list from the plugin (filter cutoff, resonance, etc.).
You can also search/filter by typing.
Repeat for all the slots you want filled.
Re-order parameters by dragging them into different slots.
Tip: You can also make multiple pages. For example:
Page 1 → Filter & Envelope controls.
Page 2 → Oscillator controls.
Page 3 → FX controls.
4. Save Remote Maps
-
Once mapped, Cubase remembers your setup for that plugin/device.
-
The next time you load that plugin, the Remote Control Editor will show your custom layout.
Setting up the Cubase Mixer background image
The Cubase background mixer should be set automatically when you load the Cubase-03.xml preset.
The image file for the mixer db values is included in the images.zip file and it will be extracted when you extract the images folder as explained in the installation instructions.
Optionally, here are the instructions to set the background image of the mixer manually.
You can download the Cubase mixer background image from here
and save it in
Mac Folder /Users/USER/Library/Application Support/MP/Host/MP MIDI Presets/Images or
~/Library/Application Support/MP/Host/MP MIDI Presets/Images
Windows folder C:\Users\USER\AppData\Roaming\MP\Host\MP MIDI Presets\Images
Right click on a Fader of the top area of the mixer

You will see this window:

Click on the Background Image button and select the Cubase mixer bg.png image.
Click close and click on the button to Save the preset.
This is it. The background of the mixer will appear the next time you open the Cubase preset.
3. Using 2 MP Controllers at the same time
See article
4. Controlling Bitwig Studio native devices via the MP MIDI app
We have a created a Bitwig Studio extension that enables you to control Bitwig Studio devices upon selecting them.
The MP MIDI app will automatically sync and display the controls for the parameters of the selected device.
You can download the installer from the user portal for Mac and Windows.
How it works
The MP MIDI app will display and sync to the selected Bitwig Studio device.
Upon selecting a device in Bitwig Studio, it sends a notification to the controller that carries the track name and the device name. Once the MP MIDI app receives the notification, it immediately loads the xml preset for the device and Bitwig sends all the values of the parameters of the selected device to the MP Controller.
Along with the extension there are text mapping files, one for each device, that contain the name of the parameters, MIDI CC and MIDI channel. The Bitwig Studio extension reads these files and that is how it knows which MIDI CC controls the corresponding parameter of the device.
On the Mac and Windows, the Bitwig Studio extension and device mapping files are placed by the installer in
~/Documents/Bitwig Studio/Extensions and the xml presets in the ~/MP/Host/BitwigPresets.
On Windows, If you have One Drive installed and using it on Windows, the Bitwig extension file and mapping files in One Drive instead of the C: drive and it will not work. If that is the case, move the folder to
C:\users\USERNAME\Documents\Bitwig Studio\Extensions
A tutorial video on how to set it up can be found here
On the left side it displays the selected device name and on the right the selected track name.

How to install and load
You need to install the MP MIDI app first. The MP MIDI app is used to control the Bitwig devices.
Run the installer and then run the MP MIDI app. Then open Bitwig Studio.
Alternatively, you can use the MP MIDI app plugin which will be saved in your Bitwig project. Do not run both, the MP MIDI app and the MP MIDI plugin.
Go to Settings in Bitwig Studio
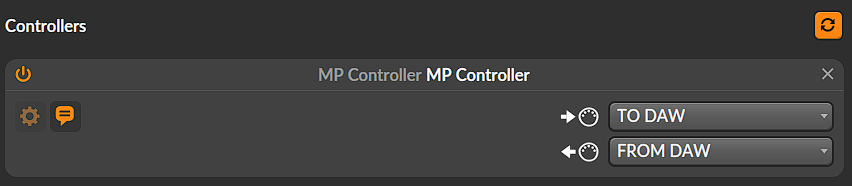
Choose Controllers
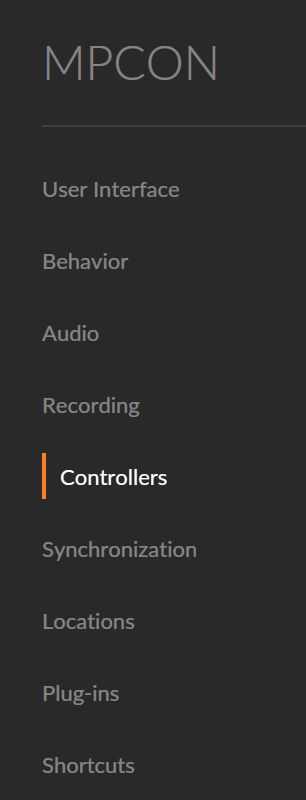
Select Add Controller
![]()
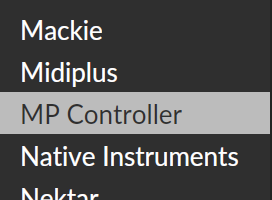
and from the list choose MP Controller
Select the Product: MP Controller and click Add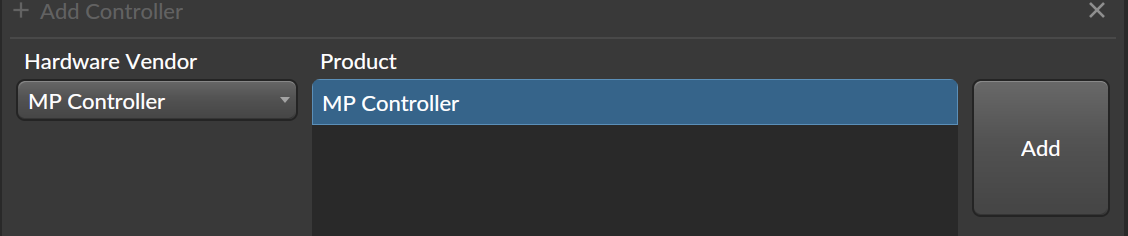
on the Mac, select the MIDI Ports: MP MIDI for IN and OUT
on Windows, you need to create 2 virtual MIDI ports as explained in the MP MIDI Documentation page.
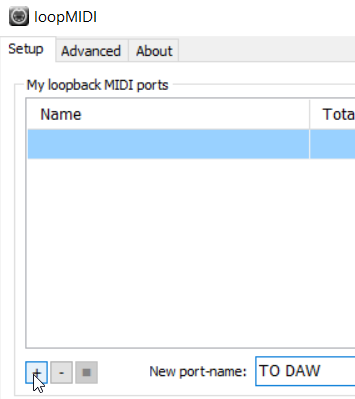
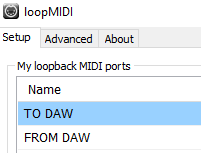
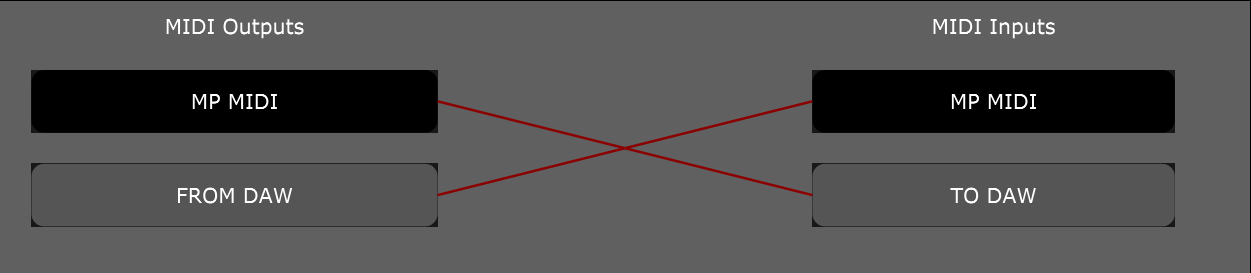
IMPORTANT: You need to use loopMIDI to create the virtual MIDI ports because it allows naming the ports: FROM DAW & TO DAW which is required for the Bitwig presets to load correctly.
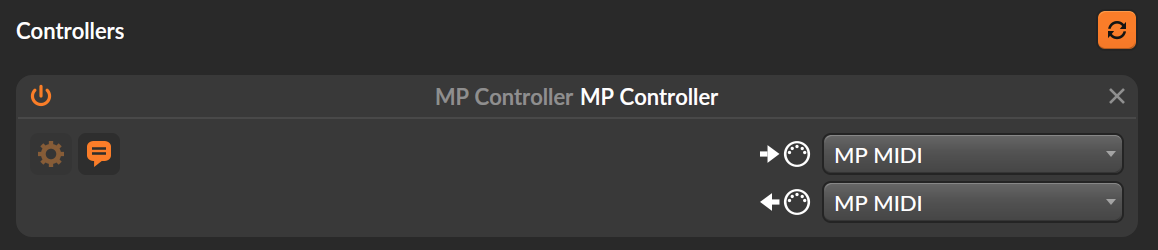
Then in the MP MIDI app, click on MIDI Devices
and choose the following:
in the default preset route using the MIDI Router as:
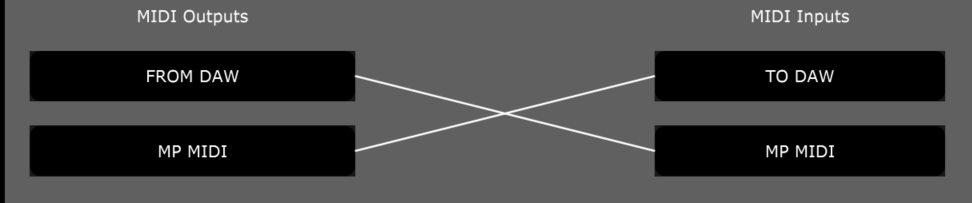
and save the default.xml (overwrite it).
Then in Bitwig, select these ports in the Controllers section:
Close settings and add a device in Bitwig Studio, the MP Controller will sync to the device and load the device preset in the MP MIDI app.
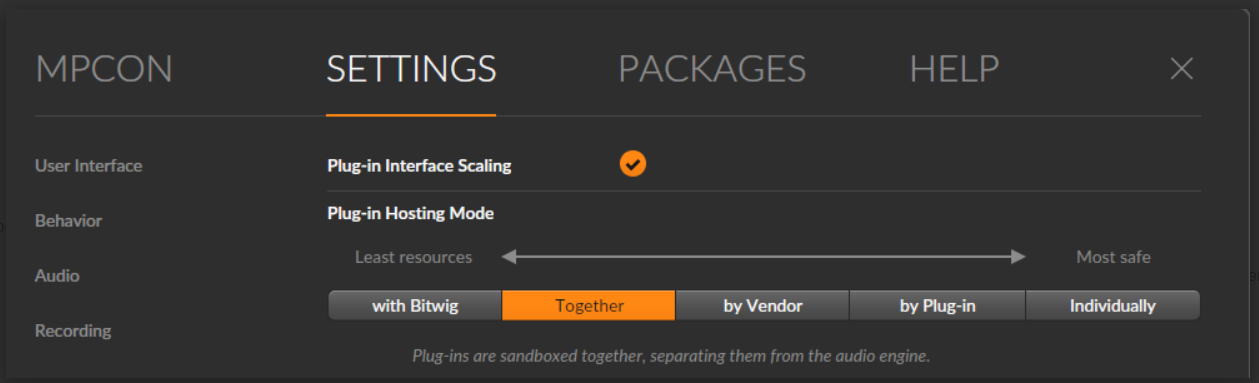
If you are experiencing strange behavior when using in the same project the MPMIDI plugin and MPH Multi host plugin make sure have this setting in Bitwig
Using it in parallel with the MP Host
The MP MIDI app can be used in parallel with the MP Host plugins. When using the MP MIDI plugin the plugin panel will be available to use as well (the plugin panel is not available in the MP MIDI standalone app).
Limitations
Please note the following limitations on devices and the have been reported to Bitwig so that they can be fixed.
The device On/Off is mapable but does not send or receive.
Audio Receiver. Mapped but not send or receive parameters.
Channel Filter. Nothing to map.
Compressor+. Does not send parameters.
Channel Map. Nothing to map.
DC Offset. Mapped but not send or receive parameters.
Drum Machine. Mapped but not send or receive parameters.Only 1 parameter to be mapped.
Dual Pan. Mapped but not send or receive parameters.
Filter+. Mapped different parameters but only the "MIX" was working ok.
FM-4. The "Glide" parameter is mapped but it does not send or receive parameters.
Freq Shifter. Mapped but not send or receive parameters.
fx-grid. Mapped but not send or receive
fx-layer. Mapped but not send or receive parameters.
fx-selctor. Mapped but not send or receive parameters.
Harmonic Split. Mapped but not send or receive parameters.
Harmonize. Nothing to map.
HW Clock Out. Mapped but not send or receive parameters.
HW CV Instrument. Mapped but not send or receive parameters.
HW CV Out. Mapped but not send or receive parameters.
HW FX. Mapped but not send or receive parameters.
HW Instrument. Mapped but not send or receive parameters.
Instrument Layer. Nothing to map.
Instrument Selector. Nothing to map.
Key Filter. Mapped but not send or receive parameters.
Loud Split. Mapped but not send or receive parameters.
Mid-Side Split. Mapped but not send or receive parameters.
MIDI CC. Mapped but not send or receive parameters.
MIDI Program Change. Mapped but not send or receive parameters.
MIDI Song Select. Mapped but not send or receive parameters.
Multiband FX-2. Mapped but not send or receive parameters.
Multiband FX-3. Mapped but not send or receive parameters.
Note Delay. Mapped but not send or receive parameters.
Note Filter. Mapped but not send or receive parameters.
Note FX Layer. Nothing to map.
Note FX Selector. Nothing to map.
Note Grid. Mapped but not send or receive parameters.
Note Length. Mapped but not send or receive parameters.
Note Receiver. Nothing to map.
Note Repeats. Mapped but not send or receive parameters.
Organ. Mapped but the "Vibrato" section does not send or receive parameters.
Peak-Limiter. Mapped but not send or receive parameters.
Phase-4. Mapped but "Glide" parameter is not working.
Pitch Shifter. Mapped but not send or receive parameters.
Polymer. Mapped but not send or receive parameters.
Polysynth. The "glide" parameter does not send or receive parameters.
Resonator Bank. Mapped but not send or receive parameters.
Sampler. The "glide" parameter does not send or receive parameters.
Stereo Split. Mapped but not send or receive parameters.
Sweep. Mapped but not send or receive parameters.
Test Tone. Mapped but not send or receive parameters.
Time Shift. Mapped but not send or receive parameters.
Transient Control. Mapped but not send or receive parameters.
Transient Split. Mapped but not send or receive parameters.
Transpose Map. Mapped but not send or receive parameters.
Velocity Curve. Mapped but not send or receive parameters.
XY FX. Mapped but not send or receive parameters.
XY Instrument. Mapped but not send or receive parameters.
Mac OS Installer Permissions
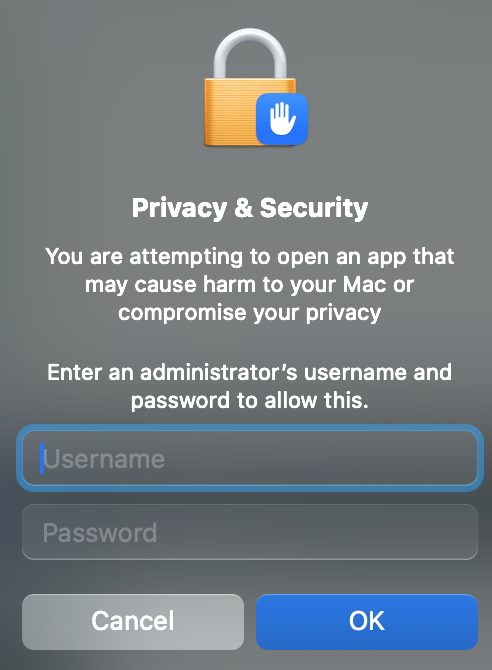
The Mac OS will prompt you to allow the installer to run.
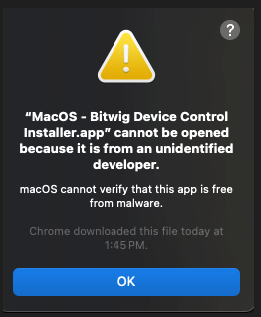
After you run the installer and get this notice, click OK and go to Privacy & Security and choose Open Anyway

In the next prompt, click OK
Presets not loading automatically on the Mac
If the device presets do not load automatically in the MP MIDI app you may need to set the permissions on the MP Host folder.
Open terminal on MacOS. Paste the following:
sudo chmod -R 777 ~/Library/Application\ Support/MP/Host

Press Enter. It will ask for your password. Type it and press enter. The permissions are now set.
Close and open the MP MIDI app.
5. MP MIDI App - September 2024 Update
In the update MPMIDI -v1.0-9d00f78--H2024-09-18--B2024-09-19 (or later version) we have introduced some exciting new features.
This update
- Sends keyboard keys. Option placed under each button's Push Options.
- Joker Encoder. Click and control any variable parameter on anything (not just plugins).
- Allows you to select to not send CC per button (dropdown of button function).
- When running the plugin version, it displays the tray(Win)/topbar(Mac) icon for easy access.
- Windows Send Keys documentation
- Windows Joker Encoder (Windows & MacOS)
- Mac Send Keys documentation
6. Windows - MP MIDI App - Sending keyboard keys
In the September 2024 update we have introduced this functionality under the button Push Options. It provides the ability to send keyboard keys (or keyboard shortcuts) to any application running in Windows.
The first field "Window name" selects the target application to send the keyboard shortcut.
It does that by finding the target application by window name. The app window name you are targeting to send keyboard keys should contain name typed here. Letter case does not matter.
For example, when you want to target Ableton Live, on Windows it shows as:
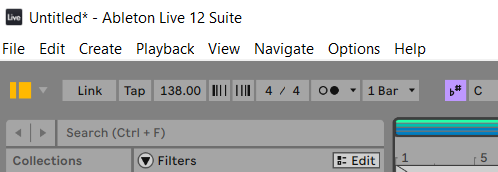
Typically apps display their window name on the top bar. You can just type the word Ableton and it will find the Ableton Live. The MP MIDI app searches for apps that contain that window name.
You can use AutoHotKey Spy app to find easily window names of apps.
The target DAW/App must not be minimized. The window of the targeted DAW/App must be open when sending keyboard keys. It will not open a minimized application.
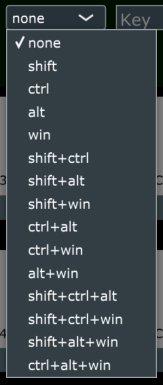
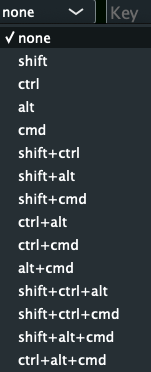
The drop down shows a list of available key modifiers, the third field is the key you want to send and the last drop down is a delay value that will be triggered after the targeted application has been selected by the MP MIDI app. This delay gives time for the application to come to focus (if needed) and then send the keyboard keys to it. This delay is optional and should be used only when needed.
You can disable sending CC when you have chosen to send keyboard shortcuts in the Push options dropdown.
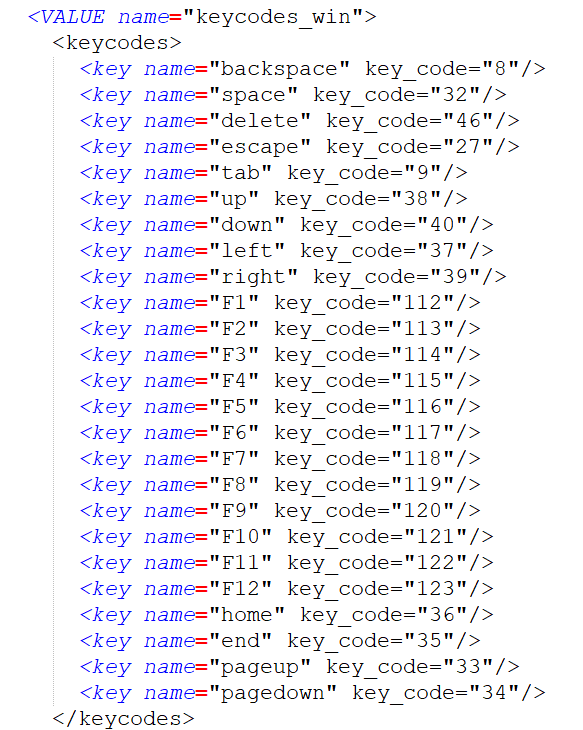
You can type in the names of the following keys when you need to send these:
backspace
space
delete
escape
tab
up
down
left
right
F1
F2
F3
F4
F5
F6
F7
F8
F9
F10
F11
F12
home
end
pageup
pagedown
for example:

The key names must be typed exactly as listed here and letter casing matters.

Modes
There are 2 operational modes on Windows,
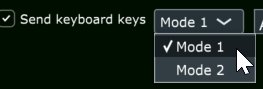
Some applications (DAWs) interpret keys in a different way, therefore we offer 2 different methods so that this feature can be compatible with many applications.
For example, Ableton Live works well with mode 1.
Cubase works with mode 1 on some keys, like for example "space" but if we send "up" (for up arrow) it does not work with mode 1, it works with mode 2.
You can try which mode works best in your DAW or other application.
Optionally, you can define the keycode definitions or even add new definitions by editing the MPMIDI.properties file under ~/MP/Host folder.
When this file is edited the MP MIDI app/plugin needs to be restarted for changes to take effect.
If you make a mistake during edits and the MP MIDI app does not work correctly you can just delete the file and run the MP MIDI app to create a new one.
To add a new one, just copy a line and place it as a new line and then save the file. The start the MP MIDI app.
You can also edit the existing ones, both the name and key code.
To get key codes from your keyboard use a free app like:
Windows - KeyboardKeyInfo (uncheck show in Hex) and
for the Mac Key Codes
7. Windows - MP MIDI App - Using the joker encoder
The MP MIDI app update in October 2024, includes a new functionality where one encoder can be set as a joker encoder. This encoder, controls mouse cursor movements, while performing a click and drag. This is useful because you can control any variable parameter/component by just clicking on it.
The Joker Encoder is only available in the MP MIDI app, not the MP Host plugins.
Video tutorial here
See a video on how to control a mixer fader in Ableton Live
Click on a parameter and then move the encoder which was previously set as a joker encoder. The mouse will perform a click and drag using vertical cursor movements.
To switch between horizontal and vertical mouse cursor movements, double right click anywhere. The app will detect the double right click and it will switch the direction of the control of the mouse cursor.
You will notice that as soon you stop moving the encoder, the mouse cursor returns to the position you clicked last (left click). This is important because when you move the encoder again, the mouse cursor will be on top of the selected parameter, therefore controlling that parameter.
How it works
The way it works is simple. You left click on a location and the coordinates of that location are recorded by the Joker Encoder app. When you move the encoder (previously selected as joker encoder) on the MP controller the mouse cursor performs a click and drag operation starting from the recorded position.
After you stop moving the encoder, the mouse cursor will return to the recorded position so you can use it again on that parameter.
It important that you don't use the mouse or move the mouse elsewhere when you use the joker encoder to control a parameter because it will not be able to control the mouse cursor.
The joker encoder can be used anywhere not just plugins. You can use it to control your mixer or anything you want to control with an encoder.
How to activate/deactivate the joker encoder
Click and hold at the center of any encoder. The encoder will show the joker icon. This is now the joker encoder in all pages of the MP MIDI app. Note that when an encoder is set to be a joker encoder it will not send CC messages to any other MIDI port. It will only work as a joker encoder.
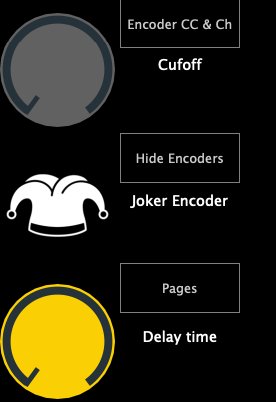
To deactivate the joker encoder, click once at the center of the encoder.
The joker encoder will be saved in the MP MIDI app presets.
When you close the MP MIDI window, the Joker Encoder will stop working.
The Joker Encoder works only when the MP MIDI window is open.
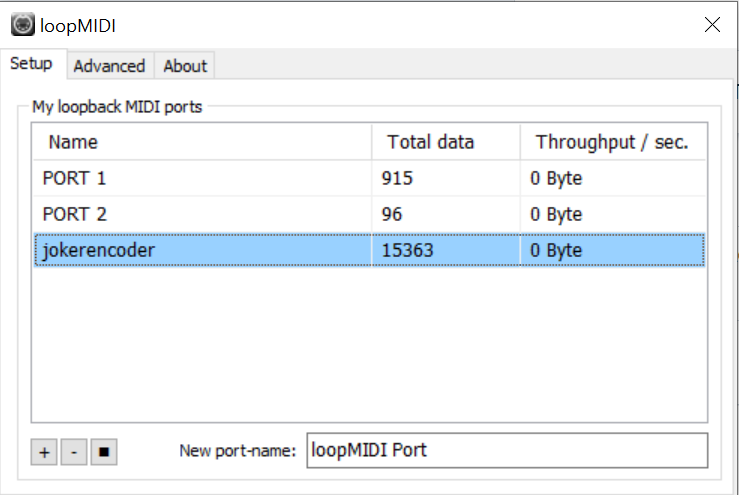
Setup the virtual MIDI port
The Joker Encoder needs a virtual MIDI port to work on Windows.
Create a virtual MIDI port named:
jokerencoder
The name should be exactly that.
8. Mac OS - MP MIDI App - Sending keyboard keys
In the September 2024 update we have introduced this functionality under the button Push Options. It provides the ability to send keyboard keys (or keyboard shortcuts) to any application running in MacOS.
Tutorial video here
Installation of SendKeysMP and Mac OS Permissions required
The MP MIDI app uses a small utility program called SendKeysMP to send keyboard keys.
This functionality was not embedded in the MP MIDI app due to restrictions of the Mac OS. Mac OS does not allow sending keyboard keys via a plugin, therefore we had to separate this feature in an app.
Install SendKeysMP (get the MP MIDI installer from your account. SendKeysMP is included)
and then set the permissions on MacOS as described here before moving further in this article.
SendKeysMP is installed in /Applications/SendKeysMP folder.
Sending Keys
To send a key to an app enter the app name. In certain cases, the app window name needs to be defined as well.
Name of the DAW/App
This should be entered as it shows in the Mac OS Activity Monitor. For example Ableton Live, it is Live.
Name of the Window
On the Mac when working with applications that have multiple windows (like plugins), for sending certain keys, it may be necessary to define the main application window name.
This is important because the keys need to be sent on specific windows.
The window name does not have to be match exactly, the app will check if a window exists that contains the given text.
Here is an example to send the key combination to create a track.

Here are some main window names to use of popular DAWs:
Ableton Live: name of the project as it appears on the top bar of the Live app. You can use a keyword like "Ableton" os something else when you save your project so that it matches on every new project.
Bitwig: Name of the project or word (keyword) included in the name of the project.
Cubase: Cubase
Logic Pro: logicx
Pro Tools: Edit
Reaper: REAPER
Studio One: Studio
Key Modifiers
The drop down shows a list of available key modifiers, the third field is the key you want to send and the last drop down is a delay value that will be triggered after the targeted application has been selected by the MP MIDI app. This delay gives time for the application to come to focus (if needed) and then send the keyboard keys to it. This delay is optional and should be used only when needed.
Stop sending CCs when sending keyboard keys
You can disable sending CC for a button, when you have chosen to send keyboard shortcuts in the Push options dropdown.
Sending predefined keys:
You can type in the names of the following keys when you need to send these:
backspace
space
delete
escape
tab
up
down
left
right
F1
F2
F3
F4
F5
F6
F7
F8
F9
F10
F11
F12
home
end
pageup
pagedown
for example:

The key names must be typed exactly as listed here and letter casing matters.

Custom keycode definitions
Optionally, you can define the keycode definitions or even add new definitions by editing the MPMIDI.properties file under ~/MP/Host folder.
When this file is edited the MP MIDI app/plugin needs to be restarted for changes to take effect. If you make a mistake during edits and the MP MIDI app does not work correctly you can just delete the file and run the MP MIDI app to create a new one.

To add a new one, just copy a line and place it as a new line and then save the file. The start the MP MIDI app.
You can also edit the existing ones, both the name and key code.
To get key codes from your keyboard use a free app like KeyCodes
To monitor keys sent from the MP MIDI app,you can use KeyCodes.
Set as target app as Key Codes and target Window as Key Codes.
Whatever you send from the MP MIDI app will be displayed there.
Troubleshooting
SendKeysMP requires port 5005 to be free on the Mac.
If you encounter issues while running it, open a terminal and paste:
sudo lsof -i :5005
It will ask for your password. Type it in and press Enter.
It should not produce any output. If it does produce output, it means some other app is using that port. That app should be terminated so that the port is free to be used by the SendKeysMP app.
Under the COMMAND header, you will see the name of the app using the port 5005.
![]()
9. Mac OS Permissions to send keyboard keys via the MP MIDI app
With the September 2024 of the MP MIDI App update and the feature to send keyboard keys, Mac OS needs the following permissions on the small utility app we have created for sending keyboard keys.
Documentation of SendKeysMP is here
The SendKeysMP app needs to run along with the MP MIDI app. It does not matter which you run first, the MP MIDI app or SendKeysMP. You can set SendKeysMP to run automatically when you start your Mac (see the last section for instructions).
Run the SendKeysMP installer follow the steps below to provide the necessary permissions.
Please note that you need to follow the steps exactly as they are described below.
The MacOS asks for permissions twice, so we need to start and stop the app twice to complete the permission's process. Adding the SendKeys app to the System Settings manually will not work.
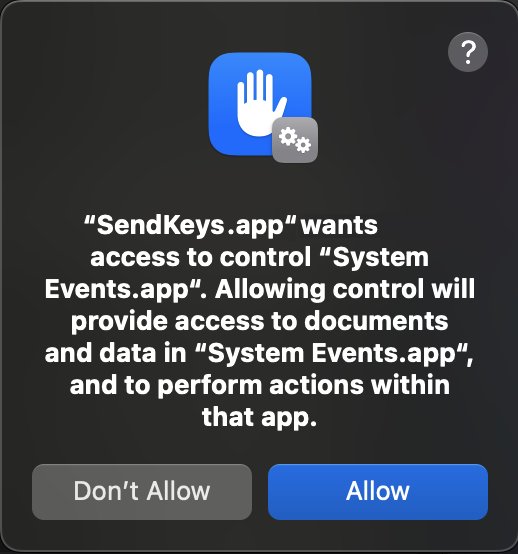
Click Allow
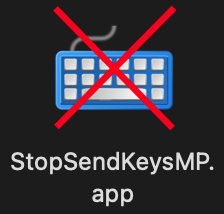
2. Double click on the stop the app run the StopSendKeysMP.app from the Applications > SendKeysMP folder. This application does not have a window.

3. Run the SendKeysMP.app again. You will be prompted with this message.
Choose to Open System Settings.
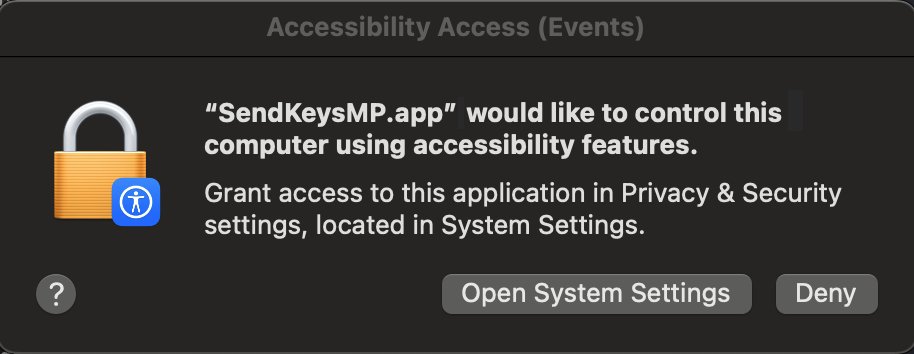
4. Select Privacy & Security

Then from within Privacy and Security, choose Accessibility

Enable the SendKeysMP.app switching it to enabled from the right slide button.

5. Double click on the stop the app run the StopSendKeysMP.app from the Applications > SendKeysMP folder. This application does not have a window.
Run the SendKeys.app again. Now it has access to send keys to your apps.
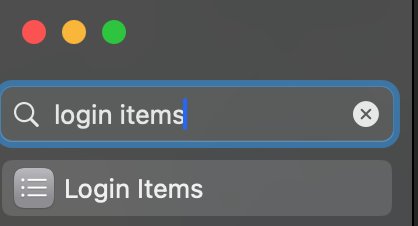
Optionally, after the prior steps, you can add the SendKeysMP.app to Login items in System Settings to start automatically when you start your Mac computer. This will way you don't have to run SendKeysMP every time you want to send keyboard keys from the MP MIDI app.
10. MacOS - MP MIDI App - Using the joker encoder
The MP MIDI app update in October 2024, includes a new functionality where one encoder can be set as a joker encoder. This encoder control mouse cursor movements while preforming a click and drag. This is useful because you can control any variable parameter by just clicking on it.
The Joker Encoder is only available in the MP MIDI app, not the MP Host plugins.
Note that the JokerEncoder app needs to run along with the MP MIDI app. It does not matter which app you run first.
You can optionally add the JokerEncoder.app in your Login items so that it runs automatically when you start your Mac.
Left click on a parameter for vertical mouse cursor movements and right click on a parameter for horizontal mouse cursor movements. If the parameter you want to control is controlled with vertical mouse movements then you should left click on the parameter to select it.
If the parameter you want to control is controlled with horizontal mouse movements then you should right click on the parameter to select it.
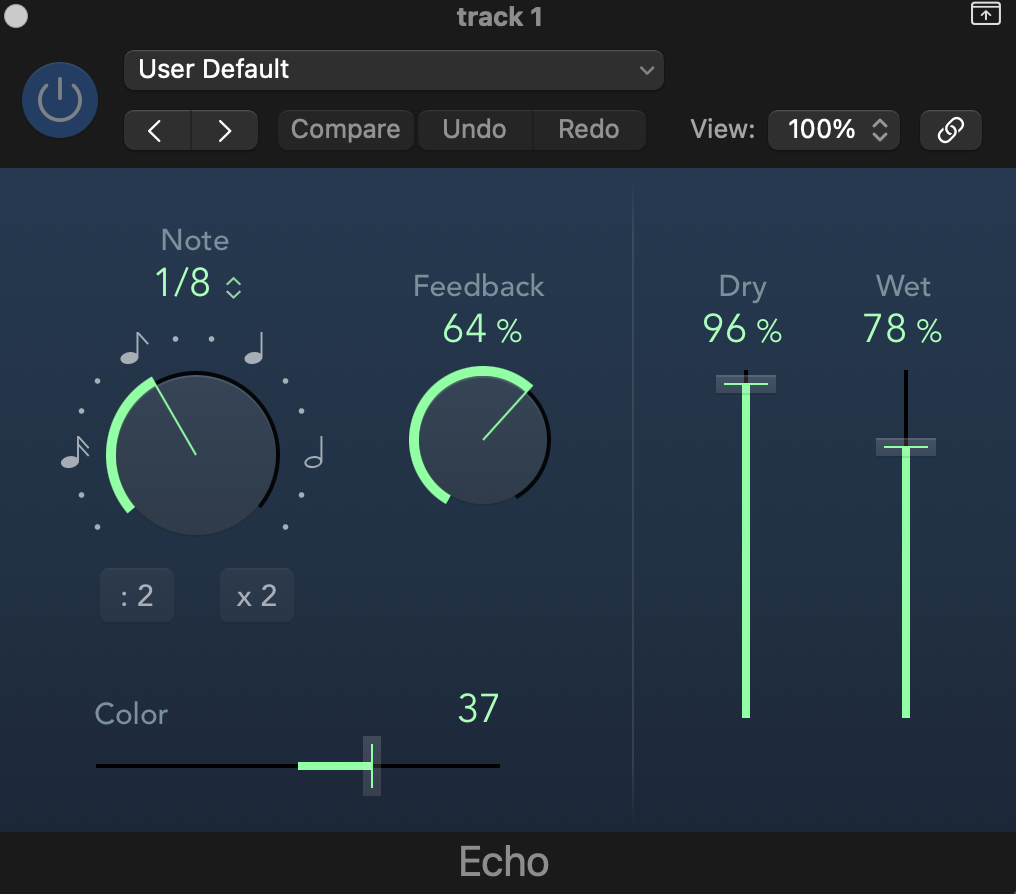
For example, left click at the center (or anywhere) of the Dry parameter. Move the joker encoder and it controls the Dry parameter with vertical mouse cursor movements..
Right click at the center (or anywhere) on the Color parameter. Move the joker encoder and it controls the Color parameter with horizontal mouse cursor movements.
You will notice that as soon you stop moving the encoder, the mouse cursor returns to the position you clicked last. This is important because when you move the encoder again, the mouse cursor will be on top of the selected parameter, therefore controlling that parameter.
The way it works is simple. You click on a location and the coordinates of that location are recorded by the Joker Encoder app. When you move the joker encoder on the mp controller the mouse cursor performs a click and drag operation starting from the recorded position.
After you stop moving the encoder, the mouse cursor will return to the recorded position so you can use it again on that parameter.
It important that you don't use the mouse or move the mouse elsewhere when you use the joker encoder because it will not be able to control the mouse cursor.
The joker encoder can be used anywhere not just plugins. You can use it to control your mixer or anything you want to control with an encoder.
Video tutorial here
How to activate/deactivate the joker encoder
Click and hold at the center of any encoder. The encoder will show the joker icon. This is now the joker encoder in all pages of the MP MIDI app. Note that when an encoder is set to be a joker encoder it will not send CC messages to any other MIDI port. It will only work as a joker encoder.

To deactivate the joker encoder, click once at the center of the encoder.
Note that the joker encoder is saved in the MP MIDI app presets.
Joker Encoder Always On Option
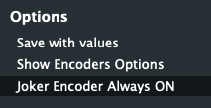
When enabled it will keep on using the encoder to control the mouse cursor even when the MP MIDI window is closed. Use this option with caution especially when using the MP Host because when turning that encoder will control both a parameter on the MP Host and the mouse cursor.
Installation and Permissions.
Due to strict restrictions on Mac OS, we created a separated app that runs in the background.
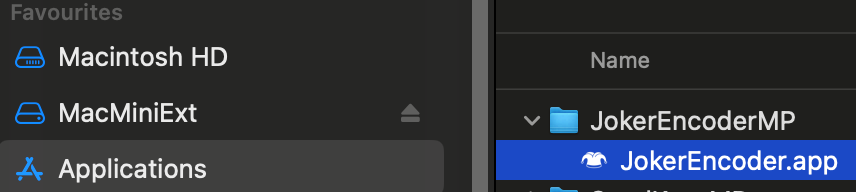
Run the JokerEncoderMP installer (included in the MP MIDI app zip download file) and allow it to run from the Privacy & Security settings in Mac OS. It will install in the Applications folder, within a new folder named JokerEncoderMP the app.

Run the JokerEncoder.app once and you will be prompted to allow it in the Privacy & Security > Accessibility settings.
Quit the JokerEncoder.app from the topbar icon
Open the Settings of MacOS and go to

In the list under Privary & Security choose Accessibility
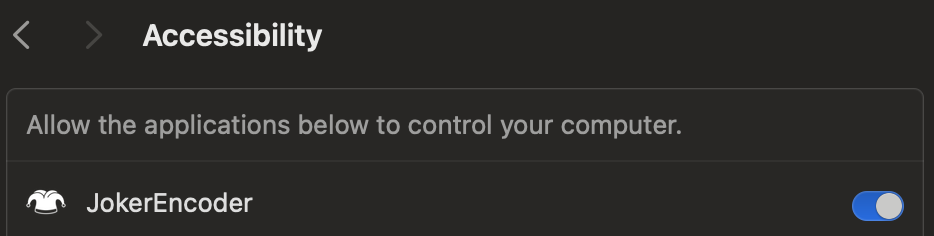
Enable the JokerEncoder.
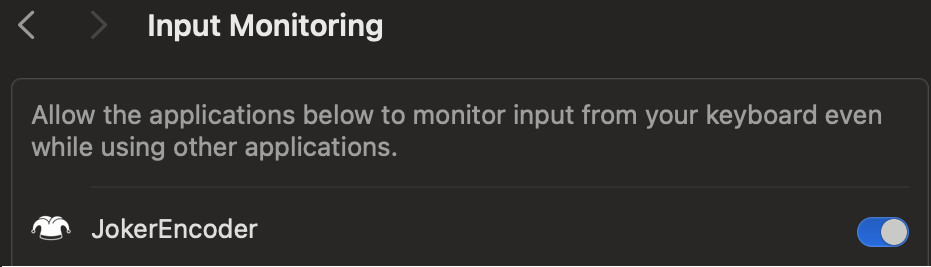
Then go to Privary & Security and choose Input Monitoring
![]()
Click on the plus symbol
![]()
Enter your password and Select the JokerEncoder.app from the Applications folder.
Then enable it
This is it. Now the JokerEncoder app has the necessary permissions to run.
Troubleshooting
Joker Encoder requires port 5006 to be free on the Mac.
If you encounter issues while running it, open a terminal and paste:
sudo lsof -i :5006
It will ask for your password. Type it in and press Enter.
It should not produce any output. If it does produce output, it means some other app is using that port. That app should be terminated so that the port is free to be used by the Joker Encoder app.
Under the COMMAND header, you will see the name of the app using the port 5006.
![]()
11. Controlling DaVinci Resolve with MIDIGrade software
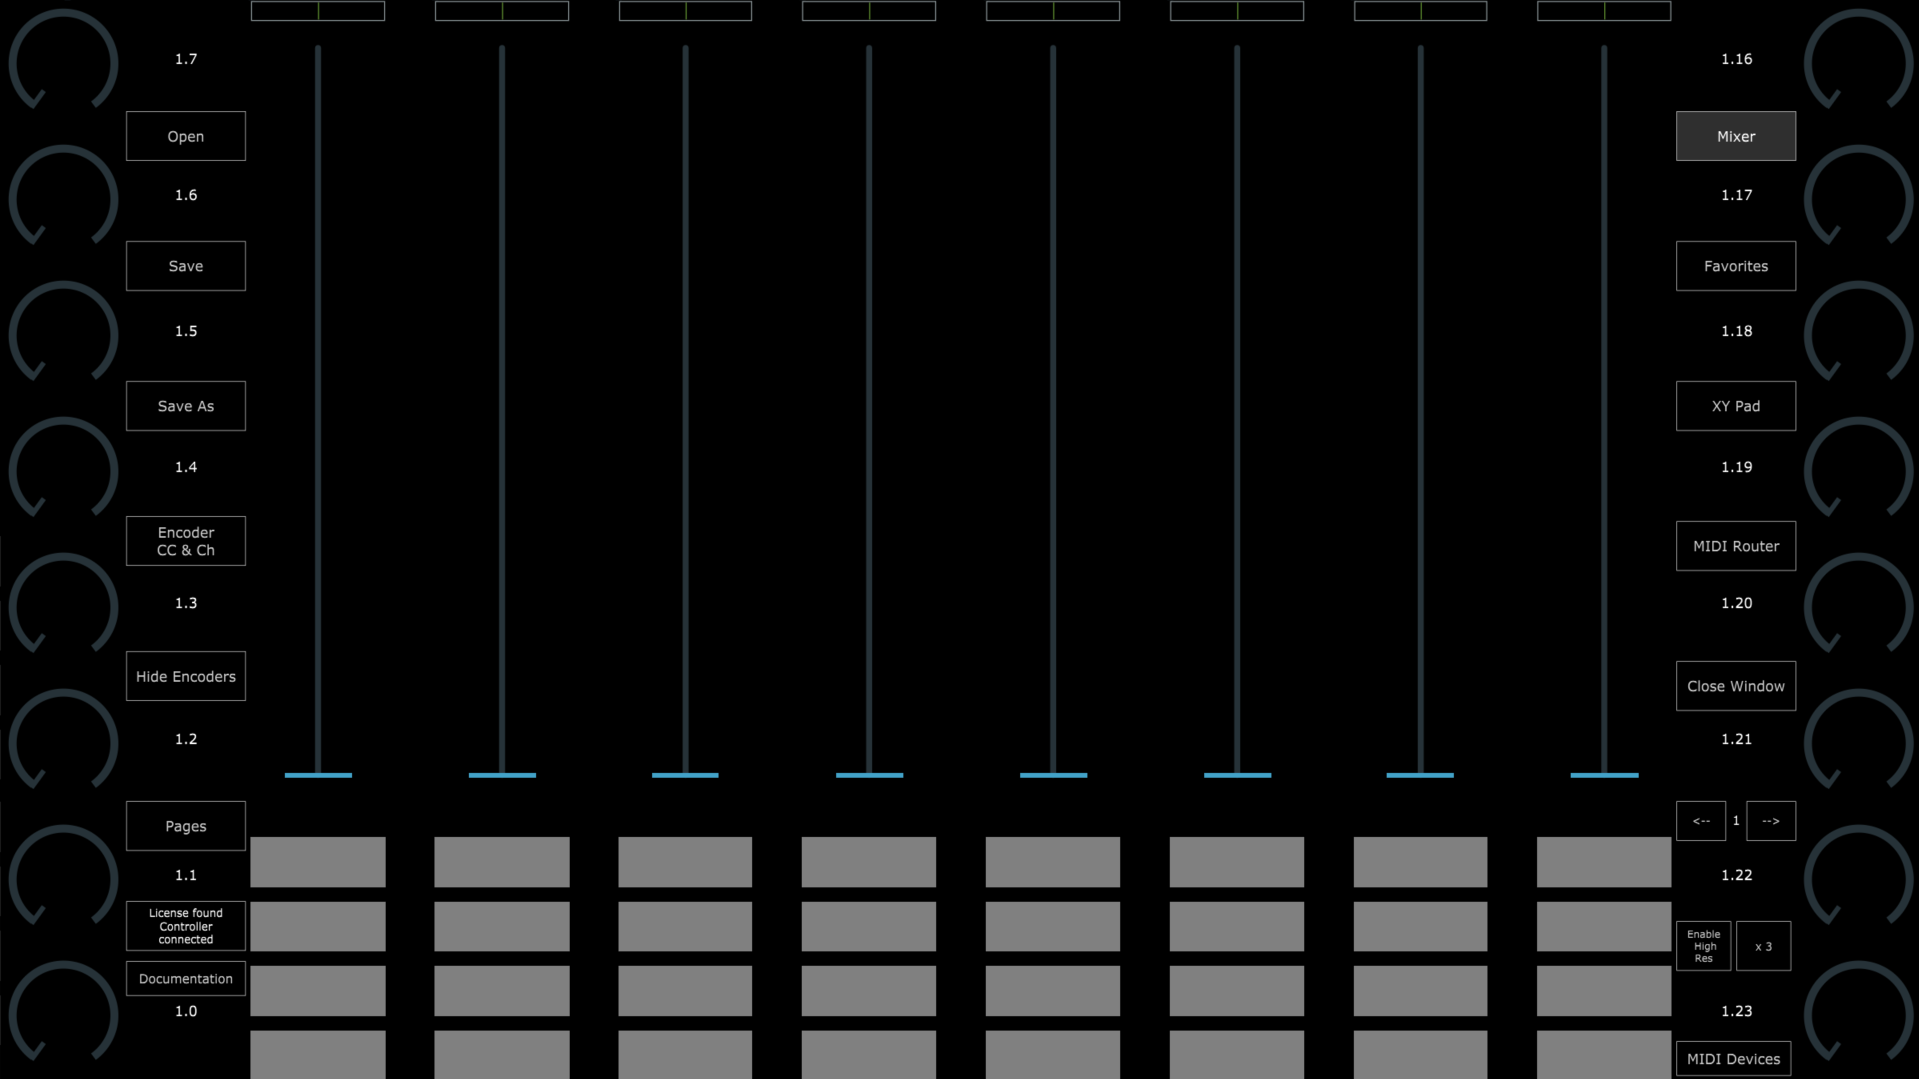
We have a created a MIDI APP Preset that enables you to control the most common parameters of the Color Page in DaVinci Resolve.
See promo video here
You need to purchase and install MIDIGrade to control DaVinci Resolve.
How it works:
The MP MIDI app will send MIDI messages to MIDIGrade.
Upon turning a knob, MIDIGrade will translate the MIDI messages into mouse movements that correspond to DaVinci Resolve Parameters in the Color page. (It uses the mouse cursor to control parameters)
MIDIGrade Website: https://www.midigrade.com/
MIDIGrade Manual: https://www.midigrade.com/MIDIGrade%20manual.pdf
Downloads and Dependencies:
Make sure you have everything that is listed below installed on your system before you proceed to the configuration.
- Download & Install MP MIDI APP as explained in the article.
- Download the zip file for MIDI APP Preset, Preset Images & DaVinci Resolve Preset and unzip it.
- Download & Install loopMIDI (Windows Only)
- Download & Install MIDIGrade
- Download & Install DaVinci Resolve
Configuration:
After everything is installed, follow the next steps.
Step 1:
From the unziped file, drag and drop the "Color.xml" into the MP Host folder:
(create the DavinciResolve folder)
Windows: C:\Users\%username%\AppData\Roaming\MP\Host\MP MIDI Presets\DavinciResolve
Mac: /Users/USER/Library/Application Support/MP/Host/MP MIDI Presets/DavinciResolve
or ~/Library/Application Support/MP/Host
Step 2:
From the unzipped file, open the "images" folder and drag and drop all the images into:
~MP\Host\MP MIDI Presets\Images
Step 3: (Windows Only - Mac users go to step 4)
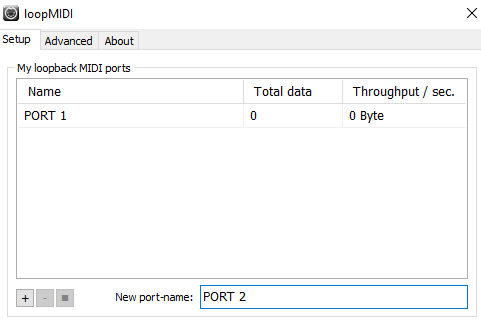
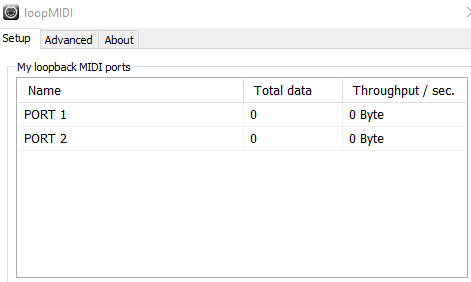
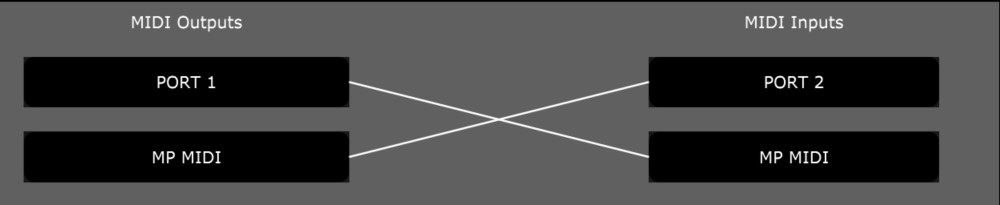
Open loopMIDI and add a port, name it "PORT 1", then add another port and name it "PORT 2"

Step 4:
For more detail configuration & Troubleshooting on MIDIGrade software, please advice the MIDIGrade Manual: https://www.midigrade.com/MIDIGrade%20manual.pdf
Open MIDIGrade and set up the settings according to your DaVinci Resolve configuration:
- Set the MIDI input device
- Select your screen resolution that DaVinci Resolve will be open
- Select your DaVinci Resolve Version "19/18/17"
- Select DaVinci Resolve "Studio" or "Free"
- Select "Dual Screen" if you have enabled the Dual Screen Mode in DaVinci Resolve

- Select between the three options according to how it is set up in yourDaVinci Resolve

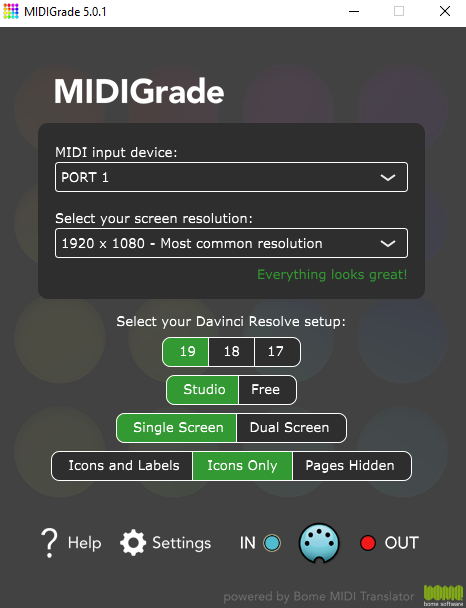
Mac Users use port "MP MIDI"
Step 5:
Open DaVinci Resolve & press "Ctrl + Alt + K" shortcut on your keyboard to open the Keyboard "Customization" window.
Next click on the three dots top-right corner and click on "Import Preset":
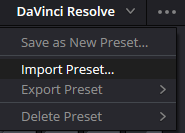
Then open the "DaVinci MP Controller.txt" file.
Step 6:
Restart the computer.
Step 7:
Now in order to use it, you just have to open, loopMIDI, the MP MIDI APP, open MIDIGrade, and load your DaVinci Resolve project you want to work on. Navigate to the Color page and you are ready to control what you want.
Dolby Vision:
The Dolby Vision license for DaVinci Resolve is a software license that enables the use of Dolby Vision technology within DaVinci Resolve. Dolby Vision is an advanced HDR (High Dynamic Range) format developed by Dolby Laboratories, which provides improved color, contrast, and brightness, delivering high-quality visuals. The license allows you to create, edit, and export Dolby Vision HDR content, including the use of Dolby's proprietary tone mapping and metadata management, which ensures the best possible viewing experience across a range of devices.
Even though the most important parameters of Dolby Vision can be controlled, the Dolby Vision license usually requires a separate activation and involves a licensing fee, which helps cover Dolby's proprietary technology costs. In some versions of DaVinci Resolve Studio, basic Dolby Vision tools might be included, but more advanced capabilities require the full license.
Dolby Vision useful links:
- https://professional.dolby.com/licensing/
- https://professional.dolby.com/content-creation/dolby-vision-for-content-creators/
- https://prostore.dolby.com/products/dolby-vision-individual-certification
Troubleshooting:
1. For Windows users, make sure all of your monitors are connected on the same graphics card. If the monitors are connected on 2 different graphics cards it will not work.
2. The CC 42 Channel 3 & 4 doesn't turn the 1st Saturation as written in MIDIGraded Manual. Instead it turns the 2nd Saturation. (This will be fixed in a future update of MIDIGrade as Julious from MIDIGrade informed us.)
3. Dolby Vision parameters in DaVinci Resolve cannot be controlled without a Dolby Vision license.(Touto pistefko kserun to oi users tou davinci pou en pro kai en na xrisimopiisoun dolby vision.)
12. Mixer Mode in the MP MIDI app
In the November 2024 update of the MP MIDI app we have introduced a new view called Mixer Mode. See video on YouTube.
The view can be activated using the Mixer Mode button on the upper right corner.

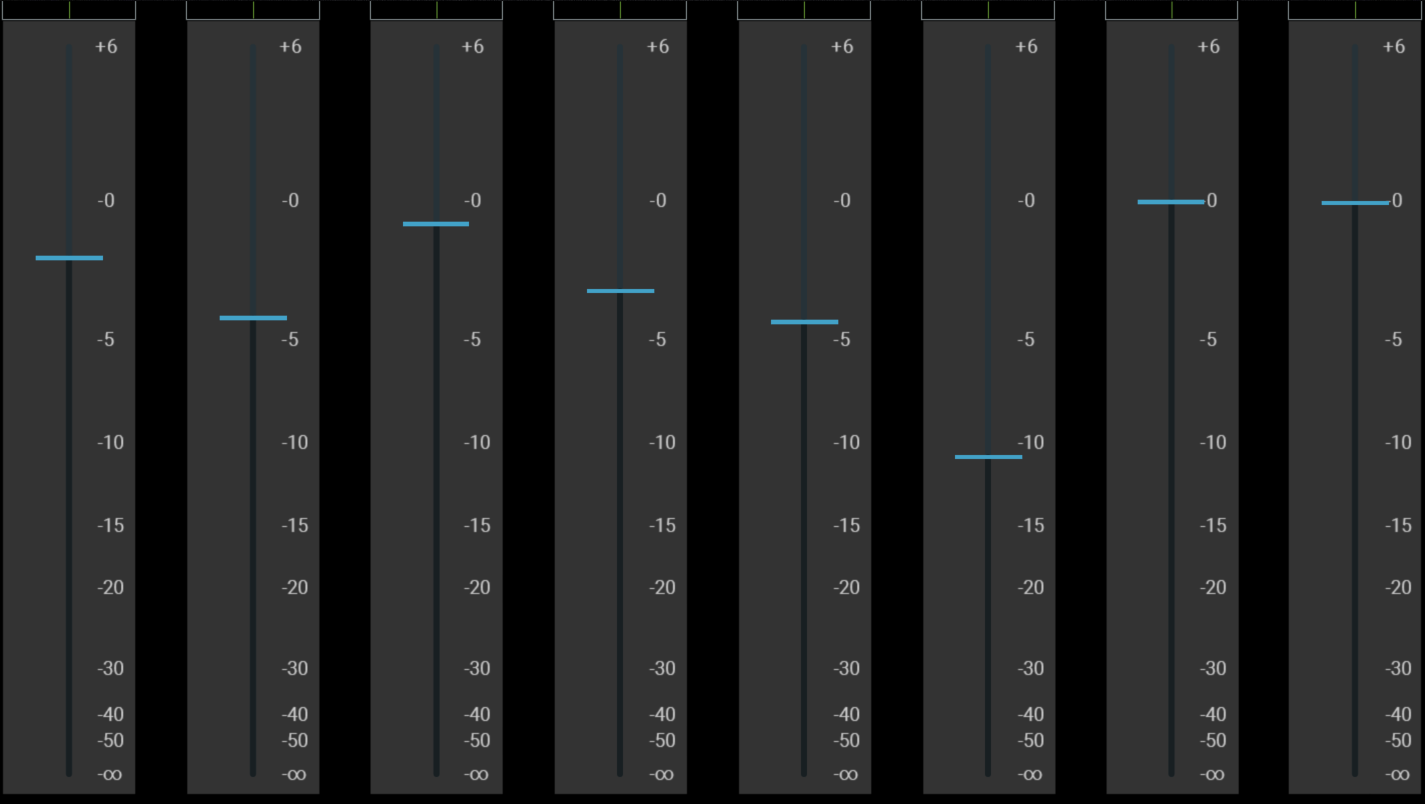
The Mixer mode shows
- 8 horizontal faders which are assigned to the top row encoders. The meter starts from the center to be mapped on the pan on the DAW's mixer.
- 8 vertical faders which are assigned to the bottom row encoders. These can be mapped on the DAW's mixer volume and can also be controlled via touch.
- 4 buttons under each column (32 in total) assignable buttons.
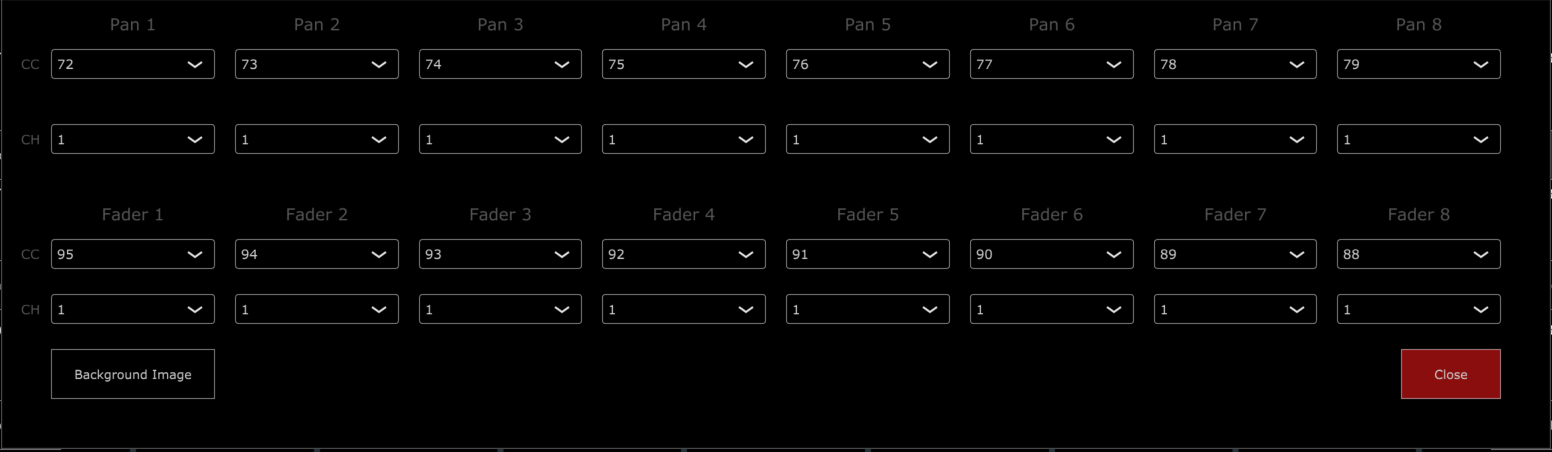
Setting CC numbers on the top encoders and faders
Right click on any fader and the option menu will appear
In odd numbered pages the default CC assignments are
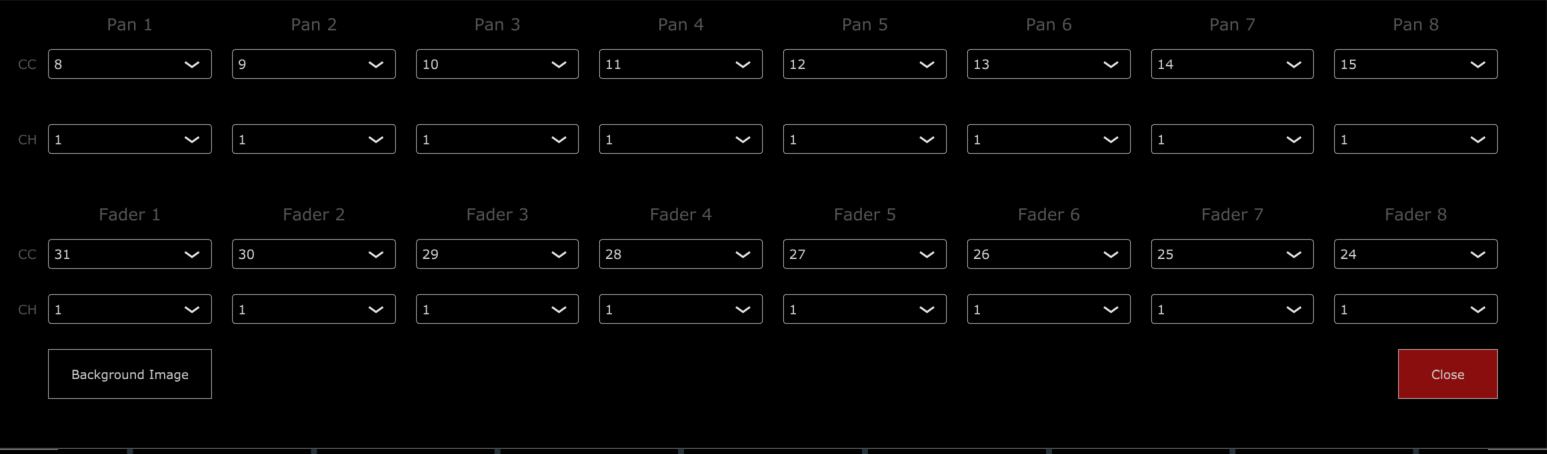
In even numbered pages the default CC assignments are
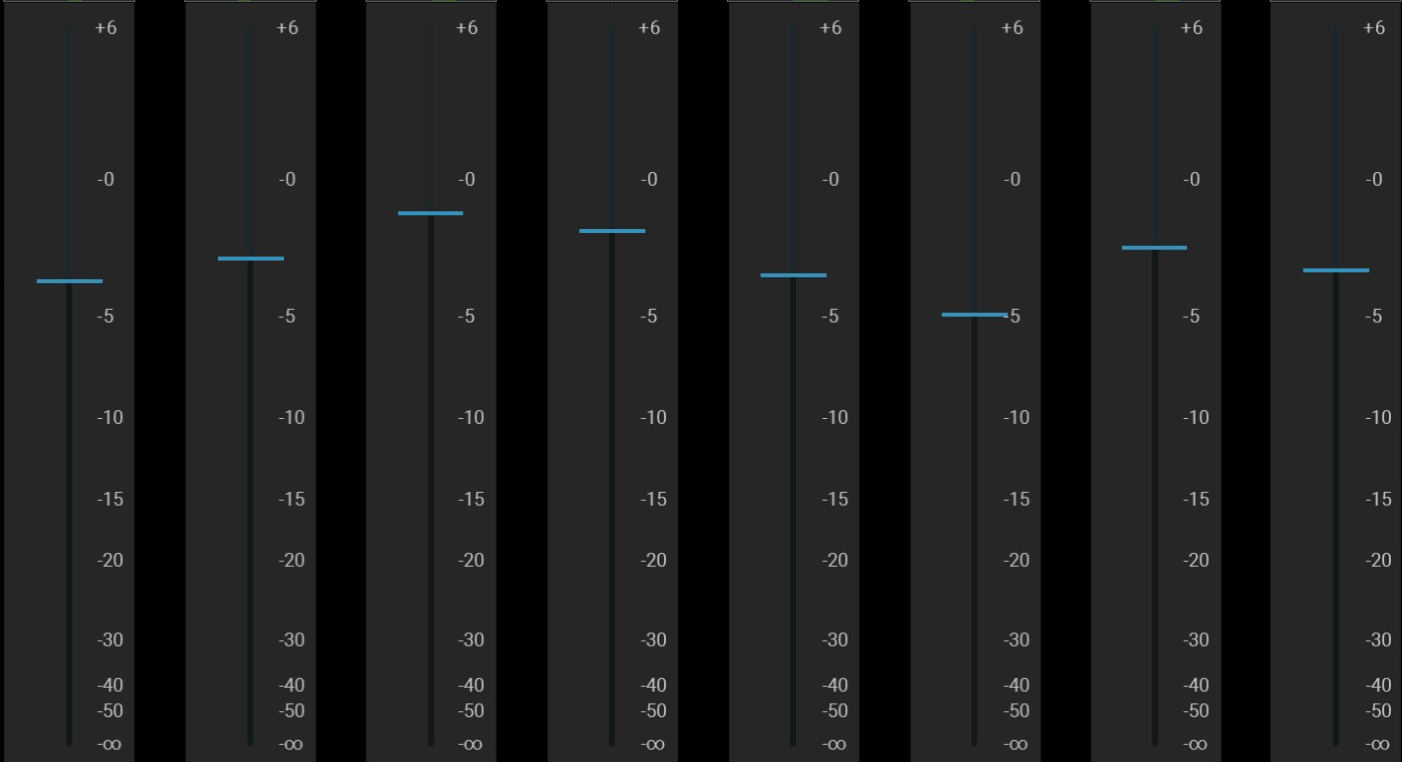
There is an option to set a background image which is ideal for showing dB values. We made images for each popular DAW to match the dB values on the mixer.
To set a background image, click on the Background Image button and select an image from the ~\MP\Host\MP MIDI Presets\Images folder.
You can download background images for your DAW from here and place them in the Images folder.
Right click on a button and it will show the button options
In the Set Name section, you can set the name of the button.
There are 2 additional options.
The Copy options to row will copy the following settings to the row of buttons:
- Name
- Colors (pressed/unpressed)
The "Copy options to the same row in all pages" will copy the options to the same row in all pages.

 Cubase use with the MP MIDI remote script
You need to download the updated Cubase-03.xml preset to use the Mixer mode.
On Windows only, after loading the preset you need to route the FROM DAW and TO DAW ports in the MIDI router and save the preset.

13. MIDI Ports on Windows
UPDATE for up coming updates on Windows 11 MIDI Services - April 2026
The new Windows 11 MIDI Services Native MIDI 2.0 support in Windows 11 is arriving through "Windows MIDI Services," rolling out to supported retail releases of Windows 11 24H2 and 25H2 starting in February 2026 and it provides the following options. To check if you have it there is a tool by Microsoft here that checks if the MIDI services are installed.
Make sure the option "Use names compatible with previous versions of the Windows MIDI APIs" is selected.
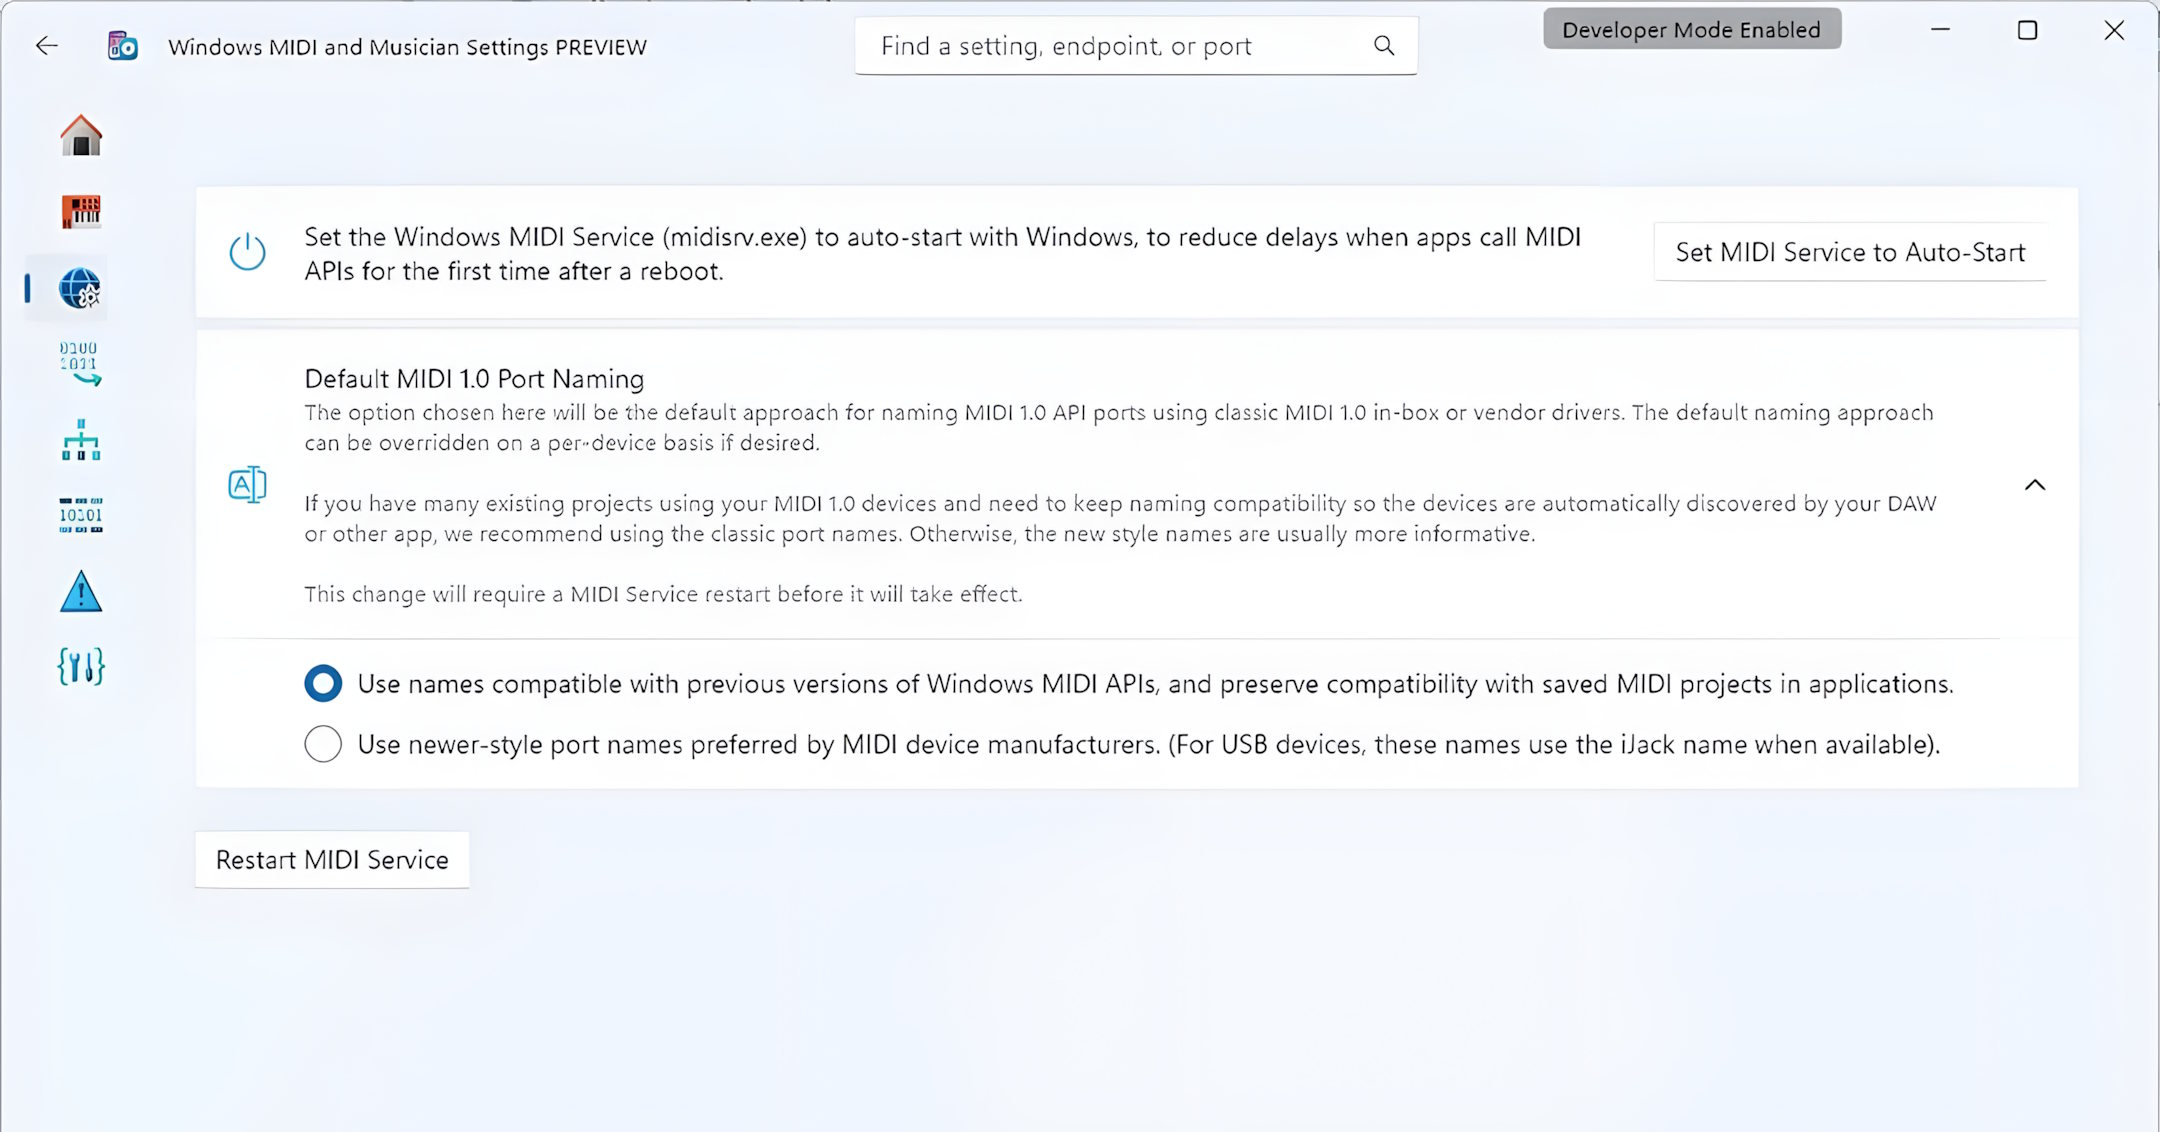
See more infomation here
Setup MIDI on Windows
To use the MP MIDI on Windows, you need to install a virtual midi port software.
We recommend loopMIDI which is a free utility software. There are others as well like LoopBe30.
LoopMIDI allows you to create multiple virtual ports you need and set custom names for each port.
For the MP MIDI we need two ports, one for sending another one for receiving MIDI.
After you install loopMIDI, open loopMIDI and add a port, name it "PORT 1",
then add another port and name it "PORT 2" so it will look like this:
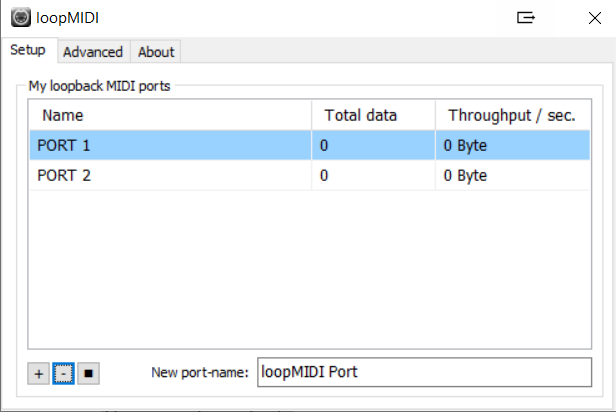
Keep in mind that each port "PORT 1" and "PORT 2" both carry MIDI inputs and outputs.
Therefore, you will see them listed in both sections of the MIDI inputs and MIDI outputs of your DAW and the MP MIDI app.
Run first the MP MIDI standalone app (not the VST plugin).
Open its window by clicking on the small bar icon and then run your DAW.
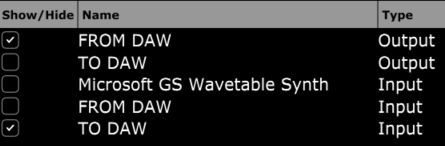
In the MP MIDI app. the button on the bottom right named MIDI devices allows you to select which MIDI devices will be visible in the MIDI router.
The MP MIDI app does not use a MIDI device unless it is linked to another device in the MIDI Router.
Selecting a device makes it visible in the MIDI router, however the device will only be used (consumed on Windows) when a line is drawn from the device to another device.
Then click on the MIDI Router button on the MP MIDI app and click and drag to create the following routing:
Click to close the MIDI Router and Save the default preset, choosing to overwrite it.
In your DAW, choose the PORT1 for the MIDI IN port, and PORT2 for the MIDI OUT port.
For bidirectional communication from/to the controller from/to the DAW, the DAW must be able to send out MIDI output. Ableton and Cubase do this very well. You need to check your DAWs ability to send out MIDI CC when changing a parameter with the mouse.
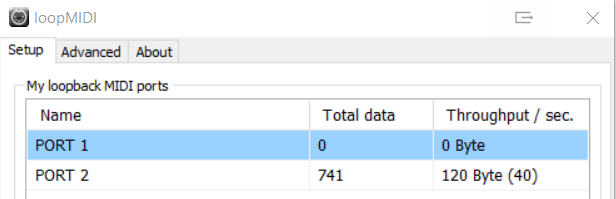
To troubleshoot, you can see the throughput traffic displayed in loopMIDI when sending MIDI from the controller (moving an encoder) and when sending MIDI from the DAW (moving a parameter with the mouse).
In this case, you can see PORT 2 displaying traffic when moving an encoder from the controller.
Understanding MIDI ports on Windows
On Windows, MIDI ports can only be used by one application at a time. They are exclusive per app.
This applies to the MIDI port IN and OUT independently. This means that one application can be using
for example PORT1 MIDI IN, and another application can be using PORT1 MIDI OUT.
However, PORT1 MIDI IN cannot be used by 2 application at the same time. The same applied to the MIDI OUT.
The first app that gets the port's IN or OUT, will be able to use it, while any other app trying to use the port, will not be able to use it.
if a MIDI port's IN or OUT is used by another application when opening an MP MIDI app preset, the connection line will show in red color, indicating that a connection cannot be made.
This is important especially when running the MP MIDI plugin, because upon opening the DAW, the DAW will consume midi ports and these will not be available to be used by the MP MIDI app.
If the port appears with a grey background, it means that the port is no longer visible on the system.
On Windows, to check if your midi ports are free, Midiview is a free app that can tell you if a device is occupied by another app.
A MIDI port has both input and output. So, if you use the input on the MP MIDI, that input must not be used in the DAW.
The same applies for output.
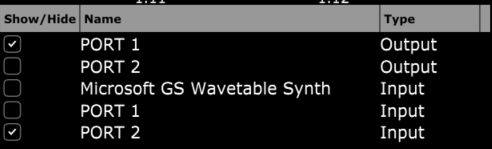
Here is an example with virtual MIDI PORTS PORT 1 and PORT 2:
MP MIDI APP: MIDI IN - PORT 1: ENABLED
DAW: MIDI IN - PORT 1: DISABLED
MP MIDI APP: MIDI OUT - PORT 1: DISABLED
DAW : MIDI OUT - PORT 1: ENABLED
MP MIDI APP: MIDI IN - PORT 2: DISABLED
DAW : MIDI IN - PORT 2: ENABLED
MP MIDI APP: MIDI OUT - PORT 2: ENABLED
DAW : MIDI OUT - PORT 2: DISABLED
14. Using 2 MP Controllers at the same time
To use 2 MP Controllers, one must be used for the MP Host (Multi or Single, Instruments and FX) and the other one for the MP MIDI app and/or the Ableton MPH.
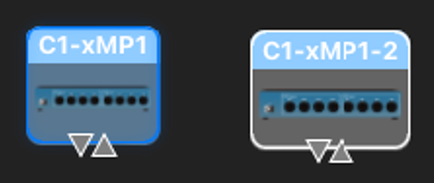
The first c1-xMP1 must be used for the MP Host and the second c1-xMP1-2 for the MP MIDI app and/or Ableton MPH.
When the 2 are connected you can choose the device from the right click menu of the MP MIDI app and/or Ableton MPH.
The MP Host does not have an option to select a C1-xMP1 device. Only the MP MIDI app and the Ableton MPH app have this option.
You cannot use 2 controllers at the same time for the MP Host (Multi or Single, Instruments and FX).
It does not matter if you are using different MP Controller models. The MIDI hardware is the same on all models.
On Windows, the USB port of connection to the computer matters.
Depending on which port you have connected each MP Controller, one of the two controllers will be found first by the operating system.
If you connect the MIDI of one controller first, then open the MP Host, and the MP Host will connect to the C1-xMP1.
Then connect the MIDI of the second controller, then open the MP MIDI or Ableton MPH, select C1-xMP1-2, and the MP MIDI will get that one.
If on the next computer reboot they are not assigned correctly swap the USB connection on the computer ports and that should do it. Every time you reboot, each controller will be assigned correctly.
On the Mac, open the Mac MIDI Studio and set the icon view (not the list view) and disconnect all MP Controllers.
Select the C1-xMP1 and delete it, from the top menu, Edit > Delete.
Connect one MP Controller and it will appear in the MIDI Studio.
Load up and open the MP Host and check that the MP Controller is working normally. Unload the MP Host.
Then go back to the Mac Studio and connect the second MP Controller and it will also appear in the Mac Studio.
Double click on the second C1-xMP1 and rename it to C1-xMP1-2.
Load and open the MP MIDI app or Ableton MPH and select the second (C1-xMP1-2) on the list.
Load and open the MP Host.
Save your DAW project, close it and then load up it up again.
The controllers should be assigned as you did when you saved the project.
If they are not assigned correctly just swap names, ie as on the image above, the left should be C1-xMP1-2 and the one on the right should be C1-xMP1.
Save your DAW project, close it and then load up it up again.
The controllers should be assigned as you did when you saved the project.
Using the MP MIDI and Ableton MPH together on the second MP Controller
You can switch between the MP MIDI app and Ableton MPH while you have the second controller connected.
If you select c1-xMP1-2 on both MP MIDI and Ableton MPH, then selecting one of the two apps (from the Plugin Panel or the small window button) will automatically close the controller window of the other app.
If you select c1-xMP1 (the first controller) on one of the two then it will close the app window automatically upon opening an MP Host window (from the Plugin Panel or the small window button).
15. Controlling Logic Pro with the MP Controller Control Surface
We have created a Logic Pro v11 control surface for controlling the following:
1. Logic Pro native audio effects and virtual instruments which have been pre mapped
2. Third party plugins (and can also be used at the same time with the MP Host for controlling third party plugins)
3. The Mixer in Logic Pro
4. Transport control
5. Send keyboard commands to Logic via assignable buttons
Compatible with up to Logic Pro version 11.2.2 and Logic Pro12 (Logic Pro Creator Studio)
This Logic Pro control surface is part of the MP MIDI app/plugins, not the MP Host plugin. It is not related to the MP Host plugin which is made to control third party plugins. The control surface works in the standalone app of the MPMIDI app. You can use both the MP Host and the control surface in the same Logic Pro project or use either of them.
Here is a short overview video of the control surface.
MP MIDI App version: v1.0-e8be5c7--H2025-10-06--B2025-10-07
Logic CS Script and Logic native devices presets updated: October 4th, 2025
You can find the change log of the Logic Pro Control Surface here
If you install the new Logic Pro Creator Studio, it is a new bundle that is identified differently on macOS than Logic Pro.
If you have just updated Logic, the app id is still the same on macOS.
If you don't have the Logic Pro Creator Studio, in the MP MIDI app choose the option Logic 11 and use the Logic 11 Launcher. If you have Logic Pro Creator Studio choose Logic Pro 12 in the MP MIDI app and use the v12 Launcher app to start it.
IMPORTANT: Select Logic Pro or Logic Pro Studio Creator from the right click menu of the MP MIDI app.
Can be downloaded from the New Releases section of the user portal.
(It requires to install the latest MP Host first: MPH_MAC_INSTALLER-v1.8)
![]()
How to install
-
Download the zip file from portal from the section Logic Control Surface (not the MP MIDI app. The Logic CS includes the MP MIDI app as well. Just use the Logic CS installer).
-
Extract the MPMIDI.app from the dmg file to your Applications folder (overwrite it if you have it already)
-
Extract the control surface installer to a temporary location. Don't run the CS installer yet. Follow the steps below to set up.
UPDATING
If you install an update, after the installation of the update, always rebuild the control surface defaults in Logic
![]()
Configure Logic Pro
-
Open Logic Pro
-
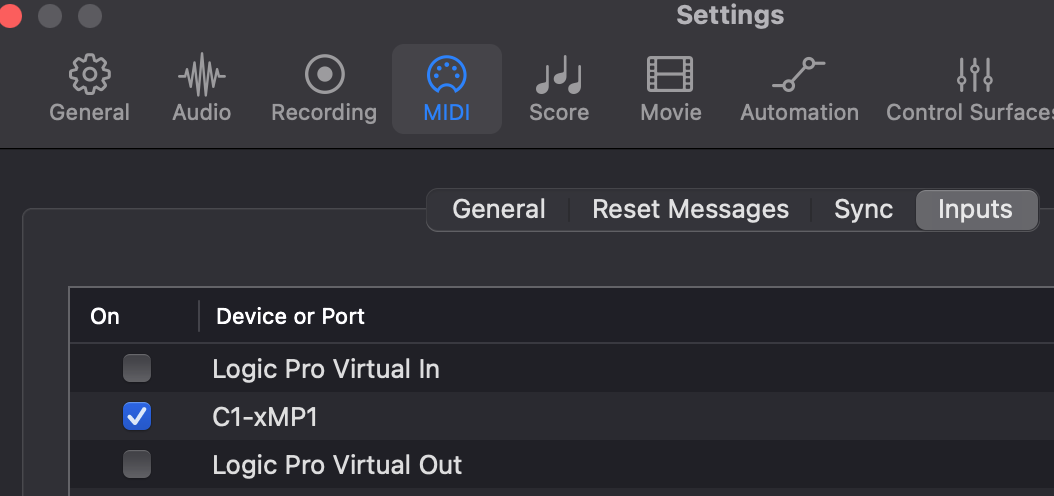
Go to MIDI Settings
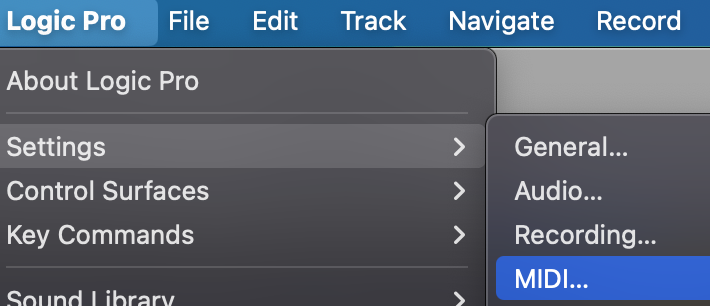
Go to Inputs and ensure the C1-xMP1 is checked
go to MIDI Settings > General and disable MIDI 2.0 (Uncheck the box)
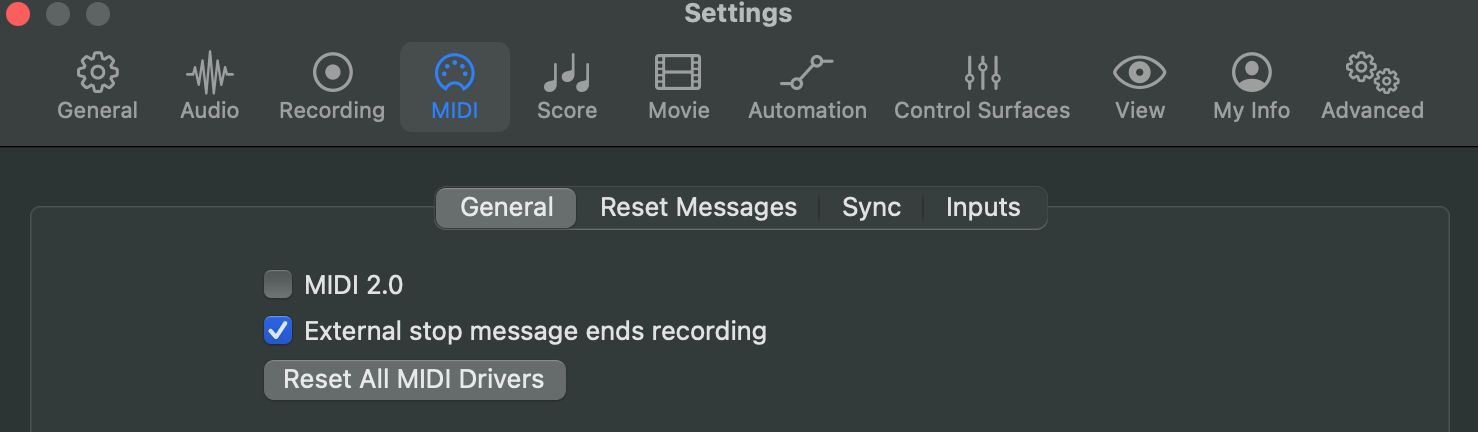
Then quit Logic Pro.
![]()
Configuring the MPMIDI App
The Logic pro control surface is part of the MP MIDI app.
Note that you should only use the standalone MP MIDI app from /Applications for the control surface,
not the MP MIDI AU plugin.
Open the MP MIDI app from the Applications folder.
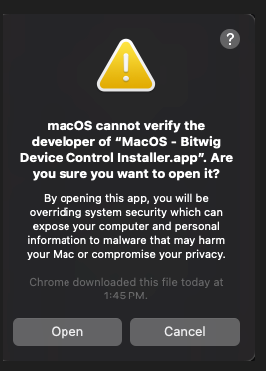
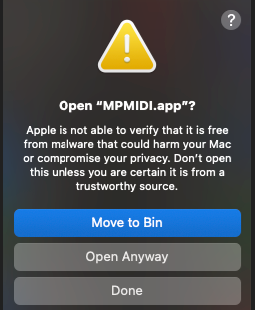
You may get a warning
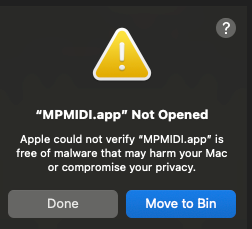
Click Done.

run the MP MIDI app again. If you get this message, click Open Anyway.
It will ask:
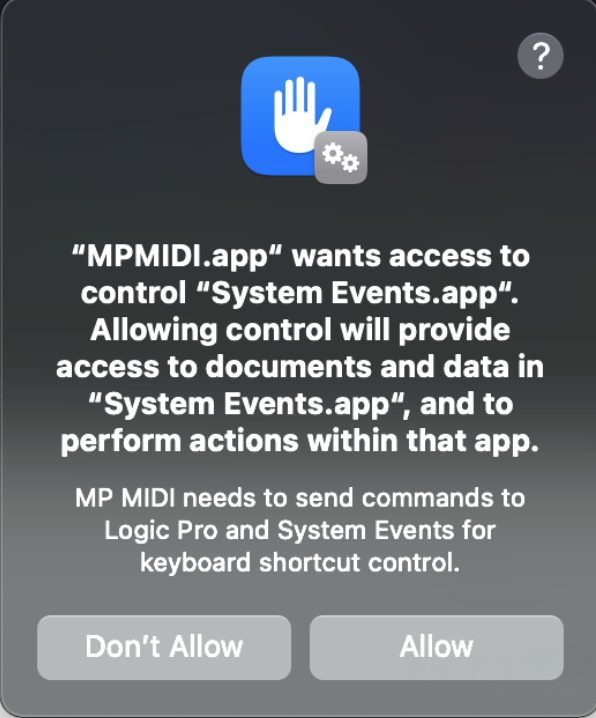
Click Allow.
Once the MP MIDI app is open it will display an icon on Mac's top bar.
Clicking on the Mac's top bar MPMIDI icon will open or close the main window
![]()
Right click on the empty black area between the top encoders and you will see the right click menu.

Select the target monitor of the MP Controller and it will be moved automatically to the MP controller's display.
If you have multiple monitors, the MP Controller is typically the last monitor in the list.

Right click on the empty area and click on Logic Pro from the Options so that a checkmark appears.
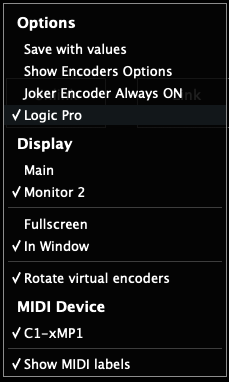
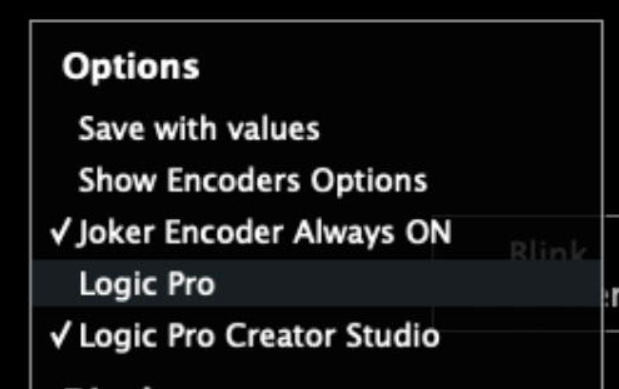
If you are using the latest version of the Logic CS, it also shows the Logic Pro Creator Studio option:
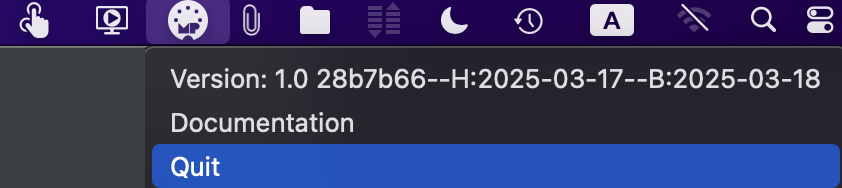
Now quit the MP MIDI app.
To quit it, right click on the top bar icon and select quit.
A pop up window will be displayed on top of the MP MIDI app and click OK.

![]()
Install the Presets and Control Surface script for Logic Pro
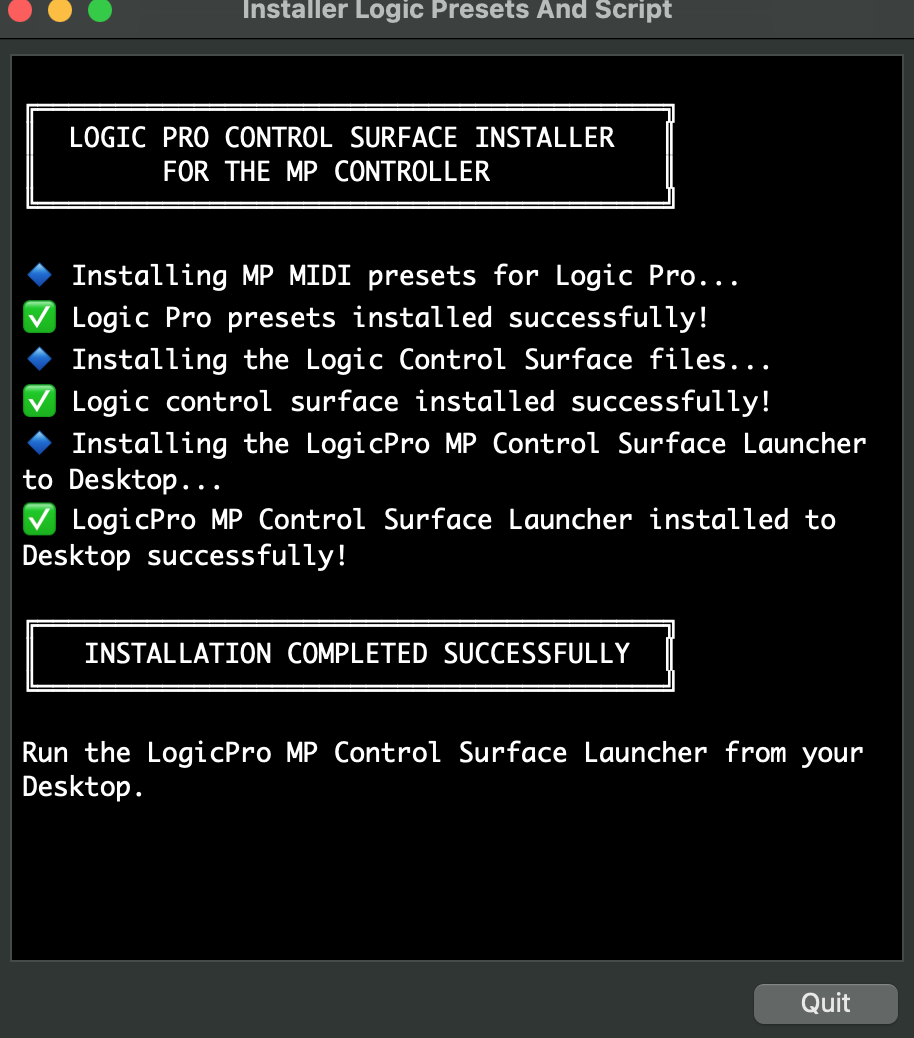
Open the "Logic CS Installer for the MP Controller".
You will get the following message:
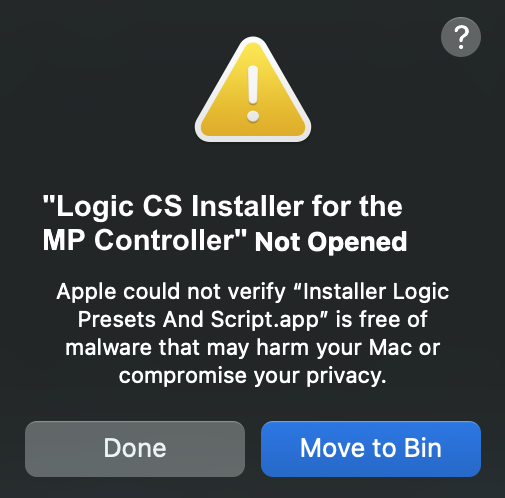
Click Done
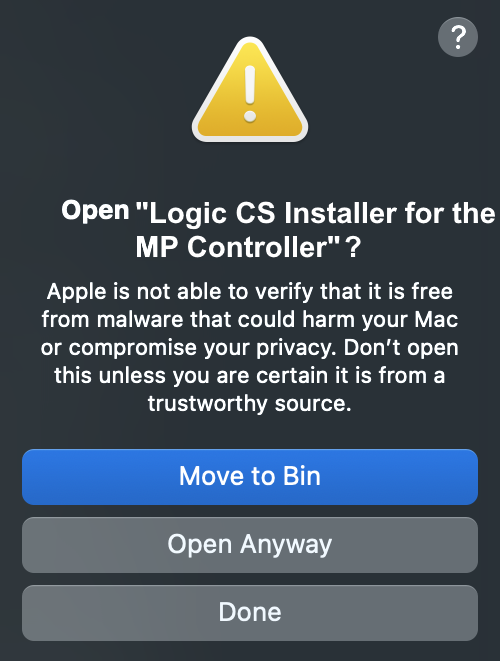
Go to System Settings > Privacy and Security and choose Open Anyway
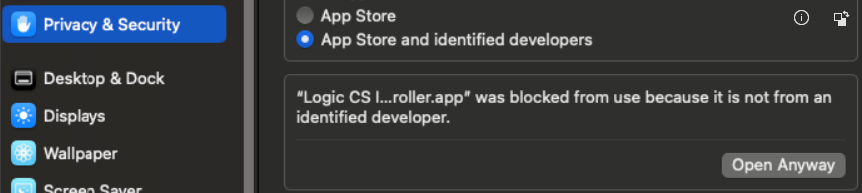
Then open the Logic CS Installer app and choose Open Anyway again
Enter your password and click OK
It will ask for the password one more time in order to run the installer.
You will see the following message and click Quit
Open Logic and it will prompt you with this popup window:
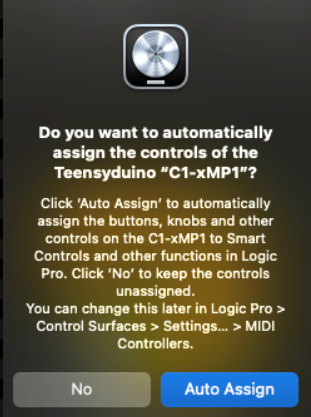
Choose Auto Assign
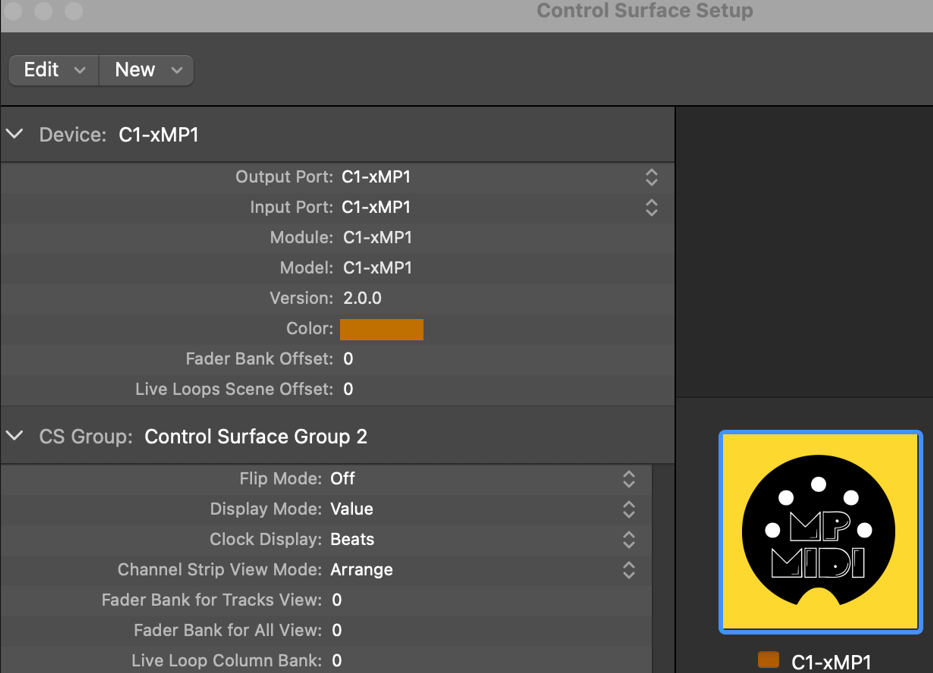
You will then see Logic's control surface setup page and you can close it.
It should look like the image below and no configuration is needed.
Close the window.
Quit Logic.
![]()
Running it for the first time
Run the MP Control Surface Launcher app from your Desktop
![]()
The Launcher will open the MP MIDI app and then Logic Pro.
If the Launcher does not open Logic and the MP MIDI app, go to System Preferences/Settings > Privacy & Security > Full Disk Access, then add Terminal.app to the list of allowed applications. Try running the following command in the terminal:
open -a "Logic Pro"
it should open Logic. This is the same command that the Launcher app is using to open Logic.
If you don't want to use the Launcher, the MP MIDI standalone app needs to be used for the Logic Pro Control Surface, not the MP MIDI plugin.
The MP MIDI app should always be started before Logic Pro, otherwise it will not work.
Alternatively, if you open Logic first and then the MP MIDI app, select Rebuild Defaults from the control surfaces in Logic and it will work normally. If you have other control surfaces, when rebuilding the defaults will reset other control surfaces as well.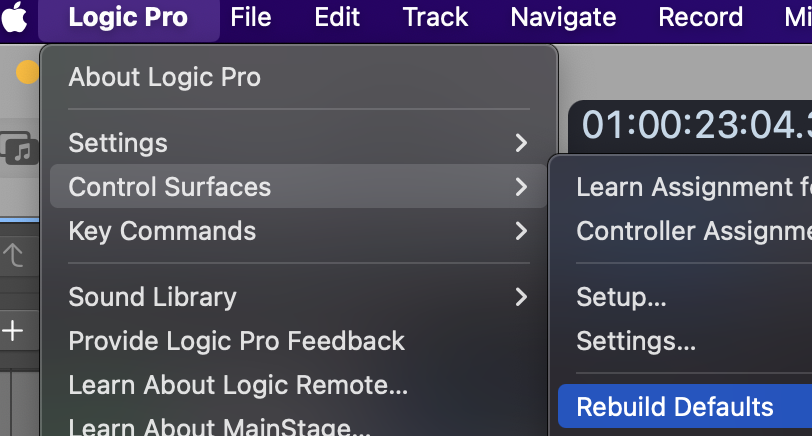
The MPMDI app has also an AU plugin version, but you should not use it in the Logic Pro because the control surface script cannot communicate with Logic when it runs as an AU plugin.
You should use the standalone MPMIDI.app. The launcher on the desktop will open the MPMIDI standalone automatically.
Setting the permissions needed for the MP MIDI app to send keyboard keys to Logic

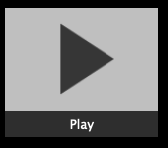
Press the Play button.
It will pop up a message about the permissions needed. Click allow or Open System Settings.
In System Settings, Privacy & Security > Accessibility and give the permission to MP MIDI by enabling it as shown:

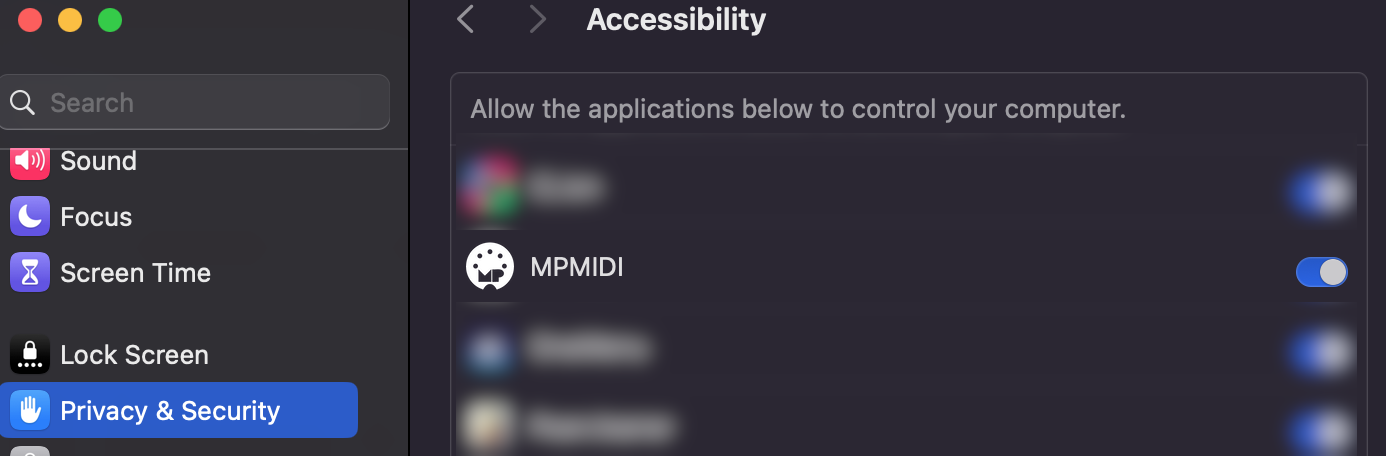
It should now send keys when using the buttons in the Button's Page.
![]()
Views of the Logic Pro control surface
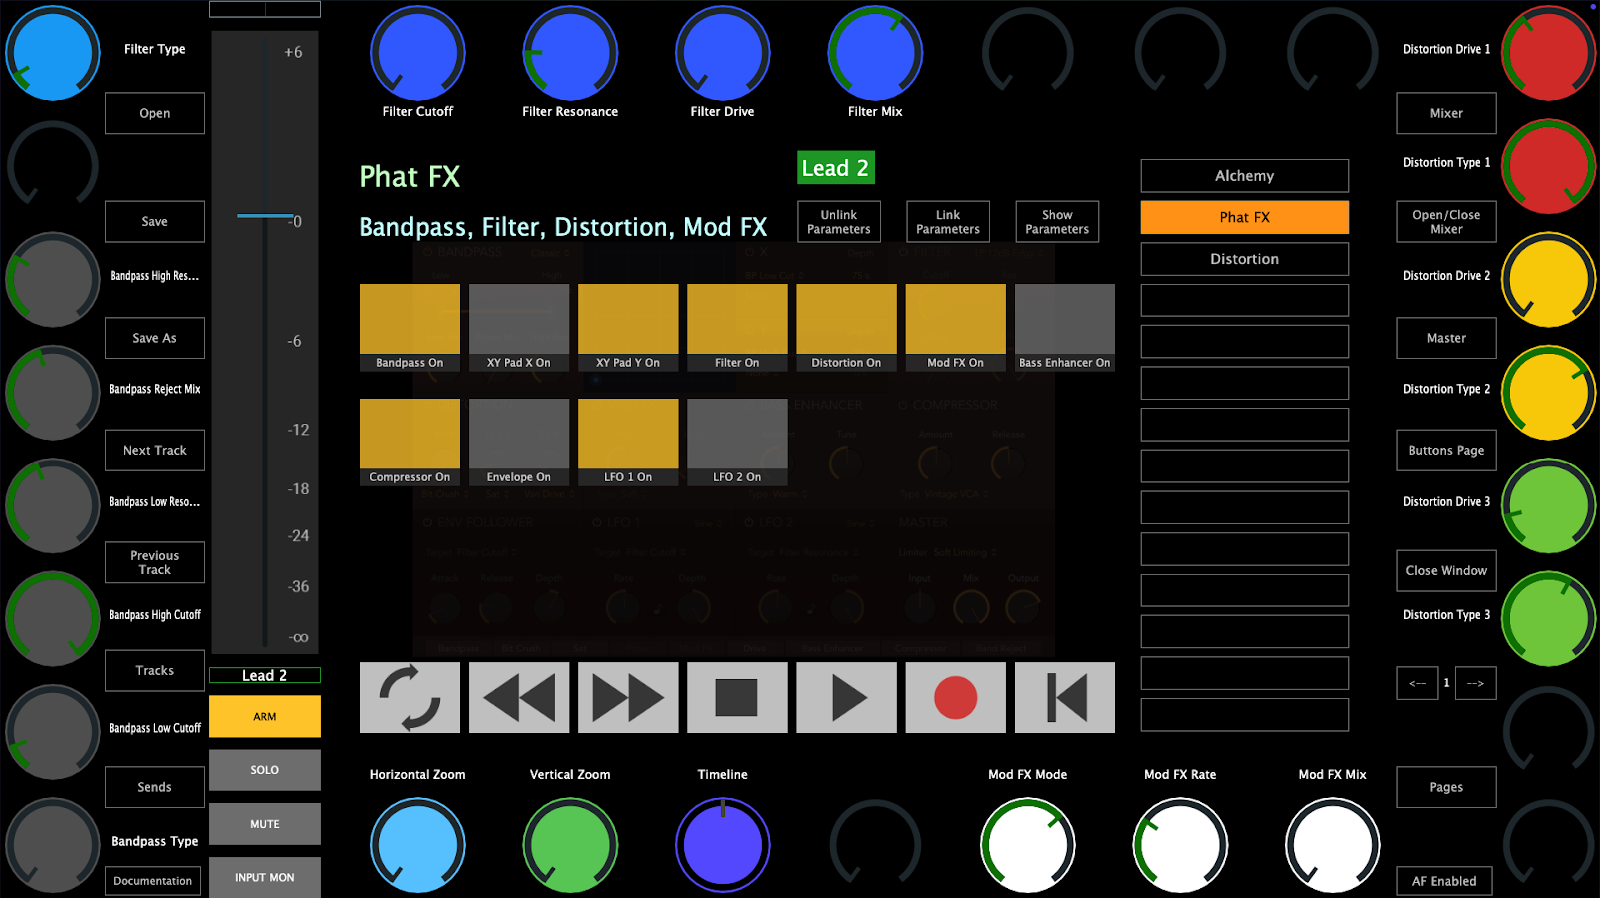
1. The Default view (plugin control)
This is the default view that will be displayed when opening the app. This view shows a virtual fader of the currently selected track in Logic Pro along with a pan control where the encoder on top of the fader can control the pan and the encoder below the fader can control the volume.
The rest of the encoders control the selected plugin of the slot that is selected on the right side of the page, except encoders 29,30 and 31 where these control the horizontal zoom level, vertical zoom level and traverse the timeline in Logic Pro.
At the center, there are buttons which are hidden by default and can be accessed by right clicking on the area of the hidden button.
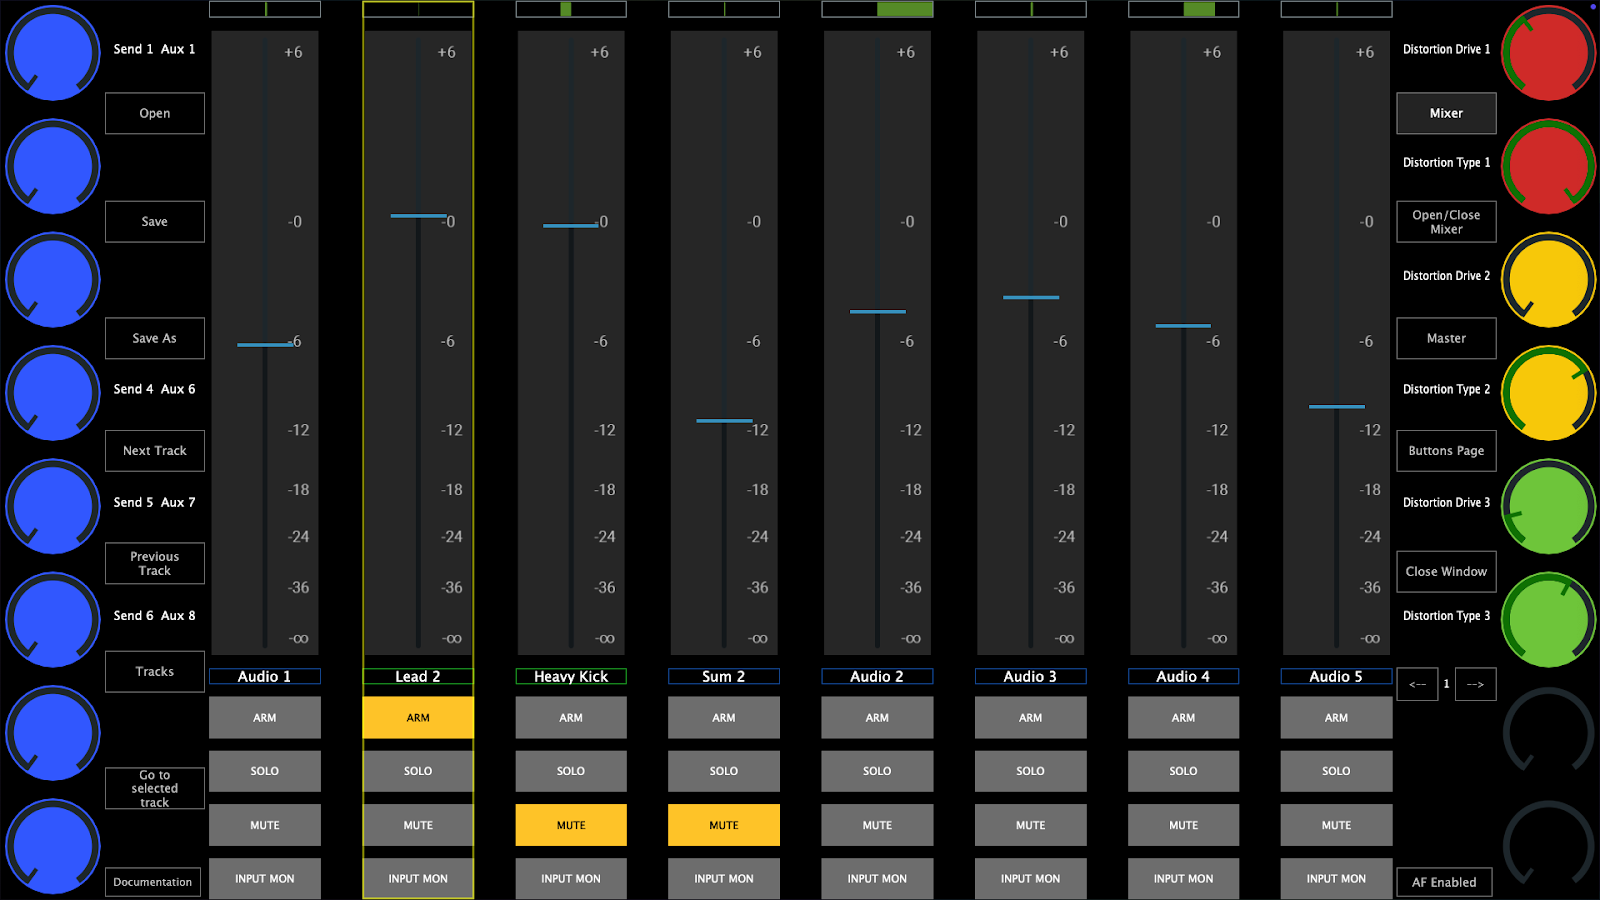
2. The Mixer view
This view shows the mixer controls of 8 tracks per page. It is easy to navigate to other tracks using the "TRACKS" button or the arrow buttons where they will display the next/previous 8 tracks.
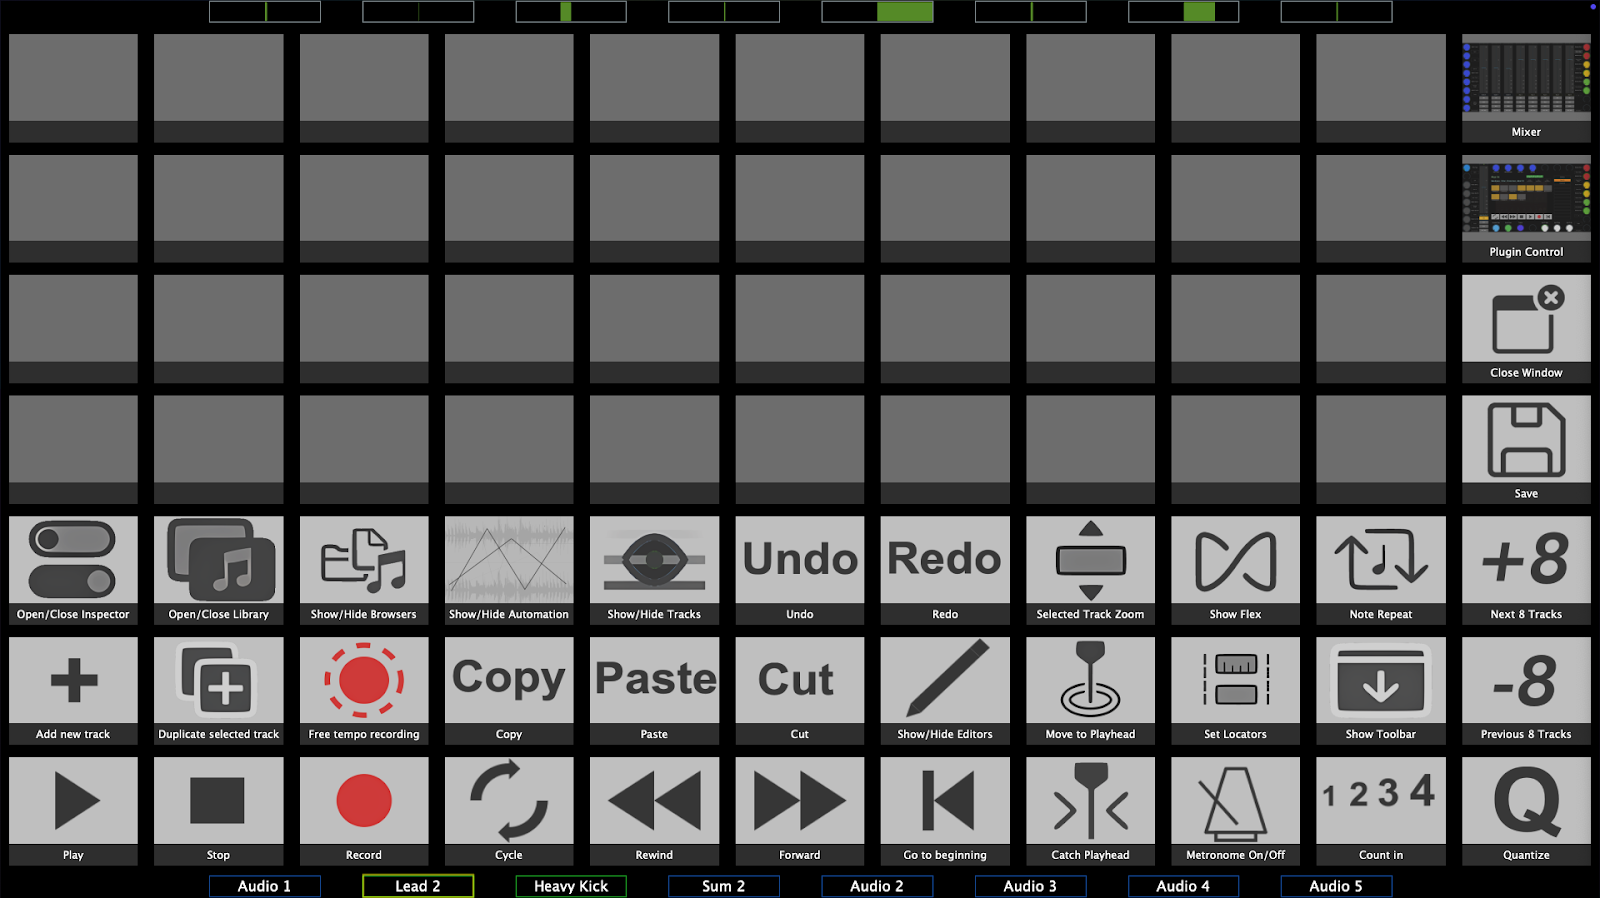
This is dedicated view to assignable buttons so that you can make your own control surface of your favorite Logic Pro shortcuts.
MacOS is quite strict about allowing to send keyboard keys to other applications. See the section below to set the permissions needed so that the MP MIDI app can send keyboard keys to Logic.
![]()
Track and Device/Plugin Selection (opening plugin windows)
The control surface follows Logic in the track selection process.
When you select a track on Logic you will see the same track selected on the MP Controller.
You can also select a track from the controller using the Tracks button from the plugin control page and the mixer page.
However, the controller surface will not select a track when you open a plugin from Logic. For example, if you are on Track 1 and you open from Logic a plugin on Track 2, the control surface will remain on Track 1.
The app displays the plugin slots of the selected track and the device name in each slot. Click/touch a slot to open a device.
Devices/plugins that are opened in Logic using the mouse, will not be opened on the MP MIDI app as well. A device/plugin must be opened from the MP MIDI app so it can be controlled from the MP controller.
Automatic plugin window open
The Logic Control Surface opens plugins when a track is selected based on the following rules
1. Switching from an audio track to another audio track will open the same plugin position. If you have plugin #2 open on the current track and switch a track, it will open plugin #2 on the newly selected track.
2. Switching from an audio track to an instrument track will open the instrument plugin.
4. Switching from an audio track to another audio track that does not have plugins or does not have a plugin in the same position as the previous track, will open a small empty plugin window.
5. If you select a higher-numbered plugin slot (e.g., the second plugin) and then navigate to a track with fewer plugins, the system will automatically open the first plugin. Example: If you have plugin slot #2 selected on one track, then switch to a track with only one plugin, that plugin will automatically open.
Preventing plugin windows from opening automatically when switching tracks
Select the first plugin on an audio track and close its window. You can navigate to any other audio track and it will not open any plugin windows.
If you navigate to an instrument track, it will open the instrument plugin window.
If you then navigate to an audio track from an instrument track it will open the first plugin window.
If you close that first plugin window, it will not open the first plugin again when you navigate to another audio track.
You can adjust the bank size of the tracks which affects the speed that Logic loads plugins. The default bank size is 64 which works well with most computers and projects. See at the bottom of the page on how to adjust the bank size.
![]()
Presets
There are 2 types of presets in the MP MIDI app for the Logic Pro control surface.
1. Logic native device and third party plugin presets.
These are the xml presets saved in ~/Library/Application Support/MP/Host/MP MIDI Presets/LogicPro/ folder (this is the default presets folder) and when a device/plugin is selected from the controller will automatically load the preset that matches the name of the device.
For example, if you select Logic's Alchemy instrument, it will automatically load
~/Library/Application Support/MP/Host/MP MIDI Presets/LogicPro/Alchemy.xml
The same applies to third party plugins.
You can create xml presets for third party plugins and these will be loaded automatically if the name of the plugin matches the name of the preset.xml.
For instance, if you load plugin UADx LA-2A

Save As, the preset as UADx LA-2A in the LogicProUserPresets folder, then it will be loaded automatically when you press the slot button on the controller.
See a short video the automatic preset loading of Logic's native devices and third party plugins.
Logic's Audio devices and Instruments have been mapped by our team and are installed when running the installer. You can edit and save these presets in the ~/Library/Application Support/MP/Host/MP MIDI Presets/LogicProUserPresets folder using the Save As button.
Do not save them in the default ~/Library/Application Support/MP/Host/MP MIDI Presets/LogicPro folder because when you install an update, these will be overwritten.
When you run the installer of the Control Surface it will make a zip file backup of the MP MIDI Presets/LogicPro folder here ~/Library/Application Support/MP/Host/MP MIDI Presets/ and then overwrite LogicPro folder.
You can create your own presets and the app will ask you to Save As in the folder
~/Library/Application Support/MP/Host/MP MIDI Presets/LogicProUserPresets
The installer creates a backup of only the MP MIDI Presets/LogicPro folder just in case you saved your own presets in the default LogicPro folder.
This is just one file that holds the data of the buttons view. This is the reference to keys, images and names of buttons.
Do not overwrite the default.xml preset in the /MP MIDI Presets/LogicPro folder.
If you have saved another preset as default.xml preset, delete it in Finder and reopen the MP MIDI app to automatically recreate the default.xml
![]()
Automap
The automap function is controlled by the Automap button. This option is global.
When enabled and it will map automatically and instantly all the available parameters of plugins or native devices as long a preset does not exist. If a preset for a plugin or device exists, it will load the preset.
![]()
Preset files and folders
located at Users/USERNAME/Library/Application Support/MP/Host/
If you save a Logic device preset in the LogicProUserPresets folder then it will be loaded automatically when that device is selected, instead of the default preset. The LogicProUserPresets has priority over the default preset folder.
If you want to replace the default presets, do a Save As on the preset and it will ask you to save it in the LogicProUserPresets folder.
Background images should be placed in the LogicProUserPresets and button images assigned to a preset buttons you created will be copied in LogicProUserPresets when selected.
|
Folder Path |
Type |
Description |
|
/MP MIDI Presets/LogicPro |
Default |
Device/Plugin xml presets |
|
/MP MIDI Presets/LogicPro/devices_images |
Default |
Device/Plugin preset background image files |
|
/MP MIDI Presets/LogicPro/Button Images |
Default |
Device/Plugin preset button image files |
|
/MP MIDI Presets/LogicPro/buttons.xml |
Default |
Buttons page default preset |
|
/MP MIDI Presets/LogicProUserPresets/ |
User |
Device/Plugin xml presets |
|
/MP MIDI Presets/LogicProUserPresets/devices_images |
User |
Device/Plugin preset background image files |
|
/MP MIDI Presets/LogicProUserPresets/Button Images* |
User |
Device/Plugin preset button image files |
|
/MP MIDI Presets/LogicProUserPresets/buttons.xml |
User |
Buttons page user preset |
*The user presets Button Images folder will be created when you select an image for a button in a preset and it will automatically copy the image in the folder.
The default installer presets location is
/Users/USERNAME/Library/Application Support/MP/Host/MP MIDI Presets/LogicPro
or another way to express this path is
~/Library/Application Support/MP/Host/MP MIDI Presets/LogicPro
The default user presets is
~/Library/Application Support/MP/Host/MP MIDI Presets/LogicProUserPresets
What is the difference between the /Library and ~/Library folders on a Mac?
![]()
Buttons in the Plugin control view and Mixer view
Open, Save and Save As buttons will open and save presets for Logic's pro devices and third party plugins.
The default Open and Save As buttons location is
/Users/USERNAME/Library/Application Support/MP/Host/MP MIDI Presets/LogicPro
Next/Previous Track buttons: will select the next/previous track in Logic
Tracks: Opens a list of existing project tracks and a track can be selected. This depends on the bank size which by default is set to 64. This means that it will display the 64 tracks maximum at a time. If your project has 100 tracks and you select track 1, you will see the first 64 tracks. If you select track 50, it will display track 50 to 100. See more information on Bank Size below.
The bank size also affects the mixer track selection.
Sends: Syncs and displays the left column of encoders to the first 8 send volume parameters of the selected track (beginning from the top encoder)
Mixer: Open the mixer page on the MP Controller
Open/Close Mixer: Opens/Closes the Mixer in Logic Pro
Stereo Out: This is a special assignable button. By default when pressed it selects the Stereo Out track. However, it can be assigned to open any track. Left click on the button and will allow you to type in the name of the target track. The name must be typed in exactly as is and it is case sensitive.
This is a global option and it is auto saved in the mpmidi.properties file so it will be used every time you open Logic and the MP Controler Surface.
Close Window: Closes the controller window and to open it again it must be done from the top bar icon.
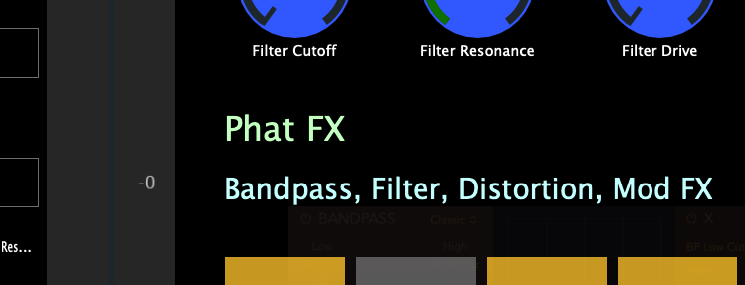
Pages: It displays the buttons of the 32 available pages per preset. To edit the page title (under the preset name), double click in the area under the preset name and the editor text box will appear.
AF Enabled: This button is enabled by default and it passes the keyboard focus to Logic after you click on the MP MIDI app. This is done to ensure that your keyboard stays focused on Logic. If disabled will stop passing the keyboard focus to Logic after a click action is completed on the MP MIDI app.
Unlink Parameters: It unlinks a linked parameter
Link Parameters: It links a parameter to the selected encoder. If another parameter is clicked on a device, it will link the next encoder.
Show Parameters: It shows the parameters of the selected device
![]()
Controlling and Linking Parameters
The MP MIDI app must be open to control any parameters.
There 28 available encoders per page to control device parameters and 21 buttons per page to control device parameters.
The MP MIDI app can control up to 256 parameters of a device/plugin.
Opening a device from the MP MIDI app will display the window of the device. You will notice that the link icon is highlighted in purple. This means that upon selection of any other device the window of this device will close and the newly selected device will open its window. You can click to disable this option.

However, opening the device from the MP MIDI app will enable the link option automatically. This auto-enable of the link option cannot be disabled and as it is automatically set by Logic when using a control surface.
You can open a device window from a device slot on the MP MIDI app but the device window cannot be closed from the MP MIDI app.
Linking Parameters
You can link the parameters of a Logic device or third party AU plugin and create a preset with the device name so that it is loaded automatically every time that device is opened in Logic.
These presets should be saved in the /MP MIDI Presets/LogicProUserPresets/ folder.
See this presentation that explains in detail how to link parameters of a device or plugin and create a preset.
![]()
Logic Native Devices Missing Parameters
Logic Pro’s built-in plugins do not normally expose all of their internal parameters to external control surfaces (MIDI controllers, Mackie Control, Logic Remote, etc.). These .plist files tell Logic which parameters of each plugin should be made available to the control surface system. See here for more information.
![]()
Buttons View - Keyboard Keys Assignments
In this view there are pre assigned buttons to control Logic, however you can edit these buttons and create your own preset.
There 40 unassigned buttons which can be assigned to send any keyboard command to Logic.
The right column of buttons cannot be edited.
The encoders in this page have the same function as when in the Mixer page.
The right column of encoders control the send volumes of the selected track.
The top encoders control the pan of the 8 tracks that appear on the Mixer.
The bottom encoders control the volume of the 8 tracks that appear on the Mixer.
The right column of encoders will control the selected device parameters which are linked to these encoders.
Left click on a button for the options menu to appear on the top side of the app.
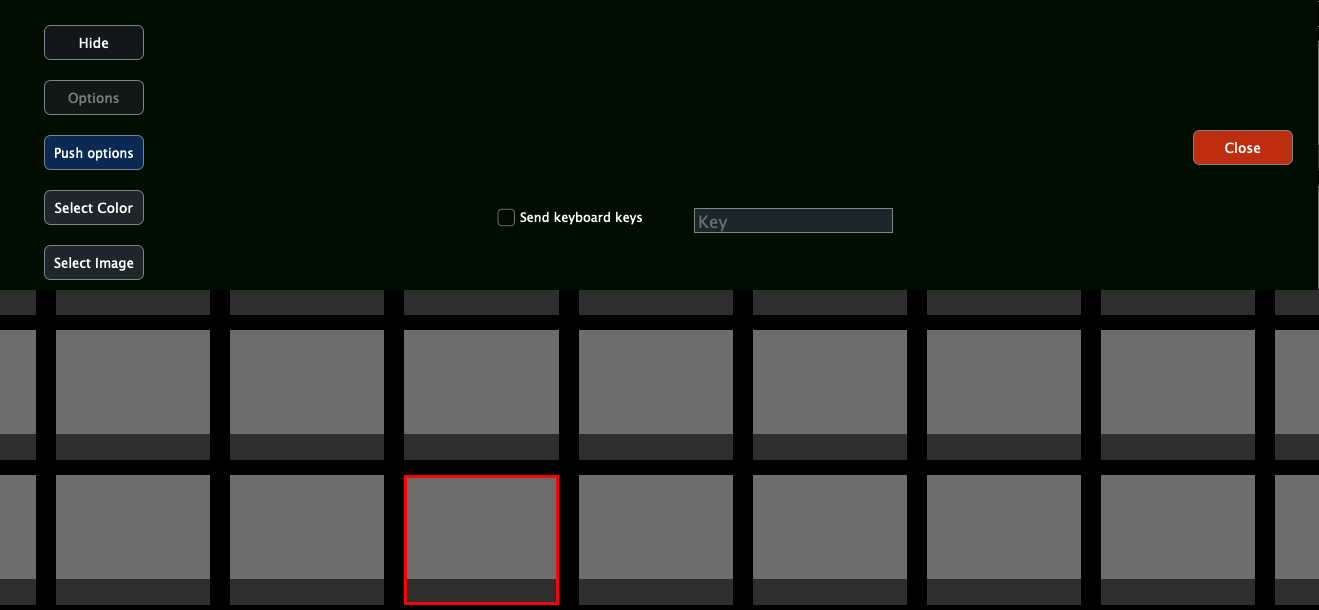
By checking the Send Keyboard keys will enable the function of that button to send a key to Logic Pro (given you have performed the permission's settings described above).
Click on the Key window and press a key on your keyboard. It will be recorded and you can close the menu.
Every time you click/touch that button will send that key to Logic.
Optionally you change the color of the pressed/unpressed state of the button and assign an image to the button.
Image files should be png files with dimensions 278 x 196 px or bigger size files with the same px ratio.
Double left click on a button to set a name to the button:
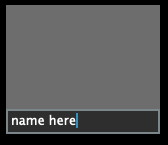
After you edit any button you should click on the Save button to save the buttons.xml in
/MP MIDI Presets/LogicProUserPresets/buttons.xml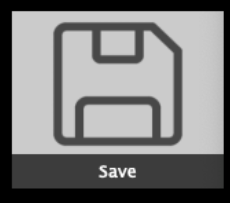
The first time you will get a message that from now on the app will load the user buttons.xml instead of the default one.
![]()
Mixer View
In this page the 8 tracks control the mixer of Logic.
The volume can be controlled by the encoder or the touch screen using the on screen fader.
The fader can be controlled using the mouse and/or mouse wheel.
The right column of encoders control the send volumes of the selected track.
The top encoders control the pan of the 8 tracks that appear on the Mixer.
The bottom encoders control the volume of the 8 tracks that appear on the Mixer.
The right column of encoders will control the selected device parameters which are linked to these encoders.
Pressing Mute on a track will also select that track.
The mixer controls 64 tracks per bank. If you have more than 64 tracks in a project, when selecting track 65 the mixer will control the next 64 tracks and so on.
Note that the mute of the Aux tracks cannot be controlled from the MP MIDI app.
![]()
Follow Logic button
When disabled you can select any track on Logic and the mixer will stay on the selected view. This is useful when you want to select other tracks in Logic but you want the view to stay in that view. For example, viewing the Master track and tracks before that, while you navigate other tracks.
This button affects only the Mixer view.
![]()
Troubleshooting
Control Surface does not synchronize with Logic
If you don't see the popup window from Logic Pro when you run Logic Pro for the first time after the CS installation, asking to Auto assign the C1-xMP1, then check this folder and ensure you have the following folder and files:
/Library/Audio/MIDI Device Scripts
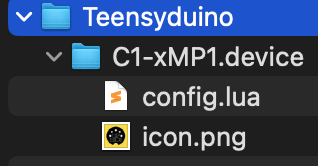
If you see the files, right click on the Teenseyduino folder and choose "Get Info"
Ensure you see these permissions at the bottom:
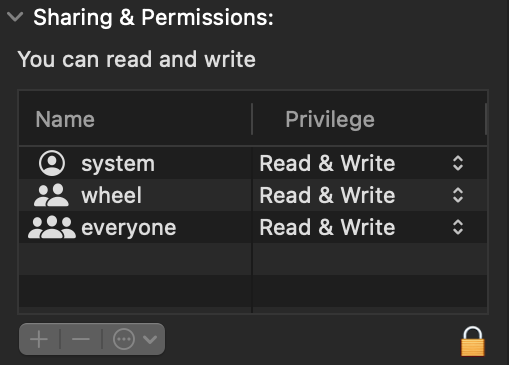
When Logic and the MP MIDI app are running, go to MIDI settings and ensure the both the MP MIDI and C1-xMP1 ports are checked as shown below.
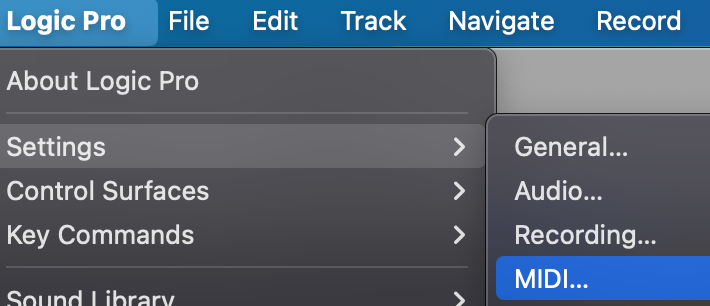
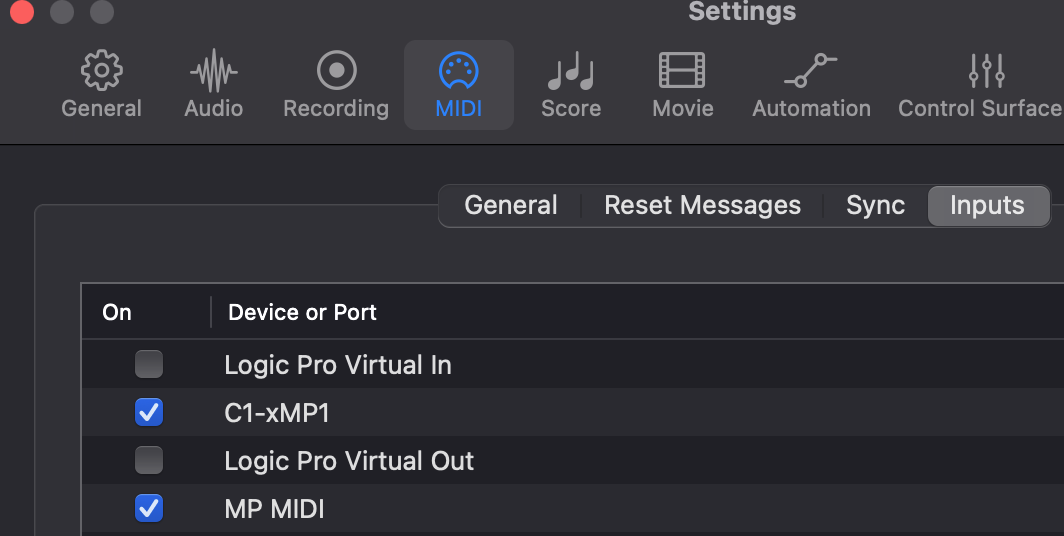
The launcher does not open Logic Pro
The laucher issues 2 simple commands to MacOS to open the MP MIDI app first and then Logic Pro.
The command that is issued to open Logic is:
open -a "Logic Pro"You can try this command in a terminal to see if it works on your computer by pasting it in a terminal and press enter. It should open Logic.
If it opens Logic, it means that the Launcher does not have the proper permissions to run.
Try in a terminal the command:
sudo chmod -R 777 ~/Desktop/LogicPro\ MP\ Control\ Surface\ Launcher.app/
and press enter. It should ask for your password. Enter it and press enter. It should not produce any output. Try the Launcher again.
If the command open -a "Logic Pro" did not open Logic, it means that MacOS cannot find Logic on your system because it is not properly registered.
You can try to do a clean install again and see if the command opens it.
A great fee app for uninstalling software from the Mac is Perlceaner
Alternatively you can edit the launcher script to point it to open Logic from the actual location it is placed.
Right click on the launcher. Click Show Package Contents and navigate to Resources.
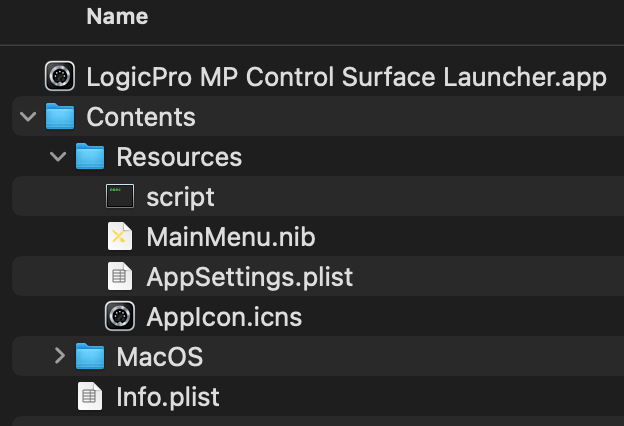
Open the file "script" by dragging it on a text editor like Sublime.
#!/bin/bash
# Script to open MPMIDI.app followed by Logic Pro
# Created on March 15, 2025
echo "Starting MPMIDI.app..."
open /Applications/MPMIDI.app
echo "Starting Logic Pro..."
open -a "Logic Pro"
echo "Both applications have been launched."You can commend out the line 10 by placing a # at the beginning.
so it will be #open -a "Logic Pro"
Try placing your own open command like:
open /Applications/Logic\ Pro.app
You can try your command in the terminal to see if it opens Logic.
Save the script file and try the launcher again.
Checking the permissions needed for the MPMIDI app to send keyboard keys to Logic
Check that it was added in the Automation section
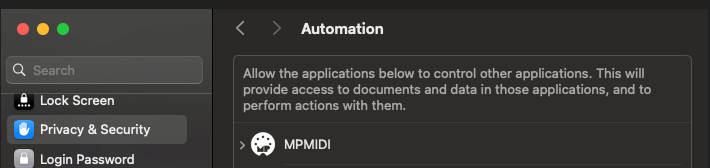
In System Settings, Privacy & Security > Accessibility and give the permission to MP MIDI by enabling it as shown

How to reset the MP MIDI app Privacy permissions on Mac OS. See here
![]()
Setting the Track Bank Size
The bank size is the number of tracks that Logic syncs with a control surface. It starts on the selected track and it shows a colored like at the bottom of the track. For example Orange:

Selecting a track 10 for example it will display the colored line up to track 74, which means it syncs with the control surface from track 10 to 74.
The bank size is directly related to how fast Logic reacts (shows plugins when changing tracks etc).
The bigger the bank size, the slower Logic gets (depending how big your project is, how many devices it has etc)
This is something that is completely governed by Logic and there is no way to change it.
The bank size we have set by default is 64, which is fairly big.
It will work when using lower or higher numbers but using a large bank size number like 256 will probably make Logic a bit slower to display plugins when switching tracks, depending how many plugins and devices the project has.
We found out that 64 is a good number to have and there is no lag on recent Mac Apple Silicon models.
Using a bank size of 64, will display 64 tracks in the Track List of the MP MIDI app. The tracks listed depend on which track you have selected.
If your project has 100 tracks, and you have track 1 selected, then the bank has tracks from 1 to 64.
If you have selected track 10, you will see tracks 10 to 74 and so on.
Logic automatically switches banks when you select a track from the main Logic window or the mixer at the bottom of the tracks. Tracks have a small orange bar highlighted at the beginning showing the bar selection
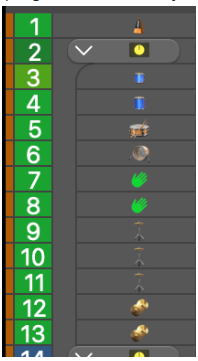
If you find the project to be slowing down, you can change the bank size to a number that suits your project or workflow.
Chaning the bank size:
Close Logic and the MP MIDI app.
Go to folder

open config.lua in a text editor. It is a single line file.
Search for: bank_size=64
Change the value to something you want, 8, 16, 64, 128, 256 or a number that suits you.
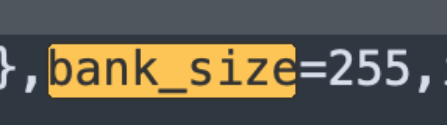
Make sure you only change the number and nothing else.
Save it and close the text editor.
Run the Launcher to reopen Logic and the MPMIDI app.
![]()
If you are receiving conflicting MIDI CC messages in instruments or audio effects from C1-xMP1, for example when you move an encoder something else is being affected in Logic, like an instrument or the mixer or even another parameter in the plugin you are controlling with the MP Host, see here how to prevent this.
16. Blocking C1-xMP1 MIDI Input CC Messages in Logic Pro
When the Logic Control Surface is enabled, it requires the C1-xMP1 to be enabled as a MIDI input device in Logic Pro. This, depending on your Logic configuration, may cause some components in Logic or devices/plugins to be listening on MIDI CC messages coming from the C1-xMP1.
For plugins, there should be an option to disable these MIDI CC mappings (listenning on MIDI Channel 1) or disable MIDI CC IN completely so that it does not conflict with MIDI controllers.
Alternatively, you can do the following in Logic, if the plugin is listening to CC coming from Logic and not directly from other MIDI ports.
If you disconnect a specific MIDI device from the Sequencer Input in Logic’s Environment, it blocks all MIDI data from that device, including:
-
MIDI CC (Control Change)
-
Note On/Off
-
Pitch Bend
-
Aftertouch
-
Program Change
-
Anything else sent via standard MIDI
This is useful if you notice that instruments or audio effects in Logic receive conflicting MIDI CC messages from C1-xMP1.
Guide to block the C1-xMP1 MIDI Device from sending MIDI to Logic Instruments and effects.
1. Open the Environment (Cmd+0)
Go to the Click & Ports layer.
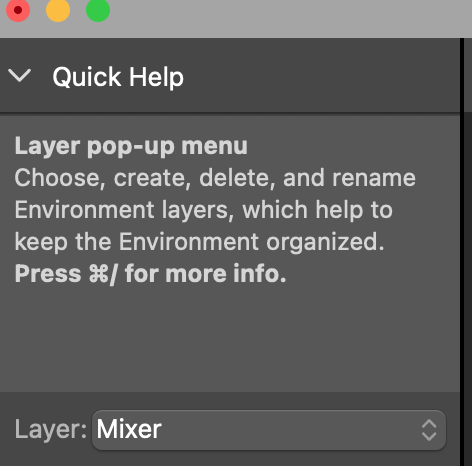
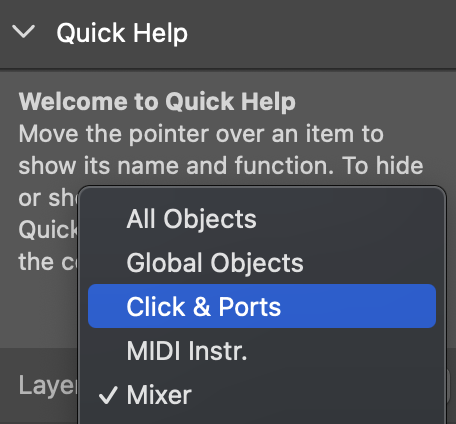
2. Identify the C1-xMP1 Device in "Physical Input"
You'll see ports like “All”, “IAC Driver”, “C1-xMP1”, etc.
3. Disconnect the Device
- Disconnect the cable from the device you want to block (e.g., "MP Controller") so that it does not connect to the "Sequencer Input". Click on the C1-xMP1 cable and it will be highlighted
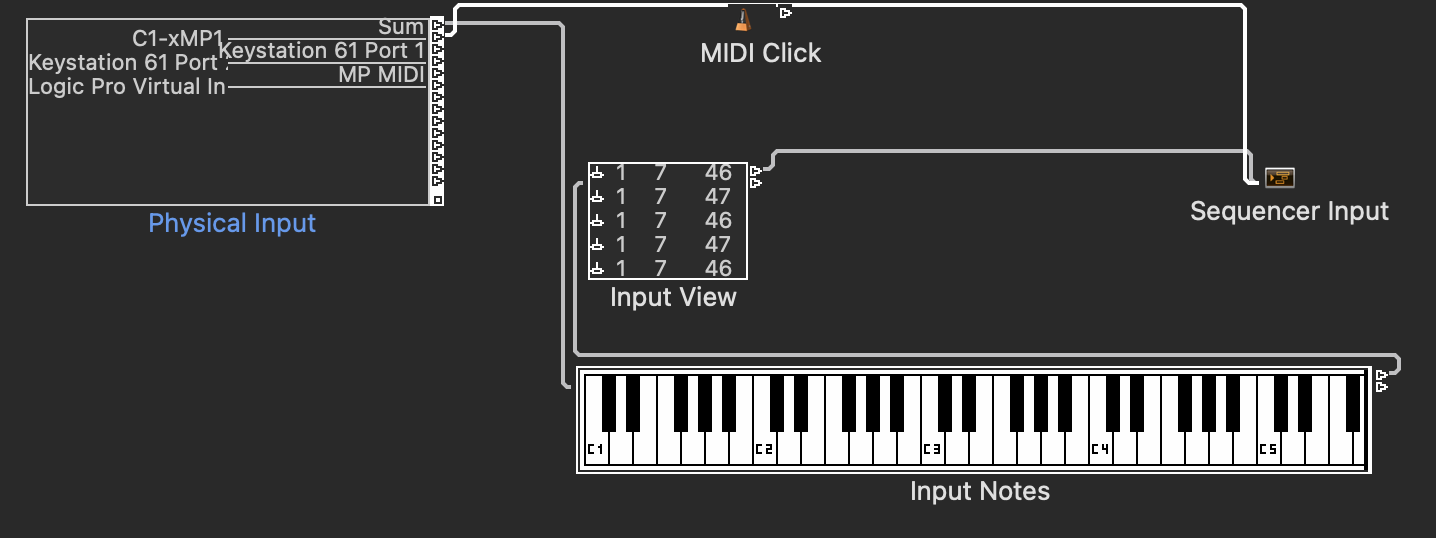
The from the Edit dropdown select Clear Cables only
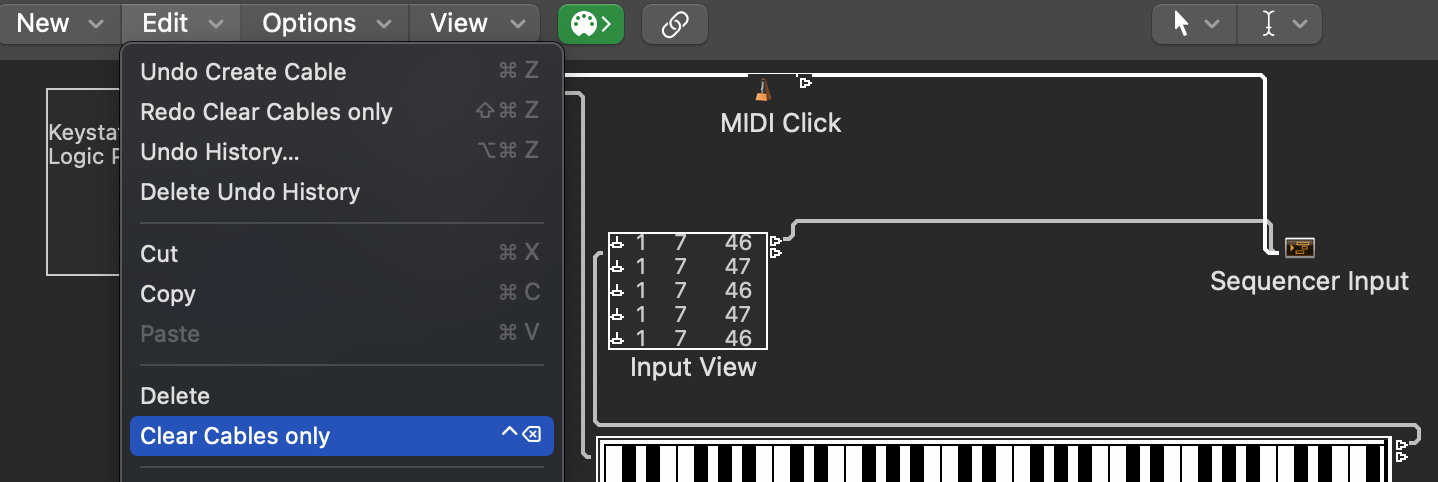
The cable is removed, so now Logic does not receive MIDI CC from C1-xMP1
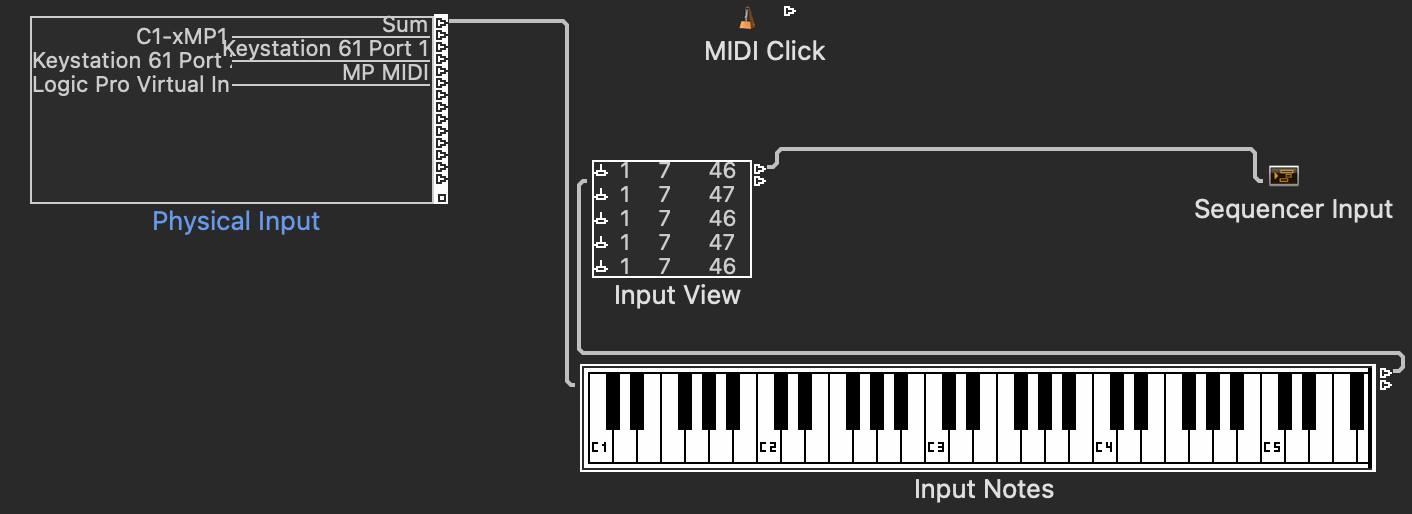
This means Logic will not receive any MIDI input from that device in instrument tracks.
4. (Optional) Route the Device Elsewhere
If you want to still use the device to control Logic through custom scripts or MIDI routing:
-
Route the device to a Monitor or Transformer object instead.
-
You can then filter, transform, or reroute the data to Logic’s control surface system, MIDI FX plugins, or external apps without affecting Logic Instruments.
5. Close the Logic Environment window.
17. Controlling external hardware via NRPN using the MP MIDI app
NRPN (Non-Registered Parameter Number)
NRPN is a protocol built on top of CC (not a separate message type). It is useful for hardware synths to expose thousands of parameters and NRPN uses multiple CC to increase the resolution.
There are 2 modes for NRPN in the MP MIDI application.
-
Global - both encoders and buttons operate with NRPN instead of CC
-
Specific - choose which encoders and buttons to use NRPN instead of CC
The global NRPN mode is stored in the MP MIDI properties file , which is an application-wide setting. It persists across sessions but is not saved per preset.
The per-encoder NRPN flag (is_nrpn on each encoder) IS stored in presets.
To activate the Global option use the right click menu:
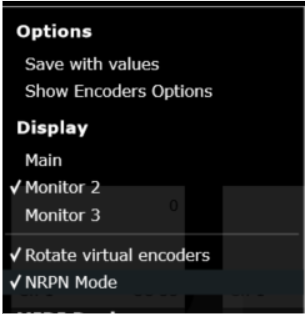
When the global NRPN mode is enabled the Encoders can be modified from the “Encoder CC & Ch” window and from the Encoder Options view (the Encoder Options view affects the physical encoder signal).

Setting specific buttons to use NRPN
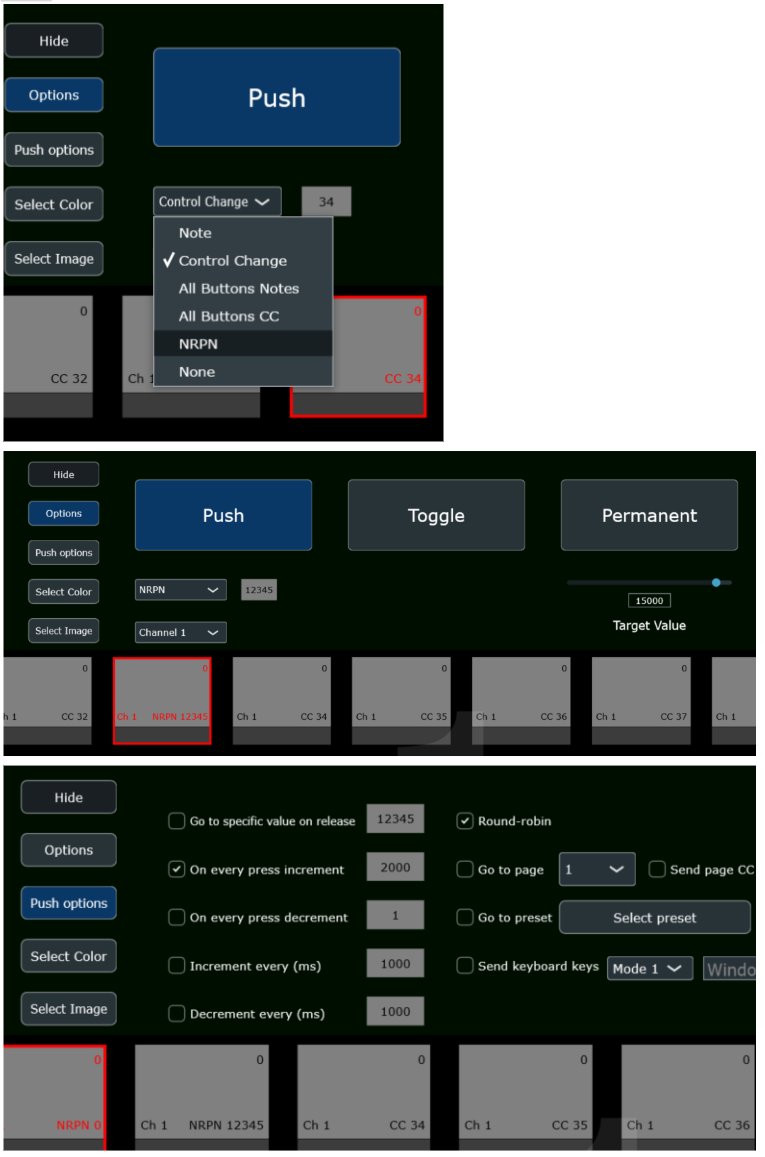
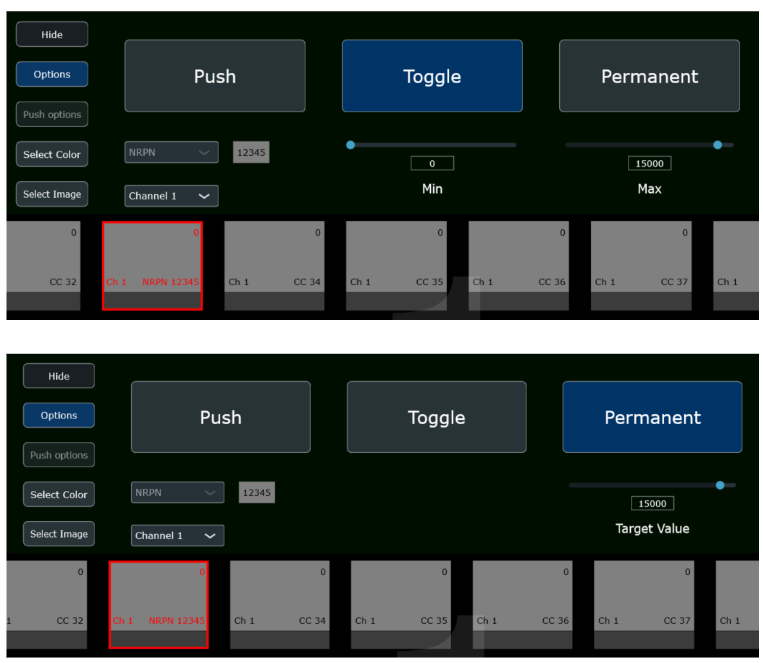
Setting NRPN per encoder while in CC mode (default mode).
Open the Encoder CC & Ch window and choose which encoders to use NRPN instead of CC.
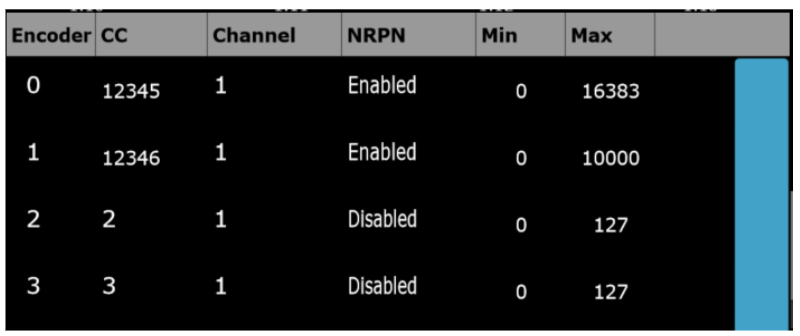
Internal CC usage in NRPN mode.
Note: NRPN uses CCs 6, 38, 98, 99 internally.
Here is an example with an encoder with NRPN parameter 1 on channel 1, sending 14-bit values as the slider is dragged.
Multiple 4-message NRPN sequences are sent as the value changes.
That's expected signal behavior during a continuous encoder movement:
B0 63 00 → CC 99, ch 1, NRPN MSB = 0
B0 62 01 → CC 98, ch 1, NRPN LSB = 1 → NRPN parameter = (0 << 7) | 1 = 1
B0 06 3C → CC 6, ch 1, Data MSB = 60
B0 26 5A → CC 38, ch 1, Data LSB = 90 → 14-bit value = (60 << 7) | 90 = 7770