**Released! August 1st 2026! Download from your user account. Demo [video](https://www.youtube.com/watch?v=nLjkikMFK1g).**
The Bitwig Control Surface exists as a standalone app and VST3 plugin. This installation guide is the same for Mac and Windows. It can control **Bitwig Studio 6** and later, the Mixer, Bitwig native devices, third party plugins, transport and can navigate tracks and plugins, and can open/close the plugin windows. Download and run the Bitwig Control Surface installer. Download and install the latest version of the MP Host plugins.The new control surface uses the OSC protocol to communicate with Bitwig and does not require MIDI ports.
Go to Controllers and click on Add Controller [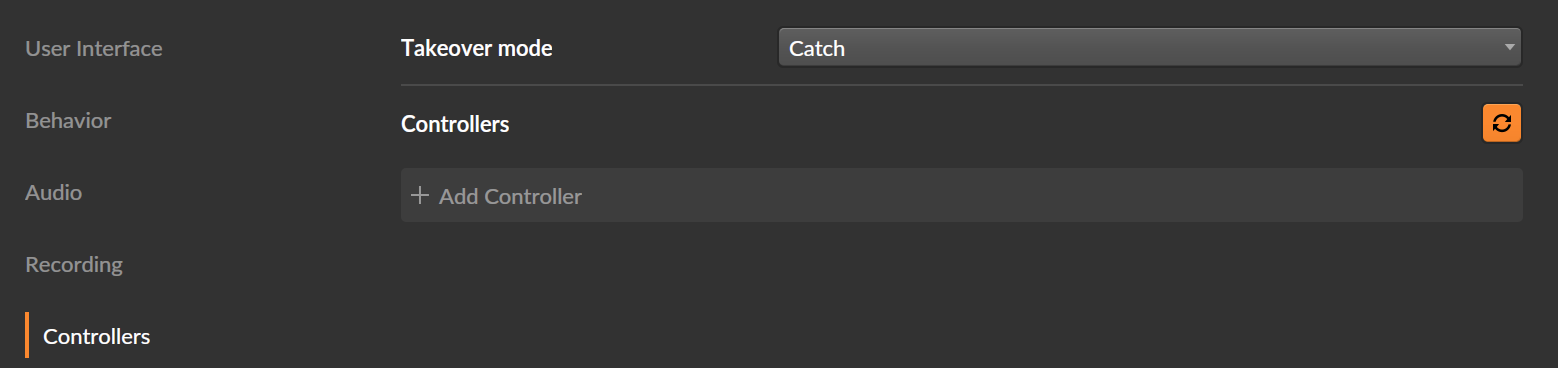](https://kb.mpmidi.com/uploads/images/gallery/2026-07/dN4lMlpLEU3p6qah-image.png) Choose the MP Controller from the list. [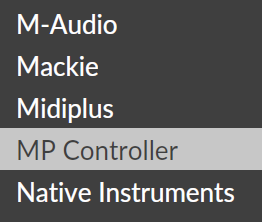](https://kb.mpmidi.com/uploads/images/gallery/2026-07/XpaUOpEZheZxoqWc-image.png) Choose **MPB Control Surface** and press Add. [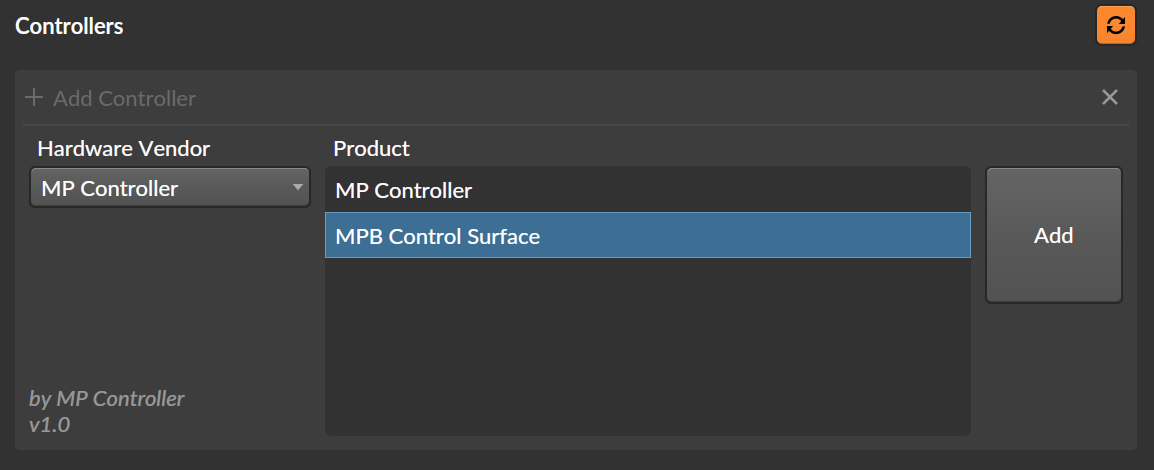](https://kb.mpmidi.com/uploads/images/gallery/2026-07/QNb7RDo17rvxe0uL-image.png) You will see the following added: [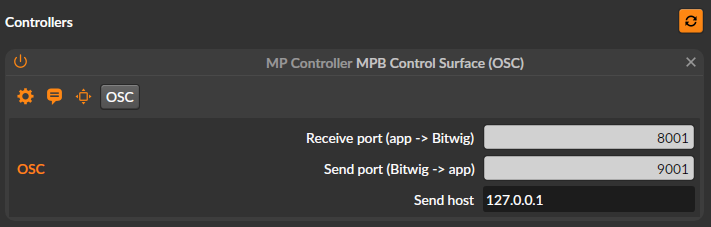](https://kb.mpmidi.com/uploads/images/gallery/2026-07/9K8MBVuMgMwEB16f-image.png) Quit Bitwig Studio. The installer will create 2 shortcuts on your Desktop: [](https://kb.mpmidi.com/uploads/images/gallery/2026-07/SLuZX7G32Mg7uKvW-image.png)Run the Bitwig CS once and right click on the empty area to show the menu. Choose the target display and quit the application.
When you run the **Bitwig CS Launcher** it will start Bitwig Studio and a couple of seconds later the Bitwig Control Surface app. When you open a project in Bitwig it will sync with the control surface **when you select a track or a device.** Quitting Bitwig Studio will automatically quit the control surface as well. Alternatively, you can load the BitwigCS VST3 plugin in your project. However, do not run both the Bitwig CS Laucher (or the Bitwig CS standalone app) and the Bitwig CS VST3 plugin. When you use the standalone app, after each click or touch on the Control Surface will pass the keyboard focus to Bitwig Studio.If you have the previous MP control surface for native device installed, remove it from Bitwig Studio.
Continue to the [documentation guide.](https://kb.mpmidi.com/books/mp-controller-documentation/page/2-bitwig-studio-control-surface-documentation) --- # 2. Bitwig Studio Control Surface DocumentationLatest version released on August 28th, 2026. Installation guide is [here](https://kb.mpmidi.com/books/mp-controller-documentation/page/1-bitwig-studio-control-surface-installation)
**The Bitwig Control Surface for the MP Controller has the ability to:** 1. Control Bitwig native devices upon selection. You can select devices from the CS as well. 2. Control third party plugins. You can select devices from the CS as well. 3. Automap native devices and plugins. Customize mappings and save default presets for each device and plugin. 4. Control the mixer and send effects per track. 5. Navigate tracks and select plugins and devices. 6. Open/close device and plugin windows. 7. Control the Bitwig transport.The control surface exists as VST3 and Standalone App. You can choose to run either, but do not run both at the same time. The installer installs a Bitwig Studio and CS launcher which starts both and quits the CS when Bitwig Studio quits. The standalone CS passes the keyboard control to Bitwig Studio after each touch or click on the CS.
See a [demo video](https://www.youtube.com/watch?v=nLjkikMFK1g) of the control surface.
--- ##### Device and Plugin Control Select a plugin or native Bitwig Studio device and the control surface will automap and sync its parameters. [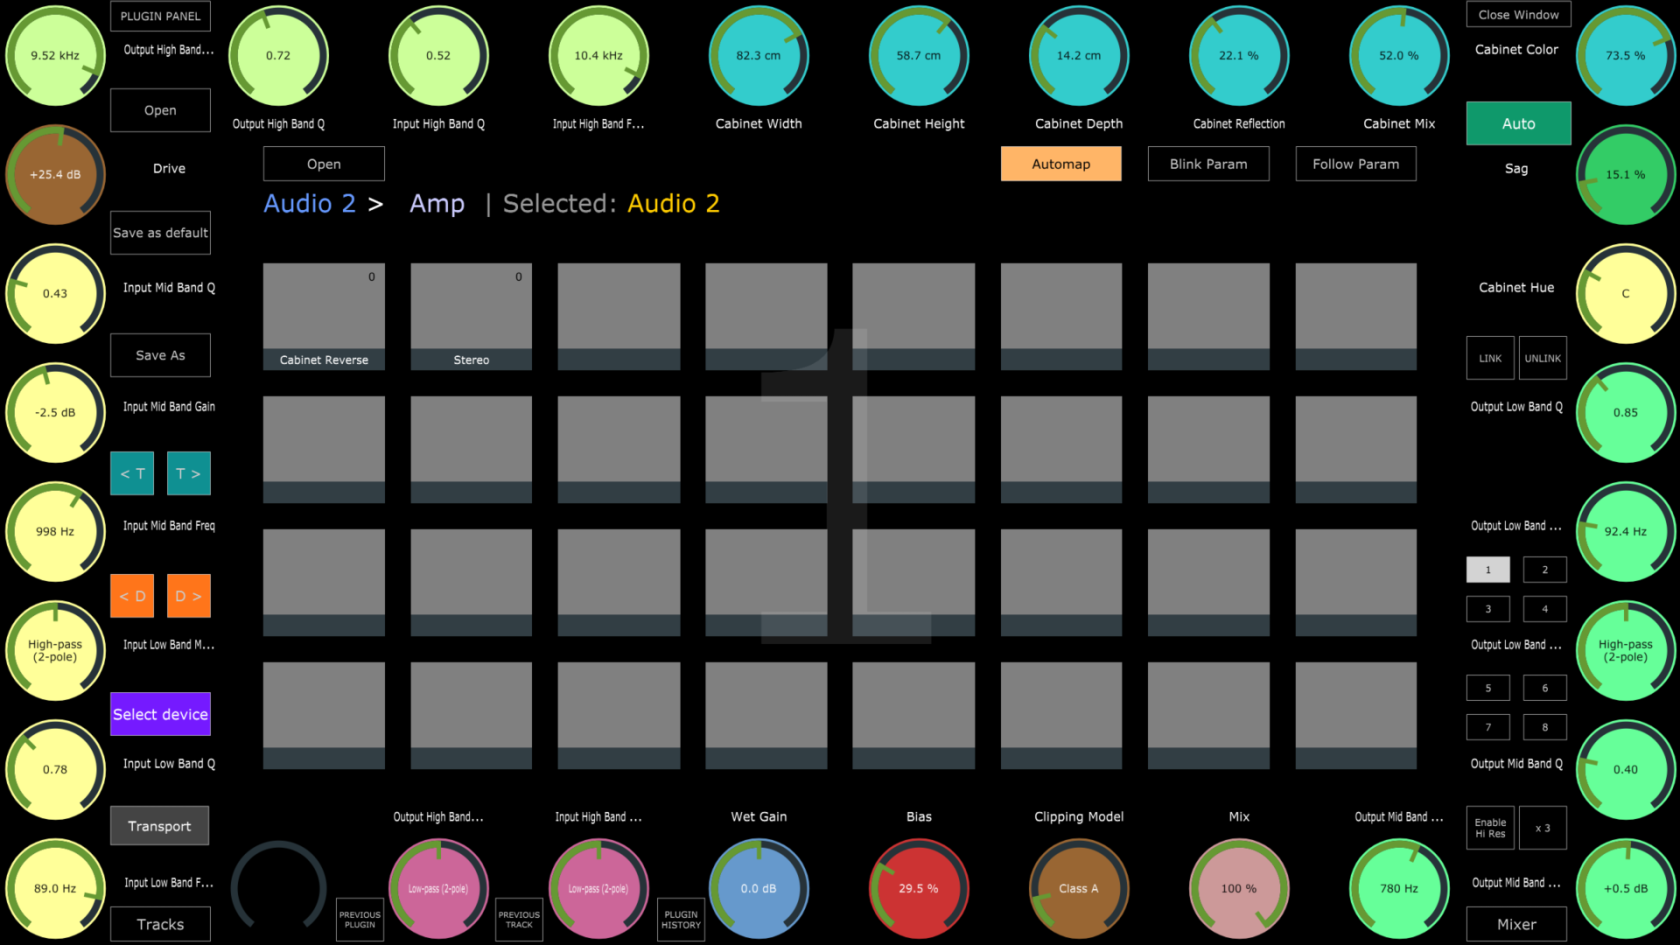](https://kb.mpmidi.com/uploads/images/gallery/2026-08/NOzdq0gLPAyOy1Mp-image.png) **Automap button.** Enables/Disables automatic parameter mapping when selecting a device. This is a global option. **Blink Param button.** When enabled, the parameters changed in Bitwig Studio will cause the mapped parameters to flash for 3 seconds. **Follow Param.** When enabled, the parameters changed in Bitwig Studio will cause the CS to change page to the affected parameter's page automatically. **Auto button.** When enabled, the CS will switch automatically to the selected device in Bitwig Studio. When disabled it will stay at the currently selected device. **Link button.** When active, the CS goes in Link mode. Click on an Encoder and it will be highlighted with a yellow ring. Move a parameter on the selected device or plugin in Bitwig Studio and it will be linked to the highlighted encoder. [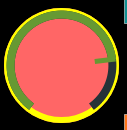](https://kb.mpmidi.com/uploads/images/gallery/2026-07/qtyWRYwcT1q8m1Jd-image.png) **Unlink button.** To unlink a parameter press Unlink and double click at the edges of a mapped encoder. Press Unlink again to exit Unlink Mode. **Presets.** You can Save as default a preset and every time a device or plugin is selected, the CS will load that preset. If there is no default preset, the CS automaps the selected device or plugin. **Open button.** Opens/closes the device or plugin window in Bitwig Studio.  Navigate Previous and Next Track.  Navigate Previous and Next device of the selected Track. **Select Device button.** Opens the Select Device view which lists the devices of the selected track. **Tracks button.** Open the Tracks window which lists the tracks of the selected bank in Bitwig Studio. Each track bank can carry up to128 tracks. You can switch banks from the Mixer view. **Plugin Panel.** Opens the MPH plugin panel which lists all the active MPH plugins in the Bitwig Studio project. Note that the Control Surface is active and can control Bitwig studio when the controller window is open. --- ##### Mixer ControlNote that the mixer fader meters can only display up to 0.00 dB. This is due to a limitation of the Bitwig API.
[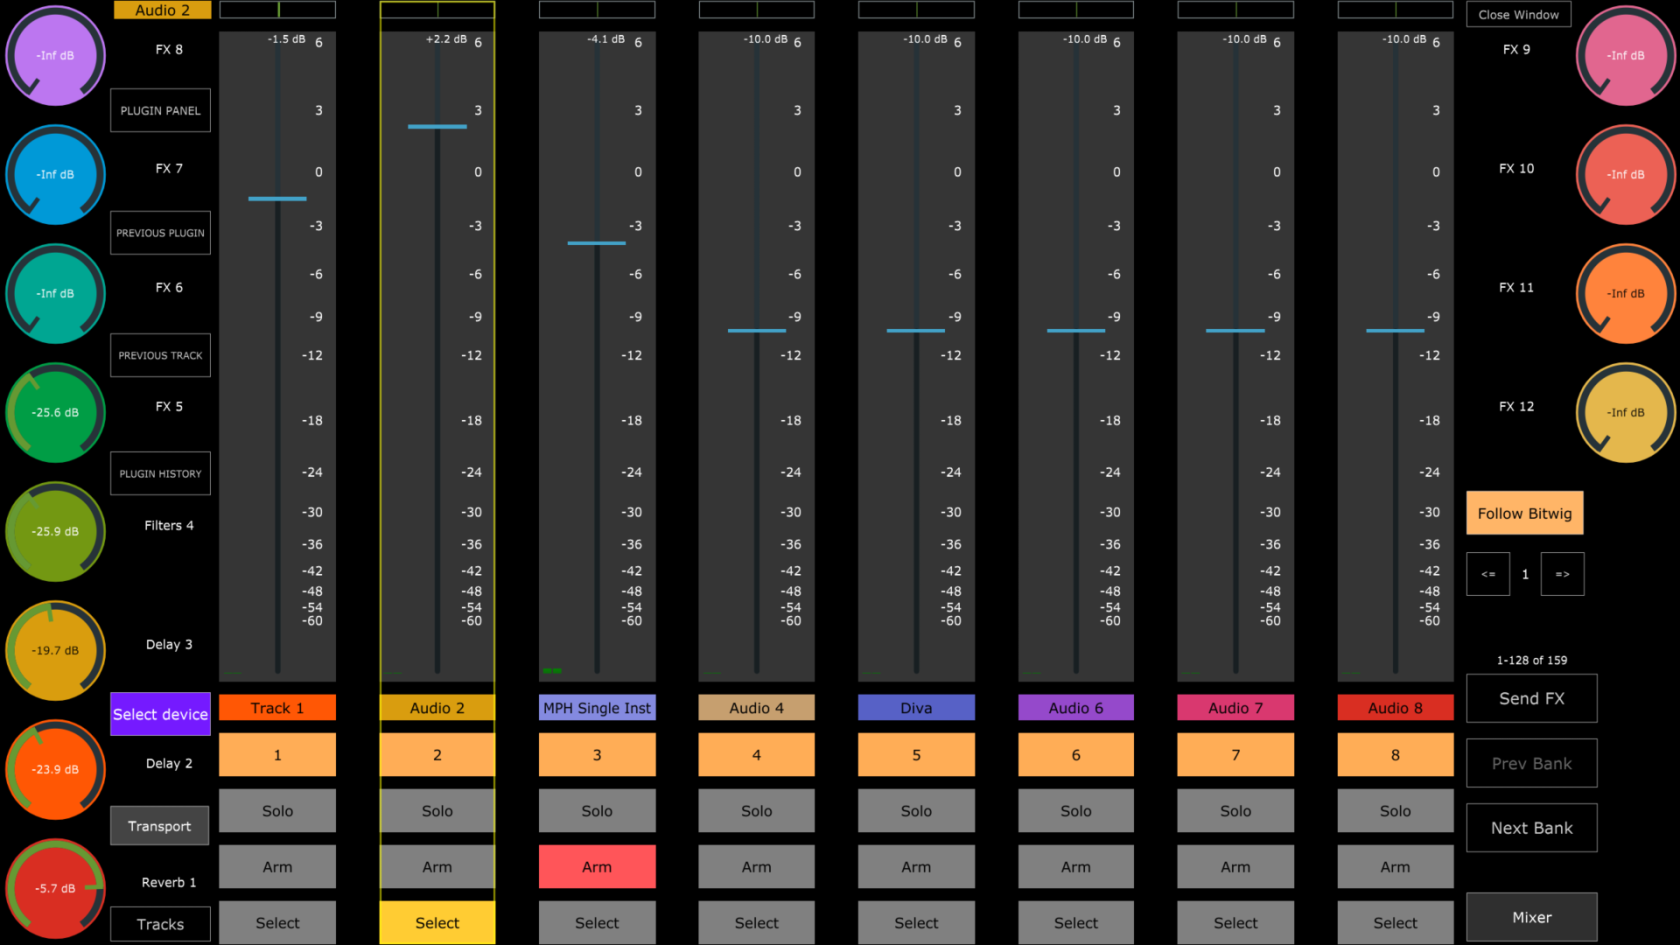](https://kb.mpmidi.com/uploads/images/gallery/2026-08/pczax474luLToTE2-image.png) The mixer view can control up to 8 tracks per page.The Plugin Panel, Previous Plugin, Previous Track buttons affect the MPH plugin instances in the project, not the Bitwig device or plugin selections.
When a track is selected, the side encoders control and sync up to 12 Send FX levels for the selected track. To control the Send FX, if the CS is the bank that has the Send FX tracks you can navigate to them using the Tracks menu or the Previous/Next track buttons. Alternatively, you can press the Send FX button. The Faders for the volume can be controlled via touch or mouse drag and the encoders at the bottom row of the MP Controller. ---