4. The MP Host Plugins
The MP Host plugins are the plugins that host third party plugins and connect directly with the MP Controller hardware.
- 1. Instrument and Audio FX MP Host plugins
- 2. DAW MIDI Settings
- 3. MP Host properties and config files
- 4. Show Preset Folder - Go to the MP/Host properties folder
- 5. Finding your existing third party plugins
- 6. Linking Parameters and Options
- 7. Automation in the DAW
- 8. Side Chaining
- 9. MP Host Presets
- 10. MP Host Favorites
- 11. Encoder Options
- 12. The MP Multi Host
- 13. Background Images and Encoder Colors
- 14. M-Plugins on the Mac
- 15. Plugins with external VST3 AU Presets
- 16. How to Reset the MP Host Plugin
- 17. Windows Unified Option
- 18. Hiding the controller window and moving the hosted plugin
- 19. MP Gain Utility - Version 2
- 20. Audiogridder - MP Host: AG-MPH Guide
- 21. Activating the MP Controller on other computers
- 22. Get the mph.license from the user portal
- 23. Receiving update notifications for the MP Host plugin
- 24. Best Practice recommendation
- 25. Controlling UVI Workstation, Omnisphere by enabling Host Automation
- 26. Controlling Steinberg plugins such as Halion, Padshop and Retrologue
- 27. Windows - Transferring the keyboard focus on the DAW
- 28. Mac OS - Transferring the keyboard focus on the DAW
- 29. Mac OS - Running one DAW in Rosetta and another DAW in ARM mode
- 30. Switching a track in Ableton Live
- 31. Loading the MP Host with one click as an Ableton preset in Ableton Live
- 32. Mac - Right click with Magic Mouse does not show pop up menu in the Favorites Window
- 33. Link Groups
- 34. Switching to other Plugins via the Plugin Panel
- 36. Run UAD Luna on Windows
- 37. Transferring the mouse pointer to the DAW display (Move Mouse Option)
- 38. Opening and closing the MP Host via MIDI CC
- 39. Using the Multi host plugin in Bitwig
- 40. Sending MIDI notes from the MP Host
- 41. Plugins appearing magnified and missing parts of their UI
- 42. Downloading Software for the MP Controller
- 43. Specific plugin settings
- 44. Plugin Scanner Utility
- 45. VST3 Generator Utility (Mac and Windows)
- 46. The MP Bridge Utility
1. Instrument and Audio FX MP Host plugins
The MP Controller hardware communicates directly with the MP Host plugin, not with the DAW.
That is why it is important to disable the MIDI IN/OUT for C1-xMP1 in your DAW. C1-xMP1 is the MP Controller’s MIDI hardware.
There are 2 versions of the single MPH plugin and 2 versions of the multi host plugin. Instrument and Audio Effect.
The MPH single and multi host plugin can host the following plugin formats
On Windows: VST2 and VST3. On Mac: AU, VST2, VST3.
The MPH single and Multi host exists in the following formats:
On Windows: VST3 and AAX. On Mac: AU, VST3 and AAX.
Windows: The installer automatically copies the plugins to their folders, respectively
VST3: C:\Program Files\Common Files\VST3
AAX: C:\Program Files\Common Files\Avid\Audio\Plug-Ins
For Windows, it is a good practice to install the C++ Redistributables from Microsoft before installing, from here.
MP Host Audio Effect and Instrument locations on the Mac
On the Mac the installer automatically copies AU, VST3 and AAX plugins to their folders, respectively.
AU (.component files): /Library/Audio/Plug-Ins/Components/
VST3: /Library/Audio/Plug-Ins/VST3/
AAX: /Library/Application Support/Avid/Audio/Plug-Ins
There are 2 Library folders on the MAC OS one is under
/Library and the other ~/Library which means under your user account.
You need to visit the ~/Library/Application Support/MP/Host
MP Host receives and sends the following from the DAW
Audio FX version:
-
Receives audio and passes the audio to the hosted plugin in MPH. In turn, it outputs audio to the DAW.
-
If the hosted third party plugin introduces latency, the MPH passes this latency to the DAW, allowing your DAW to compensate for the latency introduced by the MPH plugin.
-
DAW tempo is received from any MPH instance, so in the case you are hosting a plugin that needs the tempo information from the DAW, like a tempo delay plugin, it will receive it from the DAW.
-
Receives automation from the DAW and passes it to the MPH’s 128 encoders. More on automation below.
Instrument version:
-
Receives midi notes (played from a midi controller or recorded) from the DAW.
-
If the hosted third party plugin introduces latency, the MPH passes this latency to the DAW, allowing your DAW to compensate for the latency introduced by the MPH plugin.
-
DAW tempo and passes it to the hosted instrument.
-
Receives automation from the DAW and passes it to the MPH’s encoders.
-
Outputs audio generated by the hosted plugin to the DAW
Plugins that can be controlled with the MP Controller
You can control all VST2/VST3/AU plugins’ parameters that can be automated by the DAW.
If a plugin has parameters but these cannot be automated by the DAW, then these parameters cannot be controlled by MP Host and controller.
The MP Controller is not using CCs to control parameters, it uses the same method that the DAW uses to automate/control parameters. This is called the automation method.
After version v1.5-89f683b--H2021-09-23--B2021-09-24, the MP Host can also transmit CC messages to the hosted plugin.
The CC method is one way, only for sending CC to the plugin. The method of using automatable parameters allows complete bidirectional control and it is recommended. This is the method used when you link a parameter to an encoder.
Incompatible Plugin Type Warning
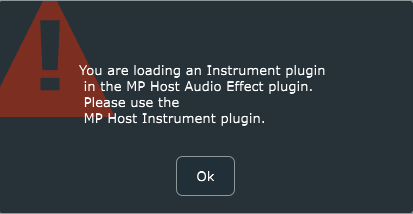
While trying to load up a plugin, if you get a pop up warning message that says that the plugin you are trying to load is not compatible, this is because you are trying to load an instrument plugin in an audio effect MP Host or the opposite. You can only load plugins effects in the MP Audio effect host plugin and only instruments in the MP Instrument host plugin.

Set a title to the pages
To set a title to the pages you need to right click in the lower area of the page button
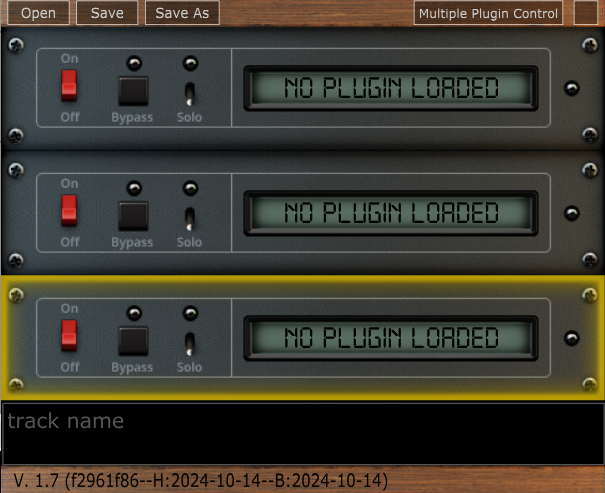
Opening and closing the MP Host plugin - Single and Multi Host
 |
 |
With MPH, you can control what you see on the controller’s screen. When you press the Control and Display button of an MPH (the Controller icon), the control is transferred to that selected MPH instance. The controller icon gets a yellow highlight and it means this is an MPH instance that interacts with the controller. When you click on another MPH instance, the button gets a yellow highlight and the controller is now interacting with that selected MPH instance.
When you close the MPH plugin small window, the MPH stops receiving any communication with the controller.

When you open a DAW project, the first time you open the MP Host plugin the small window will open and there will not be anything display on the controller's display until you click on the controller icon.
This is only necessary the first time after opening a DAW project. The rest of the times when you open the MP Host plugin from the DAW it will automatically open the window on the controller and highlight the icon or the multihost slot that was selected last.
Note that the MP Host does not interact with track selection of the DAW so it will not open a plugin when a track is selected.
If the DAW opens plugins upon selecting a track, (not just hiding and unhide them like Ableton does) then the MP Host will also open and it will display the hosted plugin.
2. DAW MIDI Settings
IMPORTANT: Go in your DAW settings and remove the MP Midi controller C1-xMP1 (midi hardware) from being used. If you don’t do this step, the controller will not be able to communicate with the MPH plugin. This applies to Mac and Windows DAWs.
Here is how to disable C1-xMP1 in some popular DAWs:
-
In Ableton, go to preferences > Midi and turn it off completely (in/out, remote, track)
- In Bitwig, go to Settings, disable and remove it from the devices

-
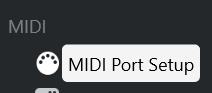
In Cubase, go to Studio and deactivate the c1-xMP1 Controller (midi in/out) and choose MIDI Port Setup:
 uncheck all the boxes for C1-xMP1
Additionally, make sure the C1-xMP1 is not selected in the following sections:


-
In Logic Pro X, to Preferences > MIDI >Inputs and uncheck the on checkbox for c1-xMP1.
-
In Pro Tools, click the Setup menu, go to MIDI, then click MIDI Input Devices and uncheck the c1-xMP1.
-
Furthermore, in Windows only, Pro Tools lock ALL the MIDI devices even if they are set to not active in the settings (while other DAWs do not lock the midi devices). This prevents the MPH plugin from accessing the c1-xMP1 controller.
-
There are a few options on how to work around this, you may choose either:
-
Connect the c1-xMP1 USB cable after Pro Tools has started and before loading an MPH plugin instance. This will prevent Pro Tools from locking the c1-xMP1.
-
Disable the c1-xMP1 in your Windows Device Manager and enable it after Pro Tools has started.
-
Use a USB hub with a USB power on/off switch. There are few with switches per USB port. Turn On the controller after Pro Tools has started.
-
Use this utility/script to start Pro Tools as administrator. This script will disable the controller, start Pro Tools and enable the controller again. There is a readme.txt in the zip file, please read it first. Download
- For Luna on Windows see this article
Troubleshoot Encoders Feedback Loop
If you encounter a feedback loop when turning the encoders - where some encoders behave erratically or appear stuck at the same value (as shown in the example video) - this usually indicates a MIDI conflict.
This issue occurs when the DAW is receiving MIDI input directly from the C1-xMP1, and at the same time, the MP Host plugin is trying to control the same parameter. Both sources are fighting for control, creating a loop.
On macOS
macOS allows multiple applications to share MIDI ports simultaneously. As a result, some plugins may be receiving MIDI directly from the C1-xMP1, even while the MP Host is actively controlling parameters.
To resolve this:
-
Disable MIDI input or control within the plugin itself.
-
Remove or disable MIDI CC assignments on individual plugin parameters, if applicable.
By ensuring the plugin only responds to the MP Host and not the direct MIDI input from C1-xMP1, the feedback loop will be eliminated.
3. MP Host properties and config files
The MPH stores its configuration, hardware.id and mph.license files, preset files and preset background image files in the MP Host folder.
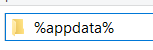
Windows: C:\Users\USER\AppData\Roaming\MP\Host
(Type %appdata% in the explorer's address bar and press enter, then navigate to folder MP)
Mac: /Users/USER/Library/Application Support/MP/Host
or ~/Library/Application Support/MP/Host
There are 2 Library folders on the MAC OS one is under /Library and the other ~/Library which means under your user account. You need to visit the ~/Library/Application Support/MP/Host
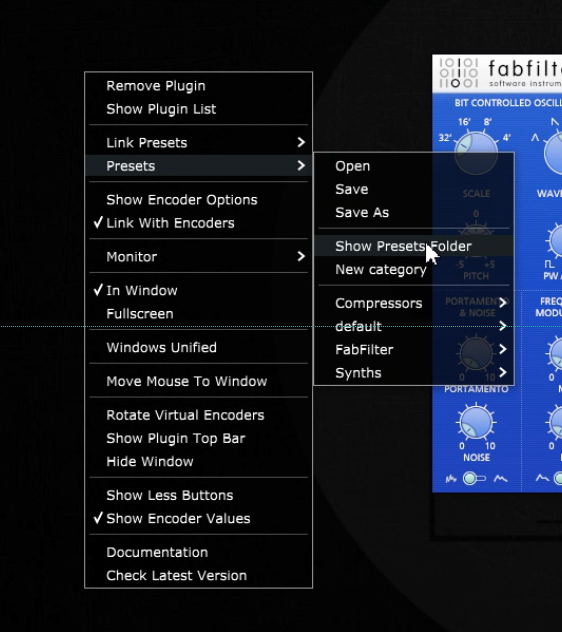
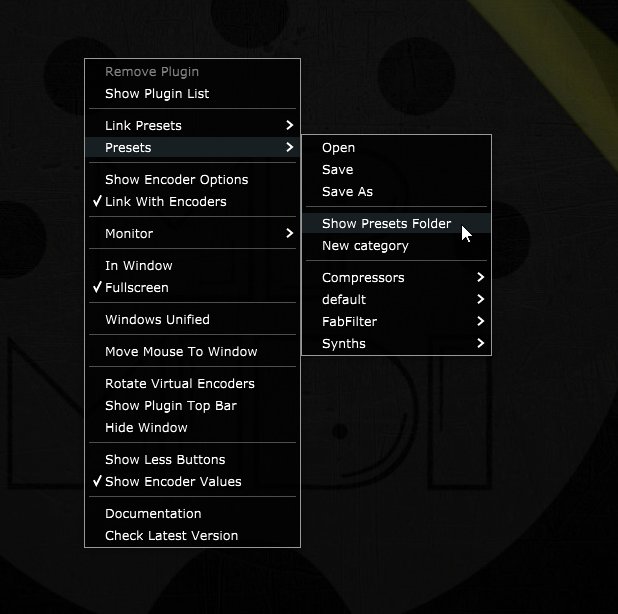
To open the MP Host Folder from the MP Host plugin, on the controller's window,
right click and Select Presets > Show Presets Folder and it will open the MP/Host folder.
See video
4. Show Preset Folder - Go to the MP/Host properties folder
To open the ~/MP/Host folder in Windows file explorer or the MacOS Finder:
1. Load the MP Host plugin in your DAW and open it
2. Right-Click on the MP Host window empty area and navigate to "Presets/Show Preset Folder"
See the full path here for Mac and Windows.
See video here
5. Finding your existing third party plugins
We created a an optional Plugin Scanning Utility. See here.
Check out the new VST3 Generator Utility
Finding your existing third party plugins
Load up the MP Host Single FX plugin and click on the Controller Icon button.
The window of the MP Host plugin will open. Right click on the empty area.
Click on the PLUGIN LIST button.

The first time you do this, it will display a message that MPH is "Reading Installed Plugins". Depending on how many plugins you have, it will take a few seconds to complete.
The MPH scans quickly your installed plugins in the standard VST and VST3 folders, even if you have them in other sub-folders.
The MP Host does not scan in depth the plugins at first. To save time and not having to wait for the dreadful scanning process, the MP Host reads and display just the filenames of plugins in their folder at first and fully scans a plugin once you choose to load/use the plugin.
On Windows the path scanned for VST2 is
- C:\Program Files\VSTPlugins
- C:\Program Files\Steinberg\VSTPlugins
and for VST3 is C:\Program Files\Common Files\VST3
The Plugin List will show all the plugins installed on your computer, however you should use this to load up a plugin and create an MP Host preset where it will load the plugin, its state, the mappings and background images. See MPH Presets
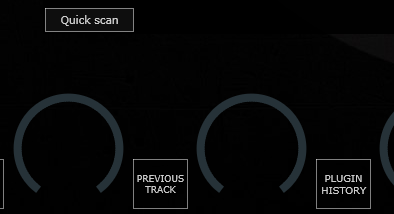
If you installed new plugins and they don't appear in the list, click on QuickScan button at the bottom of the Plugin List window:
Plugins not shown in the Plugin List
For Windows, if VST2 plugins are not shown in the plugin list see this article.
For Mac, if the Plugin List does not show all the plugins you have installed, you may need to reset the permissions as shown in this article or check that these were not added in the ~/MP/Host/Plugin-Exlude-List.txt.
Category, Manufacturer and Version columns
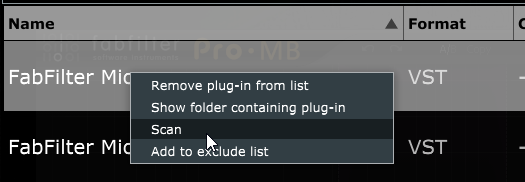
When you first scan (Quickscan) the plugin list, you will see that the Category, Manufacturer and Version columns will not have any data. These columns will be filled once you open a plugin for the first time, or right click on a plugin and select Scan.
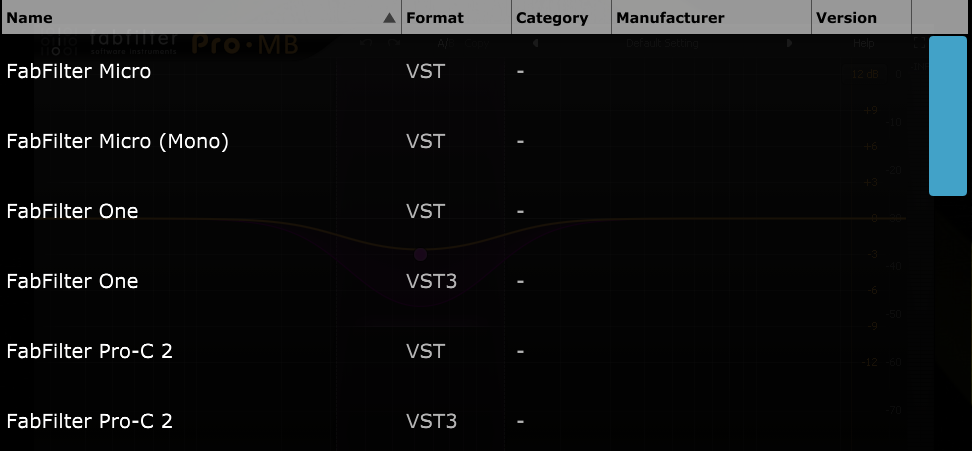
Until installed plugins are opened once or perform a right click > Scan, will be displayed in the plugin list of both MP Host types (instruments and effects).
You will notice instruments and effects are shown in the same list, until you open or right click > Scan them for the first time. When you scan an instrument while in MPH FX you will see the plugin be removed from the list. It will only now appear in the MPH Instrument Plugin List.
The same applies to audio FX while in MPH Instrument.
Loading an incorrect type of plugin
If you try to load an instrument plugin in the MPH FX you will get a pop up window saying that you are trying to load the wrong type. The same will occur if you try to load an audio effect plugin in MPH Instrument.
Waves Plugins Waveshells
Waves plugins because they are bundled in a shell, do not have this option. Instead, you have to find the Waveshell in the list and right click > Scan. The MPH will scan the Waveshell and populate the list with the Waves plugins included in the bundle shell. You have to scan each Waveshell.
If there plugins missing (VST2/3) after you scan the Waveshells, check the Plugin-Exlude-List.txt file (see next section). Delete the Plugin-Exlude-List.txt file from the ~/MP/Host folder and scan the Waveshells again. The missing plugins should appear in the plugin list after you press the Quickscan button.
If you have installed a new or older Waves package of plugins and plugins are missing, make a backup of the host.properties file and delete it. Then open again the MP Host so that a new one is created. Then select your target monitor and scan for plugins again, including the Waveshells.
For plugins not showing up in the MP Host on MacOS also check this article.
Excluding Plugins from the list
When you right click on a plugin, you also have the option to add it to an Exclude list, which is a text file placed in the MP/Host directory.
This excludes plugins which will not be scanned next time you perform a Quick Scan.
If you want to remove plugins from the Exclude list, you can delete them from the ~MP/Host/Plugin-Exlude-List.txt.
If you want to delete them all in the exclude list, you can just delete the Plugin-Exlude-List.txt file.
Waves plugins also don’t have the option to be added to the Excluded list because they belong in a shell.
When you Install new plugins, perform a quick scan so that MPH can locate these plugins.
If a plugin causes the MPH to crash during right click > Scan, it will be added automatically to the Plugin-Exlude-List.txt file. This includes Waves plugins as well during scanning Waveshells.
On Waves v15 on Windows, delete/move the GrandRhapsody.bundle folder from C:\Program Files (x86)\Waves\Plug-Ins V15 before scanning the Waveshells, as this is not compatible with the MP Host. you can place it back after scanning the Waveshells with the MP Host.
Searching for plugins
Searching for plugins is easy. You can just type in the bar on top of the list and it will search the manufacturer and plugin name once you press enter.
The Manufacturer column data will only be searched/found if a plugin has been opened at least once, or has been scanned using right click > Scan.
Reporting Issues with Plugins
If you would like to report plugin-specific issues please submit this form
If your DAW crashes (for any reason) and causes the MPH to exit abnormally, the next time you open it you will need to click the Control & Display button twice instead of once (or the Plugin Holder area in the Multihost) in order to display the MP Host in the controller’s touchscreen.
6. Linking Parameters and Options
There are 3 methods to link parameters. See video
Intelligent Automatic Mapping of Plugin Parameters
Note that in version v1.7-d8422138--H2025-04-19--B2025-04-19 we have introduced the Auto Map function, which links all the parameters of a plugin upon loading the plugin from the plugin list.
It will set a different color to each encoder, unless:
- the parameters belong in the same group (plugins can have parameter groups, see U-He, Fabfilter)
- the parameters are not in the same group and the next parameter begins with the same 3 letters of the previous parameter, it will set the same color as the previous parameter (for example, Delay Type, Delay Size, Delay Mod...)
The Automatic Mapping option is enabled by default and it can be disabled via the right click menu.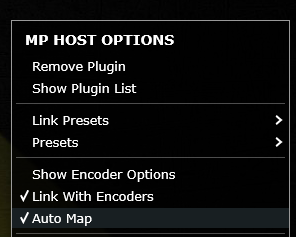
Automatic mapping is enhanced to map groups of parameters in different pages and automatically name these pages based on the group. Automatic mapping of plugins with many parameters is mapped across pages per group/color.
When you click or touch a parameter, it will take you automatically to the page the parameter is linked onto an encoder and it will blink for 3 seconds making it easy to identify the encoders. If the parameter is linked onto an encoder in the same page, it will blink in that page.
When Follow Param button is enabled, MP Host will not automatically change pages when you adjust a parameter using the mouse or touchscreen if that parameter is linked to a different page than the one currently displayed.
This is especially useful when working with Automap on plugins with many parameters. It allows you to remain on the current page, controlling selected parameters with the physical encoders, while simultaneously adjusting other parameters that are mapped to different pages using the mouse or touchscreen, without interrupting your workflow.
Method 1 - Mapping/Linking using the Link button
In version v1.7-d8422138--H2025-04-19--B2025-04-19 the link button works in continuous mode. This means you can click/turn an encoder and continue to link parameters. You may select an encoder or the parameter first and it will still link them.
The unlink button also works in continuous mode, by turning an encoder or clicking on one.
Click or touch on the “Link” button to activate the Linking Mode,
then click on the hosted plugin’s parameter you want to link,
then click on the edge of MPH encoder you want to link or move the encoder you want to link and it will link the parameter.
If you click on another encoder when in linking mode, it will continue linking from that encoder.
See this video that demonstrates the Link process using the Link button.
Changing the name of a linked parameter
Double click on the label area of the parameter name and you will see the cursor blinking so you can edit the name of the parameter.
Setting a color to an encoder
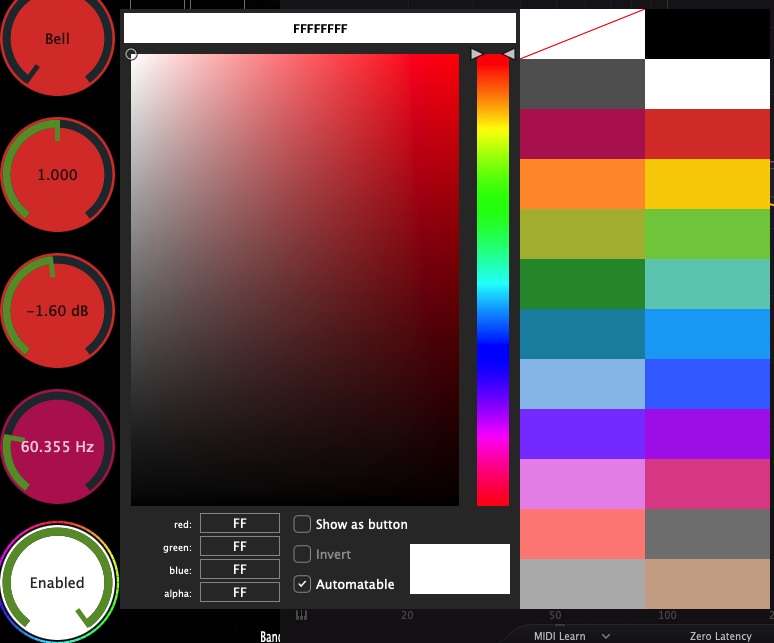
Right or left click at the center of an encoder to show the color palette and select a color to assign to an encoder.
See here for more details and how to disable the left click to not show the color palette.
Mapping parameters in multiple pages
You cannot map the same hosted plugin’s parameter to more than one MPH encoder on the same page, however you can remap a hosted plugin’s parameter again on another page. This is handy when you want to control some parameters in every page. For example, you may want to control the filter section of a virtual synth on every page.
When linked, an encoder gets the value of the hosted plugin’s linked parameter.
When you link the same parameter in multiple pages, both on the single and multi hosts, the encoders linked in other pages will be connected to the first encoder linked.
For example, if you link the Cutoff parameter to encoder 1 in page 1, then link the Cutoff again in page 2, page 3 and so on, all links will be connected to encoder 1 in page 1.
This is done so that we don't report to the DAW the same parameter multiple times.
Only the firstly linked parameter will be reported to the DAW as an automatable parameter.
You can use the encoders in other pages to control the Cutoff and if you record automation it will be recorded regardless of which page you are.
If you unlink encoder 1 in page 1 (the firstly linked encoder), it will automatically unlink all encoders linked with the same parameter in other pages.
In the case of the Multihost, you will notice that you cannot assign an automation ID (it is greyed out) on encoders that have been linked with the same parameter in other pages. This is done to prevent reporting the same parameter to the DAW as an automatable parameter.
You can replace a linked encoder too. Press the Link button, click/move the parameter you want, click at the edge the onscreen encoder you want and it will replace it with the new parameter. It does not replace it if you turn the physical encoder.
How to troubleshoot issues when linking parameters
The MP Controller controls parameters reported by third party plugins as "automatable". These are the same parameters your DAW has access to and can control via automation.
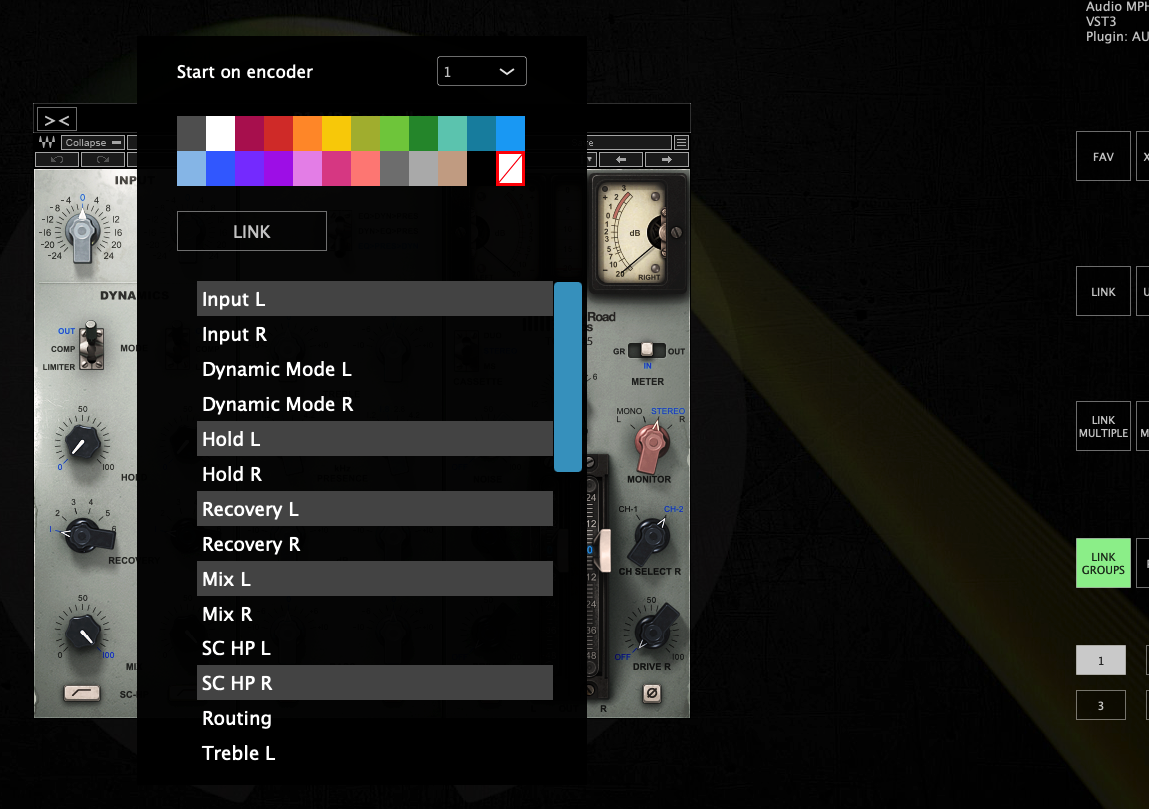
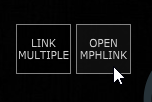
Some plugins (Waves, Plugin Alliance, Kush and others) may be reporting multiple parameters at once. If you want to link a single parameter only then use one of the other options, LINK MULTIPLE or LINK GROUPS.
When using LINK MULTIPLE you can remove parameters from the list by double clicking on them.
In LINK GROUPS, to select individual parameters from the list hold the Mac: Option button, Windows: Ctrl button, and click on the parameters you want with the mouse.
If you are having issues with a specific plugin you may try other formats of the plugin, VST2, VST3 or AU on the Mac as there have been cases where on format may not link parameters properly and another format links parameters normally.
If the parameter is linked but does not behave smoothly when turning an encoder you can enable ABS (absolute mode) on the encoder under Encoder Options.
Lastly, ensure that you have the latest version of the plugin you are using. There have been reports on some older versions of plugins (like PA plugins) that were not reporting their parameters correctly and this was addressed in newer versions of the plugins.
UI rendering Issue on Windows with specific VST3 plugins on some DAWs
If you encounter an issue with VST3 plugins (like Plugin Alliance) not updating the UI when moving the hardware encoders, use VST2 plugins instead.
We were able to confirm the issue in Ableton Live 12 with VST3 P.A. plugins, however in other DAWs like Reaper this issue does not occur.
SoundToys on the Mac: For better compatibility and parameter syncing use VST2 or VST3 instead of AU.
Method 2 - LINK MULTIPLE
Mapping/Linking many parameters at once
Click or touch on the “LINK MULTIPLE” button and it will show a list on the left of the MPH big window. Begin clicking on parameters on the hosted plugin. The parameter names are added to the list. To remove a parameter, double click on a parameter name on the list.
It is possible to assign colors to each parameter to be linked by clicking on the color cell in the parameter row. The selected color will be automatically assigned to all previous rows until a row with color assignment is found. This makes it possible to assign colors to groups of parameters (ie ADSR). To change a color just click on the cell and the color palette will appear.
It is not possible to reorder the parameter in the list. Once you are finished with the parameters you wish to link click on the “LINK MULTIPLE” button again and it will ask to enter the encoder number (0 to 127) to begin linking the parameters.
If you want to link parameters which are already linked again in another page, then you need to be in that page when you initiate the link multiple procedure and enter the encoder number that corresponds in the page.
How to unlink a parameter
Click on the Unlink button and then click on the encoder to unlink it. See video
Note that in version v1.7-d8422138--H2025-04-19--B2025-04-19 the unlink button stays activated so you can unlink multiple parameters. Press the unlink button again to stop the unlinking process.
Show as button
This option in the Color Selector converts the encoder in an on/off toggle button. This is useful if the parameter you are controlling is an on/off parameter. Turning an encoder will make the button a round encoder.
Dynamic Parameter Names
Some plugins, for example Kontakt Analog Dreams library and other scripted Kontakt liraries, are programmed to change the parameter mapped on the same parameter index when switching presets. In this case, i.e. a parameter index assigned to "Balance" becomes "Reverb" when changing a preset on Analog Dreams. The MPH receives the parameter name change notification and updates the parameter name.
Note that some Kontakt libraries sometimes don't send all the parameter names, propably due to an error in their script and this also happens when loaded directly in the DAW, so it does not have to do with the MPH
If you rename that parameter, then the MPH stops updating the parameter name when receiving a parameter name change notification.
Unlinking the parameter resets it to update names dynamically. When you unlink the parameter and link it again, it will update the name when it receives a notification for a name change from the hosted plugin.
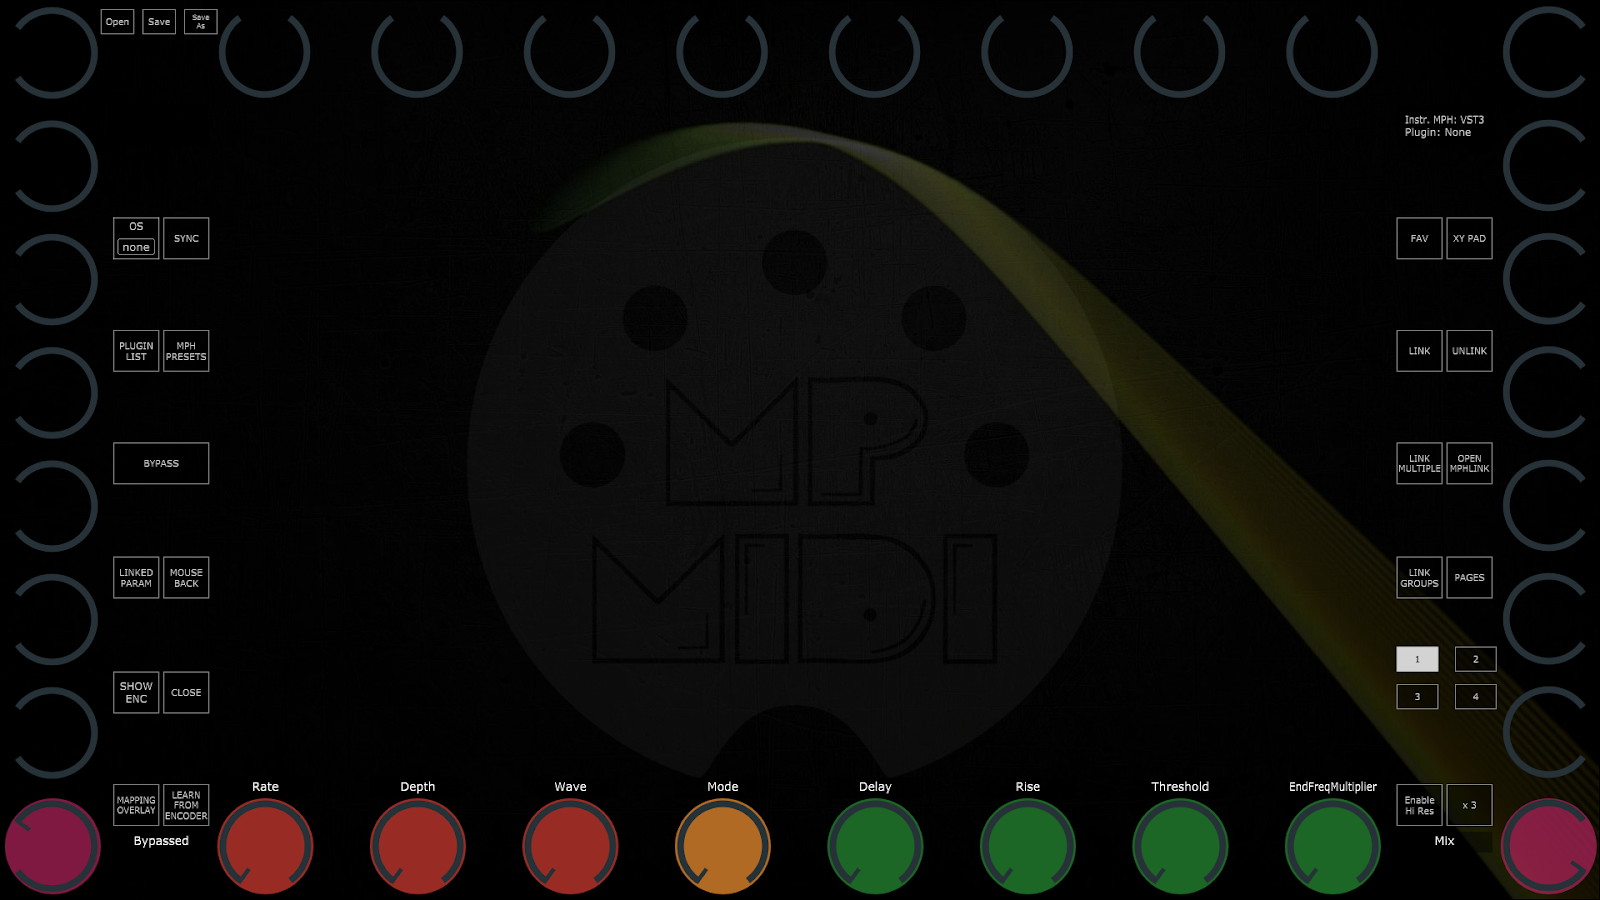
16 Pages of available encoders to be linked to parameters
With the April 2024 update, the MP Host has increased the number of parameters that can be controlled, from 128 to 512 parameters, allocated to 16 pages. Each page can carry a title which can be set by "double right clicking" on the lower area of the button, for the text editor to appear.
The Pages are divided into groups of 4 pages per group, a total of 4 groups.
Group 1: Pages 1 -4, Group 2: Pages 5 - 8, Group 3: Pages 9 - 12, Group 4: Pages 13- 16
Each Group carries the following encoder IDs:
Page 1: 0 -31, Page 2: 32 - 63, Page 3: 64 - 95, Page 4: 96 - 127
Each page can carry its own background image.
When enabling the top bar, the name of the page is shown, if there is a name on the page.
Here are video 1 and video 2 on how to link parameters of plugins
Method 3 - Link Multiple parameters via Link Groups
See here for the Link Groups method for linking parameters.
Learn from Encoder
When you open MPH, the default preset has already mapped the controller’s encoders to the MPH encoders, from CC 0-31 in page 1, CC 32-63 in page 2, CC 64-95 in page 3, CC 96-127 in page 4, and this repeats for the next groups of pages (ie page 5 has encoders with CC 0-31 and so on).
To see the CC numbers right click on the controller window and choose the ENCODER OPTIONS from the right click menu.
The CCs are editable and you can change the numbers as you like. You can have the same CC on more than one encoder. This allows you to create macros and control more than one parameter per encoder.
See video on controlling multiple parameters using one encoder.
The Learn From Encoder button allows you to control a parameter that has been linked to another encoder.
Let's say you have linked 3 parameters on 3 encoders and then you want to control all 3 parameters using one encoder.
One way of doing it is by manually going and changing the encoder CC IDs
If you set on all 3 the CC to 0, then the first encoder (encoder 0) will be controlling all 3 parameters.
The other way of doing this is by pressing the button Learn From Encoder, click/touch on the parameter's virtual encoder on the screen and then turn the encoder you want to use.
The linked parameter learns and has now assigned the CC from the encoder you have turned.
When you do this on multiple parameters you control multiple parameters with that one encoder.
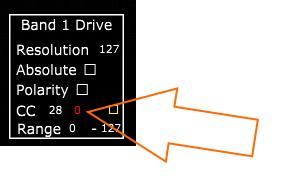
Furthermore, you can adjust the Range, Polarity and Resolution on each linked parameter so that they behave differently when you turn an encoder.
An example would be to control the Resonance and Cutoff parameter with one encoder. However, you want the resonance to perform a less change in value than the Cutoff. In this case, you increate the Res (resolution) on the Resonance and it will change in value less in comparison to the Cutoff when you turn the encoder.
Single MPH Control and Display (the Controller icon on the small window)
|
|
|

With MPH, you can control what you see on the controller’s screen. When you press the Control and Display button of an MPH (the Controller icon), the control is transferred to that selected MPH instance. The controller icon gets a yellow highlight and it means this is an MPH instance that interacts with the controller. When you click on another MPH instance, the button gets a yellow highlight and the controller is now interacting with that selected MPH instance.
When you close the MPH plugin small window, the MPH stops receiving any communication with the controller.

When you have multiple MPH instances open in the same DAW project and you click on the Control and Display one MPH instance, it will sync the controller by sending to it all the parameter values and page number of the MPH Instance.
When the small MPH plugin window in the DAW is closed and you open it, it will automatically open the plugin in the controller’s screen. This means you don't need to click Control and Display to open it in the controller.
Sending CC messages to hosted plugins
Sending MIDI CC Messages to parameters of plugins
The MP Host plugin can send CC messages to hosted plugins. This is useful as some plugins make certain parameters to work only with CC messages, for example changing the presets. CC messages unlike automatable parameters are not bidirectional (from/to the plugin). A plugin can only receive MIDI CC messages but not send CC, therefore when moving a parameter with the mouse or when changing presets on the hosted plugin will not update the MP Host and the controller. This is because plugins don’t have MIDI interfaces to transmit CC messages.
To activate sending CC messages per encoder select ENCODER OPTIONS from the right click menu and check the yellow box.
You can then rename the encoder by double clicking on its name and assign a color by right clicking in the center of the encoder via the color selector.
If the hosted plugin can accept CC messages and has MIDI Learn functionality you can send CC messages from the MP Controller. The CC message ID sent to the hosted plugin, is the same as the CC ID in the ENCODER OPTIONS per encoder. Note that CC ID 0 may not be received by certain plugins.
When CC sending is active, the M-P-R and Resolution options do not apply to the encoders.
Pitch Bend automation not playing back
In the case you have recorded pitch pend automation with your keyboard for a virtual instrument, depending on the instrument it may not playback the pitch bend automation and/or cause other automated parameters to not work during playback. In this case, link the pitch bend parameter to an encoder and record the automation in the DAW using the encoder.
Fader View
This option shows 8 assignable fader where you can select an already linked parameter to be controlled by an on-screen fader. When opening the Fader View, the Sync button becomes an Options button for the Fader View. From there you can select using search as you type to find the parameter you want to link to each fader.
Controlling multiple parameters at once
You can control multiple parameters from a hosted plugin at once, by setting the same Encoder ID to multiple encoders that have been previously linked to parameters.
Here is how to do it:
1. Link the parameters normally to encoders.
2. Choose Show Encoder options
Set the CC ID to the first encoder (or other that you will use to control all parameters)
Now turn encoder 34, it controls all three parameters at once. You can also set the Resolution to different values to control them at different rates. The Polarity will invert the control.
See this demo video here
7. Automation in the DAW
Single MPH Automation
The MP Single Host reports the parameter names of the hosted plugin (ie Cutoff, Resonance etc). The parameters to be automated need to be linked on encoders so that they can be reported to the DAW.
In Ableton Live, you click on Configure and move the parameters with an encoder or the mouse and it will appear on the plugin area, as usually done with any other plugin.

(Ableton Live update: If you are using the AU version of the MPH you need to have one automation point before recording automation in Ableton Live, in VST3 this is not needed)
Multi Host Automation
The MP Single Host reports the plugin and parameter names of the hosted plugin (ie Cutoff- Sylenth1, Resonance - Sylenth1 etc).
The parameters to be automated need to be linked on encoders so that they can be reported to the DAW.
In the latest release of February 2026 the automation method that sets automatable parameters in the Multi Host has changed. See at the bottom of this document the section that describes the new method to set automatable parameters.
In the Multi Host, you need to set in the ENCODER OPTIONS the parameter ID to be automated. This is the number with red font on the bottom right corner in the ENCODER OPTIONS (see below).
To automate in the Multi Host, click ENCODER OPTIONS, there are 2 options:
1. The automated method
From the right click menu select "Set parameter ids" and it will automatically assign ids to all encoders that have been linked but don't carry an automation id.
This option works per plugin slot and the ids will continue to increase from slot to slot. For example, if you have linked 4 parameters in the first slot, then it will use ids 1 to 4. On the second slot it will use ids 5 and onwards.
In Ableton Live, you click on Configure and move the parameters with an encoder or the mouse and it will appear on the plugin area, as usually done with any other plugin.
2. The manual method
set an ID in the red box from 1 to 128, 0 means automation is disabled and it’s the default value.
Once you set the parameter number, move the parameter so it is being recognized by the DAW (like you would normally do automation without the MPH) and that’s it. You can only use one automation ID per encoder. If you enter an automation ID number (1 to 128) that is already used you will get a pop up notifying you where that id is being used so you can use another one. When saving a multi host preset the automation IDs are not saved in the preset.
In the case of the Multi Host, you will notice that you cannot assign an automation ID (it is greyed out) on encoders that have been linked with a parameter which has been linked on an encoder in another page. This is done to prevent reporting the same parameter to the DAW as an automatable parameter.
For example, if you link the Attack parameter in page 1 and then link it again in page 2, you don't need to enter an automation id on the encoder in page 2. You will see that the id field is greyed out and it will use the automation id from page 1. This way we report only one time the parameter to the DAW and avoid conflicts.
For linking the same parameters in multiple pages see here
Update: In the v16-2d9a51a2--H2023-12-19--B2023-12-19 version of the MP Host, it reports the names of the plugin parameters to the DAW for automation.
Setting automatable parameter in the Multi Host (February 2026 Release and onwards)
Since the introduction of Automap, setting the IDs of all linked parameters to be automatable would soon exhaust all 128 available parameter slots available for all Multi Host slots. For example, if you load Fabfilter Pro Q in the first slot with Auto map enabled, then "Set Parameter IDs" to mark all linked parameters IDs as automatable would leave no room for additional slots to be automated.
Therefore, we introduced a new way to set manually the parameters you want to automate in your DAW.
Right click on an encoder to view the Color Selector. There you will see a checkbox "Automatable". When you check the box, the parameter is reported to the DAW as automatable parameter and gets a rainbow outline, so it is obvious that it is set as automatable.
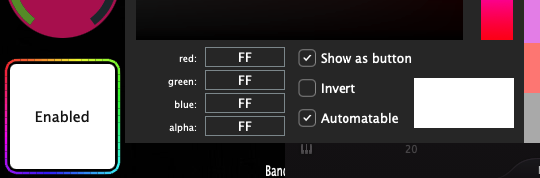
The Automatable parameters are saved in the MP Host preset, (SIngle Host preset and Multi Host preset) so the next time you load that preset, parameters set as automatable will be recalled.
Overwriting Automation in Cubase and Nuendo.
If you have automation already written in a track, enable the Auto Latch mode to write new automation over it. Press F6 to open the Automation Panel. In Nuendo, use Auto-Latch or Cross-Over mode whether there is automation or not.

When you use Auto Latch:
- As soon as you touch a parameter Cubase ignores existing automation
- It starts writing your new values
- After you release, it keeps writing the last value (this is the “latch” part)
8. Side Chaining
You can use side chain in the Single and Multi FX Hosts. Instrument hosts do not accept side chain signal.
To side chain, send the side chain signal on the MP Host from your DAW as you would normally do with any plugin.
Then enable the side chain feature on your hosted third party plugin.
9. MP Host Presets
There are 3 preset types in the MP Host plugin (MPH):
-
Single Host presets (MPH Presets)
-
Multi Host presets (Multi Presets)
Loading a third party plugin from the Plugin List menu in the MP Host plugin, will not load the linked parameters to encoders. Loading a plugin from the Plugins List menu will allow you to link parameters, and save it as an MPH Single xml Preset.
An MPH Single Preset xml, loads the hosted third party plugin, mappings to encoders with colors, the state of the plugin as it was last saved and optionally, background images per page.
Check out the new VST3 Generator Utility
Comparison of the MP Host presets
|
Preset Type |
Loads the third party plugin |
Loads links to parameters (mappings) |
Can be loaded in the Single Host |
Preset File Extension |
|
Single Host presets |
Yes |
Yes |
Yes |
.xml |
|
Multi Host presets |
Yes |
Yes |
No |
.mxmli for instrument and .mxmlf for audio effects |
|
|
No |
Yes |
Yes |
.mphlink |
![]()
The Single MPH presets are saved in .xml format. The MPH single presets include (save):
-
the reference to the hosted plugin
-
the mappings of parameters to encoders
-
background images
-
the state of the hosted plugin when you save the single preset
These are saved via the button from the controller screen on the top left corner.
![]()
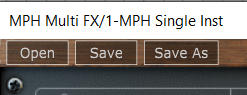
There are 3 ways to load a MPH xml preset.
1. The first method would be from the top left corner of the main window to use the Open Button.
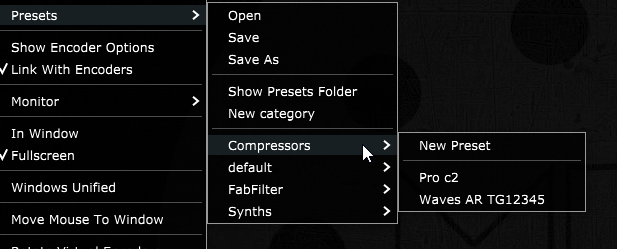
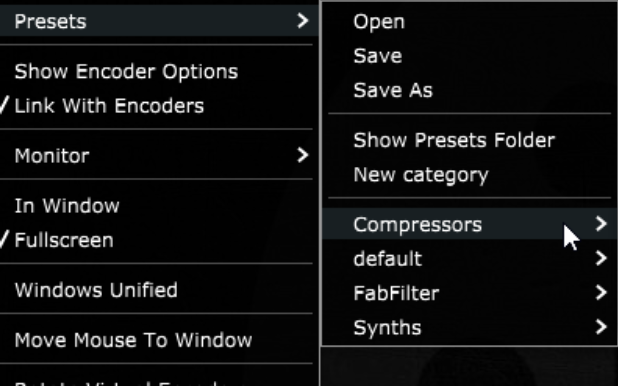
2. The second method is by right clicking on the background area of the MPH and select Presets.
It will show you the Preset structure as it is on your hard drive, the main category being a folder and in the folder you will see the plugin list which corresponds to the preset xml files saved. Each preset xml must be saved in a folder to be seen by the right click menu of MPH. This is very handy because you can categorize your presets as you like and this reflects the folder structure as it is on your hard drive. (See more info below in the section Preset Categories)
3. The third method is by using the MPH Presets button

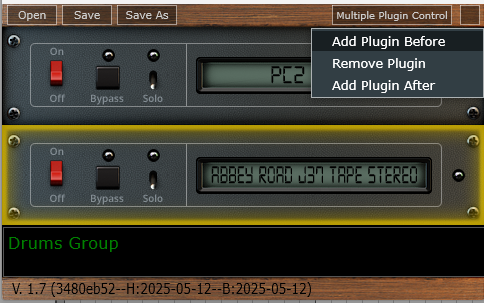
To remove the loaded plugin, right click on the background area of the MPH and select Remove Plugin. It will remove the hosted plugin, background image and all mappings and load the default.xml.
(The default.xml cannot be overwritten from the MP Host and you should never manually overwrite it because it may create loading issues)
![]()
The Multi Host presets are saved in .mxmli for instrument and .mxmlf for audio effects.
The Multi Host presets save whatever is loaded at the given time in a multi MPH. It’s a preset that holds a chain of multiple plugins (or multiple single MPH slots). These are saved from the Multi small window.
Additionally, while using the Multihost the controller window provides the same menu to save MPH single .xml presets. This is because the multihost is a collection of single MPH plugins (or a chain of single MPH plugins).
This means that from within the Multihost you can open Single Host .xml presets from the menu on the controller window or the right click menu as shown above.![]()
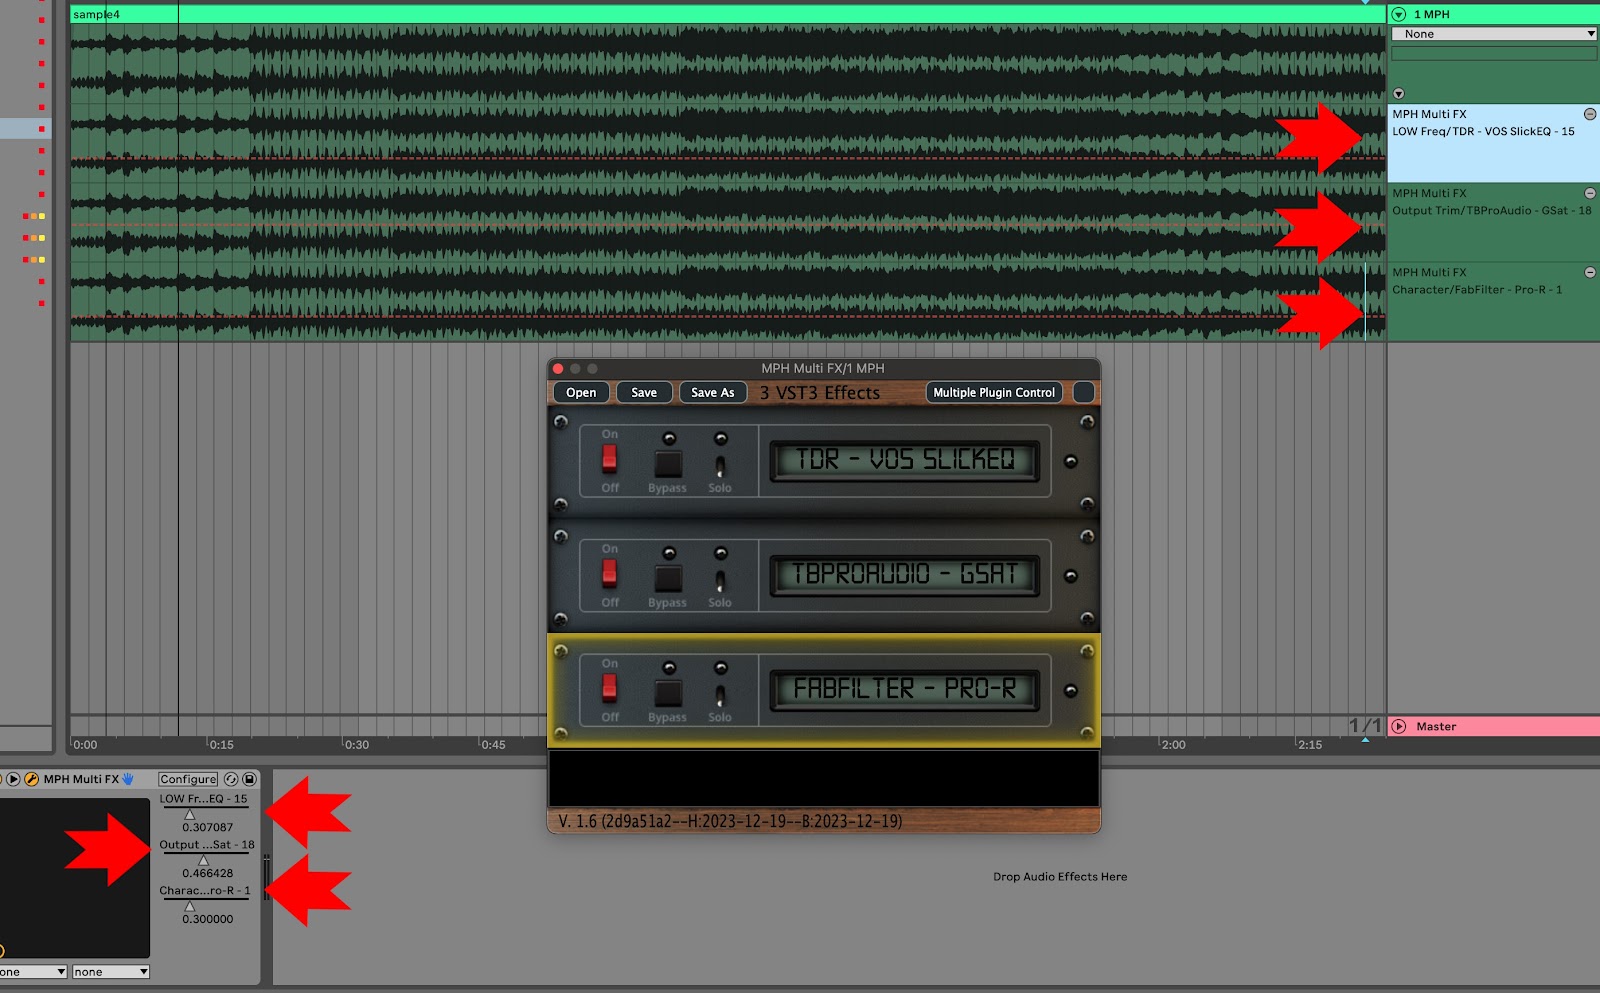
The MP Multi Host. Each slot (row) of the Multi host is an MPH Single Host plugin
![]()
Preset Categories in the MPH Single xml presets
There is an option to create a Preset and have it listed in the MPH Preset Menu. Go to Presets again and select "New Category". A Category is a hard drive folder created inside the Presets folder (under ~\MP\Host\Presets). The MPH plugin will read folder items that exist inside the Presets folder and list them on the menu.

Therefore, if you create a category and a preset, it will create a folder on the hard drive and the preset will be placed in that folder. The folder and preset will be listed in the MPH Menu.
MPH Link Presets
The 3rd type of preset of the MP Host plugin is an additional portable type of preset with extension mphlink.
(introduced in version v16-a91f8a59--H2022-08-10--B2022-08-11)
These presets carry the
-
Link to encoders
-
Colors of encoders
-
Pages images
But unlike the MPH xml presets, do not save/hold the state of the plugin or reference to the plugin.
An MPH Link preset does not contain/load a third party plugin. The third party plugin should be loaded first and then load the mphlink preset. Then save it as an MPH xml preset.
Onwards, you can use the xml preset which will load the third party plugin and the mappings to encoders.
MPH Link presets are portable (portable means are compatible/transferrable across computers, regardless of type of computer, Mac or PC, for any type AU/VST/2/3).
The mphlink presets should be loaded after a third party plugin is hosted/loaded in the MP Host.
Loading an mphlink preset does not affect the state of the hosted third party plugin and has no path reference to the hosted third party plugin.
This makes these presets portable, cross platform (Mac/PC) and cross plugin type (VST/2/3/AU) compatible that can be easily shared.
For example, if you have created an mphlink preset on an AU plugin on a Mac, you can use this preset on a VST in Windows. This provides more flexibility to create presets for many plugins and share them with users.
The mphlink presets are saved in a folder under the MP Host folder at
Windows: C:\Users\USER\AppData\Roaming\MP\Link Presets
Mac: ~/MP/Host/Link Presets
IMPORTANT: Before extracting from the zip file the downloaded MPH Link preset files, go to the MP Host and right click. From the menu go to Link Presets and choose Save.
The MPH plugin will generate the folder named "Link Presets" in the MP Host folder ~\MP\Host\

Then, from the right click menu choose to Open the MP Host folder.
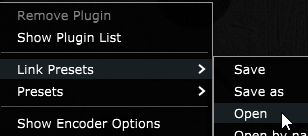
The MPH Link presets can be Opened and Saved from the right click menu in the big window of the MP Host plugin or the button Link Presets which brings up a searchable list window.
Create an xml preset from an mphlink preset.
We provide portable mphlink presets so that you can create your MPH xml presets.
-
Load a third party plugin you want to control in the MP Host plugin.
-
The load an MPH LINK preset.
-
Then save it as an MPH xml preset
The next time you want to use that plugin, you will load the MPH xml preset which will automatically load the third party plugin as well.
It is recommended to do this process for any of the mphlink preset you want to use.
Tutorial videos:
1. How to extract and load the .mphlink MPH LINK presets
2. How to create an MPH preset from an .mphlink preset
You can download the MPH Link presets zip file from your account.
Here is the up to date list of MPH Link presets.
If you would like to share presets you made, export them as mphlink presets and send them to us via email. We will create a folder with your name under the manufacturer's folder and update the presets zip file so that others can use your presets.
Opening the mphlink presets
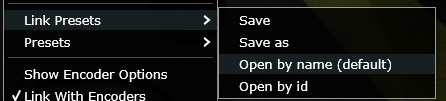
"Open by Name" option for mphlink presets (default)
This option uses matches plugin parameters with encoders using the name of the parameter instead of the parameter id. This is useful because some plugin developers don’t use the same IDs on different plugin types. For example, VST2 ids may be different from AU ids. Loading the MPH Link Presets using this method, solves this problem. For example, if the parameter name is Cutoff and the mphlink preset has a parameter named Cutoff it will match it.
"Open by id"
This option maps the plugin parameters in order using the index number of the parameter. This method may cause some parameters to be mapped on another parameter in the case that the plugin developer has changed the order of parameters.
Changing 3rd party hosted plugin presets
When you change or load up a new preset on any hosted third party plugin in MPH, the hosted plugin sends the new loaded values in its parameters to the host plugin and the controller.
There are some exceptions though to this rule. Some VST2 plugins do not send a notification to their DAW automatically when they change via a preset change. Such an example is our beloved Reveal Audio Spire Synthesizer.
Although this is not often found in third party plugins, if you notice the MPH encoders not being updated then hit the Sync button to receive the current parameter values from the hosted plugin. This is the only purpose of the Sync button and should only be used on such occasions. If you have changed a preset in such a hosted third party plugin and have not clicked on Sync and you Saved or Save As, the MPH encoders will automatically sync with the hosted plugin and be saved properly in your preset.
Updating MPH Presets when new 3rd party plugin versions are released
If a new version of the third party plugin is released by a third party vendor, depending on the update there is a possibility (although rarely, ie in the case of N.I. Kontakt) that the updated version will cause the MPH (and perhaps your DAW) to see this update as a new plugin.
In this case, your MPH xml presets may not show the third plugin plugin when loaded.
Install the update of your plugin as you would normally do and load up the MPH xml preset you have created.
If the hosted 3rd party plugin is not showing up in the main window, choose it again from the PLUGIN LIST. It will load the plugin in the already loaded preset.
All the linked encoders should work and there is no need to link them again.
Then, Save the MPH Preset again.
Alternatively, you can save your MPH xml preset as an mphlink preset and load it after you load the third party plugin. Then save it as an MPH xml preset.
In the case you have created M- file plugins on the Mac, choose Create Plugin to replace your M- file with an updated one.
Migrating Presets from Windows to Mac
If you switch from Windows to Mac and you want to convert your existing Presets for VST2 and VST3,
use this utility (instructions are included):
10. MP Host Favorites
MPH Favorites
The Favorites screen has placeholders for favorite plugins, so that they can be loaded instantly using the touch function or mouse click.
For every placeholder, an image can be selected to be displayed and an MPH preset. Clicking on touching on the placeholder’s area loads the MPH preset.
Right click on a box area in the Favorites window and select the placeholder’s favorite mph .xml file preset. The placeholder will take the name of the .xml preset file.
Note that the images selected will be automatically resized and then copied in the ~/MP/Host/Images/Favorites folder.
See video on how to create Favorites
NEW! Utility for creating screenshots of your favorite plugins automatically
On the Mac you need to set permissions for the utility app: System Preferences → Security & Privacy → Privacy → Screen Recording
Set your favorites in the MP Host Favorites first. Then run the utility to generate thumbnails.
If you delete any thumbnails from ~/MP/Host/Images/Favorites and run the utility again, it will create the thumbnails.
Run the utility to create the thumbnails and then open the MP Host. The thumbnails should appear in the Favorites.
Note that the utility works only for Single Host presets (.xml) but not for MultiHost presets (.mxmlf and .mxmli)
How it works
When you click on "Scan for Presets" the utility will read the InstFavorites.xml and FXFavorites.xml which are the files that hold your favorites. It will show a list of Favorites that don't have a thumbnail assigned. Clicking on "Generate Thumnails" will begin loading the plugin of each preset set as a favorite and taking a screenshot. Then setting the path to the screenshot in the InstFavorites.xml or FXFavorites.xml.
If a plugin crashes during loading it will be added in the Plugin-Exclude-List.txt so the next time you run the tool will not scan that plugin. Because it saves the xml file every time it creates a new plugin screenshot, the next time you run the utility, will not generate screenshots for the ones that were done before the crash occured.
Suggestion for taking screenshots:
Windows: Windows Print Screen tool (Snipping tool), Lightshot , Flameshot, Greenshot
Mac: Built-in macOS Tool (Cmd + Shift + 5), QuickTime (already installed on Mac), Flameshot
Load up a plugin in the DAW or the MPH.
Take a screenshot of the plugin by pressing "print screen"
Then click the Save icon to save it on the desktop.
Then choose that saved image file to set it as a favorite background.
Categories
The favorites are separated into categories, each category has a placeholder in the top two rows of the favorite screen. The category placeholders can be renamed by right clicking and typing the name you want.
There are 16 categories of favorites and each category can carry 24 favorite plugins, in total 384 can be selected (384 for audio effects and 384 for instruments).
The favorites are separated for audio effects and instruments, so you can set different categories and favorites for audio effects and instruments.
The favorites screen can be optionally set to load on startup from the same right click menu.
The above options can be selected by right clicking on each of the favorites placeholders.
The favorites are stored in two separate files FXFavorites.xml and InstFavorites.xml in the ~/MP/Host folder.
Here is a demo video on favorites
Moving to a new Mac computer
In the case you will get a new Mac, copy the MP/Host folder to the new Mac (delete the hardware id and mph license files and get ones from the server).
If your username is different from your previous Mac, you can open FXFavorites.xml and InstFavorites.xml files in a text editor and check that the path to presets is the same.
You can change it by doing a find and replace ALL in the text editor.
For example on your previous Mac, it could be:
/Users/USERNAME/Library/Application Support/MP/Host/Presets/Comp/preset-name.xml
And on your Mac, if your username is different, then the absolute path will be different. You can replace the username with the current one for all favorites and the path will be correct again.
11. Encoder Options
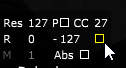
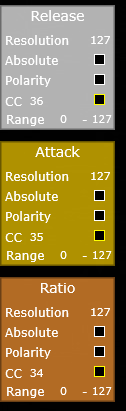
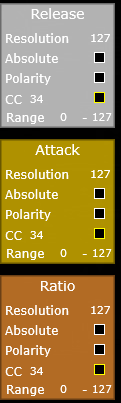
Encoder Resolution and M-P-R Options
This options are accessible via the right click menu by enabling Encoder Options. Each encoder has a number of options and these become visible by each MPH encoder when the M-P-R checkbox is checked and each encoder has two working modes, Absolute and Relative.
Absolute mode is activated if Abs checkbox is checked. In absolute mode, the encoder receives and sends standard MIDI cc messages, each message contains the value, hence it is absolute. There are 128 CC values, therefore the standard resolution (steps) of the encoder is 128, 0 to 127. If Abs is checked, the M option becomes available.
M checkbox for Magnitude for Absolute mode. This is a scaling factor for each encoder when it receives MIDI messages from the controller, ranging from 1 to 50. So your incoming CC can be scaled accordingly. If you set the Magnitude to high values, such as 50, then the encoder will behave like an on/off switch.
Relative mode is activated if Abs is unchecked. Relative mode interpretes MIDI messages from the controller as pulses of plus or minus (-1 or +1) and sends them to the software encoder and to the target plugin parameter. In Relative mode we can set the resolution (shown as Res) of each encoder in the Resolution box from 1 step to 999 steps. Absolute and relative modes may seem the same but with the In absolute mode, values transmitted from the controller are absolute (0,1,2,3..127) once we reach CC max or min (value 0 or 127) anything sent after max/min will not make any difference, but in relative mode there is no max or min, it just keeps on increasing or decreasing.
The following can be used whether in absolute or relative encoder mode.
P checkbox for Polarity. For inverting the incoming midi CC message. Moving the hardware controller clockwise, moves the virtual encoders anticlockwise.
R checkbox for Range. Set the minimum and maximum range, from 0 to 127, you want the Virtual Encoders to respond. If Polarity is checked then the range is inverted (the min becomes max and max becomes min).
CC checkbox for Control Change Number. Set the same CC number, by clicking in the CC box, to multiple virtual encoders and create macros. Combine this feature with M-P-R and you can create complex macros.
Red font number for multiplugin automation ID (explained above). Shows up only in Multiplugin host.
High Resolution Button
Oversampling (deprecated after version v1.7-39f136c1--H2025-07-14--B2025-07-15)
Oversampling will operate the hosted plugin in a sample rate multiple to that of your DAW project. This is a unique feature of the MPH, and it is made possible because MPH hosts the 3rd party plugin. The Oversampling options are 2x, 4x, 8x. MPH features anti-aliasing filters when using oversampling. Oversampling tends to be most useful and shows results when pushing a plugin to its limits or when using overdrive/distortion type of plugins. It is standard that the oversampling process will consume CPU and introduce some latency, which is reported to the DAW. When you choose an oversampling option, the hosted plugin will automatically reload in MPH. If you plan to use oversampling with specific plugins, it is best to test that it works well with the hosted plugin, prior to using it in a work project. Some plugins, when oversampled too high, will create problems, even crash the DAW. This is outside of our control.
This video explains well the process of oversampling a plugin.
Linked Parameters List
The Linked Param button displays a searchable list with all the parameters that have been mapped to an encoder. This is useful when a lot of parameters have been linked and you want to check the corresponding encoder of a parameter, or to reference automation of an encoder.
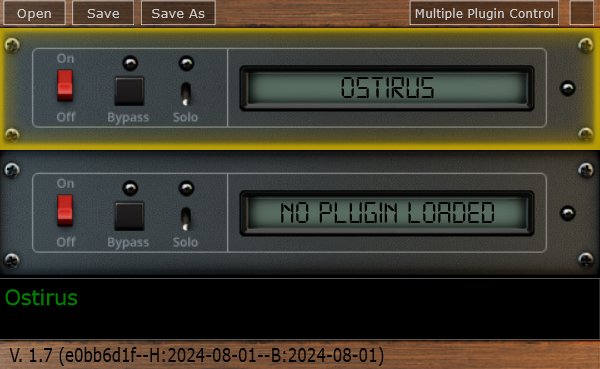
12. The MP Multi Host
Plugin holders in the Multi Host
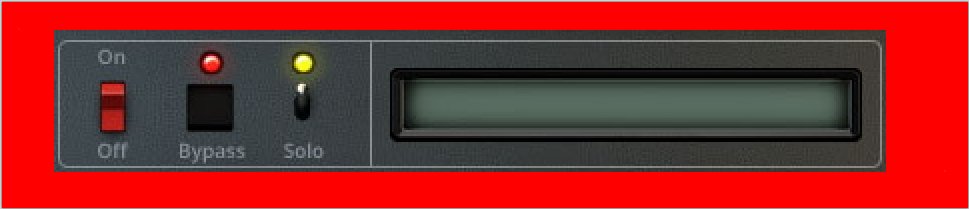
To open a plugin on the controller monitor click on the area on and around the lcd screen on the plugin holder.
The lcd area will display the name of the third party plugin loaded. If you save an MPH xml preset, then it will display the name of that preset.
When you add a new plugin holder an empty instance of the single MPH is created. Each plugin holder can host one plugin. To remove a plugin holder right click on the red area and select Remove Plugin. A pop up menu will appear to ask if you want to remove the plugin holder. When a plugin holder is removed it removes the plugin hosted in it as well and there is no undo for this.
When you click and drag up/down on the area marked in red below on the Multi Host of each plugin holder you can change the order of the plugin.
Add/remove plugin holders (slots)
There are 3 options to add slots in the Multi Host.
- Right click in the area shown in the image above in red on a plugin holder
2.
- Click on the top corners, where the little screws are, (left or right) of a slot to add a plugin slot on top of the currently selected slot.
- Click on the bottom corners, where the little screws are, (left or right) of a slot to add a plugin slot below the currently selected slot.

Changing the order in the audio effect MPH will affect the audio signal path which is routed from top to bottom plugin holders, feeding from one plugin holder to the next. Changing the order of the instrument MPH just affects the visual order but not the signal path as in the instrument audio is output in parallel for every plugin loaded.
When the MPH plugin window in the DAW is closed and you open it, it will automatically open the plugin holder that was selected last, in the controller’s screen.
Within the Multi host you are able to bypass and solo plugins, change their order of audio processing in Audio effects by dragging up/down and save Multi Host presets. In the Instrument version, you can still drag the plugin slots up/down but since the processing of audio is parallel (each plugin instrument produces audio concurrently) changing the order will only affect viewing order on the small window.
The Off/On and Bypass operations on the Multi host should not be performed during playback as unpredictable latency will be introduced. For the Bypass, if the hosted plugins do not have any natural latency, the Bypass will not cause the audio be out of sync. If there is latency reported by the hosted plugins, then the Bypass will actually bypass the plugin from the routing chain of the Multi host, thus causing the audio to fall out of sync. Therefore, the Bypass on the touchscreen should be used instead of the Multi host one during playback.
You can also bypass a plugin slot from the controller window by long pressing on the button in the Multi host menu. Long pressing again will remove the bypass from the slot.
Output led meter: The meter shows grey when no output is present, green when signal above -40 dB is preset up to -6dB, yellow when signal above -6 dB is present up to 0 dB and red when signal above 0 dB is present. Of course some plugins may produce sound that is not clipping above 0 dB because we are in the digital domain, but some other plugins that are emulating hardware may be producing unwanted artifacts, so the meters should be taken into consideration according to the plugin hosted. As a general rule it may be safer to keep the signal under 0 dB so that you don’t have to worry about clipping.
Multi Plugin Control Button

As of version v16-a91f8a59--H2022-08-10--B2022-08-11 a new screen was added to the Multi host, where it allows controlling with the controller all the automatable parameters of the MultiHost. These are parameters that have been assigned automation ids.
See this article for Automation in the MultiHost.
The purpose of this screen is that from a single screen we can now control parameters from multiple plugins hosted in the MultiHost.
The screen is activated by clicking on the Multi Plugin Control button located at the top of the Multi host plugin.
Multiplugin Presets
The MPH stores its configuration, preset files and preset background image files in:
Windows: C:\Users\USER\AppData\Roaming\MP\Host
Mac: /Users/USER/Library/Application Support/MP/Host
multi host presets have an mxmlf file extension for audio effects and mxmli for instruments. They can be loaded via the multiplugin only. When you save a multiplugin preset it contains the current state of all loaded plugins including mappings, background images etc. However, it is still possible to Save individual xml plugin presets, with the Save button in the main controller screen, so you can use them in new future multiplugin instances. Saving a multiplugin preset will not automatically save individual single plugin xml presets.
Multi host maximum number of hosted plugins
We have set a 12 plugin holders limit in the multiplugin version. Although we don’t have to implement a limit, we did set one because in a DAW channel everything runs on the same audio thread. Even without the MPH all the plugins you load in a DAW channel run in a single CPU thread so that the audio processing is uninterrupted (not switching from one thread to another). Since, with the MPH you now have the ability to run 12 virtual instruments on a single thread, this can put extreme load on a single thread of the CPU, not because of the MPH but because of the number of plugins you have in a single channel. With a limit of 12 it means you can run 12 instruments and 12 effects with just one MPH instance for instrument and one for effects. Of course you can load as many MPH instances you want per channel, but even with the latest computers this may not be such a good idea, and it is in general better to spread the load across channels. We may increase this limit of 12 plugins in the future depending on feedback we receive.
In the July, 2024 update, the MP Instrument host (Single and Multi) plugin supports up to 16 stereo outputs
For setting up automation parameters in the Multi host see the article here
July 2024 update, for using the MP Host in Bitwig on Windows, see this article here
13. Background Images and Encoder Colors
Background Images
You can load background images to each page of the MPH. You can drag and drop an image, jpg or png format to the current page you are working on, from your file explorer. The image must be of 1920 x 1080 px resolution, jpg or png. The image will be saved when saving a preset and be placed in the Images folder on the same folder level as the Presets folder, in the MP/Host folder on your computer.
Encoder Background Colors
Right/Left clicking on the inner area of each encoder will display a palette of colors which you can select to color code the encoders. It’s a good practice to color encoders that belong in the same group, like an ADSR envelope. These encoder assigned colors are saved in multi host and single host presets.
You can disable the left click to show not show the color palette by editing the host.properties file in a text editor and changing the last line:
<VALUE name="disable_left_click_color_palette_on_encoders" val="0"/>
to
<VALUE name="disable_left_click_color_palette_on_encoders" val="1"/>
Then, save the file.
Remove the MP Host and load it again and now it should not show the color palette when left clicking in the center of the encoder.
14. M-Plugins on the Mac
Generate M-Plugins as Audio Units on the Mac
This feature is only available when loading MPH Single host as an AU and hosting AU third party plugins.
When you host an AU third plugin in an AU instance of the MPH in a new folder (which is displayed as a Category in MPH menu), you will see the option in the MPH Menu (right click in main window > Presets) to see the option Create Plugin. This will create a new .component file (AU) in /Library/Audio/Plug-Ins/Components/ that can be seen by the DAW as a new plugin.
Check out the new VST3 Generator Utility
Creating a new M-plugin is useful because when loaded in the DAW directly it will show the name that you chose.
This plugin's name will always start with "M-" so the file name of the plugin generated will be
M-the_name_you_entered.component. (Do not write the M- )
M-plugins have the exact same functionality as the MP Host. However, in an M-plugin you cannot remove the hosted plugin.
Once you create a new M- plugin, scan for your plugins in your DAW or in case of Logic Pro X reopen Logic and it will scan and find the plugins.
New AU plugins need to register with Mac OS so sometimes, depending on the DAW a reboot may be necessary. If your newly created M-plugin does not pass the validation scan in Logic, reboot the Mac and open Logic again. It should scan it again and it will pass validation. Otherwise you can manually scan it in Logic's Plugin Manager.
This M- plugin has all the settings, mappings, and references to the third-party plugin. It can be recalled from the MPH Menu or your DAW.
The default xml preset for the M-plugin saved in the .component file is the xml preset you have created. So, when you load the M-plugin, it will open the xml preset you created, without having to load another preset. Last, you can load other presets in the M-Plugin, because like mentioned before, the functionality is exactly the same as the single MPH.
If you save the M-plugin preset in a folder inside the ~/MP/Host/Presets folder, then the folder name will be used as the vendor (manufacturer) name for your M-plugin.
For example, if you save a Pro Q3 by Fabfilter in a folder ~/MP/Host/Presets/FabFilter then in your DAW you will find the M-plugin listed under the manufacturer FabFilter.

In Logic's expandable plugin menu you will find your M-plugin under manufacturer FabFilter.
 If you don't use a folder name and save it directly in ~/MP/Host/Presets/ then the manufacturer will be set as "AU".
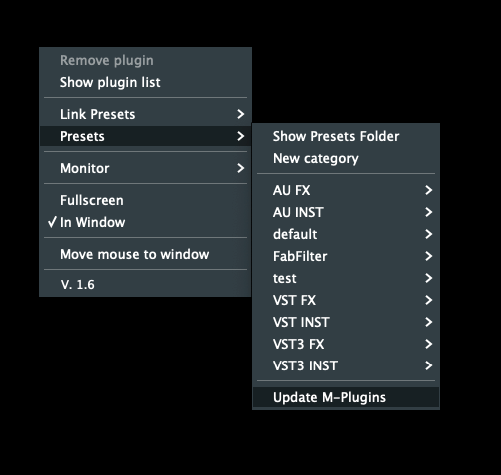
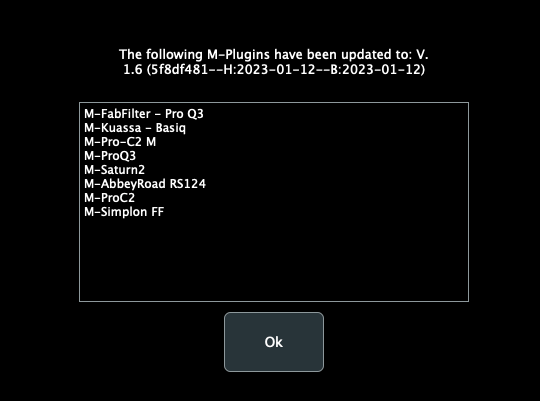
Update M- AU Plugins
This is an option in the main window menu, that should only be used when you have installed an updated version of the MP Host. When selected, it will place the new version of the MP Host inside the M- plugin .component files.
When you download and install a new version of the MP Host, click on Update M-Plugins option and it will update all your M- plugins to the newest MP Host version.
After the update you will see a report of all the plugins updated to the version updated.
Troubleshooting
M-plugins are not being created
If the M-files are not being created in the Audio Units directory
/Library/Audio/Plug-Ins/Components/ , (you cannot see the newly created M- plugin in the Finder under the components folder) it is because the OS permissions do not allow the MPH to write the new M-file.
To solve this issue, run in a terminal:
sudo chown -R "$(whoami)":staff "/Library/Audio/Plug-Ins/Components"
and optionally you may also run
sudo chmod 777 /Library/Audio/Plug-Ins/Components/
this makes the permissions in the Components folder less strict.
It will ask for your Mac's password. Type it and hit enter.
There should be no output on the terminal and you may close it.
Reopen Logic and try to create the plugin again.
M-plugins not loading in the DAW
If you have migrated to a new Mac, and copied over the plugins from the previous Mac, it may cause Mac OS to prevent opening M- plugins due to permissions.
Run in a terminal:
sudo chmod -R 777 /Library/Audio/Plug-Ins/Components/M-*.component
It will ask for your Mac password, type it and hit enter.
There should be no output on the terminal and you may close it.
Reopen Logic Pro X or the DAW and try to load the M-plugin.
How to remove M-plugins
Delete the M-name.component file from /Library/Audio/Plug-Ins/Components/
Open Logic's plugin Manager and search for the M-plugin. Select it and then choose the "Reset and Rescan Selection".
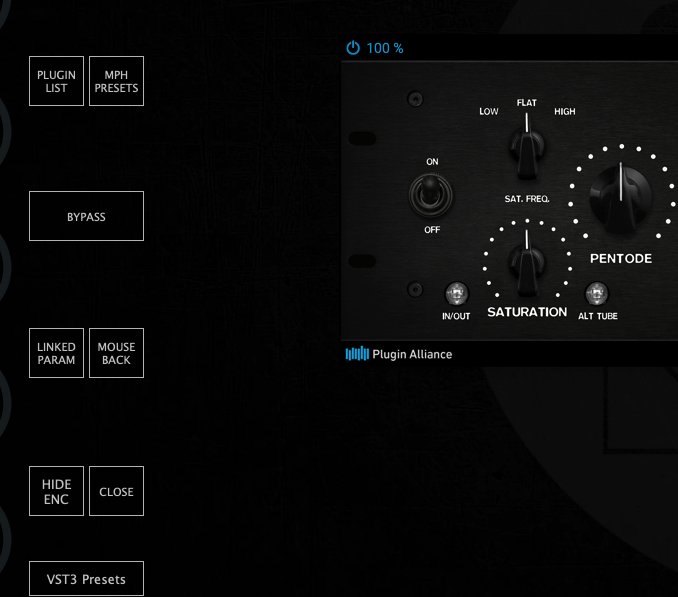
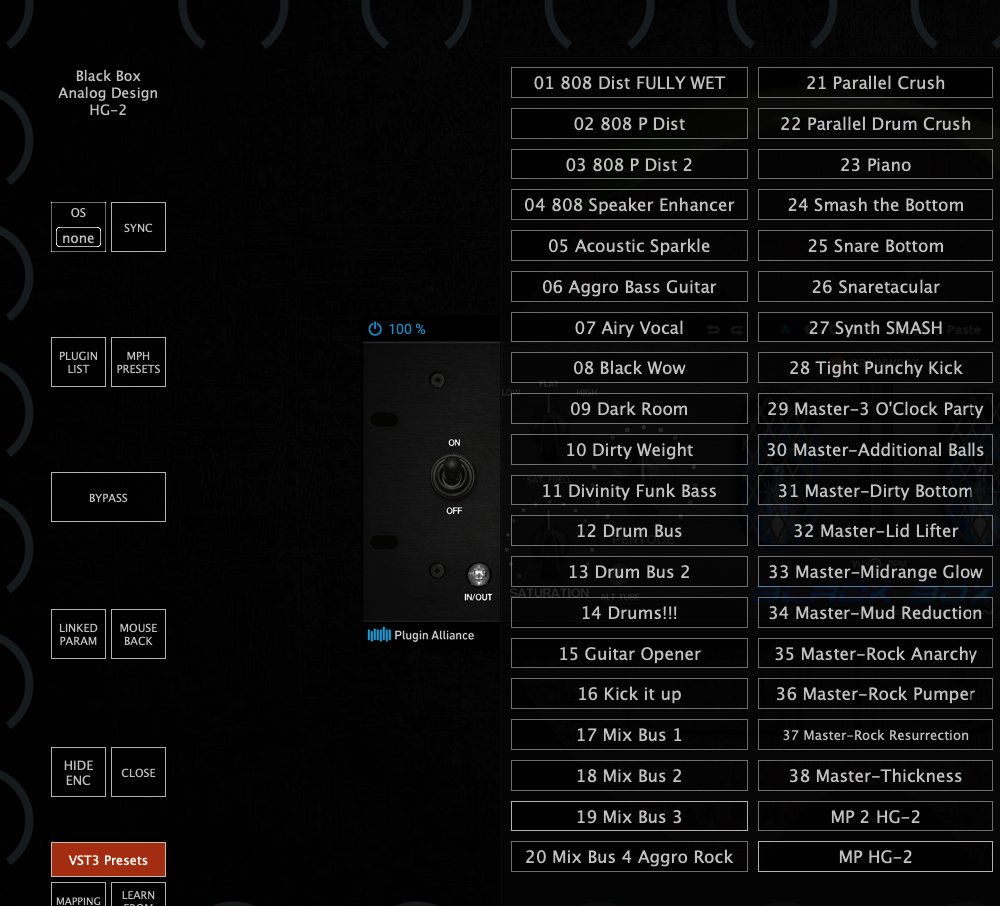
15. Plugins with external VST3 AU Presets
Some vendors create their plugin presets as .vstpreset files for VST3 or AU plugins. One such example is Plugin Alliance plugins. When you host in the MPH such plugins, upon loading the third party plugin the MPH will search under:
Mac /Users/USER/Library/Audio/Presets
Win C:\Users\USER\Documents\VST3 Presets\
the folder with the plugin’s vendor name (ie Plugin Alliance) and within that, the folder with the name of the plugin loaded and it will display these vstpreset files in the menu on the controller’s window.
When a plugin with VST3 Presets is loaded the MPH will automatically display a button on the top encoder row named “VST3 Presets”. This button brings up a list with the available VST3 Presets of the hosted plugin.
Alternatively, to view and load VST3 Presets: Right click > Presets > VST3 Presets
From that list you can choose any preset and it will be automatically loaded in the hosted plugin.
16. How to Reset the MP Host Plugin
All the settings and scanned plugins references are stored in the host.properties text file located in:
Windows: C:\Users\USER\AppData\Roaming\MP\Host
Mac: /Users/USER/Library/Application Support/MP/Host
To reset all the settings and return to default delete or rename this host.properties file.
To reset the default preset, just delete the default.xml and it will be recreated the next time you load the MPH in the DAW.
When you delete the host.properties file your MPH presets will not be affected. When the host.properties file is deleted, you will need to select the target monitor the first time you run the MP Host plugin.
If when loading the MPH is loading a preset you created instead of the empty preset, delete the default.xml from the Presets folder.
17. Windows Unified Option
This option can be accessed from the right click menu.
When it is unchecked (default), the hosted plugin has its own Window instead of being embedded the MPH Window. If checked, the hosted plugin will open inside the MPH existing Window.
The default value is "unchecked - not enabled".
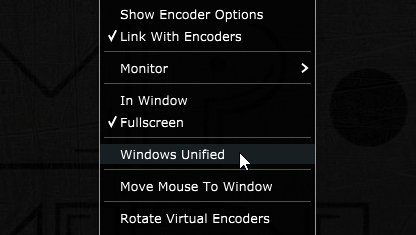
After you check the box, right click anywhere on the black area of the MPH big Window to display the menu.
Click again to hide the menu and this will reload the GUI of the hosted plugin and the change will take effect.
This "Unified Window" option is helpful if you are using multiple 4k monitors and you encounter the hosted plugin to appear outside the controller monitor. It ensures that the hosted plugin will always be placed at the center of the MP Host window. It is also helpful if plugins generate new option windows and these may be hidden behind the MP Host.
This option is saved in a plugin xml preset so next time you recall your preset it will be part of it.
Note that if the Top Bar option is enabled, then Windows Unified option is not available to use abnd it will be greyed out. Disable the Top Bar option and the Windows Unified can be enabled.
18. Hiding the controller window and moving the hosted plugin
These options is available via the right click menu.

This is particularly useful when working on a laptop and when you don’t have the MP Controller with you.
Hide Window will hide the controller’s big window and will show only the hosted plugin. The hosted plugin will have a title top bar and it can be dragged with the mouse. Closing and reopening the small MPH window, will hide the hosted plugin and display it in the center of the monitor. This option is global, meaning it will affect all plugins of the MP Host.
Show Plugin Top Bar will add a title bar to the hosted plugin and allow to drag the hosted plugin to another display with the mouse. You will still be able to control the plugin with the controller. This option is global, meaning it will affect all plugins of the MP Host.
In the 2025-04-30 update, we introduced a new button on the left side of the top bar that restores the plugin window to its original position on the MP Controller.

See this example video
Note: if you move a plugin to a different position and then resize it, the way the plugin handles resizing may affect how it appears when returned to its original location. In some cases, it might not be perfectly centered, and you may need to adjust it manually. To avoid this, use the plugin’s “Set Default Size” option (if available), save it with that size, and it will correctly snap to the center when restored.
Some plugins have automatic monitor resolution detection and change their size automatically when moved to a new monitor with a different resolution. Such plugins may shown cropped and magnified when hosted in the MP Host and moved to a monitor with a different resolution than the MP Controller.
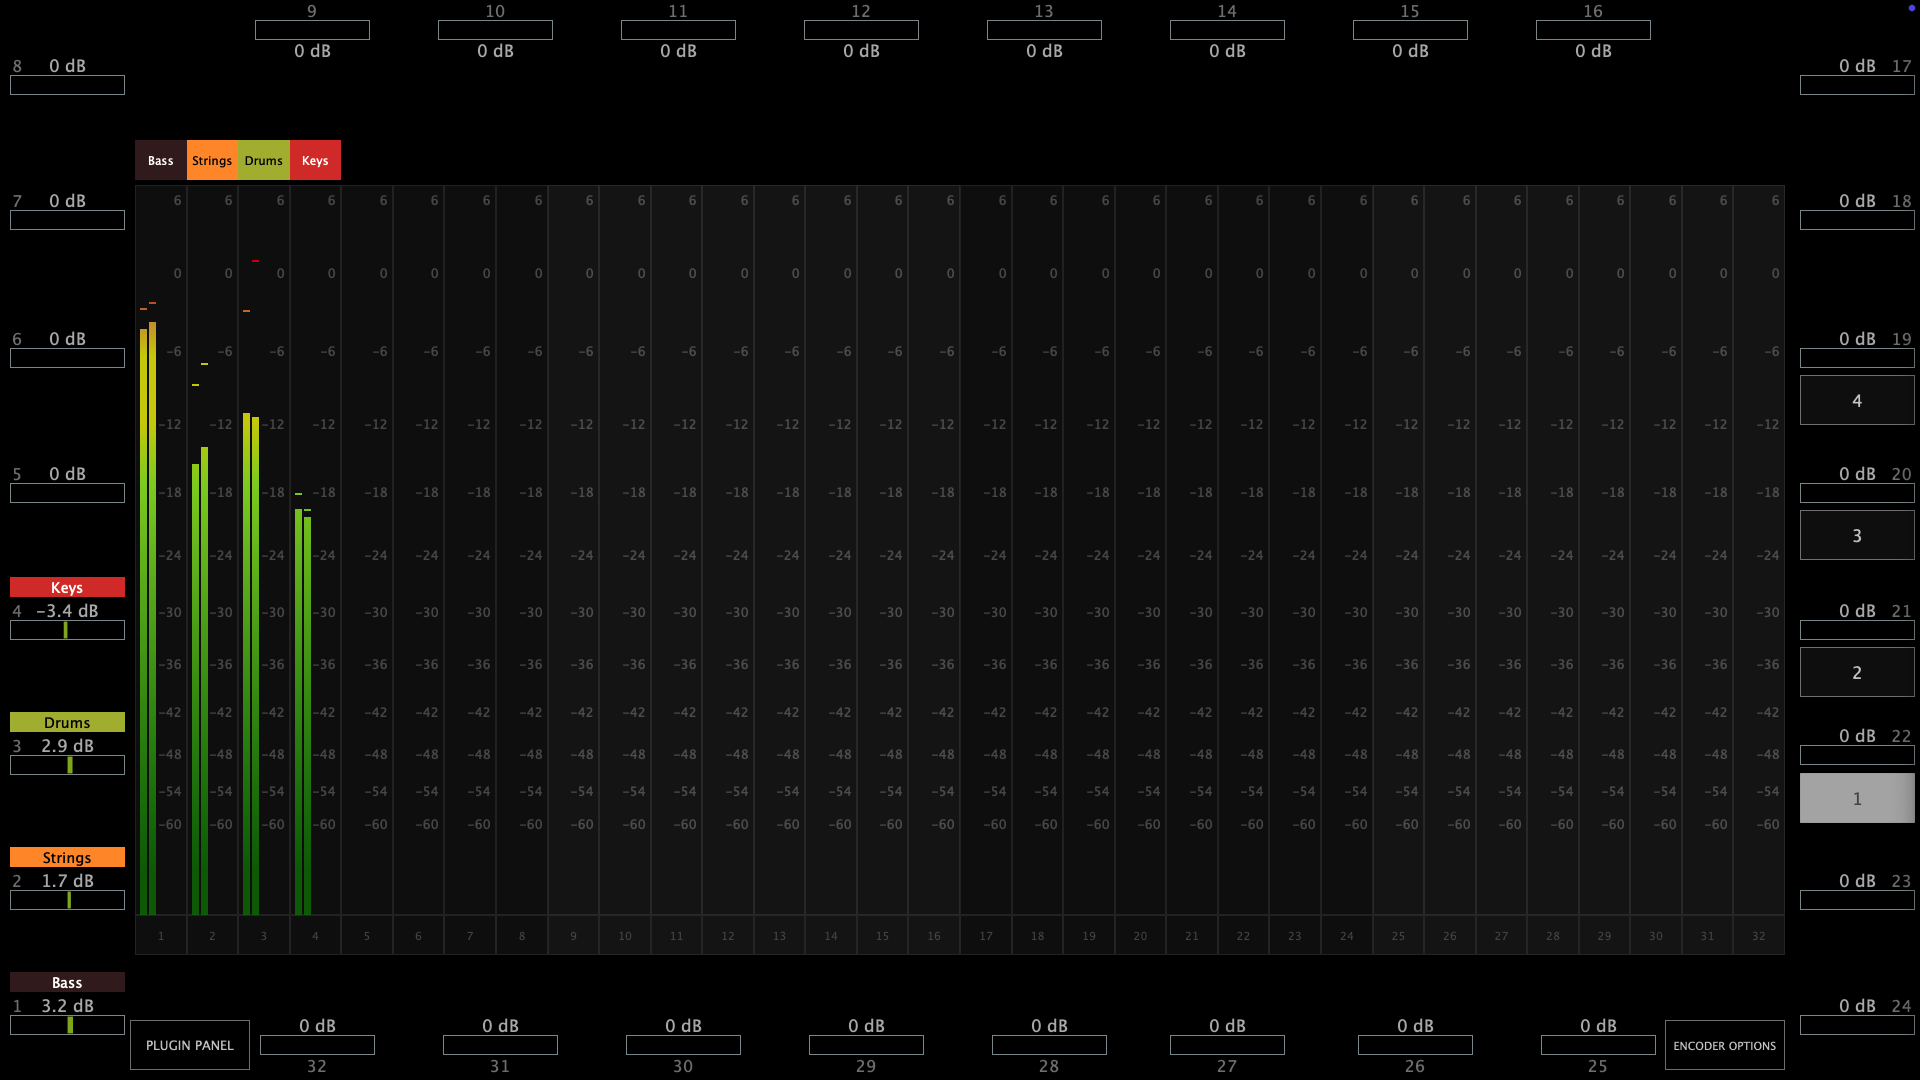
19. MP Gain Utility - Version 2
The MP Gain Utility plugin enables you to control the +/- gain on your tracks from the MP Controller. With the MPGU plugin you can control up to 128 gain utility plugins. You can use it for mixing and gain staging. It works on all DAWs and does not require any configuration.
See the short promo video
Here is a short tutorial video
Current version: v2.0-689ea7e--H2025-09-10--B2025-09-10
Download
The MPGU can be downloaded from the user portal.
How it works
The MP Gain Utility consists of two plugins.
One server plugin (displayed on the mp controller) and one client plugin (displayed on your DAW).
Both are lightweight plugins and consume negligible amounts of cpu and ram resources.
The MP Gain Utility can be found in your DAW as vendor MPUT.
You only need to load one instance of the server plugin per DAW project. The server plugin can be placed on any track in your DAW however there must be only one instance loaded.
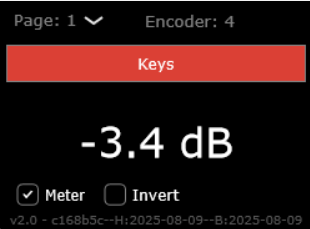
The client plugin can be placed on any track and it will act as a gain plugin controlled by the corresponding encoder shown on top. You can add up to 128 client plugins in the same DAW project.
You don't need to open the client plugin to control its gain from the mp controller.
Each client plugins maps automatically onto the next available encoder on the mp controller.
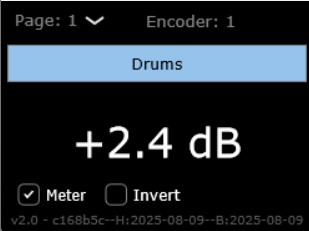
Turning an encoder to the left will reduce gain in increments of 0.1 dB, turning an encoder to the right will add gain.
The values are displayed in dBs and the range is -40 dB to +40 dB.
The Meter checkbox when checked (checked by default) sends the volume signal to the server to display it.
The Invert checkbox when checked (unchecked by default) inverts the gain on the client.
Right click on the empty black area to select the target monitor of the mp controller.
Once you load the server plugin then load a client plugin where you want.
The server plugin does not process any audio, it allows audio to pass through it unaltered. The client plugin processes audio with its only function being adding or subtracting volume to the signal.
Each client plugin carries an id starting from 01 to 32. Each id corresponds to an encoder on the server plugin and the controller per page. There are 4 pages and they can be switched from the right column of the server.
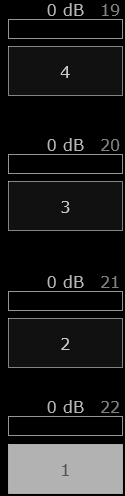
When you load the first client plugin, it will take id 01, mapped onto encoder 1 and it will be controlled by encoder 1. If you load another one it will take id 02 automatically and so on up to 32.
If you change the encoder id from the client it will be reflected on the server. If you change the page on the client the server will also go to that page.
If you have a clients in page 1 with ids, i.e. 1, 2, 7 and you add a new one, it will take id 8. When adding a new client it finds the encoder with the greatest id and adds the next one. If there are no available ids in that page it will go to the next page and take the id after an existing encoder with the greatest id.
You can load multiple client plugins on the same track. For example, you can enter a client plugin before an audio effect and one after an audio effect, on the same track to do gain staging.
Gain Staging
Add a client plugin before a plugin you want to control the gain staging, ie a compressor. Add another one after. Disable the meter on the first client and enable the meter on the second client and enable the Invert.
Turning the encoder to increase the value it will add gain feeding the the compressor (on the first client plugin) while at the same removing the same amount of signal after the compressor from the second client plugin. Your signal will remain at the same level and you will only hear the difference made by the compressor. You can apply the same principle to any plugin or set of plugins.
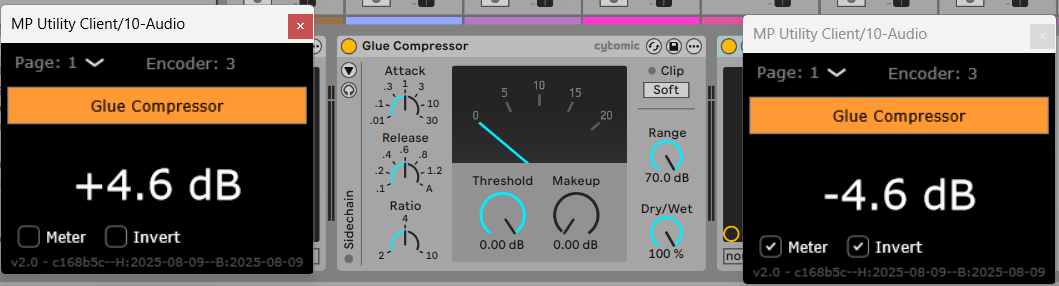
Do not copy and paste existing client plugins because the client will not take a new id automatically.
Always load a new client plugin
Selecting a new id for the client plugin will copy over the name, color and dB value to the new encoder, overwriting any existing client.
Naming and Coloring
Once you add a new client plugin you can enter the name in the client text box and it will send the name to the server.
Alternatively, you can write the name onto the corresponding encoder on the server plugin and it will send it to the client that has the same encoder id.
Cubase and Logic Pro have the ability to send the track name of the plugin via the VST protocol. The gain utility takes advantage of this and receives the name of the corresponding track where the client plugin(s) is placed.
In Cubase, it also receives the color of the track along with the name.
When in Cubase or Logic Pro, a checkbox appears on the client named "Track name" which is checked by default. This enables receiving the track name automatically from the DAW.
When you type a custom name in the client, the check box will automatically turn off. The same applies when changing the name or the color of the encoder from the server.
Enabling the "Track name" checkbox again will instantly receive the track name.
Assigning Colors
To assign a color to each on-screen encoder right click on the encoder and it will show the color palette window.
You can copy the lastly used color by clicking on it on the color palette:

Reset to 0 dB
Double click on the meter of the on-screen dB meter of the server next to the encoder and the value will return to 0 dB.
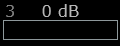
Identifying a meter or an encoder.
Click on the name of the encoder and it will blink the corresponding on screen meter.
Click on the meter and it will blink the corresponding encoder.
Automation
If you would like to record gain automation using the MPGU, you can do it at the track you placed the server plugin. Each encoder is automatable like in the MPH.
The client has no controllable parameters and it only displays the value in dB.
Total Recall
When you save your project, all the values and state of the server and client will be saved with your project. When you open your project everything will be recalled. If you delete the Server plugin by mistake, just load it again and it will sync up with the existing clients.
The MPGU, unlike the MPH, does not save presets.
Using it with the MPH
You can load the MPGU and the MPH in the same DAW project. The Controller Icon button works as it does on the MPH. Clicking on the button will close any open MPH instance and display the MPGU on the controller. Clicking on the Controller Icon button of the MPH, will close the MPGU window and display the MPH.
You can also switch to it from the small bar icon on your Mac or Windows or using the Plugin Panel.
Cubase meter settings
In Cubase if you are using mono tracks, ensure you have your track meters set to post fader.
Right click on the meter in Cubase and set it to Post-Fader.

How does it work and troubleshooting
The server and client use the OSC protocol to communicate and it requires port 6565 and 6566 to be open and available.
If the client and server do not communicate you can check if the port is available.
On the Mac's terminal enter this command:
lsof -i : 6565
If nothing is returned → nothing is currently using port 6565. You can check the same for port 6566.
If something is returned → it shows the process using that port.
On Windows open a cmd window and type:
netstat -ano | findstr :6565
If nothing appears → port 6565 is not currently in use. You can check the same for port 6566.
If you see output, the last column is the PID of the process using it.
If some other process is using the port you need to stop be in order to use the MP Gain Utility.
Alternatively, you can change the default port numbers from the mputility.properties file and use different ports by opening the file in a text editor.
20. Audiogridder - MP Host: AG-MPH Guide

Audiogridder - MP Host Integrated Guide
The Audiogridder project is an open source project that enables DSP processing of third party plugins outside the DAW. See here
We have created a modified version of the Audiogridder, called AG-MPH so that it works in an optimal way with the MP Controller. See example videos Logic on Mac and Bitwig on PC, however the principle is the same for all DAWs.
To get the installer of the AG-MPH send us an email.
The latest AG-MPH version is v1.2.0-1328f91--H2023-09-08--B2023-09-09
Why did we make this?
Audiogridder, even when used on the same computer, utilizes much better the CPU and allows running more plugins than when running then directly in the DAW. In fact, on a recent test we did on a Mac M1, we found that we could run almost 3 times more - heavy on resources - Acustica plugins than when hosted the same plugins in Logic. (We were able to run 10 instances of an Acustica Eq plugin directly hosted in Logic. We were able to run 28 instances of the same Eq plugin via Audiogridder).
You can run the AG-MPH without additional latency by setting the buffer block size to 0, however for taking advantage of the DSP offloading we suggest to set it to 1 or 2 blocks of buffer size where the latency is hardly noticeable (that of course also depends on your computer and the DAW project you are running).
As the number of plugins loaded in Audiogridder increases, you may want to increase the buffer size (blocks) of the Audiogridder to avoid audio dropouts and the exact same applies when using the AG-MPH.
What we have changed
-
After opening the AG-MPH plugin in the DAW, click on the + symbol and it will load an instance of the MP Host on the MP Controller. (It is required that you have the latest MP Host VST3 installed, Audio and Instrument plugins).
-
The AG-MPH hides the small window of the MP Host, thus you don’t have an extra window floating.
-
It automatically gets the name of the hosted plugin or preset from the MP Host and displays it on the AG-MPH slot.
-
Selecting a plugin slot in the AG-MPH plugin automatically opens on the controller’s screen.
-
We made the bypass coloring of the slot more obvious and now displays the word “bypass”.
-
The processing of DSP works and other settings/options, exactly as the original Audiogridder and we have not changed that.
-
Switching from one instance of the AG-MPH to another, unlike the original AG, it un-highlights the current plugin slot and highlights the selected one. This applies when running the MPH host directly in the DAW. The two, AG-MPH and MPH single/multihost can be loaded in the DAW at the same time and switching from one to the other will un-highlight the previously selected slot.
-
We added a Slot Selector. This allows to select plugins from the touch screen via the Select Slot button. To enable/disable the button from showing, uncheck the top-right box on the AG-MPH window. This is a universal option and it will affect all instances of the AG-MPH.
Prerequisites and Settings
You need to have the latest MP Host installed (after March 23, 2023) for the AG-MPH to work. The MP Host installer is not included in the AG-MPH installer. There are 2 separate installers.
You need to install the AG-MPH using the AG-MPH installer. It will install
-
The AG-MPH server and AG-MPH plugin tray.
-
On Mac, the AG-MPH VST3, AU and AAX, all universal binaries x64.
-
On Windows, the AG-MPH VST3.
In Windows, the AG-MPH server is placed in C:\Program Files\AG-MPH\
Create a shortcut on your desktop or taskbar for convenience.
On the Mac, it will place it in Applications.
For both Win and Mac, you only need to run the Server once.
The plugin tray will automatically launch when you load the AG-MPH plugin in the DAW.
Check that you have these settings in AG-MPH Server (From the menu choose Settings)
Once you load the AG-MPH plugin in the DAW, click on "add server" and type in 127.0.0.1
This IP address (127.0.0.1) is a universal address on all operating systems for the local machine. By adding this as the default server you ensure that the AG-MPH will always connect to the local machine via the fasted route (instead of going through virtual ethernets or your router).
Check that the MPH Single Instrument and Audio effect were found and scanned by the AG-MPH
Right click on the AG-MPH icon on the task bar while it is running.
Select the option Plugins.
You should see the 2 MPH Single Plugins. If you see any other plugins in red font you can ignore them.

Knowhow and limitations
-
You can have both Audiogridder and AG-MPH installed on the same computer, however, you cannot run Audiogridder server at the same time you run AG-MPH server. Only one server can run at a time.
-
When using the AG-MPH server, it automatically loads the MP Host plugin VST3. You cannot load directly in AG-MPH any other third party plugins, but only through MPH.
-
You need to run the AG-MPH server app and then the AG-MPH plugin in the DAW, just like the original Audiogridder.
-
If you plan to run an AG-MPH server on another computer, then the MP Controller should be connected on that computer, because the server is the app that runs and displays the hosted third party plugin. You can run AG-MPH on a Windows computer while running the AG-MPH plugin on a Mac computer, just like the original Audiogridder. See Video
-
Via the AG-MPH plugin, you can connect on an AG-MPH server in the same way you connect on an original Audiogridder server.
-
On the Mac, you need to give the AG-MPH permissions in the Mac Accessibility settings, so that it does not complain when starting the server, just like the original Audiogridder. Press the + button in Accessibility and navigate to AG-MPH to add it to the list.
-
Audiogridder server scans all plugins on start. This is an option you should disable from the Server settings. AG-MPH and the original Audiogridder share the same settings, so AG-MPH will not rescan your installed plugins. However, AG-MPH has been programmed to only scan the MPH Single Audio Effect and Instrument.
-
The AG-MPH was built using the codebase from Audiogridder version 1.2.0 stable which is the latest as of May 2023.
-
The third party plugins are being hosted by the MP Host and the workflow remains the same as when using the MPH in the DAW including presets etc.
-
You can install MP Host updates when we issue them, and it will continue to work normally with AG-MPH. There will not be a special edition of the MPH in order to work with AG-MPH.
-
There is no additional CPU load when using the AG-MPH, compared to the original Audiogridder. There is no additional latency either when compared to the original AudioGridder.
-
AG-MPH should be set to “Chain Isolation” mode on the server settings (which is already the default)
-
We noticed that the AG-MPH AU does not load on Ableton on the Mac, however the same issue occurs with the original Audiogridder AU plugin. The Ableton Live's 11.2 log says “Failed to initialize the plugin”. This may not be the case on your Mac. The AU runs fine in other DAWs. The VST3 works fine in Ableton Live.
-
Resetting the Audiogridder server settings on the Mac (by deleting the files) will reset the AG-MPH as well. To reset Audiogridder/AG-MPH go in your home folder and Press Command+Shift+Dot this will show your hidden folders. You will have a folder .audiogridder grayed out and delete it.
16. How to Uninstall AG-MPH on Windows:
- Delete the folder C:/Users/[name]/AppData/Roaming/AudioGridder or by navigating to %appdata% and then deleting the AudioGridder folder
- Delete the folder C:/ProgramFiles/AG-MPH and C:/ProgramFiles/AG-MPHPluginTray
- Delete the folder of plugins from C:/ProgramFiles/Common Files/VST3/AG-MPH
17. When using Wavelab, for the AG-MPH plugin to connect to the server, an audio file needs to be imported in Wavelab and press play. See video here
Setting Permissions for AG-MPH server on the Mac
If you see this message when you start AG-MPH
 Go to Settings > Privacy & Security > Accessibility

Click the + sign and add AG-MPH

Restart AG-MPH
Troubleshooting on the Mac
If you see an error, it may be that the VST3 plugin cannot be accessed by the AG-MPH.
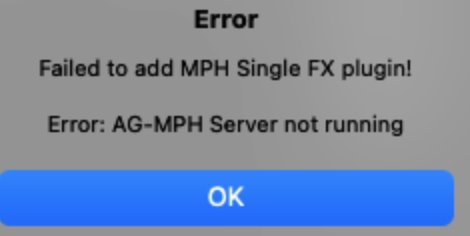
AG-MPH works with MP Host VST3.
Quit the AG-MPH server.
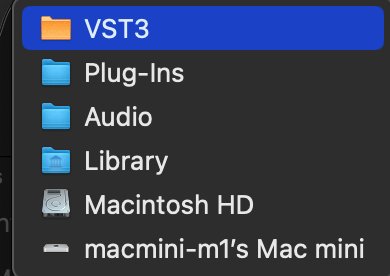
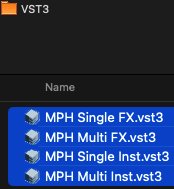
Then reset Audiogridder/AG-MPH go in your home folder and Press Command+Shift+Dot this will show your hidden folders.


When you reset AG-MPH, you need to check the server settings and set them again as described in the section above.
21. Activating the MP Controller on other computers
You need to generate a new mph.license file to use the MP Host on another computer.
You don’t need to enter the controller serial again in the user portal.
To generate a new mph.license for another computer you need to log on the user portal from that new computer and choose one of the following methods to create your license:
- Use the License Manager application (recommended)
- Register via the MP Host plugin by uploading the new hardware.id file (generated when you run the MP Host) and download the mph.license file.
First, download the latest version of the MP Host from the user portal and install it on your new computer.
If you plan to use your older computer again do not delete the mph.license and hardware.id from the older computer. IT is ok to keep the files on both computers, given that they have been generated for those computers.
DO NOT USE HARDWARE.ID or MPH.LICENSE FILES FROM OTHER COMPUTERS.
YOU NEED TO RUN THE MP HOST TO GENERATE NEW ONES.
On the new computer, if you have copied the hardware.id and/or mph.license from another computer then delete the hardware.id file and mph.license from /MP/Host folder
See full path here
To generate a new license see the initial guide here
How to navigate to the MP/Host folder from the MP Host plugins and delete the hardware id:
Open your DAW and load the Single FX or Instrument MP Host plugin.
Open the plugin and click on the Controller icon button to open the MP Host window on the MP controller.Right click on the main black area of the big window
Select Presets > Show Presets Folder and it will open the MP/Host folder. See here
In that folder you will find the hardware.id file. Note that on the new computer if the hardware.id and mph.license are present, ie have been copied via time machine or hard drive transfer) delete the hardware.id and mph.license files
Then run the MPH plugin in the DAW to generate a new hardware.id file. (remove and reload the MP Host plugin in the DAW if it is already loaded)
Then login in your account and upload the new hardware.id to the server to get the new mph.license

There is a limit on the activation server for 5 different computers. If you need activation for more computers, please contact us.
If you see the message “License not found, Controller Not connected” see here.
22. Get the mph.license from the user portal
Open the /MP/Host folder as shown here and upload your hardware.id file in the user portal
The hardware.id file is automatically generated when you run the MP Host plugin.
If the hardware.id file is not being copied to the Mac's Desktop when trying to setup for the first time, see here
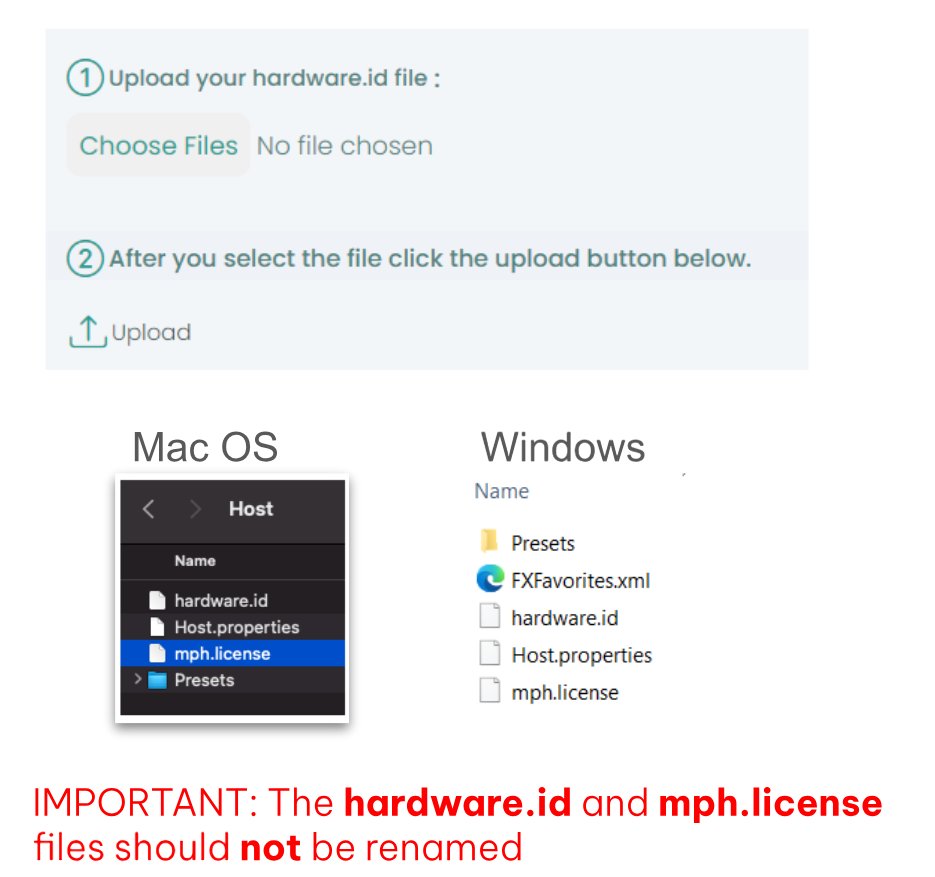
Download the mph.license and place it in the /MP/Host folder next to the hardware.id file

23. Receiving update notifications for the MP Host plugin
As many tend to keep their studio computers offline or behind firewalls, this would prohibit our plugin to connect on our server and check for updates.
We publish new versions in the mpmidi.com/latest-readme first page and on https://mpmidi.com/mph-versions.html
We don't have a notification system yet, but an easy way to get notifications for new versions is by registering at one of the following free services:
https://www.followthatpage.com
and enter this link to monitor
https://mpmidi.com/mph-versions.html
24. Best Practice recommendation
MP Controller transforms your third party plugins into a hardware console so that you can control them as if it were hardware.
We suggest that you start with one favorite and mostly used plugin, ie like an equalizer or compressor or synthesizer plugin you use all the time. Make the most convenient mappings/links to you and incorporate this in your workflow.
After a few projects and heavily using it, you will feel like you know this interface and reach for the controls intuitively. Repeat this process with another plugin and so on.
Trying to use and map many plugins at once and use MPH in every plugin, may not help improve your workflow as you introduce too many new things at once.
Enjoy your new controller!
25. Controlling UVI Workstation, Omnisphere by enabling Host Automation
Link Parameters
To enable Host Automation right click on the parameter you want to link and choose Enable Host Automation.
To avoid getting conflicting MIDI CC incoming messages, it is a good practice at first to clear all MIDI assignments in Omnisphere (note that this clears automated parameters assignments as well, save as template if you want to keep your assignments).
Additionally, note that as of Omnisphere V3.0.2 the AU version of omnisphere does not report the units of the automatable parameters and it was reported to Spectrasonics so it may be fixed soon. You can use any Omnisphere type (VST2/3/AU) in the MP Host.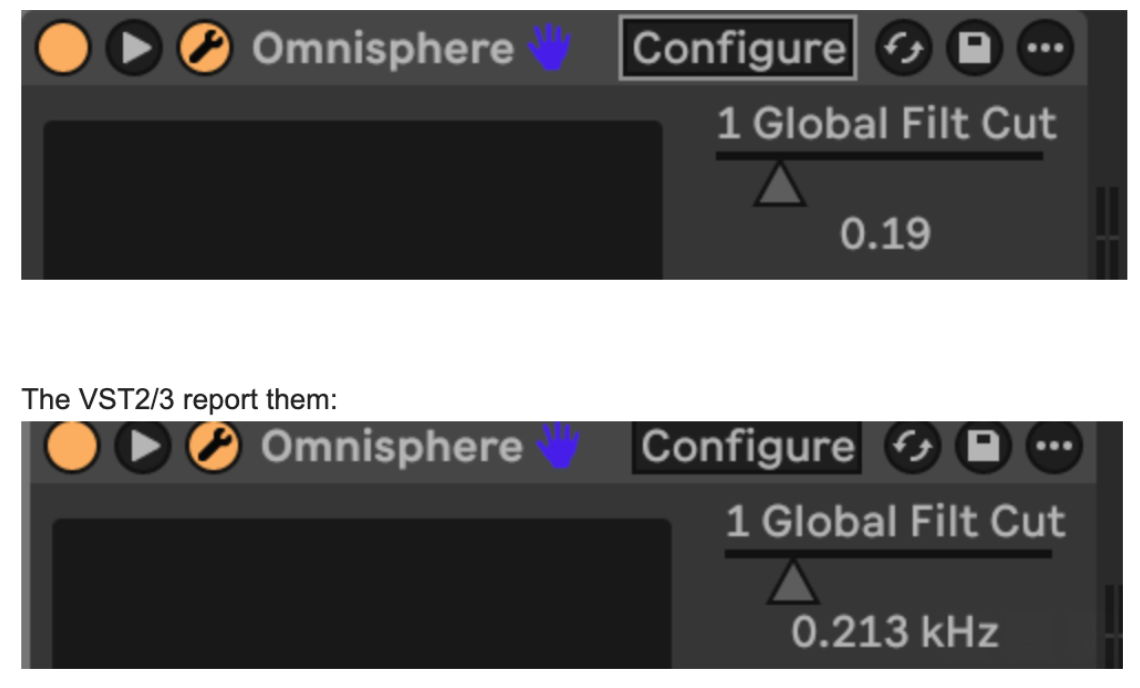
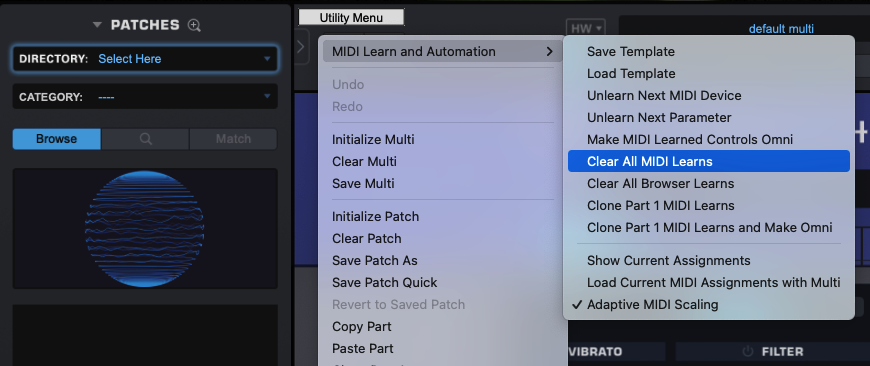
Using our premade template
Omnisphere has thousants of parameters and a limit to control only 512 parameters per instance. Therefore, we adjusted our template accordingly. The template has mapped 415 parameters so you can link more as you go but do not exceed 512. You can use "Show Current Assignments" from the Omnisphere menu as shown above to see which and how many parameters are enabled for automation.
To use our template update to Omnisphere 3.0.2. AU does not report automatable parameter units as of this version and this was reported to Spectrasonics to fix it. VST2/3 report the units.
How to use our template:
You need to do this process once. Here is an overview video that shows the following process.
Download the template from here (same for Mac and Windows, all DAWs - it is an Omnisphere .midiLrn file).
Install our latest MP Host Beta version prior to using the template for best coloring/grouping of parameters
Extract the zip contents to your Omnisphere STEAM folder: /STEAM/Omnisphere/Settings Library/Presets/MIDI Learn/
For STEAM folder locations see the Omnisphere manual
Load the MP Host Instrument plugin (Single or Multi) in your DAW
Right click on the controller window and disable Automap:
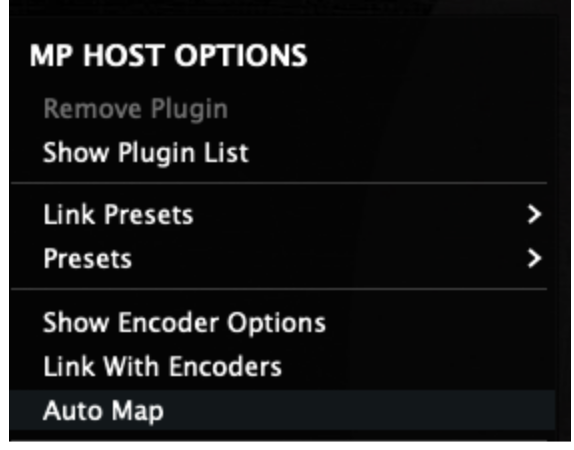
Then load Omnisphere from the Plugin List (anyone from AU,VST2/3)
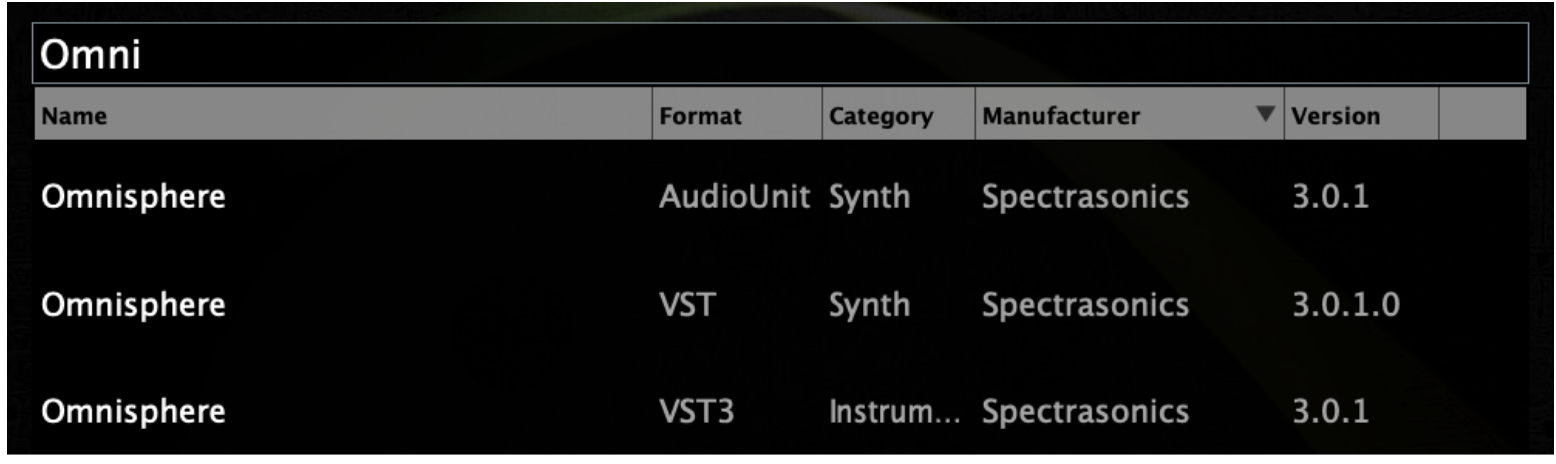
Clear all MIDI assignments and automation ids in Omnisphere.
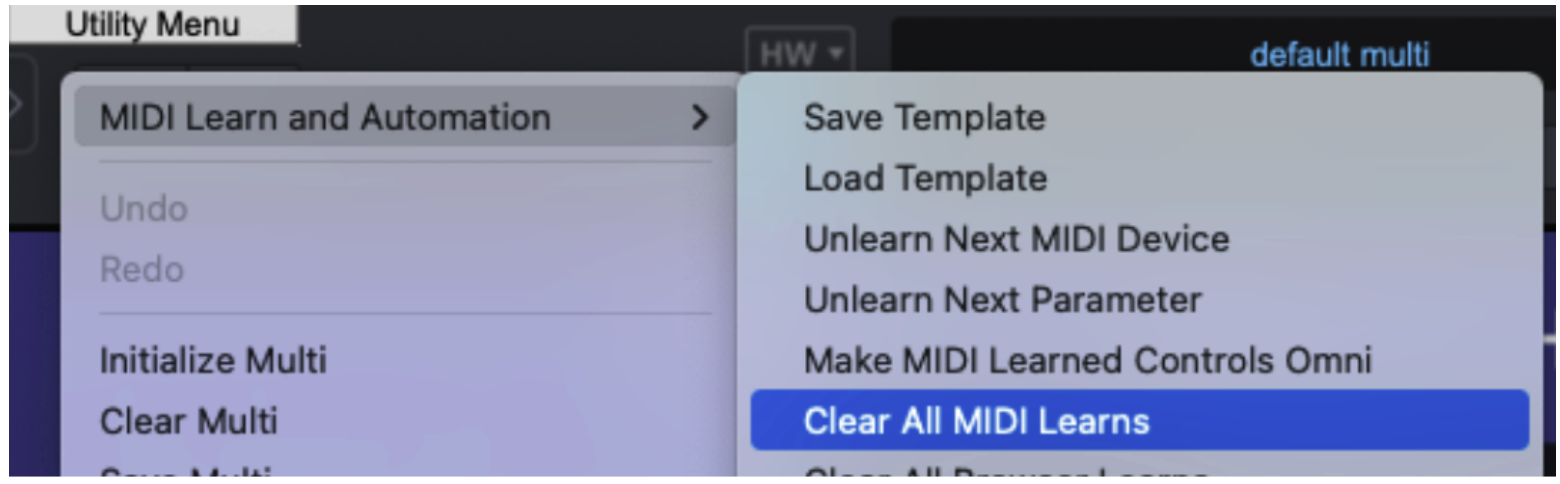
Then from the same menu choose Load Template

The file dialog will open and you will see the Omnisphere template you copied from the zip.
Choose ![]()
Now, right click again on the controller's empty area and from the right click menu, enable Automap again.
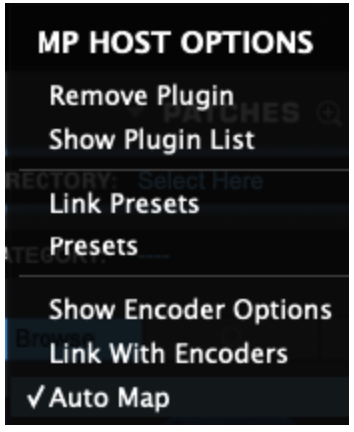
Then again from the right click menu, Remove Plugin.
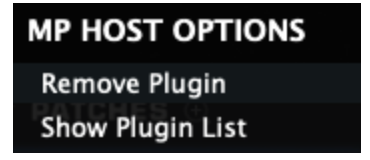
Now load Omnisphere again from the Plugin List
You will see the parameters linked and ready to be controlled. There are 9 pages of parameters linked, grouped by color.
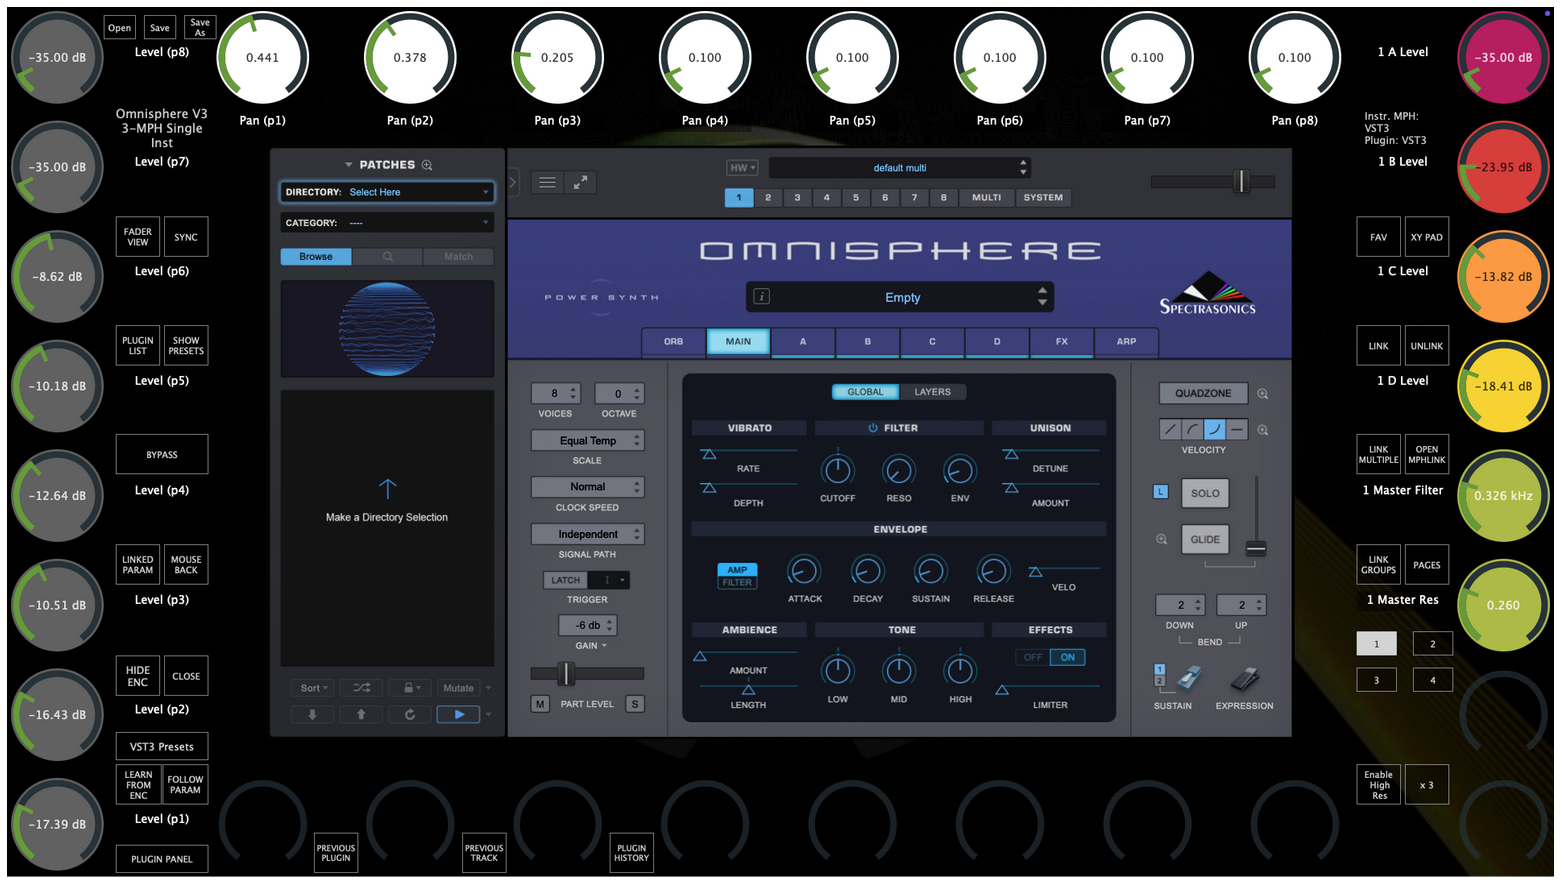
Moving any parameter with the mouse will cause the linked encoder to blink. If the encoder is on another page, it will go automatically to the other page.
Optional: You can rename the pages by right clicking on the page title and save your preset
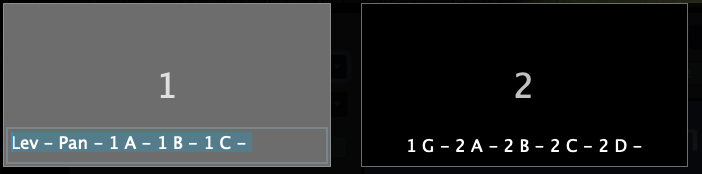
Other Omnisphere V3 templates (OPTIONAL)
We have created additional templates for each part. These have more parameters linked per part. You need to load a different template to control a different part (1 - 8) of Omnisphere.
Download from here
For example, to control Part 2, load MP PART2.midiLrn in Omnisphere as shown above.
Note that when you load a different template any existing automation will be replaced by the parameter that matches in the loaded template. Therefore these templates are best to use for sound design and live performance.
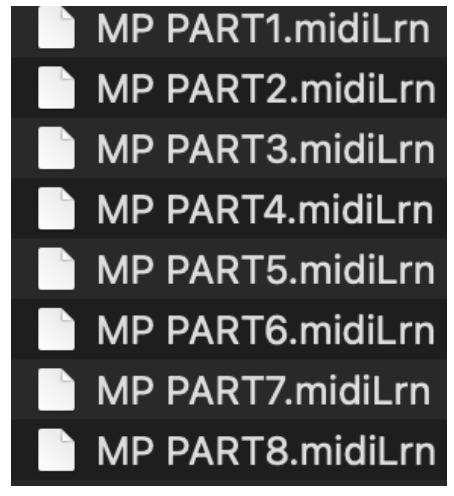
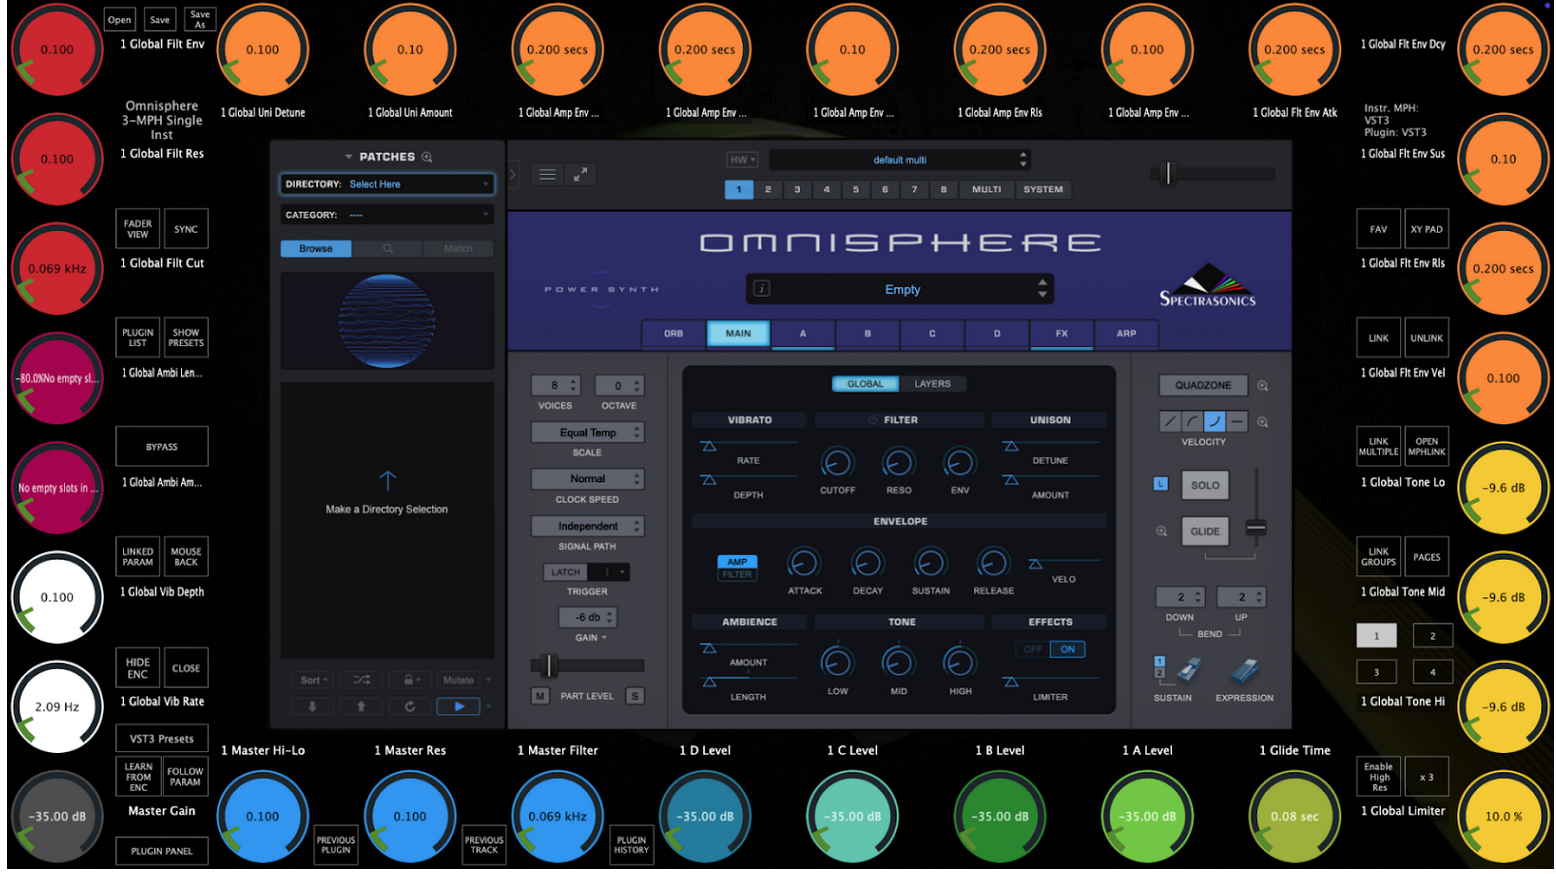
Pages 6, 7, 8 control global parameters.
You can save this as an MP Host preset and load it from Favorites or the Preset List.
This template now controls Part 1 of Omnisphere. You can edit the linked parameters (unlink, replace with other etc, link parameters from the FX section that we have not linked)
To control Part 2 - 8, load the corresponding template and the parameters will be automatically updated.

Select Part 2 in Omnisphere and load the MP PART2 template.
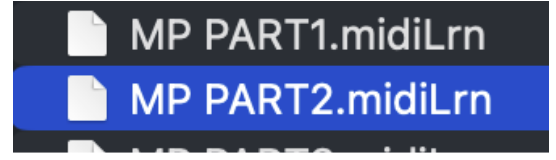
All parameters now begin with "2"
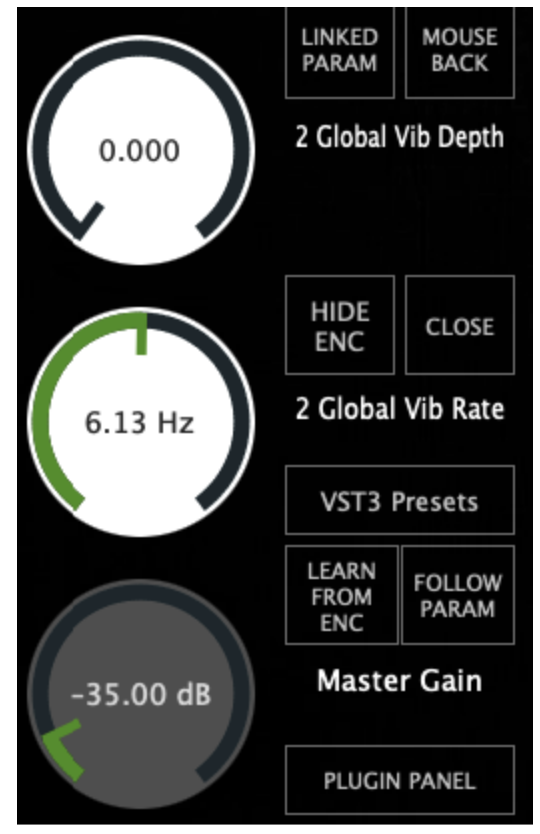
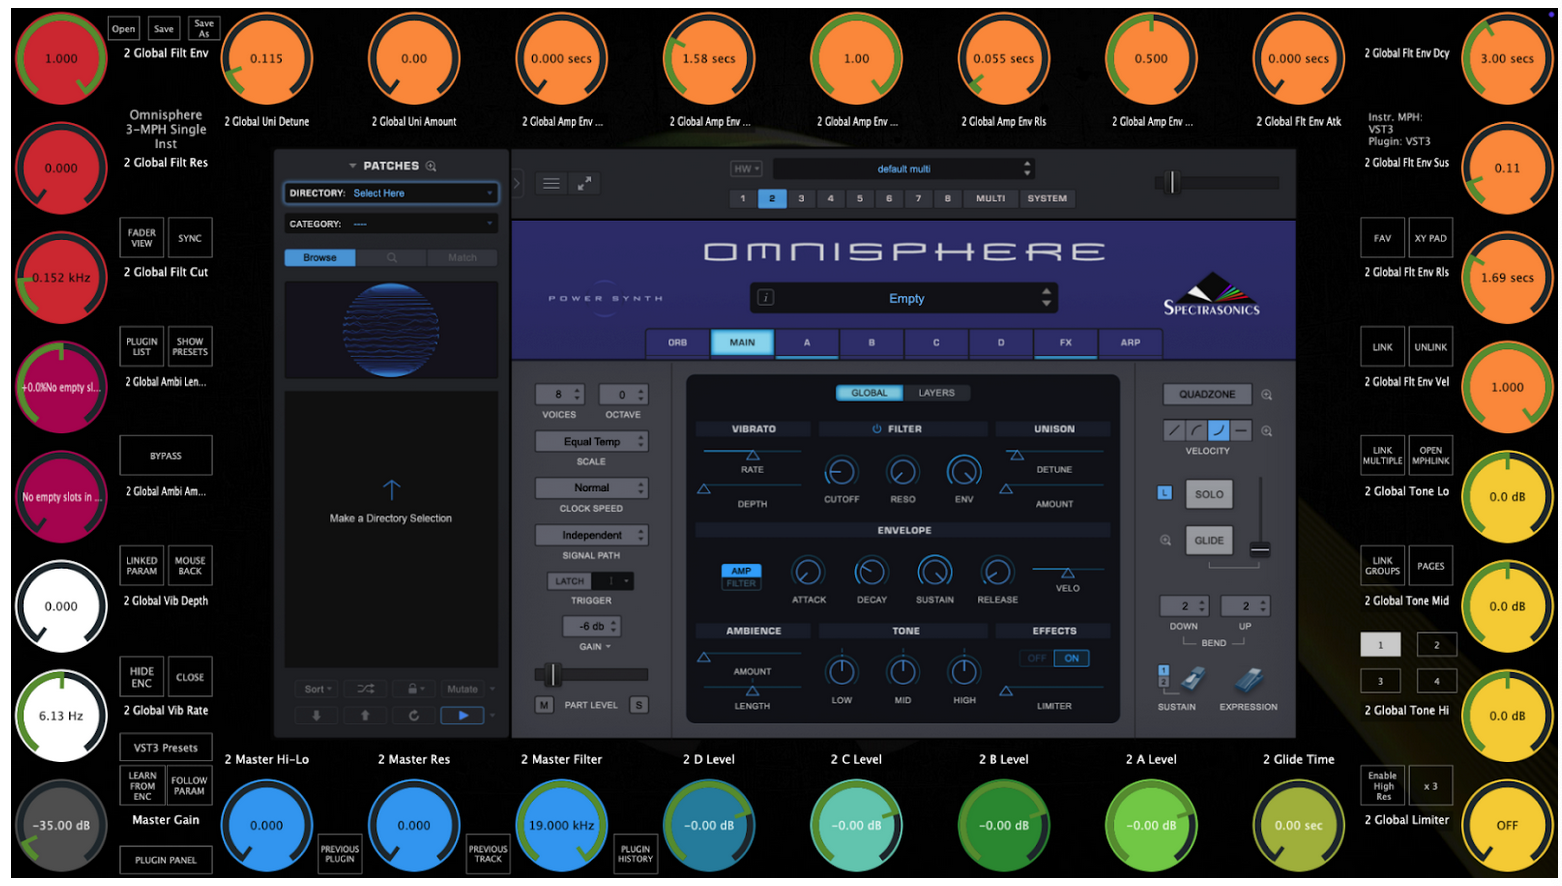
26. Controlling Steinberg plugins such as Halion, Padshop and Retrologue
You may find that when linking some encoders on parameters of Steinberg plugins may seem stuck or behave erratically. To overcome this issue click on Encoder options (right click menu > Encoder Options, on the MP Host) and choose Absolute mode instead of Relative mode which is the default.
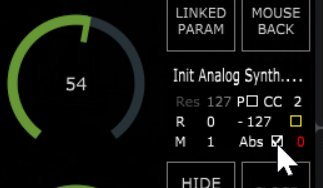
In addition, via the right click menu enable Windows Unified
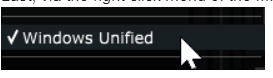
If some parameters have MIDI CC assigned to them, right click and Forget CC. This may conflict with the VST method that the MP Controller uses to control parameters.
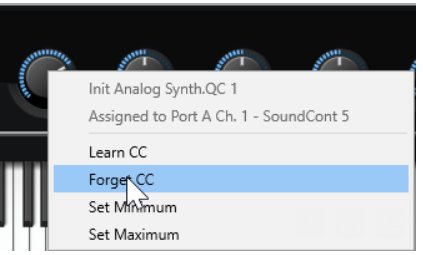
27. Windows - Transferring the keyboard focus on the DAW
In the April 2025 update, v1.7-f4941c72--H2025-04-22--B2025-04-22, we have introduced an automated way to pass the keyboard focus to the DAW.
Clicking on the MP Host and/or the hosted plugin in the MP Host will cause the keyboard focus to be transferred there and not on the DAW.
On Windows, with this update, the MPH passes automatically the space key to the DAW.
When you have the MP Host big window selected and working with the plugin, if you press the space key it will send it to the DAW, while before it was not possible and you had to click to the DAW. The only requirement for this to work is that the MPH window needs to have the keyboard focus, not the hosted plugin.
Pressing the space key will not only pass the key to the DAW, but it will also transfer the keyboard focus onto the DAW.
When you have the MP Host big window selected and working with the plugin, if you press the space key it will send it to the DAW, while before it was not possible and you had to click to the DAW.
The only requirement for this to work is that the MPH window needs to have the keyboard focus, not the hosted plugin.
Using UPDD:
In UPDD enable this setting: "Reset keyboard focus after a gesture action ends"
Note that "Reset mouse cursor after a gesture action ends" will take the mouse cursor back to it's previous position before the gesture was made.
Using Auto Hot Key:
We have created a small app for a few popular DAWs to transfer the keyboard focus back to the DAW by pressing Win key & z together.
You only need to run the app once. You can add it to your Startup folder so that it starts automatically with Windows
You can download the app for each DAW from here
Zip file password is 123456
More information:
The apps to transfer the keyboard focus were created with Auto Hot Key. A great free scripting platform for creating automation on Windows.
We have included the ahk script in the web folder, in case you want to extend it for more automation.
28. Mac OS - Transferring the keyboard focus on the DAW
In the April 2025 update, v1.7-f4941c72--H2025-04-22--B2025-04-22, we have introduced an automated way to pass the keyboard focus to the DAW.
More specifically, on the Mac the keyboard focus is passed to the DAW when a key is pressed is transferred to the small window of the MP Host which means all the keys will be passed to the DAW.
The information below applies to older versions of the MP Host.
If you want to pass the keyboard focus back to the DAW (press space to start and stop the playback in the DAW) you can switch easy to the DAW main window using UPDD or a Mac automation tool like Keyboard Maestro or Better Touch Tool.
For Logic Pro X use the Better Touch Tool (see below).
Using UPDD
In UPDD Commander enable this setting: "Reset keyboard focus after a gesture action ends"
Note that "Reset mouse cursor after a gesture action ends" will take the mouse cursor back to it's previous position before the gesture was made.
Using Better Touch Tool (BTT)
We have created a preset for Logic Pro and you can download it from here
Depending on your DAW, you may need to choose to create this workflow as a global option. To set this workflow as a global option, follow this article.
Choose Import Preset from the top bar menu
Here is how to create the same workflow in BTT:
Run Logic Pro
Choose "Select app from running apps" and then choose Logic Pro.
Then choose Keyboard Shortcuts and record the key "Space"
In the Trigger Conditions on the right pane choose "Prevent recursive triggers"

Then in Actions create the following actions:
1. Activate Specific Window and set the App Name to: Logic Pro
2. Set the action to "Send Keyboard Shortcut" and record the key "Space".
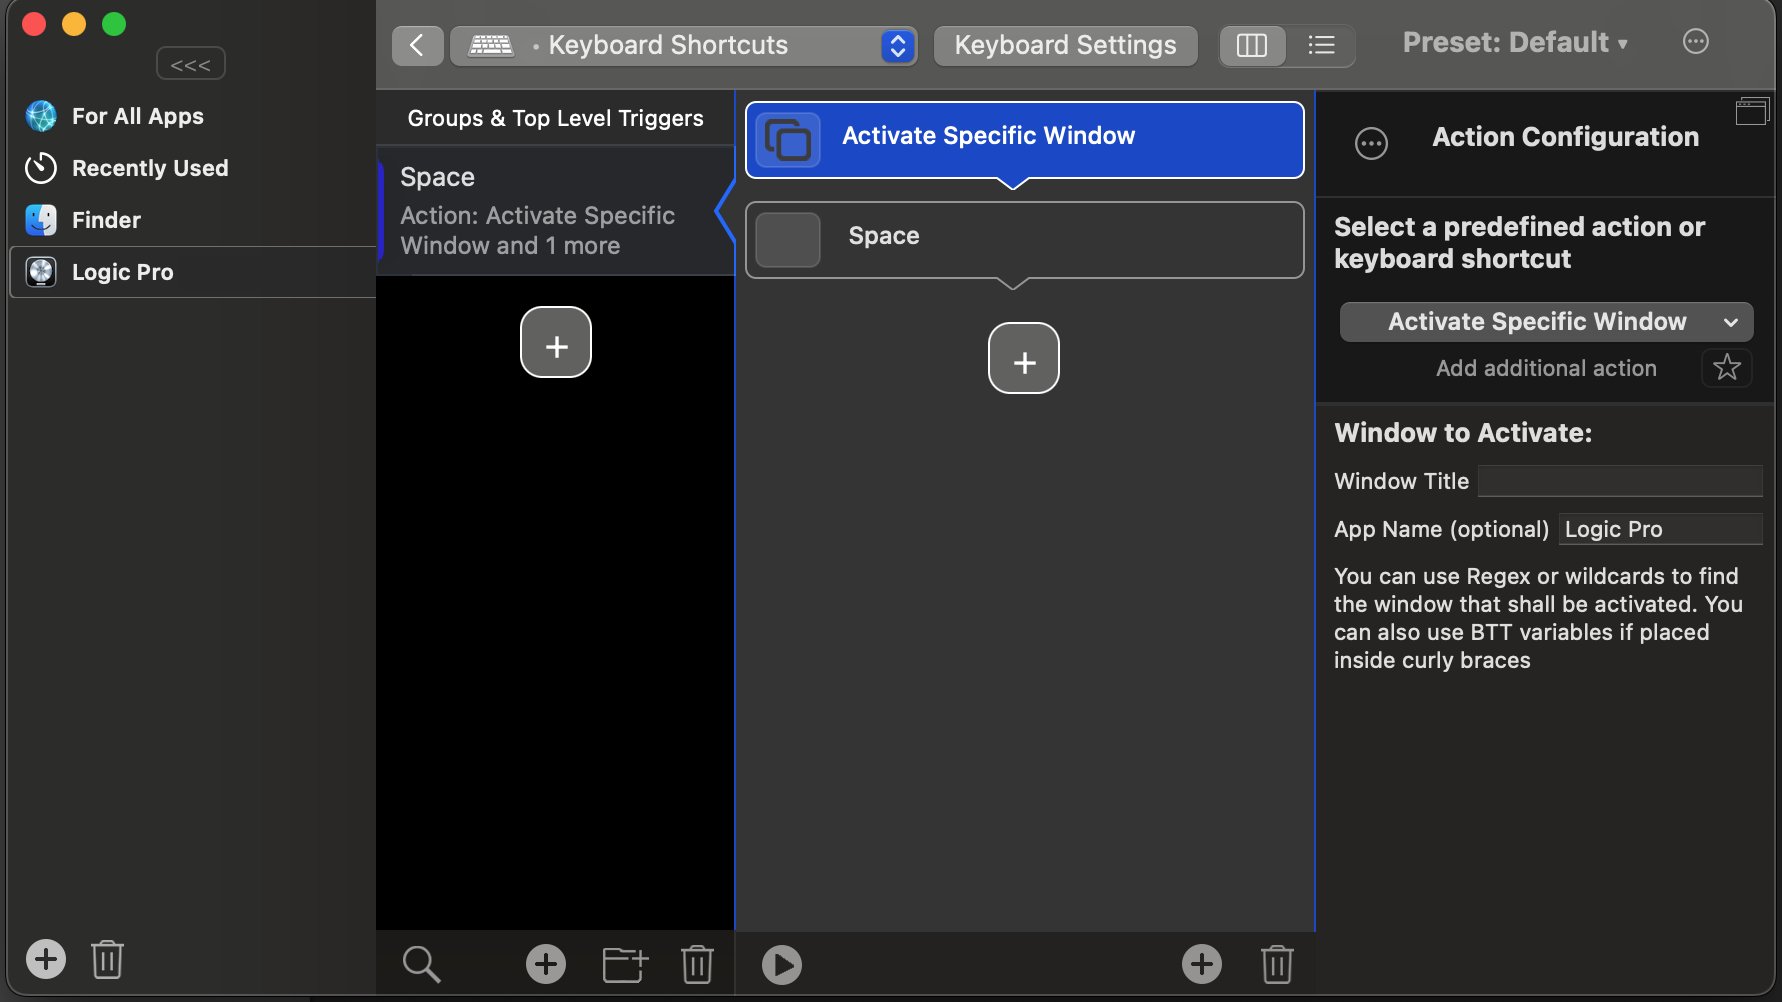
Using Keyboard Maestro
Keyboard Maestro is a great app used by many music professionals on the Mac to automate tasks.
Here is an example of how to do this in Keyboard Maestro:
Open your DAW
Open the Keyboard Maestro app.
Create a new Macro in Keyboard Maestro.
Chose the trigger key. In our example below we have chosen 
Then in Actions choose from the list of actions "Bring a Window to the Front"
Choose the DAW from the list "in"
Choose "Windows with title containing"
Type in the title of your main DAW Window. Here we use logicx which is a text that always appears on Logic's main window.
Your Macro should look like this:
You can also download this example Macro from here
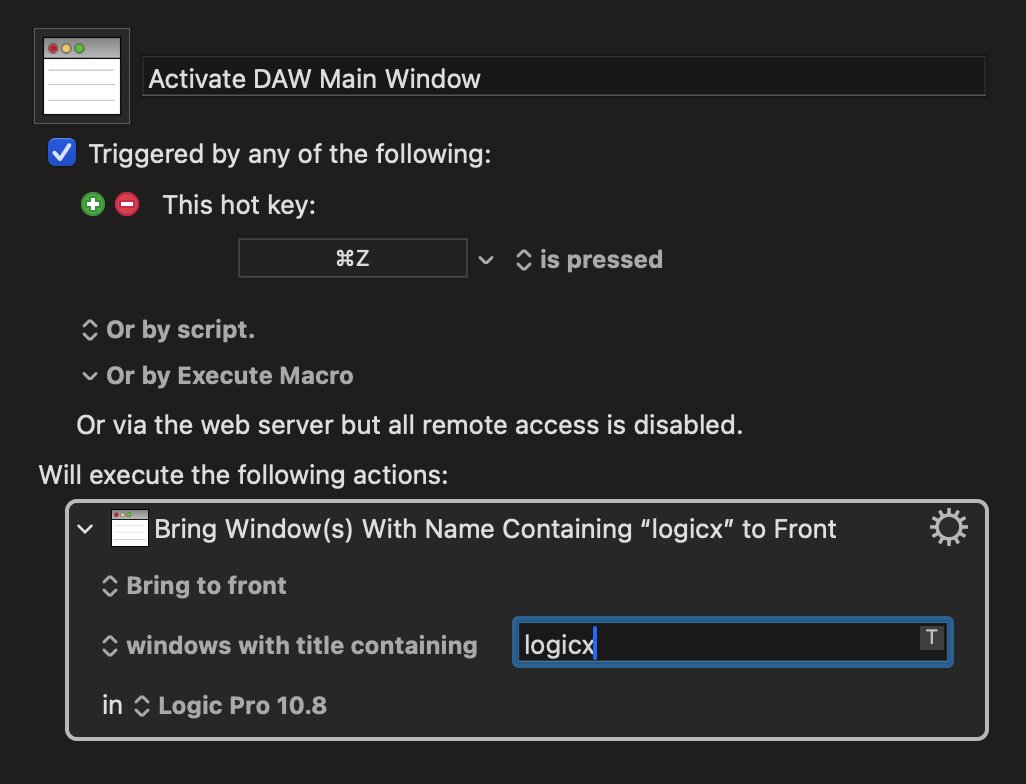
Try it by pressing the Run button on top or by trying the key combination assigned.
The Macro will bring the DAW to the front if you are in MP Host or any other app on the Mac.
29. Mac OS - Running one DAW in Rosetta and another DAW in ARM mode
In case you run one DAW under Rosetta and another in ARM, this will result in the DAW that runs second to not been able to open the Control and Display window.
You need to reboot the Mac and run the DAW you want to use first.
30. Switching a track in Ableton Live
When you have the option to auto-hide plugins in Ableton Live,
![]()
switching a track hides the small window of the MP Host while the controller window remains open and you can still control the plugin. This is often a benefit because you can still control a plugin located on another track (while without the MP Controller you cannot do that, unless you change the A.L. option.)
When you change a track and you choose to control another plugin via the MP Host, it will close the previous MPH Controller window from the previous track.
If you don't want to use the mouse, a good practice is to drag beforehand the small window of the MP Host on the controller's touch screen.
Once you change a track, touch the Control and Display (Controller Icon on the single host).
Then touch the touchscreen or click anywhere on the controller window, the small window will be hidden below the big window.
Thereafter, when you switch a track again in Ableton the small window will show on top.
The same applies to the MP Multi Host.
See tutorial video here
After changing a track, Touch the Control and Display (Controller Icon on the single host)
The MP Host will automatically open the controller window when the MP Host plugin opens from the DAW. This means that the MPH plugin is completely closed in Ableton Live and you click on the A.L. icon to open it ![]()
In other words, opening the small window will automatically open the controller window as well.
Alternatively, If you have another midi controller to open/close plugins in Ableton, like Push or other midi controller, you can program it to close the MP Host and then open it, and it will automatically open the controller window.
31. Loading the MP Host with one click as an Ableton preset in Ableton Live
Additional to the MPH presets and Favorites, you can save the MP Host, while having hosted the third party plugin you want to use, as an Ableton preset and load it with a single click.
See the video here
Can I rename a plugin in Ableton?
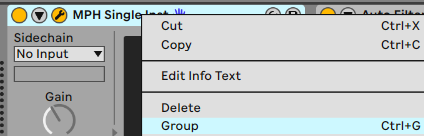
Expand the rack
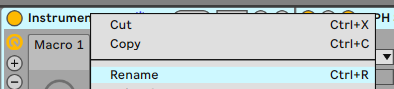

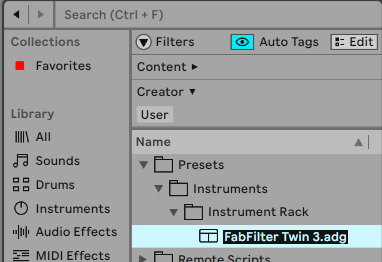
The same principle applies in other DAWs if the DAW allows to save presets.
32. Mac - Right click with Magic Mouse does not show pop up menu in the Favorites Window
There were reported cases where some versions of the Apple Magic mouse would not show the right click menu in the Favorites window.
If you are using an Apple Magic Mouse, you have to press the Control key and hold it while you right click to generate the right mouse click.
Additionally, see the following suggestions on how to troubleshoot the right click on the Mac in this article
33. Link Groups
You can link multiple parameters with the Link Groups method.
See video
If the plugin displays the parameters in groups, selecting a group will link all the parameters within a group.
You can select a color and all the parameters will get that color on the encoders after linking.

If the plugin does not report its parameters in groups you can select them one by one or hold the ctrl (Windows) or Option (Mac), to select individual parameters you want to link or use shift to select multiple parameters, (or Shift to select consecutive parameters).
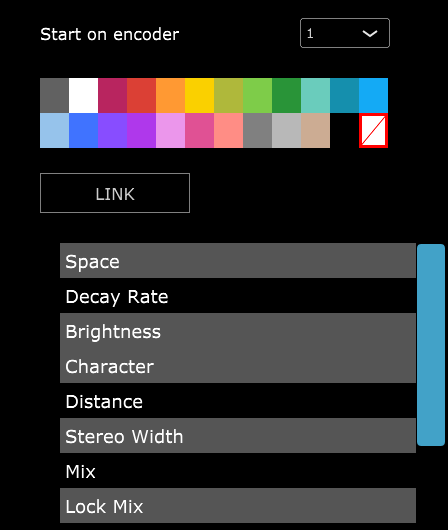
When you select individual parameters and select a color, it will assign the first parameter the color you selected and assign the next color in line to the next parameter and so on.
34. Switching to other Plugins via the Plugin Panel
The Plugin Panel is part of the update v1.7-dbe3ca3c--H2024-06-14--B2024-06-14 or later version.
With this feature we can now switch to any plugin loaded in an MPH Multihost instance.
The Beta version of January 2026 allows the usage of the MP Single Host in the plugin panel as well.
Version 09-March-2026 enables switching to/from the Plugin Panel view double clicking on the background area as shown in this demo video
While previously it was only possible switching, via the touch screen, to other plugin slots of the current Multihost, with the plugin panel you can switch to any plugin slot of any Multihost.
The Plugin Panel button appears at the left bottom area of the Multihost controller window and there are 3 additional buttons
- Plugin History, which displays the last 12 accessed plugins.
- Previous Plugin, which switches over to the previously accessed plugin.
- Previous Track, which opens the Plugin Panel and selects the previously selected track.
How it works
Note that the 09-03-2026 update allows the MP Single Host to participate in the plugin panel.
Here is a brief tutorial video on the Plugin Panel.
Track Names in MP Host
The MP Host plugin shows a track name on the big window, the small window, and in the Plugin Panel. This name can come from two places:
- Your DAW (Ableton Live, Logic, etc.) - the name of the track the plugin is on.
- By typing directly into the track-name field in the small window (Single or Multi Host).
What to Expect
- When you rename a track in your DAW, MP Host picks up the new name automatically. It appears on the small window, the big window, and the Plugin Panel.
- You can also rename the track from inside MP Host by clicking the track-name field and typing a new name. Press Enter or click away to confirm. The new name immediately updates the big window and the Plugin Panel.
- The DAW always has the final say. If you rename the track from MP Host and then later rename it in the DAW, the DAW name replaces your custom name everywhere.
- Your custom name is saved with the project, so it will still be there the next time you open it, unless the DAW sends a new name, in which case the DAW's name wins.
Tip
If you want a custom track label that sticks, set it in your DAW - that's the name MP Host will always use.
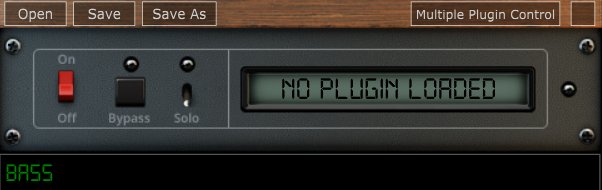
If two or more Multihosts are used on a track, these must carry the same track name, so that they appear under the same track in the Plugin Panel.
Note that on the main window of the MP Host the track name is now displayed under the plugin/preset name
Plugin Panel Behavior and Limitations
The Plugin Panel displays track names only. It does not have awareness of the track order within the DAW. Track names are provided by the DAW, which passes them from the VST instances to the plugin. You can rename tracks directly within the MP Single and MP Multi Hosts.
Because the Plugin Panel does not track ordering, the sequence of plugins may vary each time a session is opened. This depends entirely on the order in which the DAW loads plugins, which is not fixed or guaranteed. The Plugin Panel itself does not store or enforce any order.
Each plugin instance maintains its own Plugin Panel. There is no centralized Plugin Panel that can define or preserve a global order, as this would depend on DAW-specific behavior outside the plugin’s control.
As a result, changes to track order within the DAW are not reflected in the Plugin Panel, and the displayed order may differ between sessions. While many projects will load in a consistent order, variations can occur and should be expected.
Ableton Live: Track Naming Behavior
When using Automatic Track Naming in Ableton Live, moving a track triggers a name update notification rather than a position change. Ableton does not provide information about track movement, only about track names.
As a result, after moving tracks, the Plugin Panel may interpret multiple plugins as belonging to the same track position, since it was not informed that the original track index has changed.
To avoid this issue, use custom track names instead of Ableton’s automatic naming. This prevents unintended renaming events when tracks are moved.
The Beta version of January 2026 allows the usage of the MP Single Host in the plugin panel as well.
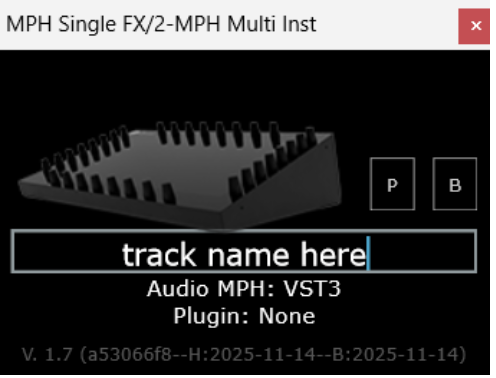
Plugin panel sections
The Plugin Panel window is split in 2 parts. The left part displays the tracks (as buttons)
and the right part displays the plugins of the selected track in columns.
Each column represents a Multihost plugin.
Multihost Instruments will appear always first and the Multihosts Effects will be placed after Instruments.
Each column shows the plugin slots (as buttons) of its respective Multihost.
The order of the Multihost columns cannot be changed and the Multihosts will appear in the order that are opened by the DAW, typically in most DAWs this is the order that are placed and appear in the DAW.
If you add/remove Multihosts and the order does not match the one you see in the DAW, you can save and reopen the DAW project for the Multihosts to be reordered.
Selecting tracks and plugins
The active track has a yellow color. This is the track that has the plugin currently open (being viewed).
If you select another track button, this will become grey and it will list the plugins loaded in the Multihosts of that track. If you select a plugin from the right section, then this will become the selected track and the button will turn yellow.
Adding a new track
When adding a new track and a new Multihosts instance, after the track name is entered (Logic and Cubase provide the track names automatically to the Multihost) the track button will appear last in the track area.
Moving a track button
If you need to place the track button anywhere in between the existing tracks, click and hold the track button for one second and it will turn orange. Then, click on another track button and the track will be moved to the place of that track button.
Removing tracks
If you remove/delete a track on the DAW that carries one or more Multihost plugins, these will automatically be removed from the tracks listed in the Plugin Panel.
Duplicating Tracks
When duplicating DAW tracks that carry Multihost instances, then these Multihosts will have the name of the original track copied. You need to change the name of the track to the new track name.
If the track name remains the same, then these Multihosts will appear as columns in the original track.
Opening a Multihost Preset
When you open a Multihost preset, the track name displayed on the Multihost bottom text area will be replaced (if you have already typed a name). Therefore, the track name needs to be entered after loading a Multihost preset.
Opening projects in Logic Pro X
The Plugin Panel clears the shared list of loaded plugins every time a DAW project closes.
Logic, uses a separate AU Hosting Service to host plugins which keeps open after a project has closed. Therefore, we recommend, when working with a Logic project that carries MP Multihost instances, to close Logic before loading another project that carries MP Multihost instances.
Alternatively, instead of closing Logic you can load an empty Logic project that carries no plugins.
You can also force quit the AUHostingservice from the activity monitor, prior to loading another Logic project that carries the MP Multihost.
Logic Pro X reports the MP Multihost as not compatible
If Logic does not load the MP Multihost open the Logic Plugin Manager and choose to re-scan the selected plugin by pressing on "Reset and Rescan Selection".
If it gives a warning that it does not pass validation scan it again with "Reset and Rescan Selection" and it will pass the validation.
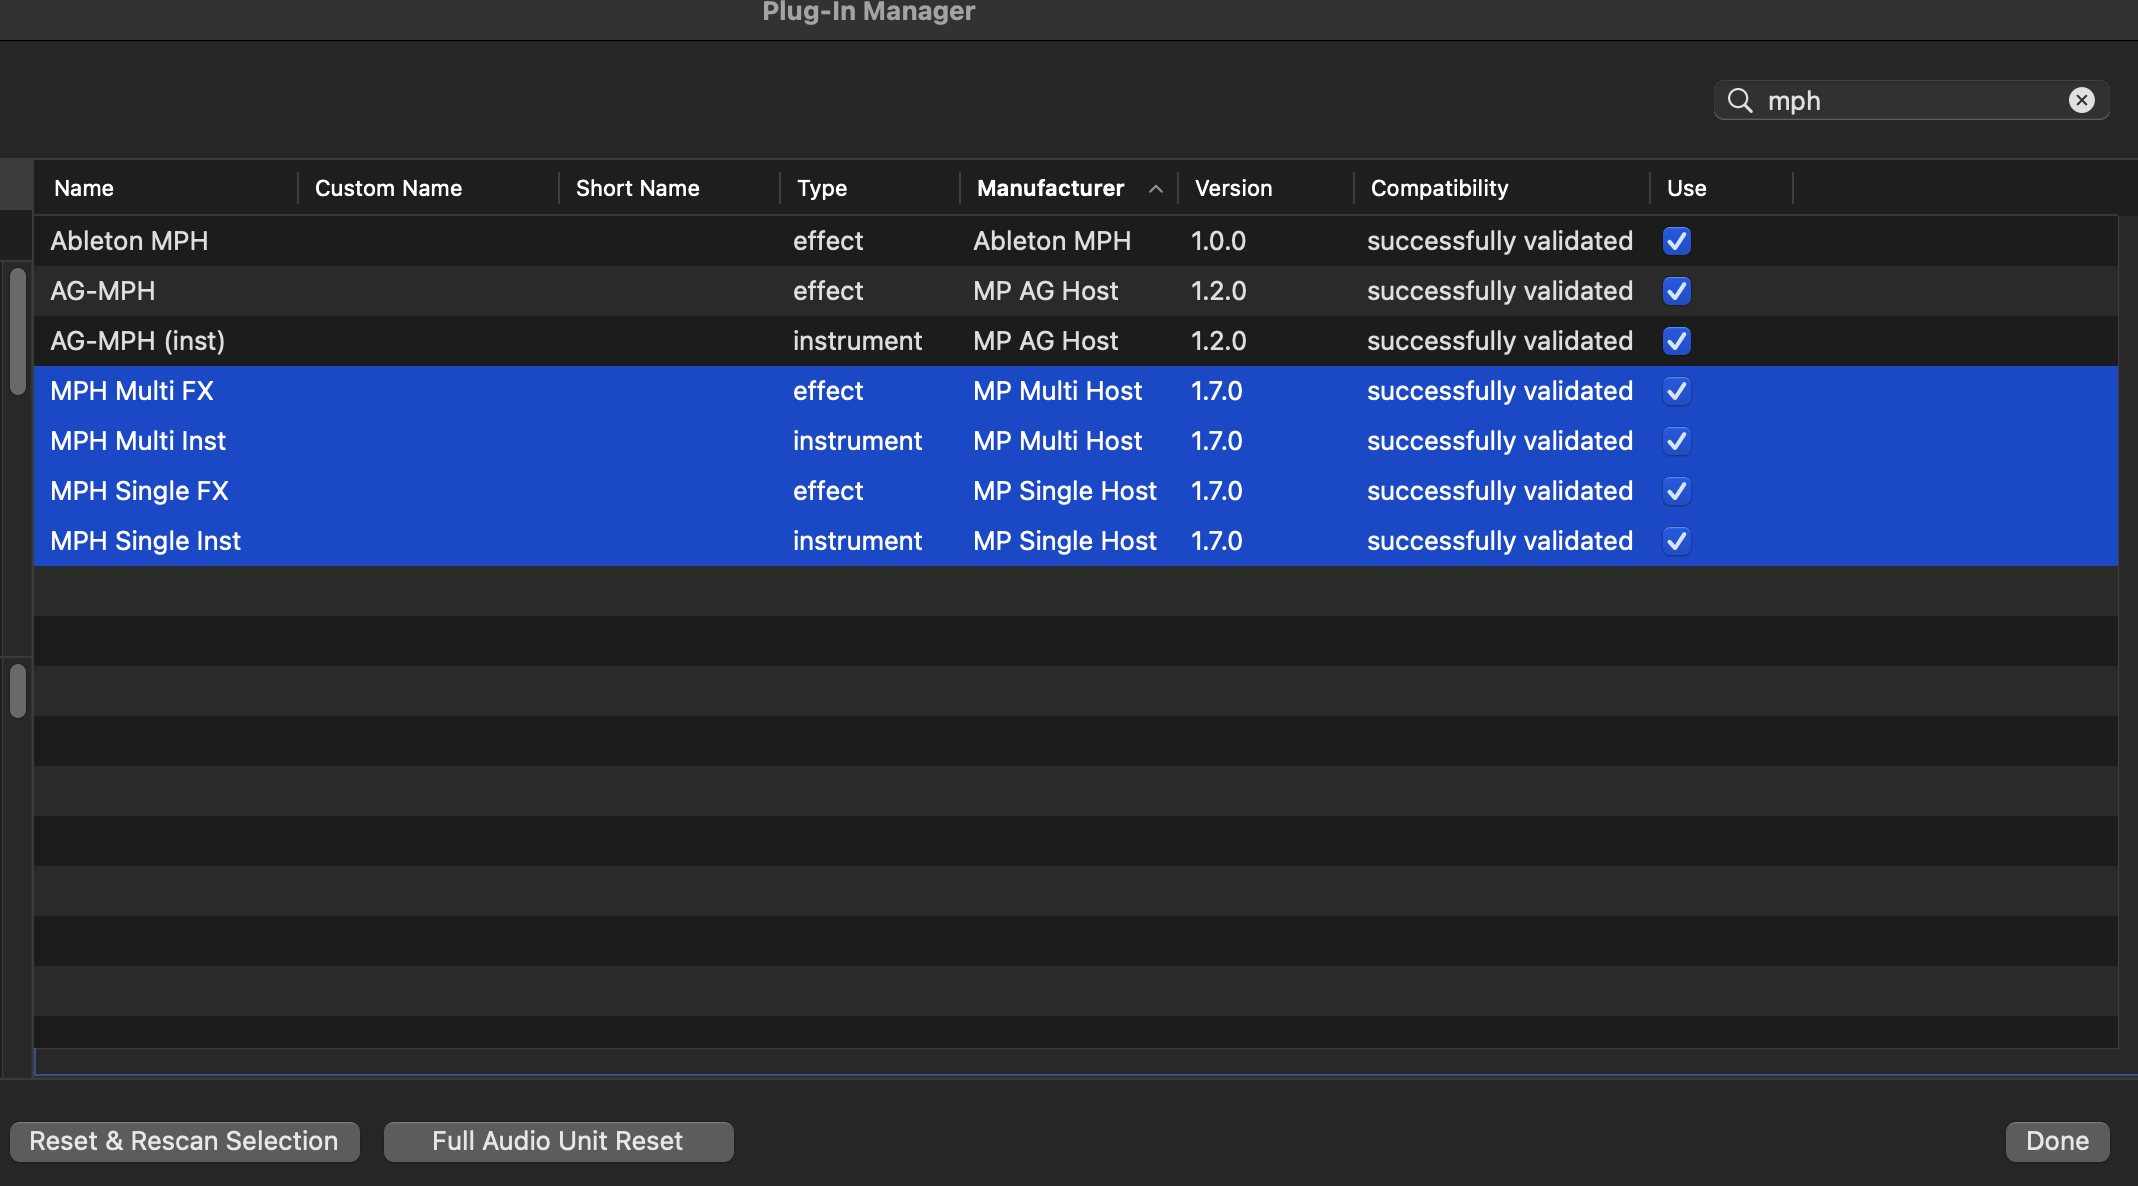
Troubleshooting
This applies to MP Host version, prior to the 2026 versions which work with the MP Bridge system.
The version of the Multi host that features the Plugin Panel uses an app allowing instances of the Multihost to communicate with each other. If you are having any issues such as a crash when you load the Multihost, ensure that the MPHCSM is installed in the MP Host folder:
Windows: %AppData% and under folders MP\Host\MPH Cache
Mac: Applications/MPH Cache.app
If the MPH Cache does not exist after you run the installer please send us an email to help you troubleshoot further.
Additionally, when you run the DAW ensure that the MPHCSM shows up as a running process while the MP Multihost plugin is loaded the DAW:
- Windows Task Manager or process explorer (allows searching for processes)
- Mac Activity Monitor (search for MPH in the Activity Monitor and it will show up)

The MPHCSM process will exit automatically when the DAW closes.
Please note that there were reports from users that when using the N.I. Maschine plugin in a DAW project, the plugin panel does not report the tracks.
36. Run UAD Luna on Windows
On Windows, MIDI drivers are exclusive per application. UAD Luna consumes all available MIDI devices on start, prohibiting any other applications to use MIDI devices.
To overcome this problem we created a small utility to start Luna.
Download the application from here. The zip file is password protected and the password is 123456
Extract the zip on a folder on your computer.
Run as administrator the START.bat file.
It will open Luna and a cmd window which will later close automatically.
Load the MPH Single in Luna and click on the controller icon to open the controller window.
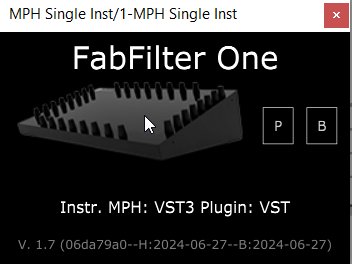
Initially, it will display the "Controller Not Connected" message. The message will disappear in about 10 seconds and the MP Controller will be available to use normally in all MP Host instances including Multi hosts.
The CMD window will close automatically after the controller window has opened.
Shortcut to run as administrator
Create a shortcut of the START.bat file. Then right click on the shortcut and choose Properties.
Then choose Advanced.
Check the box Run as Administrator so that it always runs with admin access when you double click on it.
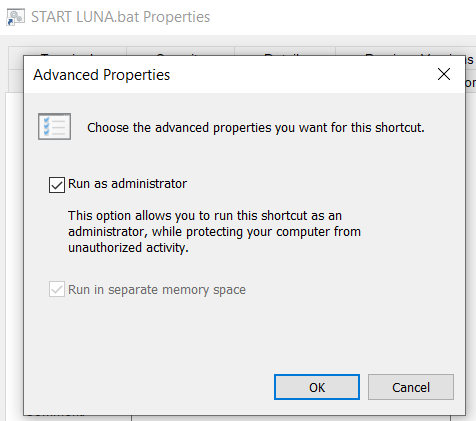
Optionally, you can set the same icon as Luna on the shortcut by right clicking on the shortcut and select Choose Icon.

Alternatively, you can run the MPMIDI standalone app before Luna. Keep its main window open on the controller. Start Luna, load any MPH plugin and it will not be blocked because the MP MIDI app consumed it first and did not let Luna consume it.
Luna crashes when opening the MP Host plugin
If you are using multiple monitors and your main display is connected on a different graphics interface than your main monitor, set the MP Controller as your main display in Windows, or connect the MP Controller onto the same graphics interface as your Windows main display.
37. Transferring the mouse pointer to the DAW display (Move Mouse Option)
Mouse Back Option
If you right click on the controller window, in the menu, there is the option "Move mouse to Controller".

When checked, left clicking on the MPH small window to open the plugin on the controller (both for Multi and Single Hosts)
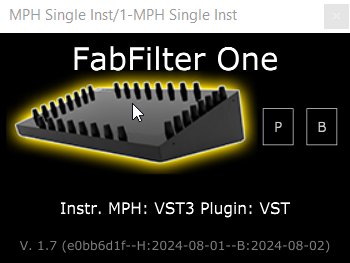
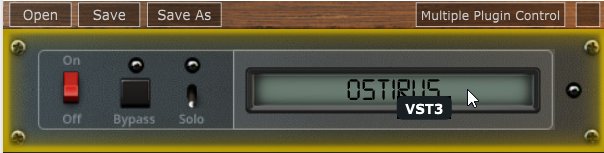
will automatically transfer the mouse pointer on the controller window. This option was made for convenience so that you don't need to drag the mouse from/to the controller.
When disabled, right clicking on a MPH to open the plugin on the controller will automatically move the mouse pointer to the controller window.
The option is global and it will affect all plugins once enabled without the need of reloading the MP Host plugins.
There is also a button on the controller window which when clicked will transfer the mouse pointer back to your main screen.

38. Opening and closing the MP Host via MIDI CC
In update MPH Beta v1.7-c7f4c2bb--H2024-07-10--B2024-07-10 we enabled the opening and closing of the MP Multi (opening slots) and Single hosts via MIDI CC messages or notes.
Since with this feature it is possible to automate the parameter during automation recording, which is something you may not want to do, we added an option in the host.properties file to enable this option as it is by default disabled.
To enable the parameter as an automatable parameter, open the host.properties file in a text editor and change the last line from:
<VALUE name="enable_openclose_parameter" val="0"/>
to
<VALUE name="enable_openclose_parameter" val="1"/>
To open the MP/Host folder see here
If you use MIDI CC to open and close the MP Host window on the controller, it is of course a good practice to set on your midi controller the button or pad used as a toggle.
This means, press once (send value 127) it will open the window, press another time (send value 0) it will close it.
Here is an example in Ableton.
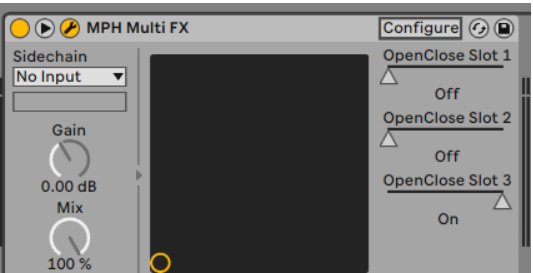
When one slot opens the rest receive a message to close. Only one effect/instrument can be open at a time on the controller.
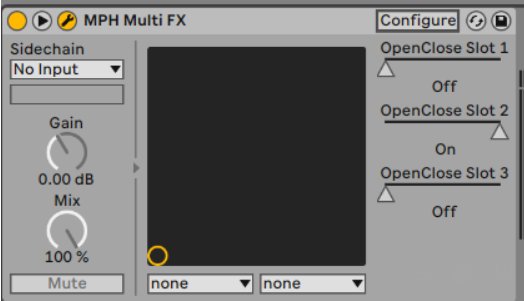
The same applies on the single host
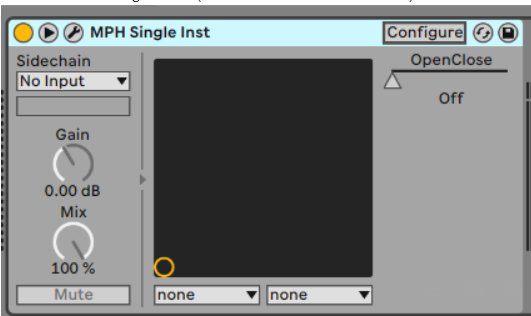
You can assign parameters to listen on a MIDI CC message
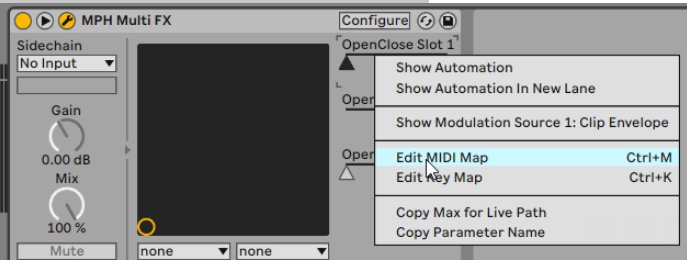
In the same manner you can use CC to control the Bypass on the Single and Multi Hosts.
Using MP MIDI app to trigger open/close or bypass.
You can use the MP MIDI app to send MIDI CC messages to open and close plugins. Alternatively, you can use the plugin panel on the MIDI app to switch plugins from the touch screen.
If you have two MP controllers, you can have the Plugin Panel constantly open on the MP MIDI app
and use the second MP controller to switch from plugin to plugin on the first MP controller.
See article Using 2 MP Controllers
39. Using the Multi host plugin in Bitwig
Bitwig uses a sandbox process to host plugins. If you remove the last MP Multi host plugin and try to load another one, Bitwig will not be able to load it.
One option to address this problem is to always keep one Multi host plugin loaded.
The other option is, if you have removed the last one Multi host plugin, just double click on the MPHCSM.exe (Windows in the ~/MP/Host folder) or MPH Cache.app (Mac in Applications) to clear the cache and load the Multi host plugin.
Important: In Bitwig setting > plugins > Plugin hosting mode
set it to: Bitwig or Together or Vendor
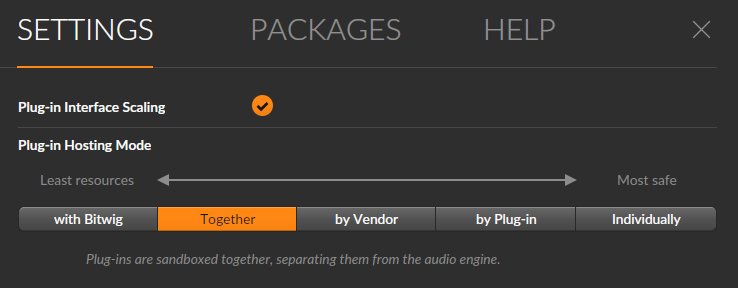
40. Sending MIDI notes from the MP Host
In the July 2024 update (Beta MPH v1.7-91f44c9b--H2024-07-20--B2024-07-20) we introduced the ability to send MIDI notes out to the DAW when using a plugin that has this ability (like Sequencer or Arpeggiator Instrument plugins like Audiomodern Riffer).
This update applies on both the Instrument MP Single host and Instrument Multi host (not the FX MPH).
See a demo video in Ableton Live.
41. Plugins appearing magnified and missing parts of their UI
If you load plugins in the MP Host and part of the plugin UI is missing because it looks bigger in size or just part of it is not showing, for example:

For Ableton Live, disable plugin Auto scaling on the MP Host plugins as described here
Or the plugin appears smaller with white surrounding area, for example Serum AU.
 It means that the current plugin type (for example Audio Unit) is set to resize automatically and this may cause incompatibilities with the MP Host.
Try to use another format of the plugin, like VST2 or VST3 or AU if possible to test.
Additionally, if the plugin has the option to set the default zoom level, set it to your liking and the plugin will appear at that zoom level when you load it in the MP Host even when you open an MPH preset.
In this example, Serum VST3 on the Mac it loads at 150% and shows correctly
Note that if a plugin does not have a "Set Default Zoom Level" and just saves as default the last resized value, then when loading an MPH preset, the size of the plugin's UI may not look correct, if you have resized the plugin loaded directly in the DAW, after you have saved the MPH preset.
This is because after you have resized the plugin outside the MP Host, when loading the MPH preset, the default size would have changed, thus the MP Host may not display it correctly.
To solve issue, resize it and save the MPH preset. Keep in mind that if the plugin does not have a default size setting and you resize it outside the DAW, then the next you load your MPH preset it may use the previous size setting and therefore not show in full.
Here are some suggestions to avoid the issue
- You can either load it directly from the plugin list and with Automap enabled so that it links parameters instead of using an MPH presets or
- Use a consistent size (ie do not resize it outside the MP Host) or
- Always load it in the MP Host instead of directly in the DAW and enable the Top Bar option so that you can drag it on other displays as well.
If the resize menu of the plugin is not visible, then load the plugin from the plugin list
in the MP Host and resize it. Then load your MPH preset.
For example:
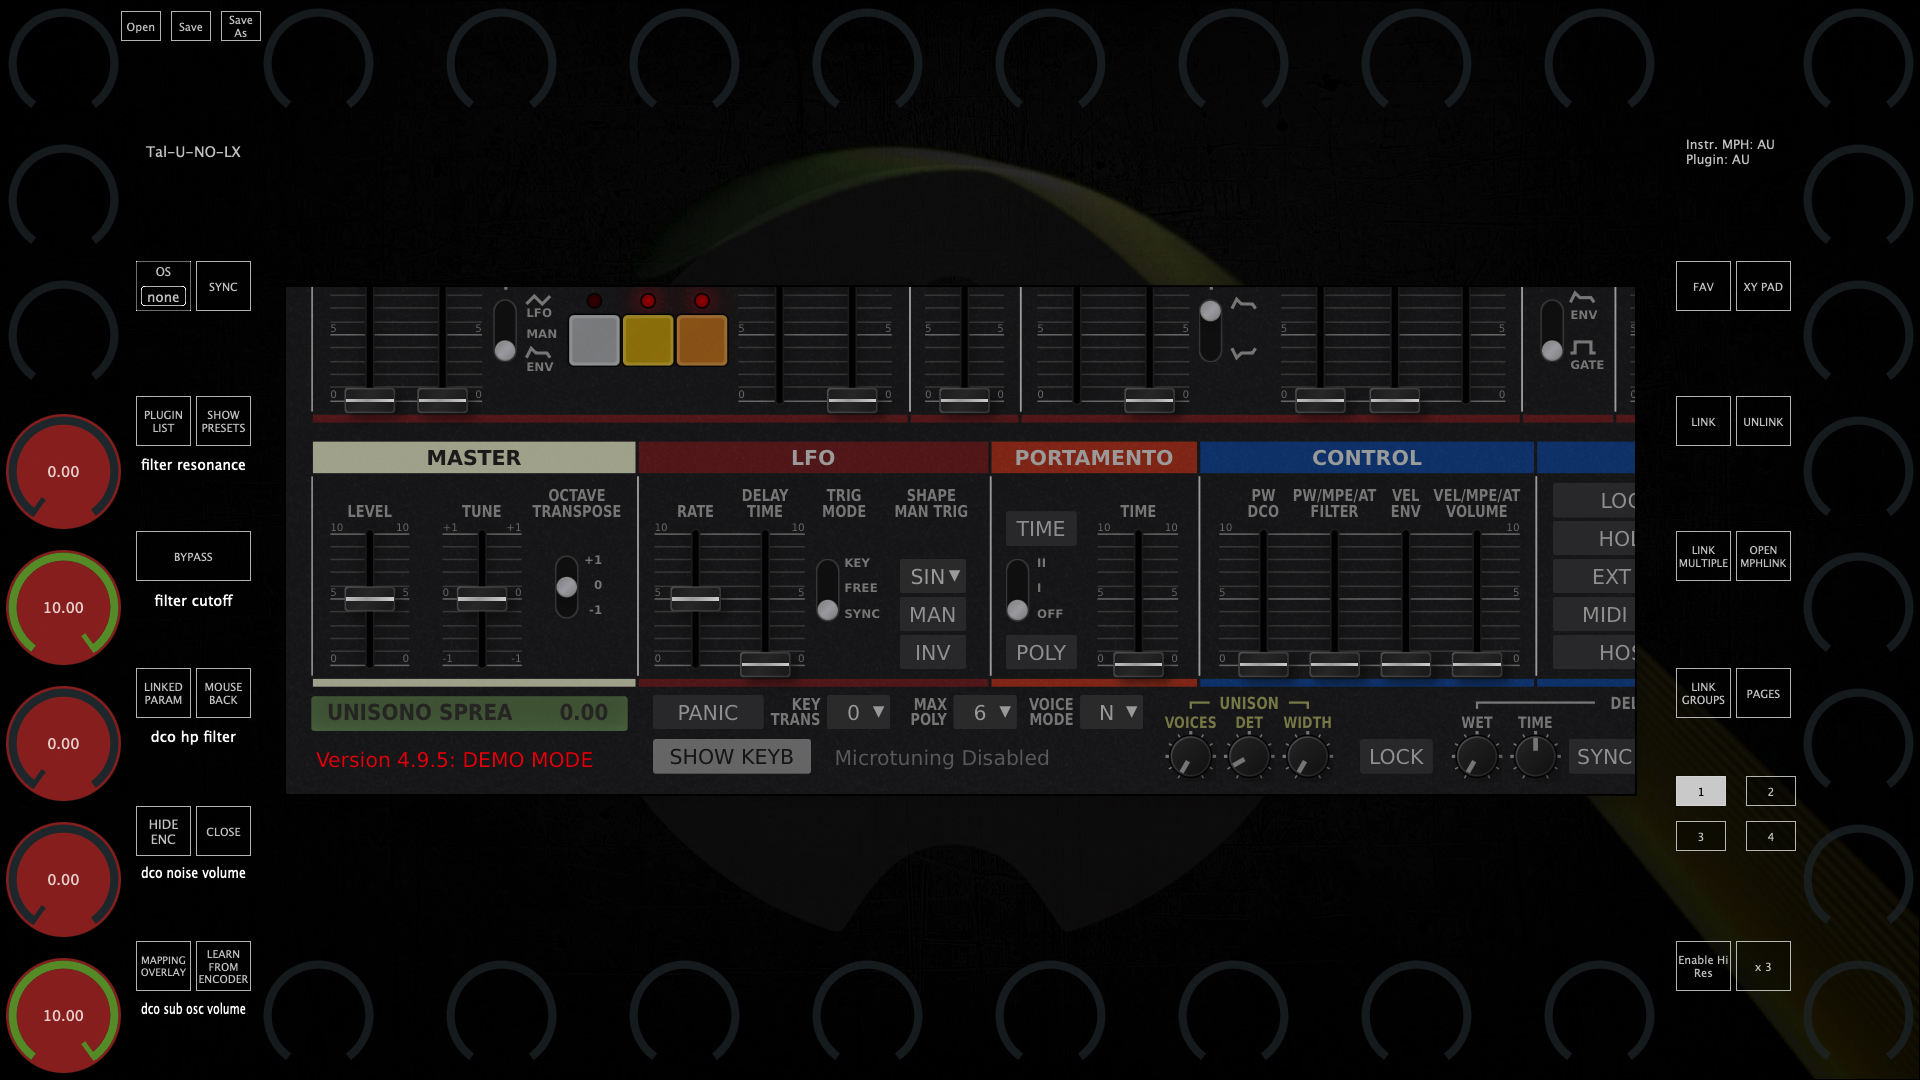
Load the plugin from the PLUGIN LIST (not preset)

Resize it
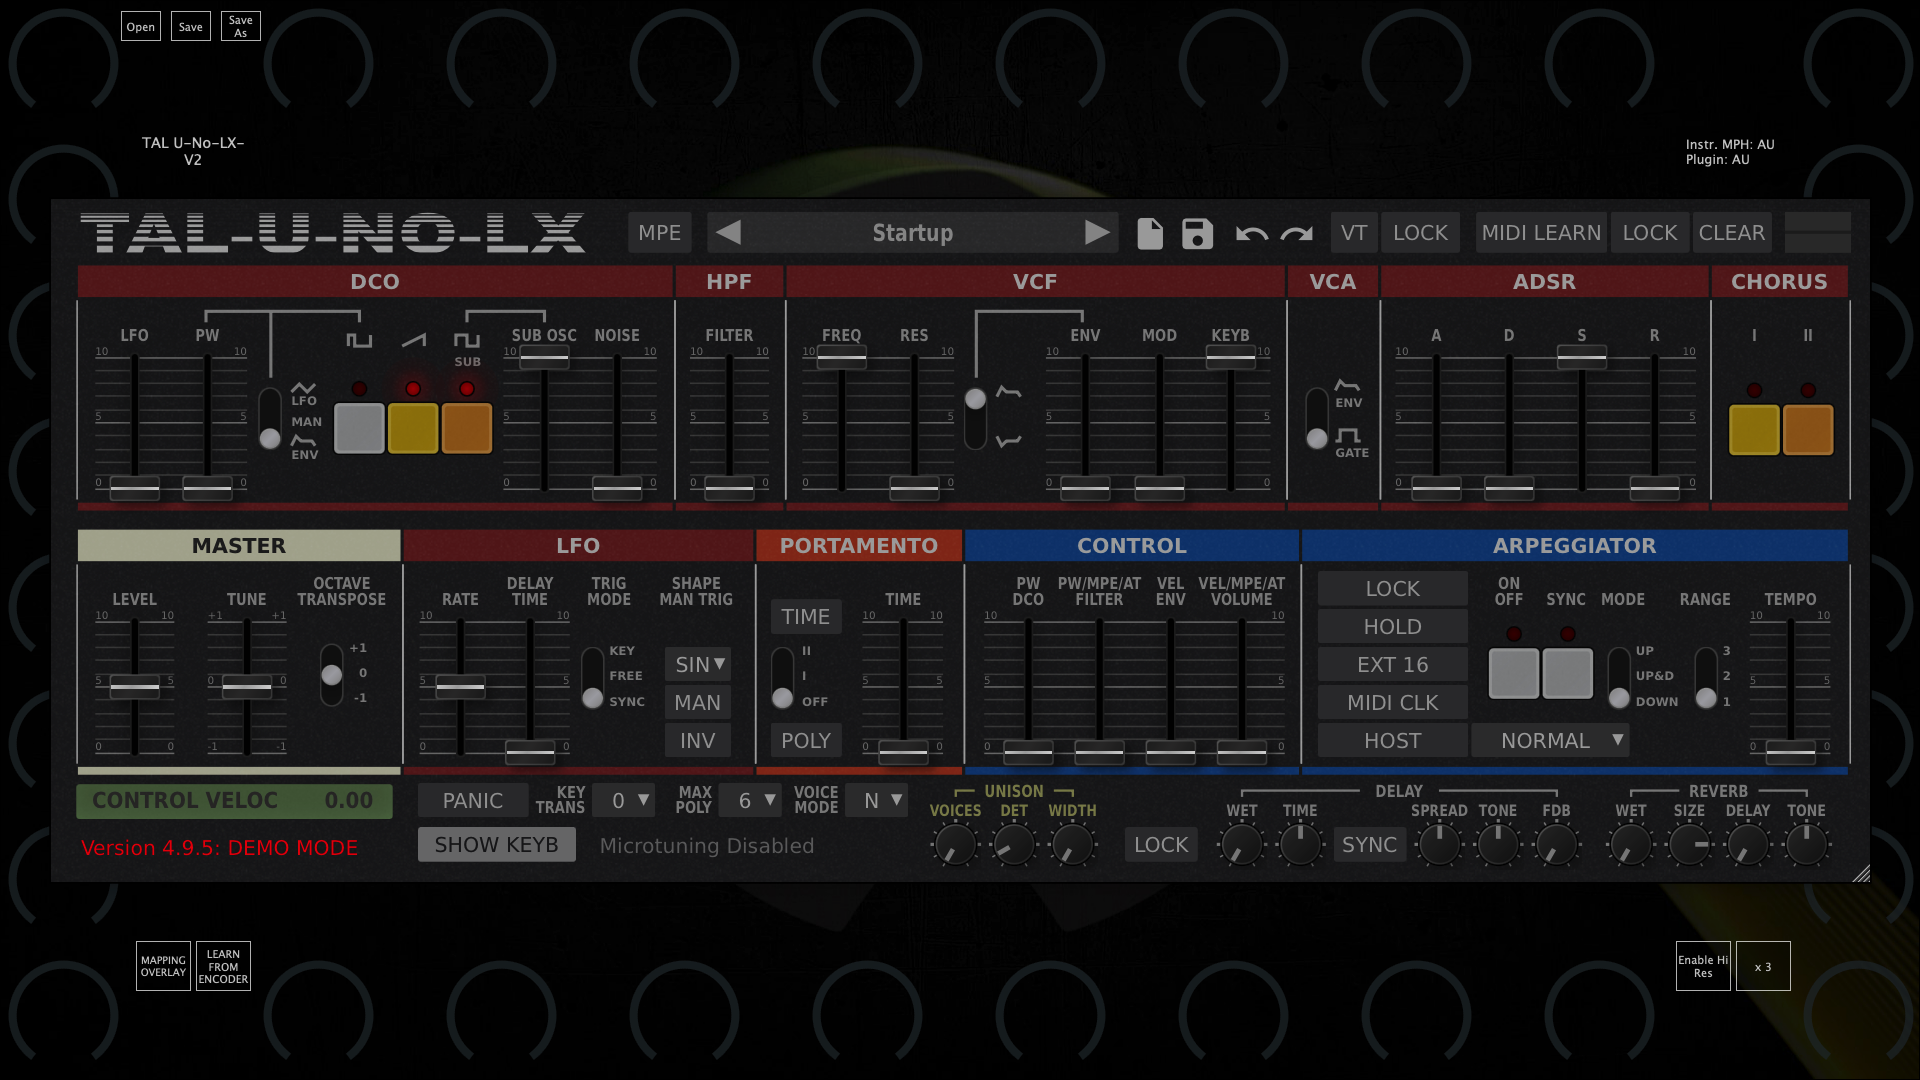
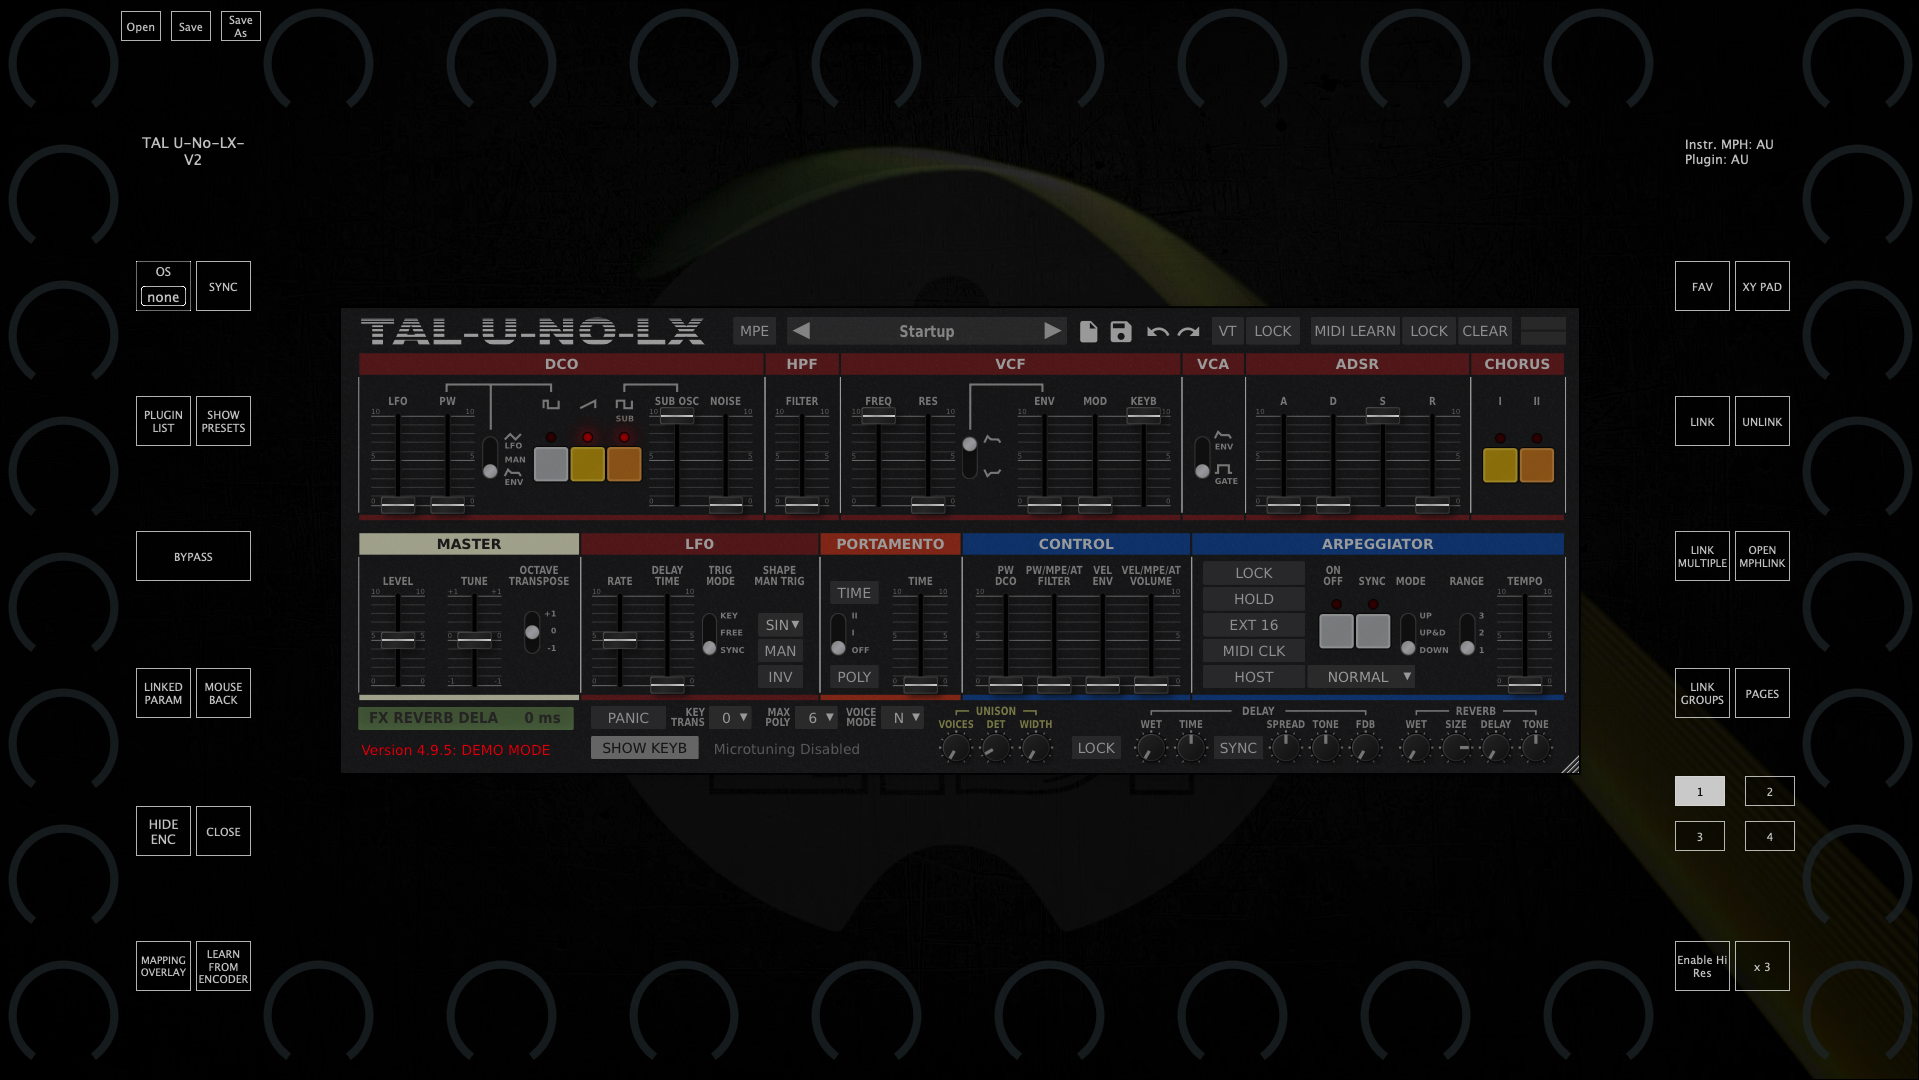
and load your MPH preset.
Alternatively, use UPDD smart magnifier to magnify plugins on demand.
If on Windows still show magnified and cropped, right click on the DAW exe program file and choose Properties, then click high DPI settings and try these options:
Additionally, you may try disabling the top bar from the right click menu of the MP Host and enable "Windows Unified".
42. Downloading Software for the MP Controller
This knowledge base website does not have any software for the MP Controller. This is for documentation purposes only.
To download plugins and and other software for the MP Controller find in your email's inbox the initial setup message received by us when you initially purchased the MP Controller.
That email message has all the information and guides on how to download related software.
If you don't have the email message, contact us here.
43. Specific plugin settings
Very rarely, some plugins do not strictly follow the VST protocol and may behave slightly different than expected.
Some Roland VST3 plugins do not produce sound on Windows. VST2 works as expected.
SoundToys on the Mac
For better compatibility and parameter syncing use VST2 or VST3 instead of AU.
Plugin Alliance VST3 plugins in Ableton Live on Windows
Depending on graphics drivers and system setup, the UI of plugins may not sync when turning encoders (although the value changes) because of a design flaw in PA plugins. The problem occurs without the MP Host as well. This is well a known issue with PA plugins and Ableton Live on Windows. VST2 plugins in Live still get parameter change callbacks that are tied more directly to UI updates so that is why they work.
Ozone 12 on Windows
If Ozone's UI is not showing correctly use the "Windows Unified" option from the right click menu.
Serum 2 on the Mac
In Logic Pro use the Serum 2 AU. Load it without the Automap enabled and link the parameters you need via the 3 linking methods available. In other DAWs use Serum 2 VST3.
Arturia AU plugins on the Mac
Some Arturia AU plugins may show strange glitches and artifacts on the MP Host window. Enable the Top bar from the right click menu and optionally save it as a preset. It will eliminate these artifaces. Alternatively, you can use VST2/3 which do not show these artifacts.
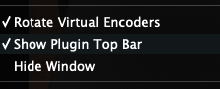
Omnisphere
See here
Kontakt 8
If you experience strange behavior when using Kontakt 8, add this line in host.properties file (open with a text editor)
and add this line:
<VALUE name="unload_big_window_on_switch" val="1"/>
Right before the last line, </PROPERTIES> so it will look like this:

Save the file and start your DAW.
44. Plugin Scanner Utility
Plugin Scanner (Beta)
We created a new plugin scanner standalone utility and will scan all plugins.
Although you don't need to scan the plugin to work with the MP Controller, this utility will populate the columns in the plugin list and seaprate the Instruments from Audio effects.
You can download it from your account.
Windows - Standalone app and VST3
Mac - Standalone app
If the utility crashes during scanning it will resume from the last plugin scanned when you reopen and scan with the utitlity .
The plugin scan results are saved after every plugin is scanned.
If the utility fails to load/scan a specific plugin that does not mean it will not work in the MP Host.
When a plugin fails to scan, the utility adds the plugin to the Plugin-Exclude-List.txt so that it is not scanned the next time.
The results of the utility are saved in scannedplugins.xml which is the file used by the MP Host to list plugins.
If the utility crashes repeatedly check the file PluginScanner-Loading.txt in the ../MP/Host/ folder and you can see which is the plugin causing the issue. You can add manually the plugin in the Plugin-Exclude-List.txt so it will not attempt to rescan it.
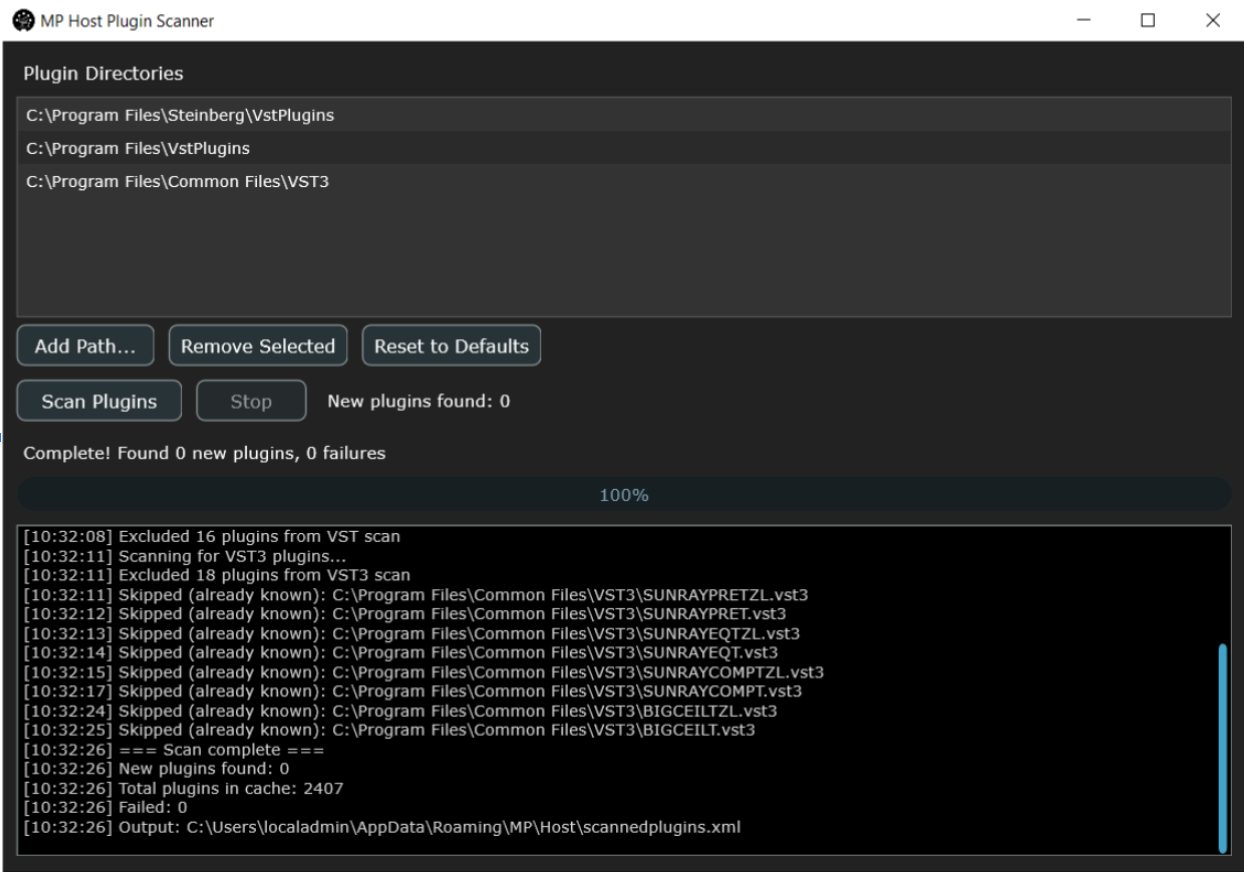
This is an optional utility and when used it offers the following benefits:
The MP Host will populate/scan the plugin details on first load, therefore scanning all plugin is not essential.
1. The plugin list is populated when you open the MP Host.
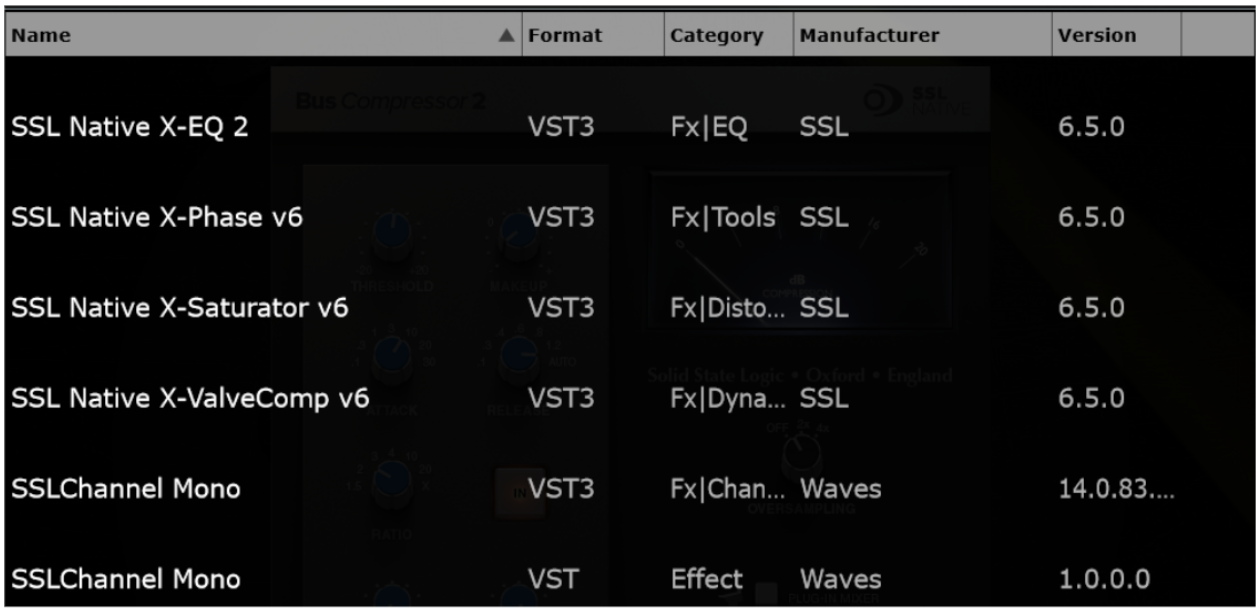
2. The Instruments and effects are not shown in each other’s plugin list.
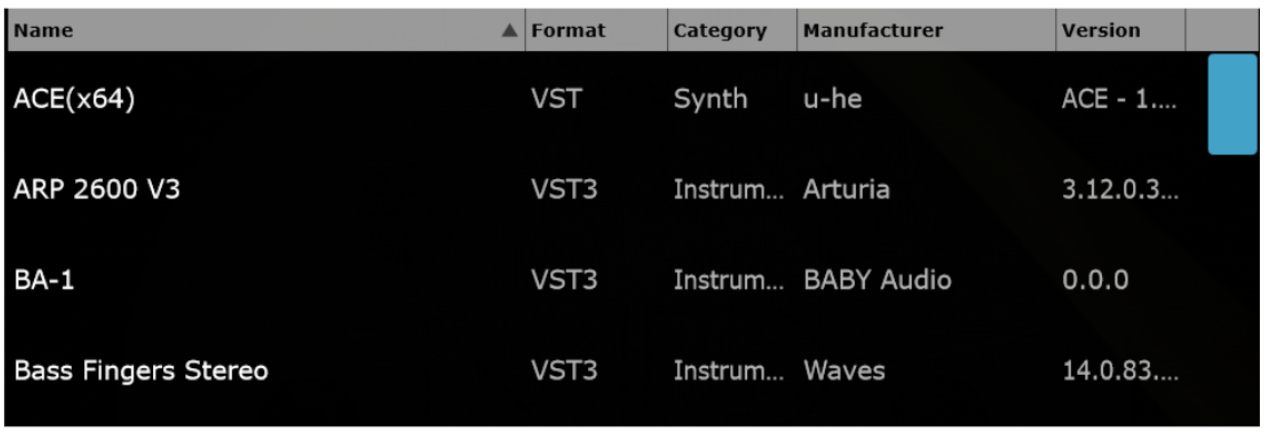
This utility is optional and the MP Host will populate the plugin name information the first time you load it as it only reads the plugin filenames. Once a plugin is loaded in the MP Host, the Category, Manufacturer and Version are populated as well.
This utility, when used it will show the Category, Manufacturer and Version for all plugins (prior to loading them in the MP Host).
45. VST3 Generator Utility (Mac and Windows)
This software requires the MP Host version released on May 5th, 2026 or later.
The application can be downloaded from your user portal account.
The use of this application is completely optional and the MP Controller can operate without using this application.
This application generates VST3 plugins for any installed third party plugin on your computer based on the MP Host. This is similar to the M-Plugins generated based on AU plugins. The benefit is that you can load these directly in your DAW without loading the MP Host and they will be displayed in your DAW as "Plugin Name - MP". For example the plugin "Pro Q4" will be shown as "Pro Q4 - MP" under the vendor "MP Controller" in your DAW.
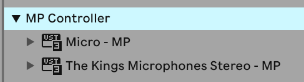
When loading these plugins they will show as "Plugin Name - MP" instead of "MPH Single FX"

This works for all DAWs that can host VST3 plugins. The created VST3 plugins can participate and show in the Plugin Panel like MP Single Host plugins because they are just copies of the MP Single Host with a different plugin name.
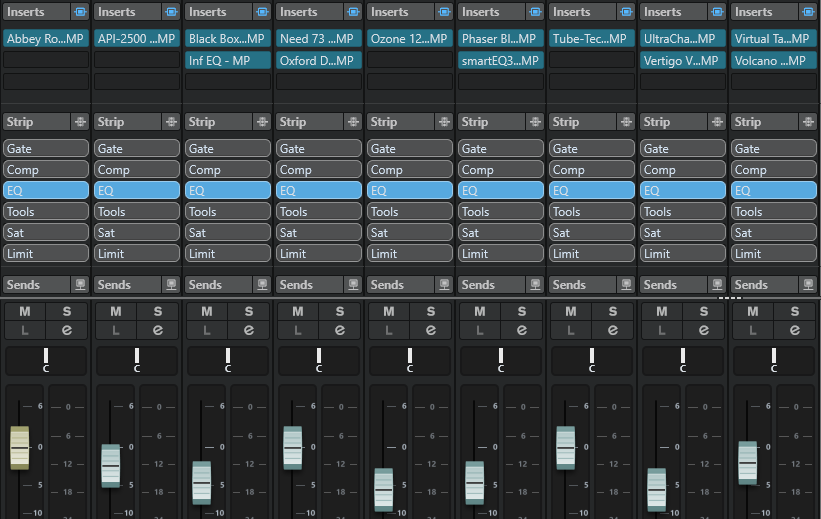
How does it work?
The application creates copies of the MP Single Host (Instrument or Effect) in your VST3 folder :
Windows: C:\Program Files\Common Files\VST3\MP CONTROLLER
Mac: /Library/Audio/Plug-Ins/VST3/MP CONTROLLER
These VST3 plugins are named after the selected plugin and a json txt file is also created that holds the VST3 attributes of the plugin.
The MP Host templates are installed by the MP Host installer in ~\MP\Host\MPH Templates\ and the MP Host must be installed first, before using the VST3 Generator application.
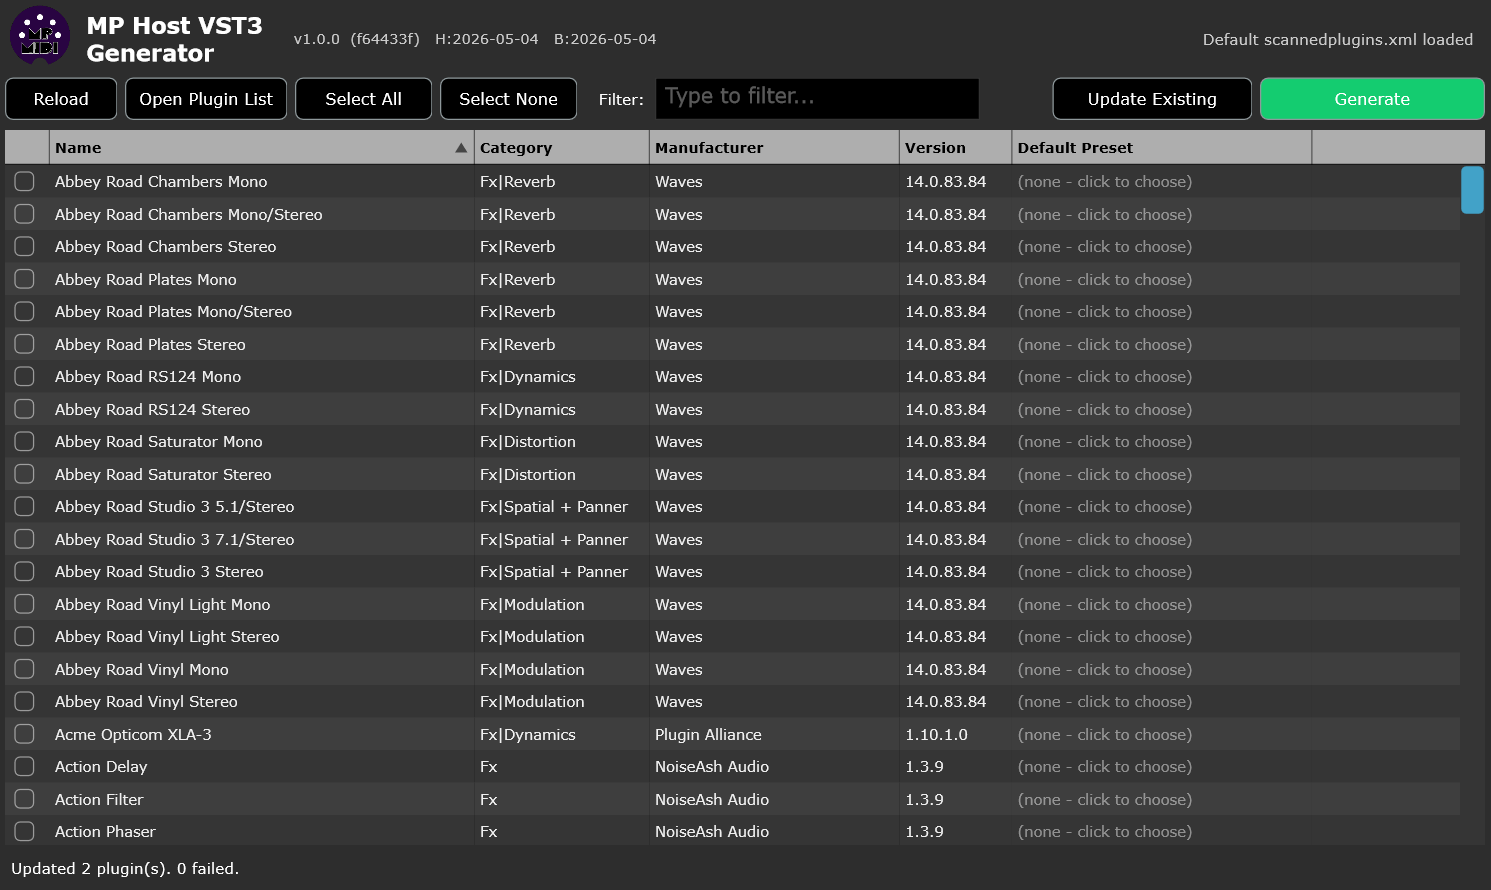
It is important that you scan your plugins first and populate them in your MP Host. You can also use the Plugin Scanner utility
to populate your scannedplugins.xml which is the file that holds information about the installed plugins on your computer (located in ~\MP\Host\scannedplugins.xml)
Each row allows the selection of an existing preset and you can point the new VST3 plugin to use a specific preset you have already created upon loading. This becomes the default preset for the plugin. If you don't choose a preset, it will load the plugin directly and if Automap is enabled, it will map it in the same way when loading a plugin in the MP Host from the Plugin List.
Do not save a preset as default in the MP Host generated plugin (replacing the default preset of the MP Host). It will replace the default.xml of your MP Host and load that preset every time you open the MP Host. You should never replace the MP Host default.xml preset. Instead use the generator app to assign a default preset to each of your generated plugins if you wish to have a selected preset when the plugin loads in the DAW.
How to use it.
Exctract from zip file and run the application.
On Windows right click on the app and choose Run as and Administrator because it will need permissions to create VST3 files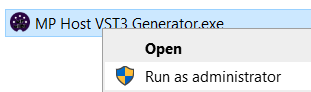
Select the plugins you want to generate VST3 plugins by checking the box on the left for each plugin.
Optionally, select a preset for each plugin. The MP Host preset can be any preset, even those using VST2 or AU third party plugins.
Click Generate.
This is it. It should generate vst3 plugins and json files for each of the plugins. Open your DAW and it will find these new plugins. Use them the same way you use the MP Host. They have no difference than the MP Single Host. because these are simply copies of the MP Single Host, Instrument and Effect.
If you have created the plugin and you decide later to use a preset as the default, open this application to select the plugin and the preset and click Generate. It will prompt you that the plugin is already created with an option to set the preset as default.
Updating the generated vst3 plugins.
When you install a new version of the MP Host it will install the new MP Host template vst3 files.
Close your DAW (Very Important). Open the Generator application. Click on Update.
It will update all the generated vst3 plugins to the latest version of the MP Host and place a log file on your Desktop.
You can delete that log file.
46. The MP Bridge Utility
The MP Bridge utility is installed automatically with MP Host versions released after December 10, 2025.
MP Bridge handles switching between MP Controller software applications, meaning it controls what is shown on the controller display. It also switches the controller’s MIDI device connection to the software currently in use.
This applies when switching between MP Host effects and instruments.
For this reason, MP Bridge must be running at all times when using the MP Controller.
Once installed, MP Bridge starts automatically and is also configured to launch when the computer starts.
You do not need to run it manually.
The installer also adds a desktop shortcut for the MP Bridge Panel, which allows you to start or stop the utility when needed.
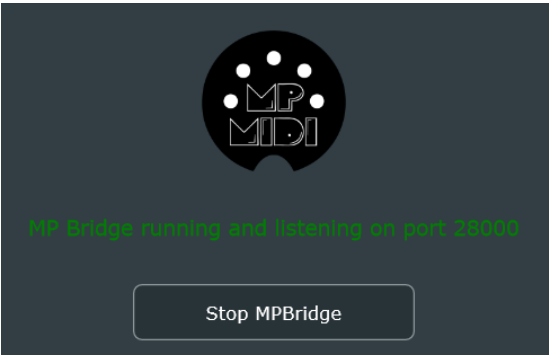
Locations:
Windows: C:\Program Files\MPBridge\
Mac: /Applications/MP Bridge/
If the MP Bridge in not running then the controller windows will not open.