5. UPDD (Windows and MacOS)
Information about UPDD installation and configuration
- 1. Using UPDD for enhanced touch functionality (Download UPDD)
- 2. Mouse to touchscreen suggestions
- 3. How to configure the UPDD Zoom and gestures
- 4. UPDD Quick Installation Guide for Mac
- 5. Uninstalling UPDD from the Mac
- 6. UPDD Commander Presets - Studio One TUIO
- 7. Mac - The UPDD Smart Magnifier shows the background instead of the MP Host
- 8. UPDD notifications
- 9. Running the UPDD Diagnostics to troubleshoot the touch screen
- 10. Touch screen calibration via UPDD
- 11. UPDD Permissions on the Mac
1. Using UPDD for enhanced touch functionality (Download UPDD)
Enhanced touch functionality via UPDD
UPDD is the best option for taking advantage of a touch screen on the macOS.
Note that we have a simple utility that will take the mouse cursor to the touch display when it detects a touch gestrure.
See more information here.
UPDD offers the following important benefits and others such as multi-gesture configurations:
1. On the Mac: If the mouse is not located on the touchscreen of the MP Controller, touch will affect where the mouse is currently located. UPDD transfers the mouse pointer to the touch screen automatically when it detects a touch gesture.
2. Both Mac and Windows: The smart magnifier (Zoom on the controller screens with gestures)
3. Both Mac and Windows: Returning the mouse position to its previous position after a touch gesture
4. Both Mac and Windows: Keep the keyboard focused on the DAW after a touch gesture.

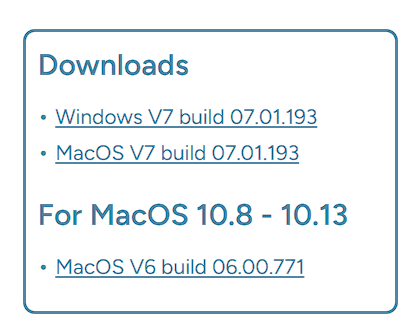
Download and Install UPDD
You can get the UPDD software from https://touch-base.com/controllerbyte at a heavily discounted price for a lifetime license and 3 years of receiving updates and support.
There is a 7 day trial available to download it prior to purchasing.
IMPORTANT:
Purchase UPDD only from https://touch-base.com/controllerbyte as this is a special version for the MP Controller.
No configuration is needed after you install UPDD except the Identify procedure.
Do not select any devices in UPDD, everything is done automatically.
MacOS: Ensure you have given UPDD the appropriate permissions during installation.
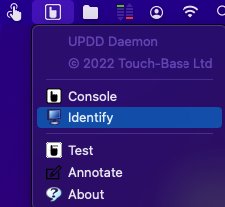
After installation you only need to run Identify in UPDD.
if you have Slate Digital Raven, you need to reach out to
support@touch-base.com and they will provide a software that works for both, the MP Controller and Raven.

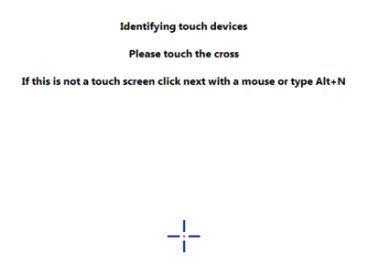
Identify Procedure
After installing UPDD, you will need to run Identify from UPDD in order to select the target monitor
Gestures for the smart magnifier are preset in UPDD (tap with 2 fingers to magnify). |

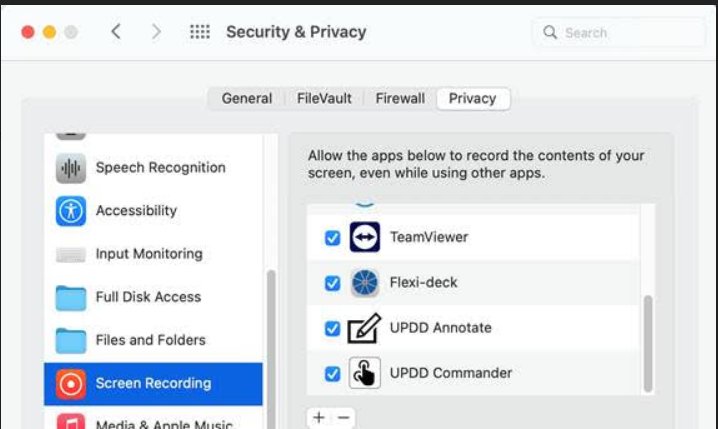
MacOS: Enable the Commander in Screen Recording
Don’t forget to enable the Commander in Screen Recording, otherwise the smart magnifier will appear on the desktop instead of the MP Host plugin window (hiding the MP Host window) see https://support.touch-base.com/Documentation/50778/Smart-Magnifier
Permissions required for UPDD on MacOS are shown here

Updating UPDD
To update UPDD go to https://touch-base.com/controllerbyte and select to download the trial (regardless if you have purchased it already).
Enter your name and email address.
Select the OS you have and submit.
It will send to your email the link to download the latest UPDD version.
If you have already register the license, it will register automatically after you install UPDD.

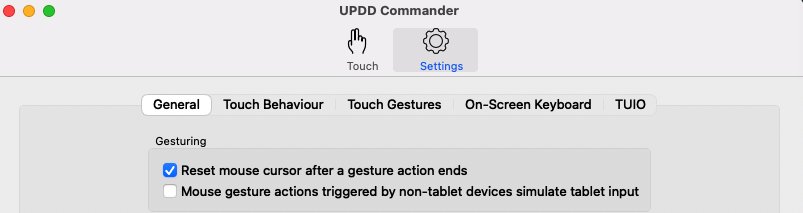
Suggestion
A very helpful setting in the UPDD settings is the Reset mouse cursor after a gesture action ends. This option automatically returns the mouse pointer back to its previous position after you finish with a touchscreen gesture.
It can also reset the Keyboard focus (take it back to the previous app). Read more here

Alternatively, see these mouse to touchscreen suggestions

Troubleshooting:
Mac OS X Touchscreen Model 1A+
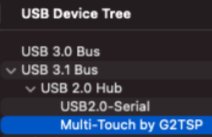
The first time, connect the Display USB, using the cable provided, directly on the Mac (not via a hub to eliminate any possibilities of issues). It should show up under System Report > USB as “MP Controller Touch Screen”.
Touch will work, but the mouse cursor needs to be on the MP Controller’s touch screen to control that screen.
UPDD takes care of this, along with other benefits such as the Smart Magnifier, right click function and many more.
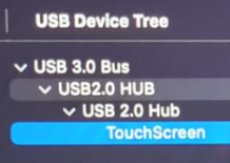
UPDD will display it as
Vendor ID 0x222A, Product ID 0x0858,
Manufacturer: MP Controller Touch Display,
Product: MP TouchScreen
Do not check the box to select the device.

Mac OS X Touchscreen Model 1A
The touch needs to show up first in System Report as G2TSP Multi touch display under USB. Then you can install UPDD for the touch function to work
The touchscreen works as mouse input, therefore when you touch the screen it gets the mouse cursor. If you touch and drag, it behaves in the same way as clicking and dragging with the mouse.
For up to Mac OSX Mojave, the touchscreen monitor does not need any drivers and works with the native Mac OSX drivers when connected. However on Mojave, the mouse position needs to be on the touchscreen so to enhance the workflow we have these 3 suggestions.

2. Mouse to touchscreen suggestions
1. Keyboard Shortcut to take automatically the mouse to the touchscreen and back with a small utility
Download from here
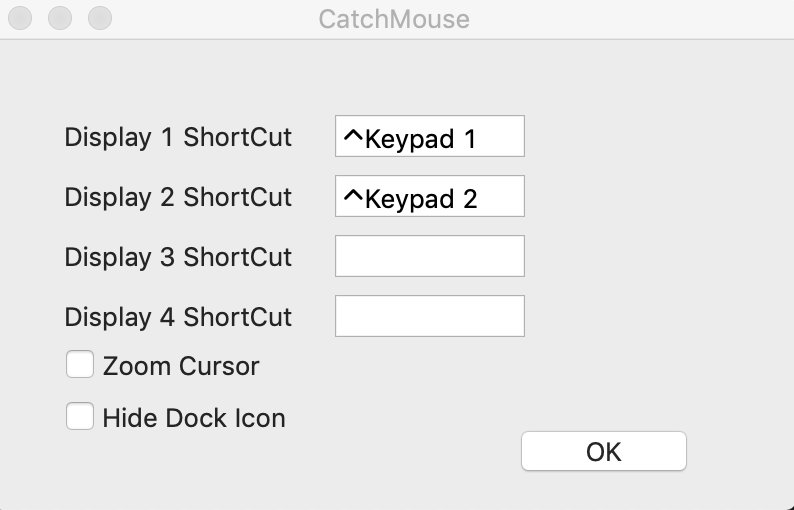
In the above example ctrl + 1 moves the mouse to the main screen, and ctrl + 2 moves the mouse to the touchscreen.
2. Take automatically the mouse to the touchscreen via Better touch tool
(45 day trial and paid $8.5 license)
-
Go to BetterTouchTool Preferences => Keyboard.
-
Click Add New Shortcut or Key Sequence button.
-
Assign new Keyboard Shortcut from Click to record shortcut
for example, for Monitor-1 Control+Shift+1, for Monitor-2 Control+Shift+2 etc. -
Then from Trigger Predefined Action dropdown menu, select
Other Mouse Actions => Move Mouse To Position -
A modal window will appear to capture your desired mouse position. Simply take your cursor to the desired position of a Monitor and Press Space to capture the position. Now Save the position in the Modal Window.
-
Repeat 2 to 5 for all your Monitors.
Now you'll be able to jump your mouse cursor to Monitor-1 by pressing Control+Shift+1, to
Monitor-2 by pressing Control+Shift+2 and to Monitor-3 by pressing Control+Shift+3.
3. Get the MP Controller Touch-base driver from here https://touch-base.com/controllerbyte
Trial available. To purchase the price is 35 GBP per license with 3 years of support.
This utility takes the mouse to the touchscreen automatically and there is no need for shortcuts
A very helpful setting in the UPDD settings is the Reset mouse cursor after a gesture action ends. This option automatically returns the mouse pointer back to its previous position after you finish with a touchscreen gesture. This means that If you are working on the main screen and you touched the touchscreen it will return back to the main screen automatically at the exact position it was before you touched the touchscreen.
For all UPDD features see here
3. How to configure the UPDD Zoom and gestures
The latest version of UPDD is configured to use Zoom Screen with the 2 finger tap gesture. Zoom Screen zooms only within the controller's display. The Smart Magnifier zooms outside the controller display as well.
If you need to change the behavior of the Smart Magnifier here are the steps to do so.
If the Smart Magnifier shows the desktop instead of zooming on the MP Host plugin see here
First make sure you have the latest UPDD version installed. This should be normally obtained from Touch Base.
Allow the necessary access on Mac OS.
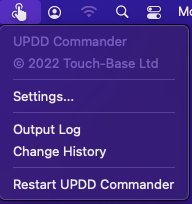
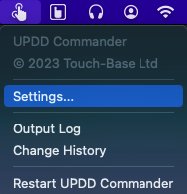
Open the UPDD Commander Settings from the top bar on the Mac
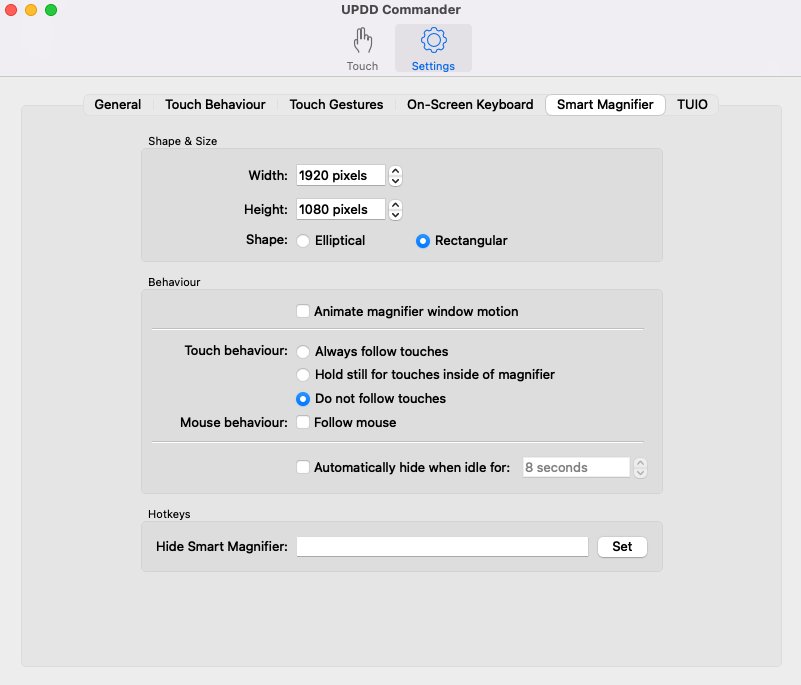
Go to Smart Magnifier tab and set the:
-
Width to 1920
-
Height to 1020
-
Rectangular Shape
-
and to Not follow touches
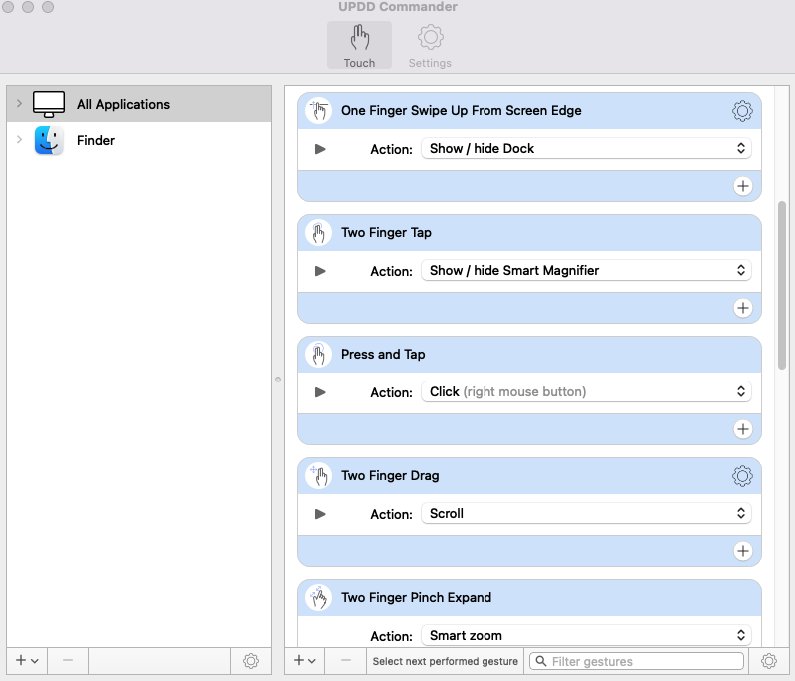
5. Navigate to All Applications
And set the:
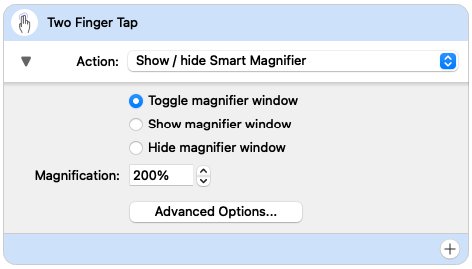
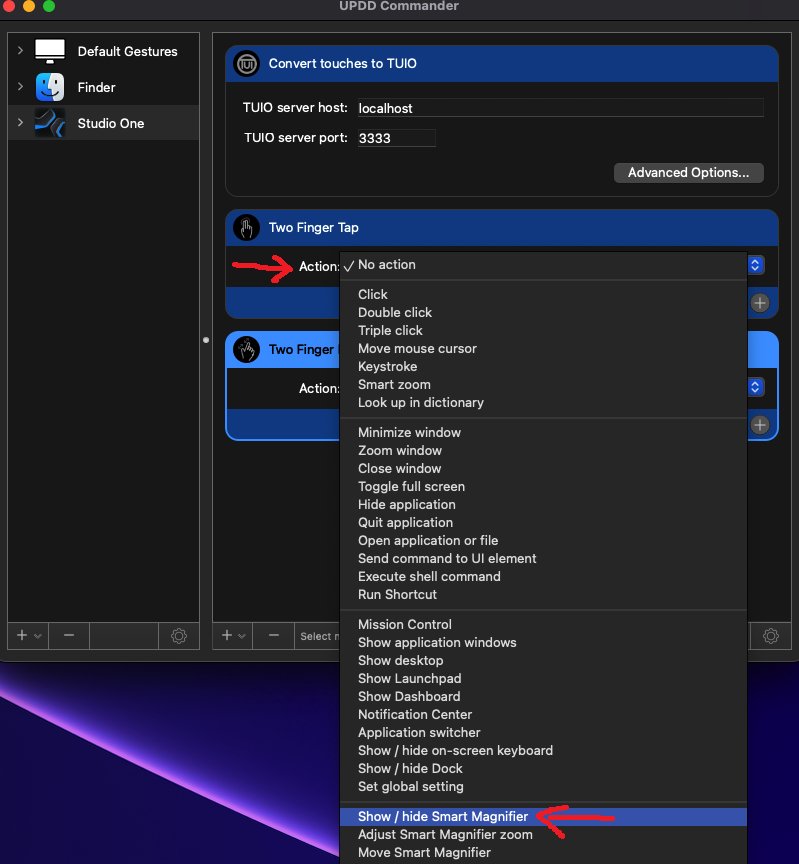
Two Finger Tap to
Action: Show/Hide the Smart Magnifier
Optionally you can set the
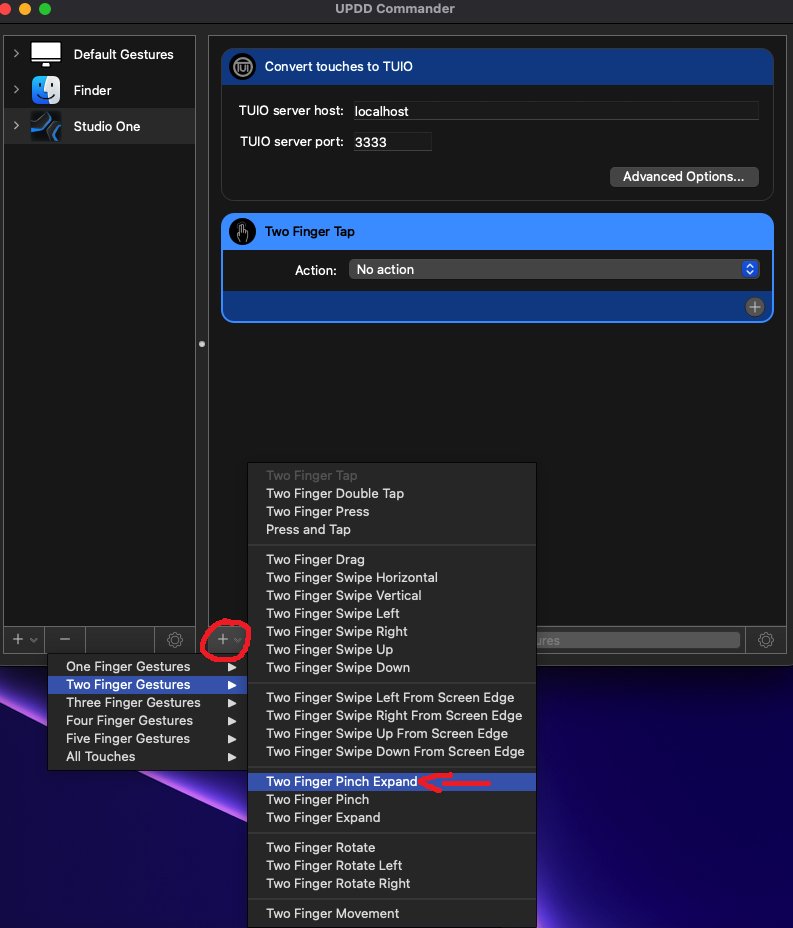
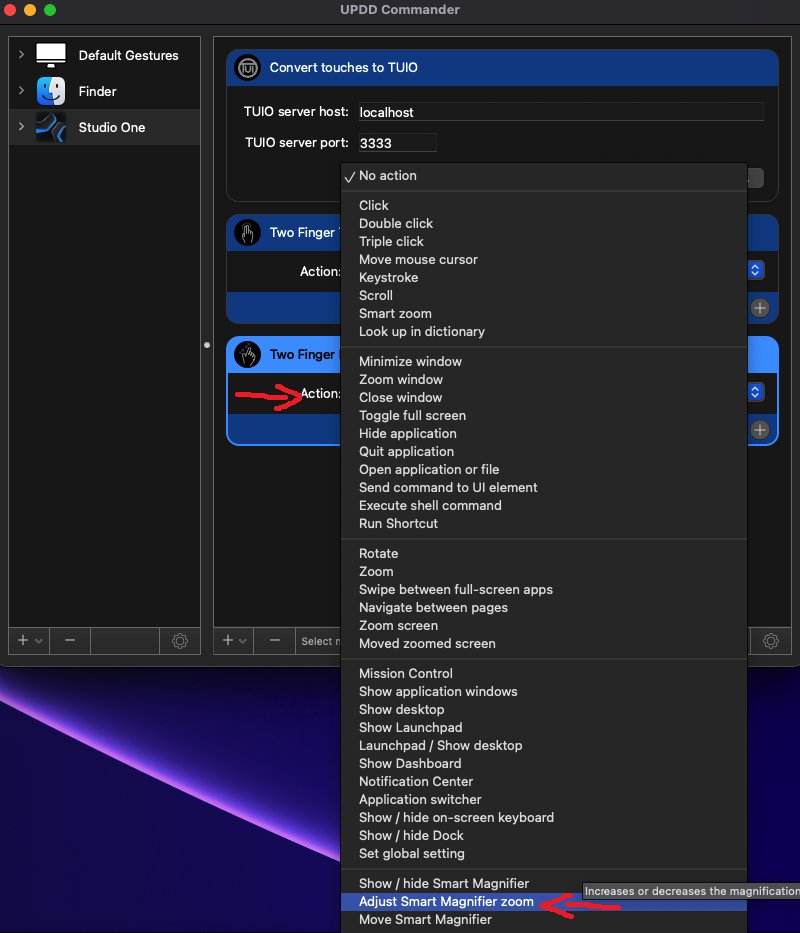
Two Finger Pinch Expand to
Action: Smart zoom
Set the Magnification to your preference ie 200%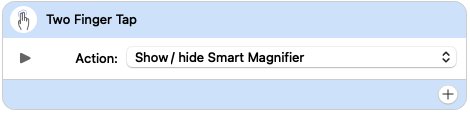
Then set the amount of
Zoom with gesture movement.

4. UPDD Quick Installation Guide for Mac
https://support.touch-base.com/Documentation/50245/Quick-installation-guide
mac OS Ventura 13.0.1 is supported by driver UPDD V7.
V7 - macOS 10.14 and above
V6 - macOS 10.8 and above
Due to security considerations, since macOS 10.13, users must manually 'Allow' these extensions to be installed, and will be prompted to do so during installation.
You do not need to change any setting in UPDD except run the identify procedure as explained here
5. Uninstalling UPDD from the Mac
Uninstall procedure
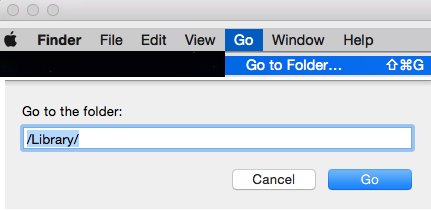
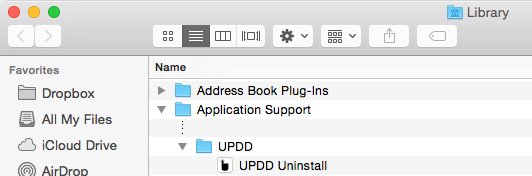
To uninstall locate and run “UPDD Uninstall” program.
Since UPDD 6.0.242 there is a shortcut icon in the Utilities folder:

This shortcut links to the actual uninstaller held in the /library/application support/updd folder.
 |
You will need to enter your login details to authenticate the uninstall request and then the
process will start. The uninstaller welcome screen is shown; click Continue.
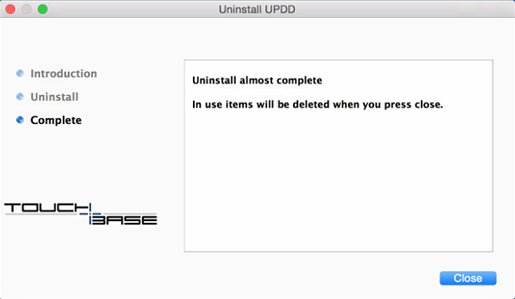
Click close to complete the uninstall.
The uninstaller also uninstalls any UPDD extensions that require the driver to be installed, such as
Commander, Gestures and TUIO Server. Any start up items are removed and the applications are
deleted from the /applications/utilites folder
(so long as they reside in this folder!)
Commander gesture settings
Since UPDD v7.0.48, uninstall can optionally delete the UPDD Commander application,
gesture and actions setting as controlled by global setting updd_commander_uninstall_settings
This setting indicates how UC gesture settings should be handled during uninstall
0 – Retain
1 – Remove
2 – Request (default – show dialog to confirm deletion, given that they may want to be retained)
Silent uninstall
In some cases it may be desirable to uninstall silently, especially if called from a 3rd party uninstaller
that needs to remove UPDD as part of its own uninstall. In this case call the uninstall program using
the “-s” option.
Note: An icon appears in the dock when running and some messages are output to the console
but we believe this should not be an issue. Please advise if it is.
6. UPDD Commander Presets - Studio One TUIO
UPDD Commander:
1. Open UPDD Commander settings.
2. Click the '+' Icon Left-Bottom and add the 'Studio One' preset.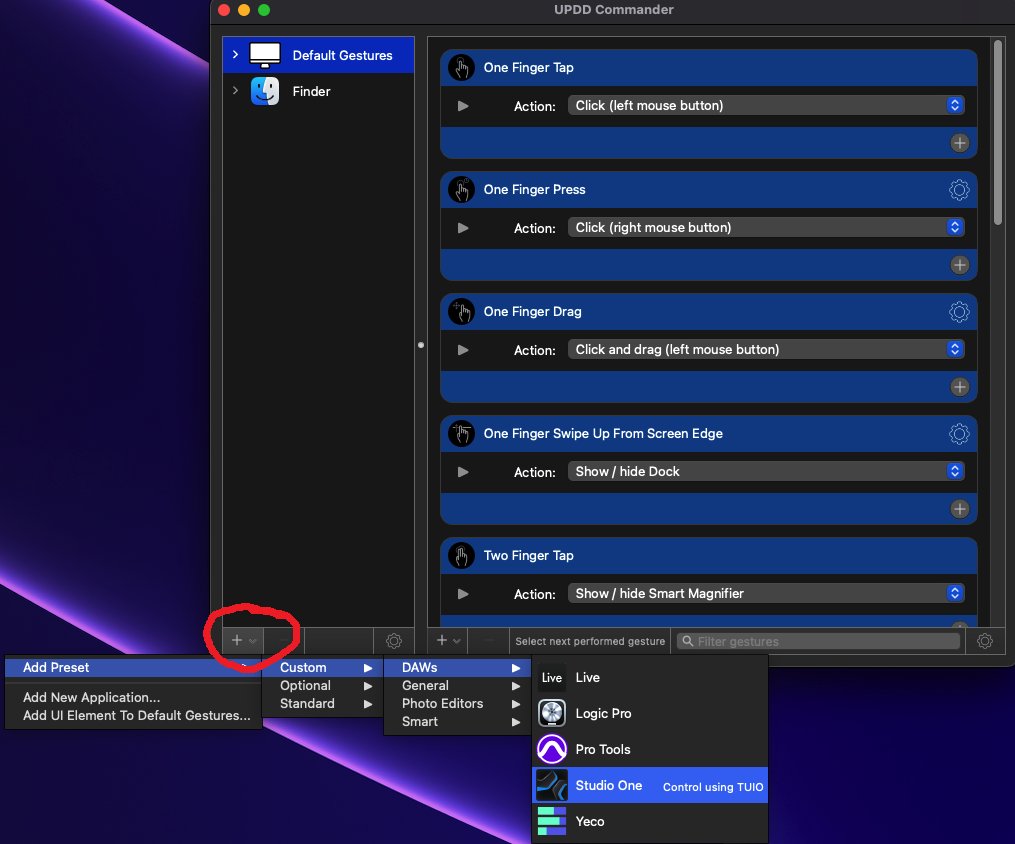
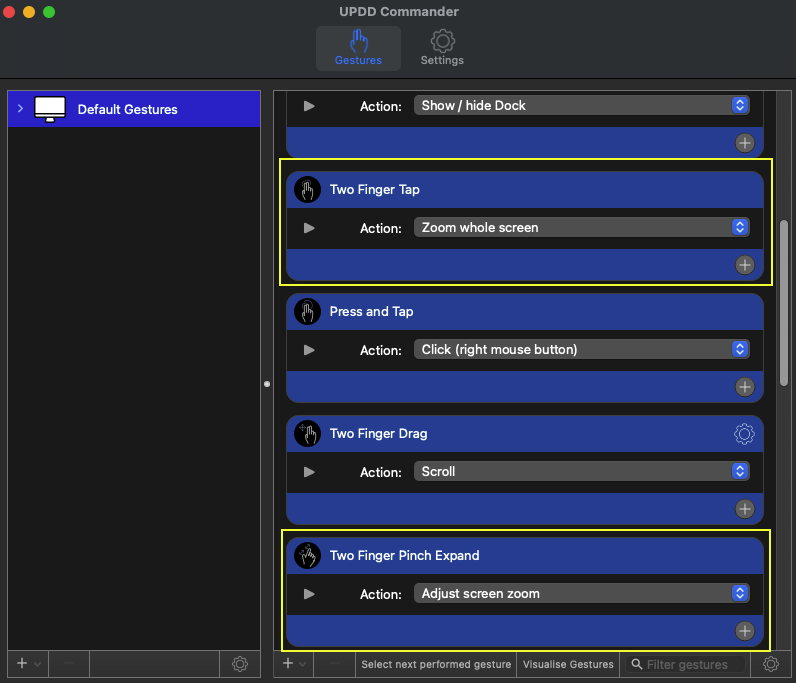
4. Click the '+' icon and add these gesture as shown below
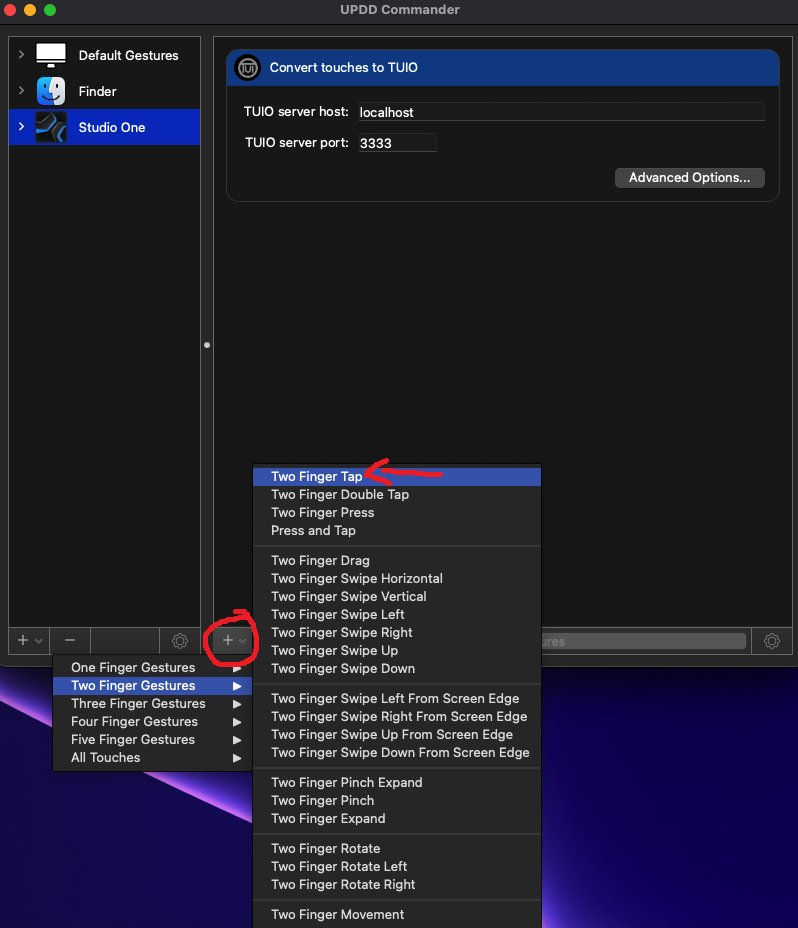
5. Set the Action for 'Two Finger Tap' to 'Show / hide Smart Magnifier'
6. Set the Action for 'Two Finger Pinch Expand' to 'Adjust Smart Magnifier zoom'
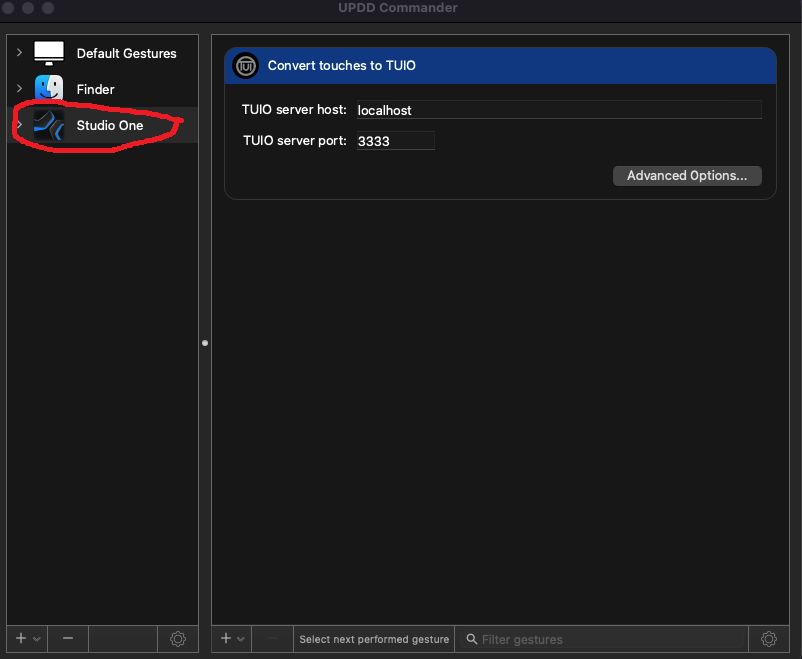
In Studio One:
- To enable touch in Studio One go to Preferences > General and enable TUIO.(Set Port at: 3333)
- Drag the Preferences window that is shown below on the MP Controller's screen and click "This"
More information from Touch-base here.
7. Mac - The UPDD Smart Magnifier shows the background instead of the MP Host
If this happens, then it means that the UPDD needs Screen Recording permissions on the Mac OS.
Set the screen recording permissions as follows for UPDD:
Run the Identify as shown in the setup article.
Reboot the Mac after making these changes.
8. UPDD notifications
If you are getting frequent notifications from updd, issue this command in a terminal on the Mac and the notifications will stop.
upddutils nodevice set minimum_notify_level 2
when n = 1 issue warning and critical only, 2 critical only. Any other value implies 0 - all notifications are issued.
9. Running the UPDD Diagnostics to troubleshoot the touch screen
Troubleshooting the UPDD touch-base driver
If the touch hardware is listed in System Report but touch is still not functional, open the Diagnostics from UPDD console and run the diagnostics:
https://support.touch-base.com/Documentation/50453/Diagnostics-procedure
You will be asked to draw some patterns.
It will create a zip file on your desktop and this can be sent to support@touch-base.com
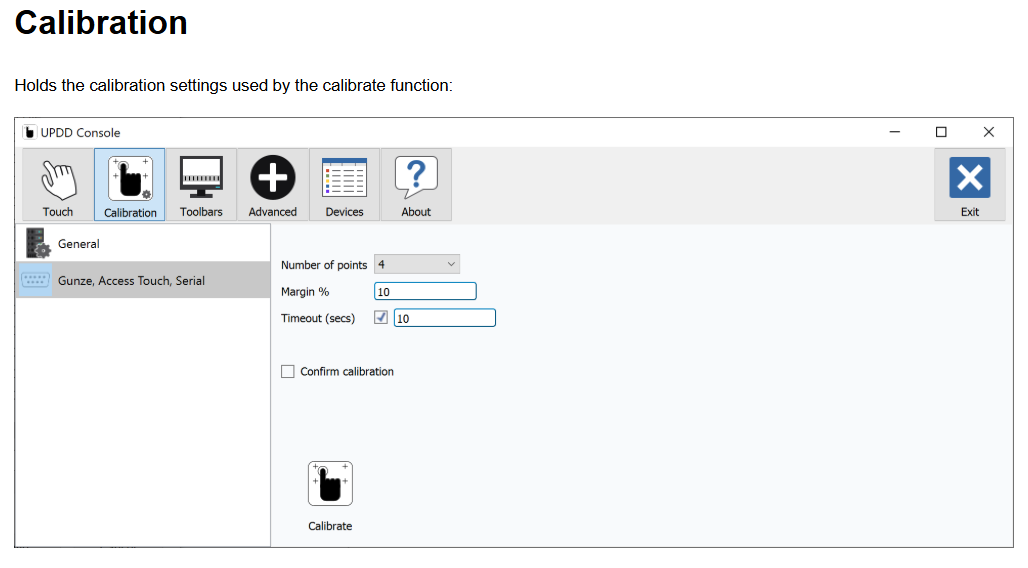
10. Touch screen calibration via UPDD
You can calibrate the touch screen if you have UPDD installed.
Click on the UPDD Console icon to open it and click on the Calibrate icon.
https://support.touch-base.com/Documentation/50697/Calibration
11. UPDD Permissions on the Mac
UPPDD Requires the following permissions in MacOS under System Settings > Privacy and Security:

![]()
![]()