If your monitor flickers (does not stay on) you can use the Y-cable to provide power and touch data. It’s recommended to use the Y-cable in any case, because it will lessen the power load on the computer’s USB port. It is also recommended to connect this port directly on the computer and not via a hub.
Port 3. The USB-C MIDI port is used to send/receive MIDI data (MIDI Controller) to/from the computer. The hardware is listed as C1-xMP1 on both Mac OS and Windows. On this port you can use longer usb cables if you need to. Connect **only** with a USB-C to USB-A cable (not USB-C to USB-C).  ##### Model 2A 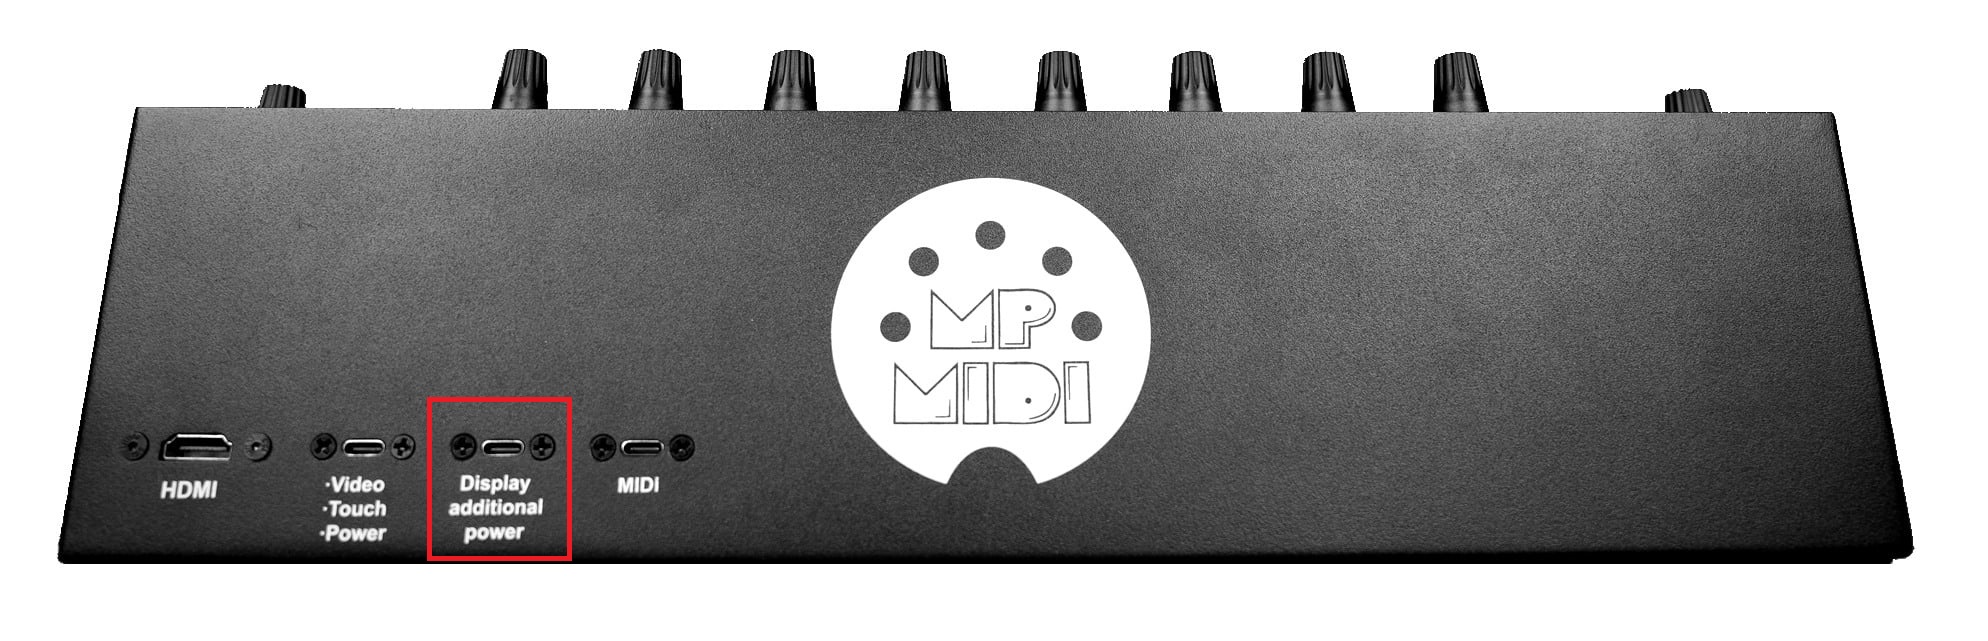 **Port 1.** The HDMI provides a video signal to the display, however it does not provide power. When the HDMI is not connected (but it has power) the display will go to sleep within 2 seconds. On a Mac or PC with thunderbolt, it is possible to connect a Thunderbolt cable on the USB-C Display port of the controller, instead of HDMI, but not both. **Port 2.** The USB-C Display port is used to provide power to the monitor and it is also used to send touch data to the computer from the monitor.On Macs, Thunderbolt ports almost always support DisplayPort Alternate Mode (DP Alt Mode) over USB-C, so a display connected through a Thunderbolt/USB-C cable can output video directly. For M4 or later Macs see [here](https://kb.mpmidi.com/books/mp-controller-documentation/page/4-mac-m4-display-connection-options). On Windows PCs, it depends heavily on the hardware: Not all Thunderbolt ports on PCs carry DisplayPort video. Some motherboards or laptops wire the Thunderbolt controller only for data/PCIe without a DP passthrough.If the GPU is not routed to that Thunderbolt controller, no video signal can be sent. Some systems require Intel Graphics / NVIDIA/AMD GPU drivers and Thunderbolt drivers/software for video over USB-C to function. On desktops, the Thunderbolt add-in card must be cabled internally to the GPU’s DisplayPort output to carry video through the USB-C connector. Without that DP link, the port only does data. Macs are wired universally to provide DP Alt Mode via Thunderbolt, while on PCs it’s optional and depends on motherboard/GPU integration.
**Port 3. A****dditional power port for the display which it can be connected on external power adapter. This port should be connected only when there is not enough power provided by the computer’s USB port for the display. However, it is a good practice and we recommend to connect this port to a wall adapter (5v/2A) so that it lessens the power load on the computer's USB port. **Port 4.** The USB-C MIDI port is used to send/receive MIDI data (MIDI Controller) to/from the computer. The hardware is listed as C1-xMP1 on both Mac OS and Windows. On this port you can use longer usb cables if you need to. Connect **only** with a USB-C to USB-A cable (not USB-C to USB-C).  ##### Common connection diagram for all models 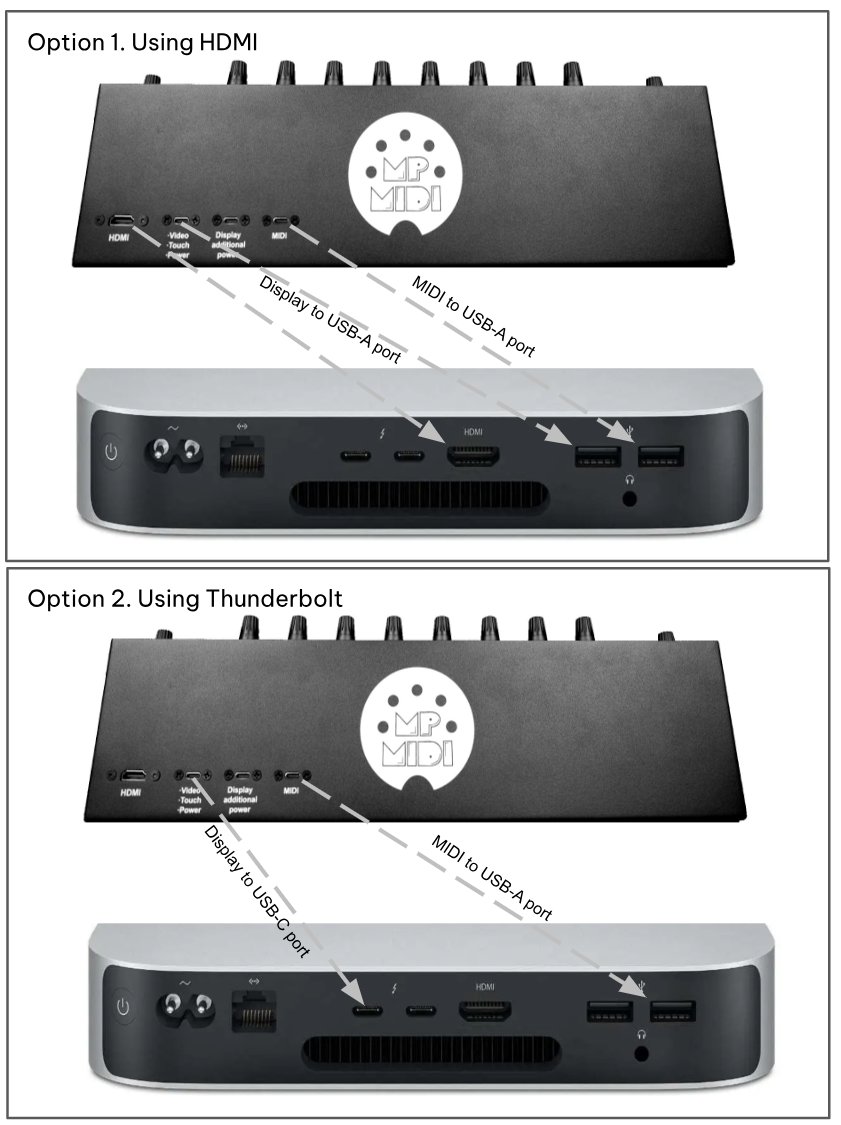 # 2. Additional HDMI Port Options and USB-C docking stations ##### HDMI and powering the display If your computer don’t have an HDMI port available but has other digital graphics connections, you can use an adapter for a digital connection such as DVI or Display port. First, connect the USB-C ports to power the display and then connect the HDMI. > **Windows only:** the controller’s display also works when connected via a [USB to HDMI adapter](https://www.amazon.de/s?k=usb+to+hdmi+converter&crid=1SGQB3E70YAQ3&sprefix=USB+to+HDMI) in case you are on a laptop or computer with limited HDMI outputs.If your Mac has reached the maximum number of displays it can output video to, this adapter will allow you to add more displays. For example the Mac Mini M1 allows only 2 displays. The Wavlink Model: WL-UG7602HC USB-A/USB-C to Dual HDMI 4K@60Hz Display Adapter works on the Mac (Apple Silicon) and Windows and it is generally available from online marketplaces. Note for WL-UG7602HC: Download the InstantView display application with UI. Support macOS 15 Sequoia, 14 Sonoma, and 13 Ventura, including MacBook Air/Pro (M1/M2/M3/M4 & Intel powered) from [https://www.siliconmotion.com/downloads/ ](https://www.siliconmotion.com/downloads/)
Do not use a USB-C to USB-C (thunderbolt) cable to connect the display on a thunderbolt port on the computer and connect an HDMI at the same time. It will cause the computer to see the controller’s monitor twice and will create conflicts. You can connect either the HDMI or a thunderbolt, but not both.
##### USB-C docking station recommendations for Macs For newer Macs with few or no USB ports or HDMI ports, we recommend getting a USB-C docking station, here are some suggestions. **Amazon.com** - [Reborn USB C Hub 5-in-1 for MacBook Pro/Air, 4K HDMI Multiport Adapter with 100W Power Delivery, 3\*USB A Data Ports, USBC Dongle for Dell, HP, ASUS, Acer and Other Type C Laptops](https://www.amazon.com/Reborn-USB-HDMI-Multiport-Delivery/dp/B0FHPMDWHC/) - [UGREEN Revodok Pro 7 in 1 Docking Station Dual Monitor, USB C Hub Dual 4K@60Hz HDMI Display, 10Gbps USB-A/C Data Ports, 100W PD, Aluminum Laptop Docking Station for HP, Thinkpad, Dell and More](https://www.amazon.com/UGREEN-Revodok-Docking-Station-Transfers/dp/B0D1XSKZRJ/) - [Anker USB C Hub, 5-in-1 USBC to HDMI Splitter with 4K Display, 1 x Powered USB-C 5Gbps & 2×Powered USB-A 3.0 5Gbps Data Ports for MacBook Pro, MacBook Air, Dell and More](https://www.amazon.com/Anker-Display-MacBook-Thinkpad-Laptops/dp/B0BQLLB61B) **Amazon.de** - [UGREEN Revodok 105 USB C Hub PD100W, 4K HDMI, 3 x USB A Data Ports USB C Adapter Multiport Adapter Compatible with iPhone 17/16, Galaxy S24, Surface, MacBook Pro/Air](https://www.amazon.de/-/en/Revodok-Adapter-Multiport-Compatible-Surface/dp/B0BR3M8XHK/) - [Baseus USB C Docking Station Dual Display, 9 in 1 USB C Dock 2 4K HDMI Dual Monitor, Gigabit Ethernet, 100W PD, SD/TF Card Reader, 3 USB, USB C Multiport Adapter for MacBook/Dell/HP/Surface/Lenovo](https://www.amazon.de/-/en/Docking-Station-Display-Ethernet-Multiport/dp/B0B5QK1W9Z/ref=sr_1_4?crid=3OU7WM16IQVBK&keywords=usb+c+docking+station+2+hdmi+mac&qid=1668253135&sprefix=docking+mac+hdmi%2Caps%2C138&sr=8-4) - [USB C Hub, Dockplug 5-in-1 DD0008 Dock USB C Adapter with 4K 60Hz HDMI, 100W PD, 3 USB 3.0, for MacBook Pro/Air M1/M2, iPad Pro, iPad Mini 6, Surface Pro, XPS 13 and More Type C Devices](https://www.amazon.de/-/en/sspa/click?ie=UTF8&spc=MToyMjM3MzI5NDU0MjM0MTMxOjE2NjgyNTMwNDY6c3BfYXRmOjIwMDYxNzk0OTgzNzk4OjowOjo&url=%2FDockplug-DD0008-Adapter-MacBook-Surface-black%2Fdp%2FB08SM393WB%2Fref%3Dsr_1_1_sspa%3Fcrid%3D3N3RNTUMKFHCZ%26keywords%3Ddocking%2Bmac%2Bhdmi%26qid%3D1668253046%26sprefix%3Ddocking%2Bmac%2Bhdmi%252Caps%252C142%26sr%3D8-1-spons%26sp_csd%3Dd2lkZ2V0TmFtZT1zcF9hdGY%26psc%3D1) - [USB C Docking Station Dual Display, 9 in 1 USB C Hub 2 HDMI Dual Monitor, Gigabit Ethernet, USB 3.0 & USB 2.0, 100W PD, SD/TF, Compatible with MacBook Pro, MacBook Huawei, Dell XPS Tablet Type C etc](https://www.amazon.de/-/en/Docking-Station-Display-Ethernet-Compatible-Black-grey/dp/B09SZ61XWK/ref=sr_1_6?crid=3OU7WM16IQVBK&keywords=usb+c+docking+station+2+hdmi+mac&qid=1668253135&sprefix=docking+mac+hdmi%2Caps%2C138&sr=8-6) ##### Connection example using a powered docking station on a Macbook In this example we are using a [Satechi multiport docking station](https://satechi.net/products/satechi-slim-aluminum-type-c-multi-port-adapter) > The docking station provides power to the MP Controller and at the same time it charges the Macbook [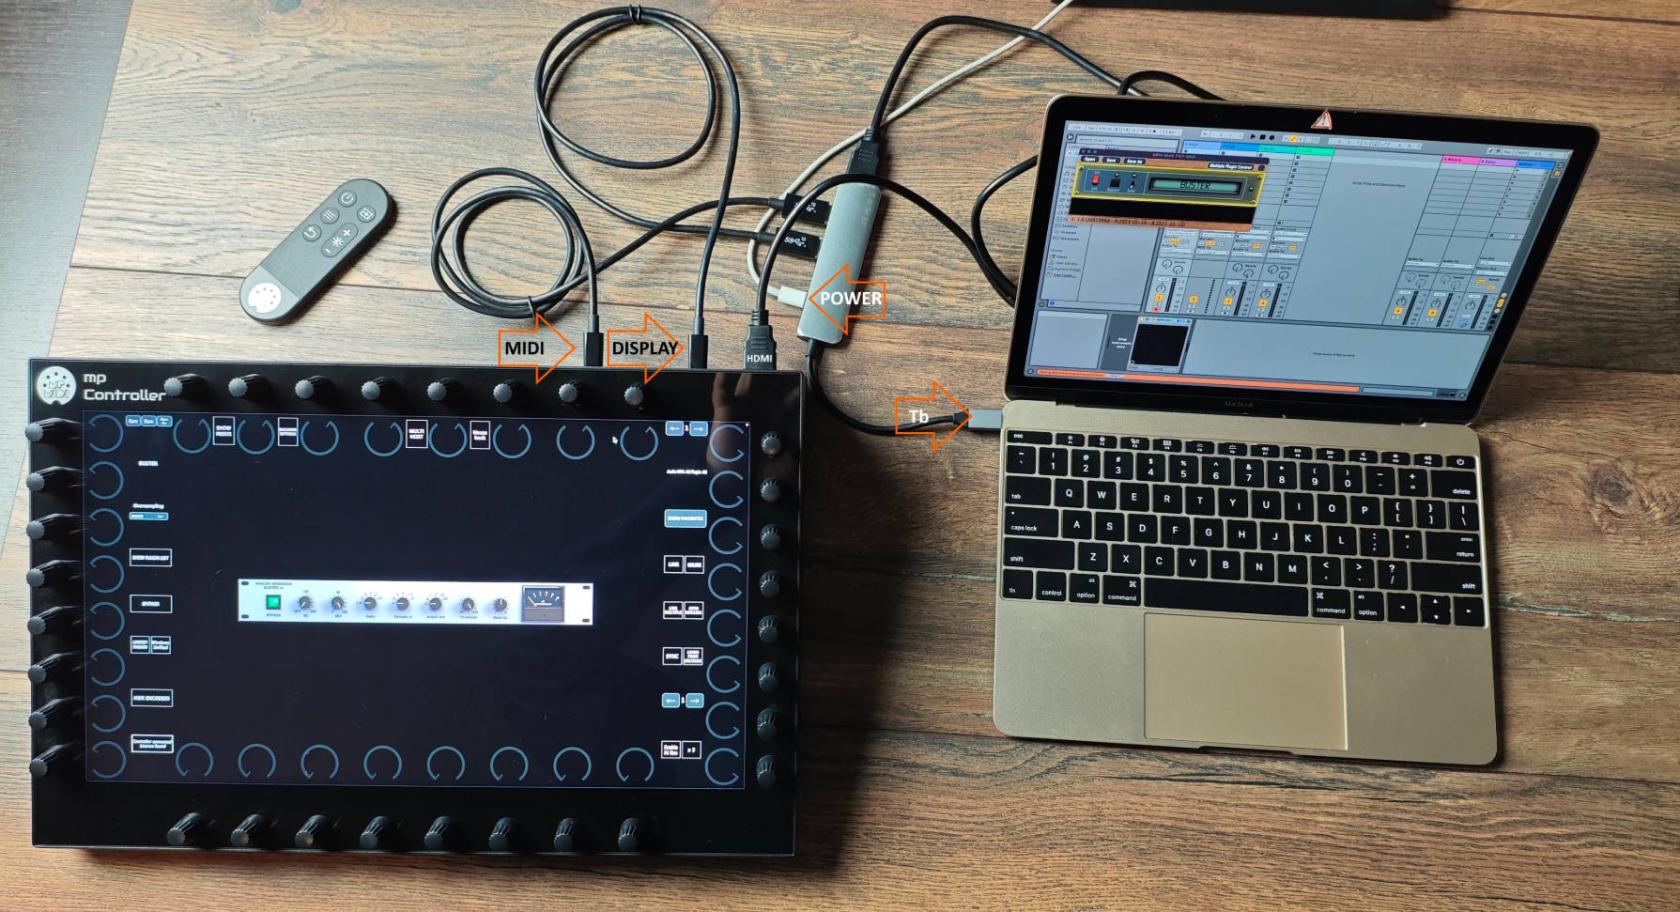](https://kb.mpmidi.com/uploads/images/gallery/2025-04/4J4YnvPQJfTxXDBx-asdgqhfgqq12352.jpg) # 3. MIDI Connectivity (C1-xMP1)IMPORTANT: For Mac and Windows, disable the MIDI IN/OUT for the C1-xMP1 in your DAW Do not rename the C1-xMP1 in MIDI Studio on the Mac |
The MP Controller's display does not receive a video signal when using Thunderbolt USB-C on the M4 as it did on previous Apple Silicon Macs.
You should use an HDMI connection for video signal and USB-C (USB-C or USB-A if using a docking station) for the touch data and for providing power to the display. > You can optionally (recommended on Model 2A) also use the additional power port using a wall adapter to provide power to the display so that it draws less power from your Mac. If you need an additional HDMI ports you can use a USB-C docking station like **[these](https://www.amazon.com/s?k=USB-c+docking+station)** offered on Amazon. # 5. Initial Setup Guide - How to setup the mp controller the first time To setup your MP Controller the first time, you need to follow the initial guide **sent by email** when you had purchased the MP Controller. That initial guide covers the important steps in order on how to connect the MP Controller, register the controller on the portal, download the MP Host plugins and generate the needed license.Do not begin your setup using the knowledge base only. You need to follow the initial guide first. This knowledge base offers information on the functionality of the MP Controller, how to setup control surfaces for DAWs and how to troubleshoot.
# 2. Display and Touch Setup on Mac OS Important information on how to setup the display and touch function for the Mac. # 1. Mac - Display and Touch Setup ##### Display configuration on the Mac (all models) The resolution of the monitor should be set to 1920 x 1080. If it is not set automatically by the OS, you can set it manually under Settings > Displays. Set the monitor as an external display in Displays on the Mac. (not mirror). System Settings > Displays. Use As: Extended Display [](https://kb.mpmidi.com/uploads/images/gallery/2025-12/7Ga85UO4ciShvdNX-image.png) The monitor frequency should be automatically set to 60Hz. In some cases, the Mac OS may set it to 75Hz and this will cause the display to not be able to show any video. The refresh rate settings on MacOS are hidden — In Display Settings, be sure to hold the Option key when clicking "Scaled" to see the refresh rate option.How to disable the Mac top bar on the MP Controller display System Preferences > Mission Control. Displays Have Separate Spaces will be selected. Simply deselect. See in detail [here](https://kb.mpmidi.com/books/mp-controller-documentation/page/4-mac-hide-the-macos-top-bar-from-the-mp-controller)
##### Reveal All Possible Screen Resolutions for a Display Connected to a Mac - Open System Preferences from the Apple menu in Mac OS X - Click on “Display” - Under the ‘Display’ tab, hold down the OPTION / ALT key while you press on the ‘Scaled’ button alongside Resolution to reveal all available screen resolution options for the display - Choose the resolution desired from the complete list of available screen resolutions, then close out of System Preferences as usualSee in more details in this article [here](https://osxdaily.com/2015/08/27/show-all-display-resolutions-external-screen-mac/)
 ##### Model 1A+/2A Touch Function The TouchScreen should show in the System Report under USB 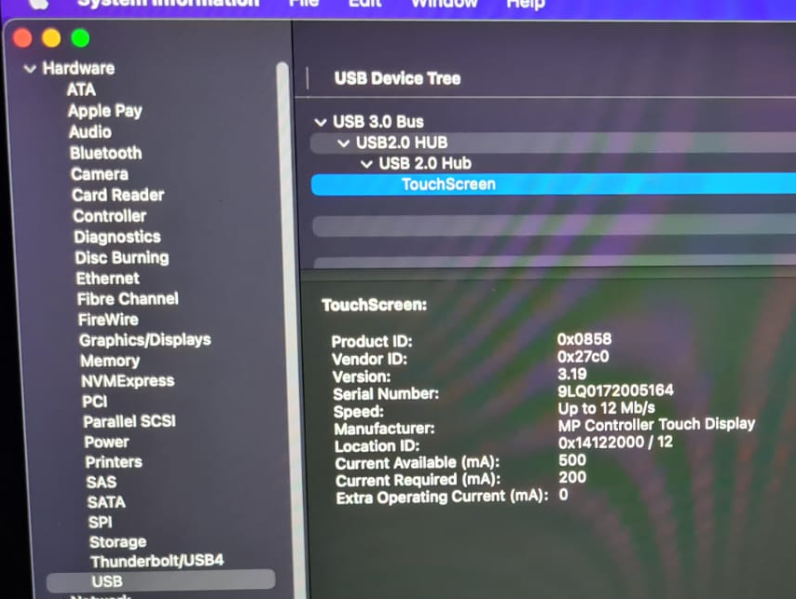 If it does not show up in the System Report, it is due to a connection issue. Connect the USB-A to USB-C cable provided directly on the Mac. (not through a hub or docking station or the Y-cable) and reopen the System Report. For further troubleshooting see [here](https://kb.mpmidi.com/books/mp-controller-documentation/page/4-mac-model-1a2a-troubleshooting-the-touchscreen). If the touch works but affects your other display, then you need to move the mouse pointer to the MP Controller display. This can be done automatically when you touch the MP Controller display instead of manually having to move the cursor by using [UPDD](https://kb.mpmidi.com/books/mp-controller-documentation/page/1-using-updd-for-enhanced-touch-functionality-download-updd). Additionally, [here ](https://kb.mpmidi.com/books/mp-controller-documentation/page/2-mouse-to-touchscreen-suggestions)are some other utilities that can move the mouse cursor to other displays.  ##### Model 1A Touch Function The Touch hardware shows as "Multi-Touch by G2TSP" in the System Report. UPDD is required for touch functionality on MacOS Catalina and later for Model 1A. See [here](https://kb.mpmidi.com/books/mp-controller-documentation/page/3-mac-model-1a-troubleshooting-the-touch-function) 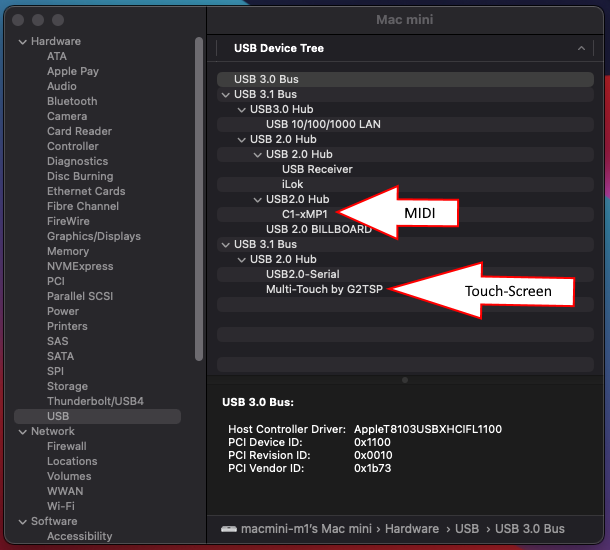 If it does not show up in the System Report, it is a connection issue. Connect the cable provided directly on the Mac (not through a hub or docking station or the Y-cable) and reload the System Report. --- ##### Using a stylus with the touchscreen: The touch screen does not work a stylus but it does work with pens that have a rubber tip. These are Capacitive Stylus Pens, [as this one](https://www.amazon.com/Screens-Sensitivity-Precision-Capacitive-Universal/dp/B0B6FT6L8P) # 2. MacOS Full screen mode and Window modeWe recommend running the MP Host "In Window" mode and disable the MacOS top bar for secondary displays via Mission Control, Spaces. See how to do this [**here**](https://kb.mpmidi.com/books/mp-controller-documentation/page/4-mac-hide-the-macos-top-bar-from-the-mp-controller)
If Spaces is not disabled then "In Window" mode will show up the top bar of Mac OS on top of the MP Host window.Note that, if the display arrangement is vertical then the Dock will appear at the bottom of the bottom display. It's not possible to set the Dock at the bottom of the top display.
[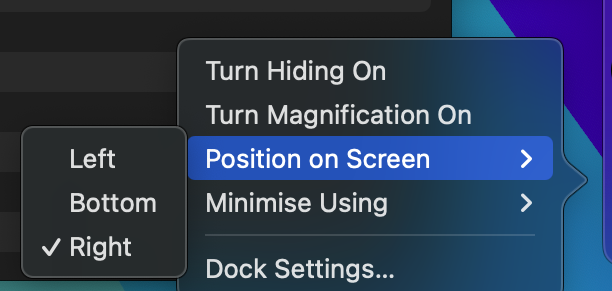](https://kb.mpmidi.com/uploads/images/gallery/2026-02/pKQzytzsm3tnsbmM-image.png) If the current possition of the Dock is on the MP Controller, choose another option and it will be moved to another display. For example, if it is on the Right of the MP Controller, choosing Left will be moved to the left side of the adjacent monitor that is on the left of the MP Controller. # 5. MacOS Dock appears on the display of the MP ControllerThe same principle applies to other MP Controller plugins or apps. Each app has it's own properties file in the /MP/Host folder where it stores the selected target monitor.
--- ##### Troubleshooting the right click: If you don't see the menu when you right click, see the following suggestions: 1. On the Mac, using a Mac mouse, ensure you have set the Mouse button Secondary Click to "Click on Right Side" [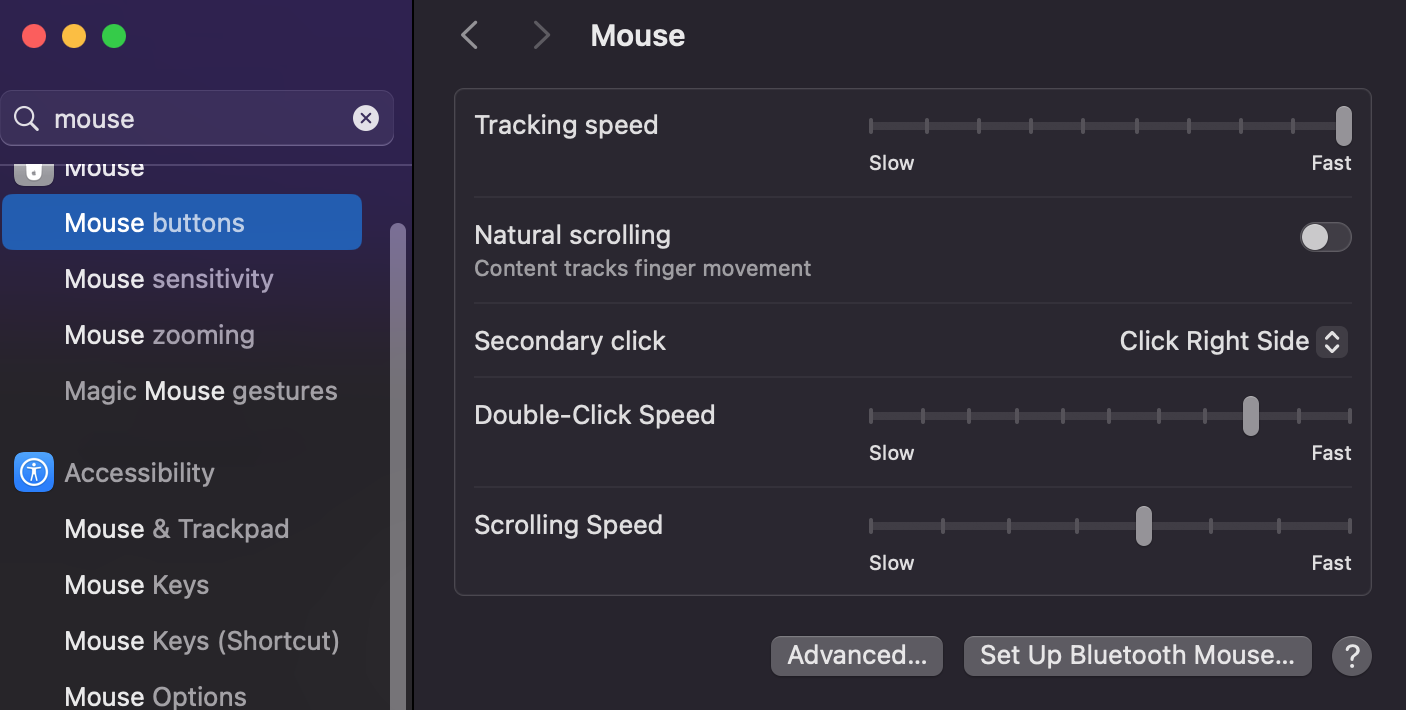](https://kb.mpmidi.com/uploads/images/gallery/2025-09/GxBMvn0RSxGCPxsk-screenshot-at-sep-19-14-16-01.png) If you are using an Apple Magic Mouse, you have to press the Control key and hold it while you right click to generate the right mouse click. 2. The controller display should be set as **Extended Display**. Check the arrangement of your displays. It is adviced to place the mp controller left ofr theright of your main display, on Mac or Windows. [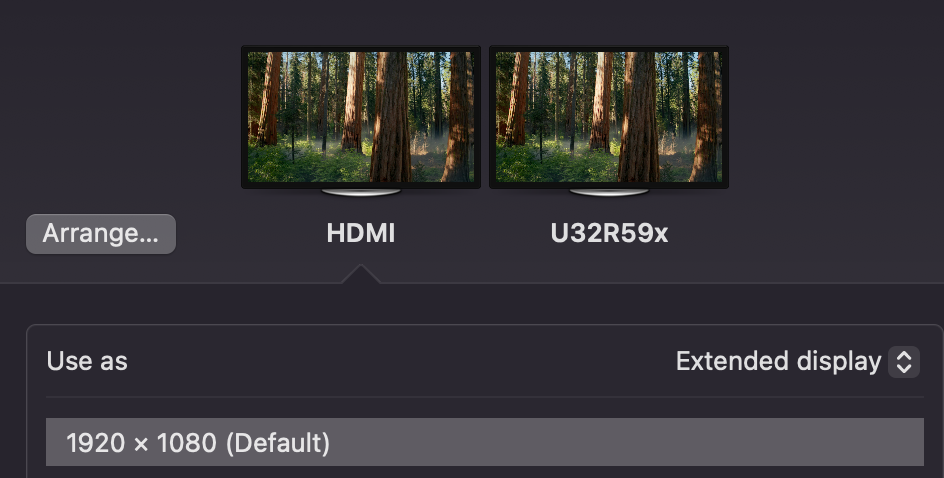](https://kb.mpmidi.com/uploads/images/gallery/2026-01/VQJ7Kf1QIHm7Q0yC-image.png) 3. Try using a mouse that has a right click button instead. 4\. Additionally, if you installed UPDD you can right click by touch and hold on the main area of the MP Host plugin. # 7. Mac - MP Touch Utility for moving the mouse cursor to the touch screen MacOS does not support touch displays natively and it sees them as a mouse trackpad. This means that when you touch the touch screen the mouse will move at the current location. If it is on your main monitor it will move the cursor there just like a mouse. To address this problem we have created a small utility that takes the mouse cursor automatically to the controller's touch display when it detects a touch gestrue on the controller's display. The utility supports Model 2A. The installer/uninstaller can be downloaded from [here](https://mpmidi.com/utilities/mpTouchUtility_Installer.zip?v=2)While this utility serves its purpose, UPDD provided by Touch Base for the MP Controller is a more advanced tool that offers many benefits and although it is optional we recommend it. See [here](https://kb.mpmidi.com/books/mp-controller-documentation/page/1-using-updd-for-enhanced-touch-functionality-download-updd)
If you are already using UPDD you should not install this utility because it will conflict with UPDD. Uninstall UPDD and install this utility. The installer will not let you install it if UPDD exists on your computer.
--- ##### How to install Run the installer and enter your password when asked. Click Allow when asked about System Events. [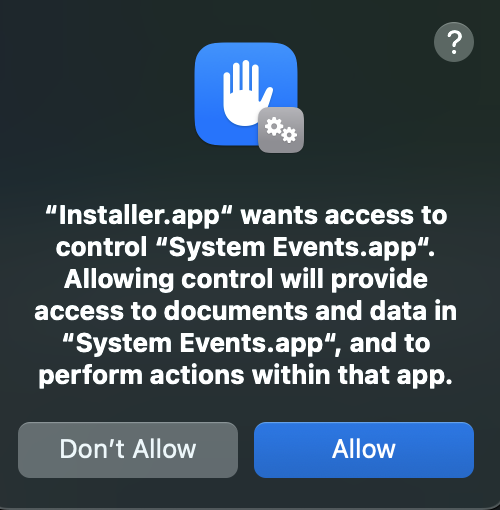](https://kb.mpmidi.com/uploads/images/gallery/2025-11/MX65aYEKGIIXewXr-1.png) and then click OK [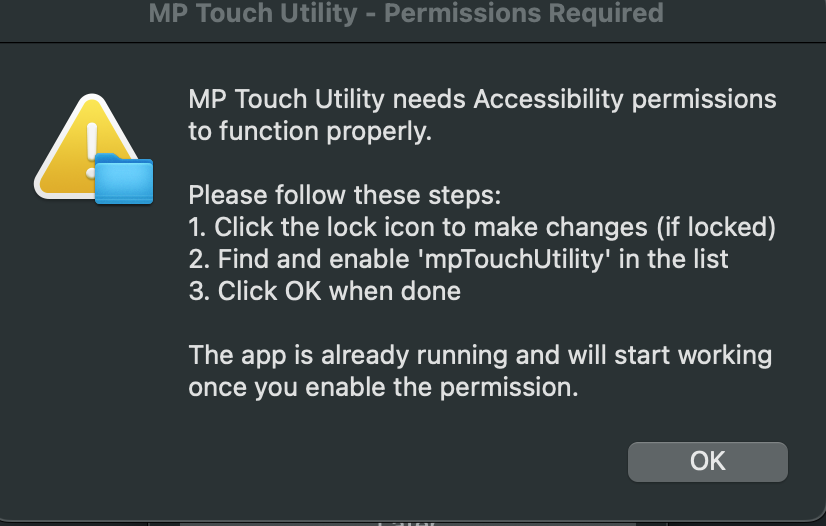](https://kb.mpmidi.com/uploads/images/gallery/2025-11/D8MYLp5RJ1zMmpoq-2.png) Enable it in Accessibility under Privacy and Security [](https://kb.mpmidi.com/uploads/images/gallery/2025-11/CPklAPvWsGzexSqc-image.png) The application should be running and there is a small icon on the top bar. Click on the icon [](https://kb.mpmidi.com/uploads/images/gallery/2025-11/FKN5U4nrtqw7S5t2-image.png) Select the controller's display (it should be the last display on the list, 1920x1080) [](https://kb.mpmidi.com/uploads/images/gallery/2025-11/rgKgaK4OvABrLLQU-image.png) Click on Check Permissions, you should see a pop up window [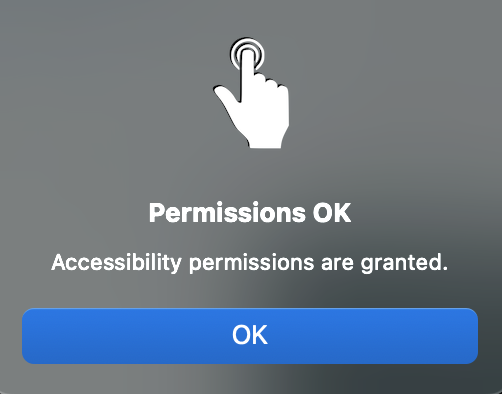](https://kb.mpmidi.com/uploads/images/gallery/2025-11/rvkRK71jpXRODxn9-image.png) Now, quit the Utility and open it from Applications [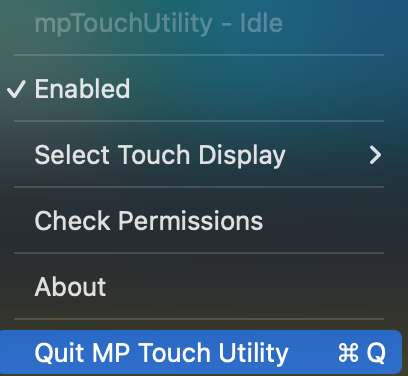](https://kb.mpmidi.com/uploads/images/gallery/2025-11/0HyBFX85JINDoscs-image.png) [](https://kb.mpmidi.com/uploads/images/gallery/2025-11/fiz9khHq8sAjQlrW-image.png) To test it, tap once on the touch screen, you should see the mouse cursor go there at the center of the display. From there you can use it normally on the touch screen. It will start automatically every time you login on your Mac.If you decide to get UPDD later on, you can run the uninstaller and install UPDD.
--- # 3. Display and Touch Setup On Windows Important information on how to setup the display and touch function on Windows # 1. Windows - Display and Touch Setup On Windows, first disable the Taskbar on Multiple Displays 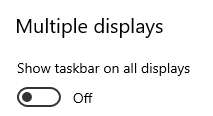 Then, choose to Extend the Displays, from Display Settings 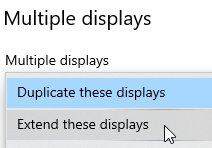 **Set, the magnification (Scaling) on Windows to 100% on the MP Controller’s display.** > if you have a different scaling setting, the MPH plugin or hosted plugins may look either too big or out of bounds, > showing partially instead of full First select the display that is the MP Controller and it will turn blue [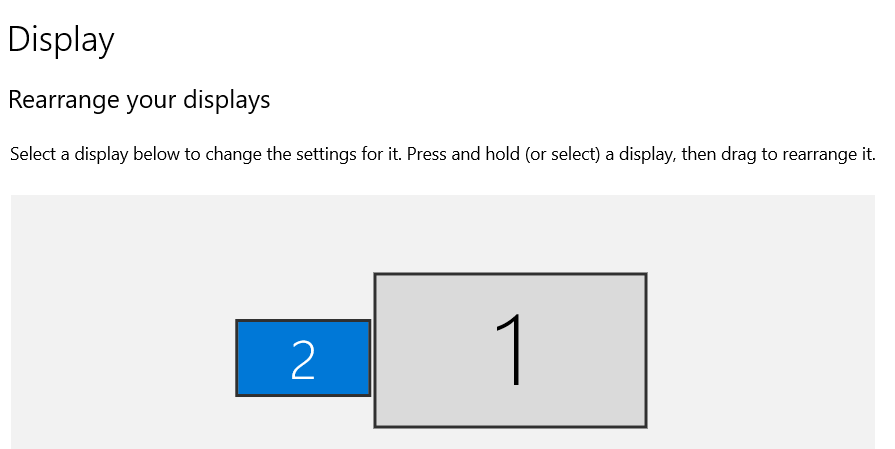](https://kb.mpmidi.com/uploads/images/gallery/2025-04/c6N0DFkNhqYHBhp9-3fHimage.png) Set it to 100% [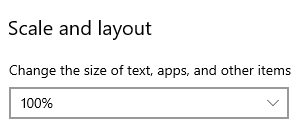](https://kb.mpmidi.com/uploads/images/gallery/2025-04/sCuD2xh32jzeumyJ-fsHimage.png) --- ##### Windows 10/11 Touchscreen setup For Model 1A+/2A see [**this**](https://kb.mpmidi.com/books/mp-controller-documentation/page/3-windows-model-1a2a-configuration-for-the-touch-hardware) guide For Model 1A see [**this**](https://mpcontrollerbyteltd.freshdesk.com/en/support/solutions/articles/103000120363-model-1a-touch-function-setup-on-windows) guide --- ##### Getting “No Signal” and then “Power Saving” 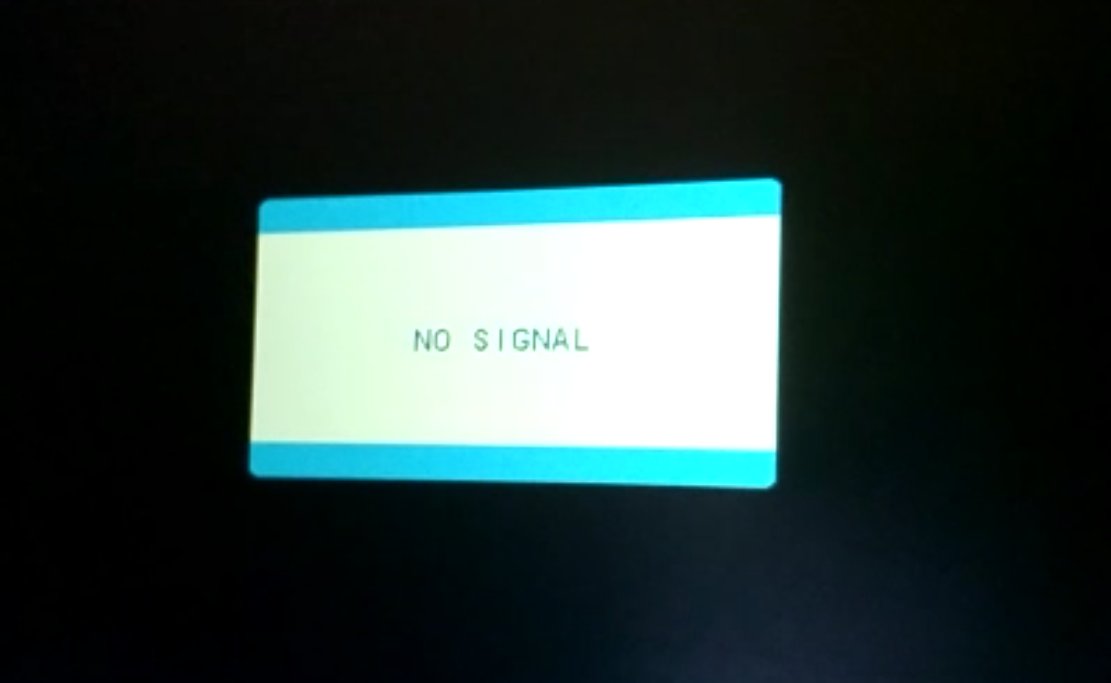 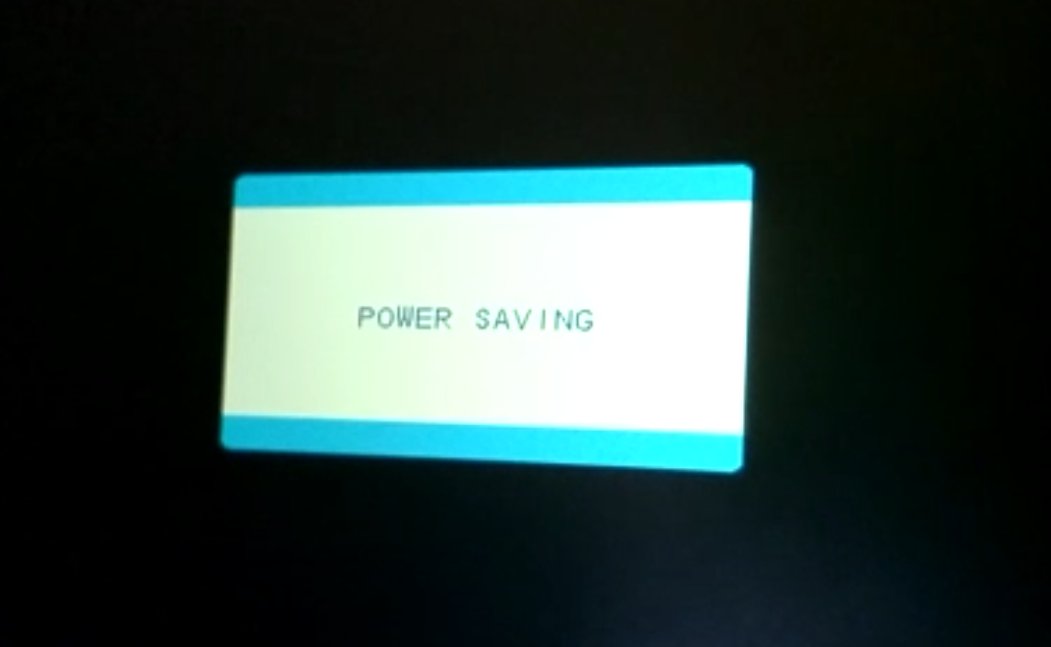 If you see a No Signal it means the monitor is powered properly. If after the “No Signal” you see “Power Saving” it means that the monitor is not receiving video signal from the HDMI port and goes to power saving sleep mode. In most systems you need to connect the USB-C cable first and then the HDMI to provide video signal If you have the HDMI connected, disconnect and reconnect it to initiate the video signal from the computer to the controller’s monitor If you are getting “No Signal” and then “Power Saving” when connecting with a USB-C to USB-C cable then it means the monitor is receiving enough power, but not video signal. Connect the HDMI. --- ##### Windows 10: a menu item does not appear on screen If using a 4k monitor and the MP Controller and If a menu does not appear in the controller’s screen then try this: Right click on the DAW exe program file and choose properties Then click high DPI settings and try these options 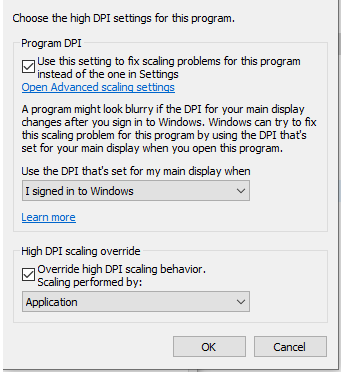Ensure you have set the scale at 100% in Windows display settings for the MP Controller's display
--- ##### Disable Auto-Scaling in Ableton Live on Windows If you have set the scaling to one of your other monitors to more than 100% then some menus of the MP Host may appear bigger and not centered. To solve this issue disable the Auto-scale on the MPH plugins in Ableton by right clicking once on each MPH from the plugin list . [https://help.ableton.com/hc/en-us/articles/209775985-High-DPI-monitor-support](https://help.ableton.com/hc/en-us/articles/209775985-High-DPI-monitor-support) 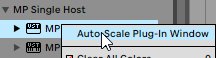The mp controller display should always be set to 100% scaling in Windows.
If you experience such issue, open the [host.properties ](https://kb.mpmidi.com/books/mp-controller-documentation/page/3-mp-host-properties-and-config-files)file in a text editor (Sublime, Notepad, Notepad++, TextEdit etc) and go to the end of the file. Find the line that has **<VALUE name="scale\_factor" val="100"/>** Set the value to the same value as your scaling factor in windows. For example if you are scaling your main display at 150%, change the number from 100 to 150. Save the host.properties text file. Quit the MP Host and reload it so that the change takes effect. The MP Host should now be centered on the mp controller's display. Alternatively you can change the DPI settings of Pro Tools.exe [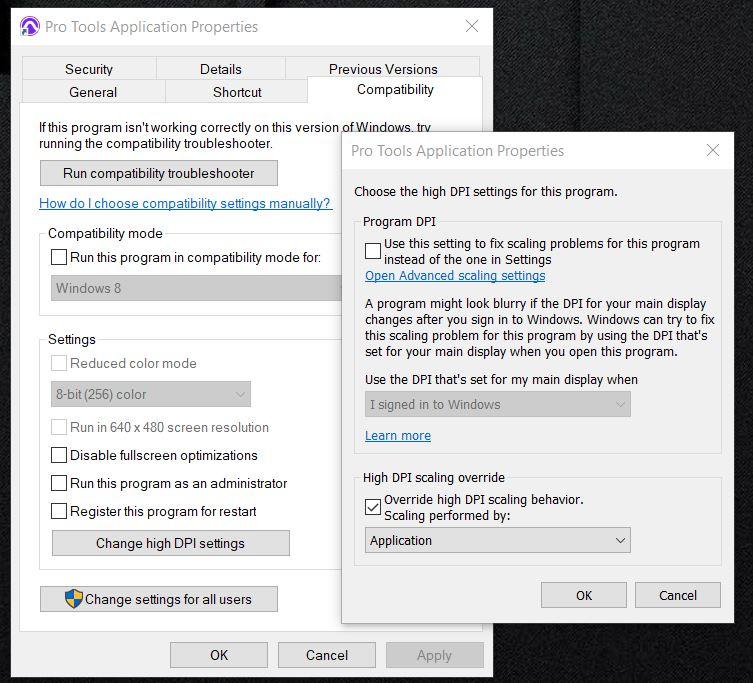](https://kb.mpmidi.com/uploads/images/gallery/2025-10/IZ275fhBjxXXFwMN-pro-tools-override-high-dpi.jpg) --- # 2. Windows - Model 1A touch setup ##### Check that the Touch Screen is showing in the Device Manager 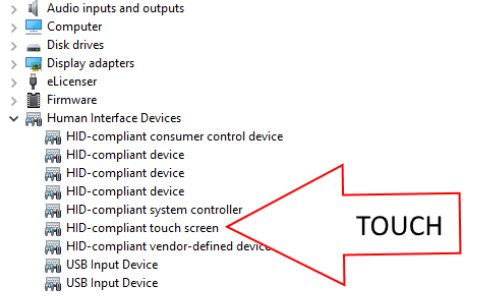 Then Open the Control Panel in Windows 10. In the search type Tablet and click on Tablet PC Settings 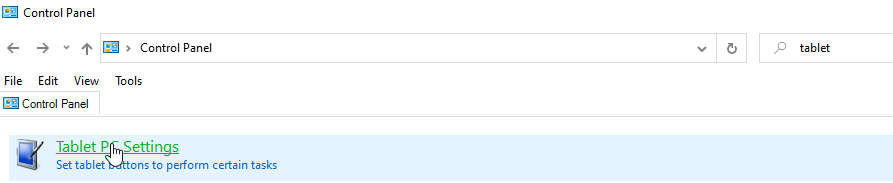 The choose the Display R15PMT01 from the dropdown of the Display Options and click Setup If Tablet is not shown in your control panel see this [post](https://answers.microsoft.com/en-us/windows/forum/windows_10-other_settings/what-happened-to-the-tablet-pc-settings-option-in/ef30c04d-9d69-472d-893b-44ee1e19f264), here are the steps to follow: - Go to the Desktop. - Right click on the Desktop and select New/Shortcut. - In the Type the location of the item window, Copy/Paste the following. - %windir%\\explorer.exe shell:::{80F3F1D5-FECA-45F3-BC32-752C152E456E} - Click the Next button and type the name Tablet PC Settings. - Click the Finish button. - Double Click the new shortcut and it should open the Table PC Settings window.  All the screens should be white with the following message being displayed:  Press Enter to move to the controller’s touchscreen. You need to tap on the controller’s touchscreen once. That’s it, now Windows has identified the controller’s touchscreen. You can test by tapping or touch and drag on it and you will see trails. Please note the magnification (Scaling) on Windows 10 should be set to 100% for the MP Controller's display (if you have a different setting the MPH plugin or hosted plugins may look either too big or out of bounds, showing partially instead of full) # 3. Windows - Model 1A+/2A configuration for the touch hardware 1. Connect the USB cable provided on the USB-C Display port and the other end directly to a USB-A port on the PC. (The first time don’t use a hub but connect directly to the PC to eliminate the possibility of any incompatibility problems caused by the hub). The HDMI should be connected as well, or else the display will automatically go to sleep mode. 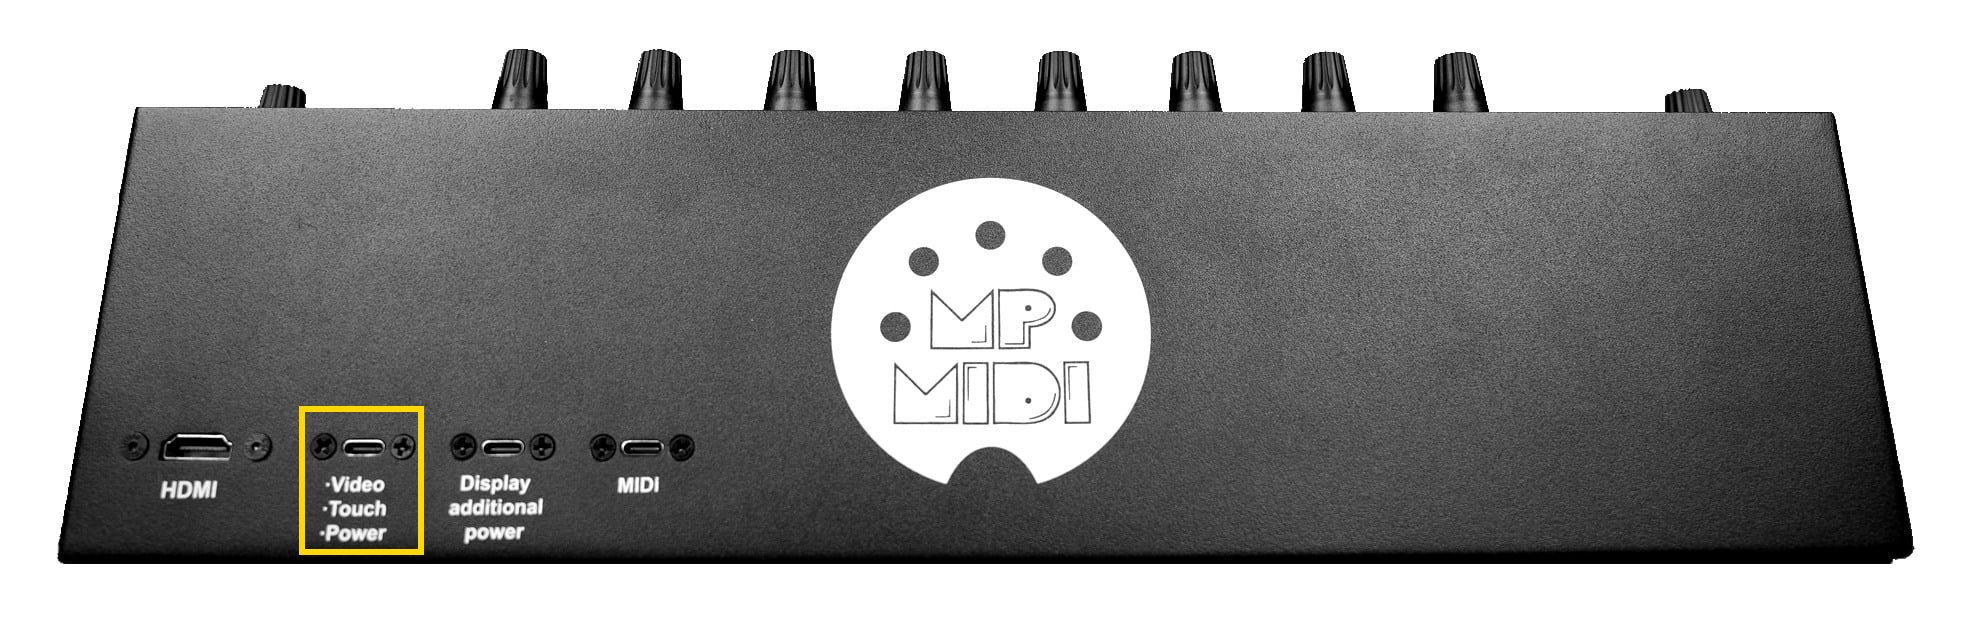No drivers are needed to be installed for Windows. The touchscreen is automatically installed by Windows. After connecting, the touch should be working but sending the touch gestures on another display connected on the computer. This is normal and you will identify the touch screen in the next step.
2. If it is **not** responding to touch (even on another screen), check the Device manager to see if the following items show up. If they are not showing up, then this is a connection problem. Connect the USB cables provided directly on the computer USB 2 or USB 3 ports and check the device manager again. **The touch screen will not work if it does not show up in the device manager.** 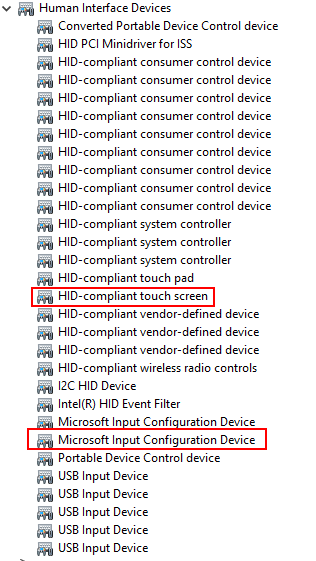 3. Open the Control Panel in Windows. In the search type Tablet and click on Tablet PC Settings 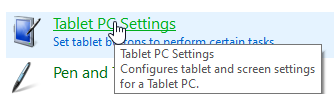 --- **If Tablet is not visible in your control panel here are the steps to follow:**Go to the Desktop.Right click on the Desktop and select New/Shortcut. In the Type the location of the item window, Copy/Paste the following. %windir%\\explorer.exe shell:::{80F3F1D5-FECA-45F3-BC32-752C152E456E} Click the Next button and type the name Tablet PC Settings. Click the Finish button. Double Click the new shortcut and it should open the Table PC Settings window.
--- 4. Select HDMI (or however it shows up on your PC) and Choose Setup 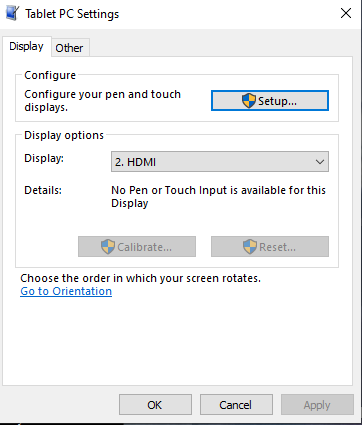 Then a white screen will appear. Hit enter until you see it on the MP Controller’s display (don’t touch the MP Controller display until it appears on the MP Controller’s display) The message will be:|  |
For Windows, it is a good practice to install the C++ Redistributables from Microsoft before installing, from [**here**](https://aka.ms/vs/17/release/vc_redist.x64.exe).
--- ##### MP Host Audio Effect and Instrument locations on the Mac On the Mac the installer automatically copies AU, VST3 and AAX plugins to their folders, respectively. AU (.component files): /Library/Audio/Plug-Ins/Components/ VST3: /Library/Audio/Plug-Ins/VST3/ AAX: /Library/Application Support/Avid/Audio/Plug-InsThere are 2 Library folders on the MAC OS one is under /Library and the other ~/Library which means under your user account. You need to visit the ~/Library/Application Support/MP/Host
MP Host receives and sends the following from the DAW **Audio FX version:** 1. Receives audio and passes the audio to the hosted plugin in MPH. In turn, it outputs audio to the DAW. 2. If the hosted third party plugin introduces latency, the MPH passes this latency to the DAW, allowing your DAW to compensate for the latency introduced by the MPH plugin. 3. DAW tempo is received from any MPH instance, so in the case you are hosting a plugin that needs the tempo information from the DAW, like a tempo delay plugin, it will receive it from the DAW. 4. Receives automation from the DAW and passes it to the MPH’s 128 encoders. More on automation below. **Instrument version:** 1. Receives midi notes (played from a midi controller or recorded) from the DAW. 2. If the hosted third party plugin introduces latency, the MPH passes this latency to the DAW, allowing your DAW to compensate for the latency introduced by the MPH plugin. 3. DAW tempo and passes it to the hosted instrument. 4. Receives automation from the DAW and passes it to the MPH’s encoders. 5. Outputs audio generated by the hosted plugin to the DAW --- ##### Plugins that can be controlled with the MP Controller You can control all VST2/VST3/AU plugins’ parameters that can be automated by the DAW. If a plugin has parameters but these cannot be automated by the DAW, then these parameters cannot be controlled by MP Host and controller. The MP Controller is not using CCs to control parameters, it uses the same method that the DAW uses to automate/control parameters. This is called the automation method. After version v1.5-89f683b--H2021-09-23--B2021-09-24, the MP Host can also transmit CC messages to the hosted plugin. The CC method is one way, only for sending CC to the plugin. The method of using automatable parameters allows complete bidirectional control and it is recommended. This is the method used when you link a parameter to an encoder. ##### Incompatible Plugin Type Warning While trying to load up a plugin, if you get a pop up warning message that says that the plugin you are trying to load is not compatible, this is because you are trying to load an instrument plugin in an audio effect MP Host or the opposite. You can only load plugins effects in the MP Audio effect host plugin and only instruments in the MP Instrument host plugin. [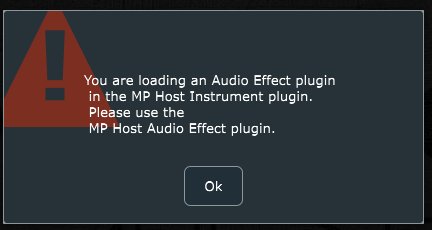](http://kb.mpmidi.com/storage/uploads/images/gallery/2025-04/image.png) --- ##### Set a title to the pages To set a title to the pages you need to right click in the lower area of the page button  --- ##### Opening and closing the MP Host plugin - Single and Multi Host|  |  |
IMPORTANT: Go in your DAW settings and remove the MP Midi controller C1-xMP1 (midi hardware) from being used. If you don’t do this step, the controller will not be able to communicate with the MPH plugin. This applies to Mac and Windows DAWs.
**Here is how to disable C1-xMP1 in some popular DAWs: ** - In **Ableton**, go to preferences > Midi and turn it off completely (in/out, remote, track) - In **Bitwig,** go to Settings, disable and remove it from the devices[](https://kb.mpmidi.com/uploads/images/gallery/2025-11/eecyPhPpgtWNCgyM-bitwig-c1-xmp1.png) - In **Cubase**, go to Studio and deactivate the c1-xMP1 Controller (midi in/out) and choose MIDI Port Setup: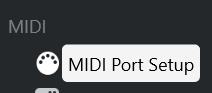uncheck all the boxes for C1-xMP1 Additionally, make sure the C1-xMP1 is **not** selected in the following sections: 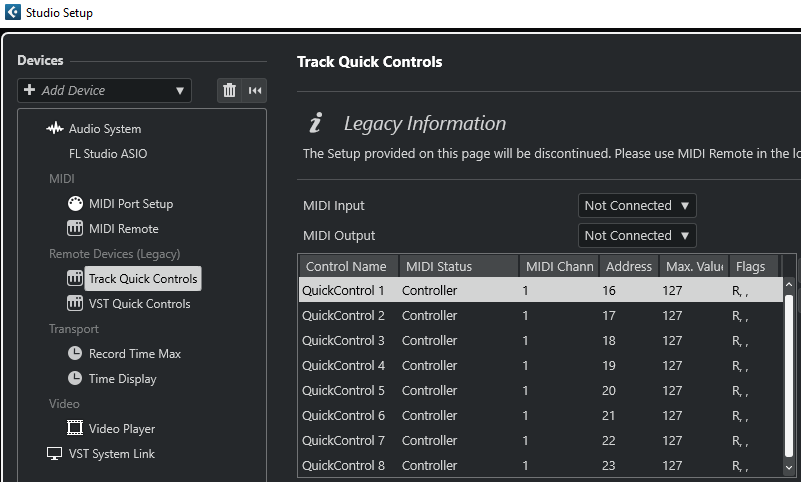  - In **Logic Pro X**, to Preferences > MIDI >Inputs and uncheck the on checkbox for c1-xMP1. - In **Pro Tools**, click the Setup menu, go to MIDI, then click MIDI Input Devices and uncheck the c1-xMP1. - Furthermore, in Windows only, Pro Tools lock ALL the MIDI devices even if they are set to not active in the settings (while other DAWs do not lock the midi devices). This prevents the MPH plugin from accessing the c1-xMP1 controller. There are a few options on how to work around this, you may choose either: 1. Connect the c1-xMP1 USB cable after Pro Tools has started and before loading an MPH plugin instance. This will prevent Pro Tools from locking the c1-xMP1. 2. Disable the c1-xMP1 in your Windows Device Manager and enable it after Pro Tools has started. 3. Use a USB hub with a USB power on/off switch. There are few with switches per USB port. Turn On the controller after Pro Tools has started. 4. Use this utility/script to start Pro Tools as administrator. This script will disable the controller, start Pro Tools and enable the controller again. There is a readme.txt in the zip file, please read it first. [Download](https://mpmidi.com/protools/Start-Protools-Script.zip) - For **Luna** on Windows see [this article](https://kb.mpmidi.com/books/mp-controller-documentation/page/36-run-uad-luna-on-windows) --- ##### Troubleshoot Encoders Feedback Loop If you encounter a feedback loop when turning the encoders - where some encoders behave erratically or appear stuck at the same value (as shown in the [example video](https://drive.google.com/file/d/1ZHNGMqA3YxbevC0bUT_PLzEiE6YeDz8T/view?usp=sharing)) - this usually indicates a MIDI conflict. This issue occurs when the DAW is receiving MIDI input directly from the **C1-xMP1**, and at the same time, the **MP Host plugin** is trying to control the same parameter. Both sources are fighting for control, creating a loop. **On macOS** macOS allows multiple applications to share MIDI ports simultaneously. As a result, some plugins may be receiving MIDI directly from the **C1-xMP1**, even while the MP Host is actively controlling parameters. To resolve this: - Disable MIDI input or control within the plugin itself. - Remove or disable MIDI CC assignments on individual plugin parameters, if applicable. By ensuring the plugin only responds to the MP Host and not the direct MIDI input from C1-xMP1, the feedback loop will be eliminated. # 3. MP Host properties and config files The MPH stores its configuration, hardware.id and mph.license files, preset files and preset background image files in the MP Host folder. **Windows:** C:\\Users\\USER\\AppData\\Roaming\\MP\\Host (Type %appdata% in the explorer's address bar and press enter, then navigate to folder MP)  **Mac:** /Users/USER/Library/Application Support/MP/Host or ~/Library/Application Support/MP/HostThere are 2 Library folders on the MAC OS one is under /Library and the other ~/Library which means under your user account. You need to visit the ~/Library/Application Support/MP/Host
To open the MP Host Folder from the MP Host plugin, on the controller's window, right click and Select Presets > Show Presets Folder and it will open the MP/Host folder. 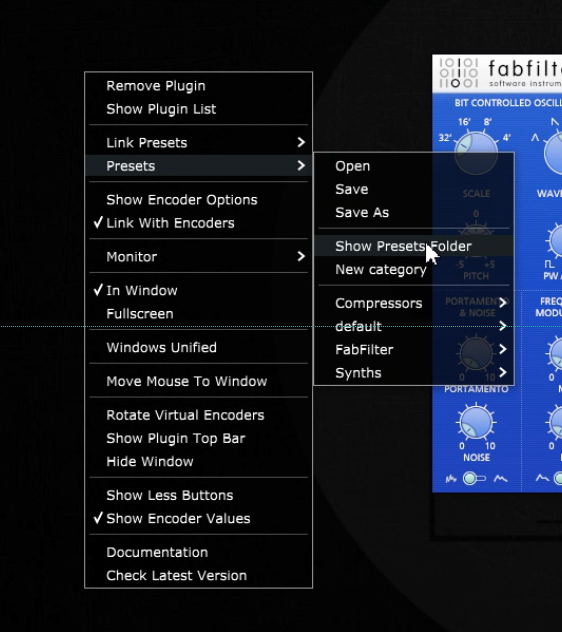 See [video](https://drive.google.com/file/d/1MIRHaAFv9iV0Yaej49BDjbVh-B3-0VXW/view?usp=sharing) # 4. Show Preset Folder - Go to the MP/Host properties folder To open the ~/MP/Host folder in Windows file explorer or the MacOS Finder: 1\. Load the MP Host plugin in your DAW and open it 2. Right-Click on the MP Host window empty area and navigate to "**Presets/Show Preset Folder**" 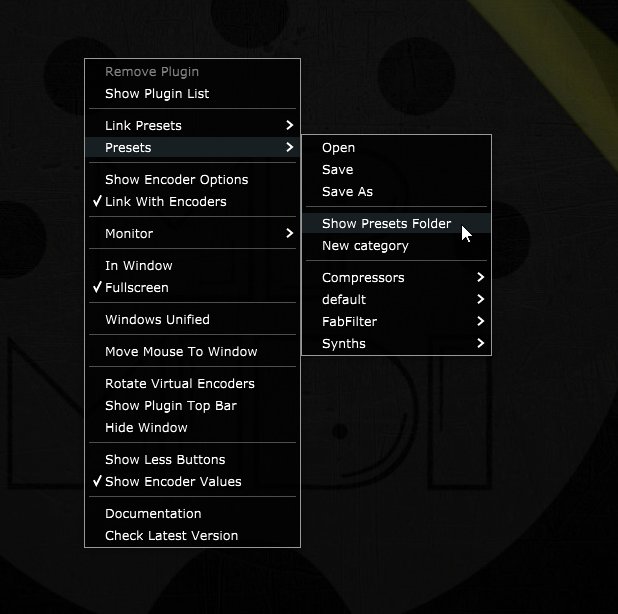 See the [full path here](https://kb.mpmidi.com/books/mp-controller-documentation/page/3-mp-host-properties-and-config-files) for Mac and Windows. **See video** [**here**](https://drive.google.com/file/d/1QDSSx4wxByOU3TZJ4KuAgxseIx5tZFkm/view?usp=drive_link) # 5. Finding your existing third party pluginsWe created a an optional Plugin Scanning Utility. See [here](https://kb.mpmidi.com/books/mp-controller-documentation/page/44-plugin-scanner-utility).
Check out the [new VST3 Generator Utility](https://kb.mpmidi.com/books/mp-controller-documentation/page/45-vst3-generator-utility-mac-and-windows)
##### Finding your existing third party plugins Load up the MP Host Single FX plugin and click on the Controller Icon button. ###  The window of the MP Host plugin will open. Right click on the empty area. Click on the PLUGIN LIST button.  The first time you do this, it will display a message that MPH is "Reading Installed Plugins". Depending on how many plugins you have, it will take a few seconds to complete. The MPH scans quickly your installed plugins in the standard VST and VST3 folders, even if you have them in other sub-folders.The MP Host does not scan in depth the plugins at first. To save time and not having to wait for the dreadful scanning process, the MP Host reads and display just the filenames of plugins in their folder at first and fully scans a plugin once you choose to load/use the plugin.
On Windows the path scanned for VST2 is - C:\\Program Files\\VSTPlugins - C:\\Program Files\\Steinberg\\VSTPlugins and for VST3 is C:\\Program Files\\Common Files\\VST3The Plugin List will show all the plugins installed on your computer, however you should use this to load up a plugin and create an MP Host preset where it will load the plugin, its state, the mappings and background images. See [MPH Presets](https://kb.mpmidi.com/books/mp-controller-documentation/page/9-mp-host-presets)
--- If you installed new plugins and they don't appear in the list, click on QuickScan button at the bottom of the Plugin List window: [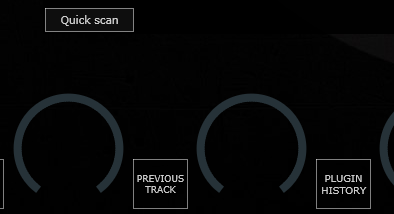](https://kb.mpmidi.com/uploads/images/gallery/2026-02/fdeGgGSYVHAuqxFj-image.png) --- ##### Plugins not shown in the Plugin List For Windows, if VST2 plugins are not shown in the plugin list see [this article](https://kb.mpmidi.com/books/mp-controller-documentation/page/5-windows-custom-vst-plugin-paths). For Mac, if the Plugin List does not show all the plugins you have installed, you may need to reset the permissions as shown in [this article](https://kb.mpmidi.com/books/mp-controller-documentation/page/7-mac-installed-plugins-not-shown-in-the-plugin-list) or check that these were not added in the ~/MP/Host/Plugin-Exlude-List.txt. --- ##### Category, Manufacturer and Version columns When you first scan (Quickscan) the plugin list, you will see that the Category, Manufacturer and Version columns will not have any data. These columns will be filled once you open a plugin for the first time, or right click on a plugin and select Scan. 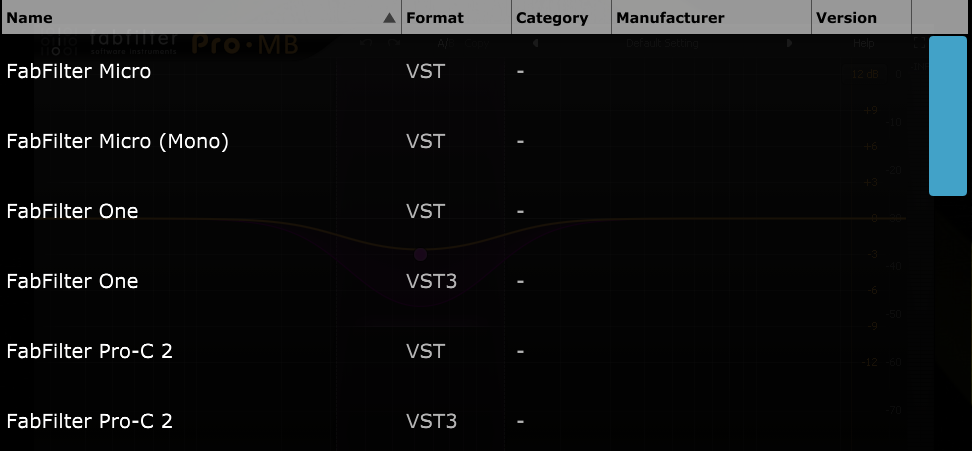 Until installed plugins are opened once or perform a right click > Scan, will be displayed in the plugin list of both MP Host types (instruments and effects). 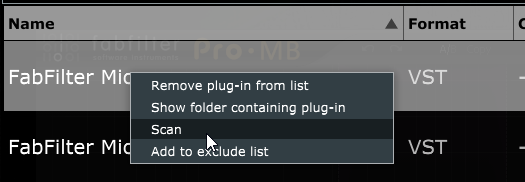 You will notice instruments and effects are shown in the same list, until you open or right click > Scan them for the first time. When you scan an instrument while in MPH FX you will see the plugin be removed from the list. It will only now appear in the MPH Instrument Plugin List. The same applies to audio FX while in MPH Instrument. --- ##### Loading an incorrect type of plugin If you try to load an instrument plugin in the MPH FX you will get a pop up window saying that you are trying to load the wrong type. The same will occur if you try to load an audio effect plugin in MPH Instrument. 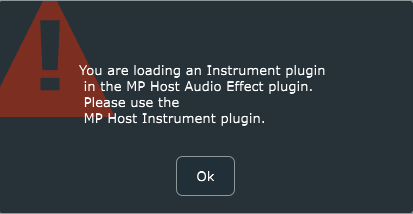 --- ##### Waves Plugins Waveshells Waves plugins because they are bundled in a shell, do not have this option. Instead, you have to find the Waveshell in the list and right click > Scan. The MPH will scan the Waveshell and populate the list with the Waves plugins included in the bundle shell. You have to scan each Waveshell. If there plugins missing (VST2/3) after you scan the Waveshells, check the Plugin-Exlude-List.txt file (see next section). Delete the Plugin-Exlude-List.txt file from the ~/MP/Host folder and scan the Waveshells again. The missing plugins should appear in the plugin list after you press the Quickscan button. If you have installed a new or older Waves package of plugins and plugins are missing, make a backup of the [host.properties file](https://kb.mpmidi.com/books/mp-controller-documentation/page/3-mp-host-properties-and-config-files) and delete it. Then open again the MP Host so that a new one is created. Then select your target monitor and scan for plugins again, including the Waveshells. For plugins not showing up in the MP Host on MacOS also check [this article.](https://kb.mpmidi.com/books/mp-controller-documentation/page/7-mac-installed-plugins-not-shown-in-the-plugin-list) --- ##### Excluding Plugins from the list When you right click on a plugin, you also have the option to add it to an Exclude list, which is a text file placed in the MP/Host directory. This excludes plugins which will not be scanned next time you perform a Quick Scan. If you want to remove plugins from the Exclude list, you can delete them from the ~MP/Host/Plugin-Exlude-List.txt. If you want to delete them all in the exclude list, you can just delete the Plugin-Exlude-List.txt file. Waves plugins also don’t have the option to be added to the Excluded list because they belong in a shell. When you Install new plugins, perform a quick scan so that MPH can locate these plugins. If a plugin causes the MPH to crash during right click > Scan, it will be added automatically to the Plugin-Exlude-List.txt file. This includes Waves plugins as well during scanning Waveshells.On Waves v15 on Windows, delete/move the GrandRhapsody.bundle folder from C:\\Program Files (x86)\\Waves\\Plug-Ins V15 before scanning the Waveshells, as this is not compatible with the MP Host. you can place it back after scanning the Waveshells with the MP Host.
--- ##### Searching for plugins Searching for plugins is easy. You can just type in the bar on top of the list and it will search the manufacturer and plugin name once you press enter.The Manufacturer column data will only be searched/found if a plugin has been opened at least once, or has been scanned using right click > Scan.
--- ##### Reporting Issues with Plugins If you would like to report plugin-specific issues please submit this [form ](https://mpmidi.com/plugin-support-form) If your DAW crashes (for any reason) and causes the MPH to exit abnormally, the next time you open it you will need to click the Control & Display button twice instead of once (or the Plugin Holder area in the Multihost) in order to display the MP Host in the controller’s touchscreen. # 6. Linking Parameters and Options ##### There are 3 methods to link parameters. See [video](https://www.youtube.com/watch?v=AVv2zcpEqxo&ab_channel=MPMidiController) --- ##### Intelligent Automatic Mapping of Plugin Parameters Note that in version v1.7-d8422138--H2025-04-19--B2025-04-19 we have introduced the Auto Map function, which links all the parameters of a plugin upon loading the plugin from the plugin list. It will set a different color to each encoder, unless: \- the parameters belong in the same group (plugins can have parameter groups, see U-He, Fabfilter) \- the parameters are not in the same group and the next parameter begins with the same 3 letters of the previous parameter, it will set the same color as the previous parameter (for example, Delay Type, Delay Size, Delay Mod...)The Automatic Mapping option is enabled by default and it can be disabled via the right click menu. [](https://kb.mpmidi.com/uploads/images/gallery/2026-02/9MajiFQOxvaL5DDn-image.png)
Automatic mapping is enhanced to map groups of parameters in different pages and automatically name these pages based on the group. Automatic mapping of plugins with many parameters is mapped across pages per group/color. When you click or touch a parameter, it will take you automatically to the page the parameter is linked onto an encoder and it will blink for 3 seconds making it easy to identify the encoders. If the parameter is linked onto an encoder in the same page, it will blink in that page.When **Follow Param** button is enabled, MP Host will not automatically change pages when you adjust a parameter using the mouse or touchscreen if that parameter is linked to a different page than the one currently displayed. This is especially useful when working with Automap on plugins with many parameters. It allows you to remain on the current page, controlling selected parameters with the physical encoders, while simultaneously adjusting other parameters that are mapped to different pages using the mouse or touchscreen, without interrupting your workflow.
--- ##### Method 1 - Mapping/Linking using the Link buttonIn version v1.7-d8422138--H2025-04-19--B2025-04-19 the link button works in continuous mode. This means you can click/turn an encoder and continue to link parameters. You may select an encoder or the parameter first and it will still link them. The unlink button also works in continuous mode, by turning an encoder or clicking on one.
Click or touch on the “Link” button to activate the Linking Mode, then click on the hosted plugin’s parameter you want to link, then click on the **edge** of MPH encoder you want to link or move the encoder you want to link and it will link the parameter. If you click on another encoder when in linking mode, it will continue linking from that encoder. See this [video ](https://drive.google.com/file/d/1_yqYeKXTMRSkcBWH96Yr2-qM3SUx5Hgm/view?usp=sharing)that demonstrates the Link process using the Link button. --- **Changing the name of a linked parameter** Double click on the label area of the parameter name and you will see the cursor blinking so you can edit the name of the parameter. --- **Setting a color to an encoder** Right or left click at the center of an encoder to show the color palette and select a color to assign to an encoder. See [here](https://kb.mpmidi.com/books/mp-controller-documentation/page/13-background-images-and-encoder-colors) for more details and how to disable the left click to not show the color palette. --- **Mapping parameters in multiple pages** You cannot map the same hosted plugin’s parameter to more than one MPH encoder on the same page, however you can remap a hosted plugin’s parameter again on another page. This is handy when you want to control some parameters in every page. For example, you may want to control the filter section of a virtual synth on every page. When linked, an encoder gets the value of the hosted plugin’s linked parameter. When you link the same parameter in multiple pages, both on the single and multi hosts, the encoders linked in other pages will be connected to the first encoder linked. For example, if you link the Cutoff parameter to encoder 1 in page 1, then link the Cutoff again in page 2, page 3 and so on, all links will be connected to encoder 1 in page 1. This is done so that we don't report to the DAW the same parameter multiple times. Only the firstly linked parameter will be reported to the DAW as an automatable parameter. You can use the encoders in other pages to control the Cutoff and if you record automation it will be recorded regardless of which page you are. If you unlink encoder 1 in page 1 (the firstly linked encoder), it will automatically unlink all encoders linked with the same parameter in other pages. In the case of the Multihost, you will notice that you cannot assign an automation ID (it is greyed out) on encoders that have been linked with the same parameter in other pages. This is done to prevent reporting the same parameter to the DAW as an automatable parameter.You can replace a linked encoder too. Press the Link button, click/move the parameter you want, click at the edge the onscreen encoder you want and it will replace it with the new parameter. It does not replace it if you turn the physical encoder.
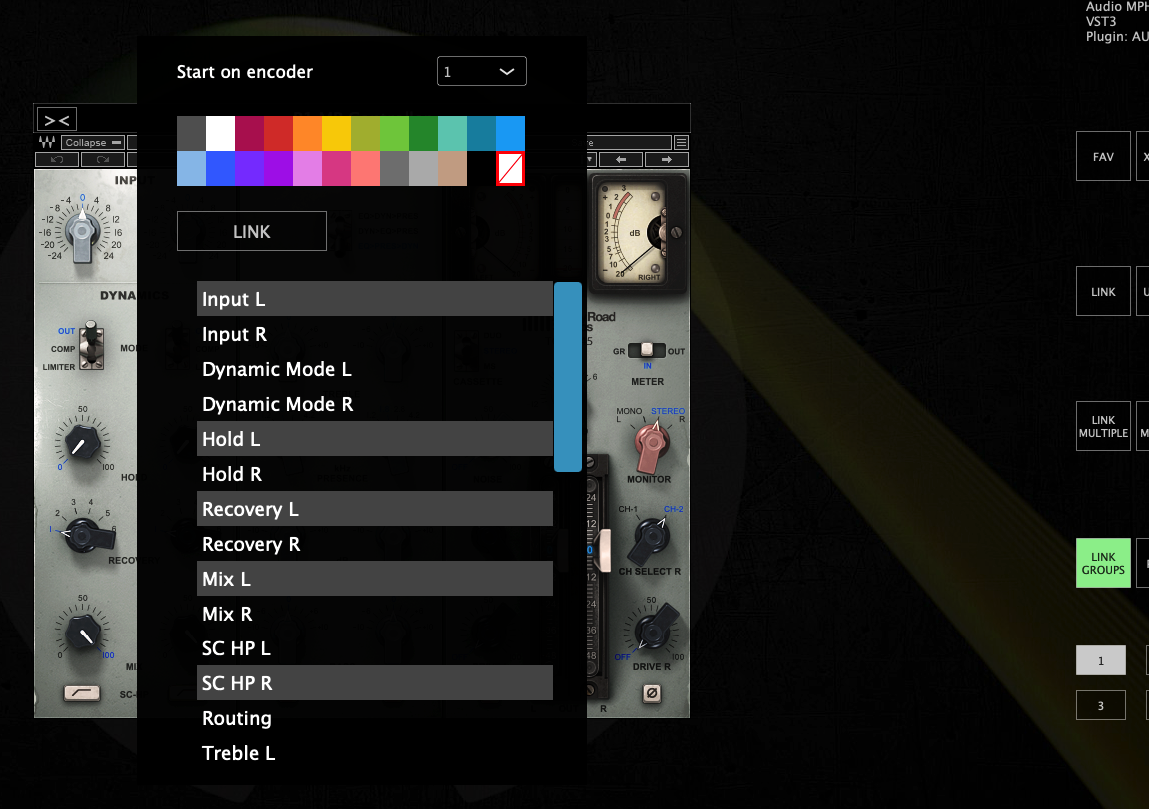
--- ##### How to troubleshoot issues when linking parameters The MP Controller controls parameters reported by third party plugins as "automatable". These are the same parameters your DAW has access to and can control via automation. Some plugins (Waves, Plugin Alliance, Kush and others) may be reporting multiple parameters at once. If you want to link a single parameter only then use one of the other options, LINK MULTIPLE or LINK GROUPS. When using LINK MULTIPLE you can remove parameters from the list by double clicking on them.In LINK GROUPS, to select individual parameters from the list hold the Mac: Option button, Windows: Ctrl button, and click on the parameters you want with the mouse.
[](https://kb.mpmidi.com/uploads/images/gallery/2026-01/WhMSDvfXFaNCqc2P-image.png) If you are having issues with a specific plugin you may try other formats of the plugin, VST2, VST3 or AU on the Mac as there have been cases where on format may not link parameters properly and another format links parameters normally. If the parameter is linked but does not behave smoothly when turning an encoder you can enable ABS (absolute mode) on the encoder under Encoder Options. Lastly, ensure that you have the latest version of the plugin you are using. There have been reports on some older versions of plugins (like PA plugins) that were not reporting their parameters correctly and this was addressed in newer versions of the plugins. --- ##### UI rendering Issue on Windows with specific VST3 plugins on some DAWs If you encounter an issue with VST3 plugins (like Plugin Alliance) not updating the UI when moving the hardware encoders, use VST2 plugins instead. We were able to confirm the issue in Ableton Live 12 with VST3 P.A. plugins, however in other DAWs like Reaper this issue does not occur. 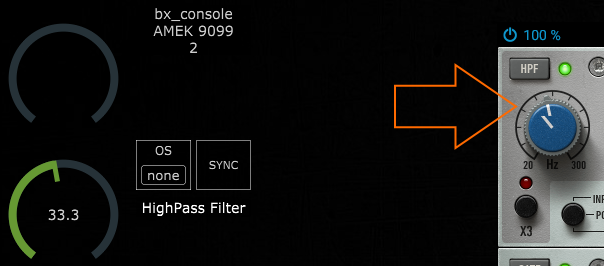 ---**SoundToys on the Mac:** For better compatibility and parameter syncing use VST2 or VST3 instead of AU.
--- ##### Method 2 - LINK MULTIPLE Mapping/Linking many parameters at once Click or touch on the “LINK MULTIPLE” button and it will show a list on the left of the MPH big window. Begin clicking on parameters on the hosted plugin. The parameter names are added to the list. To remove a parameter, double click on a parameter name on the list. It is possible to assign colors to each parameter to be linked by clicking on the color cell in the parameter row. The selected color will be automatically assigned to all previous rows until a row with color assignment is found. This makes it possible to assign colors to groups of parameters (ie ADSR). To change a color just click on the cell and the color palette will appear. It is not possible to reorder the parameter in the list. Once you are finished with the parameters you wish to link click on the “LINK MULTIPLE” button again and it will ask to enter the encoder number (0 to 127) to begin linking the parameters. If you want to link parameters which are already linked again in another page, then you need to be in that page when you initiate the link multiple procedure and enter the encoder number that corresponds in the page. --- ##### How to unlink a parameter Click on the Unlink button and then click on the encoder to unlink it. See [video](https://drive.google.com/file/d/1homslLkAlsEcq2tSji9sBIuzf-IXpZnm/view?usp=sharing)Note that in version v1.7-d8422138--H2025-04-19--B2025-04-19 the unlink button stays activated so you can unlink multiple parameters. Press the unlink button again to stop the unlinking process.
--- ##### Show as button This option in the Color Selector converts the encoder in an on/off toggle button. This is useful if the parameter you are controlling is an on/off parameter. Turning an encoder will make the button a round encoder. --- ##### Dynamic Parameter Names Some plugins, for example Kontakt Analog Dreams library and other scripted Kontakt liraries, are programmed to change the parameter mapped on the same parameter index when switching presets. In this case, i.e. a parameter index assigned to "Balance" becomes "Reverb" when changing a preset on Analog Dreams. The MPH receives the parameter name change notification and updates the parameter name.Note that some Kontakt libraries sometimes don't send all the parameter names, propably due to an error in their script and this also happens when loaded directly in the DAW, so it does not have to do with the MPH
If you rename that parameter, then the MPH stops updating the parameter name when receiving a parameter name change notification. Unlinking the parameter resets it to update names dynamically. When you unlink the parameter and link it again, it will update the name when it receives a notification for a name change from the hosted plugin. --- ##### 16 Pages of available encoders to be linked to parameters With the April 2024 update, the MP Host has increased the number of parameters that can be controlled, from 128 to 512 parameters, allocated to 16 pages. Each page can carry a title which can be set by "double right clicking" on the lower area of the button, for the text editor to appear. 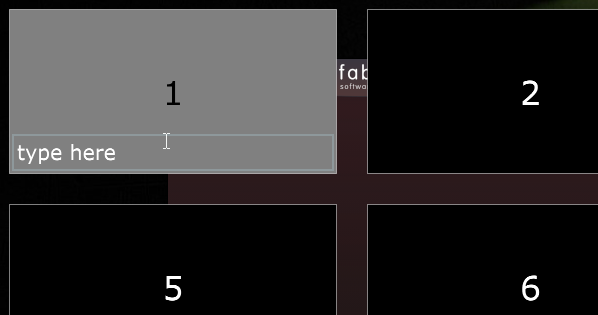 The Pages are divided into groups of 4 pages per group, a total of 4 groups. Group 1: Pages 1 -4, Group 2: Pages 5 - 8, Group 3: Pages 9 - 12, Group 4: Pages 13- 16 Each Group carries the following encoder IDs: Page 1: 0 -31, Page 2: 32 - 63, Page 3: 64 - 95, Page 4: 96 - 127 Each page can carry its own background image.When enabling the top bar, the name of the page is shown, if there is a name on the page.
---Here are [video 1 ](https://www.youtube.com/watch?v=nWawI-pEG5s) and [video 2](https://www.youtube.com/watch?v=ADccLuF3kHY) on how to link parameters of plugins
--- ##### Method 3 - Link Multiple parameters via Link Groups See [here ](https://kb.mpmidi.com/books/mp-controller-documentation/page/33-link-groups)for the Link Groups method for linking parameters. --- ##### Learn from Encoder When you open MPH, the default preset has already mapped the controller’s encoders to the MPH encoders, from CC 0-31 in page 1, CC 32-63 in page 2, CC 64-95 in page 3, CC 96-127 in page 4, and this repeats for the next groups of pages (ie page 5 has encoders with CC 0-31 and so on). To see the CC numbers right click on the controller window and choose the ENCODER OPTIONS from the right click menu. The CCs are editable and you can change the numbers as you like. You can have the same CC on more than one encoder. This allows you to create macros and control more than one parameter per encoder. See [video ](https://drive.google.com/file/d/1-u-llpIRKNgorg0mV5qe8DA_kp4CG72u/view?usp=sharing)on controlling multiple parameters using one encoder. The Learn From Encoder button allows you to control a parameter that has been linked to another encoder. Let's say you have linked 3 parameters on 3 encoders and then you want to control all 3 parameters using one encoder. One way of doing it is by manually going and changing the encoder CC IDs 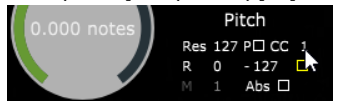 If you set on all 3 the CC to 0, then the first encoder (encoder 0) will be controlling all 3 parameters. The other way of doing this is by pressing the button Learn From Encoder, click/touch on the parameter's virtual encoder on the screen and then turn the encoder you want to use. The linked parameter learns and has now assigned the CC from the encoder you have turned. When you do this on multiple parameters you control multiple parameters with that one encoder. Furthermore, you can adjust the Range, Polarity and Resolution on each linked parameter so that they behave differently when you turn an encoder. An example would be to control the Resonance and Cutoff parameter with one encoder. However, you want the resonance to perform a less change in value than the Cutoff. In this case, you increate the Res (resolution) on the Resonance and it will change in value less in comparison to the Cutoff when you turn the encoder. --- ##### Single MPH Control and Display (the Controller icon on the small window)|  |  |
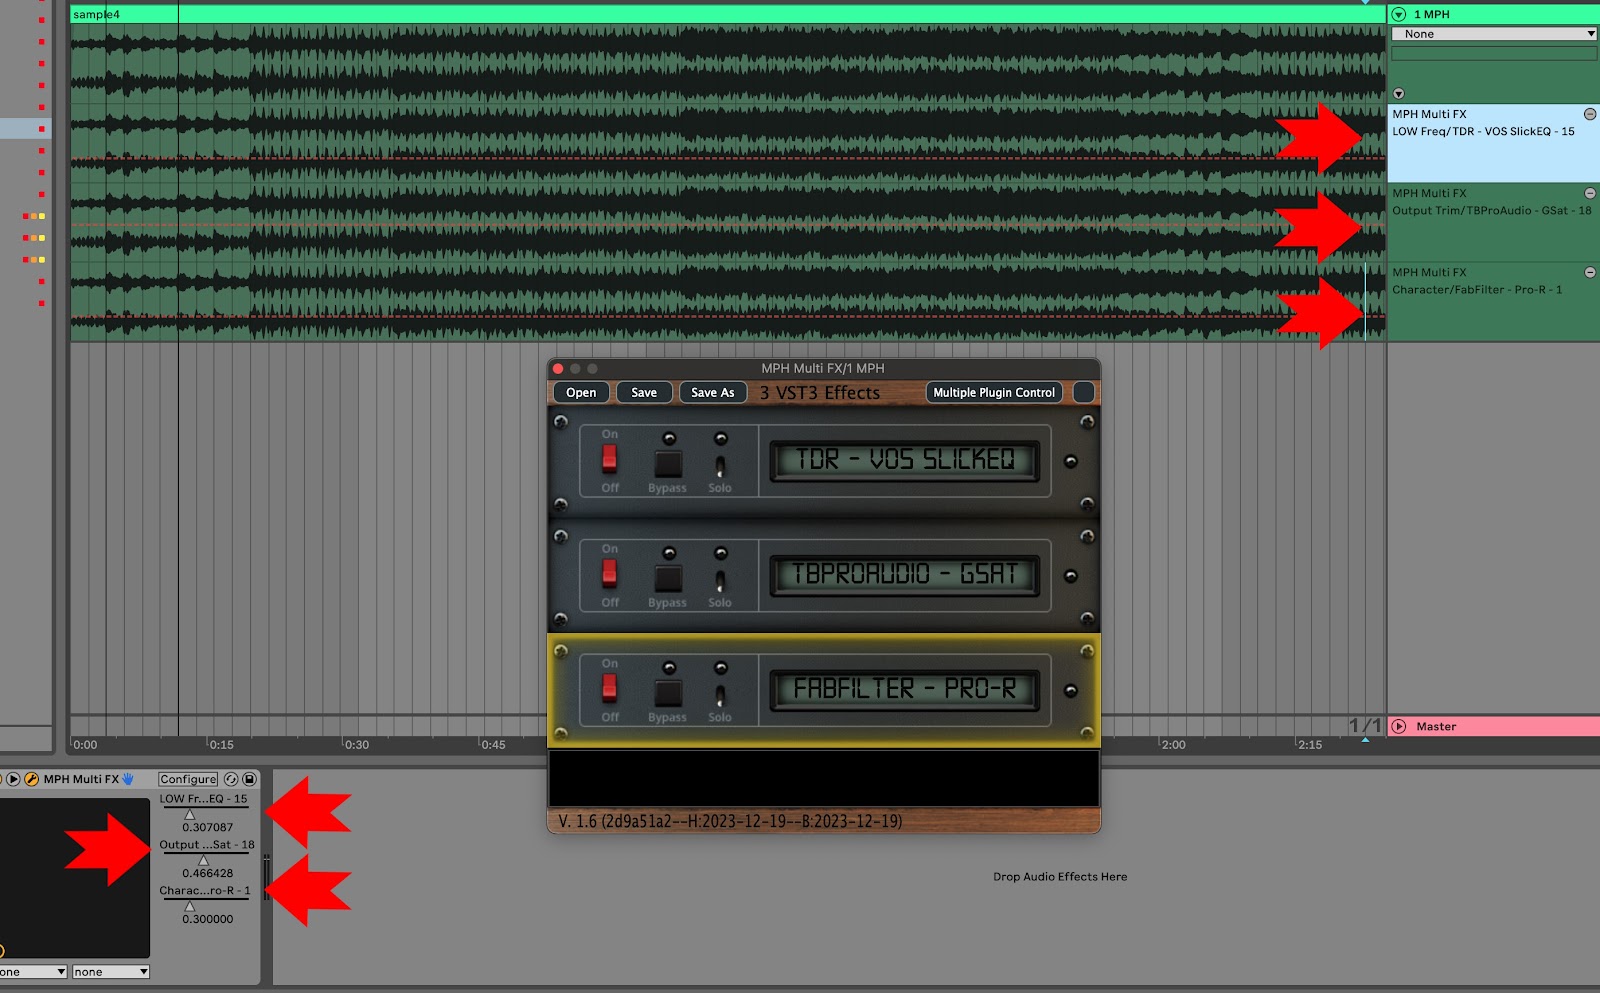
In the latest release of February 2026 the automation method that sets automatable parameters in the Multi Host has changed. See at the bottom of this document the section that describes the new method to set automatable parameters.
In the Multi Host, you need to set in the ENCODER OPTIONS the parameter ID to be automated. This is the number with red font on the bottom right corner in the ENCODER OPTIONS (see below). To automate in the Multi Host, click ENCODER OPTIONS, there are 2 options: **1. The automated method** From the right click menu select "Set parameter ids" and it will automatically assign ids to all encoders that have been linked but don't carry an automation id. This option works per plugin slot and the ids will continue to increase from slot to slot. For example, if you have linked 4 parameters in the first slot, then it will use ids 1 to 4. On the second slot it will use ids 5 and onwards. In Ableton Live, you click on Configure and move the parameters with an encoder or the mouse and it will appear on the plugin area, as usually done with any other plugin. 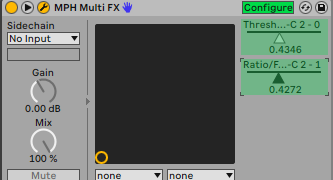 **2. The manual method** set an ID in the red box from 1 to 128, 0 means automation is disabled and it’s the default value. 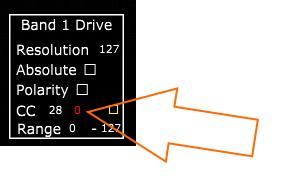 Once you set the parameter number, move the parameter so it is being recognized by the DAW (like you would normally do automation without the MPH) and that’s it. You can only use one automation ID per encoder. If you enter an automation ID number (1 to 128) that is already used you will get a pop up notifying you where that id is being used so you can use another one. When saving a multi host preset the automation IDs are not saved in the preset. [See video](https://drive.google.com/file/d/1tK62wodVC6BVkVz-qZfg2UwmoYBW4Ymg/view?usp=sharing) --- In the case of the Multi Host, you will notice that you cannot assign an automation ID (it is greyed out) on encoders that have been linked with a parameter which has been linked on an encoder in another page. This is done to prevent reporting the same parameter to the DAW as an automatable parameter. For example, if you link the Attack parameter in page 1 and then link it again in page 2, you don't need to enter an automation id on the encoder in page 2. You will see that the id field is greyed out and it will use the automation id from page 1. This way we report only one time the parameter to the DAW and avoid conflicts. For linking the same parameters in multiple pages see[ here](https://kb.mpmidi.com/books/mp-controller-documentation/page/6-linking-parameters-and-options)Update: In the v16-2d9a51a2--H2023-12-19--B2023-12-19 version of the MP Host, it reports the names of the plugin parameters to the DAW for automation.
 --- ##### Setting automatable parameter in the Multi Host (February 2026 Release and onwards) Since the introduction of Automap, setting the IDs of all linked parameters to be automatable would soon exhaust all 128 available parameter slots available for all Multi Host slots. For example, if you load Fabfilter Pro Q in the first slot with Auto map enabled, then "Set Parameter IDs" to mark all linked parameters IDs as automatable would leave no room for additional slots to be automated. Therefore, we introduced a new way to set manually the parameters you want to automate in your DAW. Right click on an encoder to view the Color Selector. There you will see a checkbox "Automatable". When you check the box, the parameter is reported to the DAW as automatable parameter and gets a rainbow outline, so it is obvious that it is set as automatable. [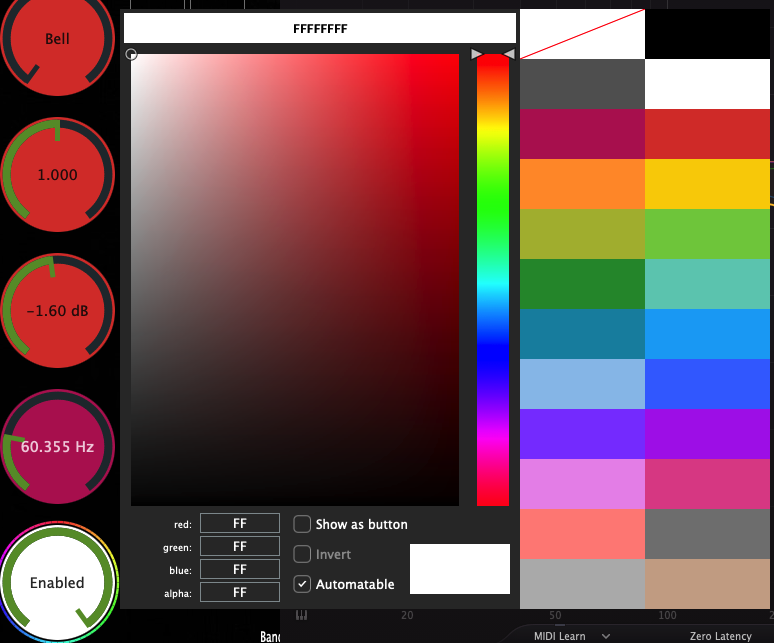](https://kb.mpmidi.com/uploads/images/gallery/2026-03/15yfqP2E6uXflBcz-image.png) [](https://kb.mpmidi.com/uploads/images/gallery/2026-03/OONo4cqyxCAsZQSU-image.png) The Automatable parameters are saved in the MP Host preset, (SIngle Host preset and Multi Host preset) so the next time you load that preset, parameters set as automatable will be recalled. --- ##### Overwriting Automation in Cubase and Nuendo. If you have automation already written in a track, enable the Auto Latch mode to write new automation over it. Press F6 to open the Automation Panel. In Nuendo, use Auto-Latch or Cross-Over mode whether there is automation or not. [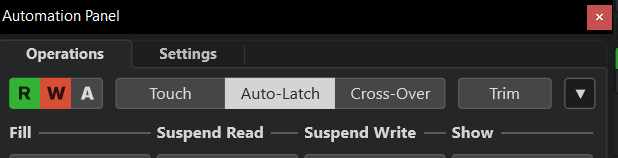](https://kb.mpmidi.com/uploads/images/gallery/2026-04/IBasmhDgam7p1Mtb-image.png) When you use **Auto Latch**: - As soon as you touch a parameter Cubase ignores existing automation - It starts writing your new values - After you release, it keeps writing the *last value* (this is the “latch” part) --- # 8. Side Chaining You can use side chain in the Single and Multi FX Hosts. Instrument hosts do not accept side chain signal. To side chain, send the side chain signal on the MP Host from your DAW as you would normally do with any plugin. Then enable the side chain feature on your hosted third party plugin. [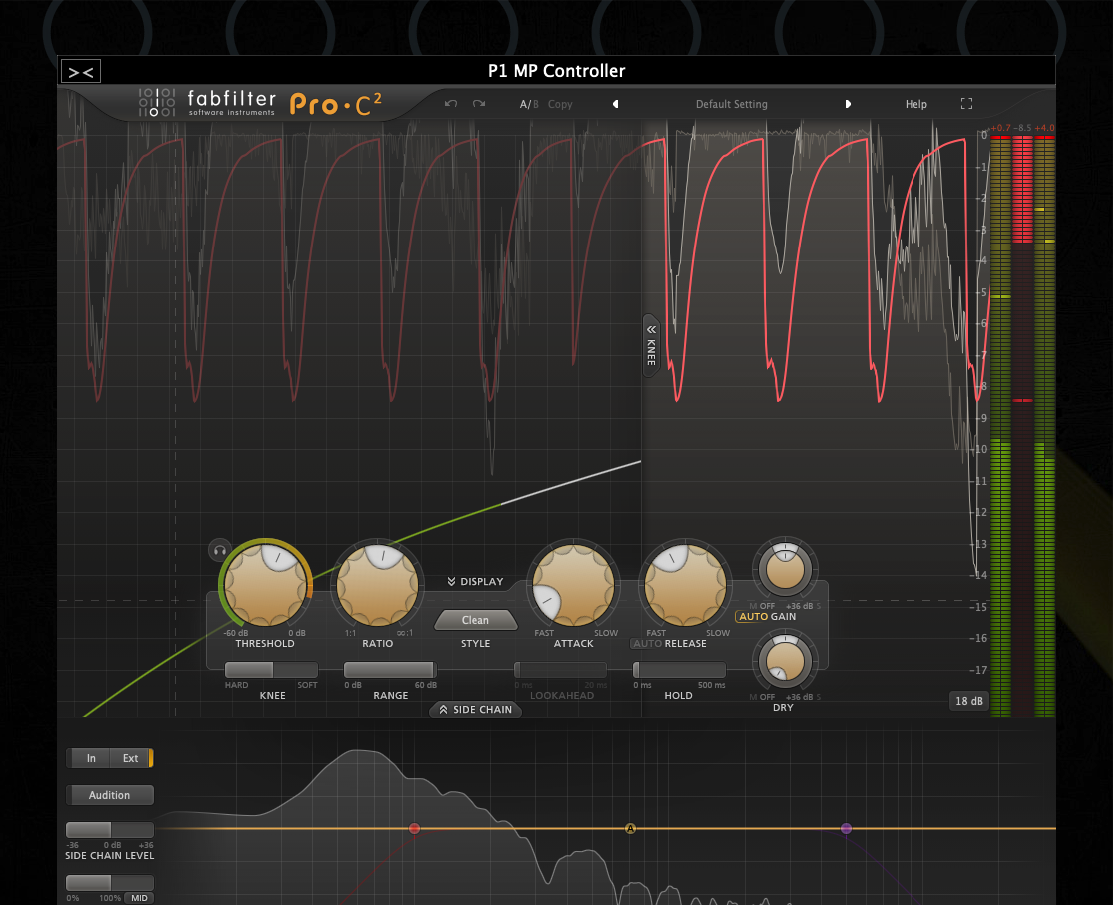](https://kb.mpmidi.com/uploads/images/gallery/2026-01/hRYd4u2xViWQDDU6-image.png) # 9. MP Host Presets ##### There are 3 preset types in the MP Host plugin (MPH): - Single Host presets (MPH Presets) - Multi Host presets (Multi Presets) - [MPH Link presets](https://docs.google.com/spreadsheets/d/1Gdek4QnMXOGFK99RZcG4o93z4cxj3mPVL53uy4RFvko/edit#gid=773578930) Loading a third party plugin from the Plugin List menu in the MP Host plugin, will not load the linked parameters to encoders. Loading a plugin from the Plugins List menu will allow you to link parameters, and save it as an MPH Single xml Preset. 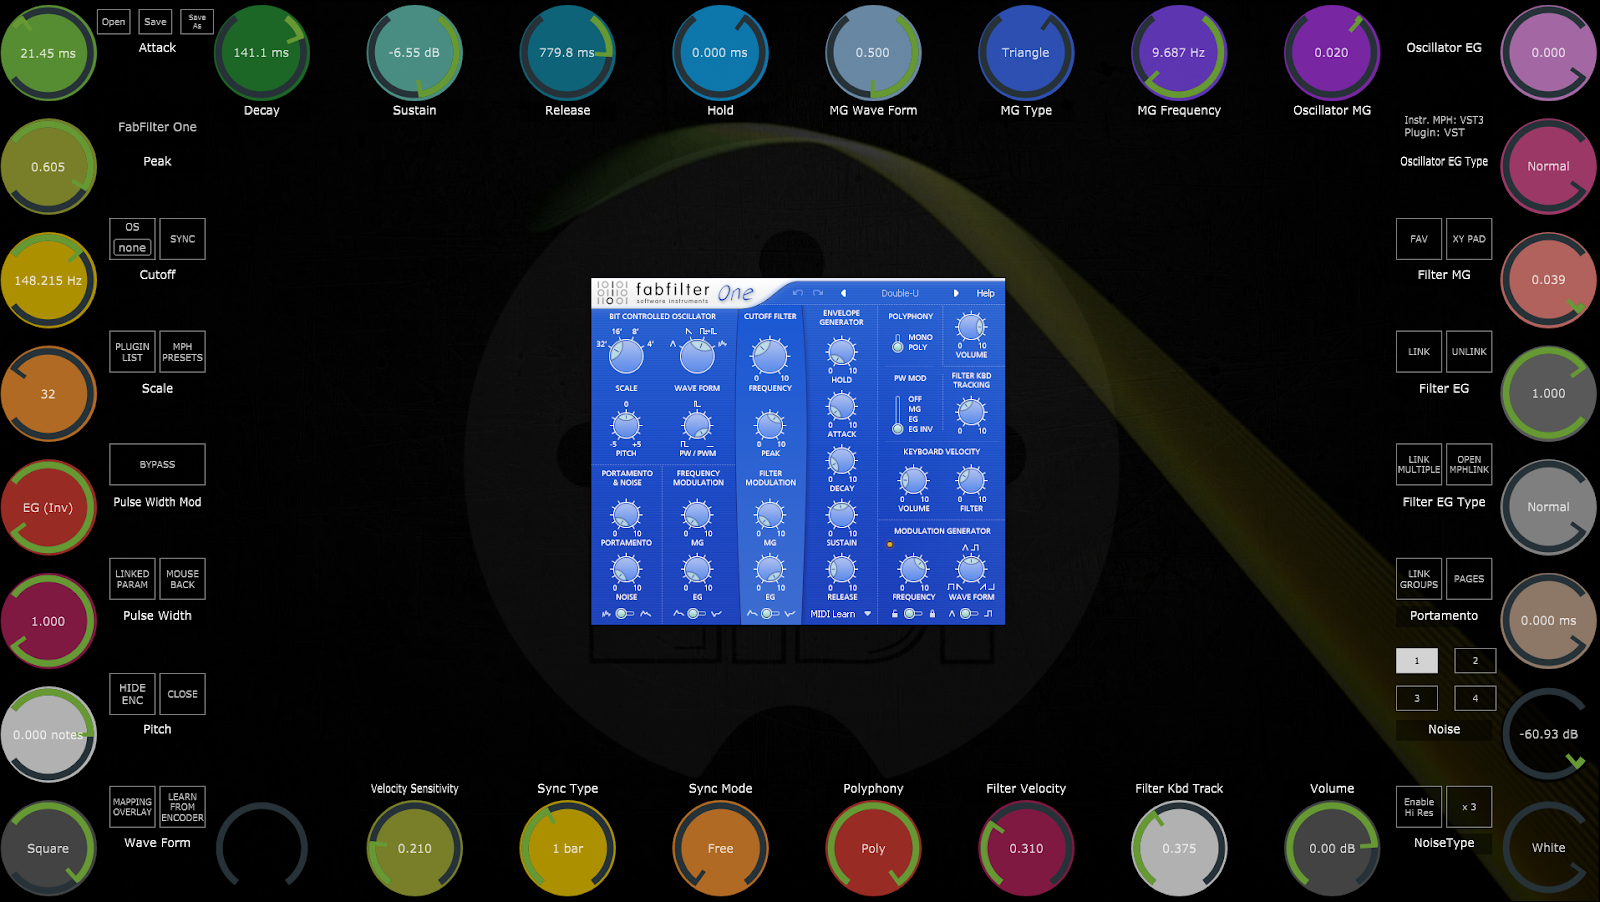 An MPH Single Preset xml, loads the hosted third party plugin, mappings to encoders with colors, the state of the plugin as it was last saved and optionally, background images per page.Check out the [new VST3 Generator Utility](https://kb.mpmidi.com/books/mp-controller-documentation/page/45-vst3-generator-utility-mac-and-windows)
--- ##### Comparison of the MP Host presets| Preset Type | Loads the third party plugin | Loads links to parameters (mappings) | Can be loaded in the Single Host | Preset File Extension |
| Single Host presets | Yes | Yes | Yes | .xml |
| Multi Host presets | Yes | Yes | No | .mxmli for instrument and .mxmlf for audio effects |
| [MPH Link presets](https://docs.google.com/spreadsheets/d/1Gdek4QnMXOGFK99RZcG4o93z4cxj3mPVL53uy4RFvko/edit#gid=773578930) | No | Yes | Yes | .mphlink |
An MPH Link preset does not contain/load a third party plugin. The third party plugin should be loaded **first** and then load the mphlink preset. Then save it as an MPH xml preset. Onwards, you can use the xml preset which will load the third party plugin and the mappings to encoders.
[MPH Link presets](https://docs.google.com/spreadsheets/d/1Gdek4QnMXOGFK99RZcG4o93z4cxj3mPVL53uy4RFvko/edit#gid=773578930) are portable (portable means are compatible/transferrable across computers, regardless of type of computer, Mac or PC, for any type AU/VST/2/3). The mphlink presets should be loaded after a third party plugin is hosted/loaded in the MP Host. Loading an mphlink preset does not affect the state of the hosted third party plugin and has no path reference to the hosted third party plugin. This makes these presets portable, cross platform (Mac/PC) and cross plugin type (VST/2/3/AU) compatible that can be easily shared. For example, if you have created an mphlink preset on an AU plugin on a Mac, you can use this preset on a VST in Windows. This provides more flexibility to create presets for many plugins and share them with users. The mphlink presets are saved in a folder under the MP Host folder at Windows: C:\\Users\\USER\\AppData\\Roaming\\MP\\Link Presets Mac: ~/MP/Host/Link Presets IMPORTANT: Before extracting from the zip file the downloaded [MPH Link preset](https://docs.google.com/spreadsheets/d/1Gdek4QnMXOGFK99RZcG4o93z4cxj3mPVL53uy4RFvko/edit#gid=773578930) files, go to the MP Host and right click. From the menu go to Link Presets and choose Save. The MPH plugin will generate the folder named "Link Presets" in the MP Host folder [~\\MP\\Host\\](https://kb.mpmidi.com/books/mp-controller-documentation/page/3-mp-host-properties-and-config-files)  Then, from the right click menu choose to Open the MP Host folder. 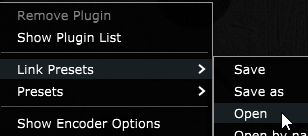 The MPH Link presets can be Opened and Saved from the right click menu in the big window of the MP Host plugin or the button Link Presets which brings up a searchable list window. 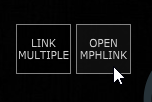 Create an xml preset from an mphlink preset. We provide portable mphlink presets so that you can create your MPH xml presets. 1. Load a third party plugin you want to control in the MP Host plugin. 2. The load an MPH LINK preset. 3. Then save it as an MPH xml preset The next time you want to use that plugin, you will load the MPH xml preset which will automatically load the third party plugin as well. It is recommended to do this process for any of the mphlink preset you want to use.**Tutorial videos:** 1.[ How to extract and load the .mphlink MPH LINK presets](https://www.youtube.com/watch?v=owibwEclfQI) 2.[ How to create an MPH preset from an .mphlink preset](https://www.youtube.com/watch?v=-JtN9Vd3o64)
You can download the MPH Link presets zip file from your account. [Here](https://docs.google.com/spreadsheets/d/1Gdek4QnMXOGFK99RZcG4o93z4cxj3mPVL53uy4RFvko/edit#gid=773578930) is the up to date list of MPH Link presets.If you would like to share presets you made, export them as mphlink presets and send them to us via email. We will create a folder with your name under the manufacturer's folder and update the presets zip file so that others can use your presets.
--- ##### Opening the mphlink presets [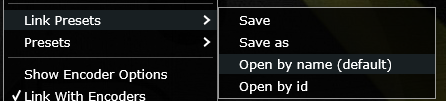](https://kb.mpmidi.com/uploads/images/gallery/2025-04/lffrT9eoibxBs5eB-C0Oimage.png) **"Open by Name" option for mphlink presets (default)** This option uses matches plugin parameters with encoders using the name of the parameter instead of the parameter id. This is useful because some plugin developers don’t use the same IDs on different plugin types. For example, VST2 ids may be different from AU ids. Loading the MPH Link Presets using this method, solves this problem. For example, if the parameter name is Cutoff and the mphlink preset has a parameter named Cutoff it will match it. **"Open by id"** This option maps the plugin parameters in order using the index number of the parameter. This method may cause some parameters to be mapped on another parameter in the case that the plugin developer has changed the order of parameters. --- ##### Changing 3rd party hosted plugin presets When you change or load up a new preset on any hosted third party plugin in MPH, the hosted plugin sends the new loaded values in its parameters to the host plugin and the controller. There are some exceptions though to this rule. Some VST2 plugins do not send a notification to their DAW automatically when they change via a preset change. Such an example is our beloved Reveal Audio Spire Synthesizer. Although this is not often found in third party plugins, if you notice the MPH encoders not being updated then hit the Sync button to receive the current parameter values from the hosted plugin. This is the only purpose of the Sync button and should only be used on such occasions. If you have changed a preset in such a hosted third party plugin and have not clicked on Sync and you Saved or Save As, the MPH encoders will automatically sync with the hosted plugin and be saved properly in your preset. ###  ##### Updating MPH Presets when new 3rd party plugin versions are released If a new version of the third party plugin is released by a third party vendor, depending on the update there is a possibility (although rarely, ie in the case of N.I. Kontakt) that the updated version will cause the MPH (and perhaps your DAW) to see this update as a new plugin. In this case, your MPH xml presets may not show the third plugin plugin when loaded. Install the update of your plugin as you would normally do and load up the MPH xml preset you have created. If the hosted 3rd party plugin is not showing up in the main window, choose it again from the PLUGIN LIST. It will load the plugin in the already loaded preset. All the linked encoders should work and there is no need to link them again. Then, Save the MPH Preset again. Alternatively, you can save your MPH xml preset as an mphlink preset and load it after you load the third party plugin. Then save it as an MPH xml preset. In the case you have created M- file plugins on the Mac, choose Create Plugin to replace your M- file with an updated one. ###  ##### Migrating Presets from Windows to Mac If you switch from Windows to Mac and you want to convert your existing Presets for VST2 and VST3, use this utility (instructions are included): [Download](https://drive.google.com/drive/folders/1y4BUfiIxfggfzfraWlILoVOE00Wq6XGz?usp=sharing) ###  # 10. MP Host Favorites ### MPH Favorites The Favorites screen has placeholders for favorite plugins, so that they can be loaded instantly using the touch function or mouse click. For every placeholder, an image can be selected to be displayed and an MPH preset. Clicking on touching on the placeholder’s area loads the MPH preset. Right click on a box area in the Favorites window and select the placeholder’s favorite mph .xml file preset. The placeholder will take the name of the .xml preset file. Within the same menu you can select an image of your favorite plugin. You can take screenshots of your plugins (using your OS or other software) , save them as jpg on your computer and then select these screenshots via the Favorites menu to appear in each box.Note that the images selected will be automatically resized and then copied in the [~/MP/Host/Images/Favorites](https://kb.mpmidi.com/books/mp-controller-documentation/page/4-show-preset-folder-go-to-the-mphost-properties-folder) folder.
See [video](https://drive.google.com/file/d/1styhr-_im0yrPX3p-x_Cfwoqtv-3wv-a/view?usp=sharing) on how to create Favorites
--- ##### NEW! Utility for creating screenshots of your favorite plugins automatically Download for [Mac ](https://mpmidi.com/utilities/thumbnailgen/MP_Host_Favorites_Thumbnail_Generator_macOS.zip)and [Windows](https://mpmidi.com/utilities/thumbnailgen/MP_Host_Favorites_Thumbnail_Generator%20_Windows.zip). On the Mac you need to set permissions for the utility app: System Preferences → Security & Privacy → Privacy → Screen Recording Set your favorites in the MP Host Favorites first. Then run the utility to generate thumbnails. If you delete any thumbnails from [~/MP/Host/Images/Favorites](https://kb.mpmidi.com/books/mp-controller-documentation/page/4-show-preset-folder-go-to-the-mphost-properties-folder) and run the utility again, it will create the thumbnails. Run the utility to create the thumbnails and then open the MP Host. The thumbnails should appear in the Favorites. Note that the utility works only for Single Host presets (.xml) but not for MultiHost presets (.mxmlf and .mxmli) **How it works** When you click on "Scan for Presets" the utility will read the InstFavorites.xml and FXFavorites.xml which are the files that hold your favorites. It will show a list of Favorites that don't have a thumbnail assigned. Clicking on "Generate Thumnails" will begin loading the plugin of each preset set as a favorite and taking a screenshot. Then setting the path to the screenshot in the InstFavorites.xml or FXFavorites.xml. If a plugin crashes during loading it will be added in the Plugin-Exclude-List.txt so the next time you run the tool will not scan that plugin. Because it saves the xml file every time it creates a new plugin screenshot, the next time you run the utility, will not generate screenshots for the ones that were done before the crash occured. --- ##### Suggestion for taking screenshots:**Windows:** Windows Print Screen tool (Snipping tool), [Lightshot](https://app.prntscr.com/en/index.html) , [Flameshot](https://flameshot.org/#download), [Greenshot](https://getgreenshot.org/downloads/) **Mac:** Built-in macOS Tool (Cmd + Shift + 5), QuickTime (already installed on Mac), [Flameshot](https://flameshot.org/#download)
Load up a plugin in the DAW or the MPH. Take a screenshot of the plugin by pressing "print screen" Then click the Save icon to save it on the desktop. Then choose that saved image file to set it as a favorite background. ##### Categories The favorites are separated into categories, each category has a placeholder in the top two rows of the favorite screen. The category placeholders can be renamed by right clicking and typing the name you want. There are 16 categories of favorites and each category can carry 24 favorite plugins, in total 384 can be selected (384 for audio effects and 384 for instruments). The favorites are separated for audio effects and instruments, so you can set different categories and favorites for audio effects and instruments. The favorites screen can be optionally set to load on startup from the same right click menu. The above options can be selected by right clicking on each of the favorites placeholders. The favorites are stored in two separate files FXFavorites.xml and InstFavorites.xml in the ~/MP/Host folder.[Here ](https://youtu.be/pBWIjKpmD3M)is a demo video on favorites
##### Moving to a new Mac computer In the case you will get a new Mac, copy the MP/Host folder to the new Mac (delete the hardware id and mph license files and get ones from the server). If your username is different from your previous Mac, you can open FXFavorites.xml and InstFavorites.xml files in a text editor and check that the path to presets is the same. You can change it by doing a find and replace ALL in the text editor. For example on your previous Mac, it could be: /Users/USERNAME/Library/Application Support/MP/Host/Presets/Comp/preset-name.xml And on your Mac, if your username is different, then the absolute path will be different. You can replace the username with the current one for all favorites and the path will be correct again. # 11. Encoder Options ##### Encoder Resolution and M-P-R Options This options are accessible via the right click menu by enabling Encoder Options. Each encoder has a number of options and these become visible by each MPH encoder when the M-P-R checkbox is checked and each encoder has two working modes, Absolute and Relative. **Absolute mode** is activated if Abs checkbox is checked. In absolute mode, the encoder receives and sends standard MIDI cc messages, each message contains the value, hence it is absolute. There are 128 CC values, therefore the standard resolution (steps) of the encoder is 128, 0 to 127. If Abs is checked, the M option becomes available. **M checkbox** for Magnitude for Absolute mode. This is a scaling factor for each encoder when it receives MIDI messages from the controller, ranging from 1 to 50. So your incoming CC can be scaled accordingly. If you set the Magnitude to high values, such as 50, then the encoder will behave like an on/off switch. **Relative mode** is activated if Abs is unchecked. Relative mode interpretes MIDI messages from the controller as pulses of plus or minus (-1 or +1) and sends them to the software encoder and to the target plugin parameter. In Relative mode we can set the resolution (shown as Res) of each encoder in the Resolution box from 1 step to 999 steps. Absolute and relative modes may seem the same but with the In absolute mode, values transmitted from the controller are absolute (0,1,2,3..127) once we reach CC max or min (value 0 or 127) anything sent after max/min will not make any difference, but in relative mode there is no max or min, it just keeps on increasing or decreasing. The following can be used whether in absolute or relative encoder mode. **P checkbox** for Polarity. For inverting the incoming midi CC message. Moving the hardware controller clockwise, moves the virtual encoders anticlockwise. **R checkbox f**or Range. Set the minimum and maximum range, from 0 to 127, you want the Virtual Encoders to respond. If Polarity is checked then the range is inverted (the min becomes max and max becomes min). **CC checkbox** for Control Change Number. Set the same CC number, by clicking in the CC box, to multiple virtual encoders and create macros. Combine this feature with M-P-R and you can create complex macros. **Red font number** for multiplugin automation ID (explained above). Shows up only in Multiplugin host. ##### High Resolution Button The Hi Res button located on the bottom right of the big window allows you to temporarily select a higher resolution factor for the encoders. The right button allows the selection of the factor from 2 to 10 and the left button enables/disables the function. This setting is saved in the MPH xml presets. ##### Oversampling (deprecated after version v1.7-39f136c1--H2025-07-14--B2025-07-15) Oversampling will operate the hosted plugin in a sample rate multiple to that of your DAW project. This is a unique feature of the MPH, and it is made possible because MPH hosts the 3rd party plugin. The Oversampling options are 2x, 4x, 8x. MPH features anti-aliasing filters when using oversampling. Oversampling tends to be most useful and shows results when pushing a plugin to its limits or when using overdrive/distortion type of plugins. It is standard that the oversampling process will consume CPU and introduce some latency, which is reported to the DAW. When you choose an oversampling option, the hosted plugin will automatically reload in MPH. If you plan to use oversampling with specific plugins, it is best to test that it works well with the hosted plugin, prior to using it in a work project. Some plugins, when oversampled too high, will create problems, even crash the DAW. This is outside of our control.[**This video**](https://www.youtube.com/watch?v=-jCwIsT0X8M) explains well the process of oversampling a plugin.
##### Linked Parameters List The Linked Param button displays a searchable list with all the parameters that have been mapped to an encoder. This is useful when a lot of parameters have been linked and you want to check the corresponding encoder of a parameter, or to reference automation of an encoder. # 12. The MP Multi Host ##### Plugin holders in the Multi Host To open a plugin on the controller monitor click on the area on and around the lcd screen on the plugin holder. 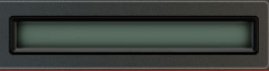 The lcd area will display the name of the third party plugin loaded. If you save an MPH xml preset, then it will display the name of that preset. When you add a new plugin holder an empty instance of the single MPH is created. Each plugin holder can host one plugin. To remove a plugin holder right click on the red area and select Remove Plugin. A pop up menu will appear to ask if you want to remove the plugin holder. When a plugin holder is removed it removes the plugin hosted in it as well and there is no undo for this. When you click and drag up/down on the area marked in red below on the Multi Host of each plugin holder you can change the order of the plugin.  ##### Add/remove plugin holders (slots) There are 3 options to add slots in the Multi Host. 1. Right click in the area shown in the image above in red on a plugin holder [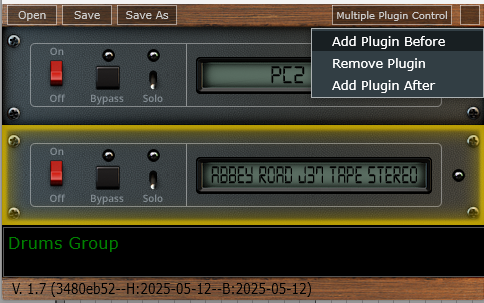](https://kb.mpmidi.com/uploads/images/gallery/2025-05/RvHD6MpKPBIOc1MX-image.png) 2\. - Click on the top corners, where the little screws are, (left or right) of a slot to add a plugin slot on top of the currently selected slot. - Click on the bottom corners, where the little screws are, (left or right) of a slot to add a plugin slot below the currently selected slot.See [this article for Automation in the MultiHost.](https://kb.mpmidi.com/books/mp-controller-documentation/page/7-automation-in-the-daw)
The purpose of this screen is that from a single screen we can now control parameters from multiple plugins hosted in the MultiHost. The screen is activated by clicking on the Multi Plugin Control button located at the top of the Multi host plugin. ##### Multiplugin Presets The MPH stores its configuration, preset files and preset background image files in: Windows: C:\\Users\\USER\\AppData\\Roaming\\MP\\Host Mac: /Users/USER/Library/Application Support/MP/Host multi host presets have an mxmlf file extension for audio effects and mxmli for instruments. They can be loaded via the multiplugin only. When you save a multiplugin preset it contains the current state of all loaded plugins including mappings, background images etc. However, it is still possible to Save individual xml plugin presets, with the Save button in the main controller screen, so you can use them in new future multiplugin instances. Saving a multiplugin preset will not automatically save individual single plugin xml presets. ##### Multi host maximum number of hosted plugins We have set a 12 plugin holders limit in the multiplugin version. Although we don’t have to implement a limit, we did set one because in a DAW channel everything runs on the same audio thread. Even without the MPH all the plugins you load in a DAW channel run in a single CPU thread so that the audio processing is uninterrupted (not switching from one thread to another). Since, with the MPH you now have the ability to run 12 virtual instruments on a single thread, this can put extreme load on a single thread of the CPU, not because of the MPH but because of the number of plugins you have in a single channel. With a limit of 12 it means you can run 12 instruments and 12 effects with just one MPH instance for instrument and one for effects. Of course you can load as many MPH instances you want per channel, but even with the latest computers this may not be such a good idea, and it is in general better to spread the load across channels. We may increase this limit of 12 plugins in the future depending on feedback we receive. In the July, 2024 update, the MP Instrument host (Single and Multi) plugin supports up to 16 stereo outputs 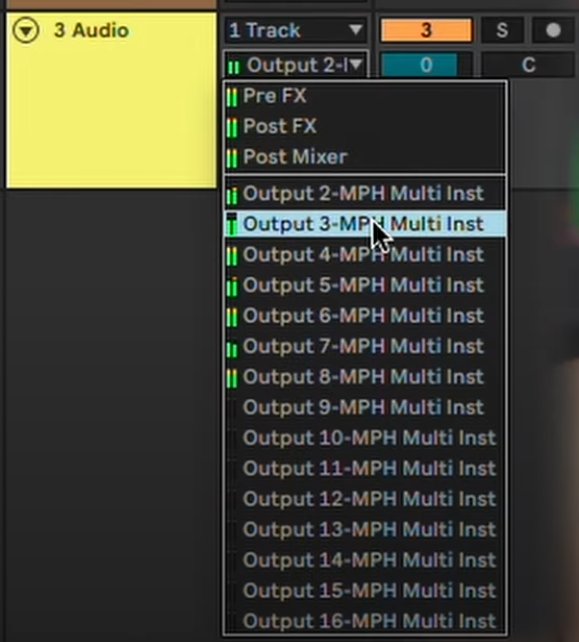For setting up **automation** parameters in the Multi host see the article [here](https://kb.mpmidi.com/books/mp-controller-documentation/page/7-automation-in-the-daw)
July 2024 update, for using the MP Host in Bitwig on Windows, see this article [here](https://kb.mpmidi.com/books/mp-controller-documentation/page/39-using-the-multihost-plugin-in-bitwig)
# 13. Background Images and Encoder Colors ##### Background Images You can load background images to each page of the MPH. You can drag and drop an image, jpg or png format to the current page you are working on, from your file explorer. The image must be of 1920 x 1080 px resolution, jpg or png. The image will be saved when saving a preset and be placed in the Images folder on the same folder level as the Presets folder, in the MP/Host folder on your computer. ##### Encoder Background Colors Right/Left clicking on the inner area of each encoder will display a palette of colors which you can select to color code the encoders. It’s a good practice to color encoders that belong in the same group, like an ADSR envelope. These encoder assigned colors are saved in multi host and single host presets. You can disable the left click to show not show the color palette by editing the **host.properties** file in a text editor and changing the last line: <VALUE name="disable\_left\_click\_color\_palette\_on\_encoders" val="0"/> to <VALUE name="disable\_left\_click\_color\_palette\_on\_encoders" val="1"/> Then, save the file. Remove the MP Host and load it again and now it should not show the color palette when left clicking in the center of the encoder. # 14. M-Plugins on the Mac ##### Generate M-Plugins as Audio Units on the Mac This feature is only available when loading MPH Single host as an AU and hosting AU third party plugins. When you host an AU third plugin in an AU instance of the MPH in a new folder (which is displayed as a Category in MPH menu), you will see the option in the MPH Menu (right click in main window > Presets) to see the option Create Plugin. This will create a new .component file (AU) in /Library/Audio/Plug-Ins/Components/ that can be seen by the DAW as a new plugin.Check out the [new VST3 Generator Utility](https://kb.mpmidi.com/books/mp-controller-documentation/page/45-vst3-generator-utility-mac-and-windows)
Creating a new M-plugin is useful because when loaded in the DAW directly it will show the name that you chose. 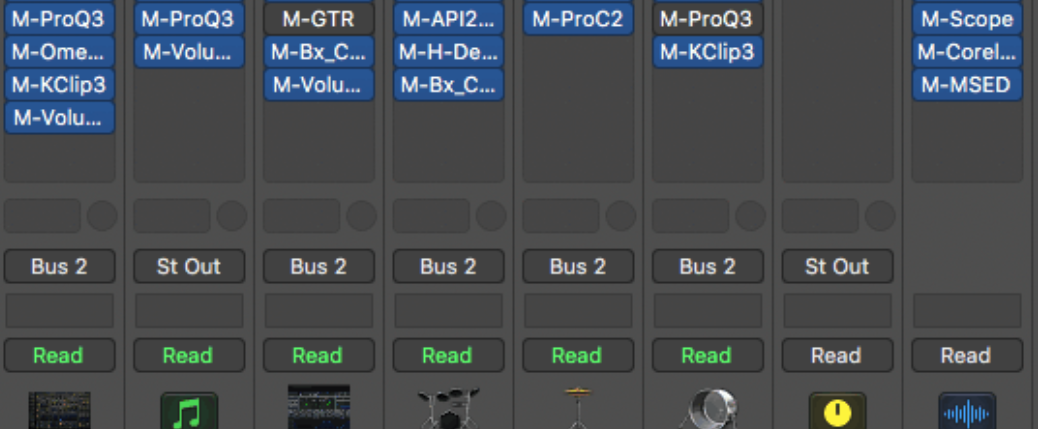 This plugin's name will always start with "M-" so the file name of the plugin generated will be M-the\_name\_you\_entered.component. (Do not write the M- ) M-plugins have the exact same functionality as the MP Host. However, in an M-plugin you cannot remove the hosted plugin. Once you create a new M- plugin, scan for your plugins in your DAW or in case of Logic Pro X reopen Logic and it will scan and find the plugins. New AU plugins need to register with Mac OS so sometimes, depending on the DAW a reboot may be necessary. If your newly created M-plugin does not pass the validation scan in Logic, reboot the Mac and open Logic again. It should scan it again and it will pass validation. Otherwise you can manually scan it in Logic's Plugin Manager. This M- plugin has all the settings, mappings, and references to the third-party plugin. It can be recalled from the MPH Menu or your DAW. The default xml preset for the M-plugin saved in the .component file is the xml preset you have created. So, when you load the M-plugin, it will open the xml preset you created, without having to load another preset. Last, you can load other presets in the M-Plugin, because like mentioned before, the functionality is exactly the same as the single MPH. If you save the M-plugin preset in a folder inside the ~/MP/Host/Presets folder, then the folder name will be used as the vendor (manufacturer) name for your M-plugin. For example, if you save a Pro Q3 by Fabfilter in a folder ~/MP/Host/Presets/FabFilter then in your DAW you will find the M-plugin listed under the manufacturer FabFilter.  In Logic's expandable plugin menu you will find your M-plugin under manufacturer FabFilter. 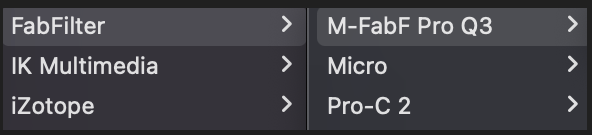If you don't use a folder name and save it directly in ~/MP/Host/Presets/ then the manufacturer will be set as "AU". --- ##### Update M- AU Plugins This is an option in the main window menu, that should only be used when you have installed an updated version of the MP Host. When selected, it will place the new version of the MP Host inside the M- plugin .component files. When you download and install a new version of the MP Host, click on Update M-Plugins option and it will update all your M- plugins to the newest MP Host version. After the update you will see a report of all the plugins updated to the version updated. 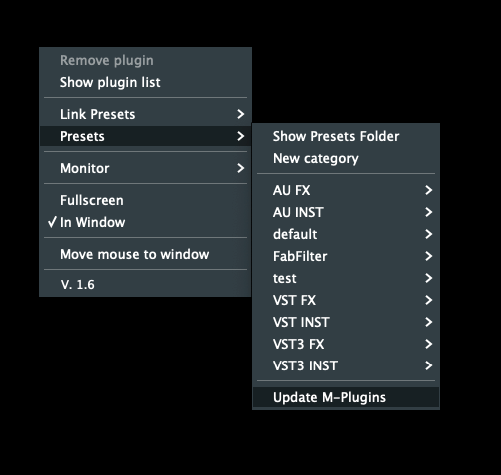 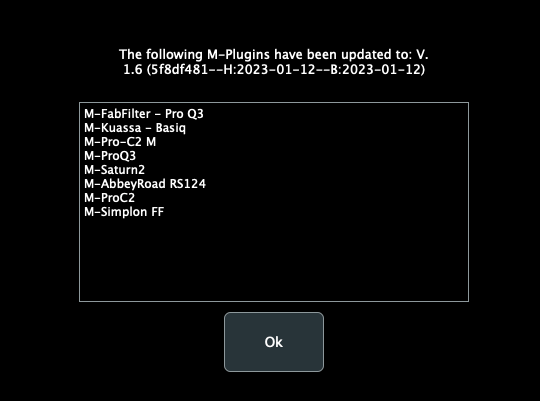 --- ##### Troubleshooting**M-plugins are not being created**
If the M-files are not being created in the Audio Units directory /Library/Audio/Plug-Ins/Components/ , (you cannot see the newly created M- plugin in the Finder under the components folder) it is because the OS permissions do not allow the MPH to write the new M-file. **To solve this issue, run in a terminal:** > *sudo chown -R "$(whoami)":staff "/Library/Audio/Plug-Ins/Components"*and optionally you may also run *sudo chmod 777 /Library/Audio/Plug-Ins/Components/* this makes the permissions in the Components folder less strict.
It will ask for your Mac's password. Type it and hit enter. There should be **no output** on the terminal and you may close it. Reopen Logic and try to create the plugin again. M-plugins not loading in the DAW If you have migrated to a new Mac, and copied over the plugins from the previous Mac, it may cause Mac OS to prevent opening M- plugins due to permissions. **Run in a terminal:** *sudo chmod -R 777 /Library/Audio/Plug-Ins/Components/M-\*.component* It will ask for your Mac password, type it and hit enter. There should be no output on the terminal and you may close it. Reopen Logic Pro X or the DAW and try to load the M-plugin. **How to remove M-plugins** Delete the M-name.component file from /Library/Audio/Plug-Ins/Components/ Open Logic's plugin Manager and search for the M-plugin. Select it and then choose the "Reset and Rescan Selection". # 15. Plugins with external VST3 AU Presets Some vendors create their plugin presets as .vstpreset files for VST3 or AU plugins. One such example is Plugin Alliance plugins. When you host in the MPH such plugins, upon loading the third party plugin the MPH will search under: **Mac /Users/USER/Library/Audio/Presets** **Win C:\\Users\\USER\\Documents\\VST3 Presets\\** the folder with the plugin’s vendor name (ie Plugin Alliance) and within that, the folder with the name of the plugin loaded and it will display these vstpreset files in the menu on the controller’s window. When a plugin with VST3 Presets is loaded the MPH will automatically display a button on the top encoder row named “VST3 Presets”. This button brings up a list with the available VST3 Presets of the hosted plugin. Alternatively, to view and load VST3 Presets: Right click > Presets > VST3 Presets From that list you can choose any preset and it will be automatically loaded in the hosted plugin. 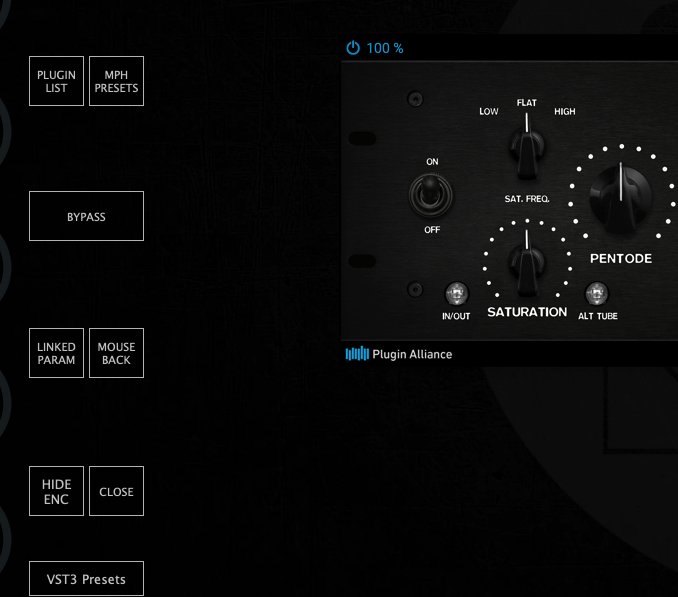 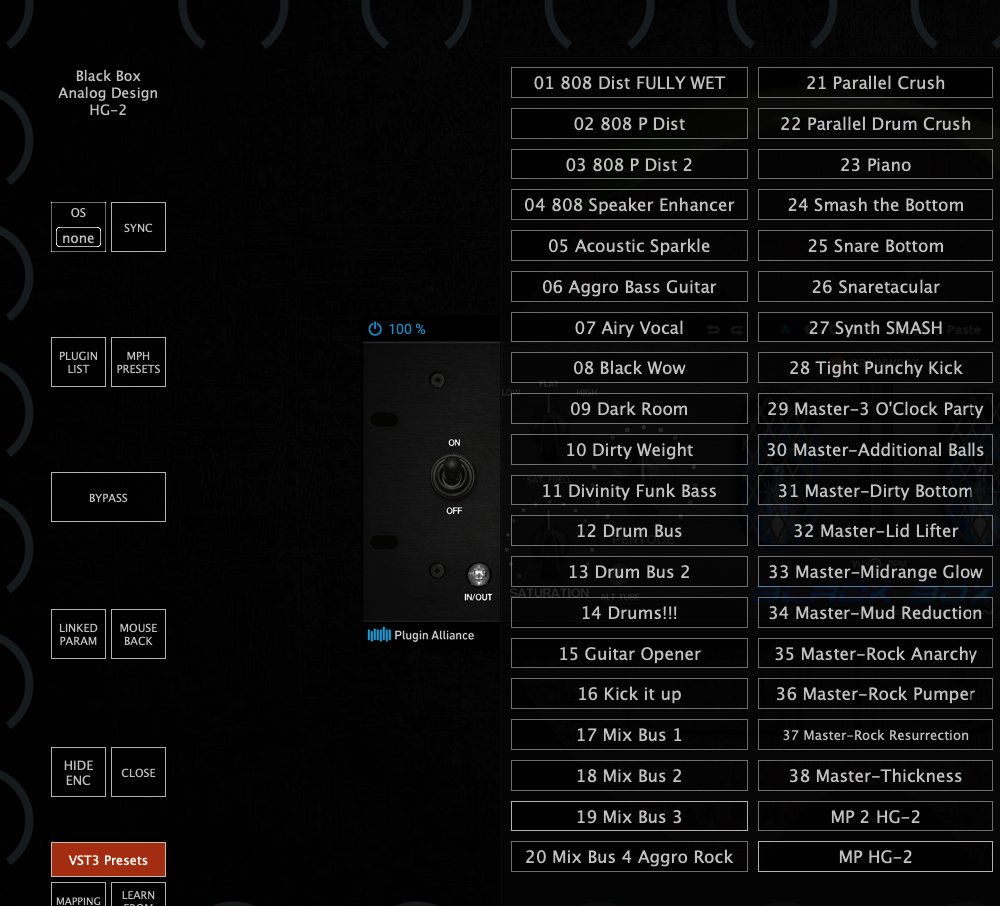 # 16. How to Reset the MP Host Plugin All the settings and scanned plugins references are stored in the host.properties text file located in:Windows: C:\\Users\\USER\\AppData\\Roaming\\MP\\Host
Mac: /Users/USER/Library/Application Support/MP/Host
To navigate to the host.properties file via the MP Host plugin see [here](https://kb.mpmidi.com/books/mp-controller-documentation/page/4-show-preset-folder-go-to-the-mphost-properties-folder) To reset all the settings and return to default delete or rename this host.properties file. To reset the default preset, just delete the default.xml and it will be recreated the next time you load the MPH in the DAW. When you delete the host.properties file your MPH presets will not be affected. When the host.properties file is deleted, you will need to select the target monitor the first time you run the MP Host plugin. If when loading the MPH is loading a preset you created instead of the empty preset, delete the default.xml from the Presets folder. # 17. Windows Unified Option This option can be accessed from the right click menu. When it is unchecked (default), the hosted plugin has its own Window instead of being embedded the MPH Window. If checked, the hosted plugin will open inside the MPH existing Window. The default value is "unchecked - not enabled". 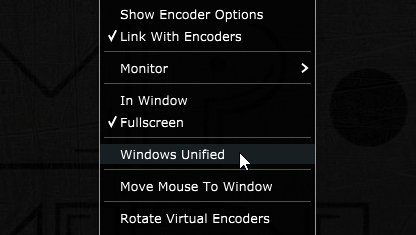 After you check the box, right click anywhere on the black area of the MPH big Window to display the menu. Click again to hide the menu and this will reload the GUI of the hosted plugin and the change will take effect. This "**Unified Window**" option is helpful if you are using multiple 4k monitors and you encounter the hosted plugin to appear outside the controller monitor. It ensures that the hosted plugin will always be placed at the center of the MP Host window. It is also helpful if plugins generate new option windows and these may be hidden behind the MP Host. This option is saved in a plugin xml preset so next time you recall your preset it will be part of it.Note that if the Top Bar option is enabled, then Windows Unified option is not available to use abnd it will be greyed out. Disable the Top Bar option and the Windows Unified can be enabled.
# 18. Hiding the controller window and moving the hosted plugin These options is available via the right click menu.  This is particularly useful when working on a laptop and when you don’t have the MP Controller with you. **Hide Window** will hide the controller’s big window and will show only the hosted plugin. The hosted plugin will have a title top bar and it can be dragged with the mouse. Closing and reopening the small MPH window, will hide the hosted plugin and display it in the center of the monitor. This option is global, meaning it will affect all plugins of the MP Host. **Show Plugin Top Bar** will add a title bar to the hosted plugin and allow to drag the hosted plugin to another display with the mouse. You will still be able to control the plugin with the controller. This option is global, meaning it will affect all plugins of the MP Host. In the 2025-04-30 update, we introduced a new button on the left side of the top bar that restores the plugin window to its original position on the MP Controller. [](https://kb.mpmidi.com/uploads/images/gallery/2025-05/HrUq4DviYY8y5euR-image.png) [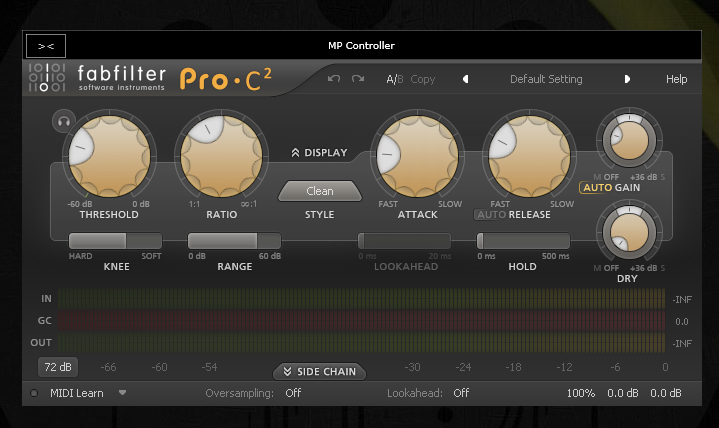](https://kb.mpmidi.com/uploads/images/gallery/2025-06/TlWDJigr60GUvxVT-image.png) See this [example video](https://drive.google.com/file/d/1mXyo2rezvjLEAkrkdRSl187wO0SS31uH/view?usp=sharing)Note: if you move a plugin to a different position and then resize it, the way the plugin handles resizing may affect how it appears when returned to its original location. In some cases, it might not be perfectly centered, and you may need to adjust it manually. To avoid this, use the plugin’s “Set Default Size” option (if available), save it with that size, and it will correctly snap to the center when restored.
Some plugins have automatic monitor resolution detection and change their size automatically when moved to a new monitor with a different resolution. Such plugins may shown cropped and magnified when hosted in the MP Host and moved to a monitor with a different resolution than the MP Controller.
# 19. MP Gain Utility - Version 2 The MP Gain Utility plugin enables you to control the +/- gain on your tracks from the MP Controller. With the MPGU plugin you can control up to 128 gain utility plugins. You can use it for mixing and gain staging. It works on all DAWs and does not require any configuration. See the short promo [video](https://youtube.com/shorts/SxxT-931woQ?feature=share) [Here ](https://youtu.be/28JDZBojrnc)is a short tutorial video**Current version:** v2.0-689ea7e--H2025-09-10--B2025-09-10
[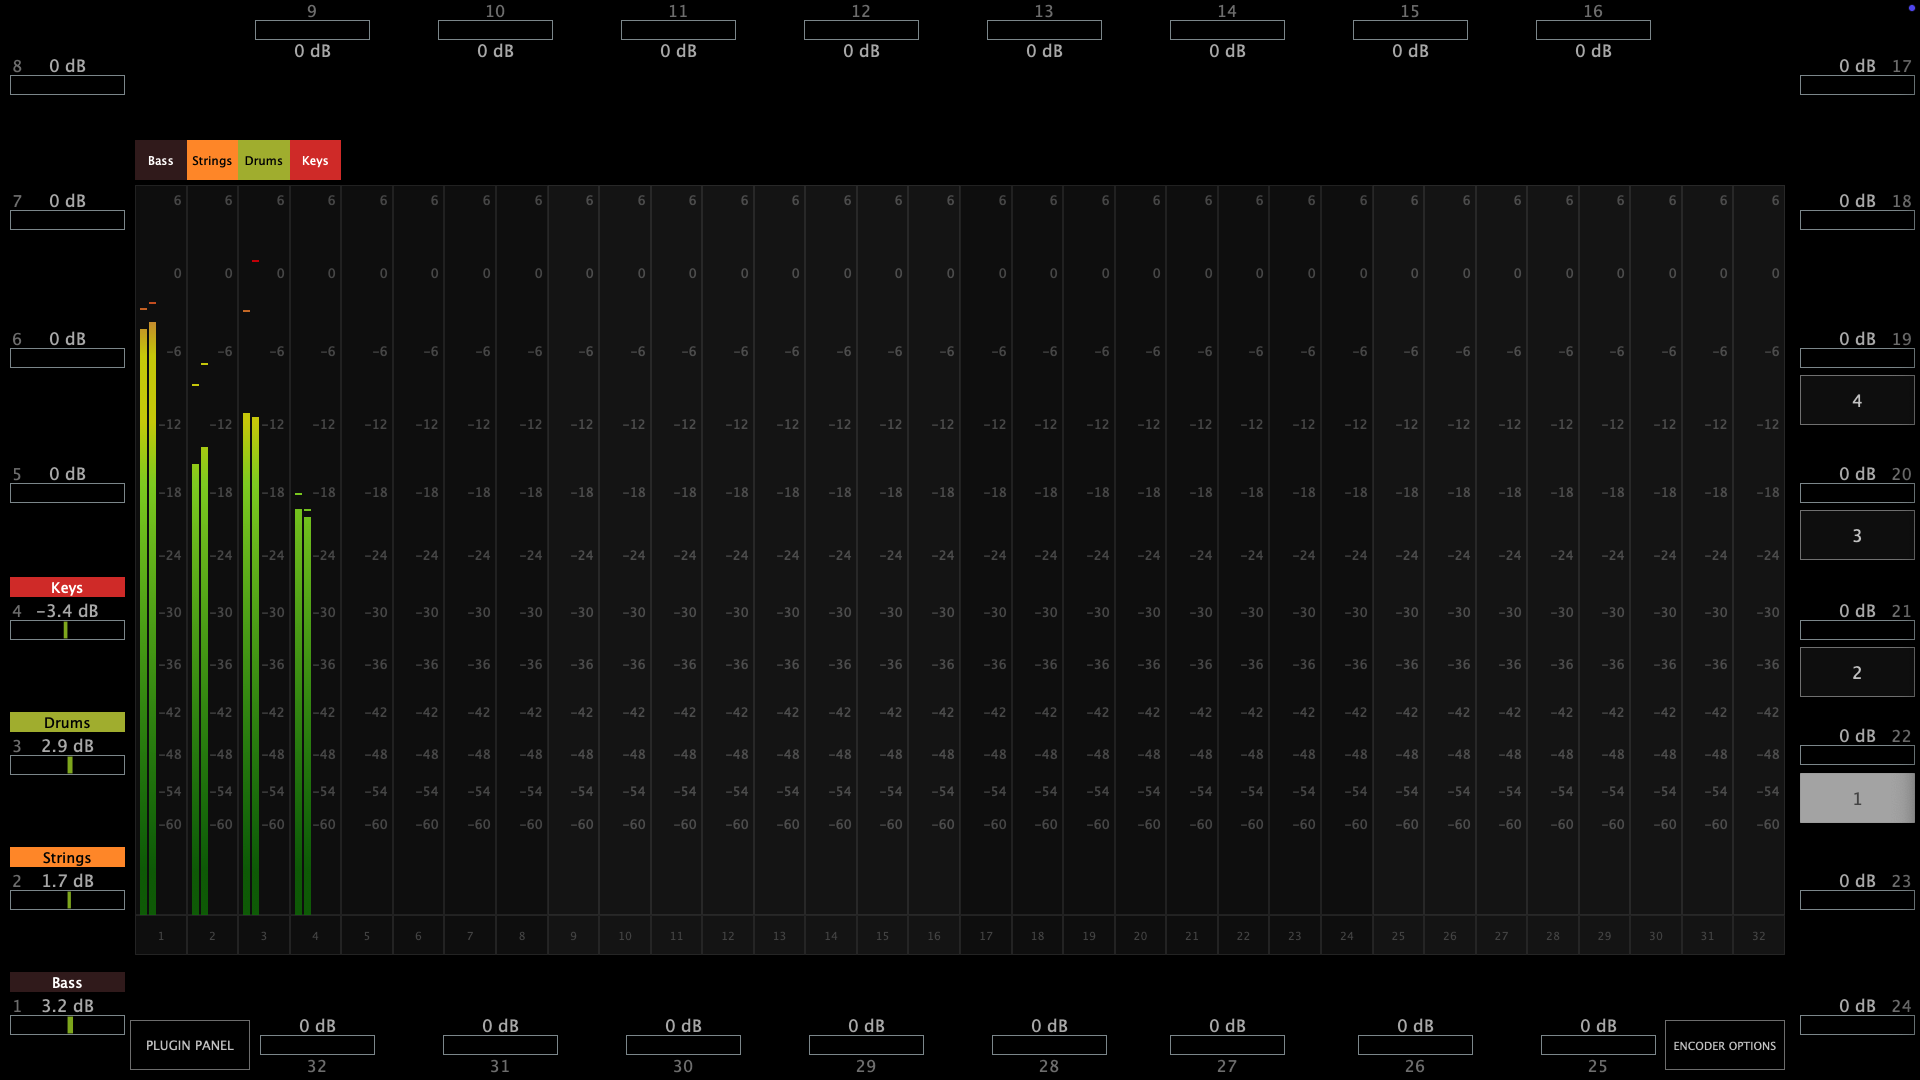](https://kb.mpmidi.com/uploads/images/gallery/2025-08/MtX2Sr4ni6BH4Bna-screenshot-at-aug-11-10-27-59.png) [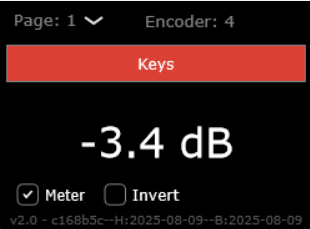](https://kb.mpmidi.com/uploads/images/gallery/2025-08/gabqHWmulot6gaHv-image.png) ##### Download The MPGU can be downloaded from the user portal. ##### How it works The MP Gain Utility consists of two plugins. One server plugin (displayed on the mp controller) and one client plugin (displayed on your DAW). Both are lightweight plugins and consume negligible amounts of cpu and ram resources. The MP Gain Utility can be found in your DAW as vendor MPUT. [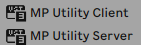](https://kb.mpmidi.com/uploads/images/gallery/2025-08/Jdu3fnykKeWIj7IN-image.png)You only need to load one instance of the **server** plugin per DAW project. The server plugin can be placed on any track in your DAW however there must be only one instance loaded.
The client plugin can be placed on any track and it will act as a gain plugin controlled by the corresponding encoder shown on top. You can add up to 128 client plugins in the same DAW project.You don't need to open the client plugin to control its gain from the mp controller.
Each client plugins maps automatically onto the next available encoder on the mp controller. [](https://kb.mpmidi.com/uploads/images/gallery/2025-08/Jnh8EOIyOIWlspvA-image.png) Turning an encoder to the left will reduce gain in increments of 0.1 dB, turning an encoder to the right will add gain. The values are displayed in dBs and the range is -40 dB to +40 dB. The **Meter** checkbox when checked (checked by default) sends the volume signal to the server to display it. The **Invert** checkbox when checked (unchecked by default) inverts the gain on the client.Right click on the empty black area to select the target monitor of the mp controller.
Once you load the server plugin then load a client plugin where you want.The server plugin does not process any audio, it allows audio to pass through it unaltered. The client plugin processes audio with its only function being adding or subtracting volume to the signal.
Each client plugin carries an id starting from 01 to 32. Each id corresponds to an encoder on the server plugin and the controller per page. There are 4 pages and they can be switched from the right column of the server. [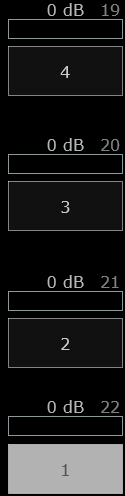](https://kb.mpmidi.com/uploads/images/gallery/2025-08/VIWJkKc11jzVekRK-image.png) When you load the first client plugin, it will take id 01, mapped onto encoder 1 and it will be controlled by encoder 1. If you load another one it will take id 02 automatically and so on up to 32. If you change the encoder id from the client it will be reflected on the server. If you change the page on the client the server will also go to that page. If you have a clients in page 1 with ids, i.e. 1, 2, 7 and you add a new one, it will take id 8. When adding a new client it finds the encoder with the greatest id and adds the next one. If there are no available ids in that page it will go to the next page and take the id after an existing encoder with the greatest id. You can load multiple client plugins on the same track. For example, you can enter a client plugin before an audio effect and one after an audio effect, on the same track to do gain staging. ##### Gain Staging Add a client plugin before a plugin you want to control the gain staging, ie a compressor. Add another one after. Disable the meter on the first client and enable the meter on the second client and enable the Invert. Turning the encoder to increase the value it will add gain feeding the the compressor (on the first client plugin) while at the same removing the same amount of signal after the compressor from the second client plugin. Your signal will remain at the same level and you will only hear the difference made by the compressor. You can apply the same principle to any plugin or set of plugins. [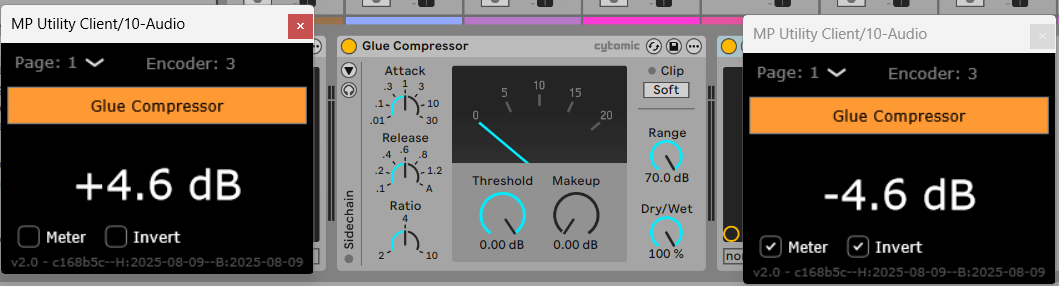](https://kb.mpmidi.com/uploads/images/gallery/2025-08/OKr0t9wf0GUQylIm-image.png)Do not copy and paste existing client plugins because the client will not take a new id automatically. Always load a new client plugin
Selecting a new id for the client plugin will copy over the name, color and dB value to the new encoder, overwriting any existing client. ##### Naming and Coloring Once you add a new client plugin you can enter the name in the client text box and it will send the name to the server. Alternatively, you can write the name onto the corresponding encoder on the server plugin and it will send it to the client that has the same encoder id.Cubase and Logic Pro have the ability to send the track name of the plugin via the VST protocol. The gain utility takes advantage of this and receives the name of the corresponding track where the client plugin(s) is placed. In Cubase, it also receives the color of the track along with the name. When in Cubase or Logic Pro, a checkbox appears on the client named "Track name" which is checked by default. This enables receiving the track name automatically from the DAW. When you type a custom name in the client, the check box will automatically turn off. The same applies when changing the name or the color of the encoder from the server. Enabling the "Track name" checkbox again will instantly receive the track name.
**Assigning Colors** To assign a color to each on-screen encoder right click on the encoder and it will show the color palette window. You can copy the lastly used color by clicking on it on the color palette: [](https://kb.mpmidi.com/uploads/images/gallery/2025-08/zgWps6xyrmFJk0N1-image.png) ##### Reset to 0 dB Double click on the meter of the on-screen dB meter of the server next to the encoder and the value will return to 0 dB. [](https://kb.mpmidi.com/uploads/images/gallery/2025-08/6GD4uzhJwwIdSpLf-image.png) ##### Identifying a meter or an encoder. Click on the name of the encoder and it will blink the corresponding on screen meter. Click on the meter and it will blink the corresponding encoder. ##### Automation If you would like to record gain automation using the MPGU, you can do it at the track you placed the server plugin. Each encoder is automatable like in the MPH. The client has no controllable parameters and it only displays the value in dB. ##### Total Recall When you save your project, all the values and state of the server and client will be saved with your project. When you open your project everything will be recalled. If you delete the Server plugin by mistake, just load it again and it will sync up with the existing clients.The MPGU, unlike the MPH, does not save presets.
##### Using it with the MPH You can load the MPGU and the MPH in the same DAW project. The Controller Icon button works as it does on the MPH. Clicking on the button will close any open MPH instance and display the MPGU on the controller. Clicking on the Controller Icon button of the MPH, will close the MPGU window and display the MPH. You can also switch to it from the small bar icon on your Mac or Windows or using the Plugin Panel. --- ##### Cubase meter settings In Cubase if you are using mono tracks, ensure you have your track meters set to post fader. Right click on the meter in Cubase and set it to Post-Fader. [](https://kb.mpmidi.com/uploads/images/gallery/2025-08/qJTjYVCxh5Uk2ve7-screenshot-at-aug-19-12-17-23.png) ---**How does it work and troubleshooting** The server and client use the [OSC protocol](https://en.wikipedia.org/wiki/Open_Sound_Control) to communicate and it requires port 6565 and 6566 to be open and available. If the client and server do not communicate you can check if the port is available. On the Mac's terminal enter this command: **lsof -i : 6565** If nothing is returned → nothing is currently using port 6565. You can check the same for port 6566. If something is returned → it shows the process using that port. On Windows open a cmd window and type: **netstat -ano | findstr :6565** If nothing appears → port 6565 is not currently in use. You can check the same for port 6566. If you see output, the last column is the PID of the process using it. If some other process is using the port you need to stop be in order to use the MP Gain Utility. Alternatively, you can change the default port numbers from the **mputility.properties** file and use different ports by opening the file in a text editor.
# 20. Audiogridder - MP Host: AG-MPH Guide   # **Audiogridder - MP Host Integrated Guide** The Audiogridder project is an open source project that enables DSP processing of third party plugins outside the DAW. See [**here**](https://audiogridder.com/) We have created a modified version of the Audiogridder, called AG-MPH so that it works in an optimal way with the MP Controller. See example videos [**Logic on Mac**](https://www.youtube.com/watch?v=0dnaN94soR4) and [**Bitwig on PC**](https://youtu.be/G9FPsOR7v5Y), however the principle is the same for all DAWs. To get the installer of the AG-MPH send us an email. The latest AG-MPH version is **v1.2.0-1328f91--H2023-09-08--B2023-09-09** --- **Why did we make this?** Audiogridder, even when used on the same computer, utilizes much better the CPU and allows running more plugins than when running then directly in the DAW. In fact, on a recent test we did on a Mac M1, we found that we could run almost 3 times more - heavy on resources - Acustica plugins than when hosted the same plugins in Logic. (We were able to run 10 instances of an Acustica Eq plugin directly hosted in Logic. We were able to run 28 instances of the same Eq plugin via Audiogridder). You can run the AG-MPH without additional latency by setting the buffer block size to 0, however for taking advantage of the DSP offloading we suggest to set it to 1 or 2 blocks of buffer size where the latency is hardly noticeable (that of course also depends on your computer and the DAW project you are running). As the number of plugins loaded in Audiogridder increases, you may want to increase the buffer size (blocks) of the Audiogridder to avoid audio dropouts and the exact same applies when using the AG-MPH. --- **What we have changed** 1. After opening the AG-MPH plugin in the DAW, click on the + symbol and it will load an instance of the MP Host on the MP Controller. (It is required that you have the latest MP Host VST3 installed, Audio and Instrument plugins). 2. The AG-MPH hides the small window of the MP Host, thus you don’t have an extra window floating. 3. It automatically gets the name of the hosted plugin or preset from the MP Host and displays it on the AG-MPH slot. 4. Selecting a plugin slot in the AG-MPH plugin automatically opens on the controller’s screen. 5. We made the bypass coloring of the slot more obvious and now displays the word “bypass”. 6. The processing of DSP works and other settings/options, exactly as the original Audiogridder and we have not changed that. 7. Switching from one instance of the AG-MPH to another, unlike the original AG, it un-highlights the current plugin slot and highlights the selected one. This applies when running the MPH host directly in the DAW. The two, AG-MPH and MPH single/multihost can be loaded in the DAW at the same time and switching from one to the other will un-highlight the previously selected slot. 8. We added a Slot Selector. This allows to select plugins from the touch screen via the Select Slot button. To enable/disable the button from showing, uncheck the top-right box on the AG-MPH window. This is a universal option and it will affect all instances of the AG-MPH. --- **Prerequisites and Settings** You need to have the latest MP Host installed (after March 23, 2023) for the AG-MPH to work. The MP Host installer is not included in the AG-MPH installer. There are 2 separate installers. You need to install the AG-MPH using the AG-MPH installer. It will install 1. The AG-MPH server and AG-MPH plugin tray. 2. On Mac, the AG-MPH VST3, AU and AAX, all universal binaries x64. 3. On Windows, the AG-MPH VST3. In Windows, the AG-MPH server is placed in C:\\Program Files\\AG-MPH\\ Create a shortcut on your desktop or taskbar for convenience. On the Mac, it will place it in Applications. For both Win and Mac, you only need to run the Server once. The plugin tray will automatically launch when you load the AG-MPH plugin in the DAW. Check that you have these settings in AG-MPH Server (From the menu choose Settings) 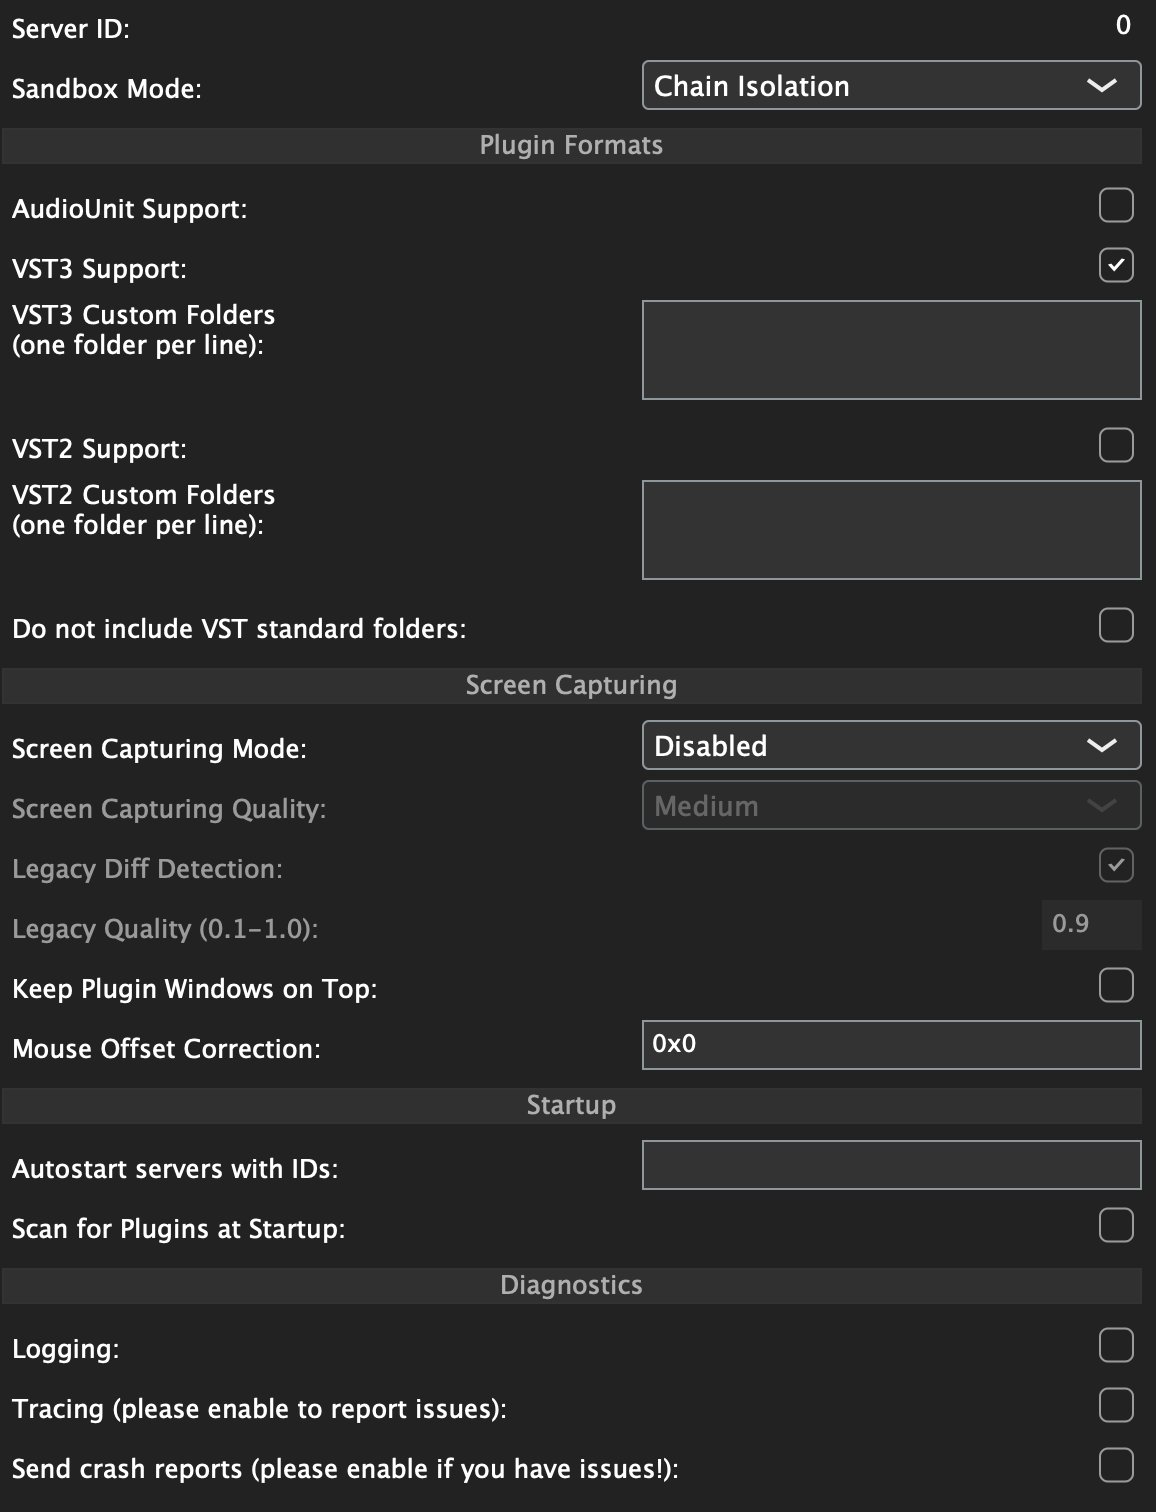 Once you load the AG-MPH plugin in the DAW, click on "add server" and type in 127.0.0.1 This IP address (127.0.0.1) is a universal address on all operating systems for the local machine. By adding this as the default server you ensure that the AG-MPH will always connect to the local machine via the fasted route (instead of going through virtual ethernets or your router). 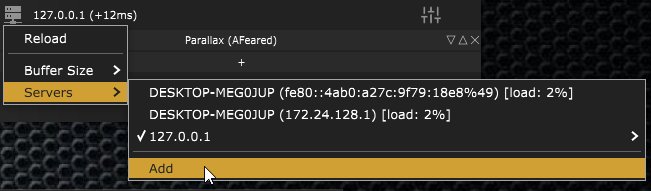 Check that the MPH Single Instrument and Audio effect were found and scanned by the AG-MPH Right click on the AG-MPH icon on the task bar while it is running. Select the option Plugins. 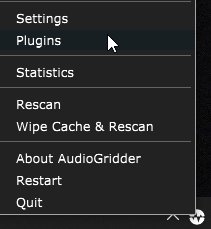 You should see the 2 MPH Single Plugins. If you see any other plugins in red font you can ignore them.  --- ##### **Knowhow and limitations** 1. You can have both Audiogridder and AG-MPH installed on the same computer, however, you cannot run Audiogridder server at the same time you run AG-MPH server. Only one server can run at a time. 2. When using the AG-MPH server, it automatically loads the MP Host plugin VST3. You cannot load directly in AG-MPH any other third party plugins, but only through MPH. 3. You need to run the AG-MPH server app and then the AG-MPH plugin in the DAW, just like the original Audiogridder. 4. If you plan to run an AG-MPH server on another computer, then the MP Controller should be connected on that computer, because the server is the app that runs and displays the hosted third party plugin. You can run AG-MPH on a Windows computer while running the AG-MPH plugin on a Mac computer, just like the original Audiogridder. See [Video](https://www.youtube.com/watch?v=W9ZZSxslyDw) 5. Via the AG-MPH plugin, you can connect on an AG-MPH server in the same way you connect on an original Audiogridder server. 6. On the Mac, you need to give the AG-MPH permissions in the Mac Accessibility settings, so that it does not complain when starting the server, just like the original Audiogridder. Press the + button in Accessibility and navigate to AG-MPH to add it to the list. 7. Audiogridder server scans all plugins on start. This is an option you should disable from the Server settings. AG-MPH and the original Audiogridder share the same settings, so AG-MPH will not rescan your installed plugins. However, AG-MPH has been programmed to only scan the MPH Single Audio Effect and Instrument. 9. The AG-MPH was built using the codebase from Audiogridder version 1.2.0 stable which is the latest as of May 2023. 10. The third party plugins are being hosted by the MP Host and the workflow remains the same as when using the MPH in the DAW including presets etc. 11. You can install MP Host updates when we issue them, and it will continue to work normally with AG-MPH. There will not be a special edition of the MPH in order to work with AG-MPH. 12. There is no additional CPU load when using the AG-MPH, compared to the original Audiogridder. There is no additional latency either when compared to the original AudioGridder. 13. AG-MPH should be set to “Chain Isolation” mode on the server settings (which is already the default) 14. We noticed that the AG-MPH **AU does not load on** **Ableton** on the Mac, however the same issue occurs with the original Audiogridder AU plugin. The Ableton Live's 11.2 log says “Failed to initialize the plugin”. This may not be the case on your Mac. The AU runs fine in other DAWs. The VST3 works fine in Ableton Live. 15. Resetting the Audiogridder server settings **on the Mac** (by deleting the files) will reset the AG-MPH as well. To reset Audiogridder/AG-MPH go in your home folder and Press Command+Shift+Dot this will show your hidden folders. You will have a folder .audiogridder grayed out and delete it. 16. How to Uninstall AG-MPH **on Windows**: - Delete the folder C:/Users/\[name\]/AppData/Roaming/AudioGridder or by navigating to %appdata% and then deleting the AudioGridder folder - Delete the folder C:/ProgramFiles/AG-MPH and C:/ProgramFiles/AG-MPHPluginTray - Delete the folder of plugins from C:/ProgramFiles/Common Files/VST3/AG-MPH 17. When using Wavelab, for the AG-MPH plugin to connect to the server, an audio file needs to be imported in Wavelab and press play. See video [**here**](https://drive.google.com/file/d/1JeQuZ8rnm6sRdG0uIcDI-10eNP6XTeoQ/view?usp=drive_link) --- **Setting Permissions for AG-MPH server on the Mac** If you see this message when you start AG-MPH 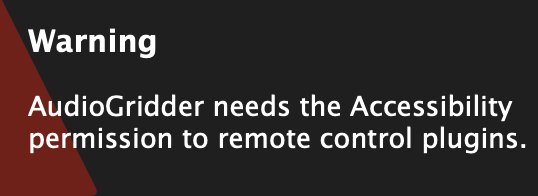Go to Settings > Privacy & Security > Accessibility **** Click the + sign and add AG-MPH  Restart AG-MPH --- **Troubleshooting on the Mac** If you see an error, it may be that the VST3 plugin cannot be accessed by the AG-MPH. 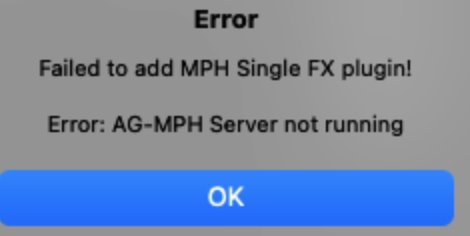 AG-MPH works with MP Host VST3. Quit the AG-MPH server.You don’t need to enter the controller serial again in the user portal.
To generate a new mph.license for another computer you need to log on the user portal from that new computer and choose one of the following methods to create your license: 1. Use the License Manager application (recommended) 2. Register via the MP Host plugin by uploading the new hardware.id file (generated when you run the MP Host) and download the mph.license file. ---First, download the latest version of the MP Host from the user portal and install it on your new computer. If you plan to use your older computer again do not delete the mph.license and hardware.id from the older computer. IT is ok to keep the files on both computers, given that they have been generated for those computers.
DO NOT USE HARDWARE.ID or MPH.LICENSE FILES FROM OTHER COMPUTERS. YOU NEED TO RUN THE MP HOST TO GENERATE NEW ONES. On the new computer, if you have copied the hardware.id and/or mph.license from another computer then **delete** the hardware.id file and mph.license from [/MP/Host folder](https://kb.mpmidi.com/books/mp-controller-documentation/page/4-show-preset-folder-go-to-the-mphost-properties-folder) See full path [here](https://kb.mpmidi.com/books/mp-controller-documentation/page/3-mp-host-properties-and-config-files) To generate a new license see the initial guide [here](https://docs.google.com/presentation/d/11dFAhWMQkr65AkyxNweT92F7MG87MP08B30MgXvg7-o/edit?slide=id.g37ff7b836b0_3_0#slide=id.g37ff7b836b0_3_0)
> **How to navigate to the MP/Host folder from the MP Host plugins and delete the hardware id:** > > - Open your DAW and load the Single FX or Instrument MP Host plugin. > Open the plugin and click on the Controller icon button to open the MP Host window on the MP controller. > - Right click on the main black area of the big window > - Select Presets > Show Presets Folder and it will open the MP/Host folder. See [here](https://kb.mpmidi.com/books/mp-controller-documentation/page/4-show-preset-folder-go-to-the-mphost-properties-folder) > - In that folder you will find the hardware.id file. Note that on the new computer if the hardware.id and mph.license are present, ie have been copied via time machine or hard drive transfer) **delete** the hardware.id and mph.license files > - Then run the MPH plugin in the DAW to generate a new hardware.id file. (remove and reload the MP Host plugin in the DAW if it is already loaded) > - Then login in your account and upload the new hardware.id to the server to get the new mph.license ####  --- There is a limit on the activation server for 5 different computers. If you need activation for more computers, please [contact us](https://mpmidi.com/contactus).If you see the message “License not found, Controller Not connected” see [here](https://kb.mpmidi.com/books/mp-controller-documentation/page/2-mac-license-not-found).
# 22. Get the mph.license from the user portal Open the /MP/Host folder as shown [**here**](https://kb.mpmidi.com/books/mp-controller-documentation/page/4-show-preset-folder-go-to-the-mphost-properties-folder) and upload your hardware.id file in the user portal The hardware.id file is automatically generated when you run the MP Host plugin.If the hardware.id file is **not** being copied to the Mac's Desktop when trying to setup for the first time, see [here](https://kb.mpmidi.com/books/mp-controller-documentation/page/2-mac-license-not-found)
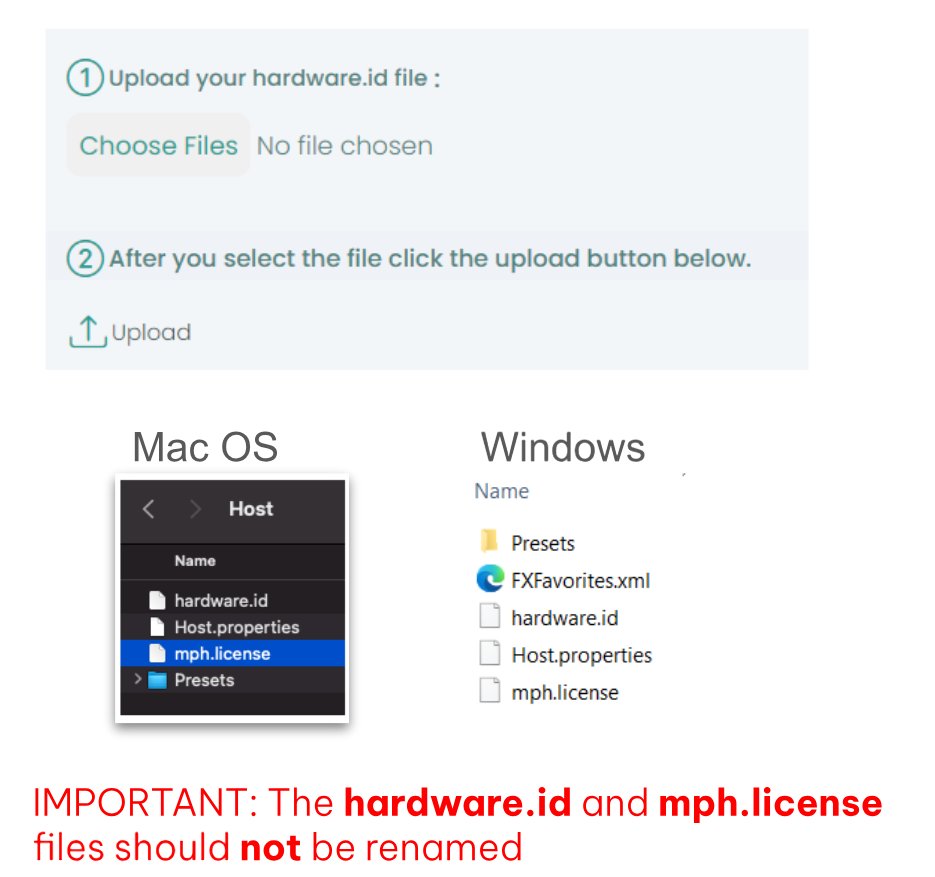 Download the mph.license and place it in the /MP/Host folder next to the hardware.id file  # 23. Receiving update notifications for the MP Host plugin As many tend to keep their studio computers offline or behind firewalls, this would prohibit our plugin to connect on our server and check for updates. We publish new versions in the mpmidi.com/latest-readme first page and on [https://mpmidi.com/mph-versions.html](https://mpmidi.com/mph-versions.html) We don't have a notification system yet, but an easy way to get notifications for new versions is by registering at one of the following free services: [https://www.wachete.com](https://www.wachete.com/) [https://distill.io](https://distill.io/) [https://www.followthatpage.com](https://www.followthatpage.com/) and enter this link to monitor [https://mpmidi.com/mph-versions.html](https://mpmidi.com/mph-versions.html) # 24. Best Practice recommendation MP Controller transforms your third party plugins into a hardware console so that you can control them as if it were hardware. We suggest that you start with one favorite and mostly used plugin, ie like an equalizer or compressor or synthesizer plugin you use all the time. Make the most convenient mappings/links to you and incorporate this in your workflow. After a few projects and heavily using it, you will feel like you know this interface and reach for the controls intuitively. Repeat this process with another plugin and so on. Trying to use and map many plugins at once and use MPH in every plugin, may not help improve your workflow as you introduce too many new things at once. Enjoy your new controller! # 25. Controlling UVI Workstation, Omnisphere by enabling Host AutomationTo avoid getting conflicting MIDI CC incoming messages, it is a good practice at first to clear all MIDI assignments in Omnisphere **(note that this clears automated parameters assignments as well, save as template if you want to keep your assignments). Additionally, note that as of Omnisphere V3.0.2 the AU version of omnisphere does not report the units of the automatable parameters and it was reported to Spectrasonics so it may be fixed soon. You can use any Omnisphere type (VST2/3/AU) in the MP Host.** [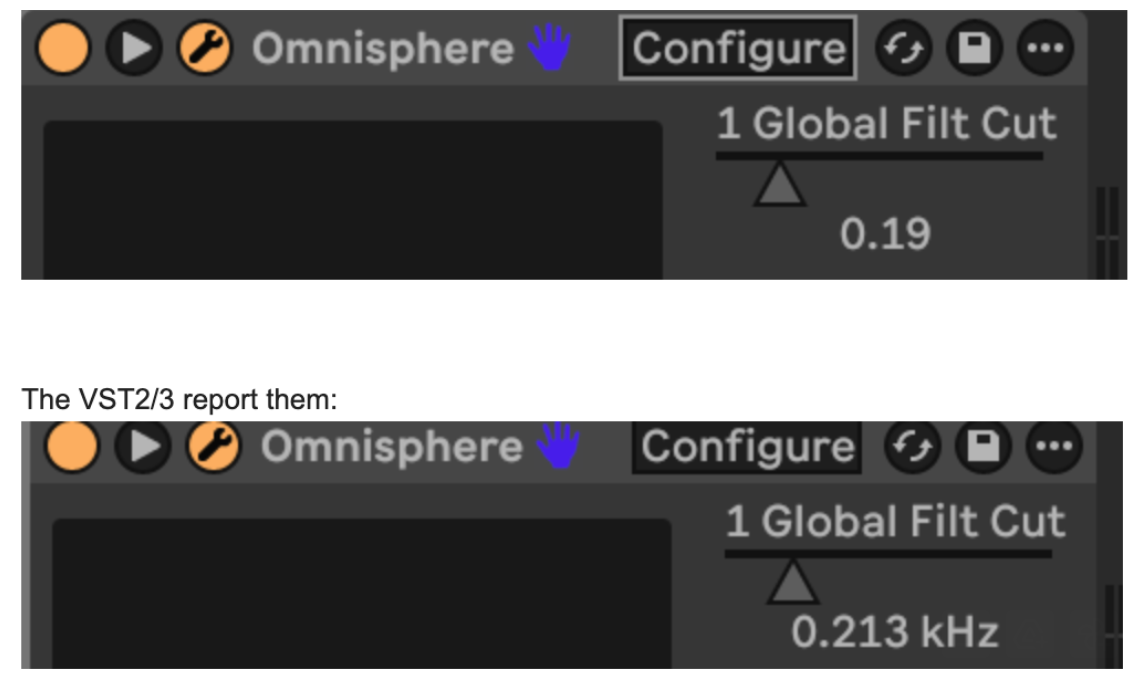](https://kb.mpmidi.com/uploads/images/gallery/2026-02/96T3mYIRYl2uqsrO-image.png)
[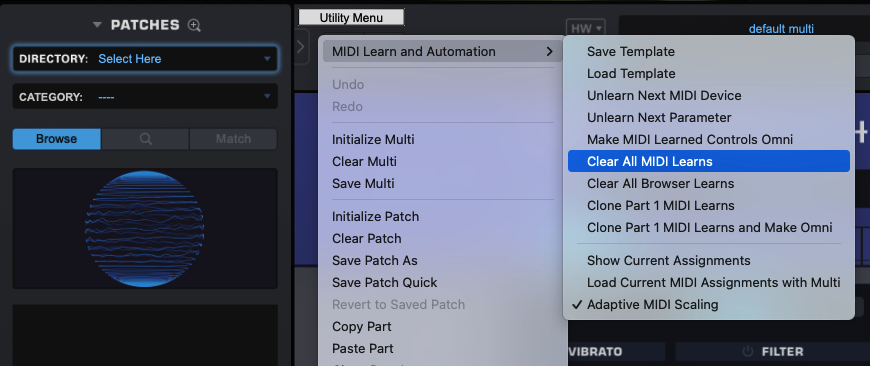](https://kb.mpmidi.com/uploads/images/gallery/2026-02/HtDNwvFMsHyaQxWZ-image.png) --- ##### Using our premade template Omnisphere has thousants of parameters and a limit to control only 512 parameters per instance. Therefore, we adjusted our template accordingly. The template has mapped 415 parameters so you can link more as you go but do not exceed 512. You can use "Show Current Assignments" from the Omnisphere menu as shown above to see which and how many parameters are enabled for automation.To use our template update to Omnisphere 3.0.2. AU does not report automatable parameter units as of this version and this was reported to Spectrasonics to fix it. VST2/3 report the units.
How to use our template: You need to do this process once. [Here](https://youtu.be/kSUX4SvaMVA) is an overview video that shows the following process. Download the template from **[here](https://mpmidi.com/utilities/omnisphere/OmnisphereV3_MP_Controller.midiLrn.zip)** (same for Mac and Windows, all DAWs - it is an Omnisphere *.midiLrn* file).Install our latest MP Host Beta version prior to using the template for best coloring/grouping of parameters
Extract the zip contents to your Omnisphere STEAM folder: /STEAM/Omnisphere/Settings Library/Presets/MIDI Learn/For STEAM folder locations see the[ Omnisphere manual](https://support.spectrasonics.net/manual/Omnisphere3/30/en/topic/get-started-page04?q=steam)
Load the MP Host Instrument plugin (Single or Multi) in your DAW Right click on the controller window and disable Automap: [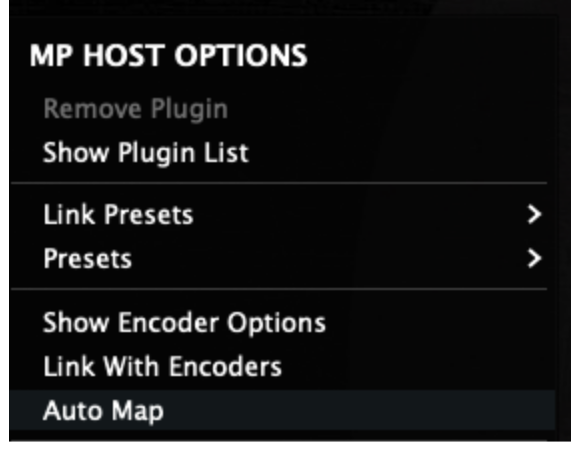](https://kb.mpmidi.com/uploads/images/gallery/2026-02/dPKKwk9qW3WAC8iU-image.png) Then load Omnisphere from the Plugin List (anyone from AU,VST2/3) [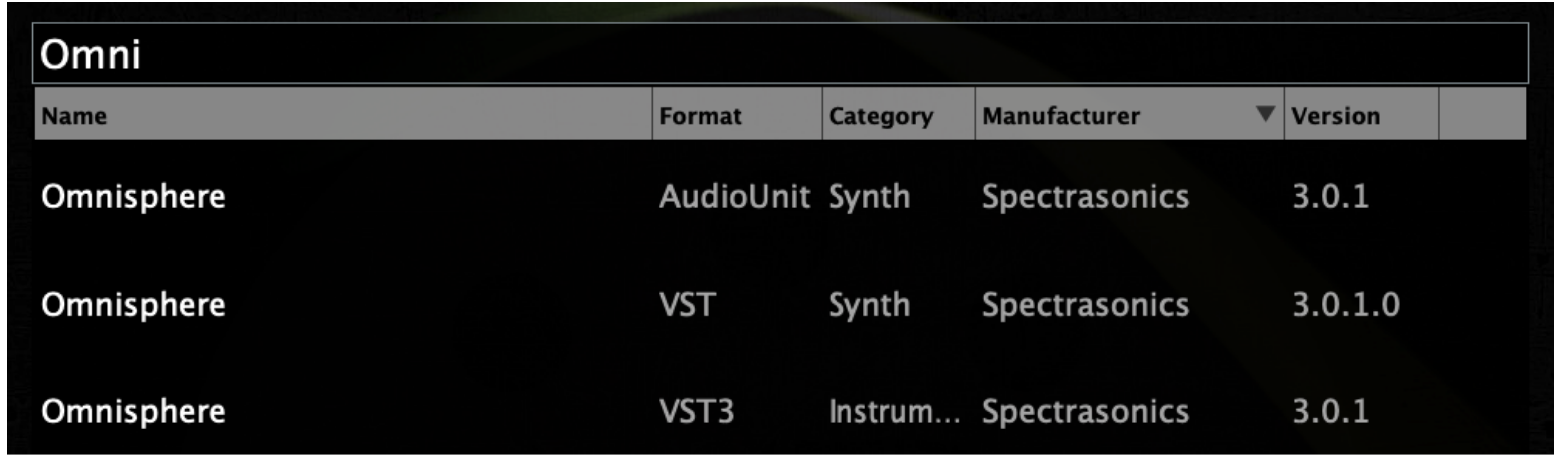](https://kb.mpmidi.com/uploads/images/gallery/2026-02/KE6YuHsTMhG7q4QQ-image.png) Clear all MIDI assignments and automation ids in Omnisphere. [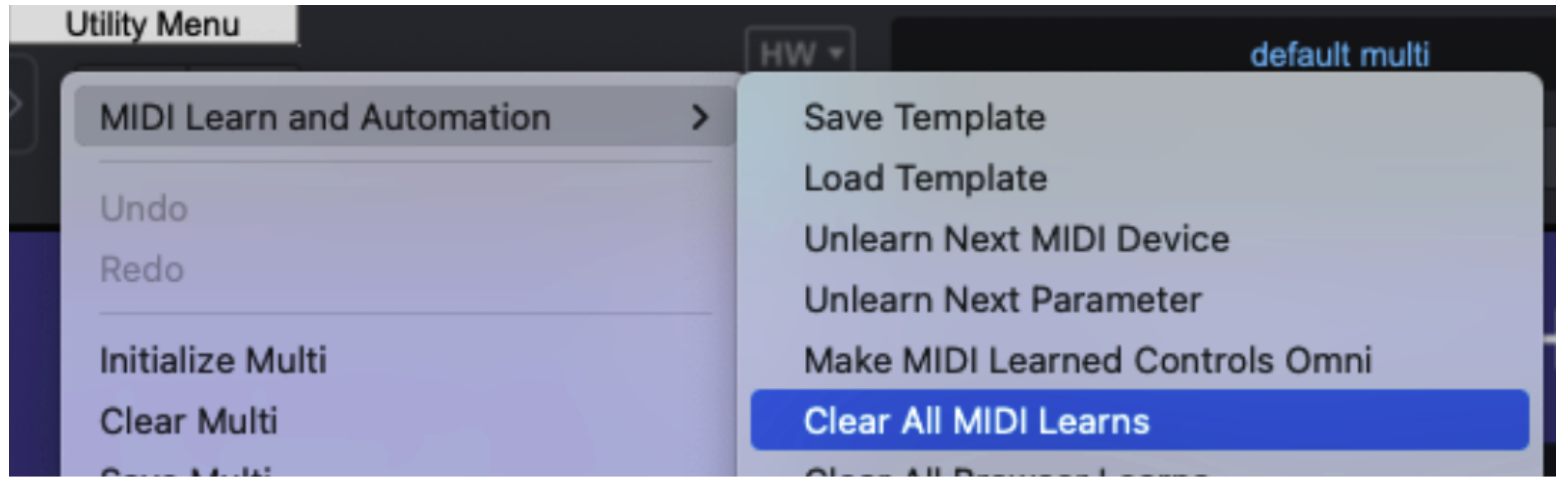](https://kb.mpmidi.com/uploads/images/gallery/2026-02/KjHmVs5ni748pbaU-image.png) Then from the same menu choose Load Template [](https://kb.mpmidi.com/uploads/images/gallery/2026-02/r7s7Rz2ksxZ58Rtw-image.png) The file dialog will open and you will see the Omnisphere template you copied from the zip. Choose [](https://kb.mpmidi.com/uploads/images/gallery/2026-02/w9jLACv4Uriz0V0y-image.png) From the Menu, choose Save as Default Multi [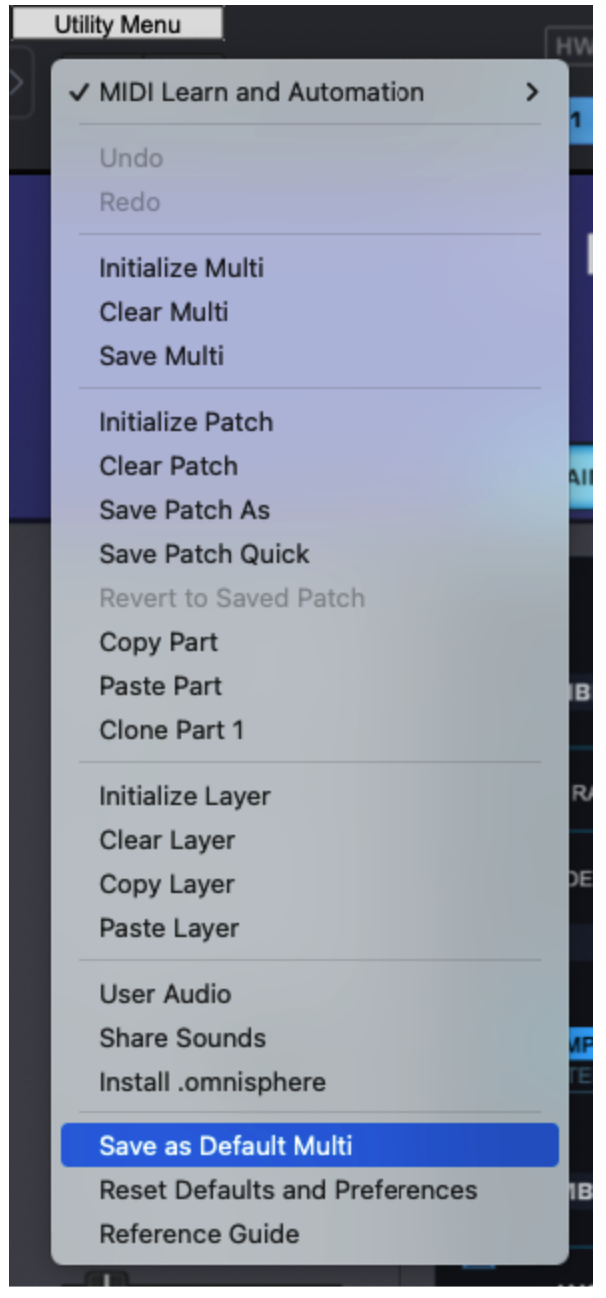](https://kb.mpmidi.com/uploads/images/gallery/2026-02/q2En3AwrgcIRLoId-image.png) Now, right click again on the controller's empty area and from the right click menu, enable Automap again. [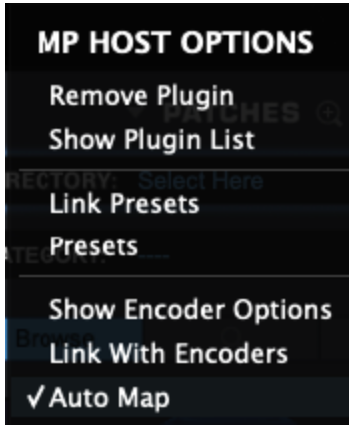](https://kb.mpmidi.com/uploads/images/gallery/2026-02/UoAGLDuRCNIffmnG-image.png) Then again from the right click menu, Remove Plugin. [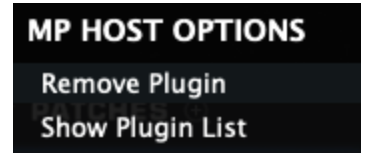](https://kb.mpmidi.com/uploads/images/gallery/2026-02/7fw7wTBNa1vFz1dp-image.png) Now load Omnisphere again from the Plugin List You will see the parameters linked and ready to be controlled. There are 9 pages of parameters linked, grouped by color. [](https://kb.mpmidi.com/uploads/images/gallery/2026-02/8cQUGuasSbOdhQN2-image.png) Moving any parameter with the mouse will cause the linked encoder to blink. If the encoder is on another page, it will go automatically to the other page. **Optional:** You can rename the pages by right clicking on the page title and save your preset [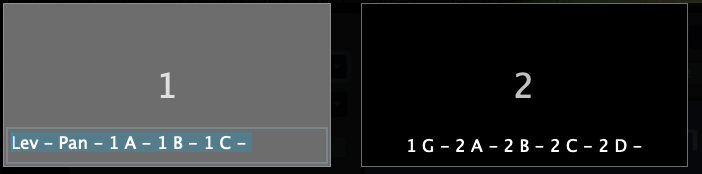](https://kb.mpmidi.com/uploads/images/gallery/2026-02/q1y4hR9OKOqxJe0M-image.png) --- Other Omnisphere V3 templates (OPTIONAL) We have created additional templates for each part. These have more parameters linked per part. You need to load a different template to control a different part (1 - 8) of Omnisphere. Download from [here](https://mpmidi.com/utilities/omnisphere/Omnisphere_V3_Optional_Control_Templates.zip) For example, to control Part 2, load MP PART2.midiLrn in Omnisphere as shown above.Note that when you load a different template any existing automation will be replaced by the parameter that matches in the loaded template. Therefore these templates are best to use for sound design and live performance.
[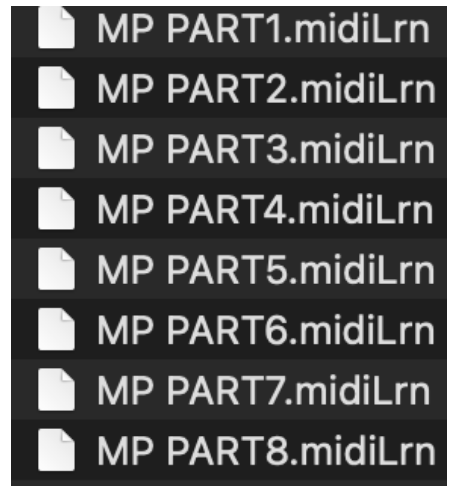](https://kb.mpmidi.com/uploads/images/gallery/2026-02/tdHut0oi8VsgZ8k1-image.png) [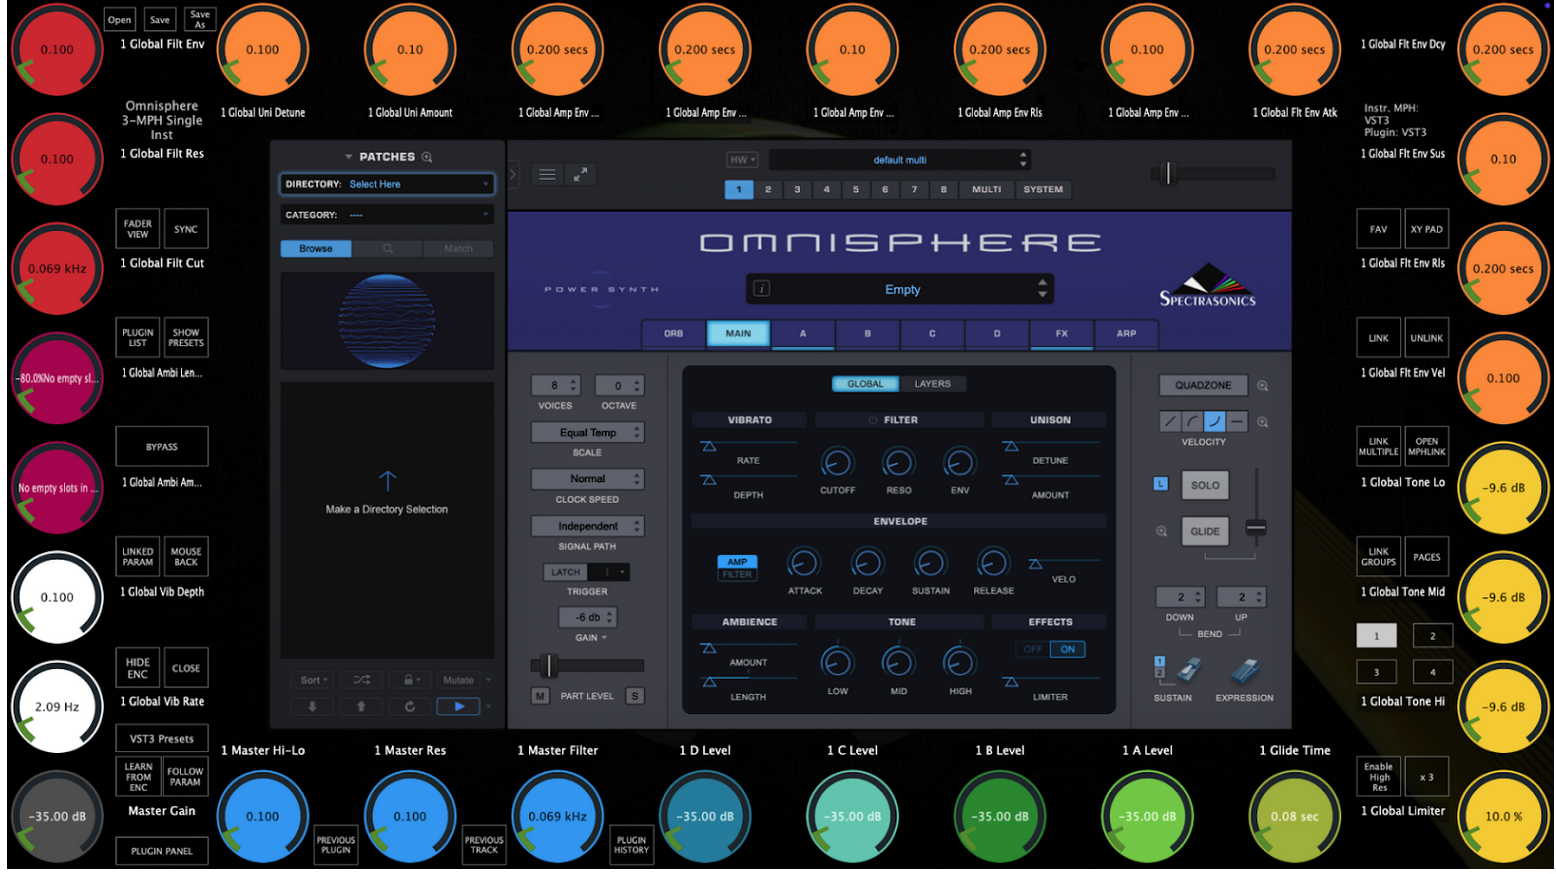](https://kb.mpmidi.com/uploads/images/gallery/2026-02/qv3FGXGHUzD2hVBT-image.png) Pages 6, 7, 8 control global parameters. You can save this as an MP Host preset and load it from Favorites or the Preset List. This template now controls Part 1 of Omnisphere. You can edit the linked parameters (unlink, replace with other etc, link parameters from the FX section that we have not linked) To control Part 2 - 8, load the corresponding template and the parameters will be automatically updated. [](https://kb.mpmidi.com/uploads/images/gallery/2026-02/aeEOsKJsFyOzgshT-image.png) Select Part 2 in Omnisphere and load the MP PART2 template. [](https://kb.mpmidi.com/uploads/images/gallery/2026-02/jhfviQMNeXY31RiV-image.png) All parameters now begin with "2" [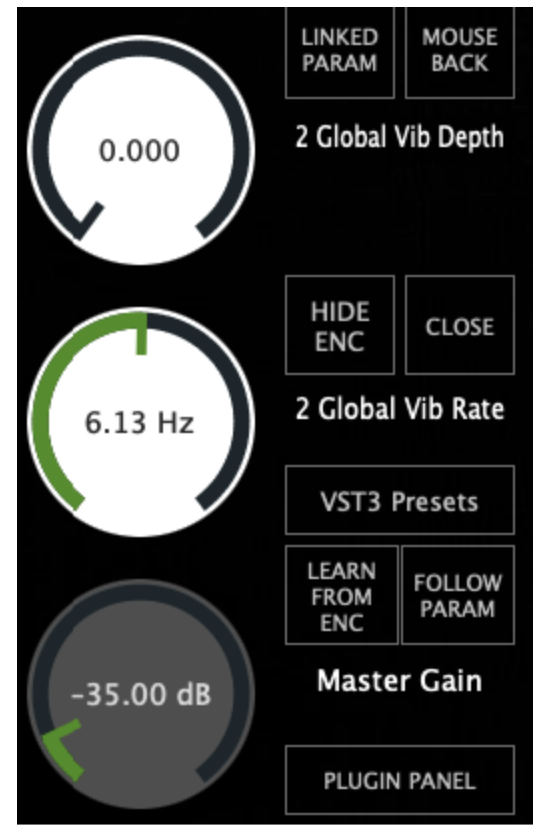](https://kb.mpmidi.com/uploads/images/gallery/2026-02/SaUlQZPdsNdkpTT2-image.png) [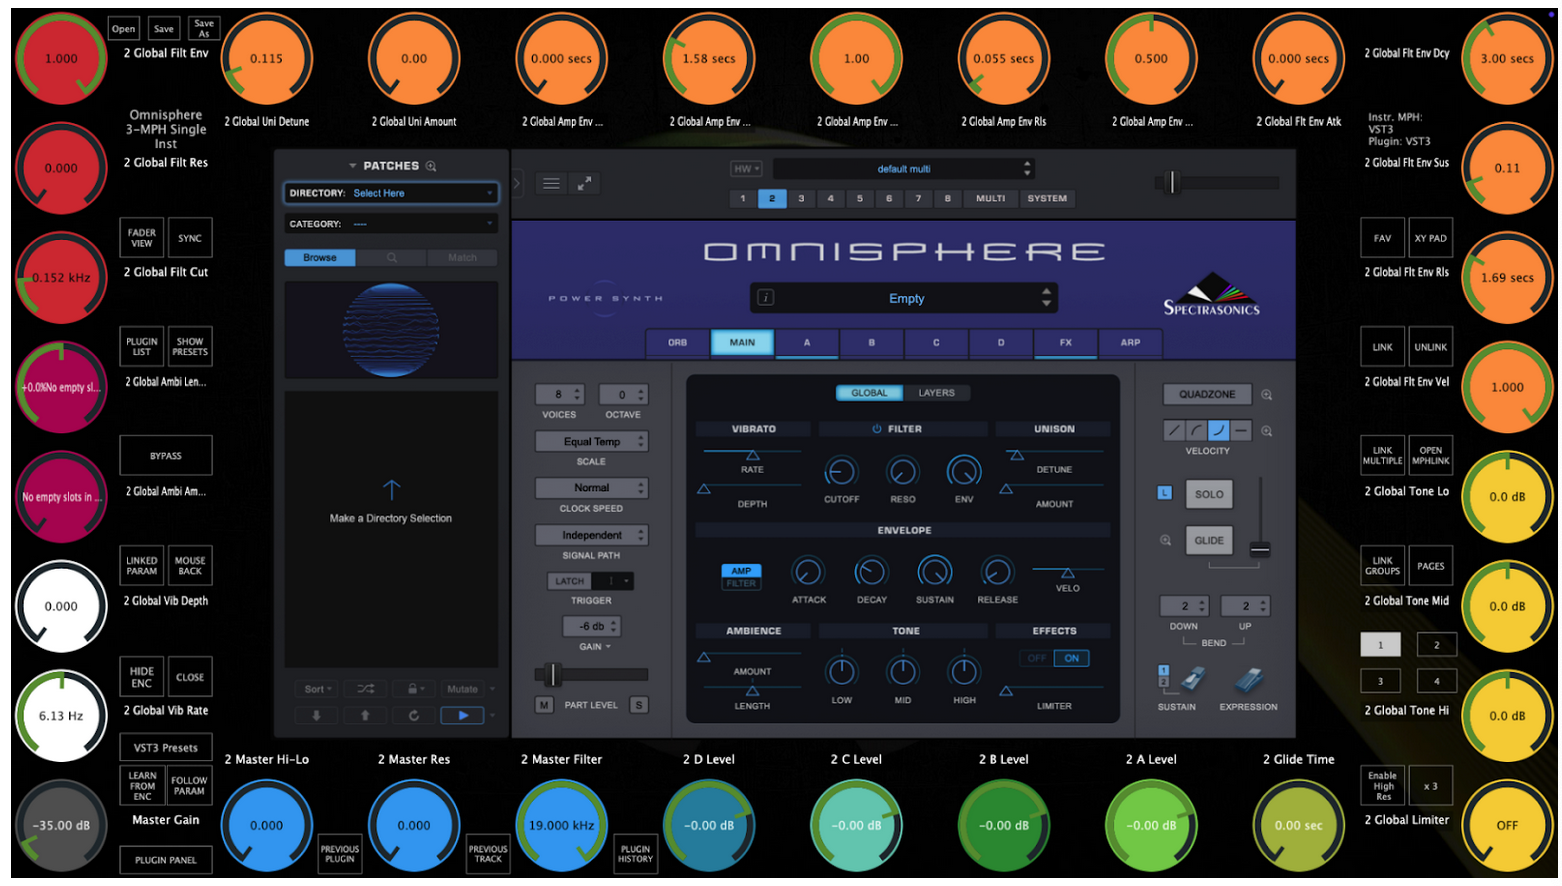](https://kb.mpmidi.com/uploads/images/gallery/2026-02/LEVoN8Bz0W8CdwZk-image.png) # 26. Controlling Steinberg plugins such as Halion, Padshop and Retrologue You may find that when linking some encoders on parameters of Steinberg plugins may seem stuck or behave erratically. To overcome this issue click on Encoder options (right click menu > Encoder Options, on the MP Host) and choose Absolute mode instead of Relative mode which is the default. 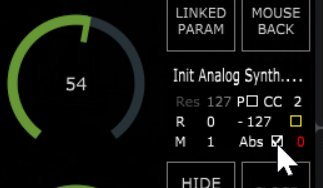 In addition, via the right click menu enable Windows Unified  If some parameters have MIDI CC assigned to them, right click and Forget CC. This may conflict with the VST method that the MP Controller uses to control parameters. 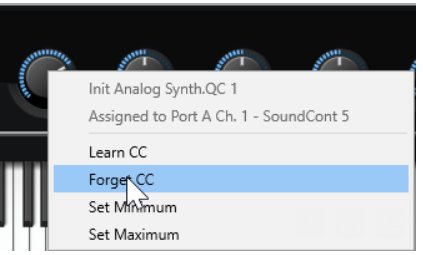 # 27. Windows - Transferring the keyboard focus on the DAW In the April 2025 update, v1.7-f4941c72--H2025-04-22--B2025-04-22, we have introduced an automated way to pass the keyboard focus to the DAW. Clicking on the MP Host and/or the hosted plugin in the MP Host will cause the keyboard focus to be transferred there and not on the DAW. On Windows, with this update, the MPH passes automatically the space key to the DAW. When you have the MP Host big window selected and working with the plugin, if you press the space key it will send it to the DAW, while before it was not possible and you had to click to the DAW. The only requirement for this to work is that the MPH window needs to have the keyboard focus, not the hosted plugin. Pressing the space key will not only pass the key to the DAW, but it will also transfer the keyboard focus onto the DAW. When you have the MP Host big window selected and working with the plugin, if you press the space key it will send it to the DAW, while before it was not possible and you had to click to the DAW. The only requirement for this to work is that the MPH window needs to have the keyboard focus, not the hosted plugin. --- **Using UPDD:** In UPDD enable this setting: "Reset keyboard focus after a gesture action ends" Note that "Reset mouse cursor after a gesture action ends" will take the mouse cursor back to it's previous position before the gesture was made. 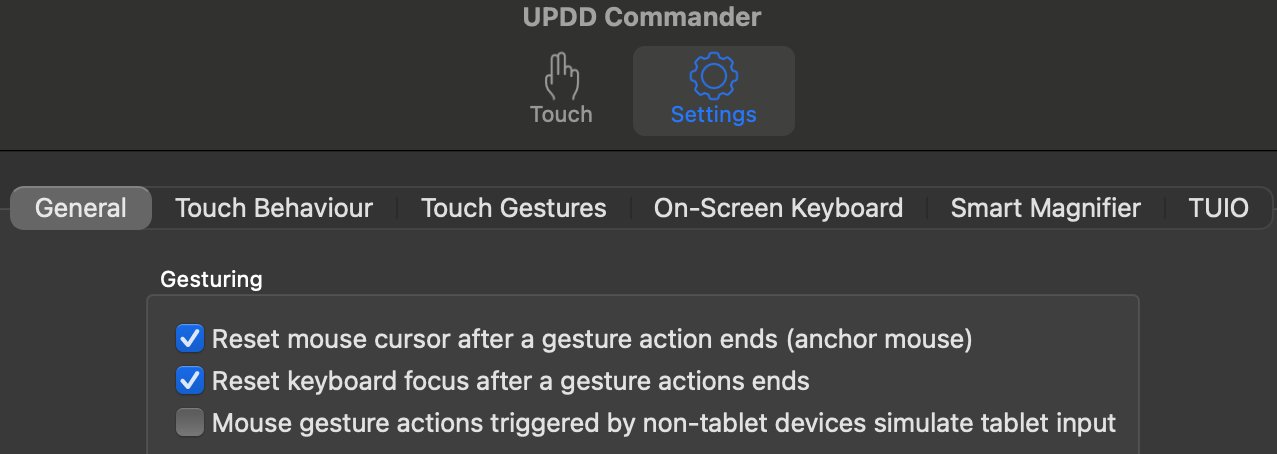 --- **Using Auto Hot Key:** We have created a small app for a few popular DAWs to transfer the keyboard focus back to the DAW by pressing **Win key & z** together.  You only need to run the app once. You can [add it to your Startup folder](https://support.microsoft.com/en-us/windows/add-an-app-to-run-automatically-at-startup-in-windows-10-150da165-dcd9-7230-517b-cf3c295d89dd#:~:text=With%20the%20file%20location%20open,location%20to%20the%20Startup%20folder.) so that it starts automatically with Windows You can download the app for each DAW from **[here](https://drive.google.com/drive/folders/1RRSjjvTGxYYl-ANiF5oBmQUOiS7w_cLk)** *Zip file password is 123456* **More information:** The apps to transfer the keyboard focus were created with [**Auto Hot Key**](https://www.autohotkey.com/). A great free scripting platform for creating automation on Windows. We have included the ahk script in the web folder, in case you want to extend it for more automation. # 28. Mac OS - Transferring the keyboard focus on the DAW In the April 2025 update, v1.7-f4941c72--H2025-04-22--B2025-04-22, we have introduced an automated way to pass the keyboard focus to the DAW. More specifically, on the Mac the keyboard focus is passed to the DAW when a key is pressed is transferred to the small window of the MP Host which means all the keys will be passed to the DAW. --- **The information below applies to older versions of the MP Host.** If you want to pass the keyboard focus back to the DAW (press space to start and stop the playback in the DAW) you can switch easy to the DAW main window using UPDD or a Mac automation tool like [Keyboard Maestro](https://www.keyboardmaestro.com/main/) or [Better Touch Tool](https://folivora.ai/). For Logic Pro X use the Better Touch Tool (see below). --- **Using UPDD** In UPDD Commander enable this setting: "Reset keyboard focus after a gesture action ends" Note that "Reset mouse cursor after a gesture action ends" will take the mouse cursor back to it's previous position before the gesture was made. 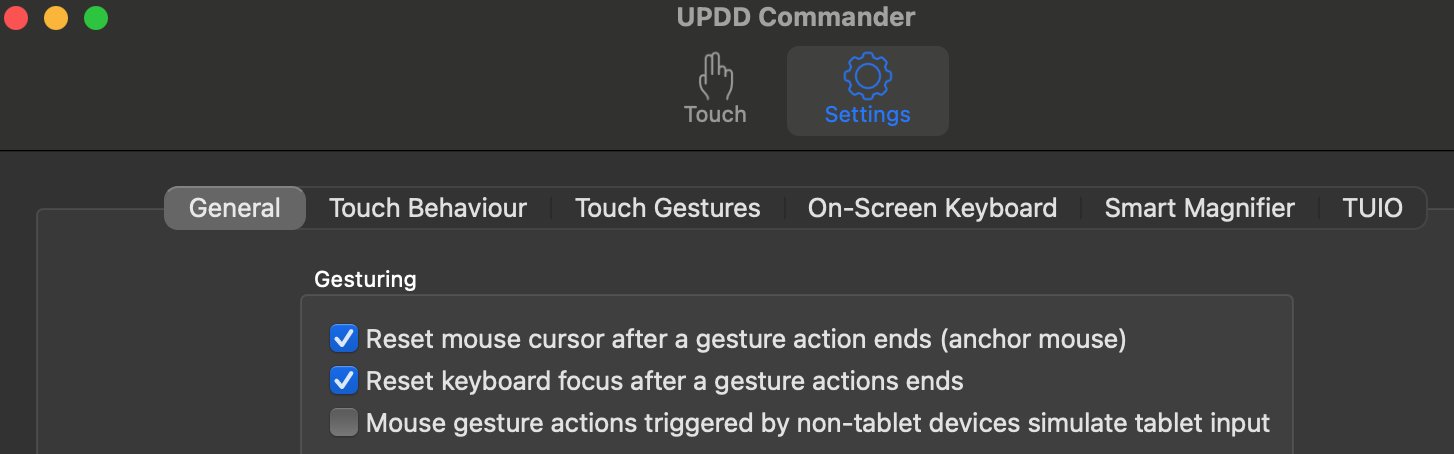 --- **Using Better Touch Tool (BTT)** We have created a preset for Logic Pro and you can download it from **[here](https://drive.google.com/drive/folders/1gVEavAjI7dcPj0cDbAl1GmEE1D8HYjg4?usp=sharing)**Depending on your DAW, you may need to choose to create this workflow as a global option. To set this workflow as a global option, follow this article.
Choose Import Preset from the top bar menu  Here is how to create the same workflow in BTT: Run Logic Pro Choose "Select app from running apps" and then choose Logic Pro.  Then choose Keyboard Shortcuts and record the key "Space" In the Trigger Conditions on the right pane choose "Prevent recursive triggers"  Then in Actions create the following actions: 1. Activate Specific Window and set the App Name to: *Logic Pro* 2. Set the action to "Send Keyboard Shortcut" and record the key "Space". 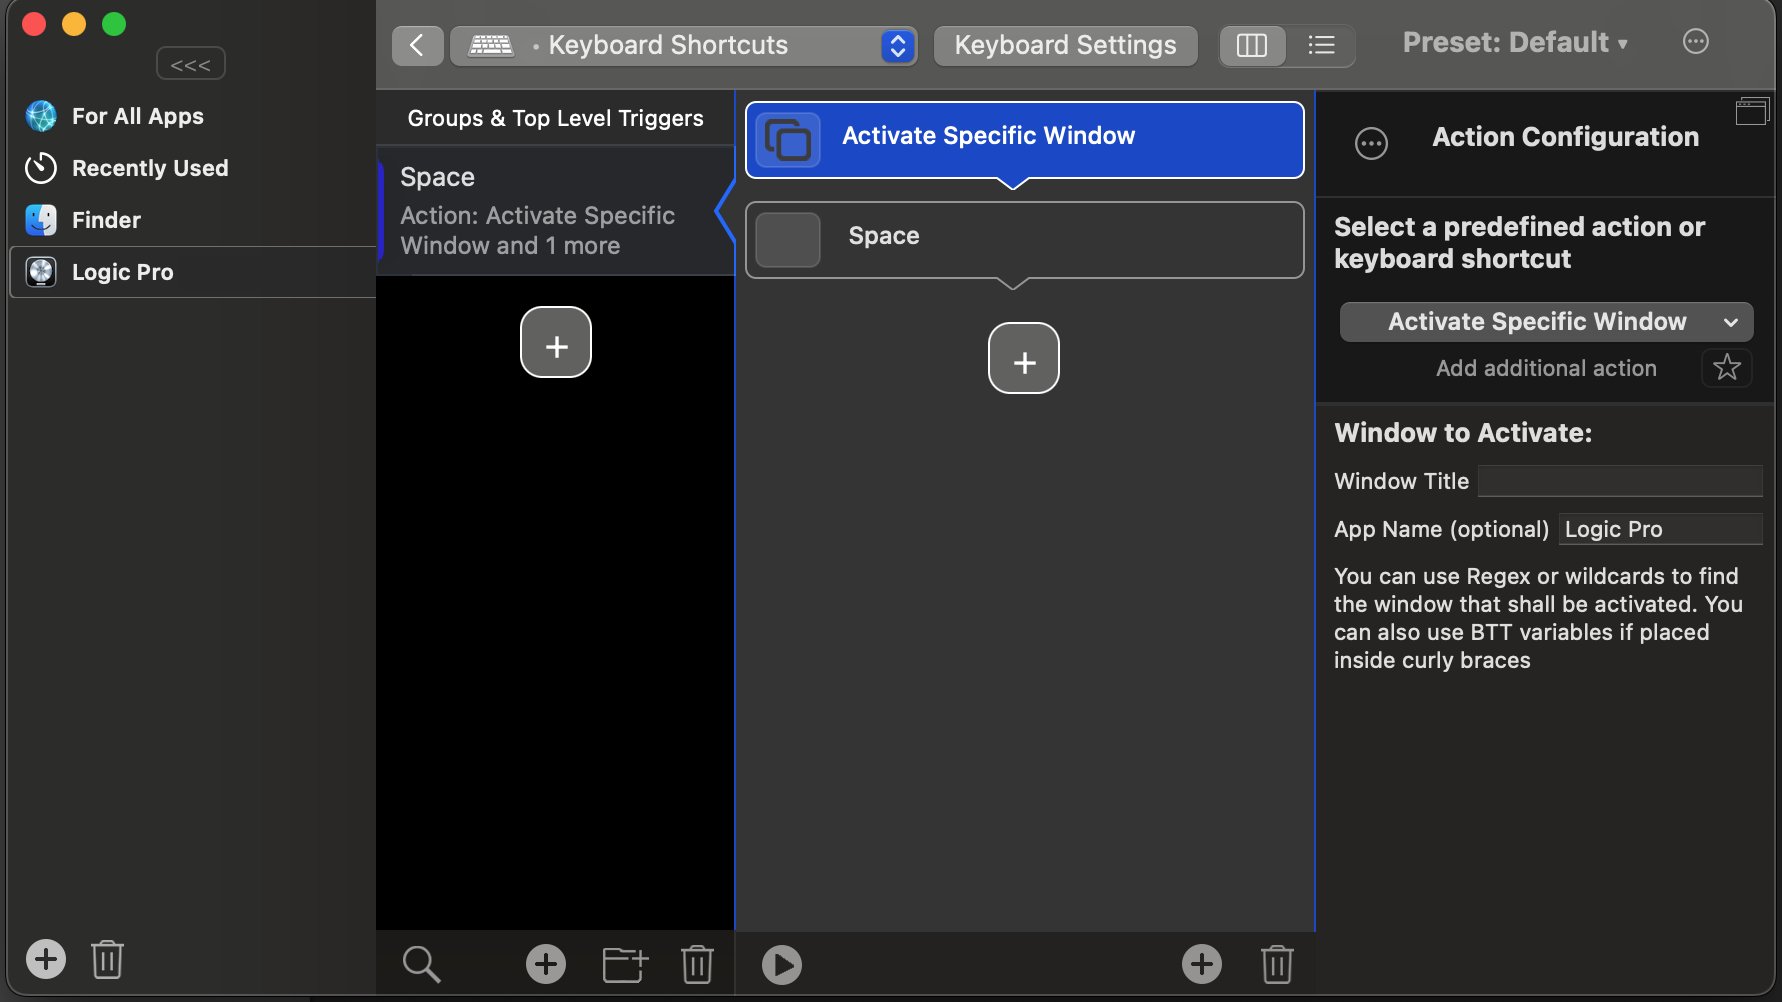 --- **Using Keyboard Maestro** Keyboard Maestro is a great app used by many music professionals on the Mac to automate tasks. Here is an example of how to do this in Keyboard Maestro: Open your DAW Open the Keyboard Maestro app. Create a new Macro in Keyboard Maestro. Chose the trigger key. In our example below we have chosen  Then in Actions choose from the list of actions "Bring a Window to the Front" 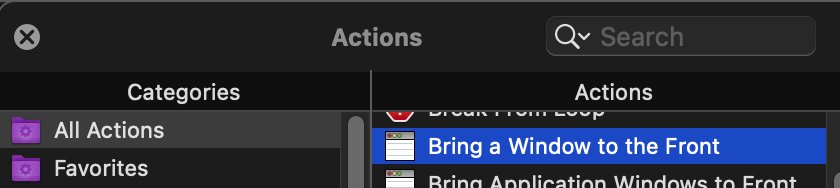 Choose the DAW from the list "in" Choose "Windows with title containing" 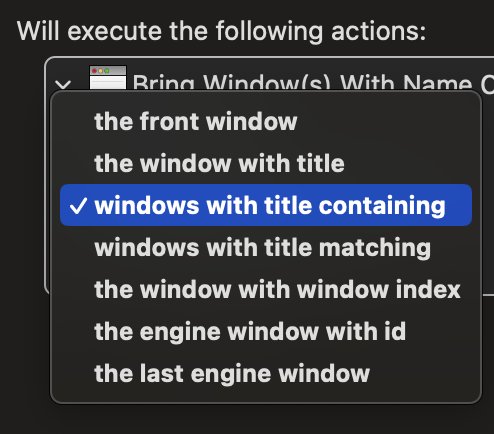 Type in the title of your main DAW Window. Here we use logicx which is a text that always appears on Logic's main window. Your Macro should look like this: You can also download this example Macro from [here](https://drive.google.com/drive/folders/1c6YHW_aBmIk4hoxmDX_jeWBs9YJa3D8P?usp=sharing) 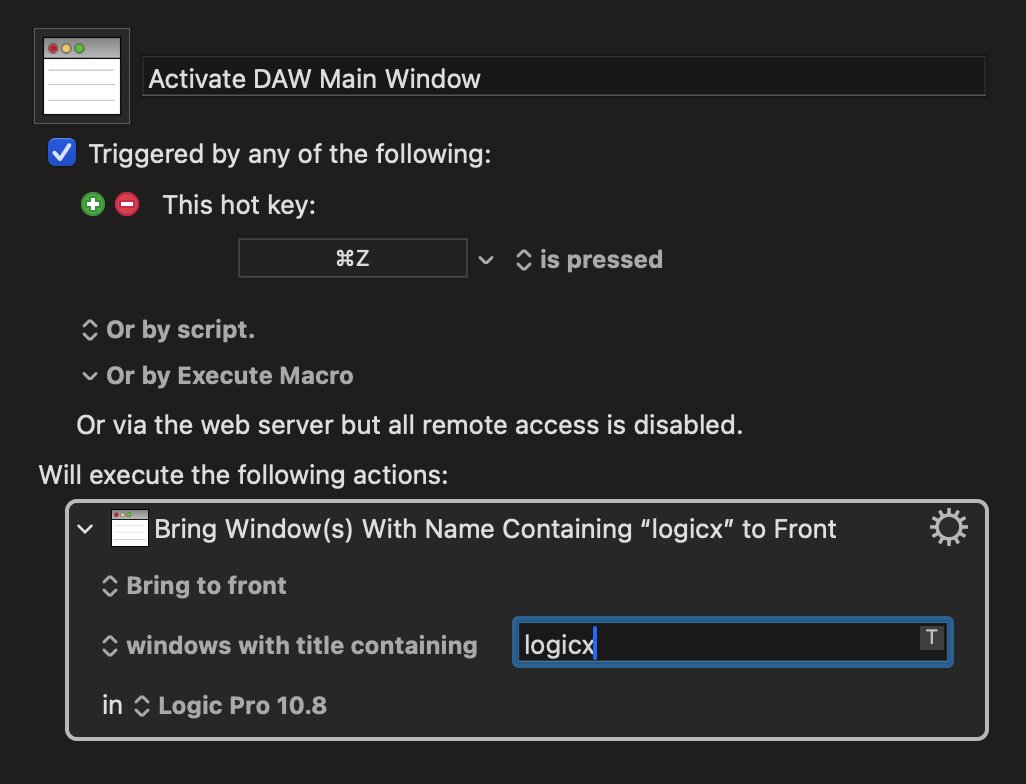 Try it by pressing the Run button on top or by trying the key combination assigned. The Macro will bring the DAW to the front if you are in MP Host or any other app on the Mac. # 29. Mac OS - Running one DAW in Rosetta and another DAW in ARM mode In case you run one DAW under Rosetta and another in ARM, this will result in the DAW that runs second to not been able to open the Control and Display window. You need to reboot the Mac and run the DAW you want to use first. # 30. Switching a track in Ableton Live When you have the option to auto-hide plugins in Ableton Live,  switching a track hides the small window of the MP Host while the controller window remains open and you can still control the plugin. This is often a benefit because you can still control a plugin located on another track (while without the MP Controller you cannot do that, unless you change the A.L. option.) When you change a track and you choose to control another plugin via the MP Host, it will close the previous MPH Controller window from the previous track. Navigating back to the previous track requires that you press on the Control & Display button (the controller icon on the small window) because Ableton does not notify plugins when a track has switched. If you don't want to use the mouse, a good practice is to drag beforehand the small window of the MP Host on the controller's touch screen. Once you change a track, touch the Control and Display (Controller Icon on the single host). Then touch the touchscreen or click anywhere on the controller window, the small window will be hidden below the big window. Thereafter, when you switch a track again in Ableton the small window will show on top. The same applies to the MP Multi Host.See tutorial [video here](https://youtu.be/Lpy0KiUVT9c)
After changing a track, Touch the Control and Display (Controller Icon on the single host) 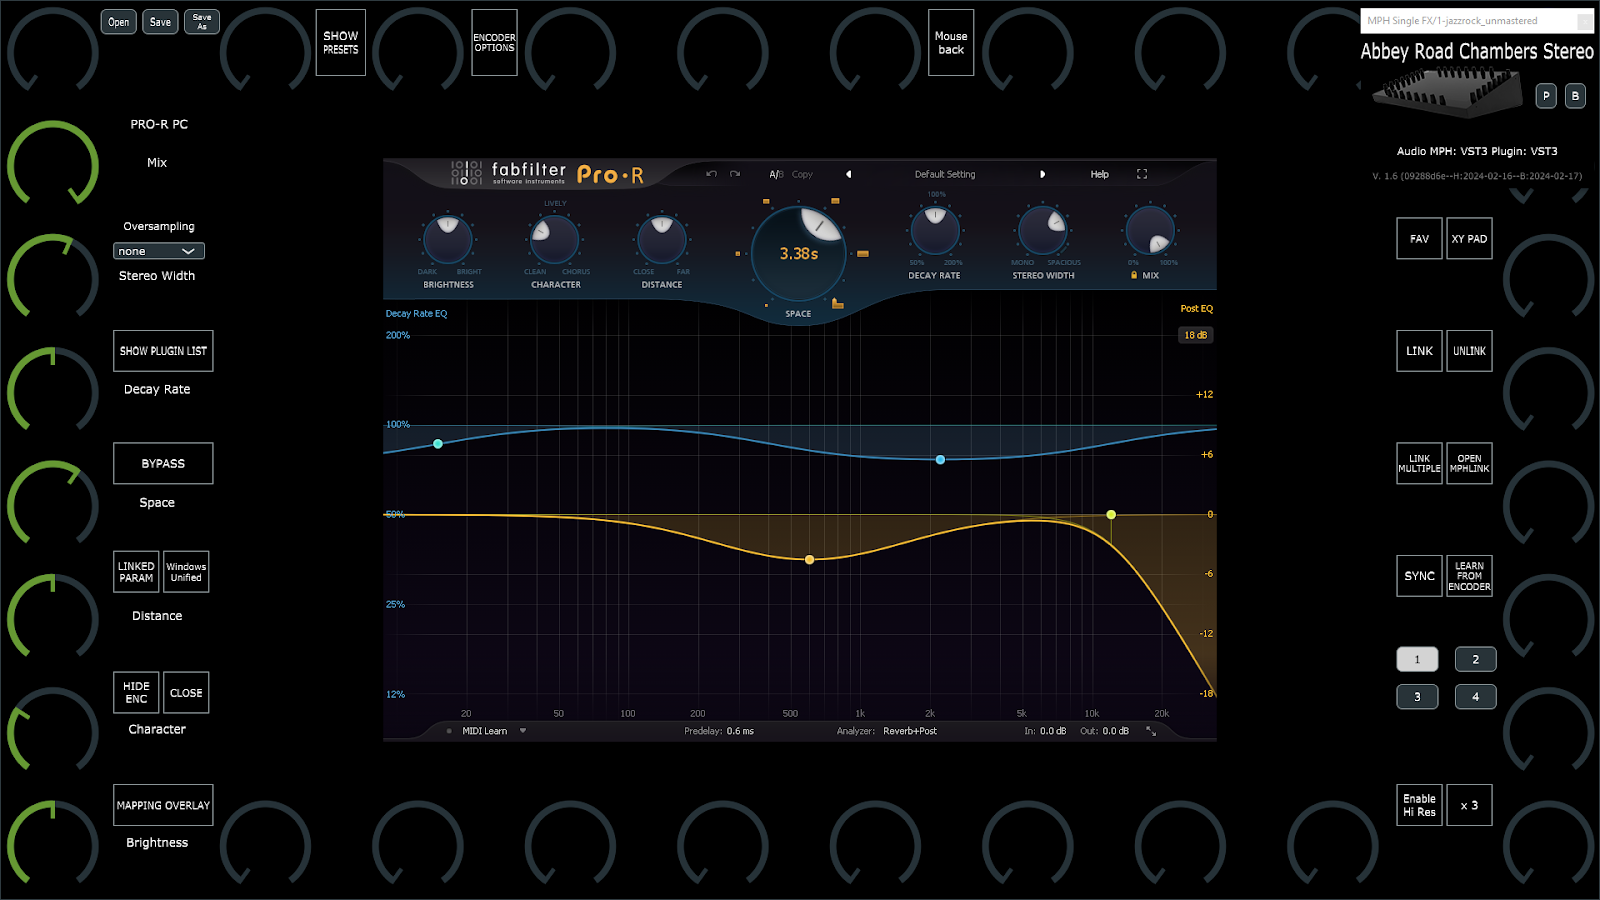 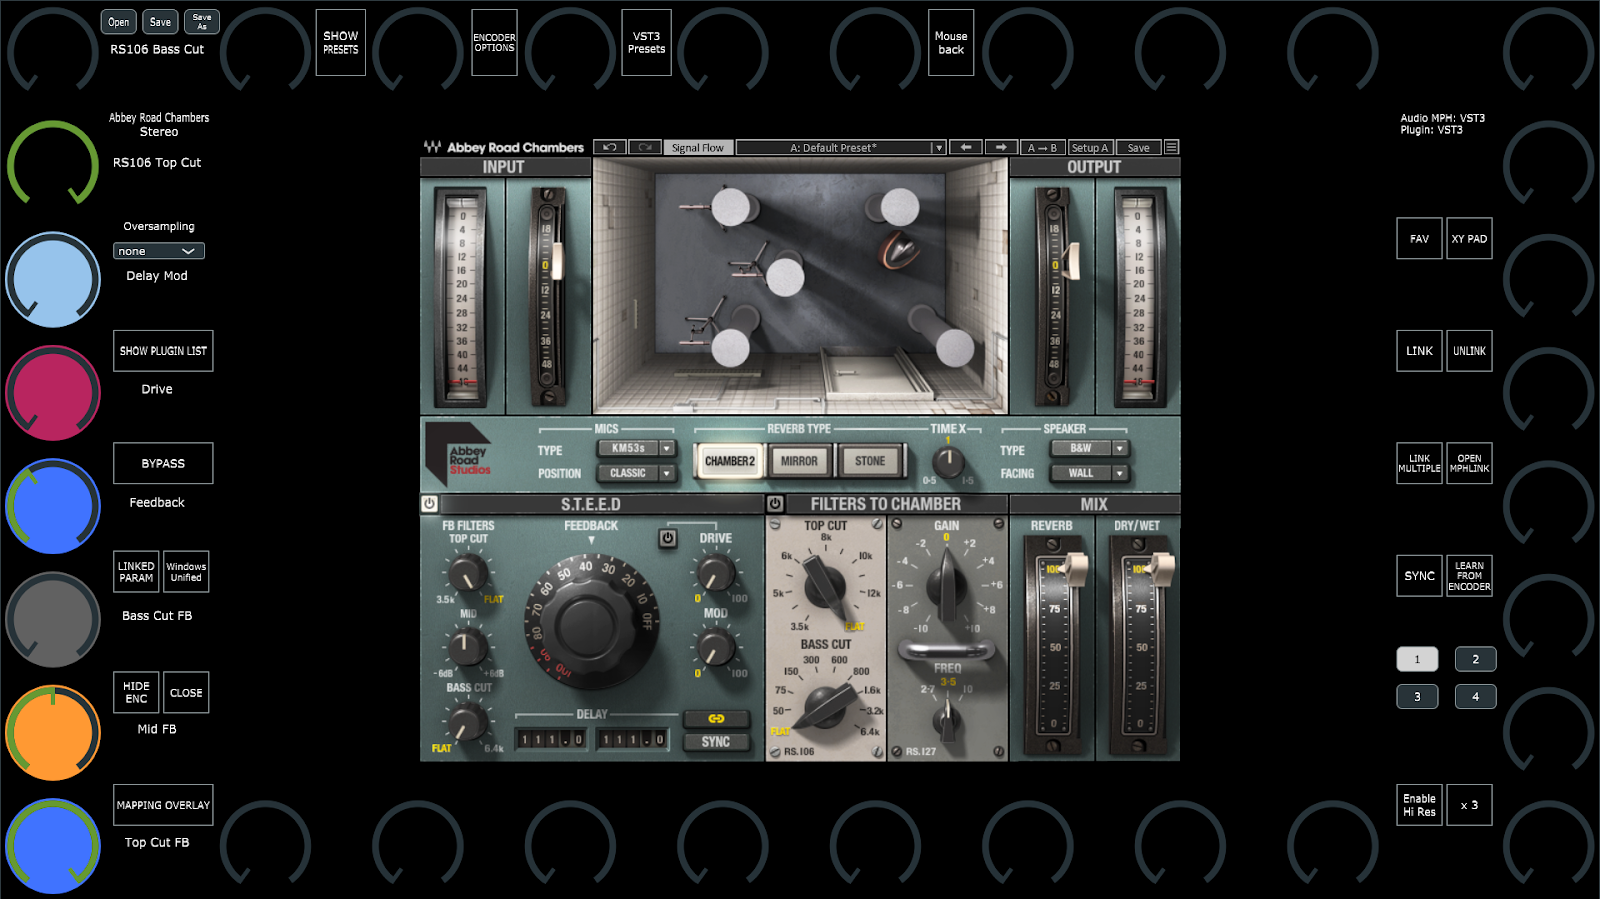 The MP Host will automatically open the controller window when the MP Host plugin opens from the DAW. This means that the MPH plugin is completely closed in Ableton Live and you click on the A.L. icon to open it  In other words, opening the small window will automatically open the controller window as well. Alternatively, If you have another midi controller to open/close plugins in Ableton, like Push or other midi controller, you can program it to close the MP Host and then open it, and it will automatically open the controller window. # 31. Loading the MP Host with one click as an Ableton preset in Ableton Live Additional to the MPH presets and Favorites, you can save the MP Host, while having hosted the third party plugin you want to use, as an Ableton preset and load it with a single click. See the video **[here](https://drive.google.com/file/d/1yQlGxf4k5pF711gLLEmfZVo9Velpo3gS/view?usp=sharing)** ##### Can I rename a plugin in Ableton?See [video](https://youtu.be/e-pAp-RvaMs?si=hluO-EIxNYksdPHe&t=115)
If the plugin displays the parameters in groups, selecting a group will link all the parameters within a group. You can select a color and all the parameters will get that color on the encoders after linking.  If the plugin does not report its parameters in groups you can select them one by one or hold the ctrl (Windows) or Option (Mac), to select individual parameters you want to link or use shift to select multiple parameters, (or Shift to select consecutive parameters). 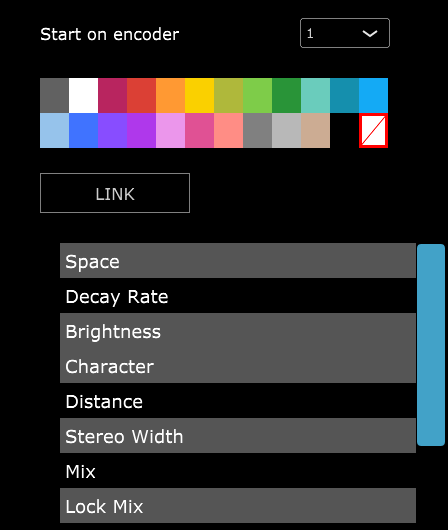 When you select individual parameters and select a color, it will assign the first parameter the color you selected and assign the next color in line to the next parameter and so on. # 34. Switching to other Plugins via the Plugin Panel The Plugin Panel is part of the update v1.7-dbe3ca3c--H2024-06-14--B2024-06-14 or later version. With this feature we can now switch to any plugin loaded in an MPH Multihost instance.The Beta version of January 2026 allows the usage of the MP Single Host in the plugin panel as well. Version 09-March-2026 enables switching to/from the Plugin Panel view double clicking on the background area as shown in this [demo video](https://youtu.be/AI3kIIV_5S0)
While previously it was only possible switching, via the touch screen, to other plugin slots of the current Multihost, with the plugin panel you can switch to any plugin slot of any Multihost. The Plugin Panel button appears at the left bottom area of the Multihost controller window and there are 3 additional buttons - Plugin History, which displays the last 12 accessed plugins. - Previous Plugin, which switches over to the previously accessed plugin. - Previous Track, which opens the Plugin Panel and selects the previously selected track. --- ##### How it works Note that the 09-03-2026 update allows the MP Single Host to participate in the plugin panel.[Here ](https://youtu.be/LQYHXOdxFBU)is a brief tutorial video on the Plugin Panel.
**Track Names in MP Host** The MP Host plugin shows a track name on the big window, the small window, and in the Plugin Panel. This name can come from two places: \- Your DAW (Ableton Live, Logic, etc.) - the name of the track the plugin is on. \- By typing directly into the track-name field in the small window (Single or Multi Host). **What to Expect** \- When you rename a track in your DAW, MP Host picks up the new name automatically. It appears on the small window, the big window, and the Plugin Panel. \- You can also rename the track from inside MP Host by clicking the track-name field and typing a new name. Press Enter or click away to confirm. The new name immediately updates the big window and the Plugin Panel. \- The DAW always has the final say. If you rename the track from MP Host and then later rename it in the DAW, the DAW name replaces your custom name everywhere. \- Your custom name is saved with the project, so it will still be there the next time you open it, unless the DAW sends a new name, in which case the DAW's name wins. **Tip** If you want a custom track label that sticks, set it in your DAW - that's the name MP Host will always use. 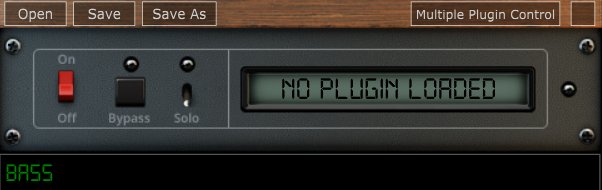If two or more Multihosts are used on a track, these must carry the same track name, so that they appear under the same track in the Plugin Panel.
Note that on the main window of the MP Host the track name is now displayed under the plugin/preset name **Plugin Panel Behavior and Limitations** The Plugin Panel displays track names only. It does not have awareness of the track order within the DAW. Track names are provided by the DAW, which passes them from the VST instances to the plugin. You can rename tracks directly within the MP Single and MP Multi Hosts. Because the Plugin Panel does not track ordering, the sequence of plugins may vary each time a session is opened. This depends entirely on the order in which the DAW loads plugins, which is not fixed or guaranteed. The Plugin Panel itself does not store or enforce any order. Each plugin instance maintains its own Plugin Panel. There is no centralized Plugin Panel that can define or preserve a global order, as this would depend on DAW-specific behavior outside the plugin’s control. As a result, changes to track order within the DAW are not reflected in the Plugin Panel, and the displayed order may differ between sessions. While many projects will load in a consistent order, variations can occur and should be expected.
**Ableton Live: Track Naming Behavior** When using Automatic Track Naming in Ableton Live, moving a track triggers a name update notification rather than a position change. Ableton does not provide information about track movement, only about track names. As a result, after moving tracks, the Plugin Panel may interpret multiple plugins as belonging to the same track position, since it was not informed that the original track index has changed. To avoid this issue, use custom track names instead of Ableton’s automatic naming. This prevents unintended renaming events when tracks are moved.
---The Beta version of January 2026 allows the usage of the MP Single Host in the plugin panel as well.
[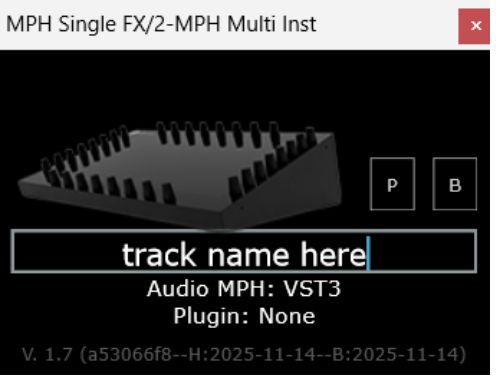](https://kb.mpmidi.com/uploads/images/gallery/2026-02/0yRT0NYtHmCyZZ1q-image.png) --- ##### **Plugin panel sections** The Plugin Panel window is split in 2 parts. The left part displays the tracks (as buttons) and the right part displays the plugins of the selected track in columns. Each column represents a Multihost plugin. Multihost Instruments will appear always first and the Multihosts Effects will be placed after Instruments. Each column shows the plugin slots (as buttons) of its respective Multihost. The order of the Multihost columns cannot be changed and the Multihosts will appear in the order that are opened by the DAW, typically in most DAWs this is the order that are placed and appear in the DAW. If you add/remove Multihosts and the order does not match the one you see in the DAW, you can save and reopen the DAW project for the Multihosts to be reordered. --- ##### **Selecting tracks and plugins** The active track has a yellow color. This is the track that has the plugin currently open (being viewed). If you select another track button, this will become grey and it will list the plugins loaded in the Multihosts of that track. If you select a plugin from the right section, then this will become the selected track and the button will turn yellow. --- ##### **Adding a new track** When adding a new track and a new Multihosts instance, after the track name is entered (Logic and Cubase provide the track names automatically to the Multihost) the track button will appear last in the track area. --- ##### **Moving a track button** If you need to place the track button anywhere in between the existing tracks, click and hold the track button for one second and it will turn orange. Then, click on another track button and the track will be moved to the place of that track button. --- ##### **Removing tracks** If you remove/delete a track on the DAW that carries one or more Multihost plugins, these will automatically be removed from the tracks listed in the Plugin Panel. --- ##### **Duplicating Tracks** When duplicating DAW tracks that carry Multihost instances, then these Multihosts will have the name of the original track copied. You need to change the name of the track to the new track name. If the track name remains the same, then these Multihosts will appear as columns in the original track. --- ##### **Opening a Multihost Preset** When you open a Multihost preset, the track name displayed on the Multihost bottom text area will be replaced (if you have already typed a name). Therefore, the track name needs to be entered after loading a Multihost preset. --- ##### **Opening projects in Logic Pro X** The Plugin Panel clears the shared list of loaded plugins every time a DAW project closes. Logic, uses a separate AU Hosting Service to host plugins which keeps open after a project has closed. Therefore, we recommend, when working with a Logic project that carries MP Multihost instances, to close Logic before loading another project that carries MP Multihost instances. Alternatively, instead of closing Logic you can load an empty Logic project that carries no plugins. You can also force quit the AUHostingservice from the activity monitor, prior to loading another Logic project that carries the MP Multihost. --- ##### **Logic Pro X reports the MP Multihost as not compatible** If Logic does not load the MP Multihost open the Logic Plugin Manager and choose to re-scan the selected plugin by pressing on "Reset and Rescan Selection". *If it gives a warning that it does not pass validation scan it again with "Reset and Rescan Selection" and it will pass the validation.* 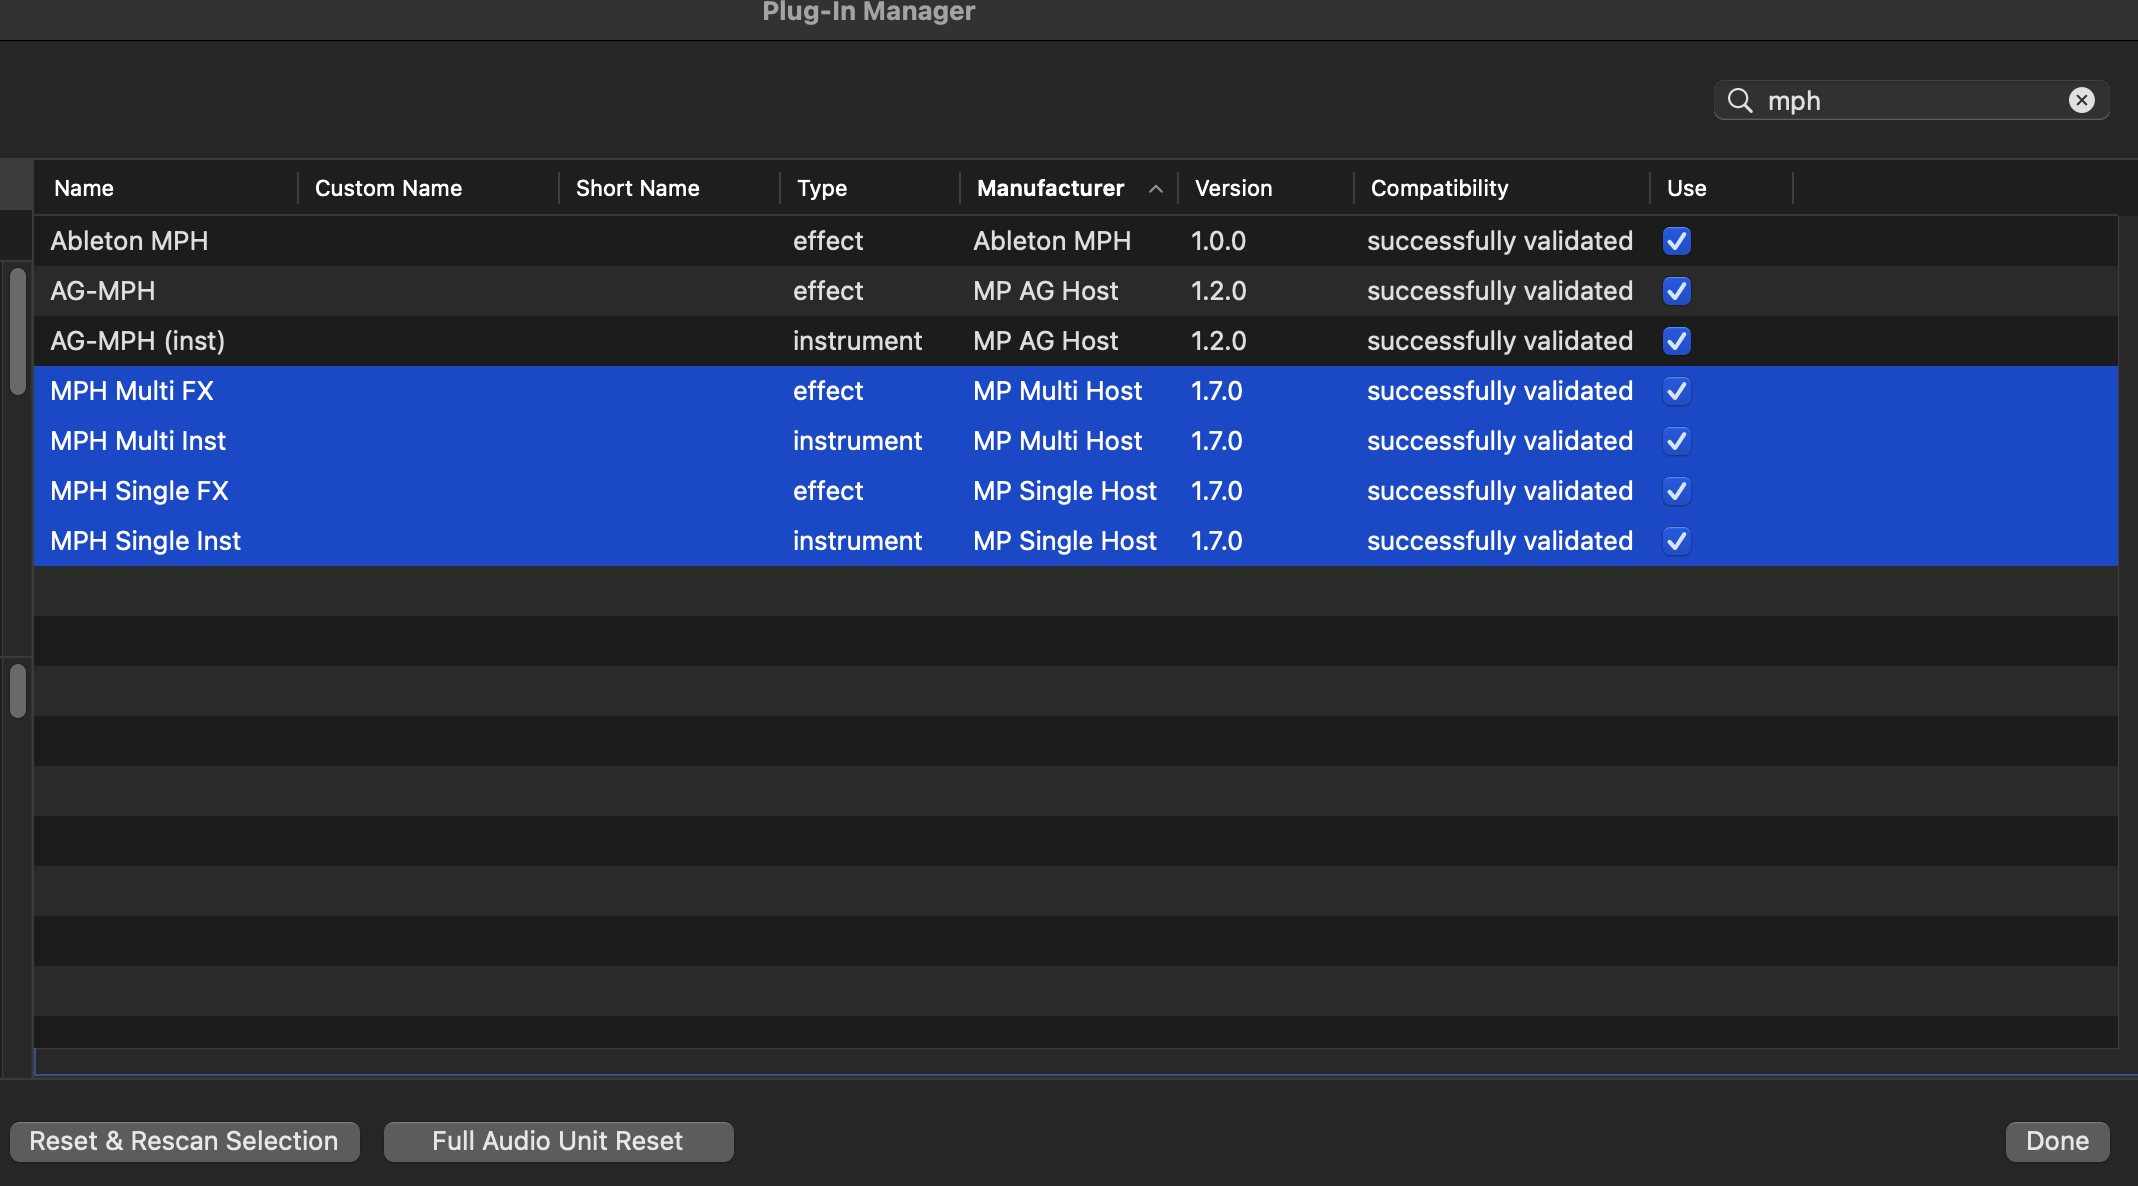 --- ##### **[Troubleshooting](https://kb.mpmidi.com/books/mp-controller-documentation/page/34-switching-to-other-plugins-via-the-plugin-panel#Troubleshooting)** This applies to MP Host version, prior to the 2026 versions which work with the MP Bridge system. The version of the Multi host that features the Plugin Panel uses an app allowing instances of the Multihost to communicate with each other. If you are having any issues such as a crash when you load the Multihost, ensure that the MPHCSM is installed in the MP Host folder:**Windows:** %AppData% and under folders MP\\Host\\MPH Cache
**Mac:** Applications/MPH Cache.app
If the MPH Cache does not exist after you run the installer please send us an email to help you troubleshoot further. Additionally, when you run the DAW ensure that the MPHCSM shows up as a running process while the MP Multihost plugin is loaded the DAW: - **Windows** Task Manager or [process explorer](https://learn.microsoft.com/en-us/sysinternals/downloads/process-explorer) (allows searching for processes) - **Mac** Activity Monitor *(search for MPH in the Activity Monitor and it will show up)* ** The MPHCSM process will exit automatically when the DAW closes.Please note that there were reports from users that when using the N.I. Maschine plugin in a DAW project, the plugin panel does not report the tracks.
# 36. Run UAD Luna on Windows On Windows, MIDI drivers are exclusive per application. UAD Luna consumes all available MIDI devices on start, prohibiting any other applications to use MIDI devices. To overcome this problem we created a small utility to start Luna.Download the application from [here](https://drive.google.com/drive/folders/1WcE8rJ68BVN-UE83mbcUjm_CaKSQQ8Gn?usp=drive_link). The zip file is password protected and the password is 123456
Extract the zip on a folder on your computer. **Run as administrator** the START.bat file. It will open Luna and a cmd window which will later close automatically. Load the MPH Single in Luna and click on the controller icon to open the controller window. 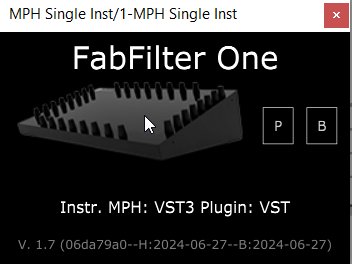 Initially, it will display the "Controller Not Connected" message. The message will disappear in about 10 seconds and the MP Controller will be available to use normally in all MP Host instances including Multi hosts. The CMD window will close automatically after the controller window has opened. --- **Shortcut to run as administrator** Create a shortcut of the START.bat file. Then right click on the shortcut and choose Properties. Then choose Advanced. Check the box Run as Administrator so that it always runs with admin access when you double click on it. [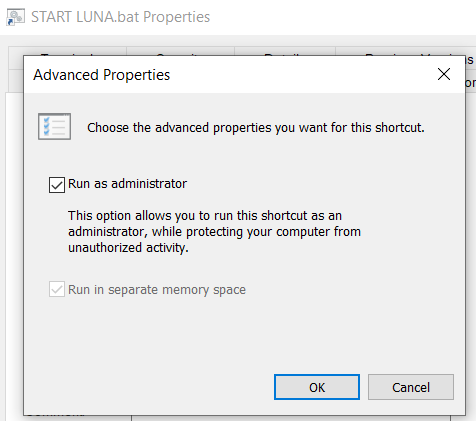](https://kb.mpmidi.com/uploads/images/gallery/2025-08/oEaBmwsfQjRFwgg6-image.png) Optionally, you can set the same icon as Luna on the shortcut by right clicking on the shortcut and select Choose Icon. [](https://kb.mpmidi.com/uploads/images/gallery/2025-08/OMeKMPVAfE9Fclej-image.png) Then navigate to Luna's installation folder and choose the Luna Icon for your shortuct.Alternatively, you can run the MPMIDI standalone app before Luna. Keep its main window open on the controller. Start Luna, load any MPH plugin and it will not be blocked because the MP MIDI app consumed it first and did not let Luna consume it.
--- ##### Luna crashes when opening the MP Host plugin If you are using multiple monitors and your main display is connected on a different graphics interface than your main monitor, set the MP Controller as your main display in Windows, or connect the MP Controller onto the same graphics interface as your Windows main display. --- # 37. Transferring the mouse pointer to the DAW display (Move Mouse Option) ##### Mouse Back Option If you right click on the controller window, in the menu, there is the option "Move mouse to Controller".  When checked, left clicking on the MPH small window to open the plugin on the controller (both for Multi and Single Hosts)  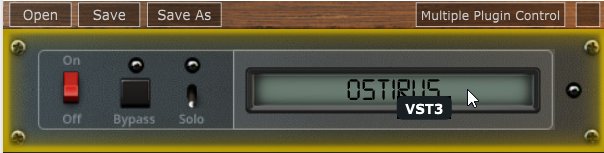 will automatically transfer the mouse pointer on the controller window. This option was made for convenience so that you don't need to drag the mouse from/to the controller. When disabled, right clicking on a MPH to open the plugin on the controller will automatically move the mouse pointer to the controller window.The option is global and it will affect all plugins once enabled without the need of reloading the MP Host plugins.
There is also a button on the controller window which when clicked will transfer the mouse pointer back to your main screen.  # 38. Opening and closing the MP Host via MIDI CC In update MPH Beta v1.7-c7f4c2bb--H2024-07-10--B2024-07-10 we enabled the opening and closing of the MP Multi (opening slots) and Single hosts via MIDI CC messages or notes. Since with this feature it is possible to automate the parameter during automation recording, which is something you may not want to do, we added an option in the host.properties file to enable this option as it is by default disabled. To enable the parameter as an automatable parameter, open the host.properties file in a text editor and change the last line from: ```To open the MP/Host folder see [here](https://kb.mpmidi.com/books/mp-controller-documentation/page/3-mp-host-properties-and-config-files)
If you use MIDI CC to open and close the MP Host window on the controller, it is of course a good practice to set on your midi controller the button or pad used as a toggle. This means, press once (send value 127) it will open the window, press another time (send value 0) it will close it.Important: In Bitwig setting > plugins > Plugin hosting mode set it to: Bitwig or Together or Vendor
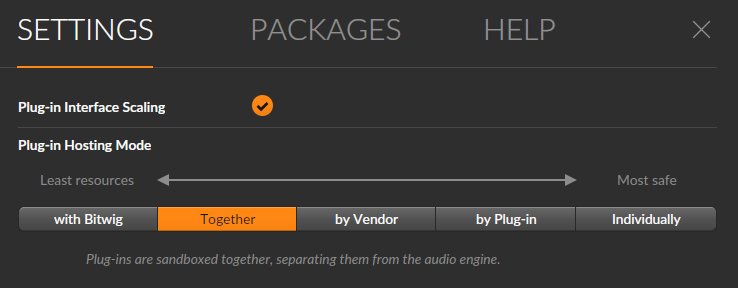 # 40. Sending MIDI notes from the MP Host In the July 2024 update (Beta MPH v1.7-91f44c9b--H2024-07-20--B2024-07-20) we introduced the ability to send MIDI notes out to the DAW when using a plugin that has this ability (like Sequencer or Arpeggiator **Instrument** plugins like Audiomodern Riffer). This update applies on both the **Instrument** MP Single host and Instrument Multi host (not the FX MPH). See a [demo video](https://drive.google.com/file/d/1jRWGfDxCMQMj7rTcmOqgzsiMI9h-dnSU/view?usp=sharing) in Ableton Live. # 41. Plugins appearing magnified and missing parts of their UI If you load plugins in the MP Host and part of the plugin UI is missing because it looks bigger in size or just part of it is not showing, for example: For Ableton Live, disable plugin Auto scaling on the MP Host plugins as described [here](https://kb.mpmidi.com/books/mp-controller-documentation/page/1-windows-display-and-touch-setup#bkmrk-disable-auto-scaling)
Or the plugin appears smaller with white surrounding area, for example Serum AU. 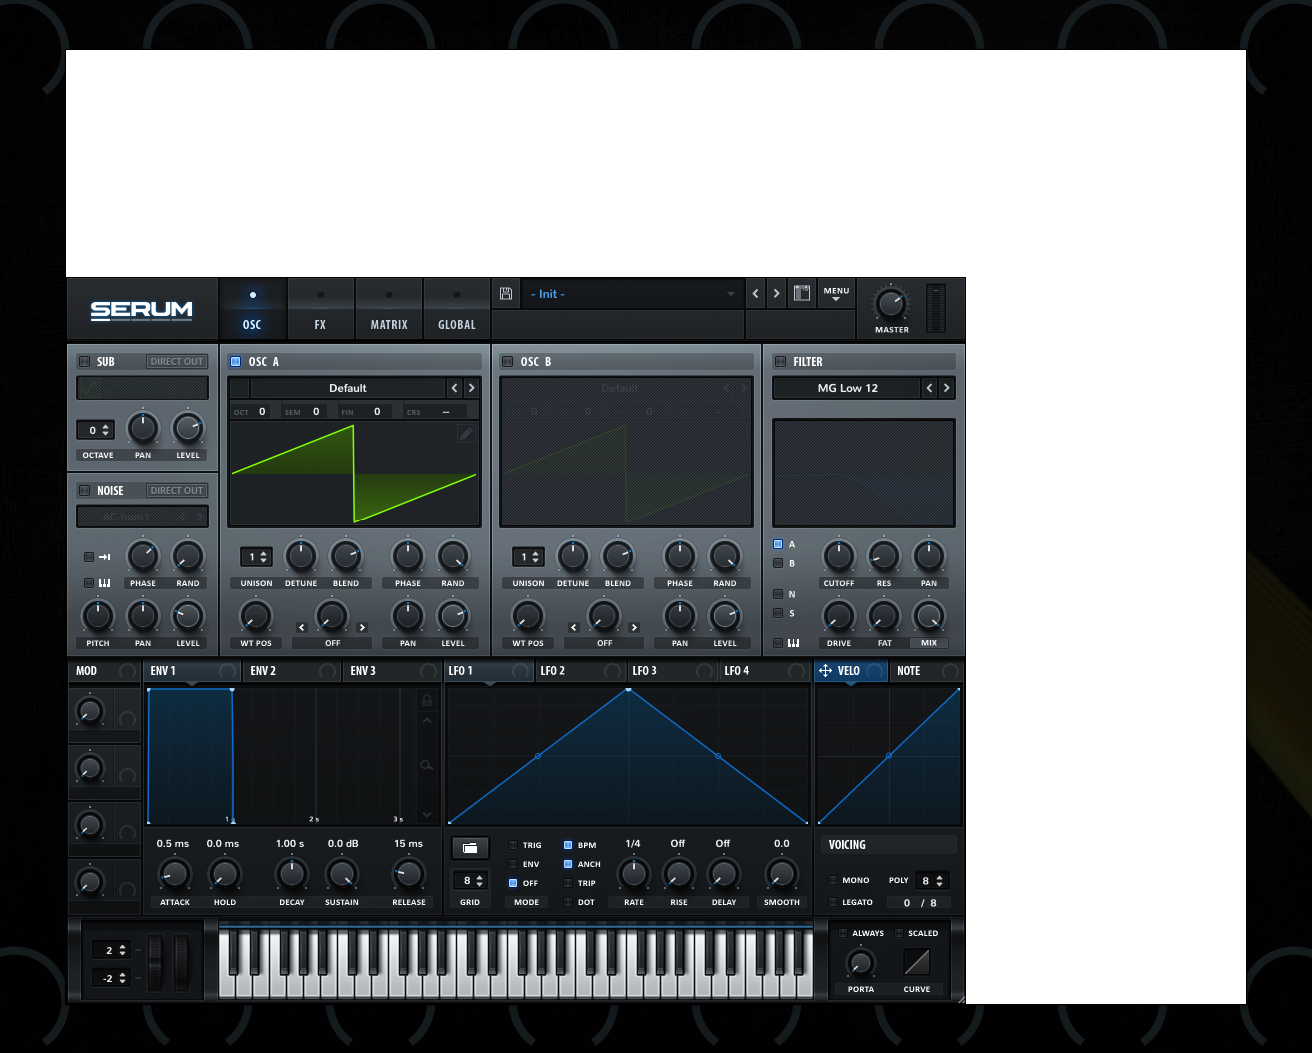It means that the current plugin type (for example Audio Unit) is set to resize automatically and this may cause incompatibilities with the MP Host. Try to use another format of the plugin, like VST2 or VST3 or AU if possible to test. Additionally, if the plugin has the option to set the default zoom level, set it to your liking and the plugin will appear at that zoom level when you load it in the MP Host even when you open an MPH preset. 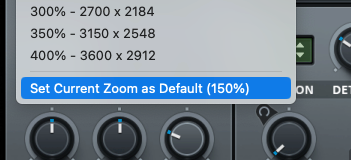 In this example, Serum VST3 on the Mac it loads at 150% and shows correctly 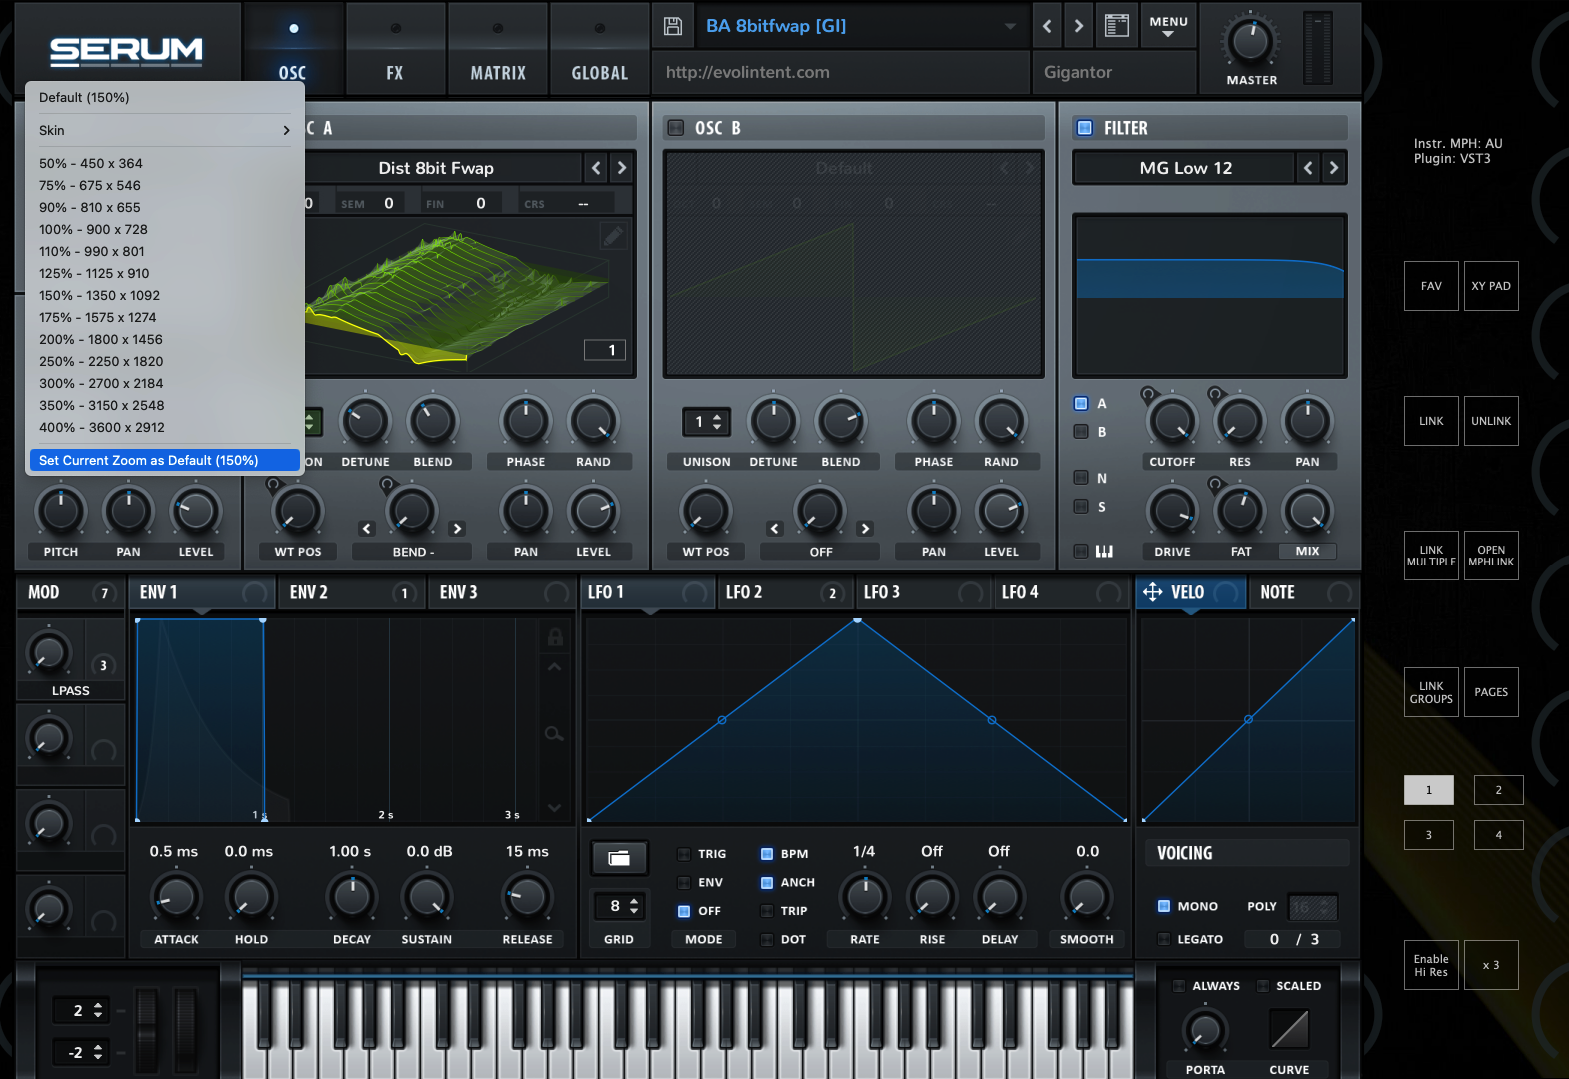Note that if a plugin does not have a "Set Default Zoom Level" and just saves as default the last resized value, then when loading an MPH preset, the size of the plugin's UI may not look correct, if you have resized the plugin loaded directly in the DAW, after you have saved the MPH preset. *This is because after you have resized the plugin outside the MP Host, when loading the MPH preset, the default size would have changed, thus the MP Host may not display it correctly.*
To solve issue, resize it and save the MPH preset. Keep in mind that if the plugin does not have a default size setting and you resize it outside the DAW, then the next you load your MPH preset it may use the previous size setting and therefore not show in full. Here are some suggestions to avoid the issue - You can either load it directly from the plugin list and with Automap enabled so that it links parameters instead of using an MPH presets or \- Use a consistent size (ie do not resize it outside the MP Host) or \- Always load it in the MP Host instead of directly in the DAW and enable the Top Bar option so that you can drag it on other displays as well. > If the resize menu of the plugin is not visible, then load the plugin from the plugin list  > in the MP Host and resize it. Then load your MPH preset. > For example: 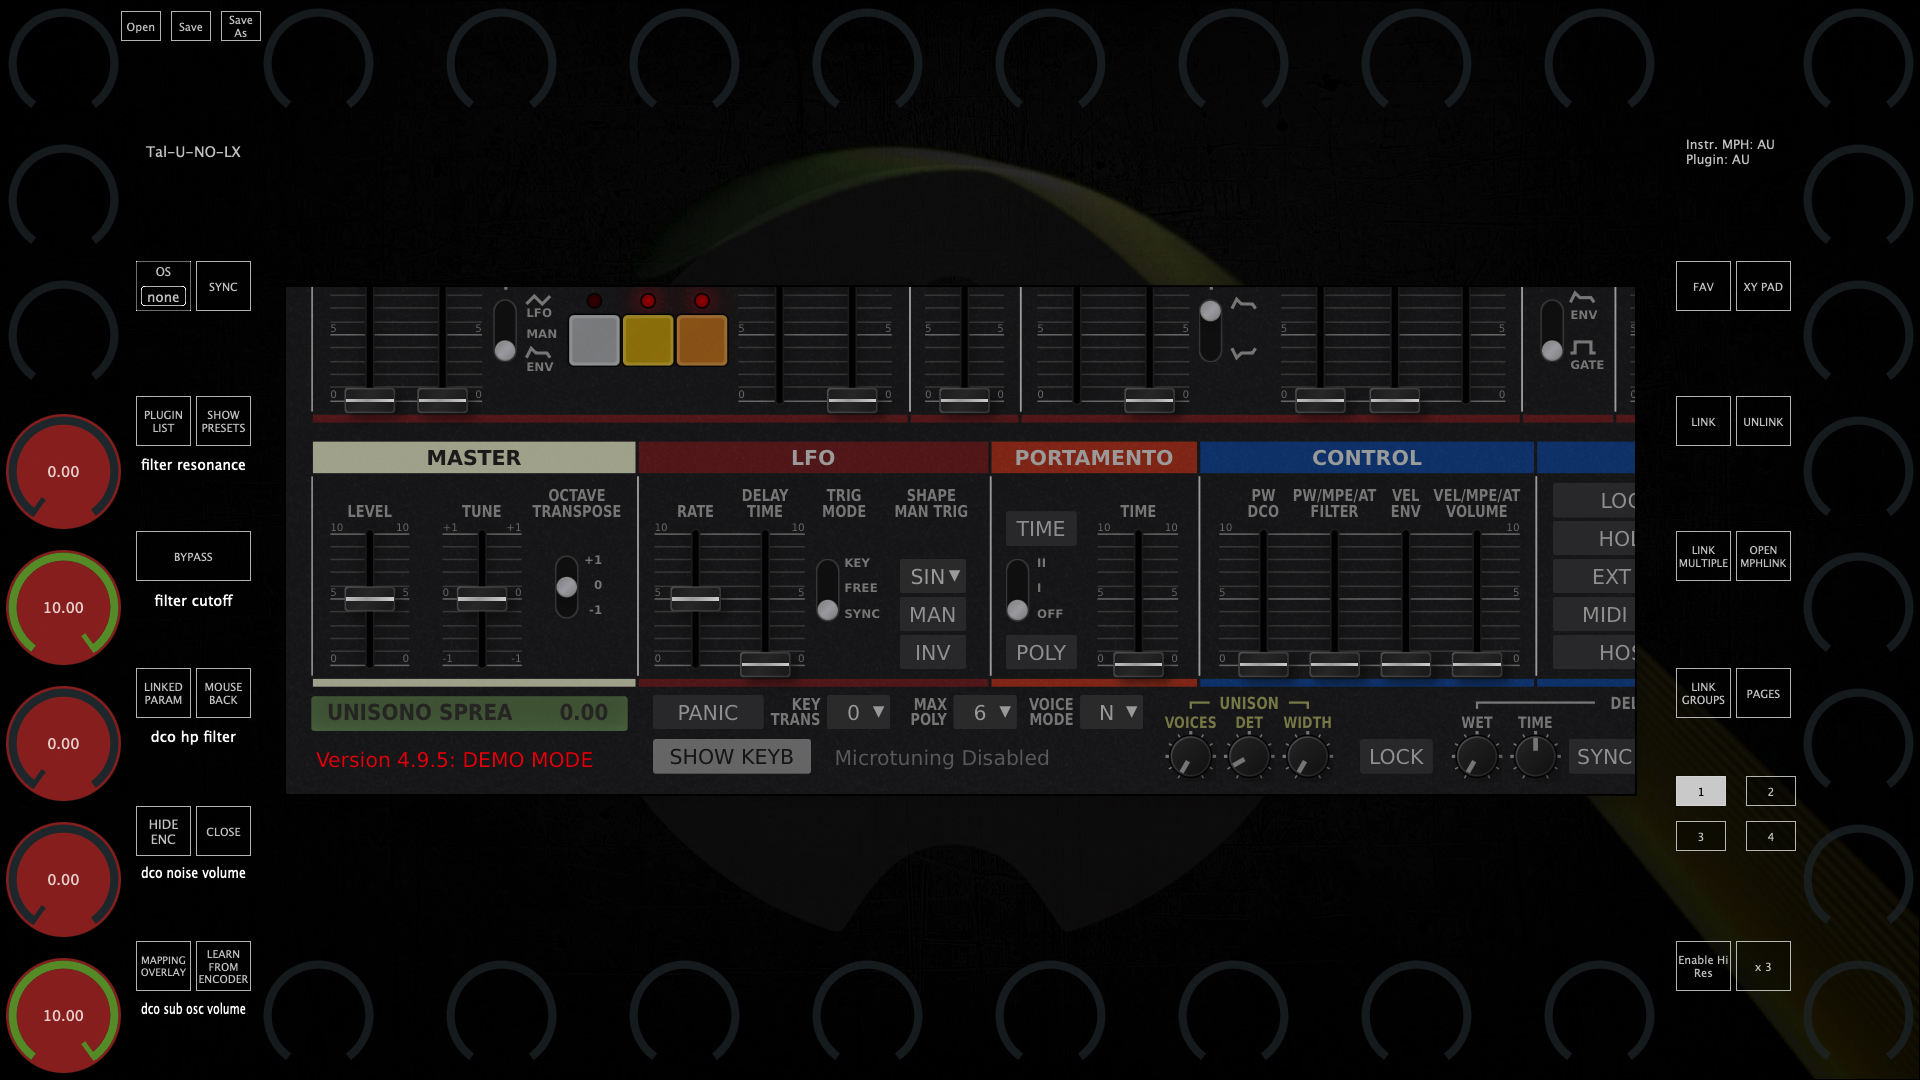 Load the plugin from the PLUGIN LIST (not preset)  Resize it 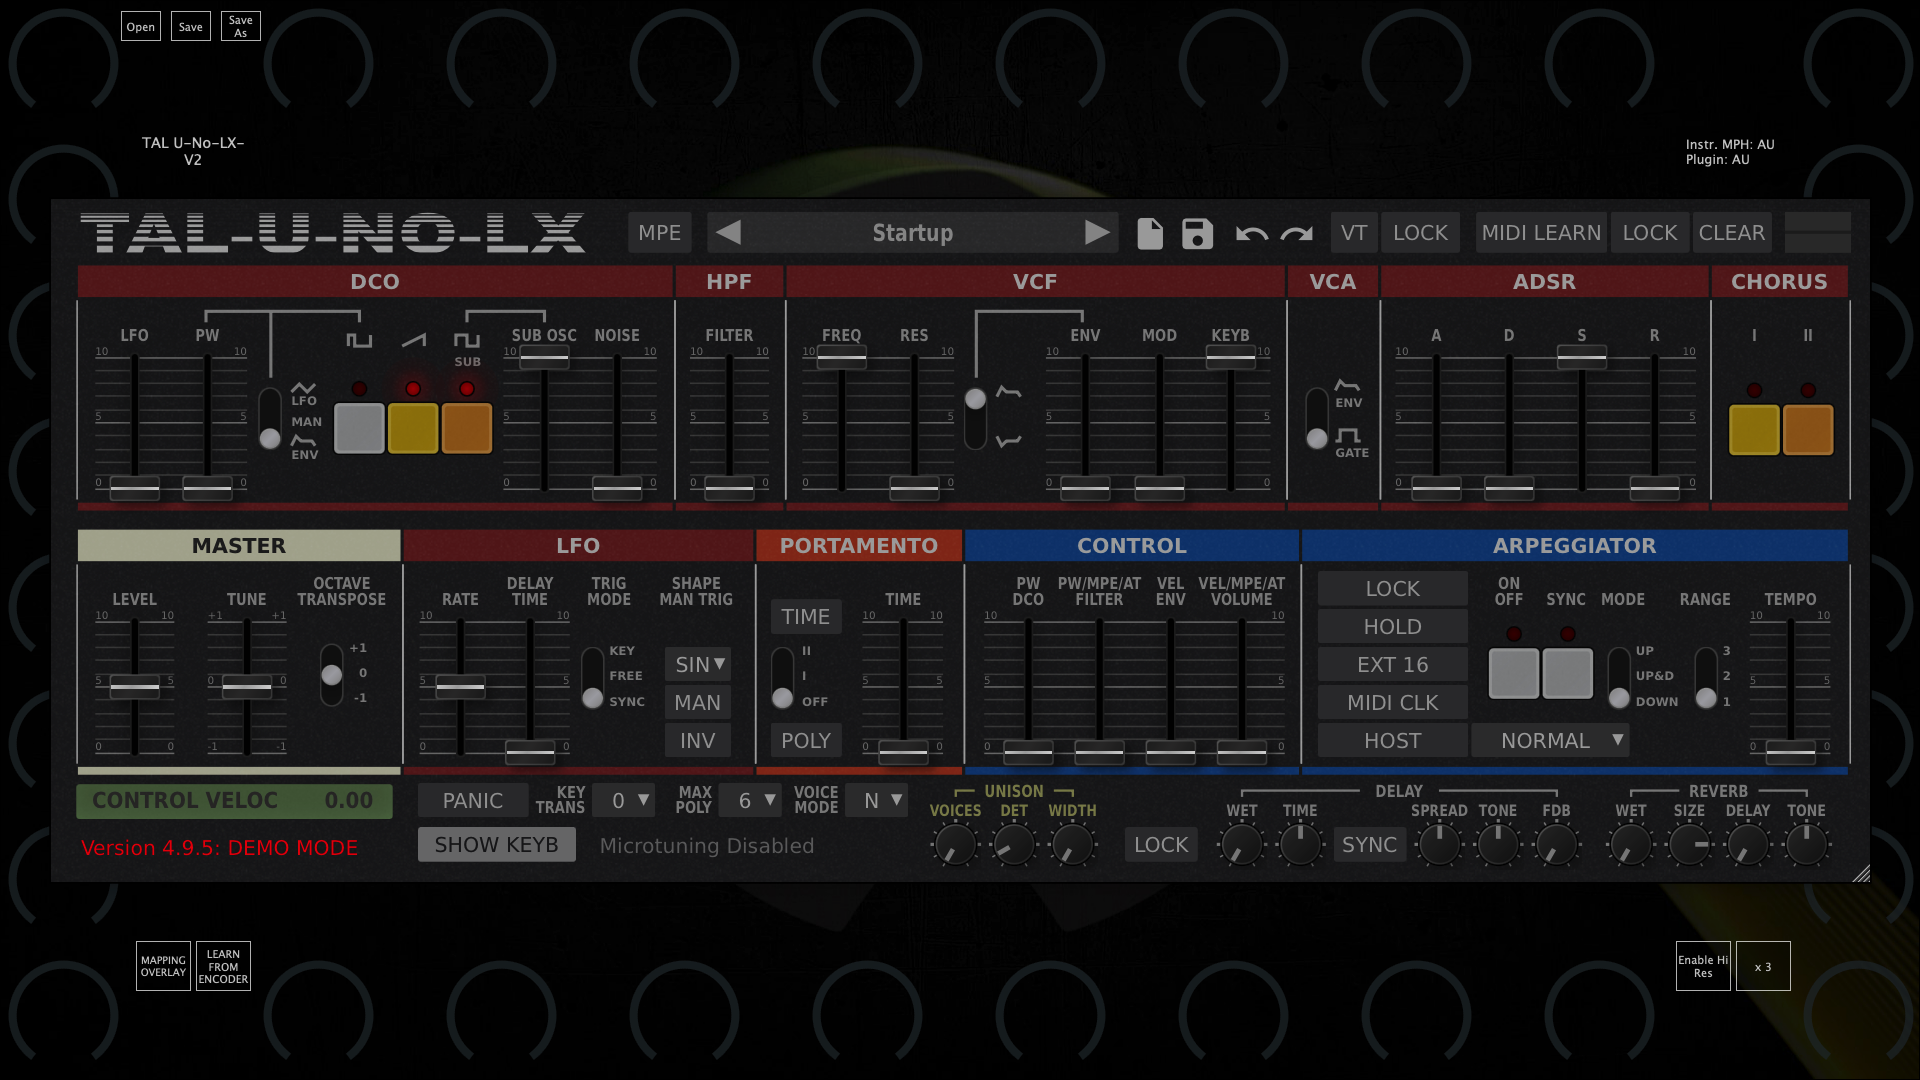  and load your MPH preset. Alternatively, use [**UPDD smart magnifier**](https://kb.mpmidi.com/books/mp-controller-documentation/page/1-using-updd-for-enhanced-touch-functionality-download-updd-download-updd-download-updd) to magnify plugins on demand. --- If on Windows still show magnified and cropped, right click on the DAW exe program file and choose Properties, then click high DPI settings and try these options: [](https://kb.mpmidi.com/uploads/images/gallery/2025-11/qTIbG5uhnJRz0pa1-image.png) Additionally, you may try disabling the top bar from the right click menu of the MP Host and enable "Windows Unified". # 42. Downloading Software for the MP Controller This knowledge base website does **not** have any software for the MP Controller. This is for documentation purposes only. To download plugins and and other software for the MP Controller find in your email's inbox the initial setup message received by us when you initially purchased the MP Controller. That email message has all the information and guides on how to download related software. If you don't have the email message, contact us [here.](https://mpmidi.com/contactus) # 43. Specific plugin settings Very rarely, some plugins do not strictly follow the VST protocol and may behave slightly different than expected. --- ##### Some Roland VST3 plugins do not produce sound on Windows. VST2 works as expected.If the utility crashes during scanning it will resume from the last plugin scanned when you reopen and scan with the utitlity . The plugin scan results are saved after every plugin is scanned. If the utility fails to load/scan a specific plugin that does not mean it will not work in the MP Host. When a plugin fails to scan, the utility adds the plugin to the Plugin-Exclude-List.txt so that it is not scanned the next time. The results of the utility are saved in scannedplugins.xml which is the file used by the MP Host to list plugins. *If the utility crashes repeatedly check the file **PluginScanner-Loading.txt** in the ../MP/Host/ folder and you can see which is the plugin causing the issue. You can add manually the plugin in the **Plugin-Exclude-List.txt** so it will not attempt to rescan it.*
[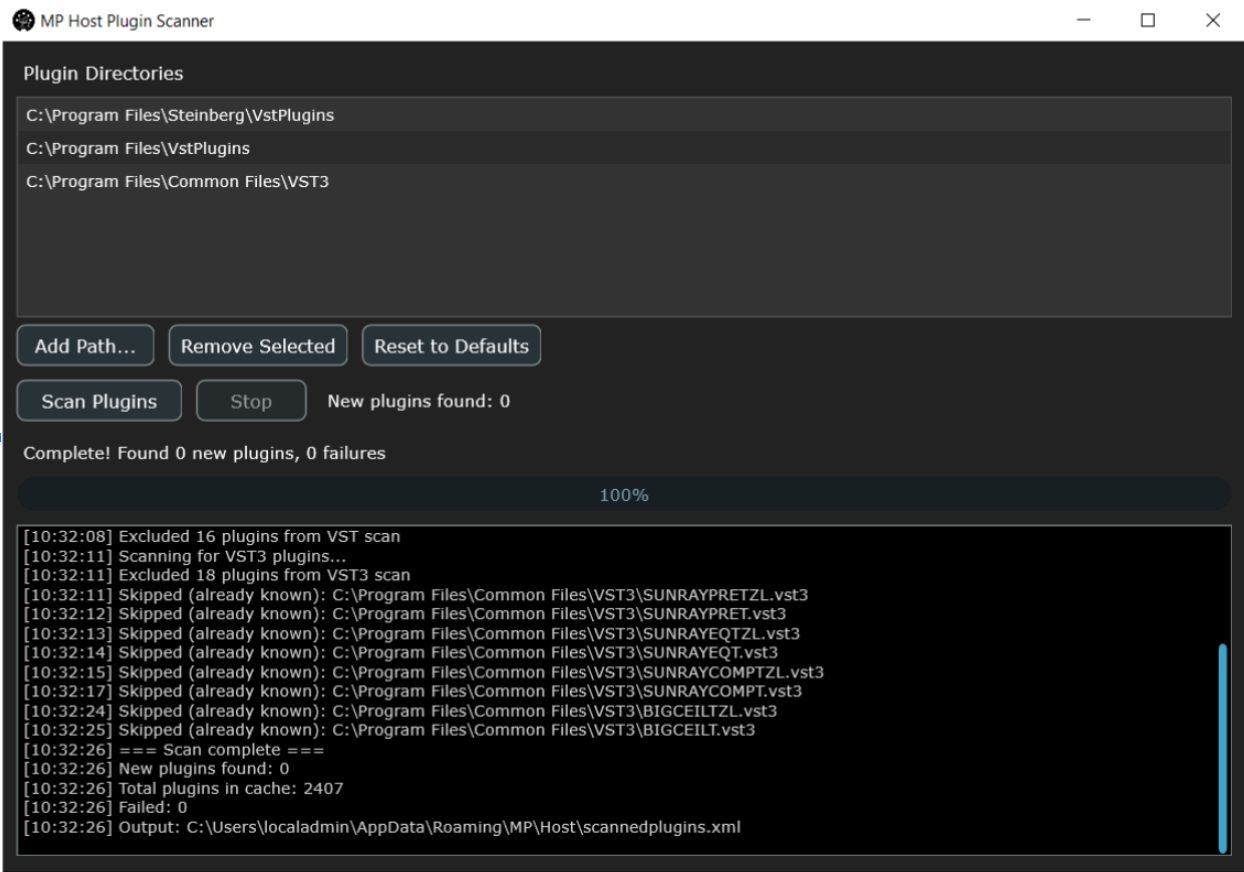](https://kb.mpmidi.com/uploads/images/gallery/2026-02/QSy0wpAXMB33LzYK-image.png) This is an **optional** utility and when used it offers the following benefits:The MP Host will populate/scan the plugin details on first load, therefore scanning all plugin is not essential.
1\. The plugin list is populated when you open the MP Host. [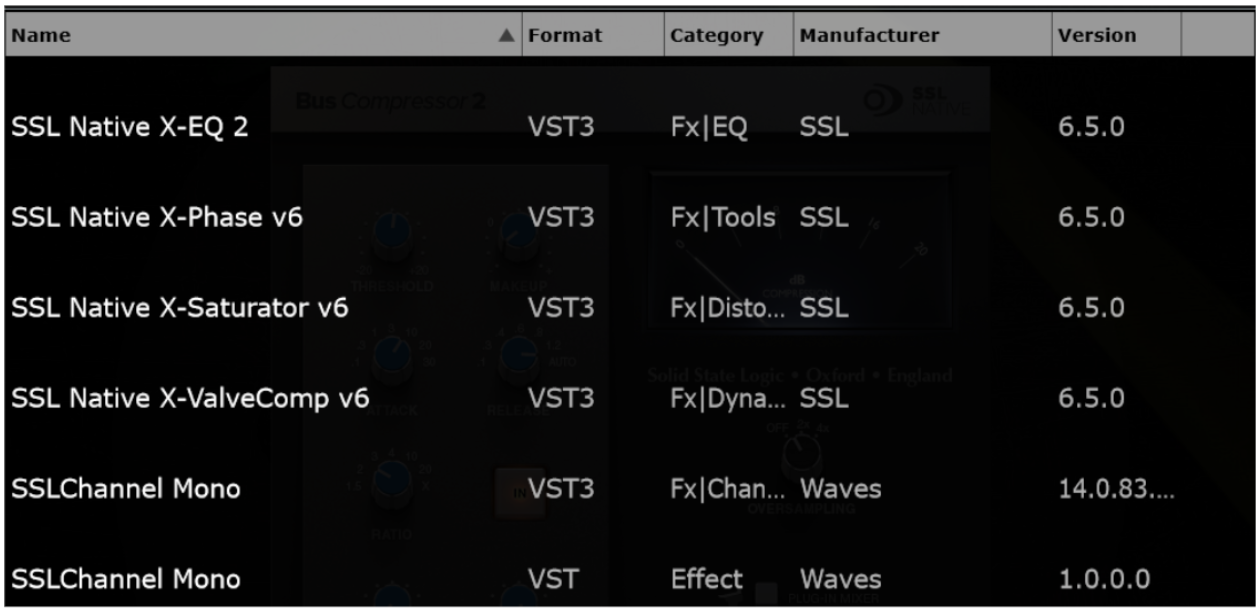](https://kb.mpmidi.com/uploads/images/gallery/2026-02/I5gP8gCVnqoY712z-image.png) 2\. The Instruments and effects are not shown in each other’s plugin list. [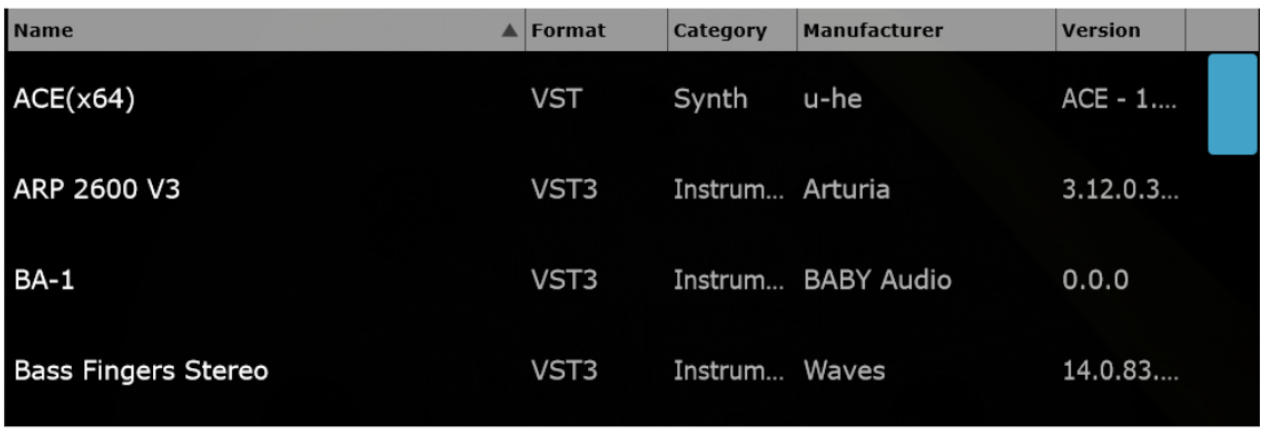](https://kb.mpmidi.com/uploads/images/gallery/2026-02/fmHUCmaPt7pGjGhK-image.png) This utility is **optional** and the MP Host will populate the plugin name information the first time you load it as it only reads the plugin filenames. Once a plugin is loaded in the MP Host, the Category, Manufacturer and Version are populated as well. This utility, when used it will show the Category, Manufacturer and Version for all plugins (prior to loading them in the MP Host). # 45. VST3 Generator Utility (Mac and Windows)This software requires the MP Host version released on May 5th, 2026 or later. The application can be downloaded from your user portal account. The use of this application is completely **optional** and the MP Controller can operate without using this application.
This application generates VST3 plugins for any installed third party plugin on your computer based on the MP Host. This is similar to the [M-Plugins generated based on AU](https://kb.mpmidi.com/books/mp-controller-documentation/page/14-m-plugins-on-the-mac) plugins. The benefit is that you can load these directly in your DAW without loading the MP Host and they will be displayed in your DAW as "Plugin Name - MP". For example the plugin "Pro Q4" will be shown as "Pro Q4 - MP" under the vendor "MP Controller" in your DAW. [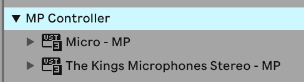](https://kb.mpmidi.com/uploads/images/gallery/2026-05/lEcOmrPW8cPLra2d-image.png) When loading these plugins they will show as "Plugin Name - MP" instead of "MPH Single FX" [](https://kb.mpmidi.com/uploads/images/gallery/2026-05/wI3III1raWKuF8WW-image.png) This works for all DAWs that can host VST3 plugins. The created VST3 plugins can participate and show in the Plugin Panel like MP Single Host plugins because they are just copies of the MP Single Host with a different plugin name. [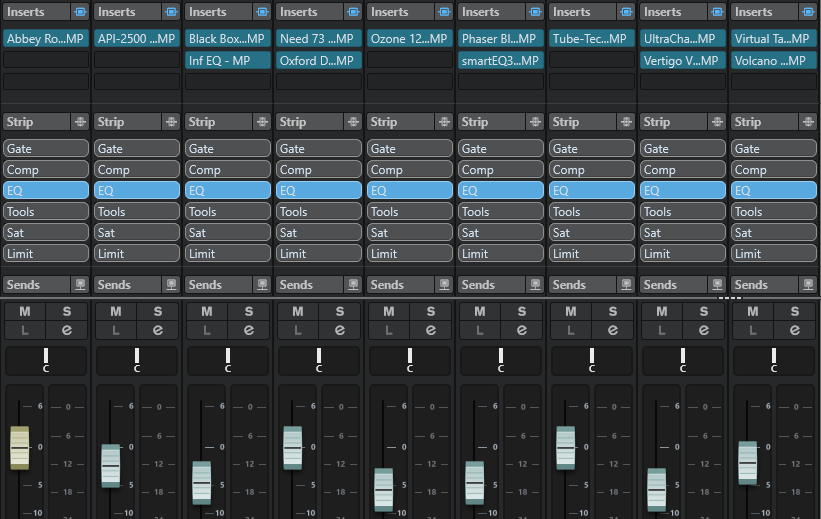](https://kb.mpmidi.com/uploads/images/gallery/2026-05/7o85TxIsbiDHJ8en-cubase-mixer.png) --- ##### How does it work? The application creates copies of the MP Single Host (Instrument or Effect) in your VST3 folder :**Windows:** C:\\Program Files\\Common Files\\VST3\\MP CONTROLLER **Mac:** /Library/Audio/Plug-Ins/VST3/MP CONTROLLER
These VST3 plugins are named after the selected plugin and a json txt file is also created that holds the VST3 attributes of the plugin. [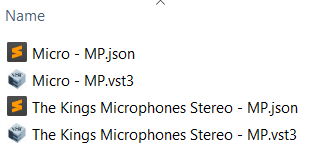](https://kb.mpmidi.com/uploads/images/gallery/2026-05/LpiYjxC5kHdvSyoV-image.png)The MP Host templates are installed by the MP Host installer in ~\\MP\\Host\\MPH Templates\\ and the MP Host must be installed first, before using the VST3 Generator application.
[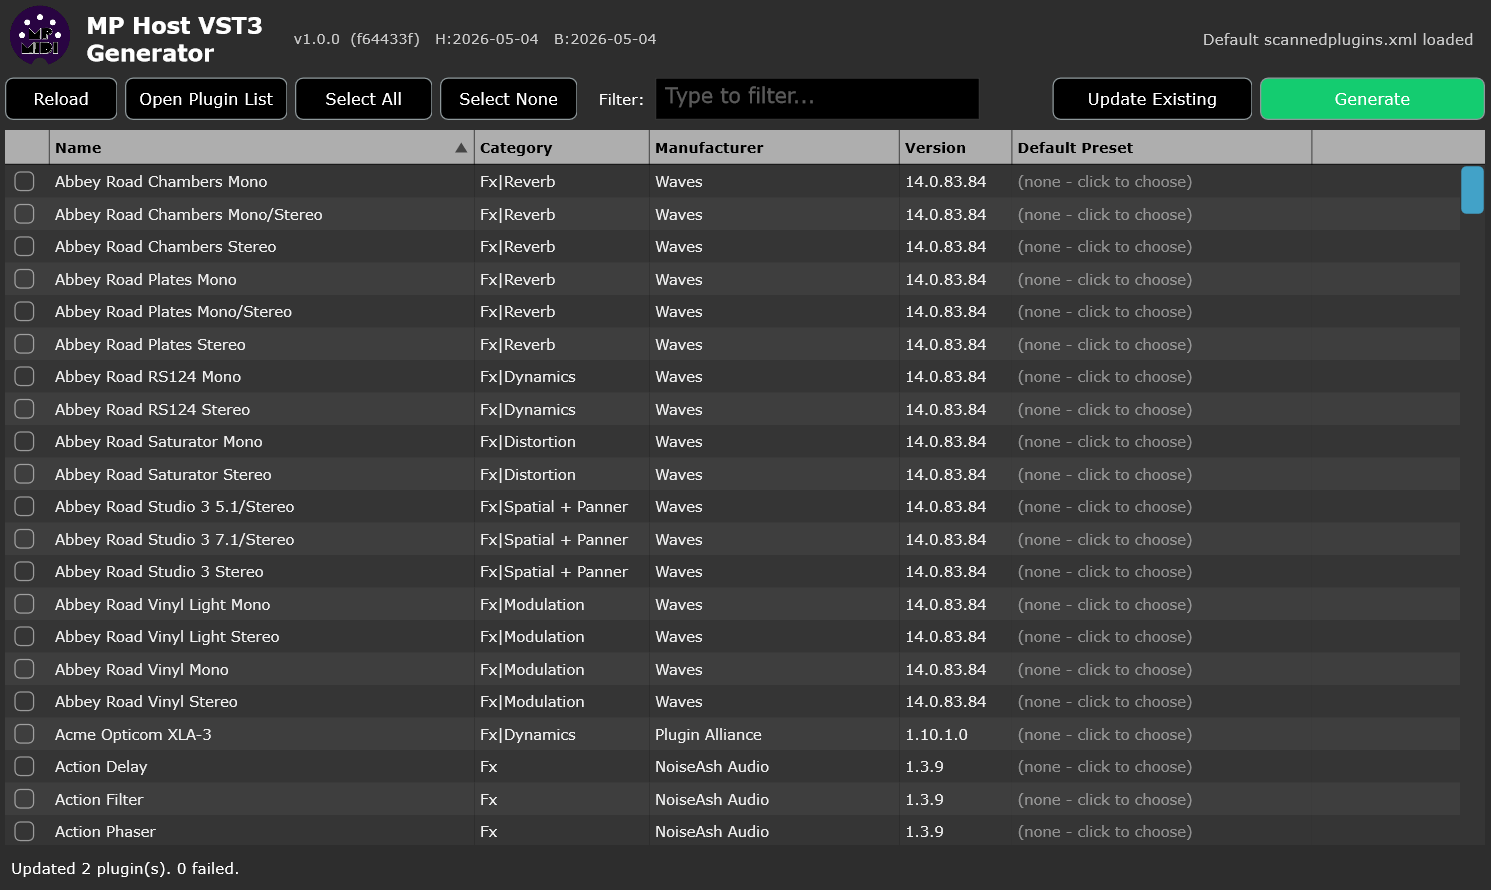](https://kb.mpmidi.com/uploads/images/gallery/2026-05/qKrJGdmwkI7RkwDF-image.png)It is important that you scan your plugins first and populate them in your MP Host. You can also use the **[Plugin Scanner utility](https://kb.mpmidi.com/books/mp-controller-documentation/page/44-plugin-scanner-utility)** to populate your scannedplugins.xml which is the file that holds information about the installed plugins on your computer (located in ~\\MP\\Host\\scannedplugins.xml)
Each row allows the selection of an existing preset and you can point the new VST3 plugin to use a specific preset you have already created upon loading. This becomes the default preset for the plugin. If you don't choose a preset, it will load the plugin directly and if Automap is enabled, it will map it in the same way when loading a plugin in the MP Host from the Plugin List.Do **not** save a preset as default in the MP Host generated plugin (replacing the default preset of the MP Host). It will replace the default.xml of your MP Host and load that preset every time you open the MP Host. You should never replace the MP Host default.xml preset. Instead use the generator app to assign a default preset to each of your generated plugins if you wish to have a selected preset when the plugin loads in the DAW.
--- ##### How to use it. Exctract from zip file and run the application.On Windows right click on the app and choose **Run as and Administrator** because it will need permissions to create VST3 files[](https://kb.mpmidi.com/uploads/images/gallery/2026-05/yghSHaQZHmjm2cBq-image.png)
Select the plugins you want to generate VST3 plugins by checking the box on the left for each plugin. Optionally, select a preset for each plugin. The MP Host preset can be any preset, even those using VST2 or AU third party plugins. Click Generate. This is it. It should generate vst3 plugins and json files for each of the plugins. Open your DAW and it will find these new plugins. Use them the same way you use the MP Host. They have no difference than the MP Single Host. because these are simply copies of the MP Single Host, Instrument and Effect.If you have created the plugin and you decide later to use a preset as the default, open this application to select the plugin and the preset and click Generate. It will prompt you that the plugin is already created with an option to set the preset as default.
--- ##### Updating the generated vst3 plugins. When you install a new version of the MP Host it will install the new MP Host template vst3 files. **Close your DAW (Very Important).** Open the Generator application. Click on Update. It will update all the generated vst3 plugins to the latest version of the MP Host and place a log file on your Desktop. You can delete that log file. --- # 46. The MP Bridge Utility The MP Bridge utility is installed automatically with MP Host versions released after December 10, 2025. MP Bridge handles switching between MP Controller software applications, meaning it controls what is shown on the controller display. It also switches the controller’s MIDI device connection to the software currently in use. This applies when switching between MP Host effects and instruments. For this reason, MP Bridge must be running at all times when using the MP Controller. Once installed, MP Bridge starts automatically and is also configured to launch when the computer starts. You do not need to run it manually. The installer also adds a desktop shortcut for the MP Bridge Panel, which allows you to start or stop the utility when needed. [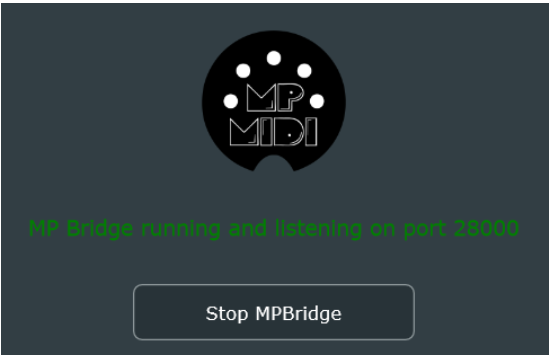](https://kb.mpmidi.com/uploads/images/gallery/2026-05/9OskcA0b47NRn8Rr-image.png) **Locations:** **Windows:** C:\\Program Files\\MPBridge\\ **Mac:** /Applications/MP Bridge/If the MP Bridge in not running then the controller windows will not open.
--- # 5. UPDD (Windows and MacOS) Information about UPDD installation and configuration # 1. Using UPDD for enhanced touch functionality (Download UPDD) ##### Enhanced touch functionality via UPDD UPDD is the best option for taking advantage of a touch screen on the macOS.Note that we have a simple utility that will take the mouse cursor to the touch display when it detects a touch gestrure. See more information [here](https://kb.mpmidi.com/books/mp-controller-documentation/page/7-mac-mp-touch-utility-for-moving-the-mouse-cursor-to-the-touch-screen).
UPDD offers the following important benefits and others such as multi-gesture configurations: **1. On the Mac:** If the mouse is not located on the touchscreen of the MP Controller, touch will affect where the mouse is currently located. UPDD transfers the mouse pointer to the touch screen automatically when it detects a touch gesture. **2. Both Mac and Windows:** The [smart magnifier](https://www.youtube.com/watch?v=wO2_4cpVhLo) (Zoom on the controller screens with gestures) **3****. Both Mac and Windows:** Returning the mouse position to its previous position after a touch gesture **4. Both Mac and Windows:** Keep the keyboard focused on the DAW after a touch gesture.  ##### Download and Install UPDD You can get the UPDD software from [**https://touch-base.com/controllerbyte**](https://touch-base.com/controllerbyte) at a heavily discounted price for a lifetime license and 3 years of receiving updates and support. There is a 7 day **trial** available to download it prior to purchasing. [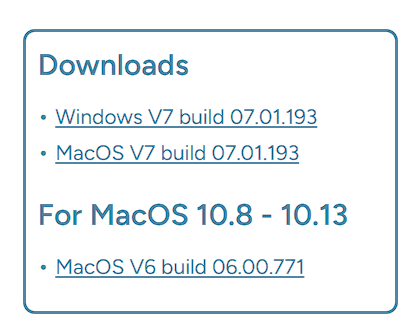](https://portal.touch-base.com/oemdrivers/mpc)**IMPORTANT:** Purchase UPDD only from https://touch-base.com/controllerbyte as this is a special version for the MP Controller. No configuration is needed after you install UPDD except the Identify procedure. Do not select any devices in UPDD, everything is done automatically. **MacOS:** Ensure you have given UPDD the appropriate permissions during installation. After installation you only need to run Identify in UPDD. if you have Slate Digital Raven, you need to reach out to support@touch-base.com and they will provide a software that works for both, the MP Controller and Raven.
 ##### Identify Procedure After installing UPDD, you will need to run Identify from UPDD in order to select the target monitor 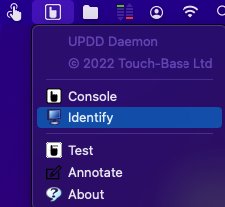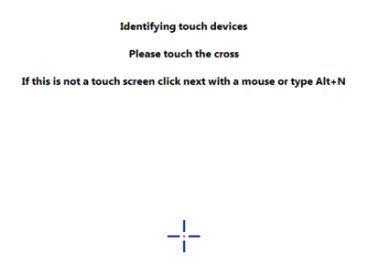| > Gestures for the smart magnifier are preset in UPDD (tap with 2 fingers to magnify). > Optionally you can also [setup](https://kb.mpmidi.com/books/mp-controller-documentation/page/3-how-to-configure-the-updd-zoom-and-gestures) your own gestures. |
Permissions required for UPDD on MacOS are shown [here](https://kb.mpmidi.com/books/mp-controller-documentation/page/11-updd-permissions-on-the-mac)
 ##### Updating UPDD To update UPDD go to [**https://touch-base.com/controllerbyte**](https://touch-base.com/controllerbyte) and select to download the **trial** (regardless if you have purchased it already). Enter your name and email address. Select the OS you have and submit. It will send to your email the link to download the latest UPDD version. If you have already register the license, it will register automatically after you install UPDD.  ##### Suggestion A very helpful setting in the UPDD settings is the Reset mouse cursor after a gesture action ends. This option automatically returns the mouse pointer back to its previous position after you finish with a touchscreen gesture. It can also reset the Keyboard focus (take it back to the previous app). Read more [here](https://kb.mpmidi.com/books/mp-controller-documentation/page/28-mac-os-transferring-the-keyboard-focus-on-the-daw)  Alternatively, see these [mouse to touchscreen suggestions](https://kb.mpmidi.com/books/mp-controller-documentation/page/2-mouse-to-touchscreen-suggestions)  ##### Troubleshooting: Mac OS X Touchscreen Model 1A+ The first time, connect the Display USB, using the cable provided, directly on the Mac (not via a hub to eliminate any possibilities of issues). It should show up under System Report > USB as “MP Controller Touch Screen”. Touch will work, but the mouse cursor needs to be on the MP Controller’s touch screen to control that screen. UPDD takes care of this, along with other benefits such as the Smart Magnifier, right click function and many more. 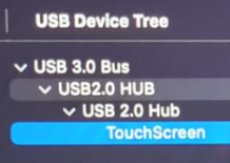**UPDD will display it as** Vendor ID 0x222A, Product ID 0x0858, Manufacturer: MP Controller Touch Display, Product: MP TouchScreen
Do not check the box to select the device.  ##### Mac OS X Touchscreen Model 1A The touch needs to show up first in System Report as G2TSP Multi touch display under USB. Then you can install UPDD for the touch function to work The touchscreen works as mouse input, therefore when you touch the screen it gets the mouse cursor. If you touch and drag, it behaves in the same way as clicking and dragging with the mouse. For up to Mac OSX Mojave, the touchscreen monitor does not need any drivers and works with the native Mac OSX drivers when connected. However on Mojave, the mouse position needs to be on the touchscreen so to enhance the workflow we have these 3 [suggestions](https://kb.mpmidi.com/books/mp-controller-documentation/page/2-mouse-to-touchscreen-suggestions). 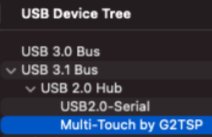  # 2. Mouse to touchscreen suggestions 1. Keyboard Shortcut to take automatically the mouse to the touchscreen and back with a small utility Download from [here](https://mpmidi.com/utilities/mouse-mac.zip) 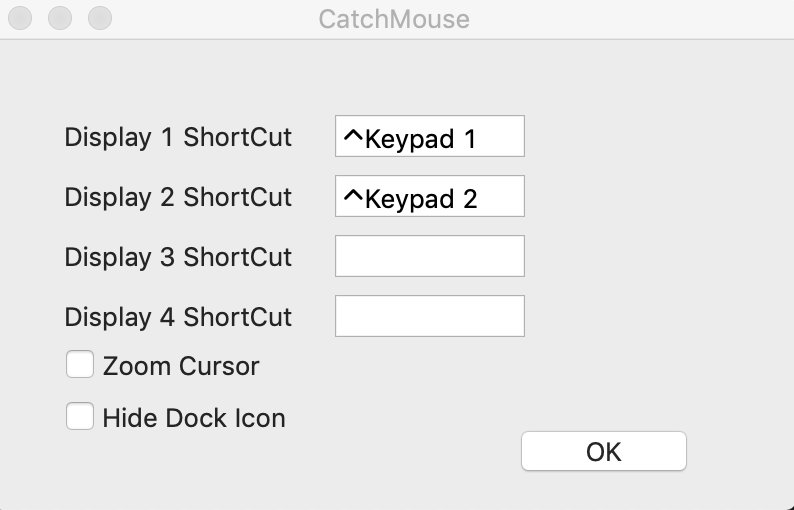 In the above example ctrl + 1 moves the mouse to the main screen, and ctrl + 2 moves the mouse to the touchscreen. --- 2. Take automatically the mouse to the touchscreen via [Better touch tool](https://folivora.ai/) (45 day trial and paid $8.5 license) 1. Go to [BetterTouchTool](https://folivora.ai/) Preferences => Keyboard. 2. Click Add New Shortcut or Key Sequence button. 3. Assign new Keyboard Shortcut from Click to record shortcut for example, for Monitor-1 Control+Shift+1, for Monitor-2 Control+Shift+2 etc. 4. Then from Trigger Predefined Action dropdown menu, select Other Mouse Actions => Move Mouse To Position 5. A modal window will appear to capture your desired mouse position. Simply take your cursor to the desired position of a Monitor and Press Space to capture the position. Now Save the position in the Modal Window. 6. Repeat 2 to 5 for all your Monitors. Now you'll be able to jump your mouse cursor to Monitor-1 by pressing Control+Shift+1, to Monitor-2 by pressing Control+Shift+2 and to Monitor-3 by pressing Control+Shift+3. --- 3. Get the MP Controller Touch-base driver from here [https://touch-base.com/controllerbyte](https://touch-base.com/controllerbyte) Trial available. To purchase the price is 35 GBP per license with 3 years of support. This utility takes the mouse to the touchscreen automatically and there is no need for shortcuts A very helpful setting in the UPDD settings is the Reset mouse cursor after a gesture action ends. This option automatically returns the mouse pointer back to its previous position after you finish with a touchscreen gesture. This means that If you are working on the main screen and you touched the touchscreen it will return back to the main screen automatically at the exact position it was before you touched the touchscreen. 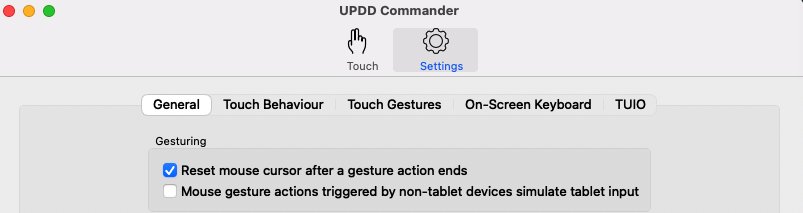 For all UPDD features see [**here**](https://mpcontrollerbyteltd.freshdesk.com/a/solutions/articles/103000120458) # 3. How to configure the UPDD Zoom and gestures**The latest version of UPDD is configured to use Zoom Screen with the 2 finger tap gesture. Zoom Screen zooms only within the controller's display. The Smart Magnifier zooms outside the controller display as well.**
[](https://kb.mpmidi.com/uploads/images/gallery/2026-03/ZFWT7TFW7gtVY2yF-screenshot-at-mar-06-14-57-32.png) If you need to change the behavior of the Smart Magnifier here are the steps to do so. > If the Smart Magnifier shows the desktop instead of zooming on the MP Host plugin see [here](https://kb.mpmidi.com/books/mp-controller-documentation/page/7-mac-the-updd-smart-magnifier-shows-the-background-instead-of-the-mp-host) First make sure you have the latest UPDD version installed. This should be normally obtained from **[Touch Base](https://touch-base.com/controllerbyte)**. [**Allow** ](https://support.touch-base.com/Documentation/50778/Smart-Magnifier)the necessary access on Mac OS. Open the UPDD Commander Settings from the top bar on the Mac 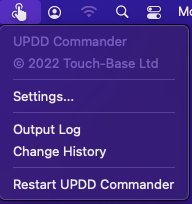 Go to Smart Magnifier tab and set the: 1. Width to 1920 2. Height to 1020 3. Rectangular Shape 4. and to Not follow touches 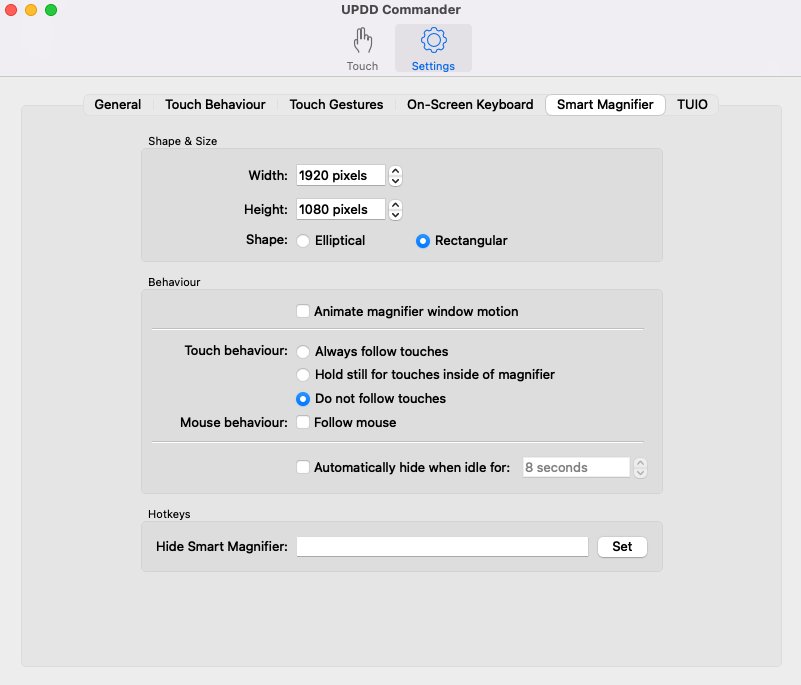 5. Navigate to All Applications And set the: Two Finger Tap to Action: Show/Hide the Smart Magnifier Optionally you can set the Two Finger Pinch Expand to Action: Smart zoom 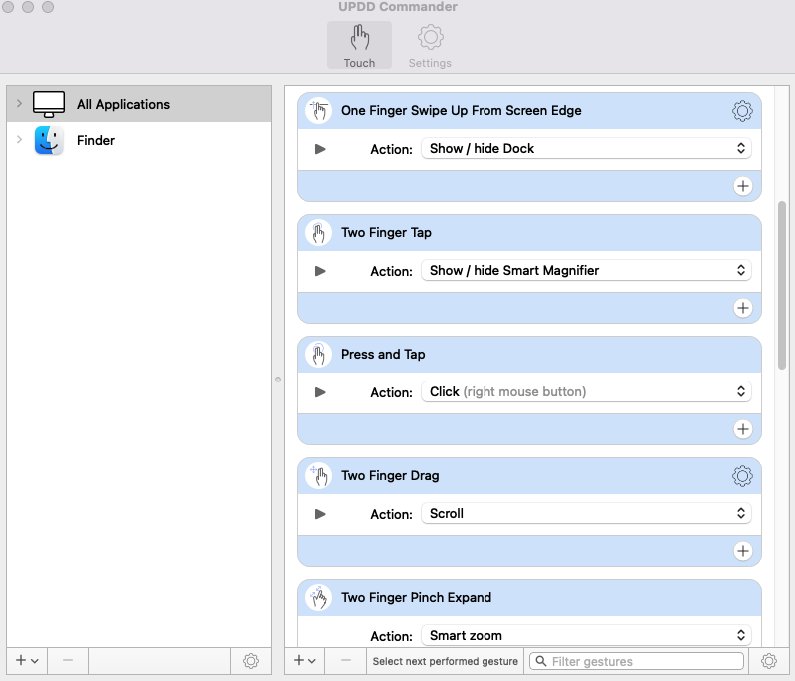 Set the Magnification to your preference ie 200%  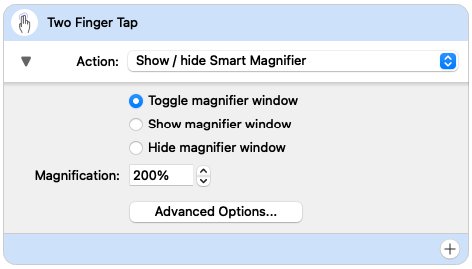 Then set the amount of Zoom with gesture movement.  # 4. UPDD Quick Installation Guide for Mac [https://support.touch-base.com/Documentation/50245/Quick-installation-guide](https://support.touch-base.com/Documentation/50245/Quick-installation-guide) mac OS Ventura 13.0.1 is supported by [driver UPDD V7.](https://touch-base.com/controllerbyte) V7 - macOS 10.14 and above V6 - macOS 10.8 and above Due to security considerations, since macOS 10.13, users must manually 'Allow' these extensions to be installed, and will be prompted to do so during installation.You do not need to change any setting in UPDD except run the identify procedure as explained [here](https://mpcontrollerbyteltd.freshdesk.com/a/solutions/articles/103000120458)
# 5. Uninstalling UPDD from the Mac # Uninstall procedure To uninstall locate and run “UPDD Uninstall” program. Since UPDD 6.0.242 there is a shortcut icon in the Utilities folder:  This shortcut links to the actual uninstaller held in the **/library/application support/updd** folder.| 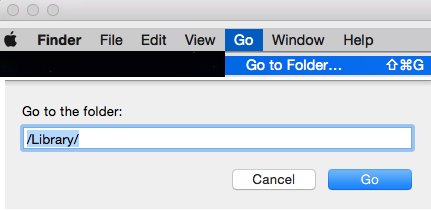 |
Alternatively, for Windows, Twinkle Tray lets you easily manage the brightness levels of multiple monitors: [https://twinkletray.com/](https://twinkletray.com/)
# 5. Cable Recommendations If you need to purchase new cables from the market here are some suggestions that work well for MIDI USB and Touchscreen Data, for Macs and Windows PCs. > Please note that for the display we recommend using USB-C 1m cables and if more length is needed use a powered docking station or powered USB hub. Using cables of more than 1m in length will create more resistance and put more stress on your computer's USB port. > For HDMI and MIDI USB-C you can use longer cables, 2m or 3m. ##### **USB 3.1 Gen 2 (USB-C to USB-C)** [AmazonBasics USB-C 3.1 Generation 2 to USB-C Cable](https://www.amazon.de/-/en/Amazon-Basics-USB-C-Generation-Cable-black/dp/B085SBNFQW?th=1) [Baseus USB C Cable, 100W 5A PD QC 4.0](https://www.amazon.de/-/en/Baseus-Charging-MacBook-Nintendo-Samsung/dp/B07TXJ6R1C/) [INIU USB-C-Cable, 100 W, 20 V/5 A, PD QC 4.0](https://www.amazon.de/-/en/USB-C-Cable-Charging-Braided-Charger-MacBook/dp/B08J41QTNN) [Fasgear 5A 100W Type C Right Angle Cable, 6ft USB 3.1 Gen 2 10Gbps](https://www.amazon.co.uk/gp/product/B08FXZLHJ9/) ##### **Thunderbolt 4 (USB-C to USB-C) (best option for connecting the display on thunderbolt)** [Amazon Basics USB-C to USB-C 4 Fast Charger Cable, 40 Gbps, 8K Video, 240W, USB-IF Cert, Thunderbolt 4/3 Compatible](https://www.amazon.com/Amazon-Basics-Charging-Thunderbolt-Compatible/dp/B0C93G2M83?th=1) [Caldigit Thunderbolt 4 Cable](https://www.caldigit.com/thunderbolt-4-usb-4-cable/) [OWC Thunderbolt 4 Cable](https://www.owcdigital.com/products/thunderbolt-4-usb-c-cable) [Cable Matters 40Gbps USB4 Thunderbolt 4 Cable with 8K Video and 100W](https://www.amazon.com/Thunderbolt-Certified-Cable-Matters-Charging/dp/B08KSM2FWR) ##### **Thunderbolt 3 (USB-C to USB-C)** [Belkin Thunderbolt 3 Cable](https://www.belkin.com/us/cables/data/thunderbolt-3-cable-usb-c-to-usb-c-3-3-ft-1-m-usb-type-c/p/p-f2cd081/) [Thunderbolt 3 Cable 40Gpbs/100W/5A,Cabletime](https://www.amazon.com/CABLETIME-Certified-Thunderbolt-Supports-Compatible/dp/B083TVNL8N) [Apple Thunderbolt Cable](https://www.apple.com/shop/product/MQ4H2AM/A/thunderbolt-3-usb%E2%80%91c-cable-08-m) ##### **USB-A to USB-C (only for MIDI, Touch data, Power the monitor but not video signal for video use HDMI)** [Amazon Basics - USB C Cable to USB Type A, USB 3.1 2nd Gen USA ](https://www.amazon.com/dp/B01GGKYR2O) [Amazon Basics - USB C Cable to USB Type A, USB 3.1 2nd Gen Germany](https://www.amazon.de/-/en/Amazon-Basics-Cable-Type-White/dp/B01GGKYS6E) [Anker Powerline II 90 cm USB C to USB A 3.1 Gen2 Cable Germany](https://www.amazon.de/-/en/Powerline-USB-IF-Certified-MacBook-Devices/dp/B07213D35X) [Amazon Basics - USB C Cable to USB Type A, USB 3.1 2nd Gen UK](https://www.amazon.co.uk/AmazonBasics-Type-C-USB-Male-Cable/dp/B01GGKYS6E?th=1) [Belkin - 3.1 USB-A to USB-C Cable (USB-C Cable)](https://www.belkin.com/us/cables/data/3-1-usb-a-to-usb-c-cable-usb-c-cable/p/p-f2cu029/) ##### **USB-C cables with ON/OFF switch** [RIITOP USB Type-C On Off Switch Cable 1 m 10 Gbps](https://www.amazon.de/-/en/RIITOP-Type-C-Switch-Support-Charge-black/dp/B0DKJCNRLG/) [RIITOP USB C Extension On Off Cable 1 m 10 Gbps](https://www.amazon.de/-/en/RIITOP-Extension-Supports-Charging-Type-C/dp/B0DCG1Q2XC/) *The cables mentioned in this page are suggestions* *and MP MIDI has no affiliation with them* # 6. MIDI Controller C1-xMP1 not detected (Controller not connected) ##### Mac: If the C1-xMP1 does **not** show up in the System Report > USB, see [**here**](https://kb.mpmidi.com/books/mp-controller-documentation/page/1-mac-controller-not-connected-message) ##### Windows: If the C1-xMP1 does **not** show up in the Device Manager, see [**here**](https://kb.mpmidi.com/books/mp-controller-documentation/page/1-windows-controller-not-connected-message) # 7. Display restarts ##### MP Controller display restarts constantly (flickering) The cause for this is that the monitor does not receive enough power. These steps may help to resolve the problem. - use a different USB port from the computer that provides more power. - use shorter USB cables (1m recommended cables [**here in section USB-C to USB-A**](https://kb.mpmidi.com/books/mp-controller-documentation/page/6-cable-recommendations) ) - use a powered USB hub - use a [Y-cable](https://kb.mpmidi.com/books/mp-controller-documentation/page/1-model-1a1a-using-a-y-cable-to-provide-more-power-to-the-display) for Model 1A/1A+ **For model 2A** you can use the additional power port to provide more power using a wall adapter 5V/2A minimum or a power bank as explained [**here**](https://kb.mpmidi.com/books/mp-controller-documentation/page/1-understanding-the-mp-midi-controller-ports) **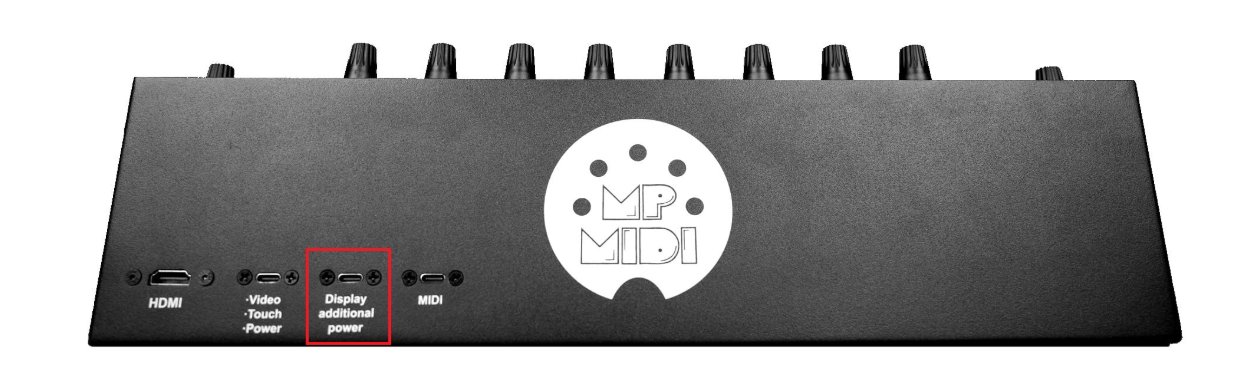** **For model 1A+ and model 2A** If when changing the brightness or switching to a preset with high brightness (such us the FPS) the monitor restarts, it means is not receiving enough power to support the level of brightness. **For mode1 1A+** you also have the option to connect a wall adapter on the internal LCD board which has an additional USB-C port. To get to that port you have to unscrew the bottom cover. **For model 1A** use the **[Y-cable](https://kb.mpmidi.com/books/mp-controller-documentation/page/1-model-1a1a-using-a-y-cable-to-provide-more-power-to-the-display)** to provide additional power. # 8. Display does not power On (Mac or Windows)As shown in this [video](https://youtu.be/q9NsGBj-H7s)
**Model 1A:** when connected to power only, after 2 seconds it shows on the display the message "No Signal" and then after 2 seconds the message "Power Saving" and it automatically powers off, if there is no video signal or the video signal received is not 1920 x 1080 resolution at 60Hz refresh rate. If you don't see the "No Signal" message and you are uncertain whether your computer's USB port can provide enough power, connect a wall adapter 5V/2A (or more amps) - like a typical phone charger - and it should show the message "No Signal". This shows that the display receives enough power. Connect the HDMI and when it receives video signal. If the display is connected to a wall adapter and you are certain it provides 5V/2A, but the display is still not showing anything, you may have an issue with the controller display or a damaged bridge port. [Contact us](https://mpmidi.com/contactus) for servicing instructions. If the display shows video but restarts frequently (flickers), it means you need to provide more power, see the guide [here](https://kb.mpmidi.com/books/mp-controller-documentation/page/1-model-1a1a-using-a-y-cable-to-provide-more-power-to-the-display)
--- ##### Providing Power to the display (Model 2A) Power can be provided by either USB-C ports of the display. (but **not** the far right USB-C MIDI port) 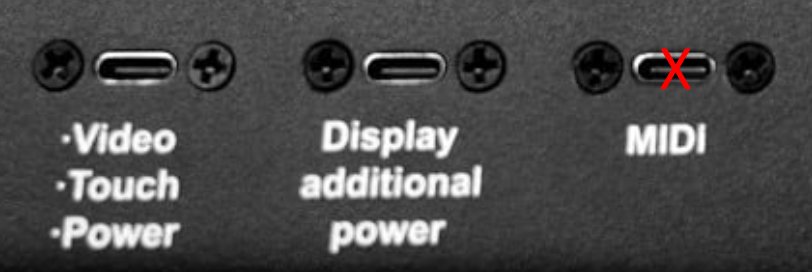 It does **not** need to be connected to a computer to show the logo when it receives power. It can be connected on a computer or a wall adapter (5V/2A) or power bank on any of the 2 USB-C ports.If you only connect to a computer the "Display additional power" port only and HDMI, (but **not** the Video/Touch/Power port) then the there will be no touch screen functionality.
See video [**here** ](https://www.youtube.com/watch?v=TCrdMa9_66Q)for connection options.Power can be provided via external wall adapter (5V/2A), or USB-C to USB-C (thunderbolt on a computer that has thunderbolt USB-C) or USB-C to USB-A
--- ##### Black Screen, nothing is shown when connected to power|  | 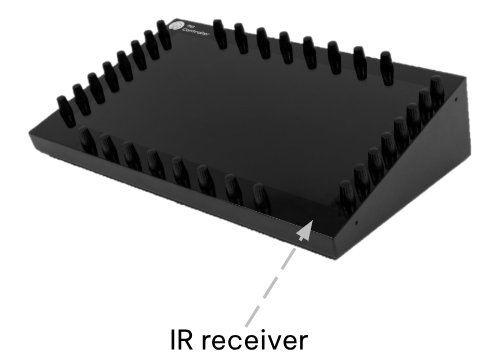 |
Here is how to check that the remote control is working properly and does not need a new battery. The remote control light is infrared and can't be seen. Go into a relatively dark room and open your mobile/cell phone camera. Point the remote to the camera, and press a button on the remote control. You would see a light blinking in the camera. See instructional video [here](https://drive.google.com/file/d/1VAJktDCLZiq-y-Zf6PxZPnfpTir_w-BE/view?usp=sharing)
**Model 1A:** You can bypass the bridge port mounted on the enclosure of the unit, the unit must be disassembled as the LCD board is mounted inside the display. [Contact us](https://mpmidi.com/contactus) for servicing instructions.
Download an instructional video from [here](https://drive.google.com/uc?export=download&id=134HpLAkotL6z4RKvRTU90rFTzOltEPm2)
|  |  |
Here is how to check that the remote control is working properly. The remote control light is infrared and can't be seen. Go into a relatively dark room and open your mobile/cell phone camera. Point the remote to the camera, and press a button on the remote control. You would see a light blinking in the camera. See instructional video [here](https://drive.google.com/file/d/1VAJktDCLZiq-y-Zf6PxZPnfpTir_w-BE/view?usp=sharing)
# 7. Latest Release and Video Tutorials The latest release of the MP Host and links to our tutorials on YouTube # Latest MP Host Release Right click on the MP Host controller window and from the menu select "Check New Version". It will open a web page and display the latest version.You can download the latest release from your account in the user portal.
For other software updates and current versions check the user portal.
|
| Version changes are described [**here**](https://docs.google.com/document/d/1pY-sQ4RGmFlL8T9PQBfujjTqUN9mBrro3JKimkX6pg4/edit?usp=sharing) |
**New version December 2025 and onwards** In this update we implemented a new communication system that allows all plugins/apps (MP MIDI, Control Surfaces, MP Gain Utility) including the Single Hosts to be part of the [Plugin Panel](https://youtu.be/LQYHXOdxFBU?si=IMtZJrR3Y8SeCAau), Plugin History and therefore switching from/to these via the touch screen. This means that in projects where you have many plugins, you can enter the Plugin Panel from one mp window, and then navigate to any mp controller plugin or control surface app/plugin, without having any small windows open.
# Video Tutorials on YouTube Check out these tutorials we have published on [**YouTube**](https://www.youtube.com/playlist?list=PL9z5UCKHtTym6AJOET1nk16OQrMsQuaYo) # 8. Troubleshooting - Windows Guides on how to diagnose and troubleshoot on Windows # 1. Windows - "Controller Not Connected" message  If you get this message on the MP Host software plugin, check that your have the MIDI port connected to the computer.Note that if the "Controller not connected" message shows, You will also not be able to use any physical encoders to control parameters and it may affect the automation capabilities of the MP Host.
[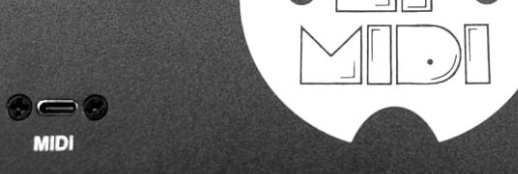](https://kb.mpmidi.com/uploads/images/gallery/2025-05/fwHxbLlUHR9tdyVA-image.png) If you have it connected directly to the computer, open the Device Manager in Windows. check that the C1-xMP1 shows up 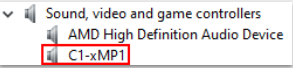 Also check that the device is enabled in the device manager. (right click on C1-xMP1). --- **Windows 11:** MIDI 2.0 services - see more infomation [here](https://kb.mpmidi.com/books/mp-controller-documentation/page/11-new-midi-services-on-windows-11-2026-updates) ---If the C1-xMP1 is enabled and shows up in the Device Manager, ensure you have disabled the MIDI and OUT of C1-xMP1 in the DAW as instructed [here](https://kb.mpmidi.com/books/mp-controller-documentation/page/2-daw-midi-settings) If the controller is active (MIDI IN/OUT) in the DAW, disable and restart the DAW, then load the MP Host again. The problem should be fixed.
Ensure that you have the latest C++ redistributable installed as shown [here](https://kb.mpmidi.com/books/mp-controller-documentation/page/3-windows-c-redistributables)
If another app (including the DAW) is using the C1-xMP1 then it will not be available for the MP Host plugin to use it and it will show the "Controller not Connected" message.All midi drivers on Windows are exclusive, meaning only one application can use them at any time. In other words, only one application can use a MIDI device. On the Mac MIDI devices can be shared in between applications.
If it is disabled in the DAW, you can verify that by using a free app like[ Midi View](https://hautetechnique.com/midi/midiview/) or use [this small utility](https://drive.google.com/drive/folders/1Hm4fZyG7KvIEG83dtrBKHsB_9uFEfEdj) we created and scans the MIDI Ports on your Windows computer. If you have an AKAI MPC connected it may be using the C1-xMP1. If the C1-xMP1 port is free it will show it like this [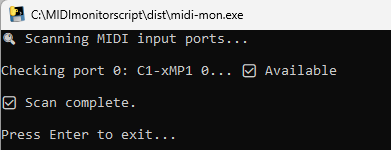](https://kb.mpmidi.com/uploads/images/gallery/2025-05/LSxt6bcBax8mMT2b-image.png) If the port is in use it will show something like this [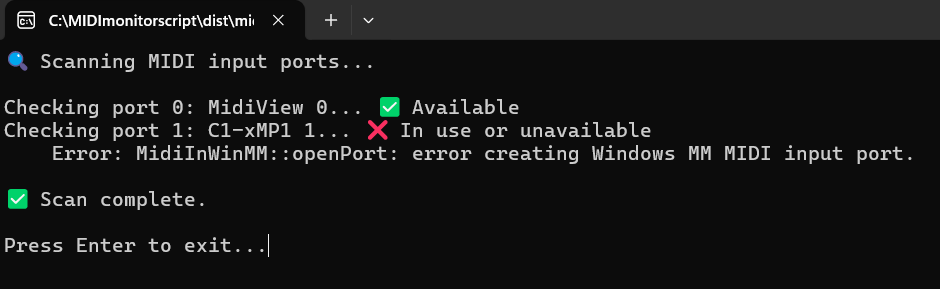](https://kb.mpmidi.com/uploads/images/gallery/2025-05/7jirOfI1FJRrqnIV-image.png) --- ##### How to check if another app is using the C1-xMP1 in MIDIView Close your DAW and any other MIDI related software. Then Open Midi View and select C1-xMP1  If the C1-xMP1 button is green, then all is ok. If you get an error message:  Then some software is using the C1-xMP1 and you need to find which software this is. Please note that It is not technically possible to detect using a program which software is using the MIDI port on Windows. You can repeat the test by opening the DAW first and then opening the Midi View (without having the MP Host open). The C1-xMP1 should be available in Midi View after the DAW has opened.If you get the error is Midi View, then the DAW is using C1-xMP1 and it will not be available to be used by the MP Host plugin, hence you will get the "Controller not Connected" message. In this case you need to disable it in the DAW as instructed [here](https://kb.mpmidi.com/books/mp-controller-documentation/page/2-daw-midi-settings).
--- ##### If C1-xMP1 does not show up in the device manager Connect the USB cable provided directly to the computer USB-A port (not USB-C) from the USB-C MIDI port on the controller.  The MIDI port works independently from the other ports of the controller - Display & HDMI - so it does not matter if these are connected or not. Try a different USB-A to USB-C DATA cable or connect directly to the computer instead of through a USB hub or KVM switch. Connect the cable provided directly from the MIDI port of the controller, to the computer’s USB A port (not USB-C port). If you are connecting to a USB-A port directly to the PC and it still does not show up in the device manager, check [this article](https://kb.mpmidi.com/books/mp-controller-documentation/page/8-windows-or-mac-c1-xmp1-does-not-show-up-in-the-device-manager-or-system-report) # 2. Windows - Model 1 A: Troubleshooting the Touch Function The only port that affects the touch function is the Display USB-C Port on the Controller. The only cable that affects the touch function is the USB cable connected to the Display Port and on the computer on the other end. If connected via a usb hub, try to connect it directly on the PC. Use the 1m cables provided with the controller. If you want to purchase additional cables, the best cable to use from the market is the 1m Amazon Basics Cable USB 3.1 Gen 2.Here are links for: [USA](https://www.amazon.com/dp/B01GGKYR2O), [UK](https://www.amazon.co.uk/AmazonBasics-Type-C-USB-Male-Cable/dp/B01GGKYS6E?th=1), [Germany](https://www.amazon.de/-/en/Amazon-Basics-Cable-Type-White/dp/B01GGKYS6E) [Here](https://kb.mpmidi.com/books/mp-controller-documentation/page/5-cable-recommendations) are some more cable recommendations
Check the Device Manager when connecting the Display Port. It should show: 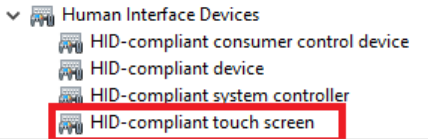 --- **Model 1A/1A+:** If, when connecting to the computer, the monitor does not stay powered ON (it flickers) then use a Y-cable as instructed [here](https://kb.mpmidi.com/books/mp-controller-documentation/page/1-model-1a1a-using-a-y-cable-to-provide-more-power-to-the-display) # 3. Windows C++ Redistributables It is a good practice to have the latest C++ redistributables on your Windows system.You can download and install the official release of Microsoft from [**https://aka.ms/vs/17/release/vc\_redist.x64.exe**](https://aka.ms/vs/17/release/vc_redist.x64.exe)
If you experience a crash of the MP Host on Windows, this most probably is due to an incompatible version of C++ redistributable installed. Install the above version (which is a permanent link to the latest release) and it should fix the issue. Reboot the computer after installing. # 4. Windows - The right click menu does not appear **Windows High DPI Override settings** If you are running 4k displays and using the Windows scaling for these displays and you are having an issue with menus not displaying in the controller’s screen then try this: Right click on the DAW exe program file and choose properties Then click high DPI settings Then try these options  # 5. Windows - Custom VST plugin paths On Windows 10 the path scanned for VST2 is C:\\Program Files\\VSTPlugins & C:\\Program Files\\Steinberg\\VSTPlugins and for VST3 is C:\\Program Files\\Common Files\\VST3 If you cannot move your plugin in the standard VST2 folder then you can do the following easily with a folder junction on Windows. A junction is like a shortcut, but Windows sees it as a real folder, without consuming extra space. It is like having a virtual clone of the original folder. When you delete, add or edit a file in that junction folder is like you are doing it in the original folder. --- ##### Creating a Junction via Symlinker You can download Symlinker from [here](https://github.com/amd989/Symlinker/releases/tag/v1.1.2.15) Create the junction with the following. The Destination Folder should be the folder you currently have your VST2 plugins. If C:\\Program Files\\VSTPlugins exists you have to rename it or delete it so it can be recreated as a junction folder. 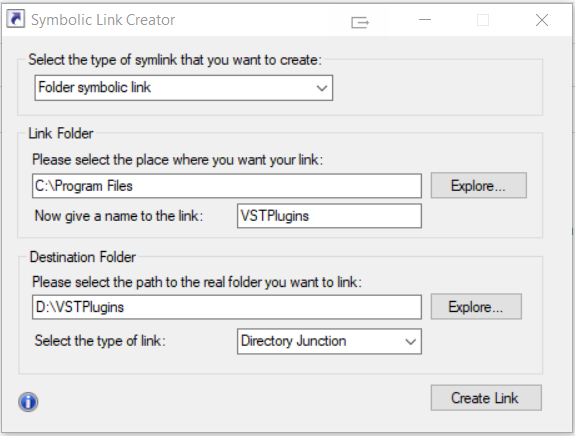 You should see the C:\\Program Files\\VSTPlugins in your file explorer after you create it. After you create the junction folder run "Quick Scan" in the MP Host to find the VST2 plugins. Alternatively you can download it from [here](https://github.com/arnobpl/SymlinkCreator) 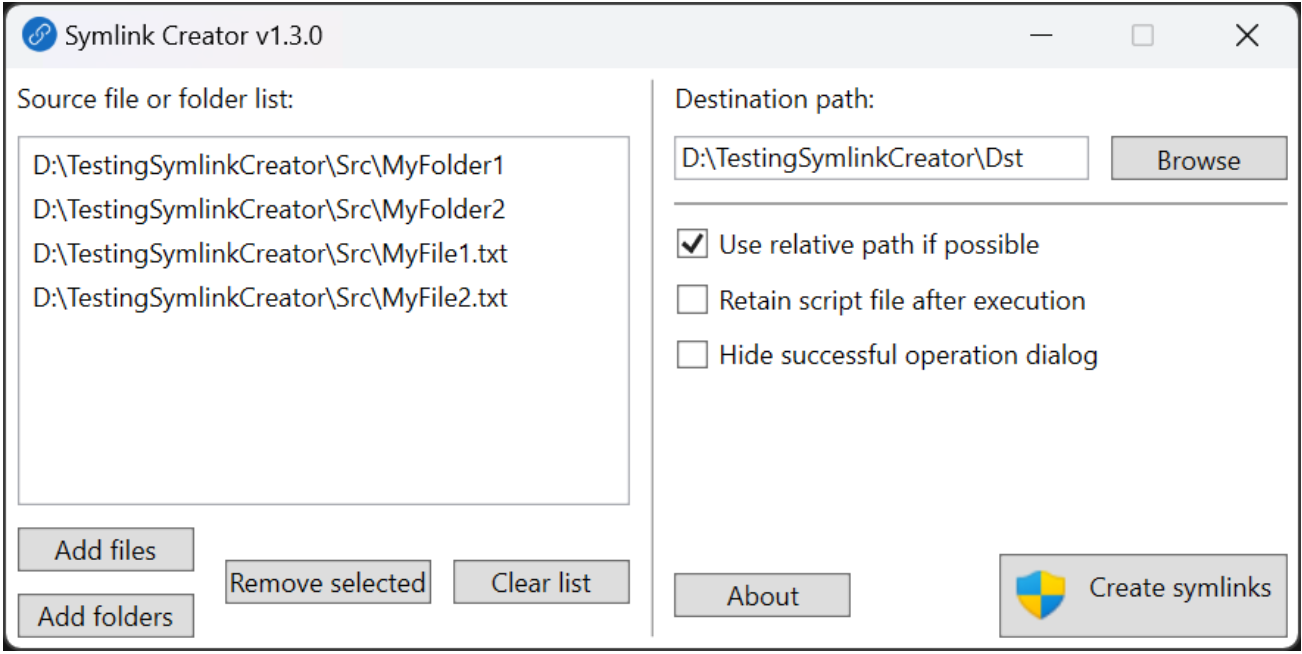 --- ##### Creating a Junction via the command line Use /J to create a hard link pointing to a directory, also known as a directory junction: mklink /J Link Target mklink /J C:\\LinkToFolder C:\\Users\\Name\\OriginalFolder This links the 2 folders (link and your vst folder) and behave as one. The LinkToFolder should be inside C:\\Program Files\\VSTPlugins i.e. mklink /J C:\\Program Files\\VSTPlugins\\myplugins D:\\Plugins\\ Think of it like a shortcut of a folder but it will behave like a folder duplicate, while not taking any space. Here is an example: Right click on cmd and choose to run it as an administrator. 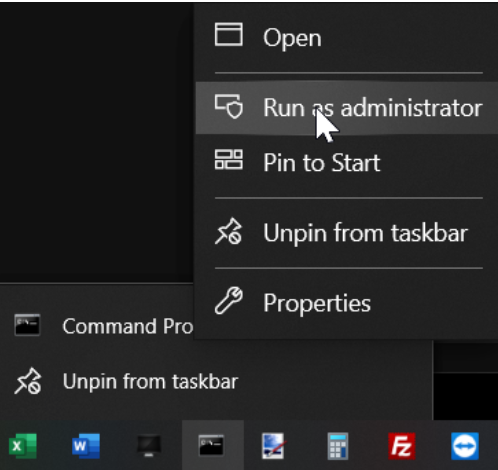 You want your plugins in D:\\Plugins\\ to appear in C:\\Program Files\\Steinberg\\VSTPlugins The syntax is: mklink /J Link Target Keep in mind that the Link folder must not exist. So, if the C:\\Program Files\\Steinberg\\VSTPlugins exists you will need to delete it and it will be recreated. Paste in CMD: mklink /J "C:\\Program Files\\Steinberg\\VSTPlugins" "D:\\Plugins\\" Now if you navigate to C:\\Program Files\\Steinberg\\VSTPlugins in Windows explorer you will see there all your plugin files that exist in D:\\Plugins\\ You can now scan with the MP Host and it will find all plugins that exist there. # 6. Windows - License not found **You can use the License Manager application (recommended) to create a new license. Download it from the user portal.** Alternatively, log on to the user portal and download the latest version of the MP Host plugin. Follow [this guide ](https://docs.google.com/presentation/d/1ID_cl5MIJIUqI522IW3qHU8w367s-BVqvCPpSYQ2-Q4/edit)to generate a license. > The **hardware.id** file is generated automatically when you run the MP Host plugin. This is the hardware id of your computer. > The **mph.license** file should be downloaded from the user portal. > Details on how to log in to the user portal have been emailed to you. The files should look like this in Windows file explorer: 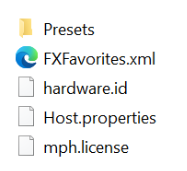 Do not rename any of the files above. --- ##### License not found due to non-latin characters If you believe you are generating the license correctly as shown in your initial setup guide, then the reason may be because of non-latin characters in your user name in Windows. If your home folder has non-latin characters like (Ç, Ş, Ğ, I, İ, Ö, Ü) or other non-latin characters for example C:\\Users\\Ümmet\\ This may prevent the MP Host from finding the license on your computer. Paste your user path [here](https://pages.cs.wisc.edu/~markm/ascii.html) to check if you get a warning  To solve the issue, please create a Windows account that contains only Latin characters. Please note that if there is a problem with the license, then it will not allow the hardware Controller to be connected to the MP Host. # 7. Windows - "Invalid mph.license" message If you get a message on the left bottom corner of the MP Host that the license is invalid it means that the mph.license file does not match the hardware of the computer you are using. You can use the License Manager application (recommended) to create a new license. Download it from the user portal. Alternatively, if you have copied the mph.license file from another computer [delete ](https://kb.mpmidi.com/books/mp-controller-documentation/page/3-mp-host-properties-and-config-files)both the mph.license and hardware.id files and run the MP Host in the DAW to create a new hardware.id file. To create a new hardware.id file, unload any instances of the MP Host plugin in your DAW and then load it. It will automatically create the hardware.id file.The hardware.id file is a digital signature of your computer and your mp controller combined, so it is passed to the server to generate a license.
Then, [**log on your account**](https://docs.google.com/presentation/d/11dFAhWMQkr65AkyxNweT92F7MG87MP08B30MgXvg7-o/edit?slide=id.g34cbf9b63e7_6_0#slide=id.g34cbf9b63e7_6_0) (sent via email when you purchased the MP Controller) and upload the hardware.id file to generate a new mph.license.The hardware.id and mph.license files should have these 2 exact names.
**Related articles:** [Activating the MP Controller on other computers](https://kb.mpmidi.com/books/mp-controller-documentation/page/21-activating-the-mp-controller-on-other-computers) [Get the mph.license from the user portal](https://kb.mpmidi.com/books/mp-controller-documentation/page/22-get-the-mphlicense-from-the-user-portal) # 8. Windows or Mac - C1-xMP1 does not show up in the device manager or System Report The C1-xMP1 module is a class compliant MIDI device and does not require software drivers on Windows and Mac. The MIDI port of the MP Controller should be connected with a USB-A port if possible. If you are connecting to a USB-A port directly (not via a USB hub) to the computer and C1-xMP1 still does not show up in the Windows Device Manager or Mac's System Report, you need to check the internal micro-USB cable that connects on the MIDI board.The MP Controller is meant to be rack mountable and there are bridge ports mounted on the enclosure of the unit connected to each module.
To get to that port, you need to unscrew the bottom cover. Open up the bottom cover by unscrewing the bottom screws. Disconnect the microUSB cable from the C1-xMP1 as shown below and connect it again. On Windows check the Device Manager [](https://kb.mpmidi.com/uploads/images/gallery/2025-08/GxHDRVWhXLYd9TQb-image.png) or the Mac's System Report under the USB tree.The Mac's System Report needs to be reopened to show newly connected devices. Alternatively you can open a terminal and paste this command ***system\_profiler SPUSBDataType | grep -i "C1-xMP1"*** If it is connected it will print: C1-xMP1. If not, it will not print anything. While on the terminal pressing the up arrow on the keyboard and enter will repeat the command[](https://kb.mpmidi.com/uploads/images/gallery/2025-08/7nvgaW23UXnFDdGK-screenshot-at-aug-07-08-29-13.png)
Disconnect by pulling gently the microUSB cable and connect it again. Check the Device Manager or System Report.  If it is still not showing in the System Report or Device Manager try the next step which is to replace the bridge port with a USB data cable. --- ##### Bypassing the internal USB bridge Port You can try to bypass the internal port of the C1-xMP1 and connect it directly from the MIDI board to the computer using a microUSB to USB-A **DATA** Cable like [this](https://www.amazon.de/-/en/Amazon-Basics-Micro-Cable-7T9MV4/dp/B07232M876).Please note that not all microUSB cables are data cables. Many are just charging cables and these will not work. Ensure you are using a data cable.
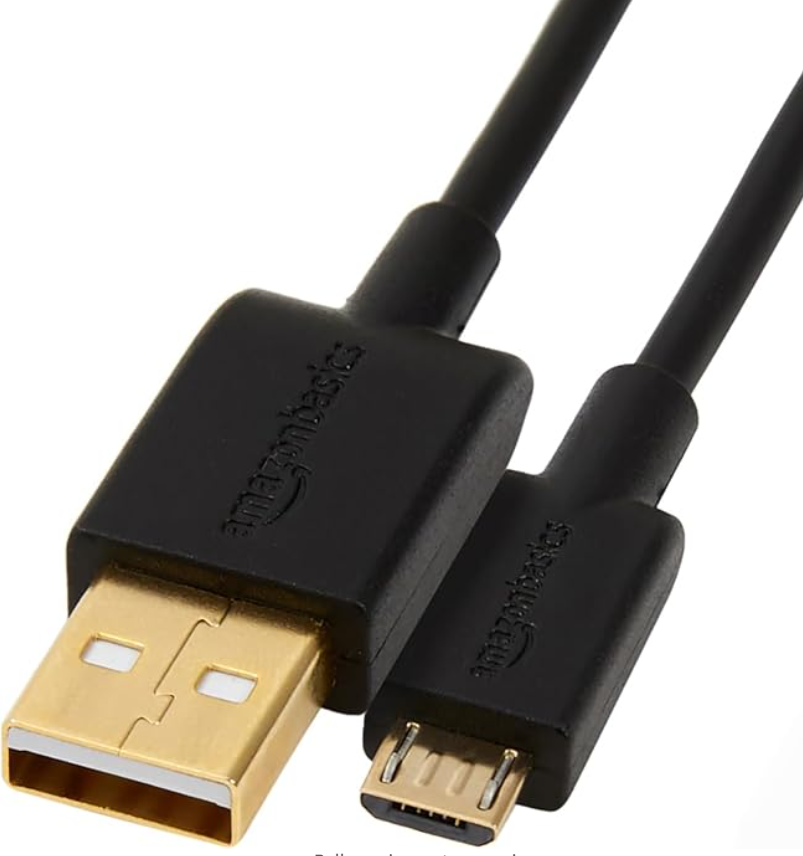 If these steps do not solve the issue, send us an email to advise further on how to proceed. # 9. Windows - The display does not power ON. (Black screen) If the display does **not** power ON at all [**see this article**](https://kb.mpmidi.com/books/mp-controller-documentation/page/8-display-does-not-power-on-mac-or-windows) # 10. Nahimic A-Volute software on the PC causes crashes and unexpected behavior If you have this on your computer, remove it immediately. Many sources report this as malware too. We have seen this recently on another user's computer and it was the cause of issues. New MSI motherboards (including Z890) ship with Realtek audio drivers bundled with Nahimic / A-Volute enhancements, even if the user never knowingly installed Nahimic. These modules **inject themselves into every audio process**, including DAWs and audio plugins/hosts. MP Host is an audio-real-time application, so these DLL injections can easily cause:There is no need to check the MIDI Studio if the C1-xMP1 does not show up in the System Report. If it is not listed in the System Report, it will definitely not be displayed in the MIDI Studio.
If the C1-xMP1 device **is listed** in the System Report but you still get the message "Controller not connected" then it is a software related issue. See step 2 of the troubleshooting steps below. If the device is listed and displays \[Safe Mode\] it is ok and it does not affect the function of the device.The Mac's System Report needs to be reopened to show newly connected devices. Alternatively, you can open a terminal and paste this command ***system\_profiler SPUSBDataType | grep -i "C1-xMP1"*** If it is connected it will print: C1-xMP1. If not, it will not print anything. While on the terminal pressing the up arrow on the keyboard and enter will repeat the command[](https://kb.mpmidi.com/uploads/images/gallery/2025-08/7nvgaW23UXnFDdGK-screenshot-at-aug-07-08-29-13.png)
---**IMPORTANT:** If you have UPDD installed and the C1-xMP1 is listed in the System Report but not found in the Mac MIDI Studio, it is possible that some setting/selection in UPDD is causing this. [Uninstall UPDD](https://kb.mpmidi.com/books/mp-controller-documentation/page/5-uninstalling-updd-from-the-mac) and reboot the Mac. Check the MIDI Studio if C1-xMP1 is listed and online Please note, UPDD does not need any hardware selection setting to be done manually. It should work **without** any manual configuration.
##### Steps to Troubleshoot 1. Check in the System Report that the C1-xMP1 shows up. (Not to be confused with MP Touch screen hardware) 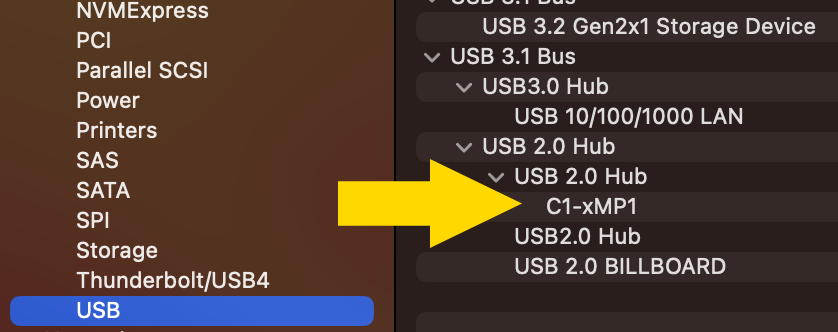 If it does not show up, there is a connection issue. Connect the cable provided directly from the MIDI port of the controller, to the computer’s USB A port (not USB-C port). If don't have a USB-A port of your Mac connect it via a USB-C docking station like [this](https://www.amazon.de/Docking-Station-Monitors-DisplayPort-Ethernet/dp/B0CT7M9MQ9) that has USB 2.0 and USB 3.0 ports. 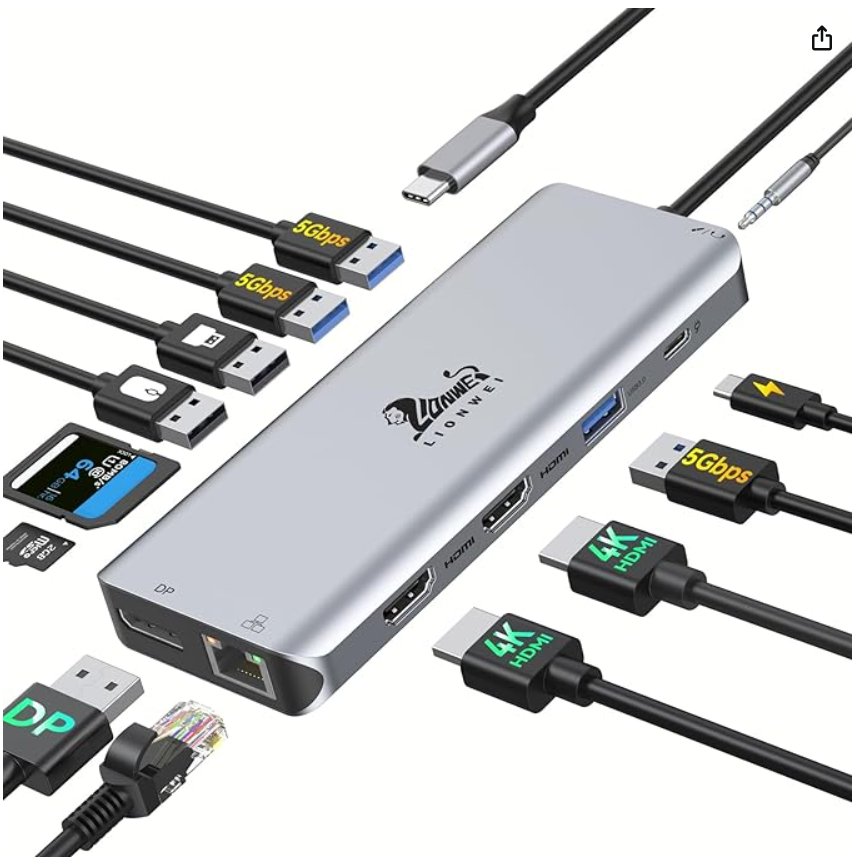If it still does **not** show up in the System Report, See [this article](https://kb.mpmidi.com/books/mp-controller-documentation/page/10-mac-c1-xmp1-not-showing-up-in-the-system-report)
2. If it **does show up** in the System Report, then make sure that it shows up and that it is active and online in MAC’s MIDI Studio. (Do not rename the C1-xMP1 in MIDI Studio on the Mac) as shown in the screenshot below. If you have more than one C1-xMP1, delete the additional one. 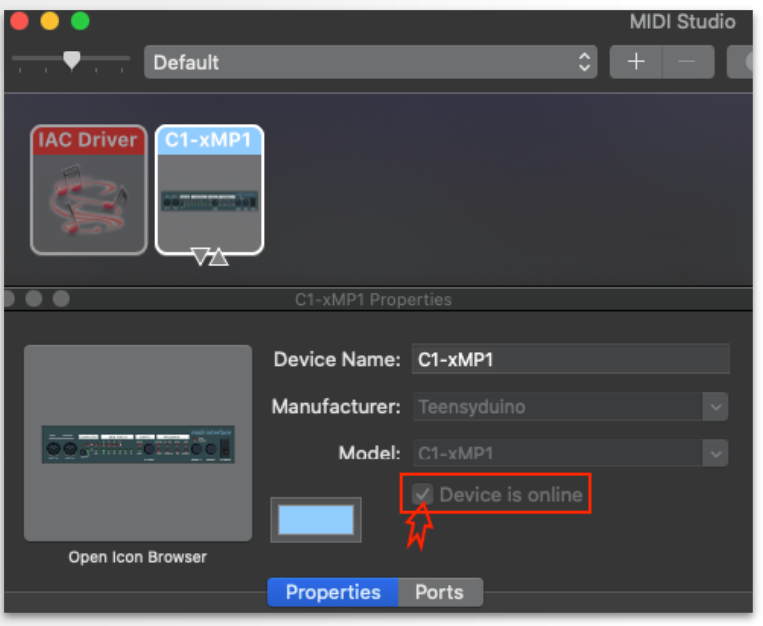 If the C1-xMP1 does not show up in the MIDI Studio, try Refresh MIDI Setup from the top bar menu option.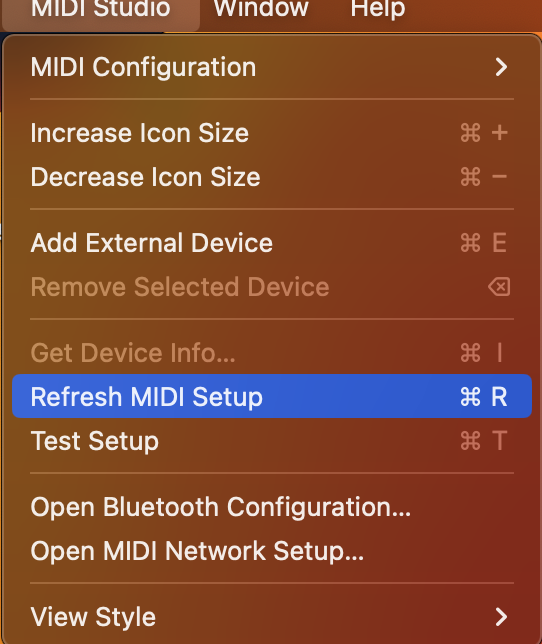 and try pressing the Rescan MIDI button  3. Disable the MIDI In/Out of the C1-xMP1 in the DAW as instructed [here](https://kb.mpmidi.com/books/mp-controller-documentation/page/2-daw-midi-settings). The controller should now be found by the MPH plugin shown on the left bottom of the MPH plugin window. ##### Logic Pro configurationIf you are using the Logic Pro Control Surface, it requires that the MIDI port for C1-xMP1 to be enabled under MIDI INPUTS in Logic. Therefore, enable it and Logic will still be able to use it. This is because macOS allows MIDI ports to be shared. See [here ](https://kb.mpmidi.com/books/mp-controller-documentation/page/16-blocking-c1-xmp1-midi-input-cc-messages-in-logic-pro)to disable the C1-xMP1 from sending MIDI CC directly to Logic. This way you allow the MIDI port to be used for the Control Surface but at the same time prevent it from sending unwanted MIDI CC messages to Logic directly.
If it does show up in the MIDI studio and you are in Logic Pro go to [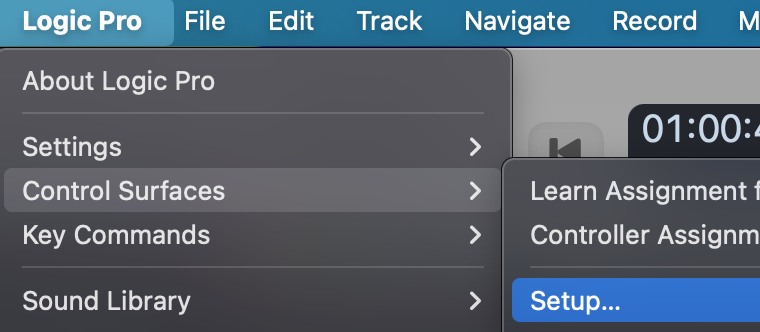](https://kb.mpmidi.com/uploads/images/gallery/2025-11/BW736TiCWSvNTFUx-image.png) and check that **no other control surface has the C1-xMP1 selected in its input/output port** (except the MP MIDI if you have the Logic Control Surface installed). If some other control surface does have C1-xMP1 MIDI ports selected, **deselect** it or delete the control surface and restart Logic Pro. [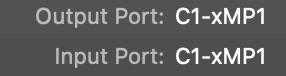](https://kb.mpmidi.com/uploads/images/gallery/2025-11/8zSji6bncGvLS7TI-image.png) # 2. Mac - License not Found The “License not found” will appear if the file **mph.license** and/or **hardware.id** files are missing from the [/MP/Host folder.](https://kb.mpmidi.com/books/mp-controller-documentation/page/4-show-preset-folder-go-to-the-mphost-properties-folder) Or if using a Mac OS older than MacOS Mojave. **You can use the License Manager application (recommended) to create a new license. Download it from the user portal.**If the license manager fails on the mac because of a permissions error such as "need permission to write files" you can paste the following in a terminal and enter your password, and press enter: *mkdir -p ~/Library/Application\\ Support/MP/Host* *sudo chown $(whoami) ~/Library/Application\\ Support/MP/Host* *sudo chmod -R 777 ~/Library/Application\\ Support/MP/Host*
Alternatively, log on to the user portal and download the latest version of the MP Host plugin. Follow [this guide ](https://docs.google.com/presentation/d/1ID_cl5MIJIUqI522IW3qHU8w367s-BVqvCPpSYQ2-Q4/edit)to generate a license. > The **hardware.id** file is generated automatically when you run the MP Host plugin. This is the hardware id of your computer. > The **mph.license** file should be downloaded from the user portal. > Details on how to log in to the user portal have been emailed to you. First, ensure you have both files in the MP Host folder as shown here: Do not rename the hardware.id and mph.license files. If the filenames are not exactly as shown above, you will get the error "License not found"
**Hardware.id file is not being copied to the Mac's Desktop** If you are using the MP Controller for the first time on a Mac and the **hardware.id** file is **not** being copied to your Desktop when you click on the STEP 1 button in the license registration, click on the *Open the MP Host Folder* button on the Licence Management window. It will open the folder in your Mac's Finder. [](https://kb.mpmidi.com/uploads/images/gallery/2025-09/rWt3JLSn1og8Usc8-image.png) Close the DAW. *Alternatively you can open the following folder in Finder. On the top menu of the Finder on your Mac, choose Go > Go to Folder and paste this path: **~/Library/Application\\ Support/MP/Host* Once the folder is open, check if the hardware.id file present in the MP Host folder. If it is not present, strict permissions by MacOS may be the issue. Paste the following in a terminal: **sudo chmod 777 ~/Library/Application\\ Support/MP/Host** It will ask for your password and then enter. *The terminal should not produce any output. If it produces a message then there may something wrong with the command provided. Take a screenshot of the message and send it to us via email.* Then open you DAW and load the MPH Single plugin and follow the steps to complete the license generation/verification process by clicking on Step 1 button. Additionally, it is a good practice to add the DAW in System Settings > Privacy and Security > Full Disk Access. [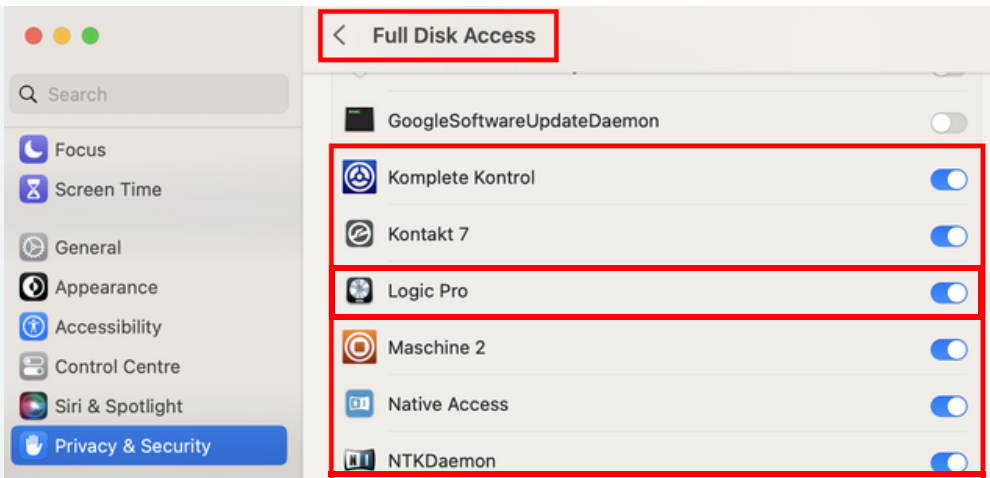](https://kb.mpmidi.com/uploads/images/gallery/2025-09/77QqRMEC7fnAAsjy-image.png) Note that without the mph.license file the MP Host plugin will not allow the hardware controller to be connected to the MP Host software and the encoders will not work.
# 3. Mac - Model 1A: Troubleshooting the Touch Function ##### UPDD needed for Mac OS Catalina and Onwards The touchscreen works as mouse input, therefore when you touch the screen it gets the mouse cursor. If you touch and drag, it behaves in the same way as clicking and dragging with the mouse. In Mac OSX Catalina 10.15.4, Apple replaced the way hardware interacts with the OS. It introduced the new Driverkit and replaced the traditional Kexts with Dexts. You can get the Mac OS software from [https://touch-base.com/controllerbyte](https://touch-base.com/controllerbyte) and you can also download a demo to try it prior to purchasing. There are 2 possibilities for why the touch screen is not working on the Mac (while video is being displayed and the monitor is ON): 1\. Is a software issue with the UPDD software on the Mac. (Usually this is due to permissions) OR 2\. A connection issue. To find out what is going on, first check under USB in the System Report: Multi-Touch by G2TSP (the touchscreen hardware. The C1-xMP1 is the MIDI Controller hardware. 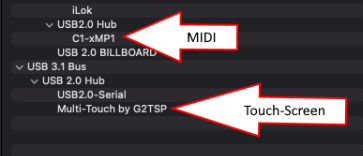 The two devices (G2TSP and C1x-MP1) work independently and are not related to each other. The C1-xMP1 does not need to be connected for the touch screen to work.This [test app](https://mpmidi.com/temp/test.zip) was created for convenience, it just detects the G2TSP touch hardware and displays it, just as it would on the System Report. Therefore, opening the System Report or the test app is the same.
>If your controller came with 2m cables, the best cable to use from the market is the 1m Amazon Basics Cable USB 3.1 Gen 2. Here are links for: [USA](https://www.amazon.com/dp/B01GGKYR2O), [UK](https://www.amazon.co.uk/AmazonBasics-Type-C-USB-Male-Cable/dp/B01GGKYS6E?th=1), [Germany](https://www.amazon.de/-/en/Amazon-Basics-Cable-Type-White/dp/B01GGKYS6E)
The best recommended connection method is using HDMI and the provided USB-C to USB-A cable directly connected on the Mac. (When the HDMI is disconnected the display goes to sleep in 3 seconds) If you see the G2TSP in the test app or system report, then run the [diagnostic](http://support.touch-base.com/Documentation/50453/Diagnostics-procedure) from Touch Base and email it to their support address. If you have it connected on the Mac with the 1m USB cable (USB-C or USB-A) and the Multi-Touch by G2TSP does not show up in the System Report (after you get a disconnection message from UPDD) then the next thing to check is the ports on the enclosure which may be causing the problem. These can be bypassed and connect directly on the LCD panel, however, to get to the port of the display the unit must be disassembled by removing the bottom cover. # 4. Mac - Model 1A+/2A : Troubleshooting the Touchscreen You need Mac OS Mojave or above for the touch function to work. UPDD does not have to be installed for the Mac OS to detect the Touchscreen hardware. First, we need to check if the Mac OS finds the Touch hardware. **Follow these steps:** 1\. Connect USB-C to USB-A cable directly to the Mac’s USB port without going through a hub or the Y-cable or any other middleware. 2\. Then connect the HDMI for video signal (if there is no video signal the monitor will power off). Alternatively to the hdmi, you can try a Thunderbolt (USB-C to USB-C) cable directly on the Mac, but the best method to test is with the provided USB-A cables. 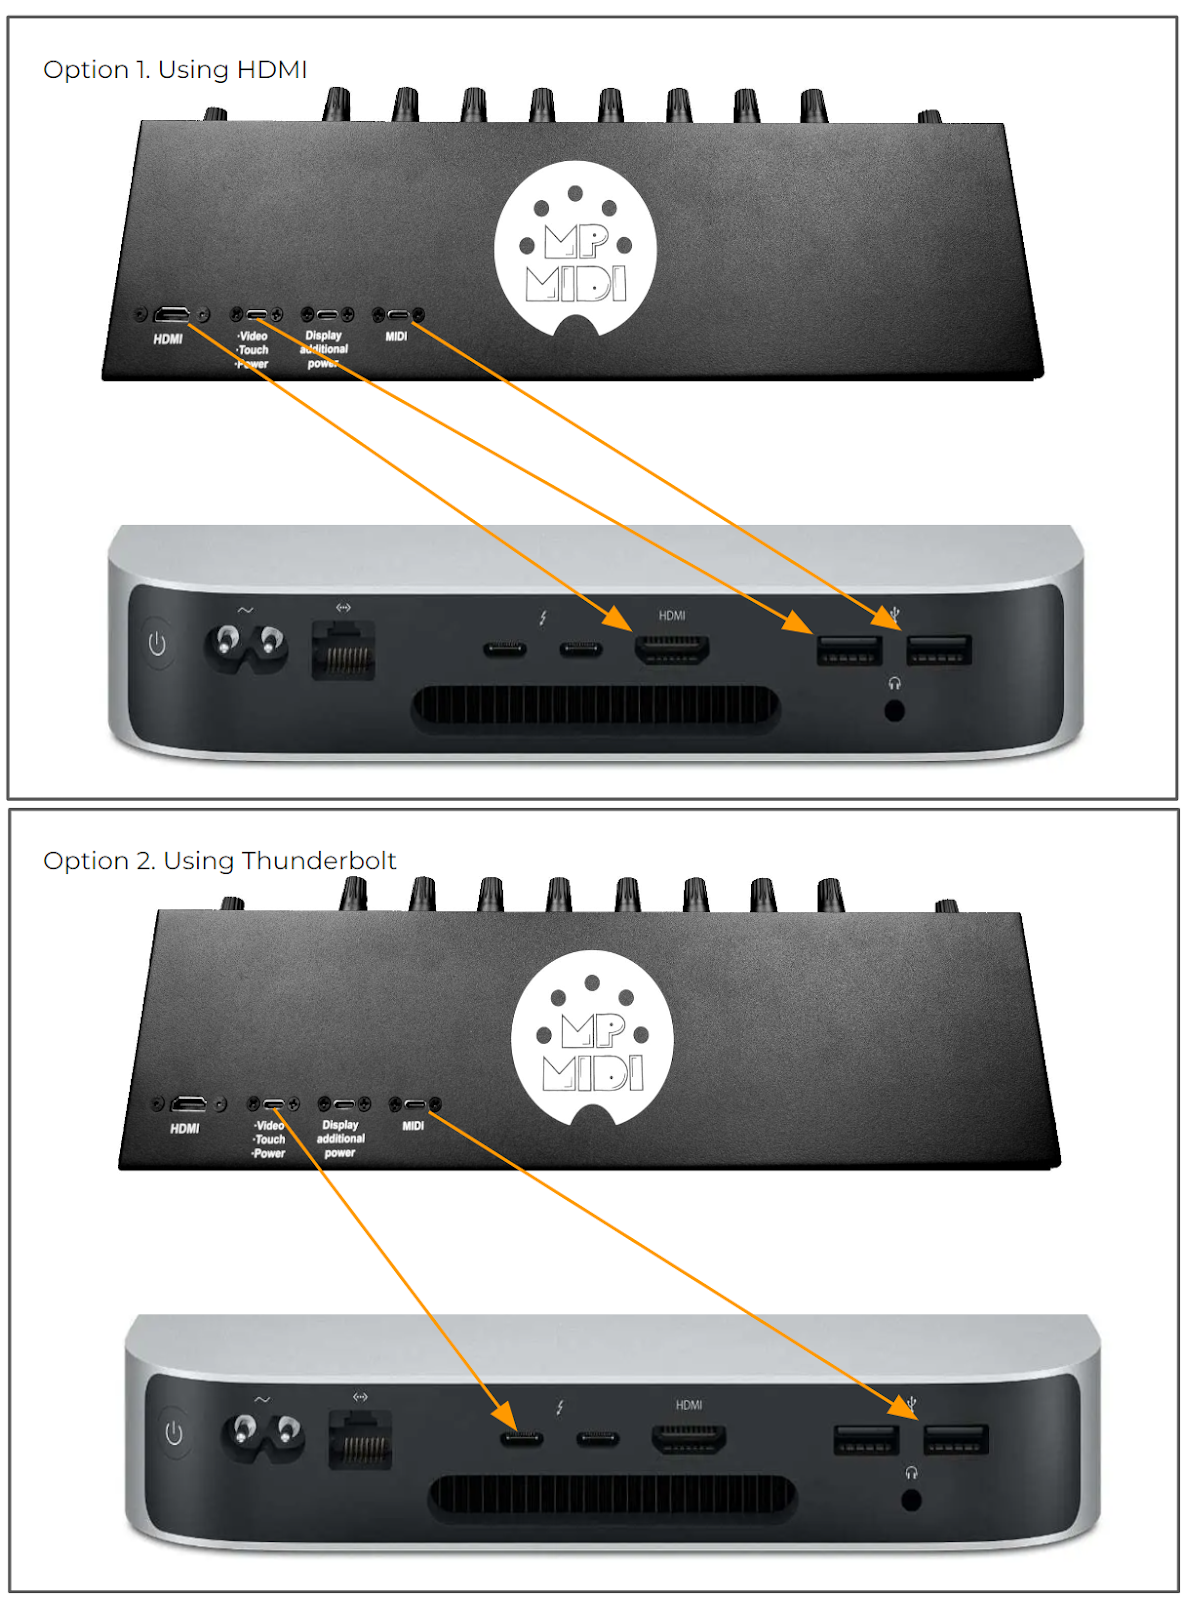 3\. Open the System Report of the Mac and check under the USB Tree, it should display \---------------------------------------------------------------- MP Touchscreen Manufacturer: MP Controller Touch Display \---------------------------------------------------------------- 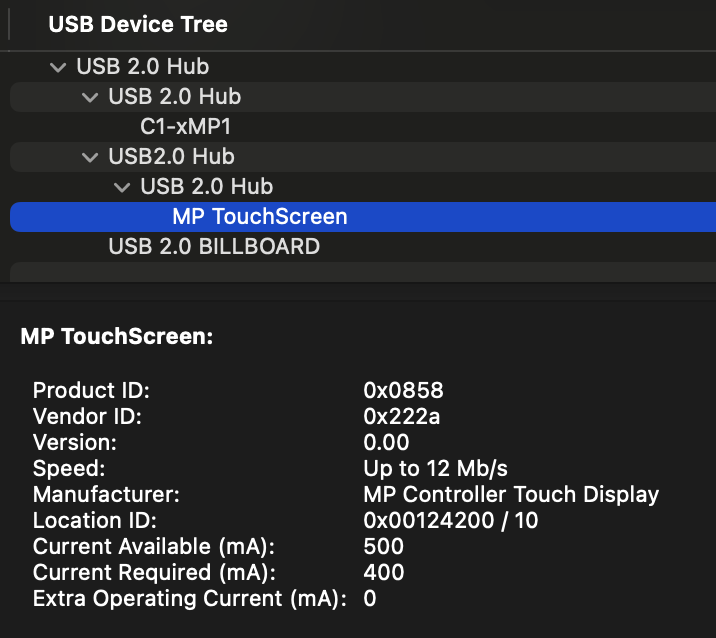 Alternatively to opening the System Report (needs to reopened every time you unplug a USB device), you can download '[this](http://mpmidi.com/utilities/Touch_Detect_Model_1A_Plus.zip)' small utility app (right click and click "save link as..." to download it) which when you run it, it shows if the MP Controller’s touch software is properly connected and found by Mac OS. Please note that the cursor of the mouse must be on the MP Controller for the touch function to work properly . If it located on your main monitor and when you touch the screen it will move the mouse in the main screen. UPDD transfers the touch on the MP Controller screen area automatically, regardless of the position of the mouse. For further information on UPDD see [this article](https://kb.mpmidi.com/books/mp-controller-documentation/page/1-using-updd-for-enhanced-touch-functionality-download-updd-download-updd) # 5. Mac - Model 1A+/2A - Display powers ON but goes to sleep - Power Saving and No Signal If the display powers on and shows the logo but short after powers off (sleep mode), this confirms that the display of the controller receives power, however - no video signal is being received from the computer or - the video signal is not of the correct resolution and/or refresh rate This is a standard behavior on all monitors connected to computers when they don't receive video signal.If the display restarts constantly, then the problem is not enough power provided to the MP Controller display port, see [this article](https://kb.mpmidi.com/books/mp-controller-documentation/page/7-display-restarts)
If the display does not power ON at all [see this article](https://kb.mpmidi.com/books/mp-controller-documentation/page/8-display-does-not-power-on-mac-or-windows) (no MP MIDI logo on startup)
 ##### Connection Options Connect the cable to the Display port (Video, Touch Power), by following one of the 2 connection options, - Thunderbolt: USB-C to USB-C or - HDMI: USB-A and HDMI. See the [connection diagrams](https://kb.mpmidi.com/books/mp-controller-documentation/page/4-mac-model-1a2a-troubleshooting-the-touchscreen) on the initial setup guide. 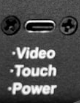 This port should always be connected, either with USB-C to USB-A when using HDMI, or USB-C to USB-C when using thunderbolt.Not all USB-C ports are the same on newer Macs. USB-C ports on some models placed in the front panel of the Mac are plain USB ports which do not provide a video signal. Ensure you are using Thunderbolt ports (usually at the back). For Apple Silicon Macs models made after 2022, to connect via Thunderbolt (For Video, Touch, Power) we recommend purchasing a 1m Thunderbolt 4 cable, for example [Amazon Basics USB-C to USB-C 4 Fast Charger Cable, 40 Gbps, 8K Video, 240W, USB-IF Cert, Thunderbolt 4/3 Compatible](https://www.amazon.com/Amazon-Basics-Charging-Thunderbolt-Compatible/dp/B0C93G2M83) (Note that, the MIDI port connection is still needed for MIDI communication)
Note: The "Display additional power" port will not transfer video signal when connected and it should only be used to provide additional power. If you connect only this port, the display of the controller will go into power saving and display the "No Signal" message
 ##### Changing the Refresh Rate If the display of the controller is shown after connection in the System Settings > Displays, the monitor frequency should be automatically set to 60Hz. 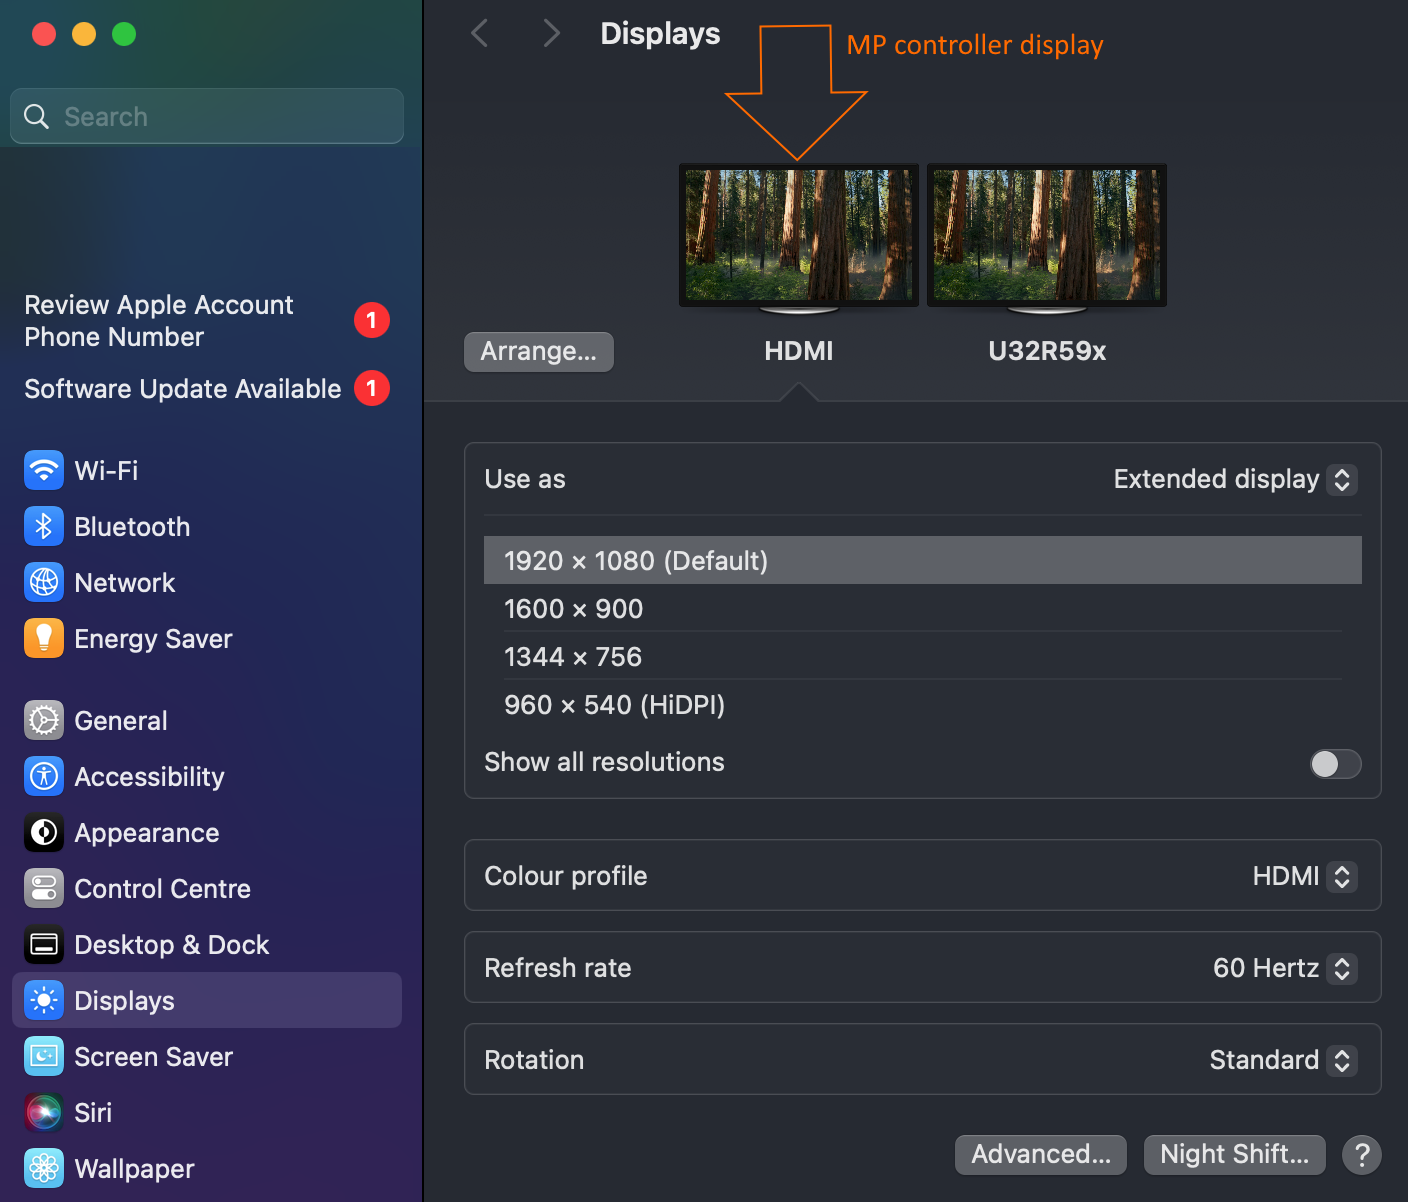 In some cases, the Mac OS may set it to 75Hz and this will cause the display of the MP Controller to go to sleep. The refresh rate settings on MacOS are hidden — In Display Settings, be sure to hold the Option key when clicking "Scaled" to see the refresh rate option.  See [video](https://www.youtube.com/watch?v=AFoT0H_6wsg) how to change the refresh rate on MacOS Sonoma The resolution of the monitor should be set to 1920 x 1080,. Set the monitor as external display in Displays on the Mac. (not mirror) If you are connecting the controller's display using USB-C thunderbolt and it does not show as an additional display in the System Settings > Displays, then it means the Mac OS cannot recognize the display. This may be due to a number of factors depending on Mac model and thunderbolt generation. In this case connect the display using HDMI as shown in the next section. Also see: MacOS 13.4 Ventura - External Monitor no longer detected. Worked until the update to 13.4 [https://discussions.apple.com/thread/254875167?sortBy=best](https://discussions.apple.com/thread/254875167?sortBy=best)  ##### Mac not able to provide video signal via Thunderbolt If using the USB-C Thunderbolt port on your Mac and it is unable to provide video signal to the MP Controller which consequentially the display goes to sleep, then connect it using HDMI and USB-A as shown below. If your Mac is unable to provide video to the display using USB-C thunderbolt, you may still be able to use USB-C to USB-C for touch/power and HDMI for video. If you don't have an HDMI port and USB ports available on your Mac, you should use a USB-C powered docking station. See some suggestions [here](https://kb.mpmidi.com/books/mp-controller-documentation/page/2-additional-hdmi-port-options-and-usb-c-docking-stations-and-usb-c-docking-stations) If you have multiple displays connected to your Mac, ensure that your Mac has the ability to provide video signal to the number of displays you have connected including the MP Controller. For example, the Mac Mini M1 can only use 2 displays. You can extend (add more) the number of displays on a Mac by using a [Wavlink USB adapter](https://kb.mpmidi.com/books/mp-controller-documentation/page/2-additional-hdmi-port-options-and-usb-c-docking-stations-and-usb-c-docking-stations). 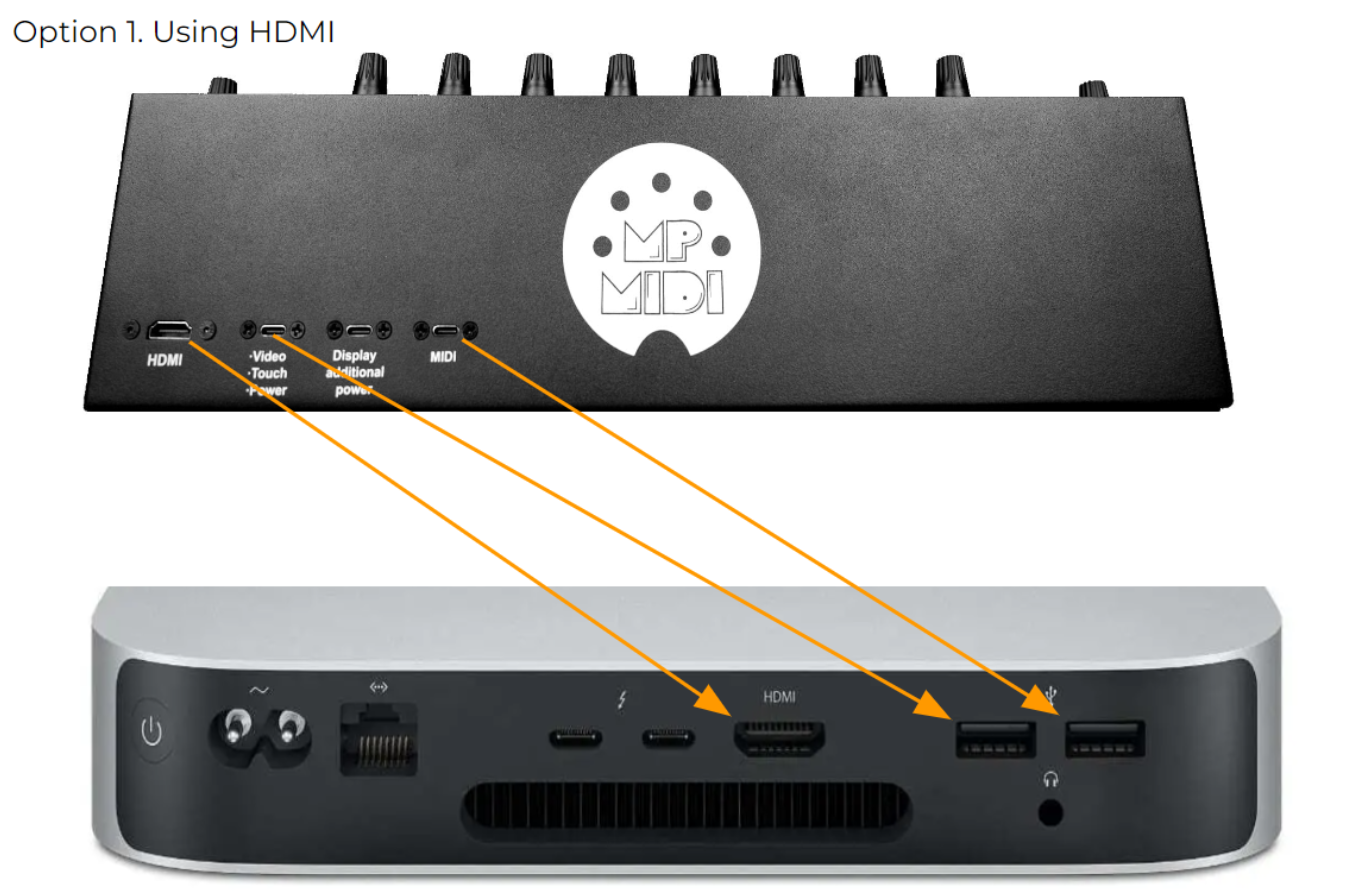  ##### Changing the video input on the display Although the input is selected automatically when detected (HDMI or Thunderbolt via USB-C), when you connect the Display port and the MP MIDI logo comes on, before it goes to Power Saving mode, use the remote control to select the correct input, HDMI or TYPE-C. 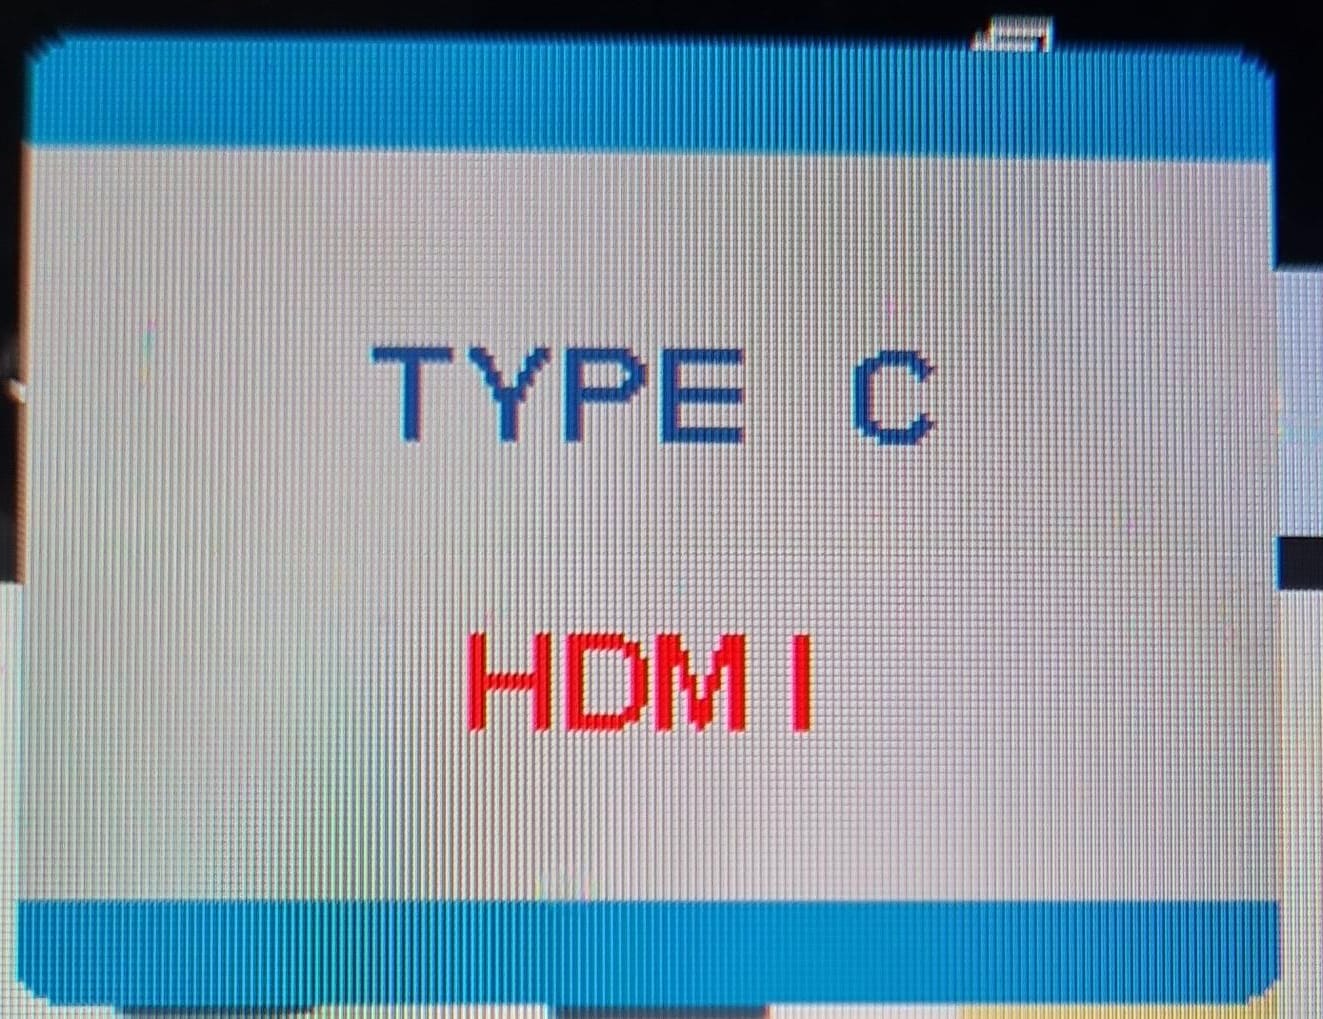 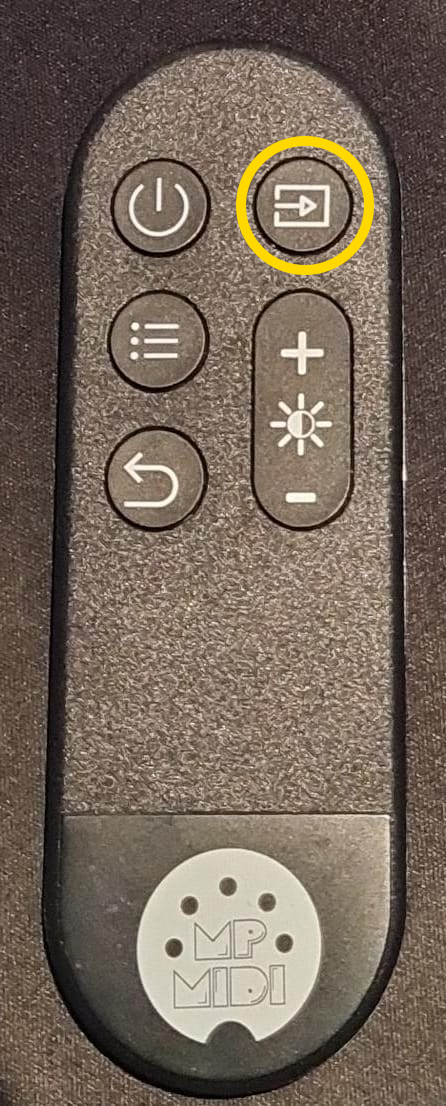 Note that the remote control must be pointed to the remote receiver on the controller. 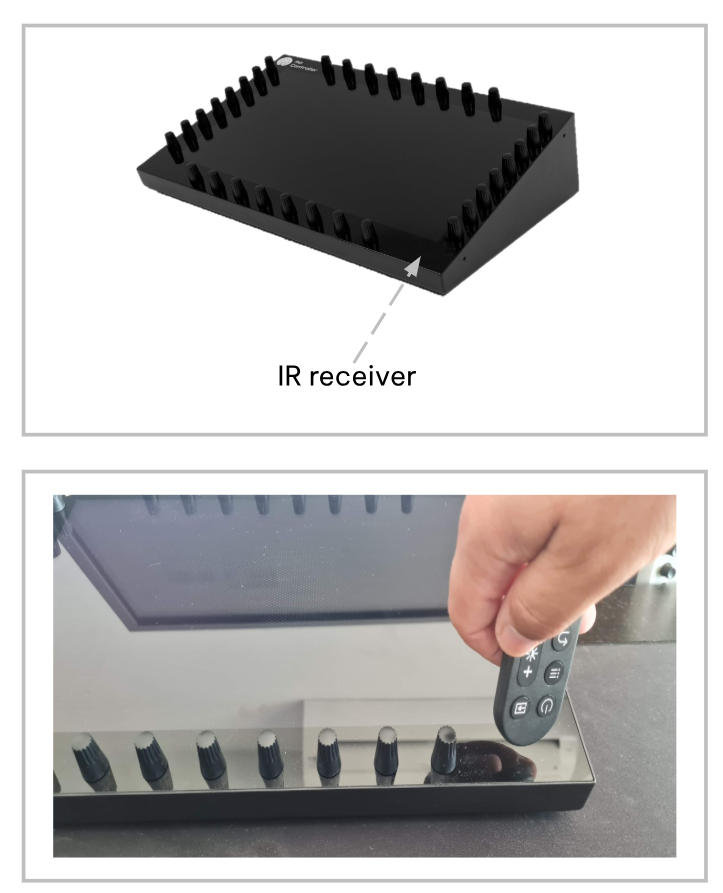 --- ##### ##### Using long cables when the computer is not close to the controllerscanning will read and display just the filenames at first, and fully scan a plugin once you choose to load/use the plugin
If the VST3 plugins are not shown in the MP Host list, navigate to the host.properties folder and rename it or delete it. Close any MP Host instances you have running and the DAW. Then reset the permissions on the VST3 folder by running in the Mac terminal:Plugins also may be removed from the plugin list (after you scan or try to try to load them once) if they are not universal binaries (Apple Silicon ARM and x86). You can find if a plugin is built for both architectures by running lipo -info PLUGIN\_PATH in a terminal
For example: *lipo -info /Library/Audio/Plug-Ins/
The hardware.id file is a digital signature of your computer and your mp controller combined, so it is passed to our user portal to generate a license.
Alternatively, if you have copied the **hardware.id** and/or the **mph.license** file from another computer (perhaps using the Mac Time Machine) [delete ](https://kb.mpmidi.com/books/mp-controller-documentation/page/3-mp-host-properties-and-config-files)both the **mph.license** and **hardware.id** files and run the MP Host in the DAW to create a new **hardware.id** file. Unload any instances of the MP Host and then load one MP Host in the DAW. It will create the hardware.id file automatically. Then, log on your [user portal](https://docs.google.com/presentation/d/11dFAhWMQkr65AkyxNweT92F7MG87MP08B30MgXvg7-o/edit?slide=id.g34cbf9b63e7_6_0#slide=id.g34cbf9b63e7_6_0) account (see email when you purchased the MP Controller) and upload the **hardware.id** file to generate a new **mph.license** and download it. Then place it in the /MP/Host folder as shown below:The **hardware.id** and **mph.license** files should have these 2 exact names.
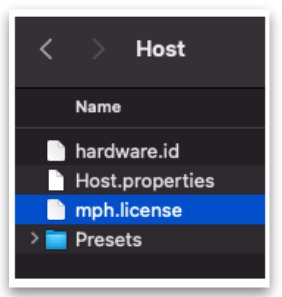 **Related articles:** [Activating the MP Controller on other computers](https://kb.mpmidi.com/books/mp-controller-documentation/page/21-activating-the-mp-controller-on-other-computers) [Get the mph.license from the user portal](https://kb.mpmidi.com/books/mp-controller-documentation/page/22-get-the-mphlicense-from-the-user-portal) # 10. Mac - C1-xMP1 not showing up in the System Report If you have tried the steps in this [article](https://kb.mpmidi.com/books/mp-controller-documentation/page/1-mac-controller-not-connected-message) and it did not work, try the following troubleshooting steps. The MIDI port of the MP Controller should be connected with a USB-A interface on the Mac and does not require any drivers to be installed as it is a USB MIDI class compliant device.**Optional:** If you have Windows computer available connect the MIDI port of the MP Controller directly on a USB port and check the device manager for C1-xMP1  If it does not show up in the Device Manager, proceed to the next step. If it shows up in the Device Manager, the problem could be with a connection method on the Mac and you can try the next step to eliminate any connectivity issues.
If you are connecting to a USB-A port directly to the Mac and C1-xMP1 still does not show up in the System Report, first check using another cable. **System Report > USB Tree** 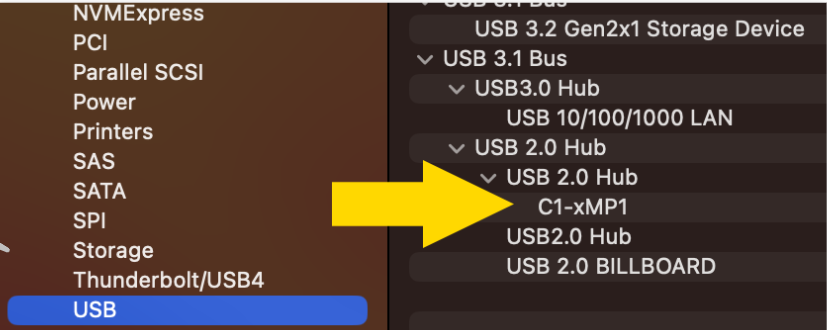The Mac's System Report needs to be reopened to show newly connected devices. Alternatively you can open a terminal and paste this command ***system\_profiler SPUSBDataType | grep -i "C1-xMP1"*** If it is connected it will print: C1-xMP1. If not, it will not print anything. While on the terminal pressing the up arrow on the keyboard and enter will repeat the command[](https://kb.mpmidi.com/uploads/images/gallery/2025-08/7nvgaW23UXnFDdGK-screenshot-at-aug-07-08-29-13.png)
If you are certain the problem is not with the cable you need to check the internal micro-USB bridge port cable that connects on the MIDI board.The MP controller is meant to be rack mountable so it has bridge ports from the enclosure to its modules. You can bypass these bridge ports.
- To get to that port, you need to unscrew the bottom cover. - Open up the bottom cover by unscrewing the bottom screws. - Disconnect by pulling gently the microUSB cable and connect it again. Do not bend the microUSB port on the board as it is sensitive and you run the risk of permanently damaging the board.  Close and reopen the System Report. If it is still not showing in the System Report try to bypass the internal microUSB to USB-C bridge port as described in the next step. ##### Bypassing the internal USB Port (Bridge port) The problem may be with the bridge port. The bridge port cable connects the MIDI board to the port mounted on the enclosure. You can try to bypass the bridge internal port of the C1-xMP1 and connect it directly using a microUSB to USB-A DATA cable as shown below. Please note that not all microUSB cables are data cables. Many are just charging cables and these will not work. Ensure you are using a data cable. Amazon Basics cables are recommended. If these steps do not solve the issue then the problem is with the MIDI board. Send us an email at support@mpmidi.com explaining in detail all the steps you have tried and we can advise further on how to proceed.
# 11. Apple could not verify the installer. How to open the installer. MacOS Gatekeeper preventing the opening of the .pkg installer because it was downloaded from the internet. This is a common issue on modern MacOS. Open System Settings > Privacy & Security. Scroll down to the section that says: **“MPH\_MAC\_INSTALLER-...pkg was blocked from use because it is not from an identified developer.”** Click “Allow Anyway.” Then, right-click the .pkg file and select “Open.” A new prompt will appear — this time with the option to “Open”. Click it. Optionally set the following setting in Privacy and Security so that you don't get the same prompt the next time you update: [](https://kb.mpmidi.com/uploads/images/gallery/2025-09/D7vN0c7q47PUm4aa-image.png) # 10. Control Surface for Ableton Live How to install and configure the control surface for Ableton Live # Ableton Control Surface (Ableton MPH) To control Ableton Live 11 and 12 native devices, the mixer and third party plugins we have developed a separate application called Ableton MPH. It exists as a standalone application and as VST3 and AU plugins. You can download the Ableton MPH from your account on the user portal. The description of the latest updates of Ableton MPH can be found [here](https://docs.google.com/document/d/1uT4Vr28OcYcnAOyCPlJg5VrFfy6Q2-sGQHq_Cdy5cnI/edit).**NEW version that features mixer control, [meters on the mixer](https://youtube.com/shorts/Qcx7XVERkhc) and automatic parameter mapping! ****New Release Candidate version:** v1.2-eee1642--H2026-04-16--B2026-04-16.** ****Current version:** v1.2-728c284--H2025-09-10--B2025-09-11 Mac Users: The latest version requires macOS 13.3 Ventura or higher. ** Here is a short [demo video](https://www.youtube.com/watch?v=eDySMNWmsnU). See more information [here](https://kb.mpmidi.com/books/mp-controller-documentation/page/controlling-the-mixer-in-ableton-live). **
**Prerequisites** The Ableton MPH application requires Ableton Live 11.3.4 or later version. Additionally, it requires that you have the MP Controller connected and the MPH **hardware.id and mph.license** files in place as described in the MP Host setup guide. You don't need to download or create another mph license. Please note that the Ableton MPH will not work if either file is missing or the controller is not connected.  ##### Tutorial VideosThe tutorial videos cover the basic functionality and knowhow, however this article is more comprehensive and up to date. [Part 1 ](https://youtu.be/_efALyldiLk)[Part 2 ](https://youtu.be/4ZiTV1nmH3g)[Part 3](https://youtu.be/B8VJd6E-bvA)
 ##### Standalone App vs Plugin You can run the Ableton MPH as a plugin in Ableton Live or the standalone application but not both. The advantage of running the plugin instead of the standalone is that when you click outside Ableton Live, it will not hide the already opened plugin windows. When using the plugin and save your A.L. project, it will load when you open your project, without the need of running the standalone application. Also, with the plugin version, the transfer of keyboard focus to the DAW is automatic.If you have a project with Ableton MPH loaded and you open another project with Ableton MPH loaded it will not be able to work. You need to close Ableton Live and open the project. When Ableton MPH is loaded it requires to quit Ableton in order to initialize the Ableton MPH control surface. The same applies if you remove the Ableton MPH plugin and load it again without quitting Ableton Live.
--- ##### Options The Ableton MPH has it's own [properties file](https://kb.mpmidi.com/books/mp-controller-documentation/page/4-show-preset-folder-go-to-the-mphost-properties-folder) and you can set its options via the right click menu by right clicking on the empty black area: [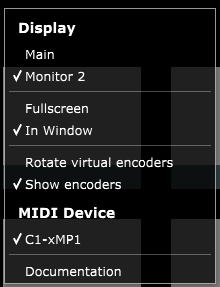](https://kb.mpmidi.com/uploads/images/gallery/2025-06/6VRAEwXZ9wM2CfIS-image.png)  ##### Plugin Panel Since the July 2024 update, he Ableton MPH plugin version has the Plugin Panel feature, which allows you to switch from the touch screen to the MP MIDI app and/or MP Host. This feature is not available in the standalone version of the Ableton MPH.  ##  #### Installation **Installation on Windows** Close Ableton Live if it is running and run the AbletonMPH installer. It installs the Control Surface script in: C:\\Users\\\[username\]\\Documents\\Ableton\\User Library\\Remote Scripts Ensure your Documents folder is not on OneDrive and accessible via the original path.Note that, OneDrive can interfere with application access to the Documents folder, depending on a few settings. If OneDrive is set to back up your Documents folder, it redirects it to something like: C:\\Users\\\[username\]\\OneDrive\\Documents
**Installation on the Mac** Run the latest version of the installer (download from the user portal).The Ableton MPH Control Surface files are installed [here](https://kb.mpmidi.com/books/mp-controller-documentation/page/ableton-control-surface-mac-installer-folders) The presets for Ableton native devices are installed in */Users/USER/Library/Application Support/MP/Host/AbletonLivePresets*
--- **Configuration for Windows and Mac** After installation open Ableton Live and it should list "AbletonMPH" under Control Surface. 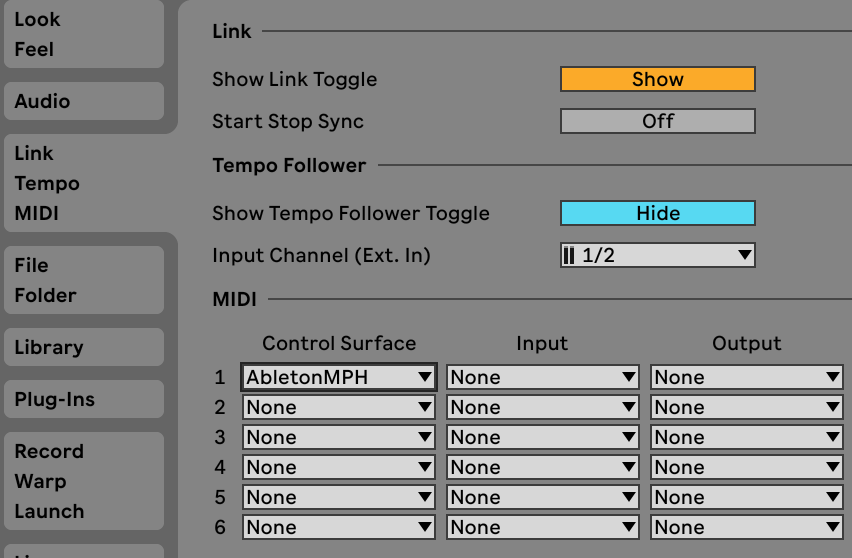 Select from the Ableton preferences Link/Tempo/MIDI section, the AbletonMPH as a Control Surface, as shown above and close and then re-open Ableton.**Mac Only:** If the AbletonMPH Control Surface does not show in the list, here is the official guide from Ableton on how to install control surfaces: [https://help.ableton.com/hc/en-us/articles/209072009-Installing-third-party-remote-scripts](https://help.ableton.com/hc/en-us/articles/209072009-Installing-third-party-remote-scripts) You can try adding Native Instrument's Machine control surface, download from **[here](https://help.ableton.com/hc/en-us/articles/209072009-Installing-third-party-remote-scripts)**, there are a few folders in the zip, you can choose one. Check if it does show in the list. If it does NOT show try setting the permissions to a lower level in the terminal by issuing the command: *sudo chmod -R 777 ~/Music/Ableton/User Library/Remote\\ Scripts* it will ask for your password and there should not be any output from the command. You may close the terminal. You can then try again to check if the control surface is listed. Additionally, you can give Ableton permission to access the hard disk: See [this article ](https://help.ableton.com/hc/en-us/articles/360003538120-How-to-enable-full-read-write-permissions)from Ableton. If it is still not listed, you can open a ticket with Ableton's support team to investigate the cause of the issue. Alternatively, you can place the inside the Ableton Live's app folder and by following [this guide](https://kb.mpmidi.com/books/mp-controller-documentation/page/setting-the-permissions-on-the-remote-script-folder-on-the-mac-optional) *Keep in mind that placing the control surface script inside the Ableton Live's app folder will cause it to be removed when you update Ableton. The app folder is replaced with the new version.*
Then, open the Ableton MPH standalone application: **Mac:** From the Applications folder. **Windows:** From the shortcut on the Desktop. Always open Ableton Live first and then the Ableton MPH standalone app so that it can connect onto Ableton Live. Click on the small icon (appears on the top bar of MacOS and in the Taskbar of Windows)  to open the main application window. By clicking again it will close the main window. Select the MP Controller's monitor by right clicking on the background area and select the last monitor in the list: 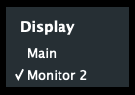 --- ##### Uninstallation **Mac:** Run the uninstaller and it will remove the remote script, the presets from the MP Host file, the standalone app and the VST3/AU plugins. **Windows:** Uninstaller coming soon. --- ##### Opening and Closing the Plugin Window (Mac & Windows) The April 22nd 2026 version of Ableton MPH has a plugin button that enables opening and closing the selected VST/AU plugin window. [](https://kb.mpmidi.com/uploads/images/gallery/2026-04/7A6tCbCpliRwR6lH-image.png) The Plugin Window button appears only when a third party plugin is selected (Blue Hand icon) in Ableton Live. **Mac Users:** When you run the standalone Ableton MPH app it will ask for Accessibility Permissions. The plugin version of Ableton MPH requires Ableton Live to have Accessibility permissions under Privacy & Security [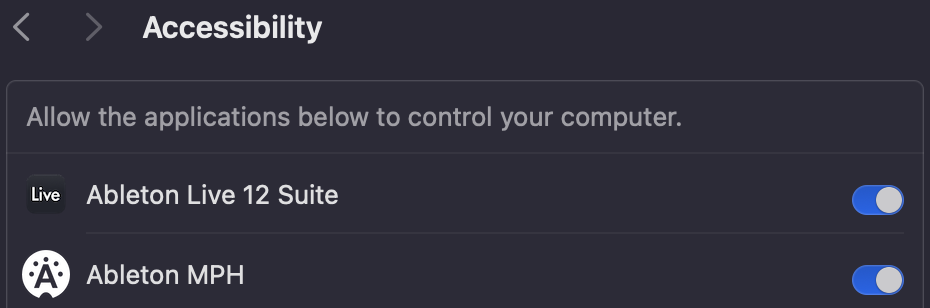](https://kb.mpmidi.com/uploads/images/gallery/2026-04/0k3aMnUOaOolTxsz-image.png) --- Right click on the icon  to display the main menu.  After the initial configuration you can use the Ableton MPH plugin instead of the standalone application, which will open automatically when you open an Ableton project. You must have only one instance of the Ableton MPH plugin loaded in a project.  ##### Track names As you probably noticed, Ableton Live automatically places a # at the beginning of each track name.  This # instructs Ableton Live to assign a track number. You must not remove the # because this is used to identify the track index and display it on the Ableton MPH. If you remove the # or write the number manually, your track may not be included in the Ableton MPH and it will not be able to identify and control the devices. All tracks must being with # for the application to work properly.If you are using the Plugin Panel, as of 21-04-2026, Ableton does not send to the VST/AU plugins the updated track name when reordering (changing the position of a track). To get the correct track name in the Plugin Panel of a track that was moved, you can type in the name in the small window of the MP Host. Alternatively, you can reload the project in Live.
 ##### Default Presets The application comes with presets for each Ableton native device. These presets are installed in the MP Host folder under AbletonLivePresets/Default and are loaded automatically every time you select a device in Ableton Live or by selecting a device in Ableton MPH. The Ableton MPH will load the preset.xml based on its name by matching it to the device type selected. For example if you have selected the Delay, then it will automatically load the Delay.xml preset. The presets do not store parameter values. They only store references to controlling the parameters. Thus the values will be taken instantly from the selected device in Ableton Live. Below, you will find the section on how to link and save your own presets.  ##### Working with the MP Host and the Ableton MPH The Ableton MPH will be closed (not quit) when clicking on Control and Display of the MP Single Host or when clicking on the slot display area of the MP Multi Host. This makes it easy to work with both systems in the same DAW project. If using the MP Multi Host, you can switch between them using the Plugin Panel if using the MP Multihost and the AbletonMPH plugin. 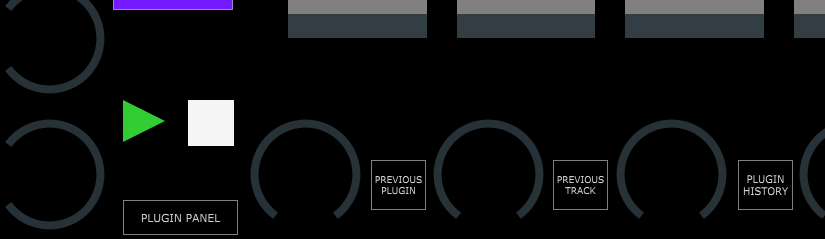  ##### Screens and Selecting a device to control There are 2 screens for device/plugin control in the Ableton MPH: 1\. Select Device, which lists the devices in a track and also allow you to navigate to the next and previous track. If a device is a group (Rack) it will list it on a new line, along with the devices inside the group.  2\. The device control screen, which carries 32 encoders and 32 buttons. There are 4 pages, thus there are 128 encoders and 128 buttons available to control a device. On the controller screen you will see 4 different names: The first name is the name of the device type, the second name after || is the name of the preset loaded, the third is the name of the track and last after > is the name of the Ableton device preset. Changing the Ableton device preset will change on the Ableton MPH as well:  There are 2 ways of selecting a device. By default the Auto/Manual button is set to Auto. This option will automatically control the selected device in Ableton Live. Any device you select in Ableton Live will cause the Ableton MPH to display the screen that controls that selected device. The second option is by setting it Manual and manually selecting the device in Ableton MPH. Click on Select Device and the devices of the track selected will be listed as buttons. Then selected the device you want to control. You can still navigate to Select Device even if the Auto/Manual button is set to Auto. Note that by selecting a track in the Ableton MPH, will also select the track in Ableton Live.  ##### Navigating tracks from the Device Selection screen The previous/next track buttons will display the devices of the track and switch track on Ableton Live. To go to the selected device in the track, click on "Go to selected device".   ##### Controlling the selected device in Ableton, from the Device Control screen This button will only show up when in Manual Mode. The "Go to selected device" button will take you to the selected device in Ableton Live. 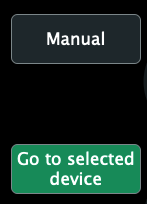 The button for setting Manual/Auto shows up in the Device Control screen only. If you are controlling another device than the selected one in Ableton Live, you can also click on the "Go to selected device" button in Ableton MPH to control the currently selected device in Ableton Live.  ##### Navigating tracks from the Device Control screen These buttons allow you to navigate to the previous or next track.  Whether you are in Auto or Manual mode it will still take you to the selected device when switching tracks from the Device Control screen. The buttons work in Round Robin mode by default.  ##### Navigating devices from the Device Control screen These buttons will navigate to the next and previous device in a track. They work in Round Robin mode by default.   ##### Navigating Tracks from Ableton Live via mouse or keyboard When switching tracks in Ableton Live (with mouse or keyboard) the Ableton MPH will follow the track switches. If you are in the Device Control screen, going to a new track (with mouse or keyboard in Ableton Live) will automatically take you to the selected device of the track, if there is a device on that selected track. If there is no device on the selected track, then Ableton MPH will stay at the previously selected device. If you are in the Device Selection screen and you are changing tracks (with mouse and keyboard in Ableton Live) it will follow Ableton Live and stay in the Device Selection screen. If the selected track has no device, it will show no device buttons to select.  ##### Device Parameter Range Each device parameter from Ableton Live returns/accepts a value from 0 to 100, regardless on what is being displayed on the Ableton Live device. Therefore, the buttons and encoders operate within this range. This is important to keep in mind as you will see in the next section Button Options.  ##### Encoder Options The encoder options offer the same options as in the MPH. For all the options see [here](https://kb.mpmidi.com/books/mp-controller-documentation/page/11-encoder-options)  ##### Button Options Each button displays the current value (0 to 100) on the upper right corner and it also displays the name of the parameter it's controlling. 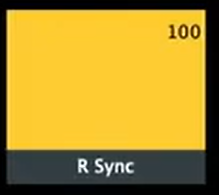 Double right click on the bottom area of the button to rename the parameter. Right click on a button and you will see the following menu appear. 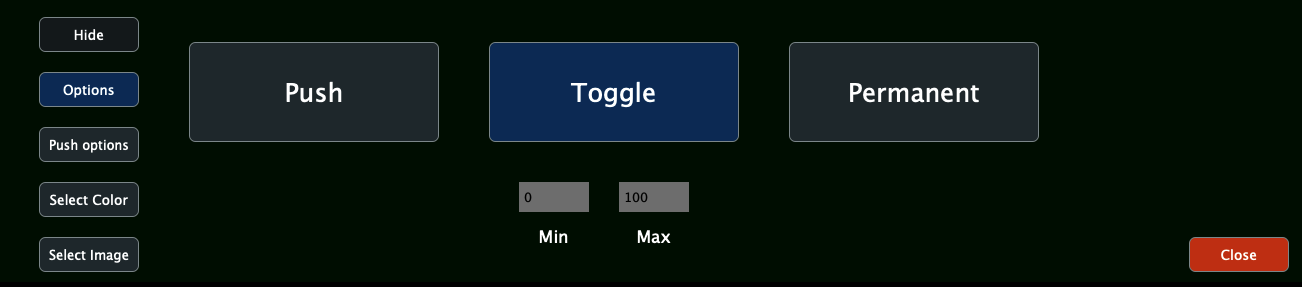 - Show/Hide: shows and hides the selected button. - Options: displays the 3 options to select the button type. - Push Options: displays the options when the selected button type is Push. - Select Color: displays 2 color palettes to select button colors for the pressed and non pressed state. - Select Image: Select an image for the button. - Close: closes the menu. While you have the button options menu open, you may right click on another button and it will show the options of that button. **Button Types** Push (default) - This is a momentary button type that when released will return to the non-pressed state. Toggle - This is a permanent type button that when pressed again will go to the non-pressed state. Permanent - This is a permanent type that can only be pressed once. You can set multiple Permanent type buttons on the same parameter to set a specific target value on the controlled parameter. When other Permanent type buttons are pressed will cause the rest of the Permanent values to change state to not pressed. This is particularly useful when you want to mimic the behavior of buttons for example in the Delay 16ths parameter. Choosing one button, causes the others to reset to a non-pressed state. 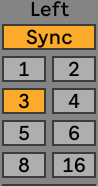 Toggle and Permanent Button Range The default Toggle button type range is 0 for minimum and 100 for maximum. However, when linking a parameter the Toggle max value will be set automatically to the value received from Ableton Live. For example, linking the Delay mode from the Delay device: 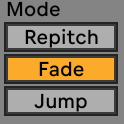 Clicking on the first option, Repitch will transmit the value 0. Clicking on Fade, will transmit the value 50. Clicking on Jump, will transmit the value 100. Therefore, setting the button Type to Toggle, sets the value to 50 which is the value transmitted when clicked on Fade. 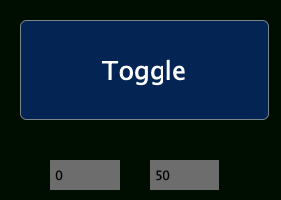 **Push Options**  Go to specific value on release - This option will set the parameter to a specific value when the button is released. This option is not available when selecting either of the following 2 options, however it is available to be selected along with the last 2 options. On every press increment - This option on every press of the button will increase the value by the value set in the box. On every press decrement - This option on every press of the button will decrese the value by the value set in the box. Increment every (ms) - This option increase the value of the parameter when the button is kept pressed every miliseconds set. The value of increment is taken from the box set on the option "On every press increment". Decrement every (ms) - This option decreases the value of the parameter when the button is kept pressed every miliseconds set. The value of increment is taken from the box set on the option "On every press decrement". Round Robin - This option affects all push options. It will cause the buttons to loop through when reaching 0 or 100.  ##### Images on Buttons You can select an image to be displayed on each button via the "Select Image" option on the menu. These can be png or jpg image files. The size does not matter but to preserve the ratio of the original image choose an image that is square. The image is converted automatically to a smaller image and copied in the AbletonLivePresets folder. You can have a color and an image set on a button. If you use a png image with transparency then the colors you have set for pressed/unpressed states will be visible. The images are set with partial opacity so the colors set on the button are still visible. You can get png icon images for free from many sites. You can use the "Select Image" option and then Remove Image to remove an image from a button. 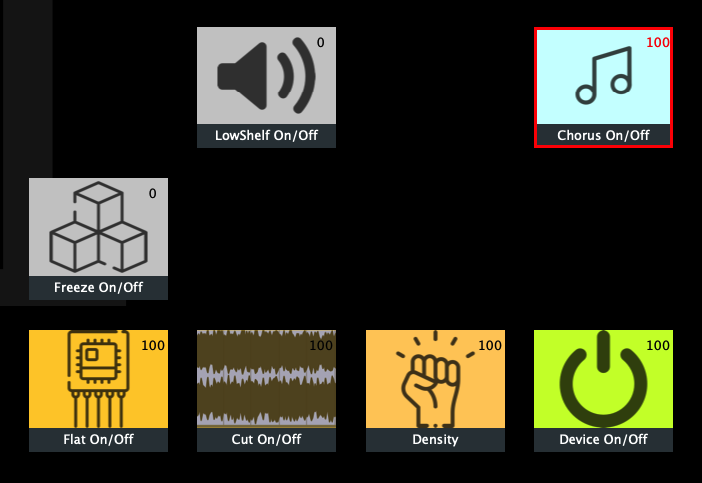  ##### Controlling the Mixer of Ableton Live In the update of June 2025 of Ableton MPH we introduced a new page to control the mixer of Ableton Live. Here is a short [demo video](https://www.youtube.com/watch?v=eDySMNWmsnU). See more information [here](https://kb.mpmidi.com/books/mp-controller-documentation/page/controlling-the-mixer-in-ableton-live). --- ##### Automatic Parameter Linking to Encoders In the June 2025 update, the Ableton MPH has the ability to link parameters of Ableton devices and plugins automatically to encoders. There are 2 types of plugins. Those which report all their parameters at once to Ableton (or any DAW) and those which report parameters on demand. When you expand a plugin view in Ableton you will see the reported parameters and these will be automatically linked to encoders. [](https://kb.mpmidi.com/uploads/images/gallery/2025-06/oABWeqiuvhBDUaPz-image.png) When the plugin does not report the parameters, in the case of Fabfilter Pro Q for example, to reveal the parameters, click on Configure and add the bands in Pro Q you want to link. Moving/changing these parameters will appear under Configure (the same process you do when you want to automate parameters). The Ableton MPH receives the notification from Ableton Live and links these parameters to encoders. [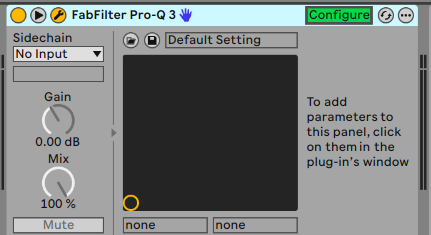](https://kb.mpmidi.com/uploads/images/gallery/2025-06/fk7HNA7LCSBaUgCa-image.png) [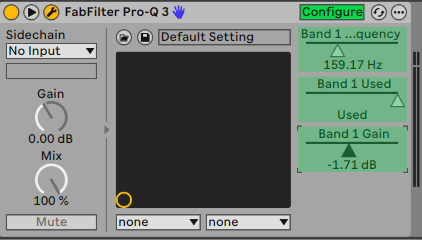](https://kb.mpmidi.com/uploads/images/gallery/2025-06/dTOW3o0m034uFpI5-image.png) Right click on the top part of the device and choose to group the device (place it in a rack). [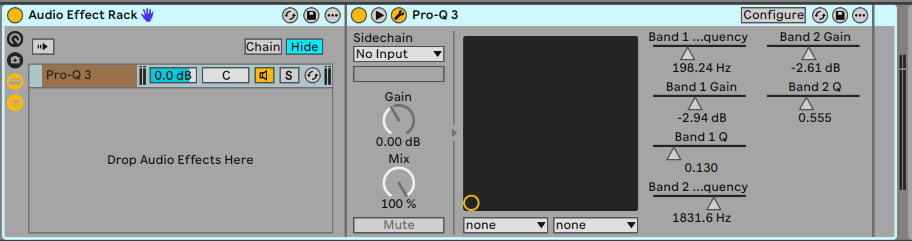](https://kb.mpmidi.com/uploads/images/gallery/2025-06/zXPOBz4fHxJ6FjOM-image.png) Save the rack by clicking on the Save icon [](https://kb.mpmidi.com/uploads/images/gallery/2025-06/9vLN17xDrV9KXZc5-image.png) and save it as the name you want for the plugin. In this case, we saved it as FF Pro Q4.adg in the User Library of Ableton. [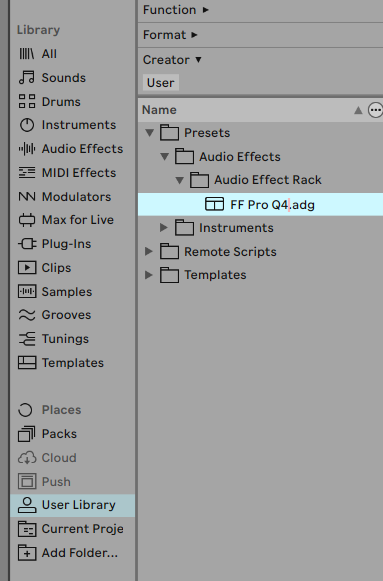](https://kb.mpmidi.com/uploads/images/gallery/2025-06/lDCO2M72ur9nsrnN-image.png) You can double click or drag this preset to any track and use it. You can also add it to your Favorites in Ableton for quicker access. The reason behind this is that when a plugin is in rack (grouped) it retains the configured parameters. If it is not in a rack, every time you add a new instance of plugins like the FF Pro Q, you have to use Configure to add the parameters.If there is no preset named exactly as the device/plugin (as it appears in Ableton Live) then the Ableton MPH will automatically link these parameters. This applies to Ableton Live devices and plugins (instruments and effects).
The coloring of encoders occurs by grouping the parameters according how these are reported by the plugin and by name. If a group does not have enough encoders to be linked, it will be linked on the next page of the Ableton MPH. --- ##### Linking Parameters Manually There are 2 methods to link parameters: **1. The LINK button** To link one parameter, click on the LINK Button. Then, click or move a parameter on a device in Ableton. If the parameter you are trying to link on the Ableton device consists of multiple buttons then click on one button that is not selected. If the parameter you are trying to link on the Ableton device is a variable (circle) parameter then move it a bit. The change in value will transmit the signal to the Ableton MPH. Then click on a button or encoder on the Ableton MPH. The parameter is now linked. (Note that there are certain parameters on a few devices in Ableton Live that cannot be linked because Ableton has not implemented these in their API. Thus, we haven't been able to link those parameters.) **2. The LINK MULTIPLE button** To link multiple parameters, click on the LINK MULTIPLE button. It will open an empty list column on Ableton MPH. Then, click or move a parameter on a device in Ableton. The change in value will transmit the signal to the Ableton MPH and list the parameter name in the column list. Keep on moving or clicking on Ableton device parameters and these will be added to the list. Note that when linking Encoders you can assign colors, however when linking buttons you can assign pressed/non-pressed state colors later after you finish linking the parameters, by right clicking on the buttons via the button options menu. You can link multiple buttons for the same parameter on the same page or a different page. Linking a second button on the same parameter will cause the button type to become the same type as the first button you have linked. --- **Unlinking Parameters** To unlink a parameter, click on the UNLINK button and then click on the encoder or button to remove the mapping. You can click on the next encoders you want to unlink and press the blinking Unlink button to exit the unlink mode.  ##### Opening and Saving your own presets You can link and create your own presets. If you place these presets in the default folder and are named using the same name as the presets provided then these will be loaded automatically every time you select a device. Alternatively, you can load these presets using the Open button. To start linking on an empty device control page move the default preset of the device you want to link outside the default folder. Then, select the device and you will see that no parameter is linked. The Save button is red. Begin linking parameters to your linking and hit Save when done. This will save it as a default preset for that device. If you don't want this to be the default preset, then move it outside the default folder and move the original preset in the default folder.  ##### Autosaved presets in the Temp folder The Ableton MPH saves temporarily presets while you are working in the temp folder. If for some reason the application is abruptly closed prior saving or you switch a screen without saving, then you can move that preset from the temp folder in the default folder and reopen Ableton MPH. Your linked parameters will be there where you left off.  ##### Controlling third party (AU/VST2/VST3) plugins Besides Ableton native devices, Ableton MPH can control the configured parameters of third party plugins (AU/VST2/VST3). The parameters must be configured first in Ableton Live in the same way you configure them for automation. Unlike the MP Host, the third party plugin will not be automatically displayed on the MP Controller's screen but it will retain its original position. Note that when pushing/clicking buttons on the Ableton MPH will cause the plugins window to be hidden and this is because Ableton hides plugin windows when clicking outside Ableton. If you are trying to control plugins that do not automatically report all of their parameters to Ableton when first loaded, then you will not be able to control those plugins. It's preferable that you use the MP Host to control these devices. Most plugins do report their parameters but there some that still do not report them. The reason that will not be able to control these devices is because the next time you load that plugin the parameters will be missing (and you will have to click the Configure button in Ableton to reconfigure all the parameters. The parameters will need to have the added one by one in the same order as when saved in the AbletonMPH preset.  ##### Learn from Encoder to control multiple encoders from a single hardware encoder This option allows you to link one hardware encoder to other software encoders and control multiple encoders with one hardware encoder. This is the same functionality as on the MP Host plugin. Click on the LEARN FROM ENCODER button and then click on an encoder, other than the one you want to use for control. Then move the hardware encoder. The hardware encoder now controls both software encoders. In the same way you can link more encoders. ###  ##### High Resolution Button The Hi Res button located on the bottom right of the big window allows you to temporarily select a higher resolution factor for the encoders. The right button allows the selection of the factor from 2 to 10 and the left button enables/disables the function. This setting is saved in the MPH xml presets.  ##### Chains in racks Note that Ableton Live does not report Chains in racks as devices, so these cannot be controlled with the controller. However, the devices inside Chains can be detected and controlled.  ##### Moving Devices on a track The Ableton MPH controls the devices by their index. This index is the order of devices in Ableton Live on a track. Therefore, when you are in Manual mode (for selecting a device) and you move a device (chan and at the same time you are controlling that device (you have it open on the MP Controller), you will notice that the device will be replaced by the device that is now at the position (index) of the previous device. For example, you have the Delay and then EQ8 devices on a track. You are controlling the Delay device. You drag the EQ8 before the Delay. Now the MP Controller displays the EQ8 instead of the Delay. However, if you have the Auto option selected, then it will automatically go to the selected Device, which is Delay.  ##### UPDD Configuration for holding down buttons This configuration enables buttons that are held down for some time to increment/decrement values. 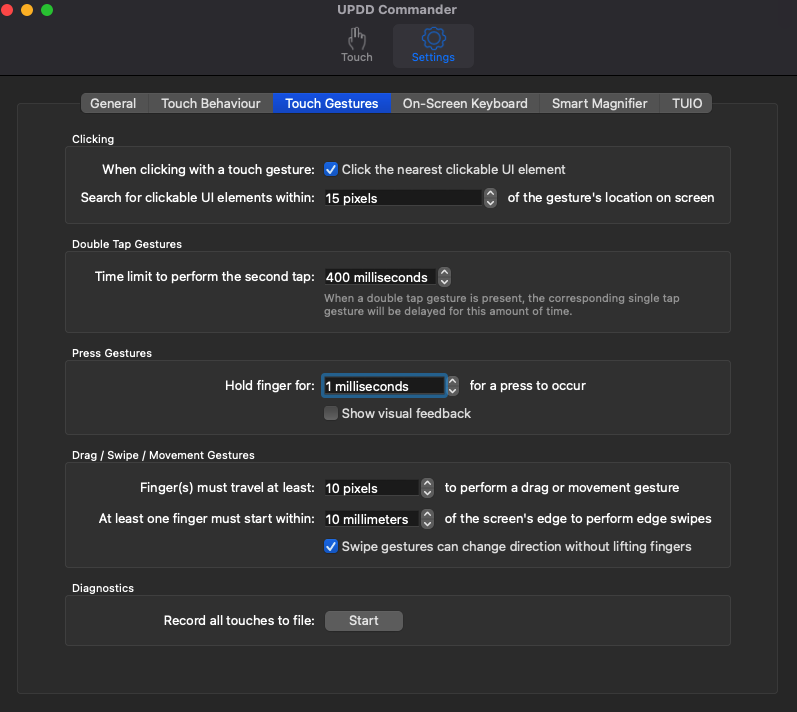 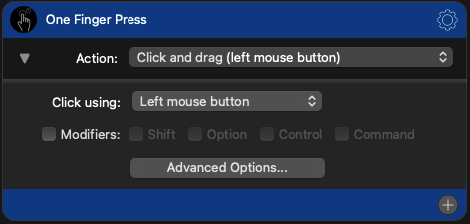 --- ##### Troubleshooting communication between Live and AbletonMPH Run first Ableton Live and then the Ableton MPH Standalone app so that it can connect to Ableton Live. Check first that the AbletonMPH shows in the Control Surfaces in Ableton in the beginning of this guide. Create a New Live set from Ableton Live's File menu and you will see this momentarily at the bottom of Ableton Live [](https://kb.mpmidi.com/uploads/images/gallery/2026-03/t28ppDN6OCWtXu4B-abletonosc.png) If you don't see this, open a terminal and paste in these two commands: lsof -i :11000 lsof -i :11001 and press enter. You should see something like the following screenshot. Under COMMAND it should print **Live** for the first command, and for the second it should print **Ableton**. If it shows something else it means that something is blocking these ports on your system and they are not free to be used. You need to terminate the processes that use these ports so that they can free up the ports. [](https://kb.mpmidi.com/uploads/images/gallery/2026-03/6kxeXBDuvdUvdKm3-checkosc.png) [](https://kb.mpmidi.com/uploads/images/gallery/2026-03/zbJg3tW2nzrlhoke-image.png) [](https://kb.mpmidi.com/uploads/images/gallery/2026-03/hCact04eNHzSHrCz-image.png) When Ableton Live and Ableton MPH are not running and you run these 2 commands in the terminal it should not print anything. This shows that the ports are free: [](https://kb.mpmidi.com/uploads/images/gallery/2026-03/DcpUcni4UV9NfwFs-image.png) --- # Setting the permissions on the Remote Script Folder on the Mac (Optional)You only need to use this guide if the installation in the Macintosh HD/Users/\[username\]/Music/Ableton/User Library/Remote Scripts does not work. This guide is for installing the Ableton Control Surface **within** the Ableton Live.app folder
You can set the permissions using the MacOS terminal or a free utility called BatChmod or using the terminal from MacOS. ##### Option 1: Using BatChmod Download BatChmod from [https://www.macupdate.com/app/mac/6440/batchmod](https://www.macupdate.com/app/mac/6440/batchmod) Right click on Ableton Live 11 or 12 Suite folder in MacOS Applications folder, and choose Show Package Contents ##  Navigate to: 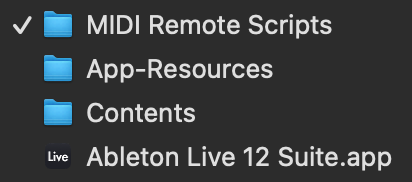 You should see the AbletonMPH folder in MIDI Remote Scripts folder 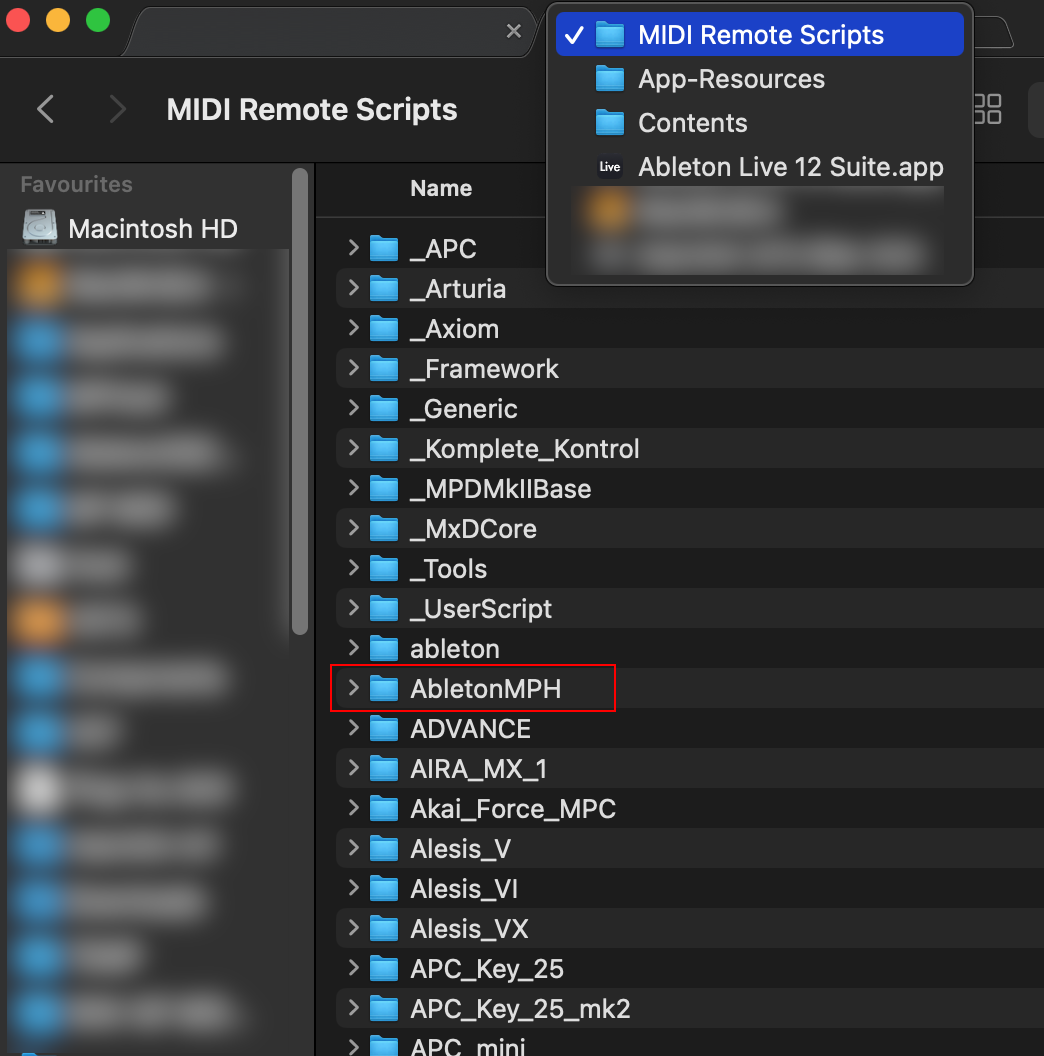 Drag the AbletonMPH folder onto BatChmod grey area, and set the permissions as: 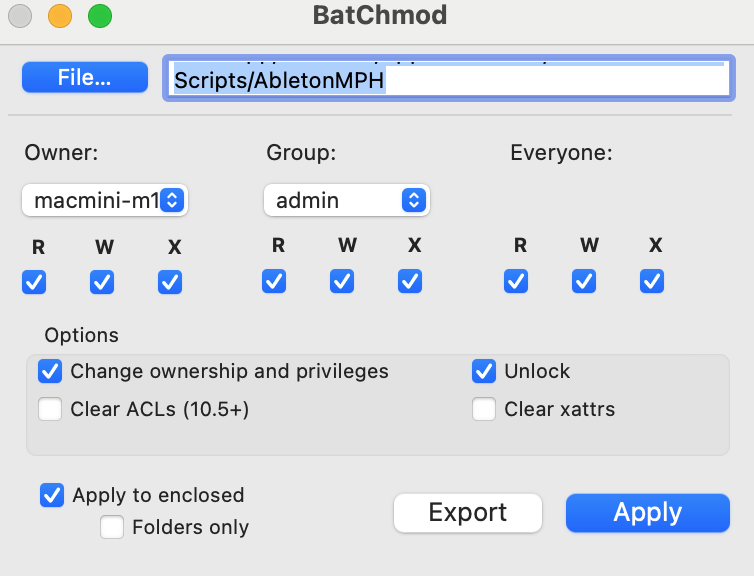 Click Apply, it will ask for your password. Enter it and click Apply. Quit BatChmod. --- ##### Option 2: Using Terminal To set the permissions via terminal, open MacOS terminal and run the following command in terminal: Before you run the command in terminal ensure that your terminal has access to Files and Folders under Privacy and Security: 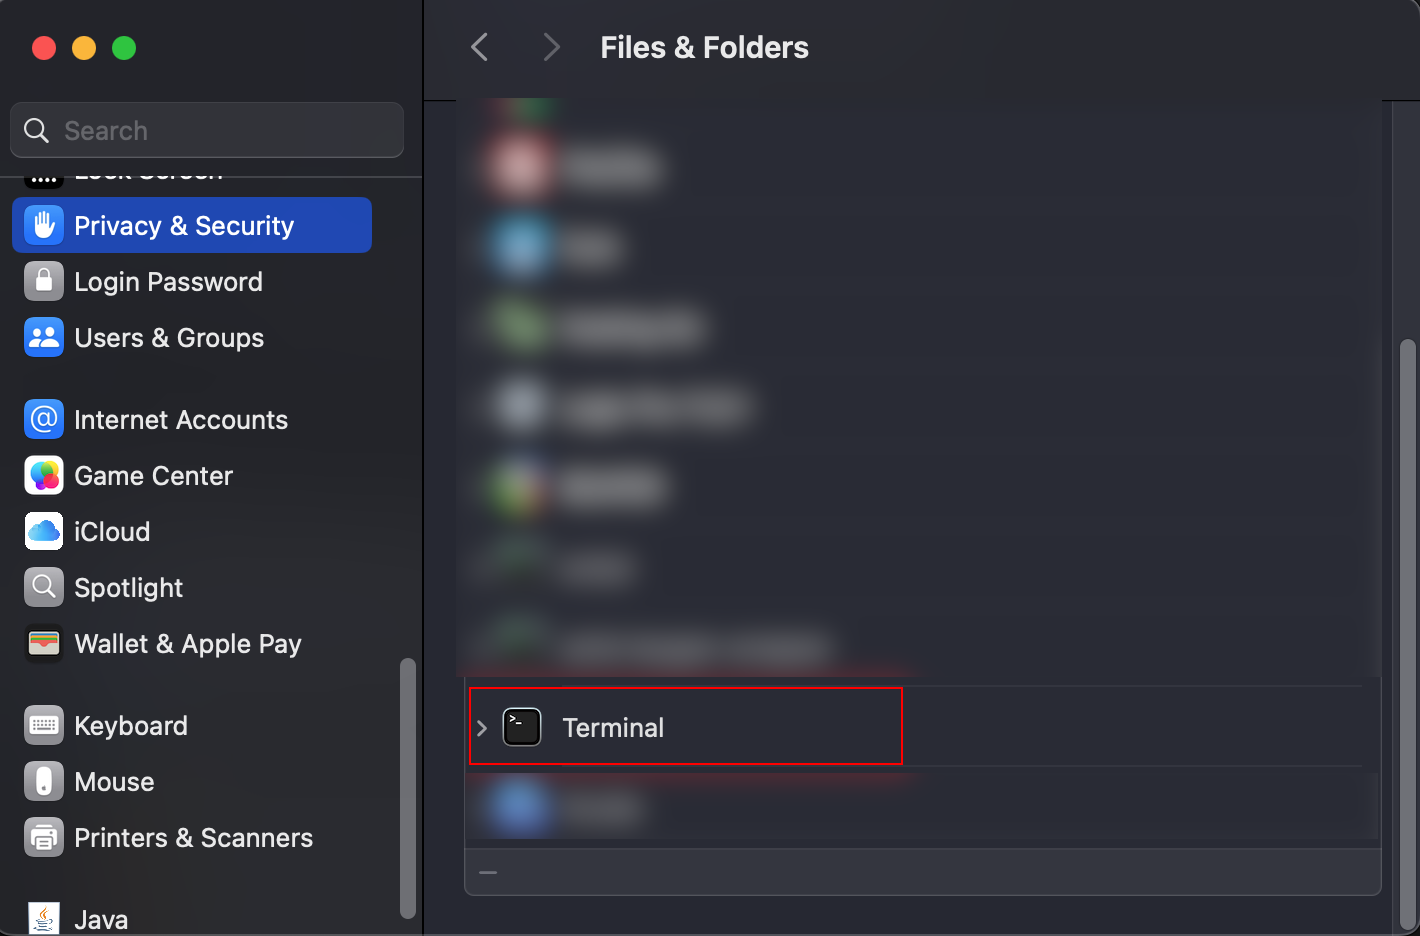 For Ableton Live 11: sudo chmod -R 777 /Applications/Ableton\\ Live\\ 11\\ Suite.app/Contents/App-Resources/MIDI\\ Remote\\ Scripts/AbletonMPH For Ableton Live 12: sudo chmod -R 777 /Applications/Ableton\\ Live\\ 12\\ Suite.app/Contents/App-Resources/MIDI\\ Remote\\ Scripts/AbletonMPH Hit enter and it will ask for your password. Type it and hit enter. The permissions are now set. If you have Ableton Live open, close it and reopen it. Then check in the AL SettingsControl Surface dropdown that the Ableton MPH is visible and select it.If it is not listed, you can try https://help.ableton.com/hc/en-us/articles/360003538120-How-to-enable-full-read-write-permissions on allowing Full Disk Access to Ableton.
If you have Ableton Live open, then close it and reopen it and check in the settings that the Ableton MPH is visible and select it: ## 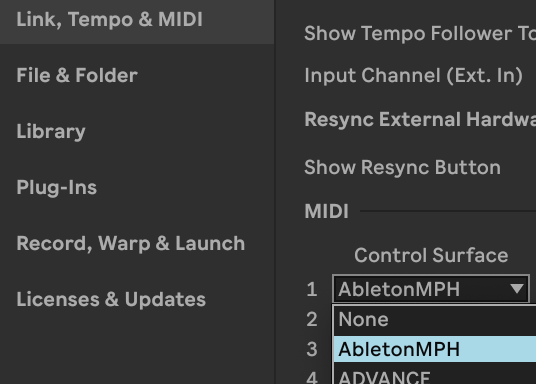 Please note, it is assumed that Ableton is installed in the Applications folder of the Mac, if not you just need to move the Control Surface script installed under Applications in the Ableton Live folder and then set the permissions to where Ableton is installed, for examplesudo chmod -R 777 /PATH TO WHERE ABLETON IS INSTALLED/Ableton\\ Live\\ 11\\ Suite.app/Contents/App-Resources/MIDI\\ Remote\\ Scripts/AbletonMPH
# Using 2 MP Controllers at the same time See [Article](https://kb.mpmidi.com/books/mp-controller-documentation/page/3-using-2-mp-controllers-at-the-same-time) # Controlling the Mixer in Ableton Live In the update of June 2025 of Ableton MPH we introduced a new page to control the mixer of Ableton Live. Here is a short [demo video](https://www.youtube.com/watch?v=eDySMNWmsnU).If you haven't installed the AbletonMPH before, follow [this guide](https://kb.mpmidi.com/books/mp-controller-documentation/page/ableton-control-surface-ableton-mph) to set it up.
Then install the beta version for: **Mac:** To **install** the update on the **Mac**, run the Ableton MPH installer and then **delete** and **replace** the AbletonMPH folder in HD/Users/\[username\]/Music/Ableton/User Library/Remote Scripts **Windows:** To **install** the update on **Windows**, run the Ableton MPH installer and it will update the control surface script and the Ableton MPH plugin and standalone app.As mentioned in the setup guide, it is better to run the Ableton MPH plugin instead of the standalone app because when you select any other application outside Ableton Live, it will hide plugin windows that are currently open. You just need to run one instance of the Ableton MPH plugin (AU or VST).
---If you have a project with Ableton MPH loaded and you open another project with Ableton MPH loaded it will not be able to work. You need to close Ableton Live and open the project. When Ableton MPH is loaded it requires to quit Ableton in order to initialize the Ableton MPH control surface. The same applies if you remove the Ableton MPH plugin and load it again without quitting Ableton Live.
--- ##### Mixer Control Two new buttons were added in the bottom left and right corners of the default Device Control page. The **Mixer** button on the right and the **Tracks** button on the left. Clicking on the Mixer button opens the Mixer page. Each page carries 8 tracks. The mixer displays tracks in groups of 8 per page, counting from the first track in Ableton Live. For example, if you select track 23, it will go and display page 3. [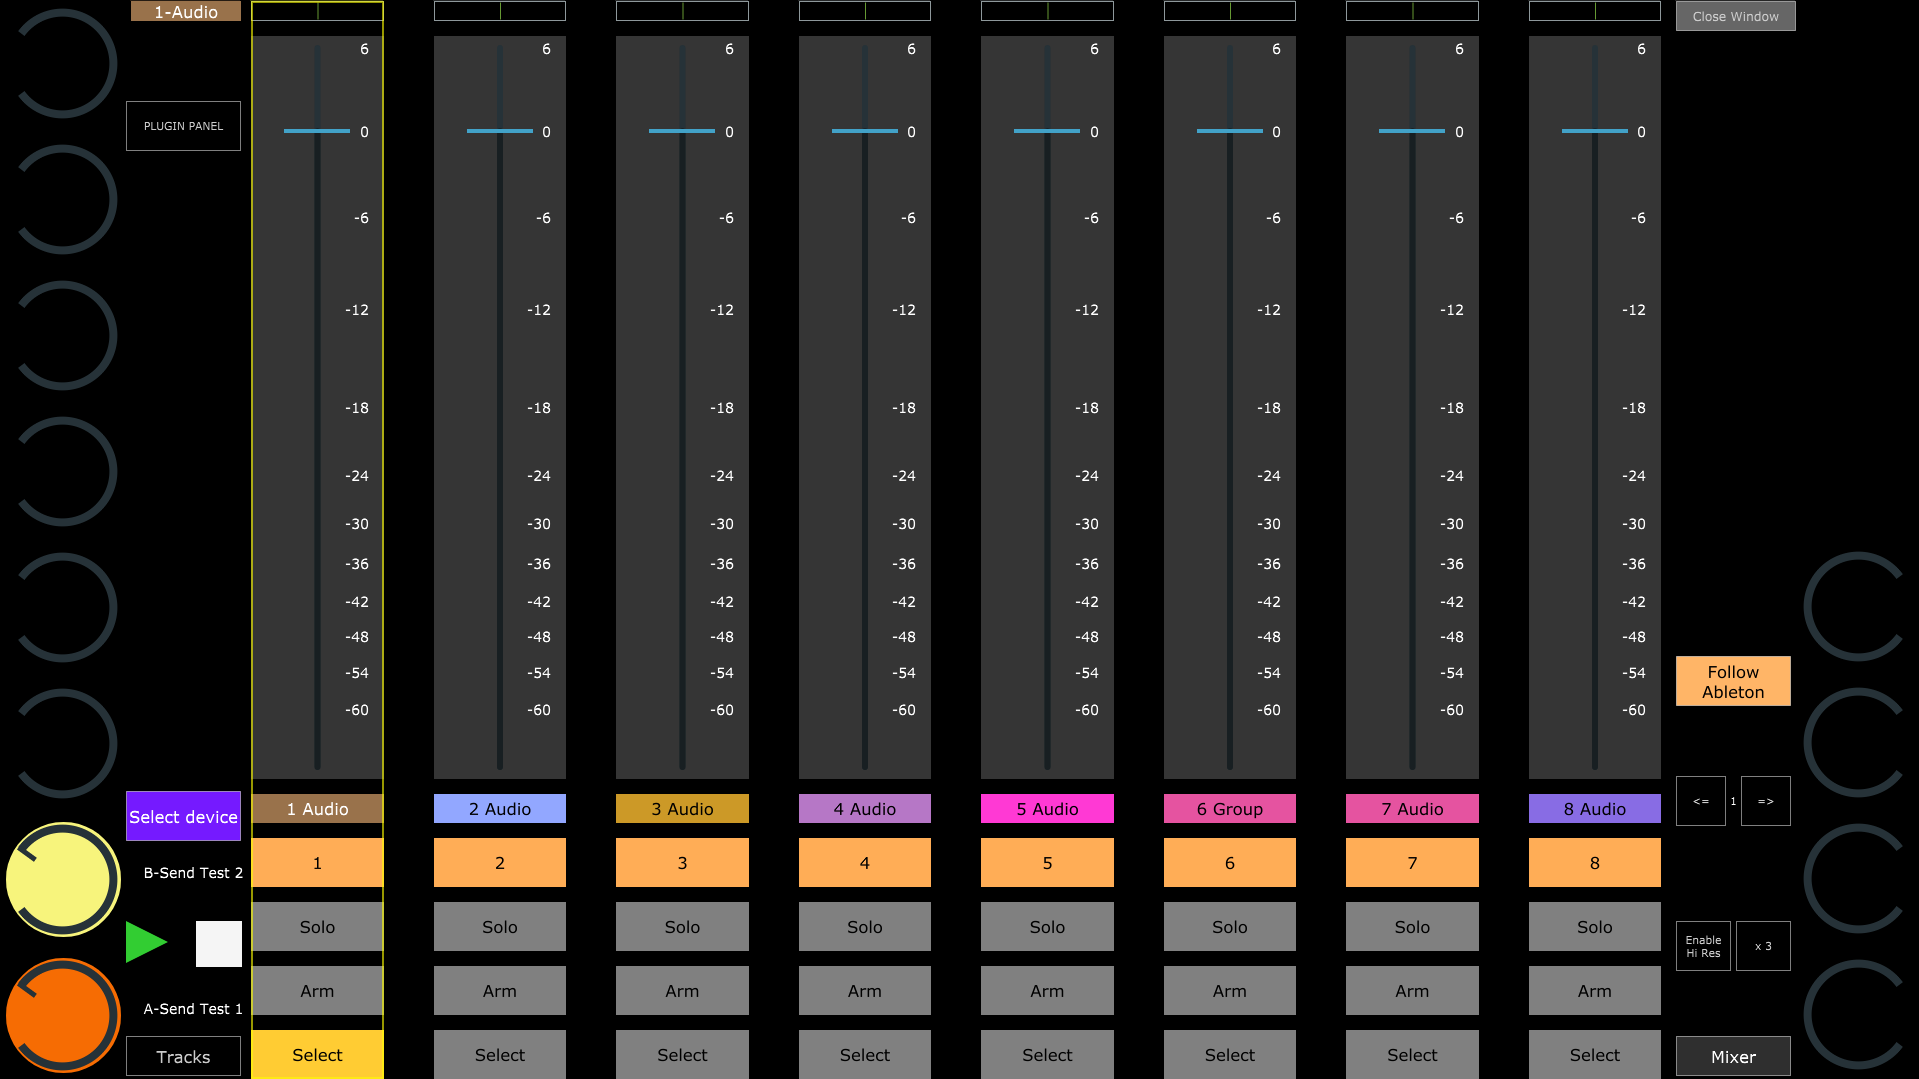](https://kb.mpmidi.com/uploads/images/gallery/2025-06/XfJ7ClIDYyUcm9XV-image.png) Each track has a **Select** button that selects the track and syncs its first 8 Return track volume levels on the left encoder column and the rest 4 Return track volume levels on the right encoder column, starting from 5th encoder of the column. The side encoders will be populated with the name of the Return tracks when these are created in Ableton Live. [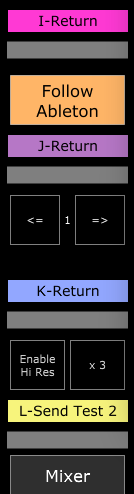](https://kb.mpmidi.com/uploads/images/gallery/2025-06/Owvq41mx3MWPezfC-image.png) Return track names always start with a capital letter.You can also select a track by just clicking anywhere once on the fader or the track name label. If you click and drag the fader it will not select the track which is convenient because you can control the volume of a track with touch or the mouse without selecting it.
On the top left corner, the name and color of the selected track are displayed [](https://kb.mpmidi.com/uploads/images/gallery/2025-05/eylzlJKGssg4LPJ6-image.png) Each track has a button to power On/Off the track, Solo and Arm for recording. The **Follow Ableton** button is enabled by default and it follows the Ableton Live track selection. When you select a track in Ableton Live, it will also select and display that track. If disabled, the mixer will stay in the current page, even if tracks from other pages are selected. This is convenient when you want to keep controlling certain tracks while you navigate to other tracks in Ableton Live. The **volume** of the tracks can be controlled via the physical encoders of the bottom row and the on-screen fader via touch and drag. You can touch anywhere on the fader and drag and it will not jump in value, however it is better to touch close to the current value so that you have more space to move up and down. The **pan** of each track can be controlled via the top row of physical encoders. The **Enable Hi Res** (High Resolution) button is a global option and it will work in the mixer page and in the devices page when enabled. This setting enables making surgical adjustments to the smallest interval step supported by Ableton Live's controlled parameter. The **Tracks** button displays a list of all tracks and takes the keyboard focus on the search-as-you-type textbox so that you can filter and find tracks easily. Selecting a track from the list will close the track list and select it on the mixer.Please note that in the first release it is not possible to select Return and the Main tracks from the mixer, however when selected in Ableton, they will also be selected on the Ableton MPH mixer.
--- ##### Virtual Encoder Views There is now an option to view the encoders as horizontal indicators. This is a global option and you can activate it via the right click menu by unchecking Show encoders. [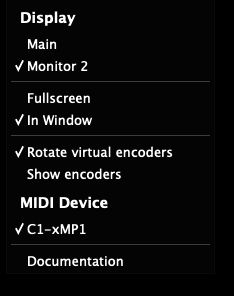](https://kb.mpmidi.com/uploads/images/gallery/2025-06/xA9ISTAFqn4QXAXf-image.png) The label and indicator will show as: [](https://kb.mpmidi.com/uploads/images/gallery/2025-06/aN9WqQWC4Zq791iF-image.png) --- ##### Rack Macro custom names In this update, you also have the ability to load different Ableton Live presets for Instrument and Audio effect racks based on the device type. This means when you rename your Racks in Ableton Live and save them as Ableton Live presets, upon loading these, the Ableton MPH will sync the Macro custom names. If you just rename your Macros in a project, but not save them as presets, it will still sync and display the custom names. [](https://kb.mpmidi.com/uploads/images/gallery/2025-05/EoQFHgflWN1vHtZG-image.png) [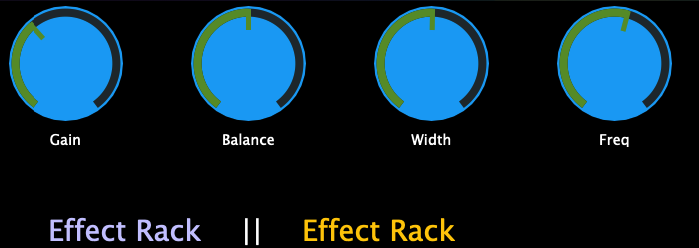](https://kb.mpmidi.com/uploads/images/gallery/2025-05/C0ge8WupqwnI3zi3-image.png) --- ##### Reusing the AbletonMPH plugin when opening other projects Once you have loaded the AbletonMPH plugin it requires to restart Ableton Live for reusing it in other projects. For example, you open Project A and it has the AbletonMPH plugin (VST3 or AU). Then you open Project B which has the Ableton MPH plugin (VST3 or AU). The AbletonMPH plugin in Project B will not work unless you restart Ableton Live. # Ableton Control Surface - Mac Installer Folders The installer installs the Control Surface files in **Macintosh HD/Users/\[username\]/Music/Ableton/User Library/Remote Scripts** 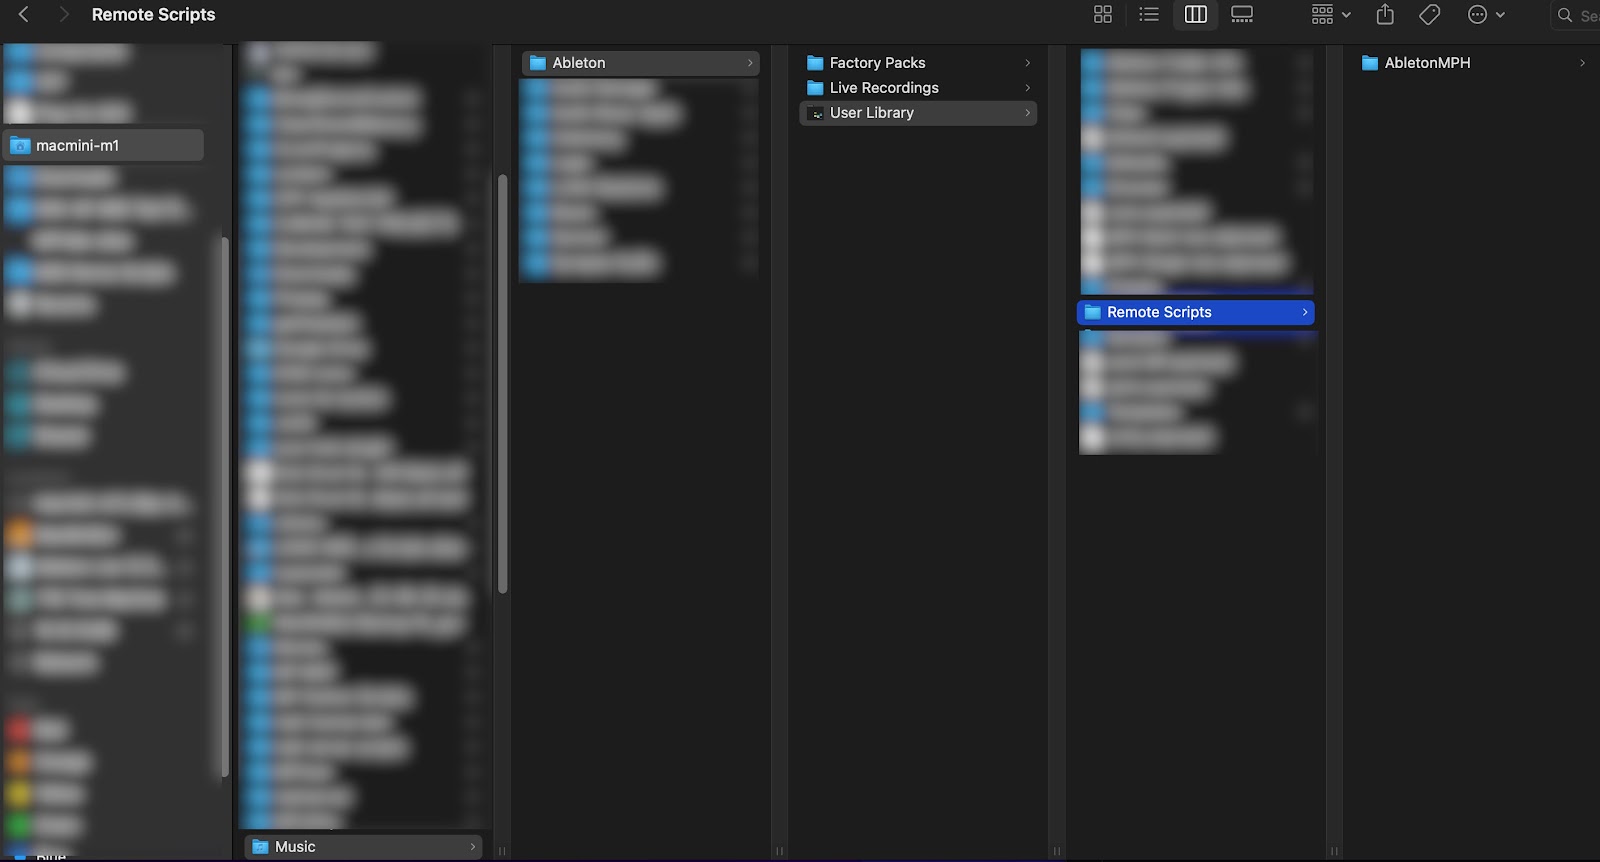 # 11. MP MIDI App and plugins All about the MP MIDI app/plugins and guides for Cubase, Bitwig Studio and Logic Pro control surfaces. # 1. The MP MIDI Controller Application The **MP MIDI Controller app/plugin** (VST3/AU/AAX and standalone application for Mac and Windows) transforms the MP Controller to a flexible, comprehensive midi controller.**Current version:** v1.0-fa4687e--H2025-11-03--B2025-11-04 Mac Users: The latest version requires macOS 13.3 Ventura or higher. **Cubase preset version:** v1.4 - Sept-04-2025
The app features 32 encoders and 32 buttons on each page and there are 32 pages. That is a total of 1024 midi encoders and buttons ready to be used. This software acts as a generic standard MIDI control for sending/receiving CC and Notes. Furthermore, it offers many more advantages than other hardware controllers because it can be programmed on the fly as you work. Here is a video overview of the MIDI app: [https://youtu.be/7miAnnNMvmA](https://youtu.be/7miAnnNMvmA)Please note that this is not a DAW specific guide on how to setup MIDI controlling in your preferred DAW. This guide only serves to introduce and explain the capabilities of the MP MIDI app/plugins. For setting up MIDI controlling in your preferred DAW, see the documentation/guides for your preferred DAW
**Mixer Mode** In the November 2024 update we have introduced the Mixer Mode view. See the documentation [here](https://kb.mpmidi.com/books/mp-controller-documentation/page/12-mixer-mode-in-the-mp-midi-app)
The guide and midi remote script for Cubase can be found [here](https://kb.mpmidi.com/books/mp-controller-documentation/page/2-midi-remote-control-surface-for-cubase-nuendo-v13-and-later)
The March 2026 update can now use NRPN to control external hardware. See [here](https://kb.mpmidi.com/books/mp-controller-documentation/page/17-controlling-external-hardware-via-nrpn-using-the-mp-midi-app) for more information
 ##### Installation The installer will install the standalone application and the VST3/AU/AAX plugins and create the necessary folders under [/MP/Host.](https://kb.mpmidi.com/books/mp-controller-documentation/page/3-mp-host-properties-and-config-files) After installation you can just run the app or load the plugin in your DAW. Only **one** instance should be run at any given time. Either the standalone app **or** the plugin. Do **not** run both. The standalone app is installed in the Applications folder on the Mac and in Program Files on Windows. In Windows, a desktop shortcut is also created.  ##### Opening, closing and quitting the standalone app First run the app as usual. It will show a small icon on the taskbar on Windows, top bar on MacOS. Then to open the app Window on the MP Controller, you need to **click on the small icon**, on Windows taskbar The same applies to the Mac, the app icon appears on the top bar. To close the app window click on the taskbar/topbar icon or click on the "Close Window" button on the application. To quit the application you need to right click on the taskbar/topbar icon and choose Quit.  A pop up window will appear asking to confirm if you want to quit (both on Mac and Windows)   ##### MIDI Ports The MIDI device of the MP Controller app will be displayed in Mac OS and Windows as "MP MIDI" (not as c1-xMP1). You can use the MP MIDI Controller app/plugin as a standard midi controller to control any DAW, software or hardware that sends and receives midi.The "MP MIDI" is a virtual port and it receives sends midi only to the c1-xMP1.
 ##### Setup MIDI on Mac On the Mac, once you run the MP MIDI app or plugin, it will create a virtual MIDI port named **MP MIDI.** The **MP MIDI port** can be selected in your DAW for IN and OUT, to send and receive MIDI. On the Mac, clicking on the MIDI router button will show up the available MIDI IN and OUT ports. No routing is necessary on the MIDI router to use the MP MIDI app/plugin with your DAW.  ##### Setup MIDI on Windows See [**this article**](https://kb.mpmidi.com/books/mp-controller-documentation/page/13-midi-ports-on-windows)  ##### XY Pad The MP MIDI app also features an XY pad which can control 3 CC on each axis 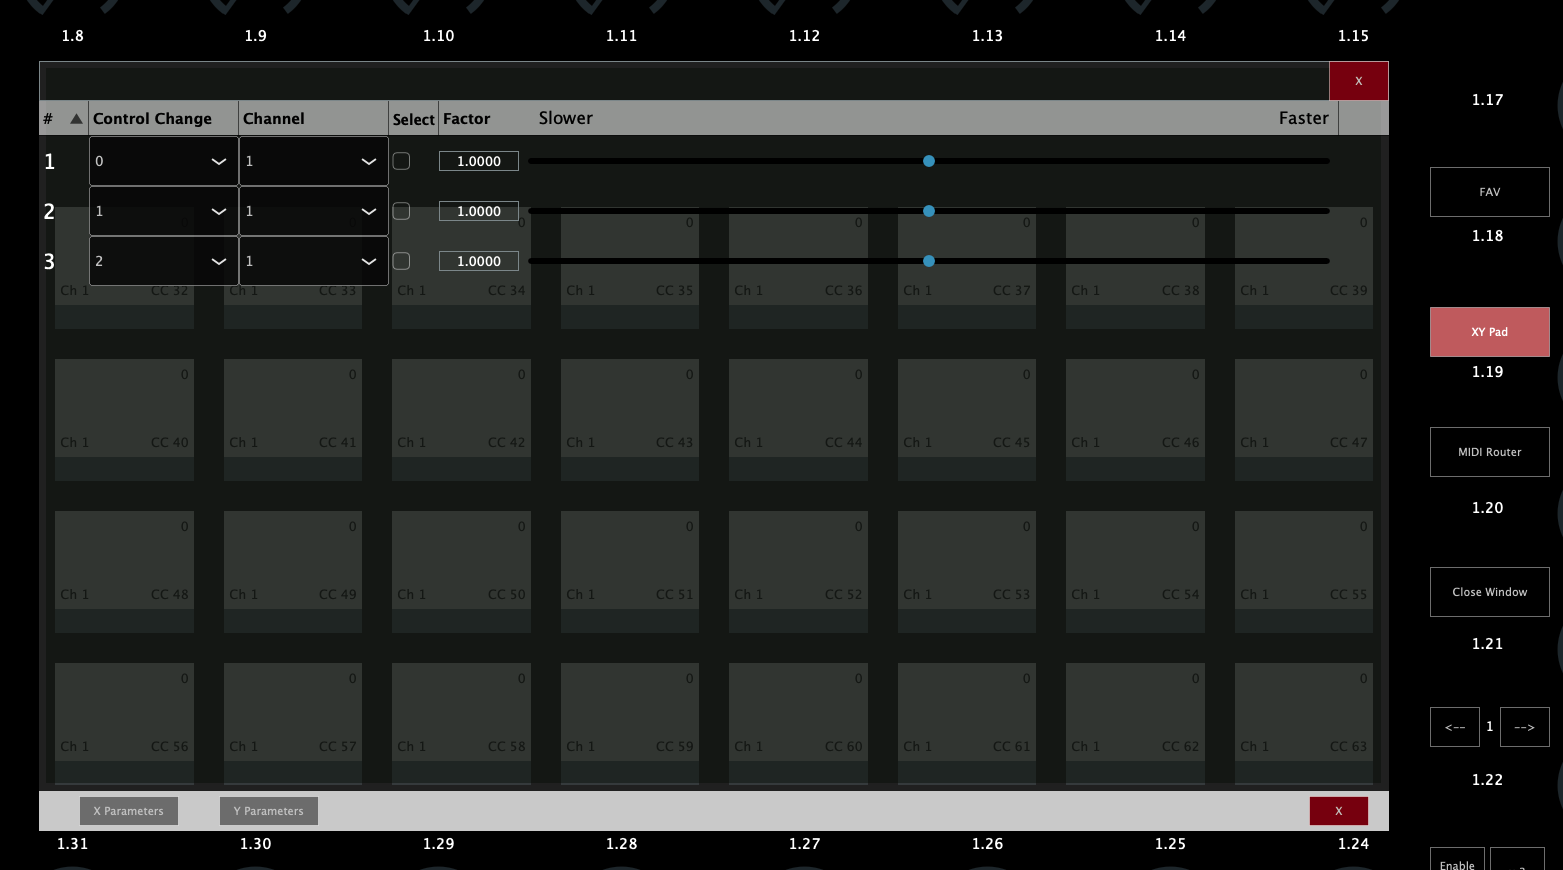 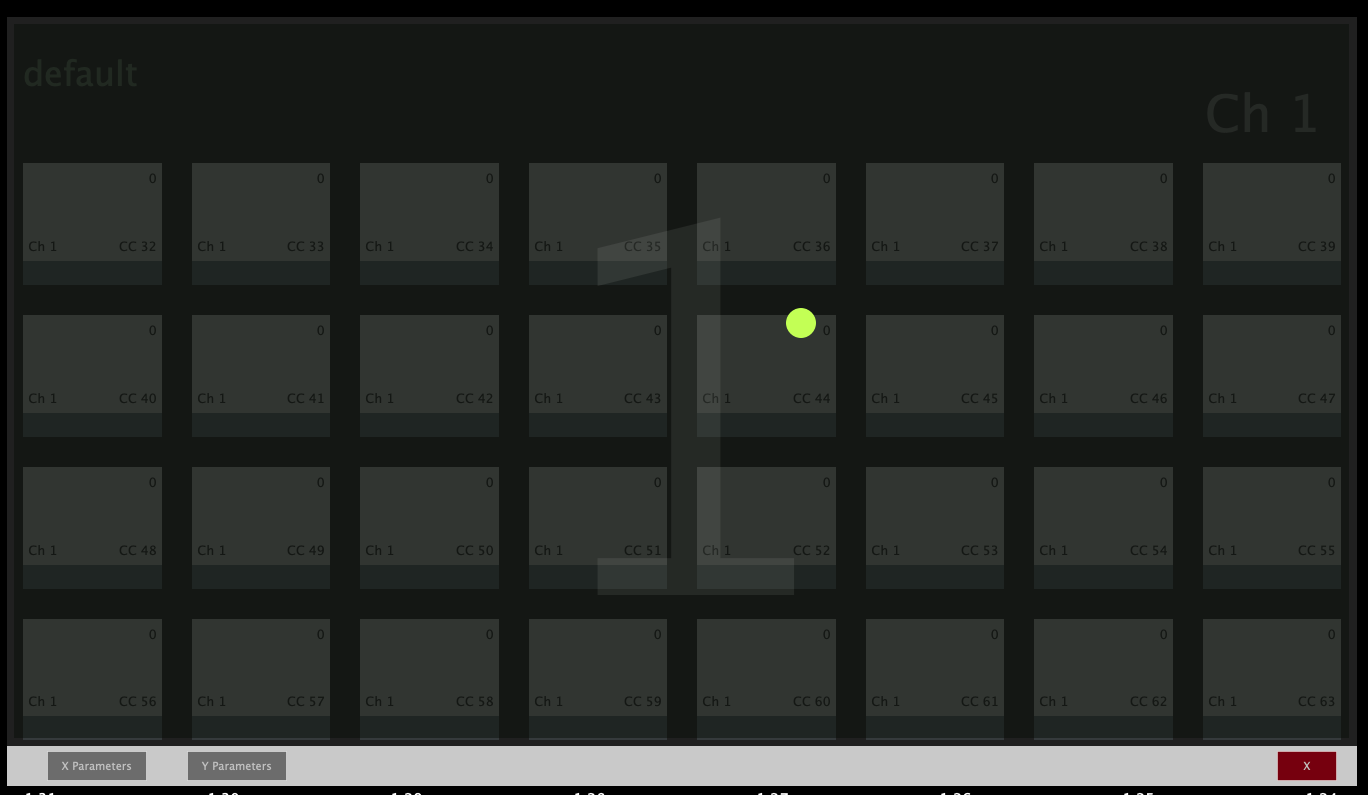  ##### Using the Plugin Panel The plugin panel was added in the July 2024 update and it can be used to switch plugins on the MP Host and switch on the Ableton Control Surface (Ableton MPH). The Plugin Panel Feature is only available when running the MP MIDI plugin (not the standalone application) and/or Ableton MPH plugin (not the standalone application).   ##### MIDI CC on encoders and buttons The app creates a default preset where the encoders are assigned from midi Channel 1, CC 0 to 31 and buttons CC 32 to 63 on the first page. On the second page, the encoders are assigned from midi Channel 1, CC 64 to 95 and buttons CC 96 to 127. The same pattern repeats for all 16 midi channels, so every 2 pages, the channel number increases by 1 and the default CC assigned to buttons and encoders are the same as pages 1 and 2. 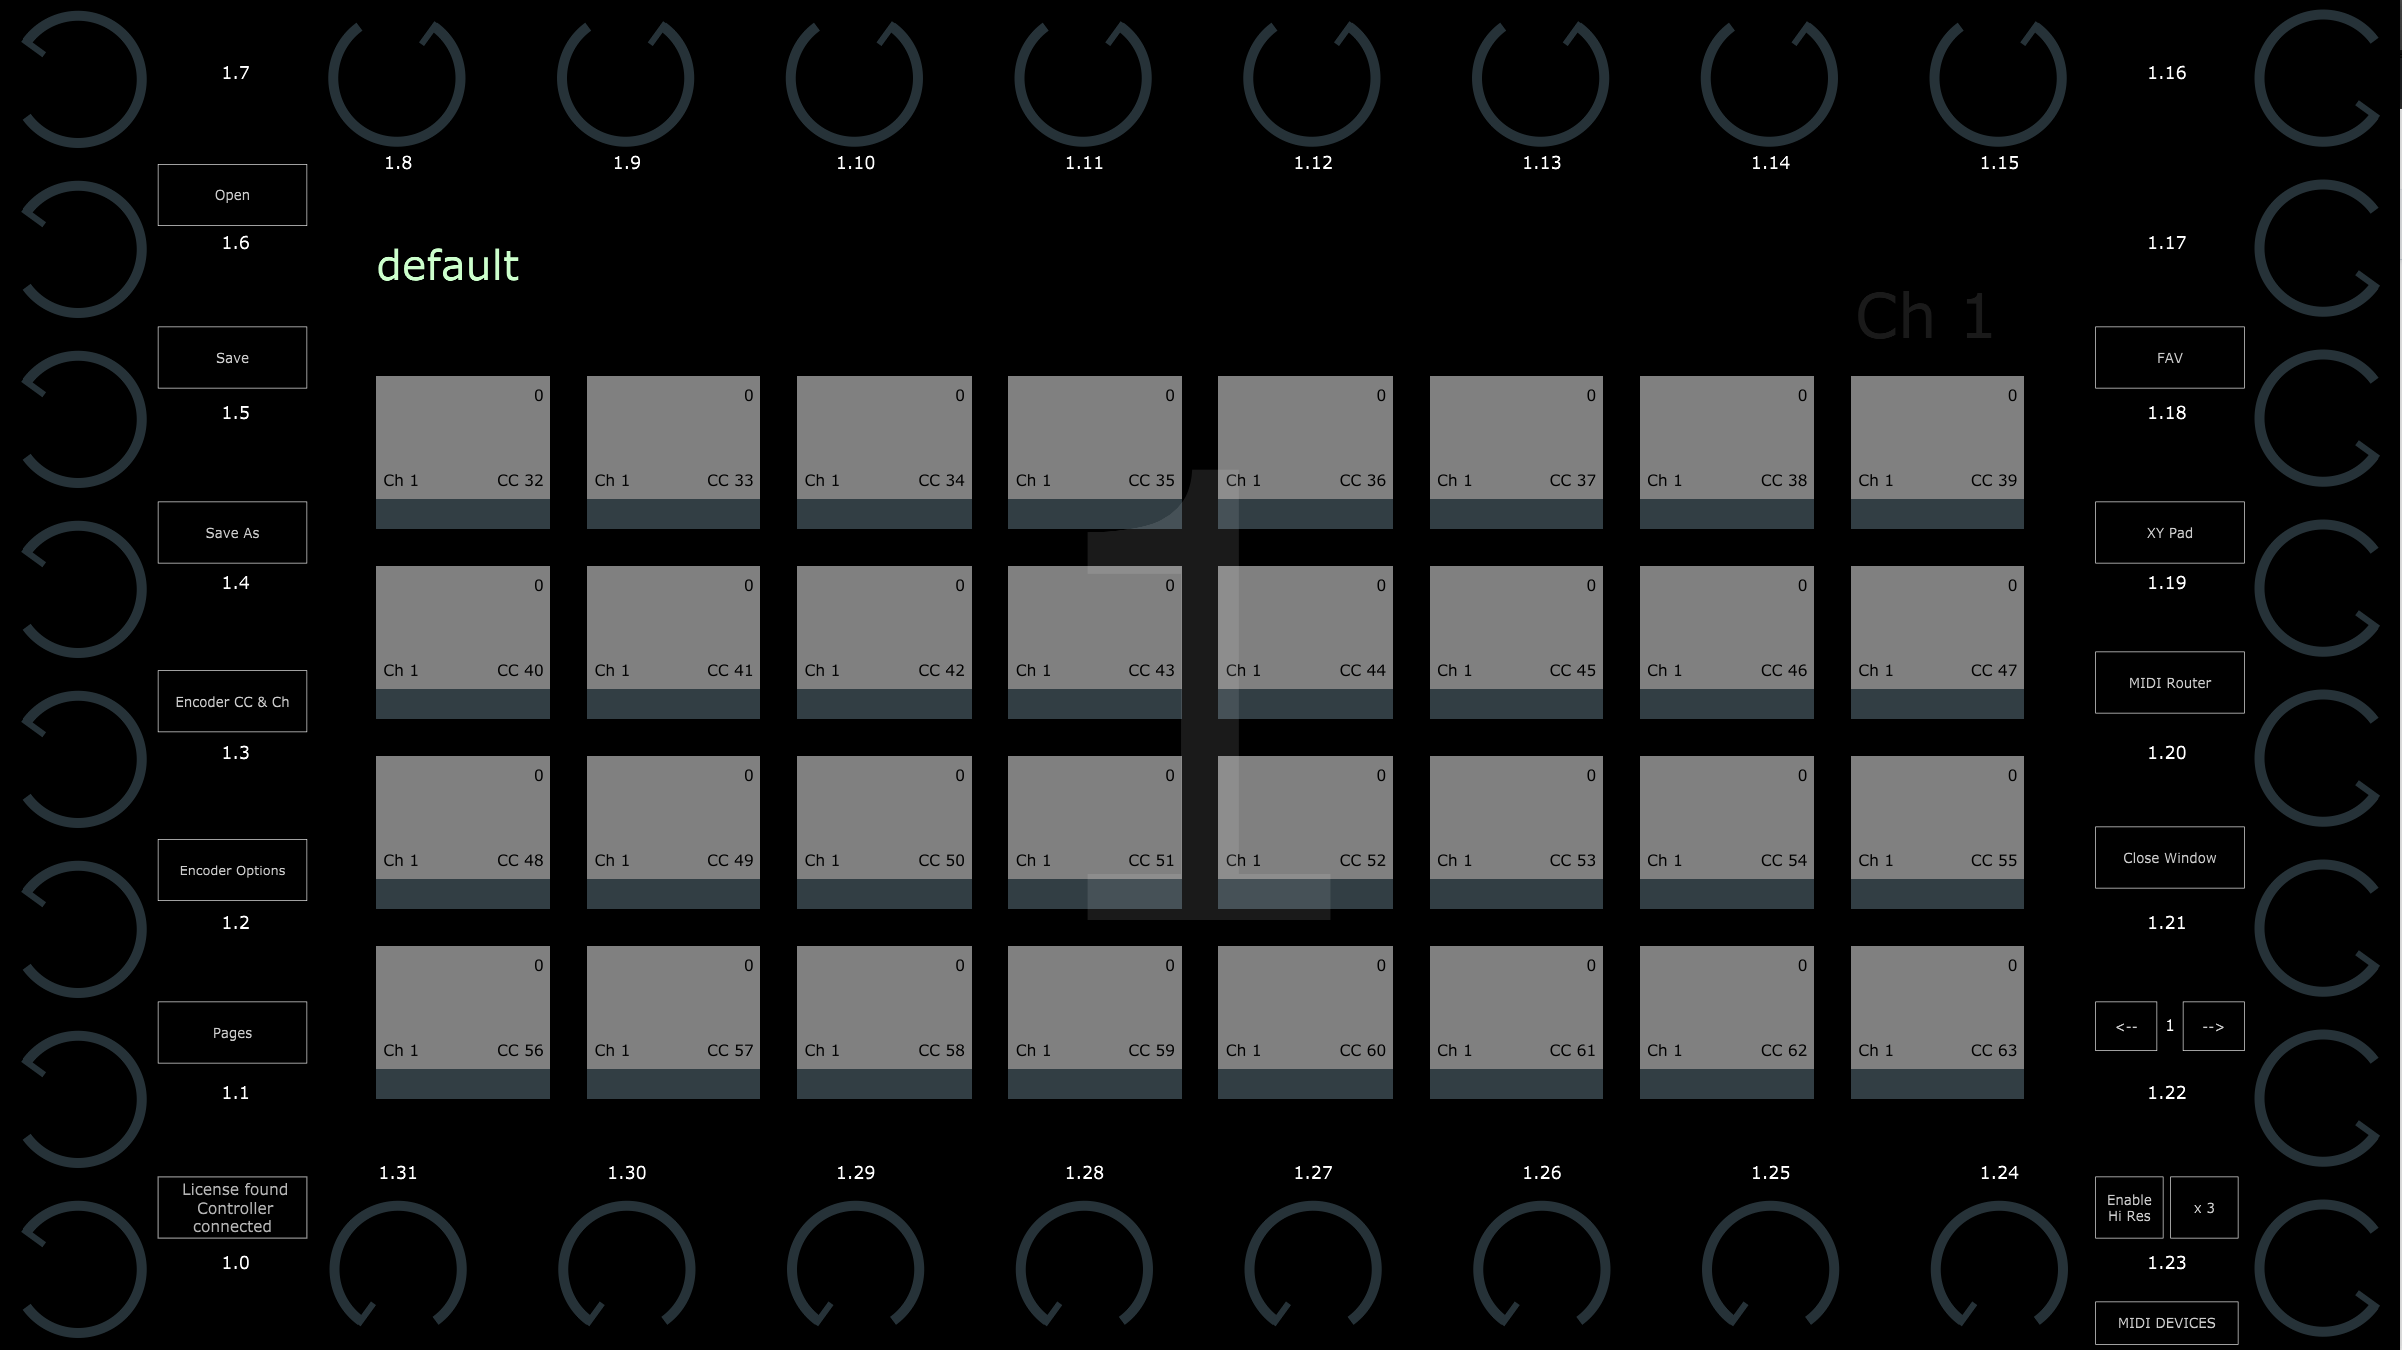 Each encoder has a default label: Channel.CC. For example, 1.31 means Channel 1, CC 31  When you double click on an encoder label area it opens a text box to type in the label you want for the encoder. 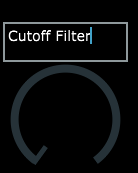 and it will appear as 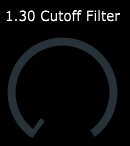  ##### The Encoder CC & Ch button  displays the list of CC ids assigned to each encoder on the currently selected page. We can change the CC and Channel for each encoder from that list. 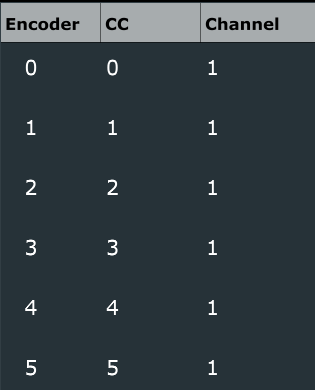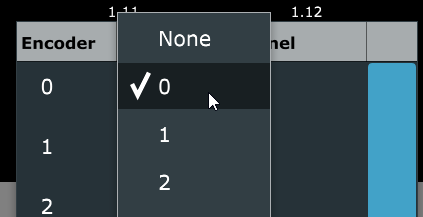The March 2026 update can now use NRPN to control external hardware. See [here](https://kb.mpmidi.com/books/mp-controller-documentation/page/17-controlling-external-hardware-via-nrpn-using-the-mp-midi-app) for more information
##  ##### Right Click Menu options 1. The right click menu on the area allows to select an option to save the CC values of the buttons and encoders. If this is selected the presets saved will include the current values of the encoders and buttons. 2. From this menu you can also select the target monitor. 3. Selecting Fullscreen or Window Mode of the app window) 4. You can choose to have the virtual encoders rotated as the bottom row of encoders. 5. This will display the Channel.CC on each encoder and button. 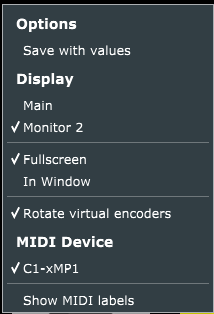 ##  ##### Encoder Options Right click and choose Encoder Options form the menu to show the encoder options for each encoder. The encoder options are described [here](https://kb.mpmidi.com/books/mp-controller-documentation/page/11-encoder-options) **The S checkbox option** Additionally, there is an **Sync** option in the MP MIDI App. 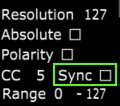 This is checked (enabled) by default on all encoders and it will sync encoders with the same CC id and channel. When you have multiple encoders with the same CC id and channel they will be synced when you turn one of them. This is useful when you set encoders with the same CC ids and channel on multiple pages. To set the CC id and channel on an encoder use the "Encoder CC & Ch" button.  ##### Pages The pages button will show a menu on screen to select 32 pages. 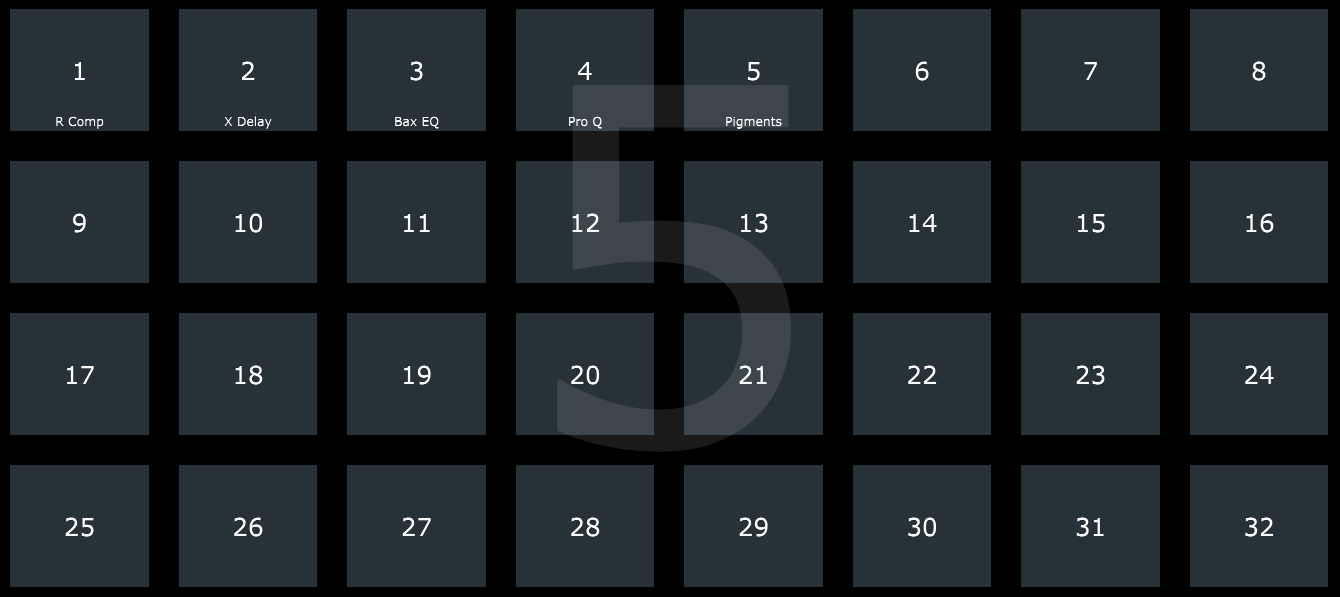 The title of a page is displayed at the bottom of each page button 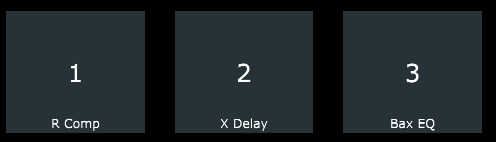 When you right click on a page button, the options menu appears on top. 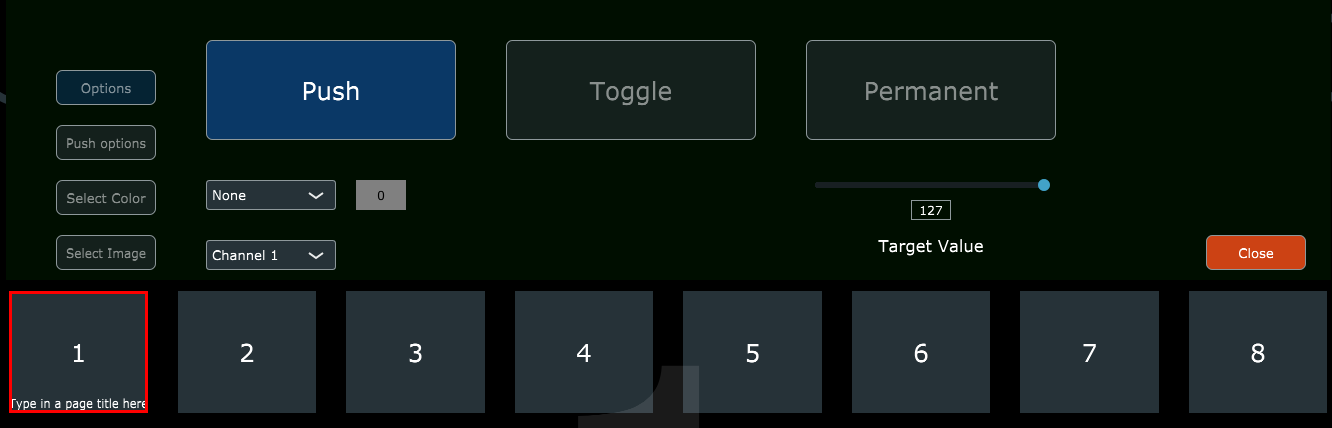 Here you can set a CC message to be sent when clicking on a page button. This is useful because you can assign it to your DAW to perform a certain action upon changing a page on the controller, like open a audio effect device or instrument. **Page Title** Each page has a title which can be written under the Preset name by double clicking under the preset name. The page title will appear on the page button of each page.   ##### Presets A preset file when saved will carry all the changes made within the application, except the current CC values of the encoders and buttons. This includes CC ids, background images on buttons and on the pages, colors of encoders, names assigned on encoders, buttons and the favorites. Presets can be saved with the Save and Save As buttons. The can be recalled via the Open button or via the Favorites button (if these presets have been assigned to Favorites). Choosing the option Save with values, will save the current values of the encoders and buttons from all pages.   ##### Favorites Clicking on the Favorites button will open the Favorites page Here you have a total of 16 buttons to name them as you wish for different categories. Right click on a button and it will allow you to type a name Right click on a preset button and it will preset the following options: 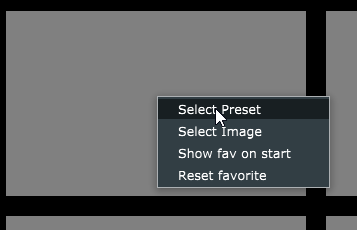 You can select a preset to be loaded when clicking on the button. Select an image to appear on the button (image files will be copied automatically in the **MP\\Host\\MP MIDI Presets\\Images** folder) 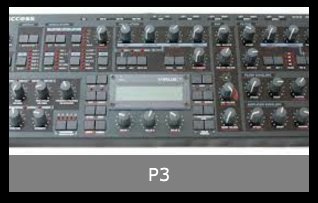 Select to show the Favorites page when the app starts. Reset the favorite.  ##### Encoder Options and Hi Res The encoder options offer the same options as in the MPH. For all the options and the Hi Res buttons see the article [here](https://kb.mpmidi.com/books/mp-controller-documentation/page/11-encoder-options)  ##### Button and Options Each button displays the assigned channel, CC and value on the top right. 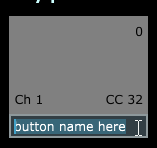 Right clicking twice in the bottom row on a button allows to type in a name for the button. Right click on any button and the button options will appear on the area on top of the buttons. 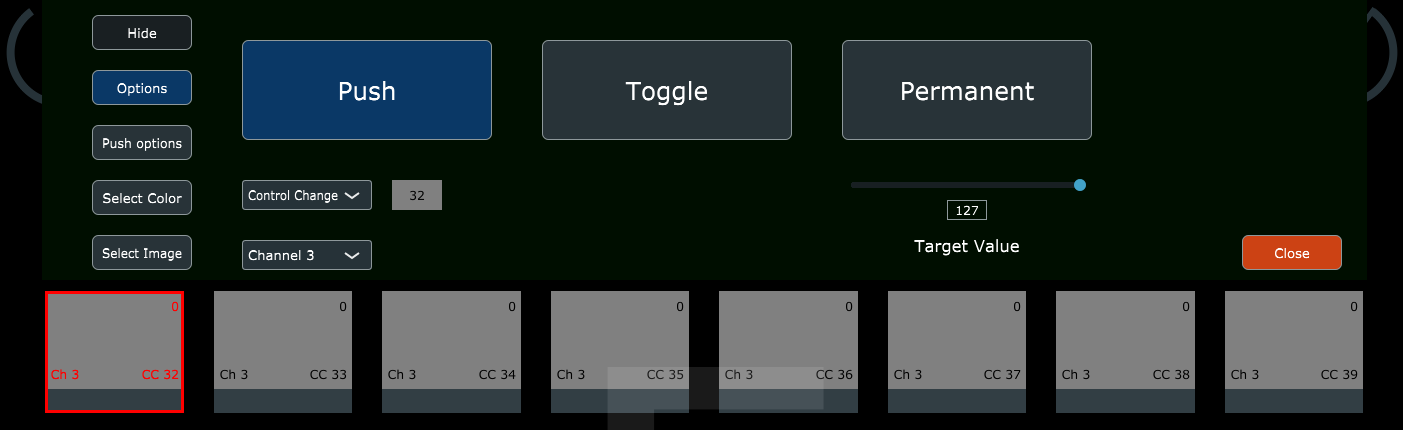 The main option buttons on the left: - Show/Hide: shows and hides the selected button. - Options: displays the 3 options to select the button type. - Push Options: displays the options when the selected button type is Push. - Select Color: displays 2 color palettes to select button colors for the pressed and non pressed state. - Select Image: Select an image for the button. - Close: closes the menu. While you have the button options menu open, you may right click on another button and it will show the options of that button. --- ****Button Types**** Push (default) - This is a momentary button type that when released will return to the non-pressed state. Here we can assign a Channel, CC id and a CC value for that button. You can also set the selected button to play a note or set all the buttons of that page to play notes. The following options are available: 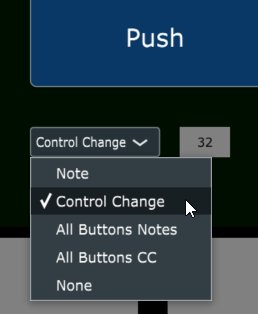 Selecting Note will set the selected button to play a note when pressed. When this option is selected, the following options appear. The middle is the note selection dropdown and the right is the octave selection dropdown.  If All Button Notes is selected then all the buttons in that page will play notes, starting from the note of the top left button. Changing the note from the dropdown will cause all the buttons to continue with notes after the top left button. 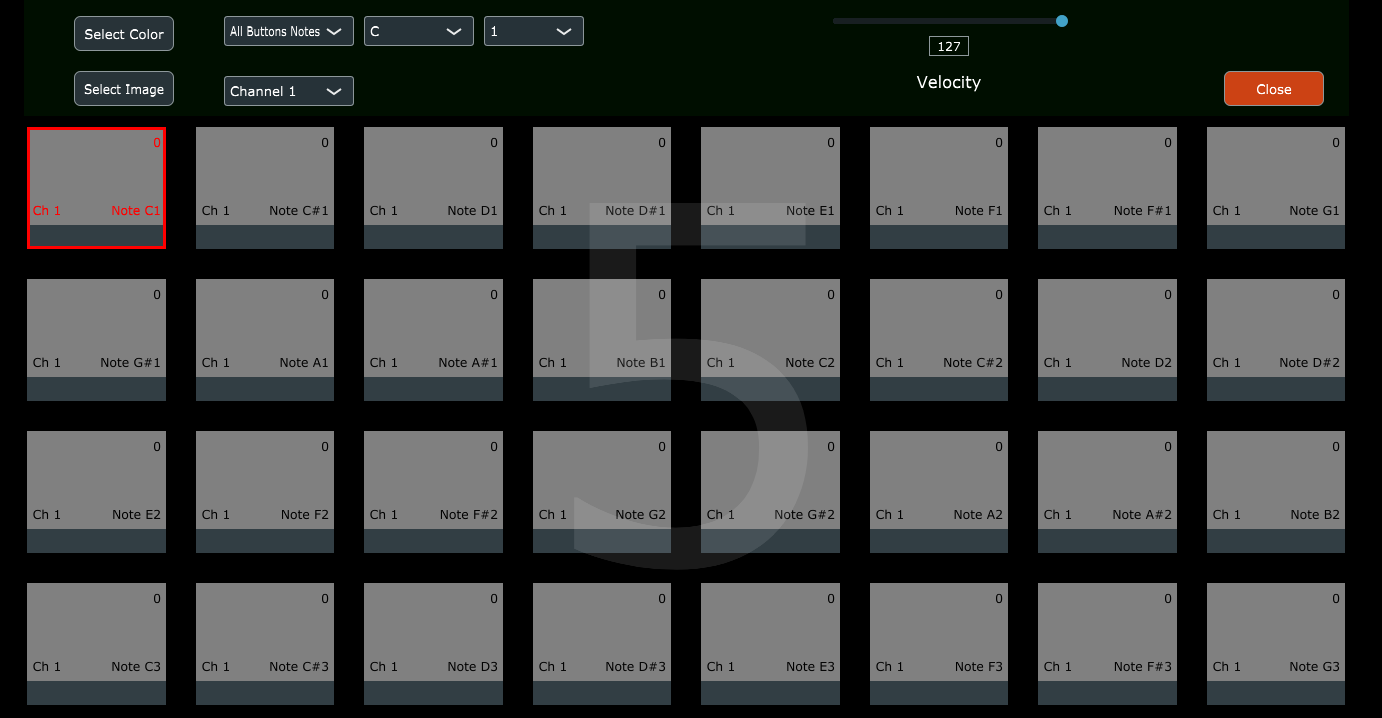 When closing and reopening the button menu, will allow you to set individual options for each button. So, you may set for instance, one button to send CC messages instead of notes, while all the other buttons still send notes. 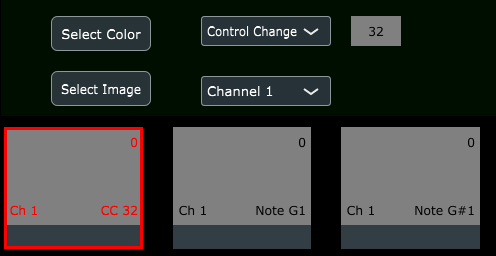 The option All buttons CC will cause all buttons in the page to send CC messages 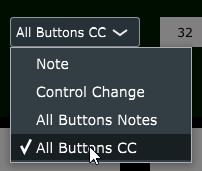 The starting CC for all buttons is set here: 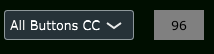 Toggle - This is a permanent type button that when pressed again will go to the non-pressed state. The default Toggle button type range is 0 for minimum and 100 for maximum. 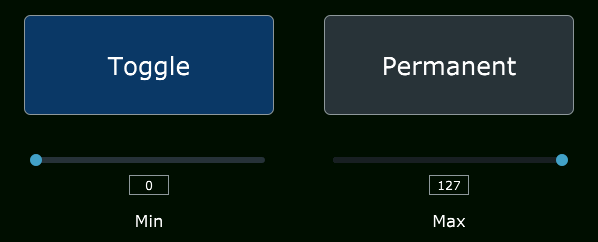 Permanent - This is a permanent type that can only be pressed once. You can set multiple Permanent type buttons on the same parameter to set a specific target value on the controlled parameter. When other Permanent type buttons are pressed will cause the rest of the Permanent values to change state to not pressed. 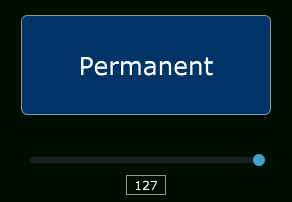 --- **Push Button Options** 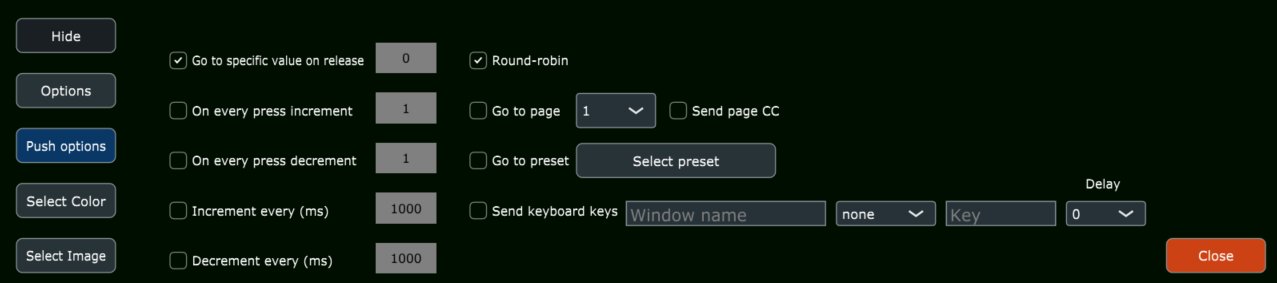 Go to specific value on release - This option will set the parameter to a specific value when the button is released. This option is not available when selecting either of the following 2 options, however it is available to be selected along with the last 2 options. On every press increment - This option on every press of the button will increase the value by the value set in the box. On every press decrement - This option on every press of the button will decrease the value by the value set in the box. Increment every (ms) - This option increase the value of the parameter when the button is kept pressed every miliseconds set. The value of increment is taken from the box set on the option "On every press increment". Decrement every (ms) - This option decreases the value of the parameter when the button is kept pressed every miliseconds set. The value of increment is taken from the box set on the option "On every press decrement". Round Robin - This option affects all push options. It will cause the buttons to loop through when reaching 0 or 100. Go to page - If checked it will open the page selected from the dropdown upon clicking on the button. Go to preset - If checked it will open the selected preset upon clicking on the button.Send Keyboard Keys - (September 2024 Update) It sends keyboard keys to the selected application. See articles for Windows [here](https://kb.mpmidi.com/books/mp-controller-documentation/page/6-windows-mp-midi-app-sending-keyboard-keys) and for Mac [here](https://kb.mpmidi.com/books/mp-controller-documentation/page/8-mac-os-mp-midi-app-sending-keyboard-keys)
**Selecting colors for states on the buttons**  With this option you can assign colors to the pressed and non pressed states of buttons. 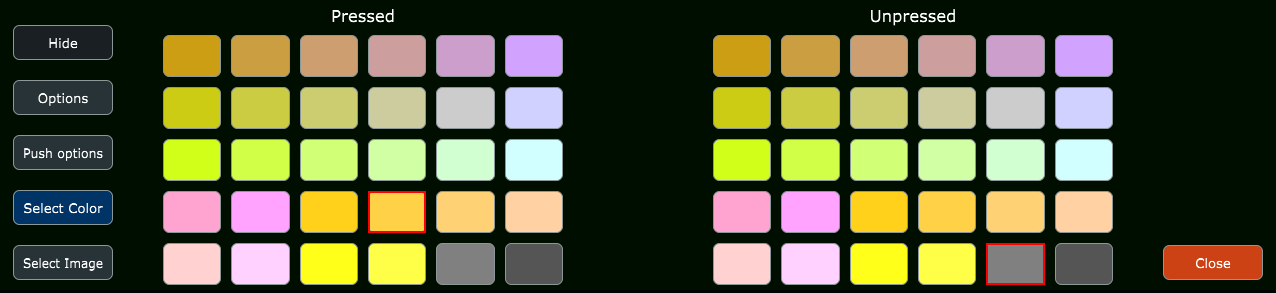 **Images on Buttons**  You can select an image to be displayed on each button via the "Select Image" option on the menu. These can be png or jpg image files. The size does not matter but to preserve the ratio of the original image choose an image that is square. The image is converted automatically to a smaller image and copied in the **MP\\Host\\MP MIDI Presets\\Images** folder. You can have a color and an image set on a button. If you use a png image with transparency then the colors you have set for pressed/un pressed states will be visible. The images are set with partial opacity so the colors set on the button are still visible. You can get png icon images for free from many sites. You can use the "Select Image" option and then Remove Image to remove an image from a button. 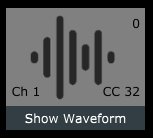 The buttons are transparent, therefore if you assigned images with background to color to them, they may blend with the assigned colors.  ##### MIDI Router The MIDI router button will show all the available MIDI ports on your computer. You can create multiple routings by clicking and dragging lines from and to each port. 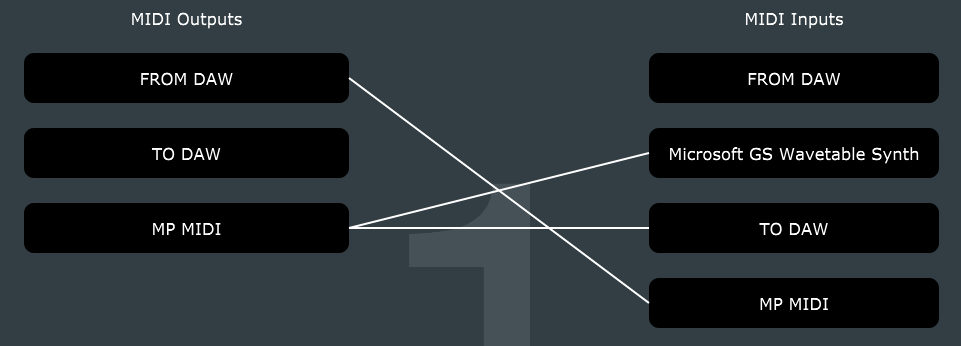 The routings you make will be saved in the preset.**Cubase/Nuendo MIDI Remote and MPMIDI preset version:** v1.5 - Dec-12-2025 Both available for download from your portal account in the **"Software Downloads"** section (tab on the left)
It will also work with Cubase v12 but there may be some minor things that don't work quite ok as v12 does not send back all the necessary info via the MIDI remote scripts.
The latest version of the Cubase MIDI Remote script is update: **June 13th 2025** Ensure you are using the latest version of the MP MIDI app and the latest version of the Cubase MIDI Remote Script. All downloads are available in the user portal. This online manual does not carry any software downloads.
To **update** from a previous version of the MIDI Remote script, delete the existing remote script as shown in the first 2 pages [here](https://docs.google.com/document/d/1ErQnAgy_YXWDR0zs7f1rvKvQq5OQJdr1EtQA9fq5Eh8/edit?tab=t.0#heading=h.uque0j9gco7y). Then, import the midi remote script again in Cubase, and follow the setup procedure for your OS, Windows or Mac as shown below.
**MIDI remote control surface is missing every time Cubase is restarted** This is an issue with Cubase 13.0.50 and onwards with MIDI remote scripts using the Cubase MIDI Remote API. This issue happens with other Remote MIDI scripts, not just the MP MIDI. Upon restarting Cubase, the Control Surface is missing and needs to be added again. [Here is a video](https://drive.google.com/file/d/1FuHmWfr8h6SvYiu787ncyCj6XL-vMDzL/view?usp=drive_link) that shows how to reproduce the issue, in the video we select a controller from AKAI, just to illustrate it happens with any controller not just the MP MIDI, and the issue is the same on Mac and Windows. A solution has been posted here:[ https://forums.steinberg.net/t/midi-remote-controller-disappearing-on-launch/951248/50?u=m\_p ](https://forums.steinberg.net/t/midi-remote-controller-disappearing-on-launch/951248/50?u=m_p)and we have copied it [here](https://docs.google.com/document/d/1ErQnAgy_YXWDR0zs7f1rvKvQq5OQJdr1EtQA9fq5Eh8/edit?usp=sharing)
 ##### How to download and install Download the MP MIDI App installer for Mac/Windows from your account. On Windows, first install the free [loopMIDI ](https://www.tobias-erichsen.de/software/loopmidi.html)as explained in the [MP MIDI App Guide](https://kb.mpmidi.com/books/mp-controller-documentation/page/1-the-mp-midi-controller-application) or other virtual MIDI port creation software like [LoopBe30](https://www.nerds.de/en/loopbe30.html).**Windows Users: [See this article](https://kb.mpmidi.com/UPDATE%20for%20up%20coming%20updates%20on%20Windows%2011%20MIDI%20Services%20-%20April%202026) about the new Windows 11 MIDI services.**
On the Mac, the virtual MP MIDI ports are created by the MP MIDI app/plugin. These ports can be used for MIDI In and Out. In order for Cubase to see the MP MIDI virtual ports, you need to run the MP MIDI app or VST3 plugin. Download the MIDI Remote Script and the Cubase.xml preset for the MP MIDI App from the User Portal. Copy the Cubase.xml preset in the MP Host folder under the "MP MIDI Presets" folder You can open the MP Host folder from the MP Host plugin as well. See [here](https://kb.mpmidi.com/books/mp-controller-documentation/page/4-show-preset-folder-go-to-the-mphost-properties-folder) - Windows folder C:\\Users\\USER\\AppData\\Roaming\\MP\\Host\\MP MIDI Presets - Mac Folder /Users/USER/Library/Application Support/MP/Host/MP MIDI Presets or ~/Library/Application Support/MP/Host/MP MIDI Presets and extract the images from the zip file in the "~/MP/Host/MP MIDI Presets/Images" folder. **For Windows, follow [this guide](https://docs.google.com/presentation/d/1QI3RdiM_N7ct2BEqE6CmfAhayS_BP1LL/edit#slide=id.p1) to continue the set up process.** **For MacOS, follow [this guide](https://docs.google.com/presentation/d/1diWQxbe-TVX3Fb6wXPB6t9I-huccSM2T1ZDNsmtaRA0/edit?usp=sharing) to continue the setup process.**  ##### How it works The MP MIDI app sends CC messages to Cubase and the Cubase MIDI remote script replies with CC messages and SysEx messages. The SysEx messages include the following: 1. Page numbers (when a page changes from Cubase) 2. Device names 3. Name and Color of selected track 4. Names of parameters 5. CC ids of parameters The MIDI remote script comprises of 6 pre-assigned pages shown in the MIDI Remote section in Cubase and 2 free pages. 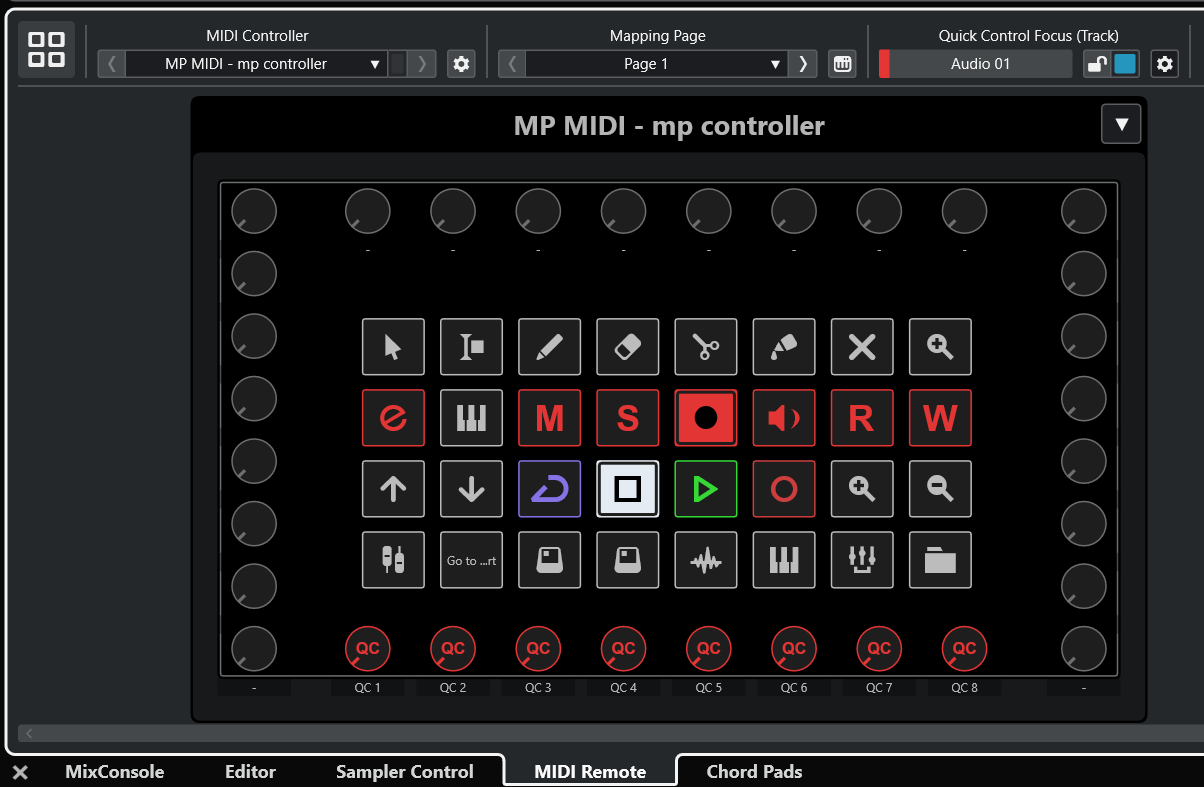 You can change pages from this section  and you can also change to another pages from the MP MIDI app from the controller.  ##### Limitations The MIDI Remote Script offered by Cubase allows users to create custom pages with functionality not available in the Controller Editor in Cubase. This functionality comes with some limitations and we have designed the control surface with these limitations in mind. The buttons and encoders assigned in the Cubase MIDI app preset should not be replaced or reprogrammed because the MIDI remote script is programmed to listen to these CC messages. You can modify the midi remote script which is written in Javascript and change the CC ids of buttons and encoders if you want to change it. Known limitations of the MIDI remote script: Page 1: The Quick Controls should always be in the bottom row of encoders (or if you want to replace them with other encoders just use the same CC ids). The buttons for selecting tools should be Push/Momentary buttons, as Cubase will not send us messages to deactivate other buttons. When you are in page 1 and have a device selected for Quick Controls, then you change page and go back to page 1, the device is no longer selected for Quick Controls and needs to be selected. Pressing buttons to switch between Mute/Solo too fast may sometimes cause the controller to not be in sync with Cubase. if that happens, just press the button again. Page 2. Opening the Mix Console from page 1 using the mixer button, if the mixer is already open it will close it. Unfortunately, this is a limitation of the script. Press F3 on the keyboard to open the Mix Console. Page 3. There is no way to activate the slots of the Channel Strip via the MIDI remote script. You have to activate them on Cubase. Page 4-6. If you are on a track and have a device selected. Then you change a page, change track, select another device and you go back to page 4, you need to click on the Cubase main window for Cubase to send the update information to the controller and bring the control over the device selected last. In all 7-8 pages, you cannot rename the parameter names on buttons and encoders because these are being received from the Cubase MIDI remote script.  ##### Pages in the MIDI Remote Script Page 1 - Home - Quick Controls Page 2 - Mixer - EQ and Mixer Controls Page 3 - Channel Strip - Detailed EQ and Strip Effects Page 4 - Insert FX Page 5 - Instruments Page 6 and onwards - User Assignable pages ##### Page 1 - General Control and Quick Controls The first page carries a set of buttons pre-assigned to Cubase functions. When a button is pressed or selected it turns yellow. The colors can be customized from the button menu using right click. The track name appears on the right side, highlighted with the color of the track from Cubase. Below the track name there is the name of the device selected that has the QC focus. On the left top there is the name of the preset and below the title of the page. [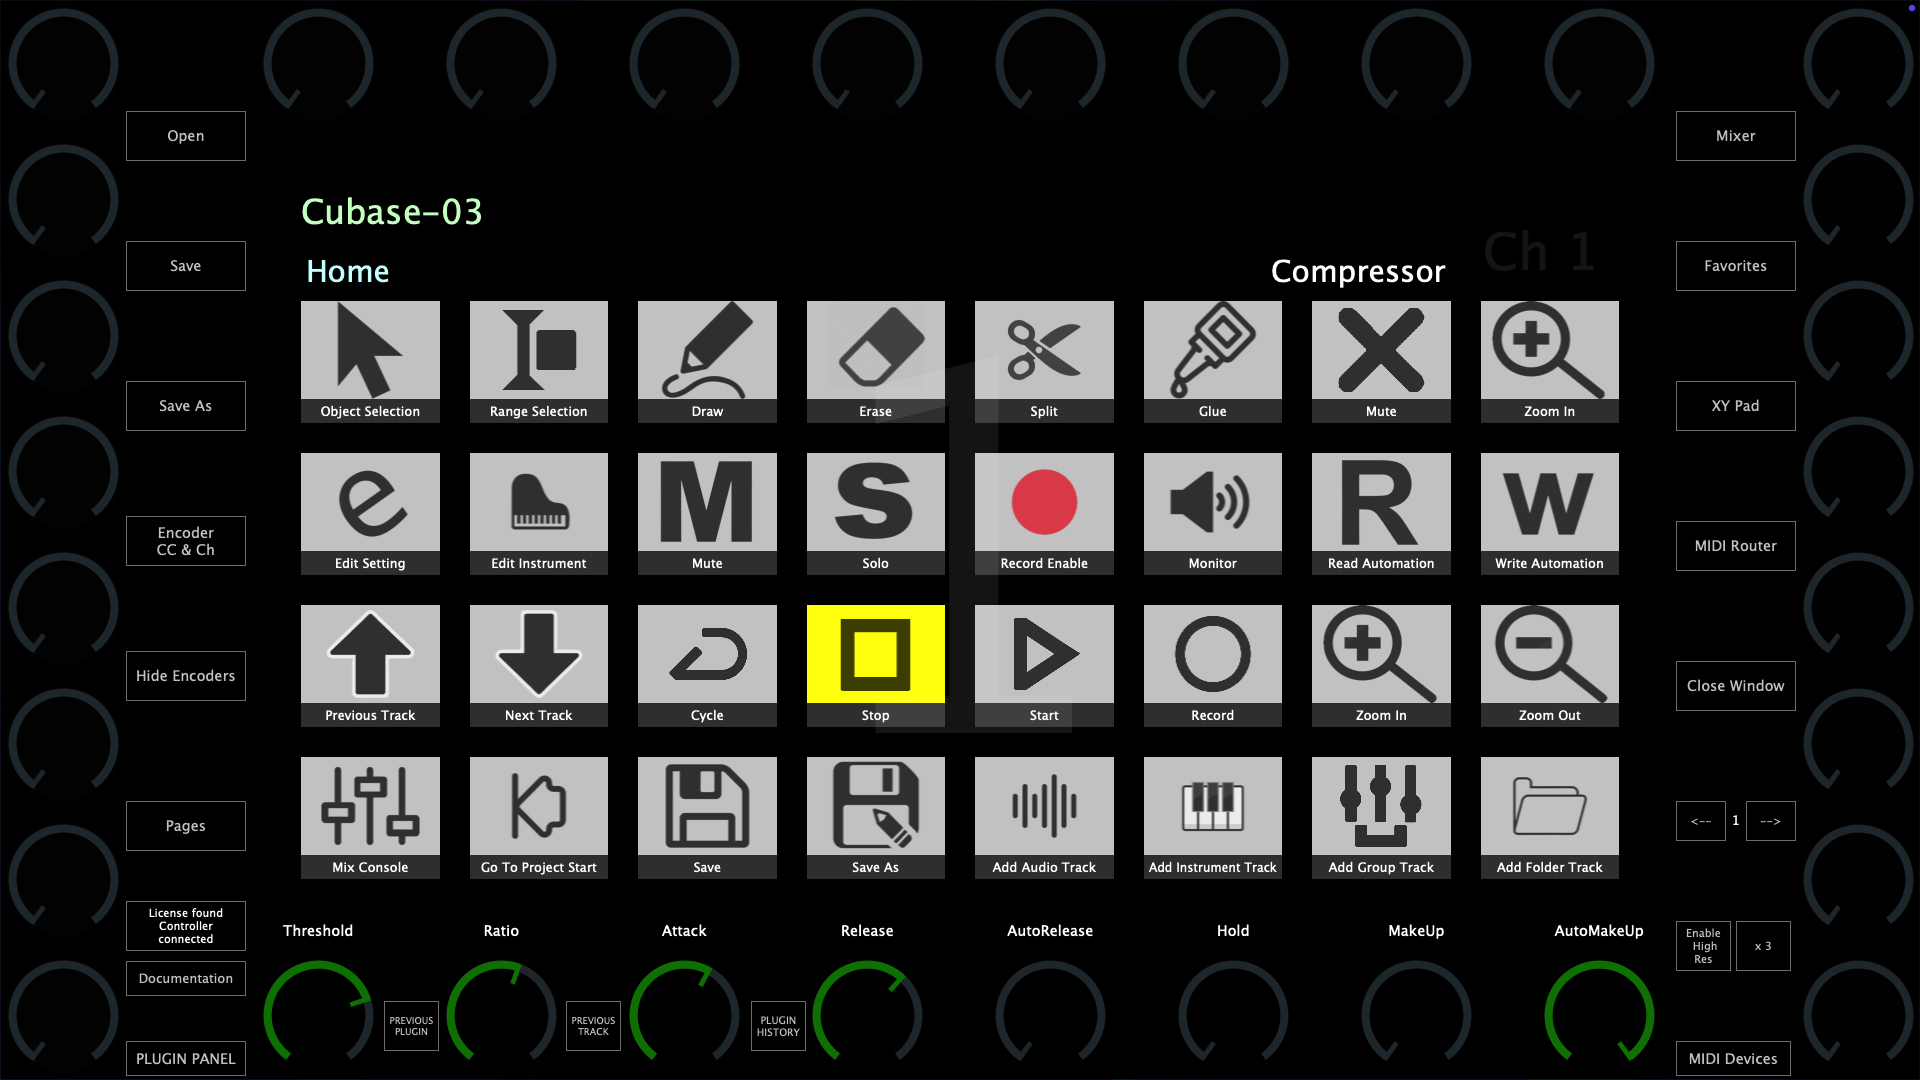](https://kb.mpmidi.com/uploads/images/gallery/2025-06/vvthNzSAI8OJNxGo-image.png) The bottom row of encoders are assigned to the 8 Quick Controls of Cubase (QC). You can change the assignments of Quick Controls in Cubase per device: 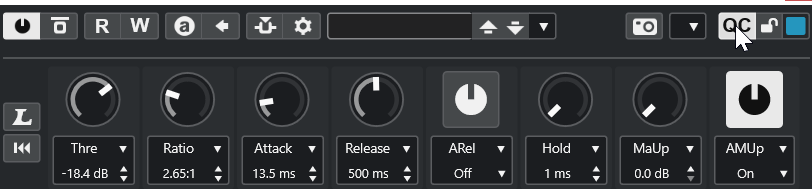 Once a device is selected in Cubase that has QC, the bottom row of encoders will sync with the QC parameters and display their names. The QC section turns blue once a device is selected  The rest of the encoders can be assigned freely to any parameter in Cubase or a third party plugin using the Learn Parameter function in Cubase. --- ##### Page 2 - Mix Console and EQ Control Page 2 is dedicated to controlling the Mix Console and the EQ. On the top row of encoders we have mapped the Pan and in the bottom row the volume of each track. The encoders take their colors from Cubase track colors. On the left and right columns of encoders we have the EQ parameters and their colors are set to group them into bands. [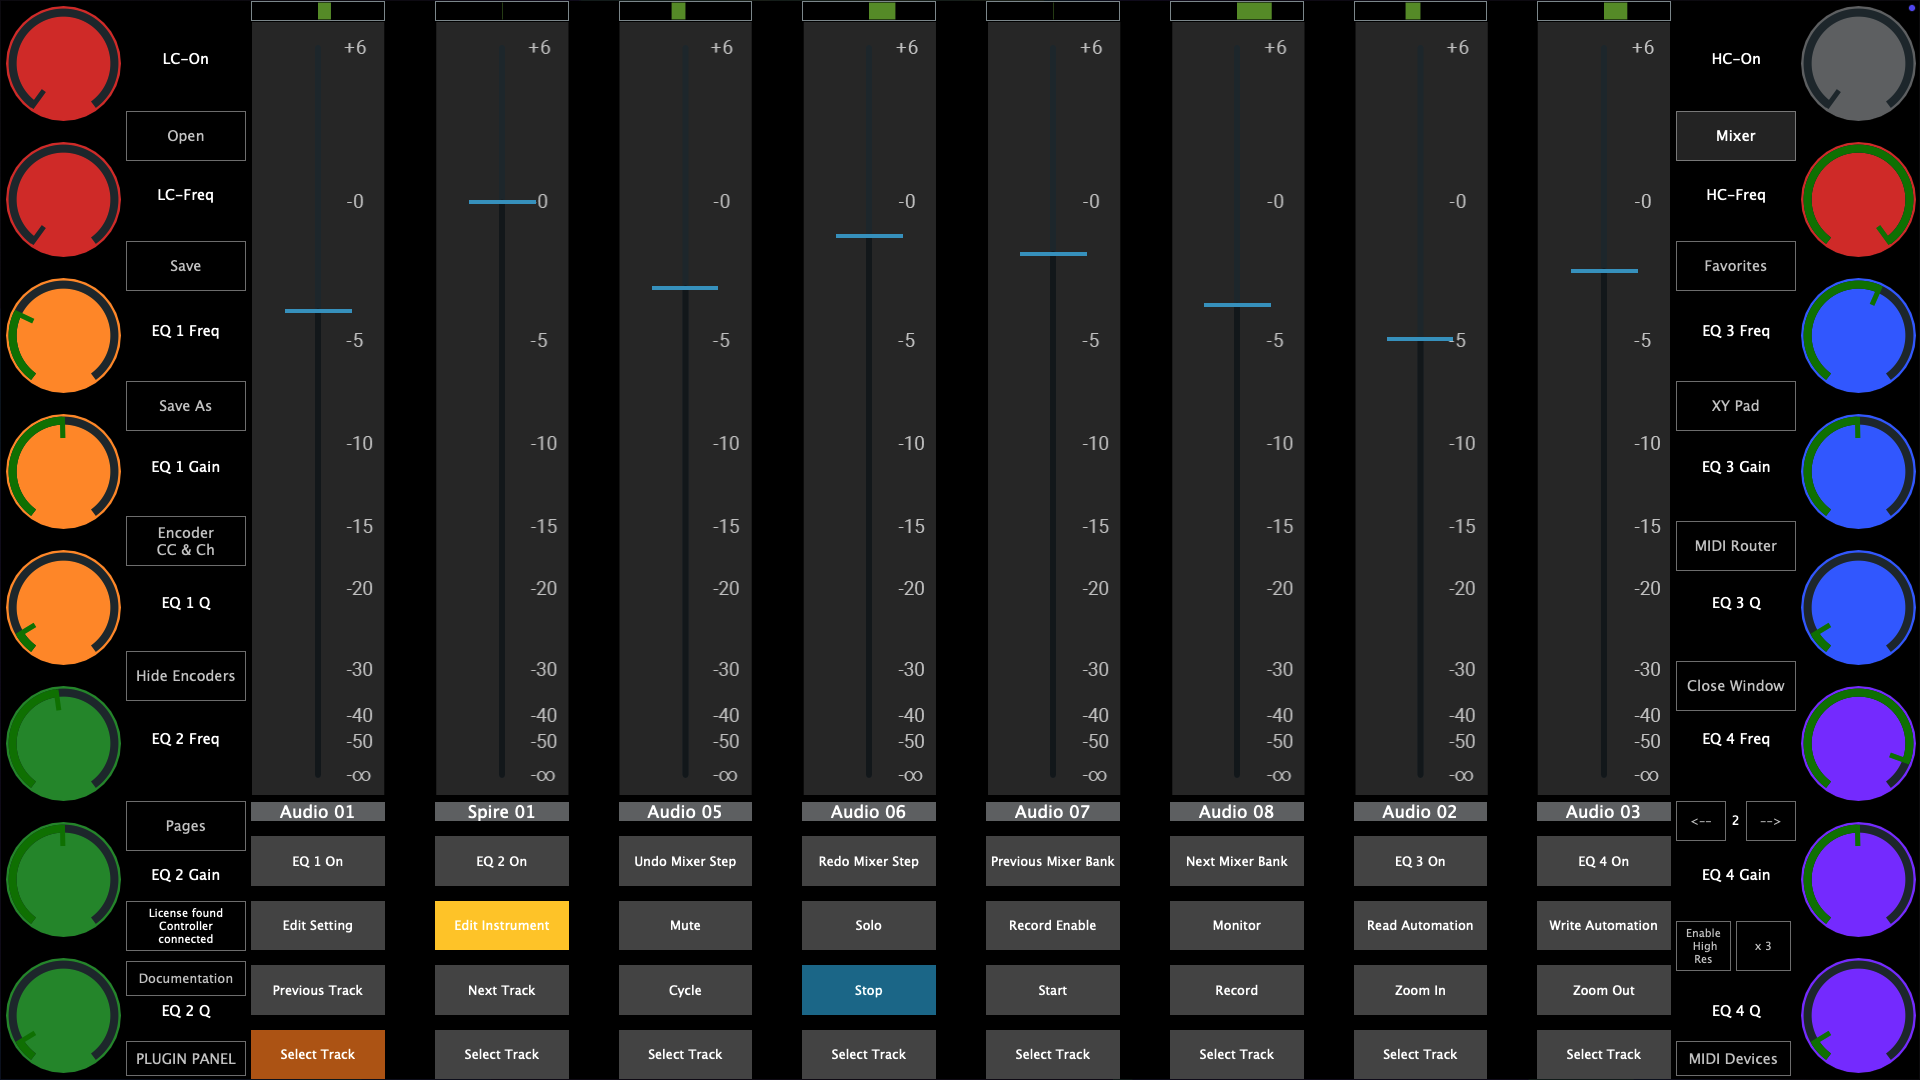](https://kb.mpmidi.com/uploads/images/gallery/2025-06/MU8rBVaLnGELsz0l-image.png) Pressing the Mixer button will hid the mixer view and show this view: [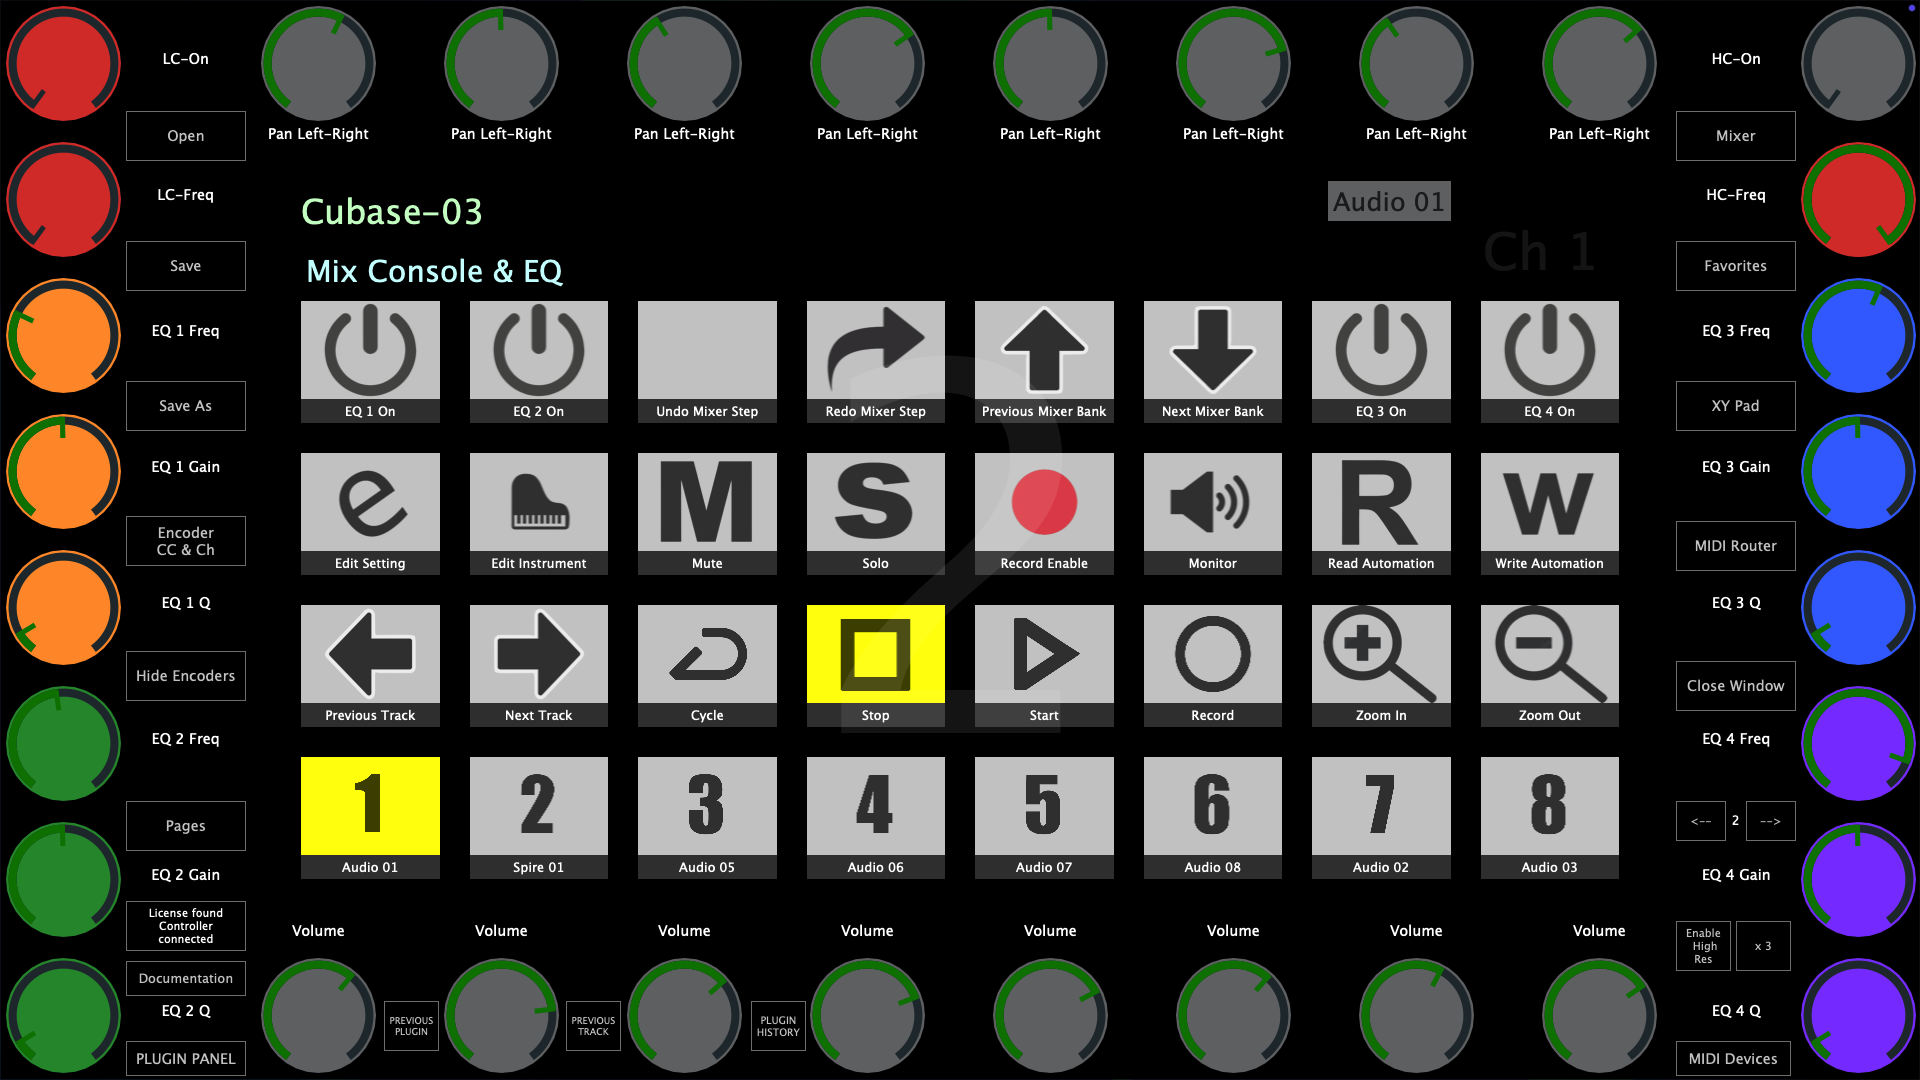](https://kb.mpmidi.com/uploads/images/gallery/2025-06/P0sTxGveyHHRUluy-image.png) In this page, using the arrows buttons, Previous and Next Mixer Bank, will pass the control on the next 8 tracks. 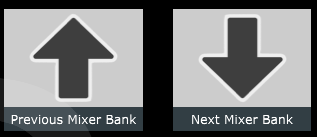 You can also change tracks using the Previous and Next track buttons. --- ##### Page 3 - Channel Strip and EQ Control In this page the top and bottom encoders are assigned to the EQ sections of the Channel Strip. The left column of encoders is assigned to the Noise Gate and the Compressor of the Channel Strip. 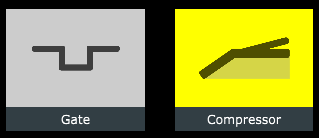 The right column of encoders is assigned to the Tools, Tape and Limiter of the Channel Strip.  Selecting one from the buttons will deselect the rest of buttons and sync the parameter names and values of the controller encoders to the selected slot. Note that rearranging the order of the slots would not affect the assignments on the MP MIDI app. [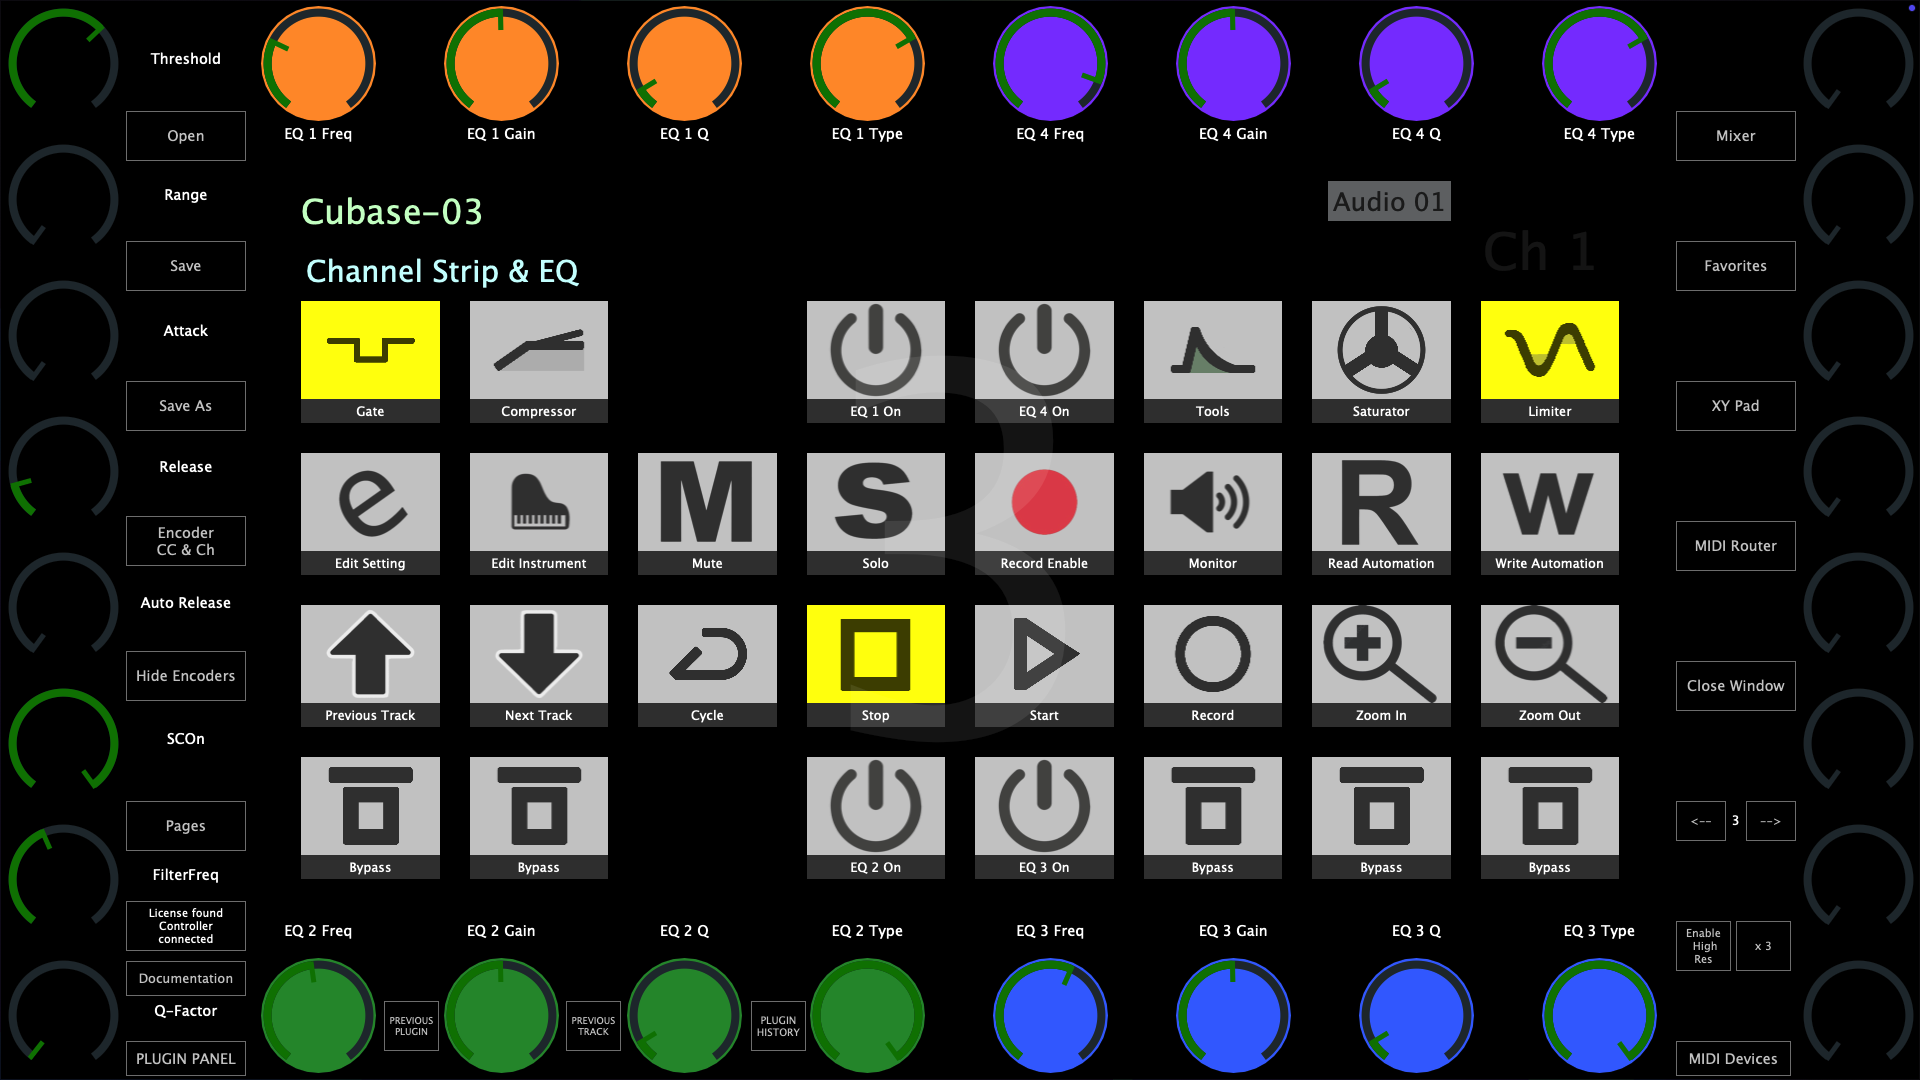](https://kb.mpmidi.com/uploads/images/gallery/2025-06/ZoSyNC0YCq2B8H3h-image.png) --- ##### Page 4 - Audio Effect Control This page controls the selected track insert effects device whether this is a Cubase effect device or third party plugin. Selecting a device will display the name of the device and sync with the encoder names and values with Cubase. Selecting a different track will display the name of the first device and sync with the encoder names and values with Cubase. [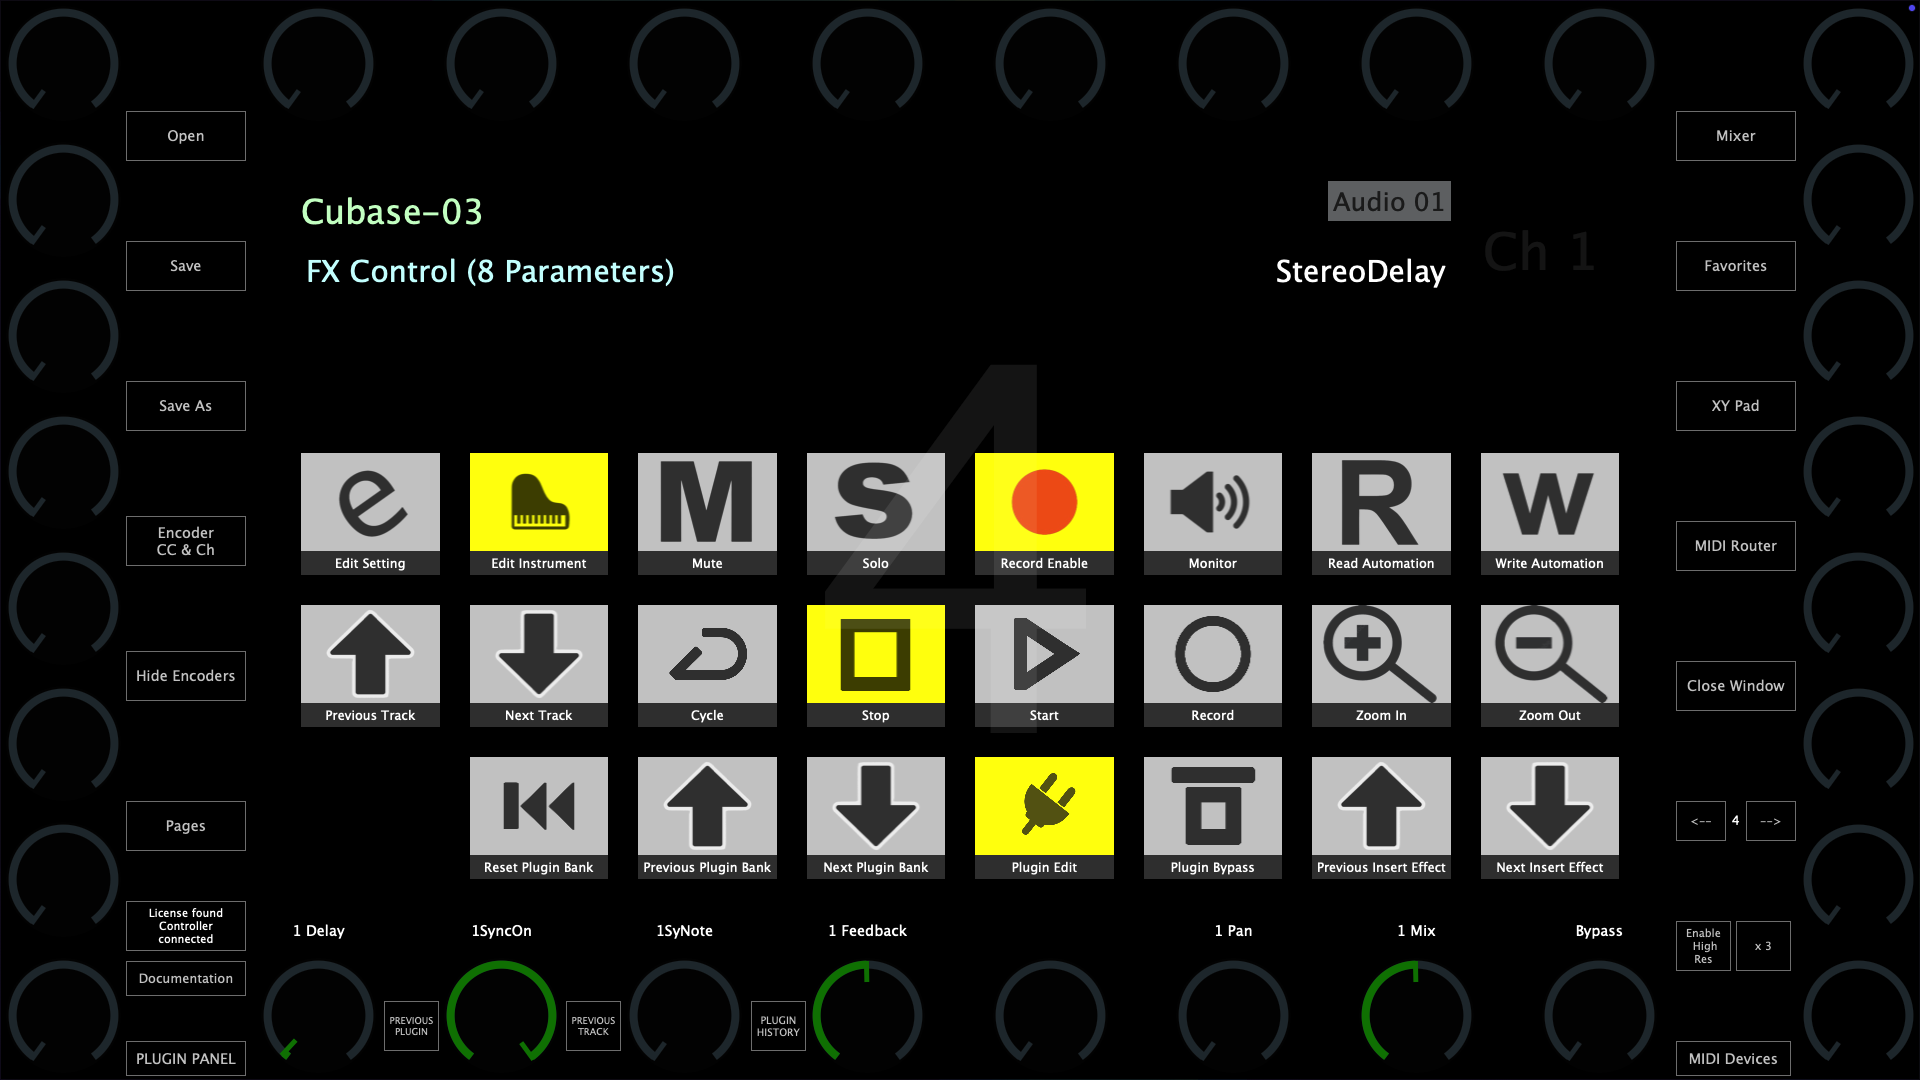](https://kb.mpmidi.com/uploads/images/gallery/2025-06/WaBkHo9b4vE2PNWF-image.png) To control the next 32 parameters of the device (if the device has more than 32 parameters) you can use the Bank buttons to select the next bank. To go back to the previous bank select Previous Bank.  The Reset Plugin Bank button will sync the controller to the first bank of parameters.  --- ##### Page 5 - Instrument Control Once you select an Instrument track, the MP MIDI app will sync with the encoder names and values with Cubase. [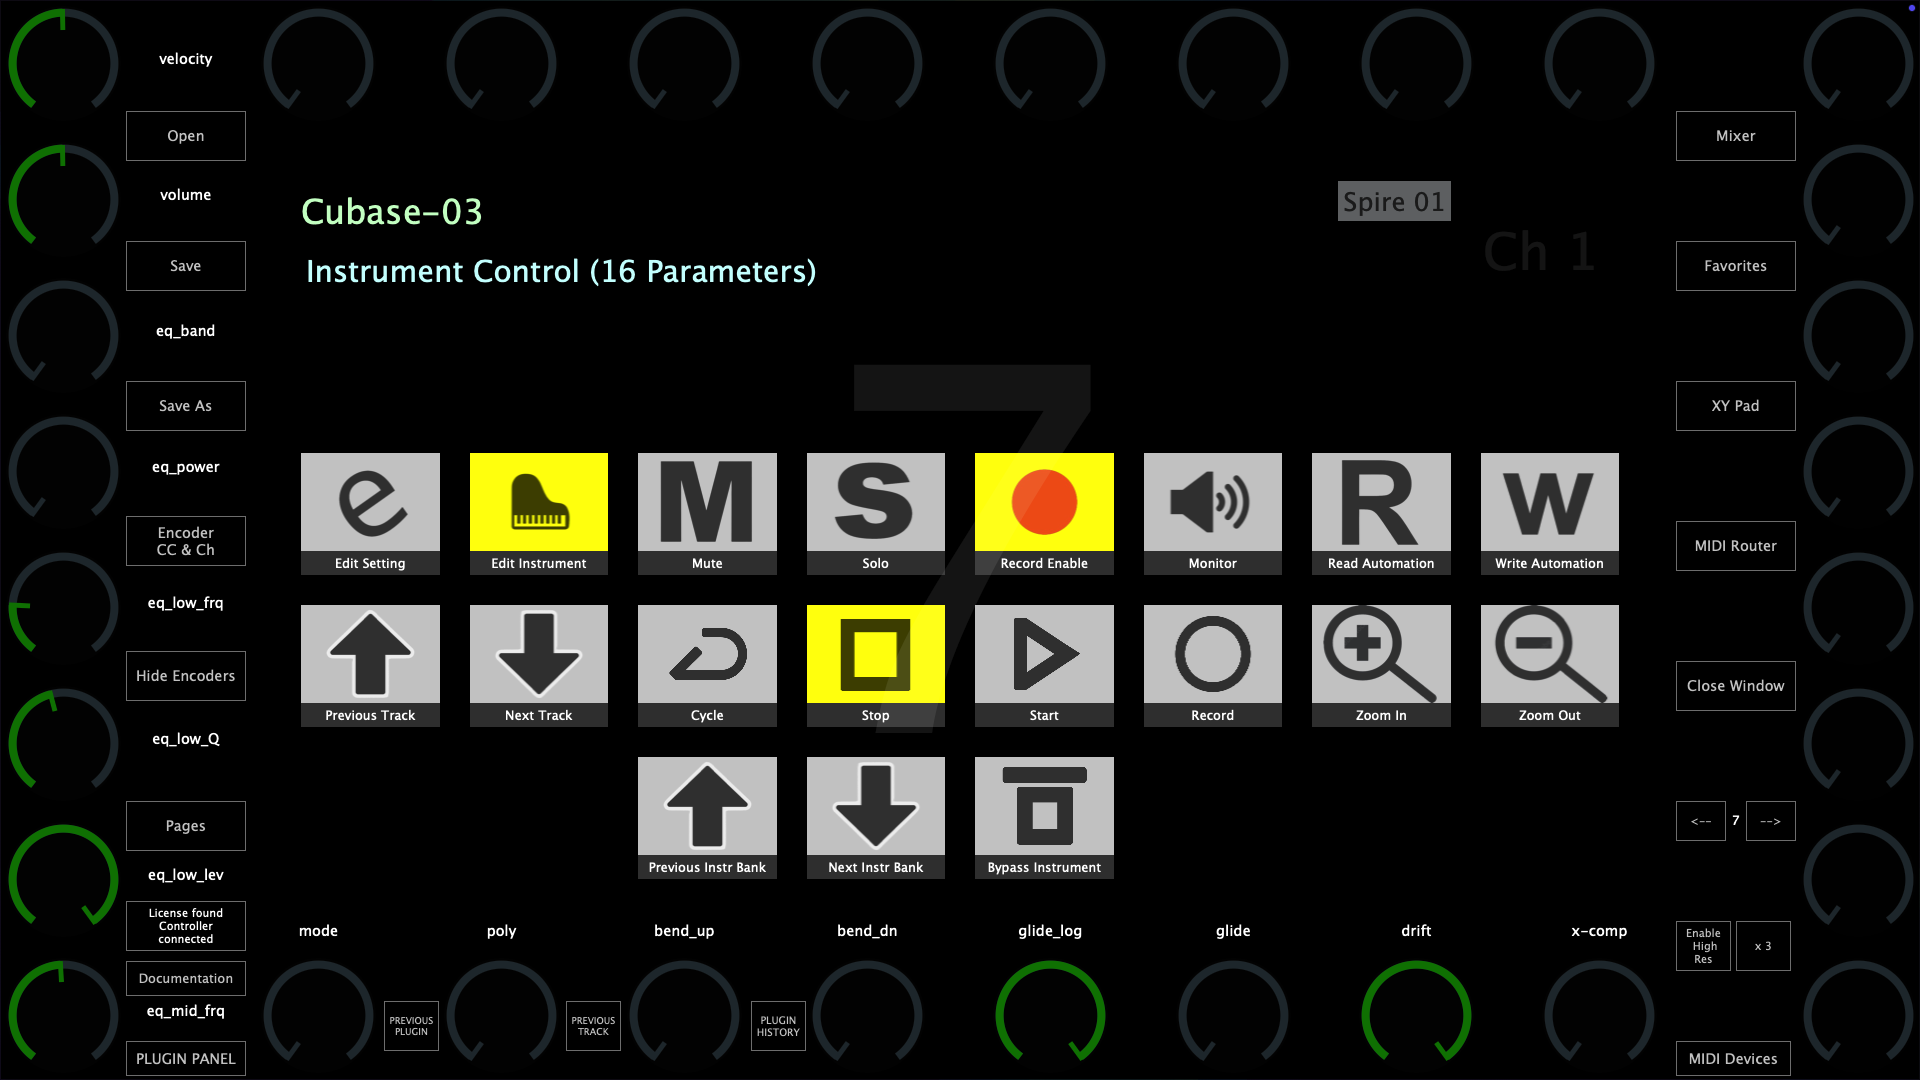](https://kb.mpmidi.com/uploads/images/gallery/2025-06/p77uIYTc3gnHWyIZ-image.png) To control the next 32 parameters of the Instrument (if the device has more than 32 parameters) you can use the Bank buttons to select the next bank. To go back to the previous bank select Previous Bank.  The Reset Plugin Bank button will sync the controller to the first bank of parameters.  --- ##### Page 6 and onwards - User Assignable pages These pages carry some of the most essential buttons and you can use the free buttons and encoders to link anything in Cubase, creating your custom pages. For example, you can link 32 volume tracks for the Mix Console. [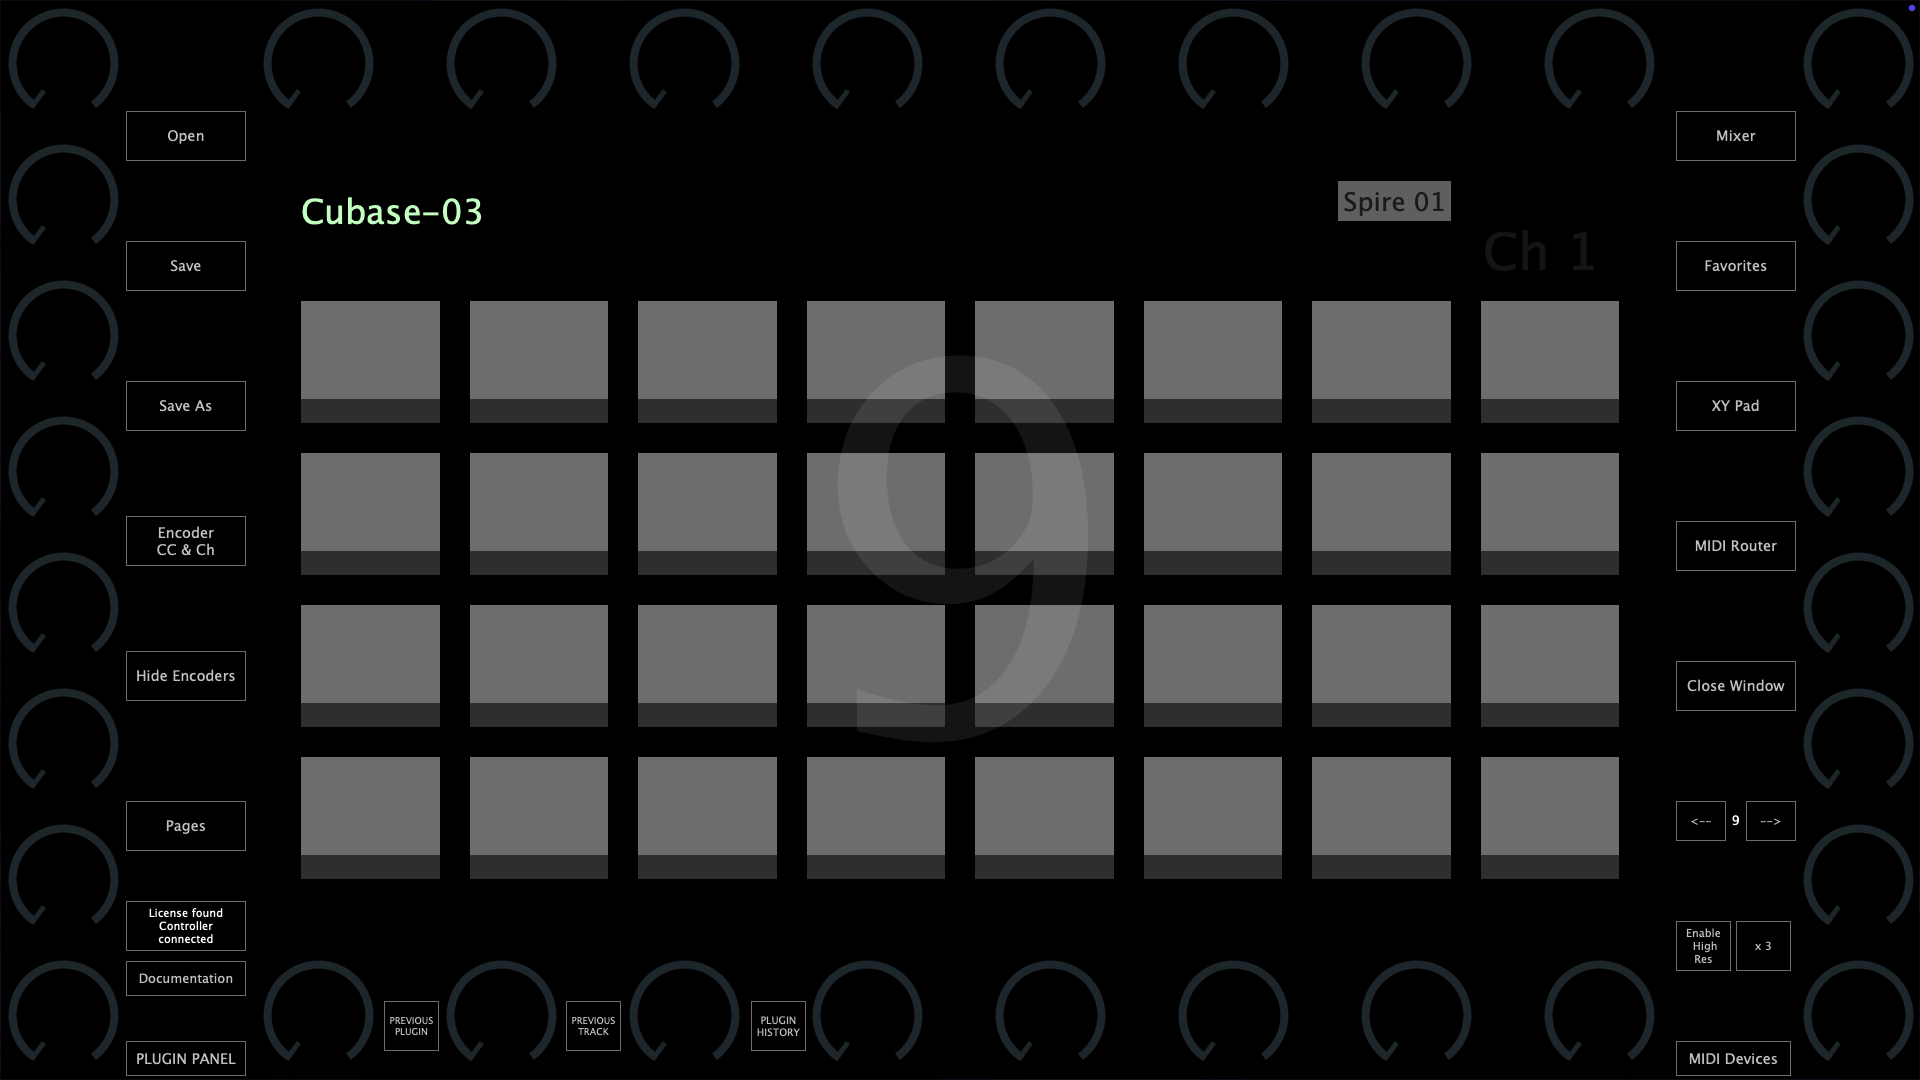](https://kb.mpmidi.com/uploads/images/gallery/2025-06/HXIG3lEmffbh4t97-image.png) If you want to use the MP MIDI app for other MIDI control purposes, it is also a good idea to use one of the buttons to open up another preset (you can set a button to open a preset via Push Options > Go to Preset) where you will have all pages and buttons available to use for anything. The switch between presets is immediate so it will feel like you are working in the same preset. --- ##### Cubase Remote Control Editor (Optional) You can edit the default assignments of parameters given by Cubase using the [Remote Control Editor in Cubase](https://www.youtube.com/watch?v=IizoHY_bkUM&ab_channel=Steinberg)Note that this is not part of the MP Controller system, and it is a feature in Cubase. This section is provided to get you familiar with the Remote Control Editor in Cubase.
[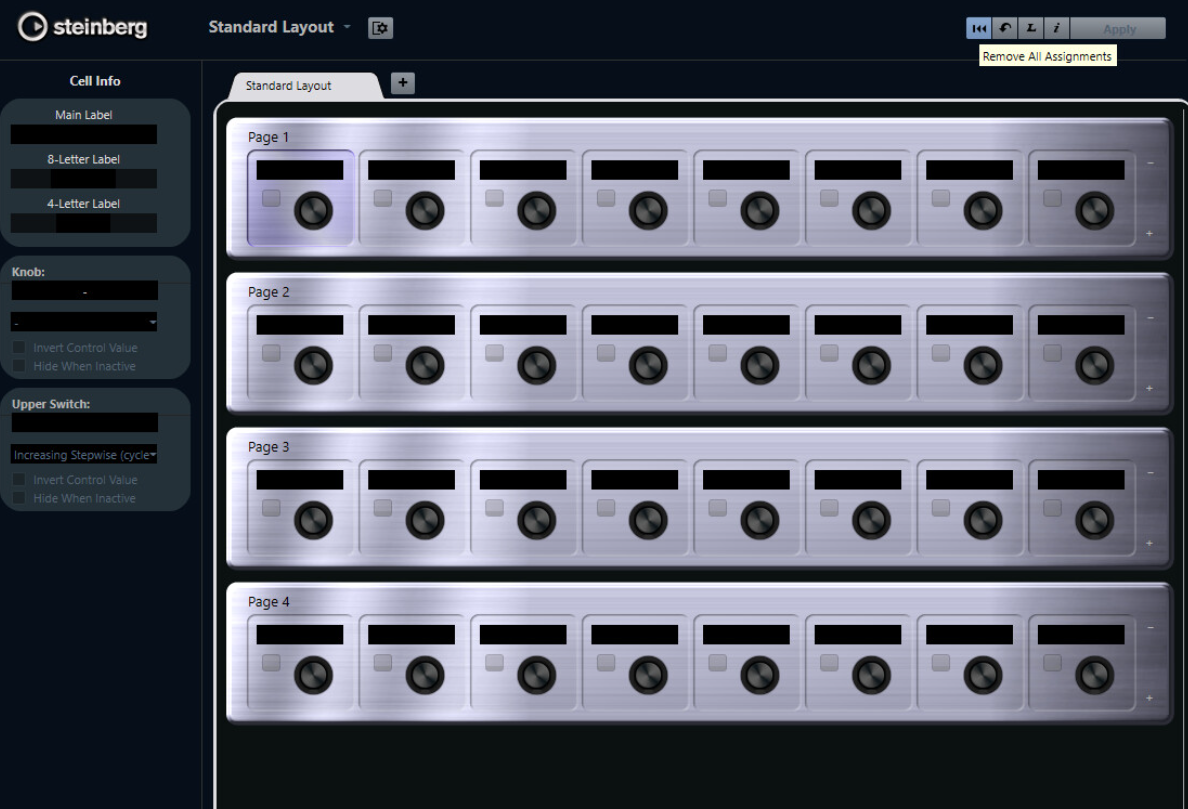](https://kb.mpmidi.com/uploads/images/gallery/2025-09/Gji6NKXeTeQMXdUh-image.png) **1. Open the Remote Control Editor** 1. Load an instrument or effect plugin on a track. 2. In the Inspector (left side of the project window), go to the Track’s “Remote Control” tab. - If you don’t see it, enable it via *Setup Window Layout*. 3. Click the “Remote Control Editor” button (little gear-like icon). **2. Understand the Layout** - The editor shows pages of 8 slots each (knobs/buttons). - These correspond to the controls that can be addressed by the MIDI Remote Control Surface (MP Controller). - Each slot can be assigned to a plugin/device parameter. **3. Assign Parameters** Click a slot → choose a parameter from the plugin/device. You’ll see a parameter list from the plugin (filter cutoff, resonance, etc.). You can also search/filter by typing. Repeat for all the slots you want filled. Re-order parameters by dragging them into different slots. **Tip: You can also make multiple pages. For example:** Page 1 → Filter & Envelope controls. Page 2 → Oscillator controls. Page 3 → FX controls. **4. Save Remote Maps** - Once mapped, Cubase remembers your setup for that plugin/device. - The next time you load that plugin, the Remote Control Editor will show your custom layout. --- ##### Setting up the Cubase Mixer background image The Cubase background mixer should be set automatically when you load the Cubase-03.xml preset. The image file for the mixer db values is included in the images.zip file and it will be extracted when you extract the images folder as explained in the installation instructions. Optionally, here are the instructions to set the background image of the mixer manually. You can download the Cubase mixer background image from [here](https://drive.google.com/file/d/1UCnnulNJmRyV7X3gKLCYL1CrDjksa0Hp/view?usp=drive_link) and save it in **Mac Folder** /Users/USER/Library/Application Support/MP/Host/MP MIDI Presets/Images or ~/Library/Application Support/MP/Host/MP MIDI Presets/Images **Windows folder** C:\\Users\\USER\\AppData\\Roaming\\MP\\Host\\MP MIDI Presets\\Images [](https://kb.mpmidi.com/uploads/images/gallery/2025-06/yr1oVu77g6LzD4Ff-image.png) Right click on a Fader of the **top area** of the mixer [](https://kb.mpmidi.com/uploads/images/gallery/2025-06/1GMM2hBqCb1ldPMw-image.png) You will see this window: [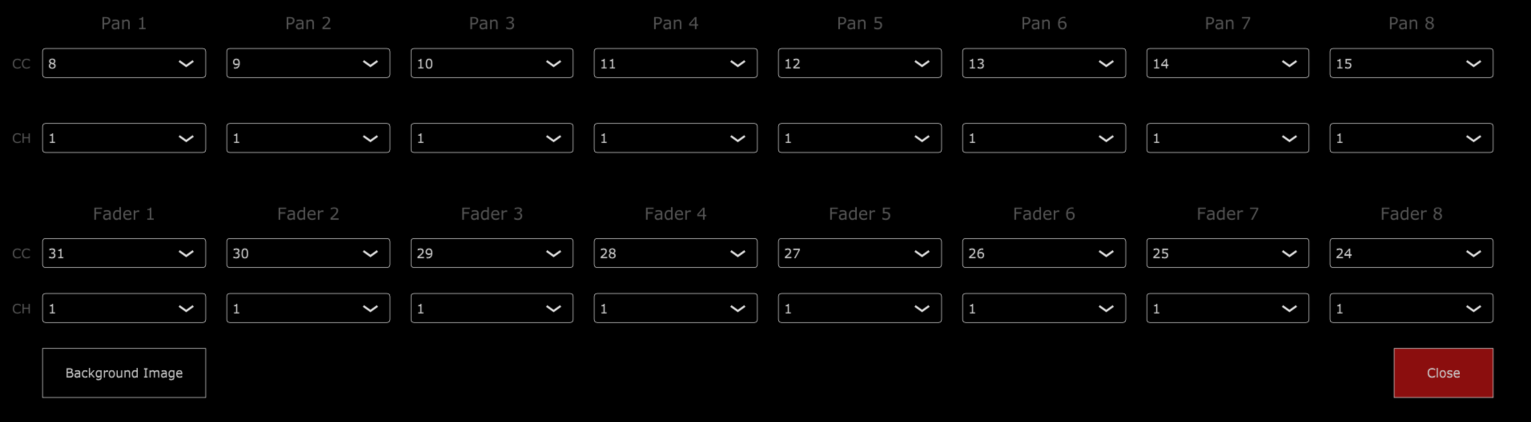](https://kb.mpmidi.com/uploads/images/gallery/2025-06/iDURnukFRZ6tySvu-image.png) Click on the Background Image button and select the **Cubase mixer bg.png** image. Click close and click on the button to Save the preset. This is it. The background of the mixer will appear the next time you open the Cubase preset. --- # 3. Using 2 MP Controllers at the same time See [article](https://kb.mpmidi.com/books/mp-controller-documentation/page/14-using-2-mp-controllers-at-the-same-time) # 4. Controlling Bitwig Studio native devices via the MP MIDI app We have a created a Bitwig Studio extension that enables you to control Bitwig Studio devices upon selecting them. The [MP MIDI app](https://kb.mpmidi.com/books/mp-controller-documentation/page/1-the-mp-midi-controller-application) will automatically sync and display the controls for the parameters of the selected device. You can download the installer from the user portal for Mac and Windows. ##### How it works The MP MIDI app will display and sync to the selected Bitwig Studio device. Upon selecting a device in Bitwig Studio, it sends a notification to the controller that carries the track name and the device name. Once the MP MIDI app receives the notification, it immediately loads the xml preset for the device and Bitwig sends all the values of the parameters of the selected device to the MP Controller. Along with the extension there are text mapping files, one for each device, that contain the name of the parameters, MIDI CC and MIDI channel. The Bitwig Studio extension reads these files and that is how it knows which MIDI CC controls the corresponding parameter of the device.On the Mac and Windows, the Bitwig Studio extension and device mapping files are placed by the installer in ~/Documents/Bitwig Studio/Extensions and the xml presets in the ~/MP/Host/BitwigPresets.
**On Windows,** If you have One Drive installed and using it on Windows, the Bitwig extension file and mapping files in One Drive instead of the C: drive and it will not work. If that is the case, move the folder to C:\\users\\USERNAME\\Documents\\Bitwig Studio\\Extensions A tutorial video on how to set it up can be found [here](https://drive.google.com/file/d/1rEVEKADBFKMEQIBvzBGAvckEBP1ZB84Q/view?usp=sharing)
On the left side it displays the selected device name and on the right the selected track name.  --- ##### How to install and load You need to [install the MP MIDI app](https://kb.mpmidi.com/books/mp-controller-documentation/page/1-the-mp-midi-controller-application) first. The MP MIDI app is used to control the Bitwig devices. Run the installer and then run the MP MIDI app. Then open Bitwig Studio. Alternatively, you can use the MP MIDI app plugin which will be saved in your Bitwig project. Do not run both, the MP MIDI app and the MP MIDI plugin. Go to Settings in Bitwig Studio 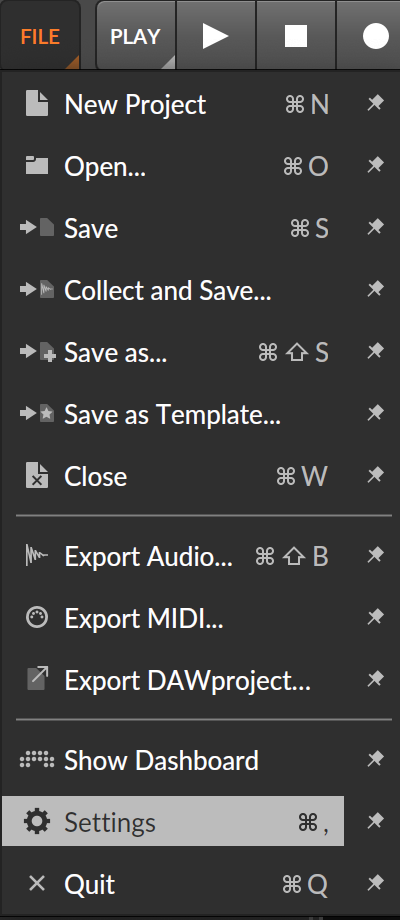 Choose Controllers 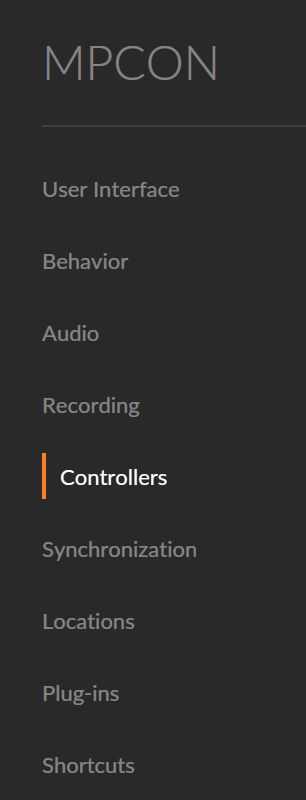 Select Add Controller  and from the list choose MP Controller  Select the Product: MP Controller and click Add 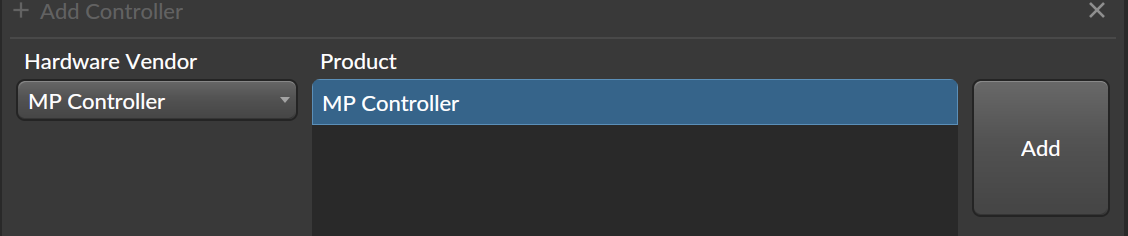 on the Mac, select the MIDI Ports: MP MIDI for IN and OUT 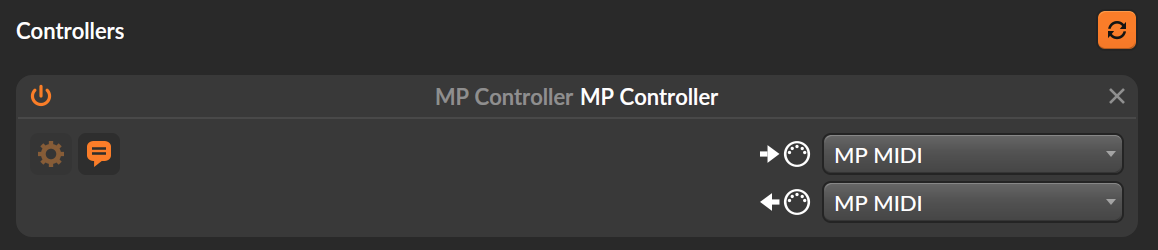 on Windows, you need to create 2 virtual MIDI ports as explained in the [MP MIDI Documentation page](https://mpcontrollerbyteltd.freshdesk.com/en/support/solutions/articles/103000247277-the-mp-midi-controller-application). IMPORTANT: You need to use loopMIDI to create the virtual MIDI ports because it allows naming the ports: FROM DAW & TO DAW which is required for the Bitwig presets to load correctly. 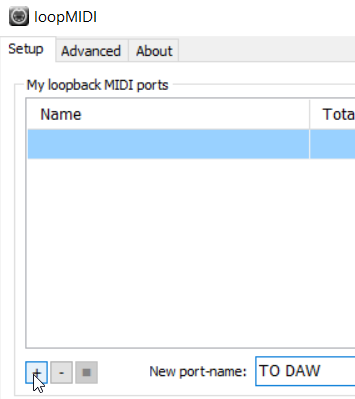 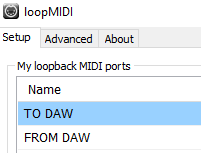 Then in the MP MIDI app, click on MIDI Devices and choose the following: 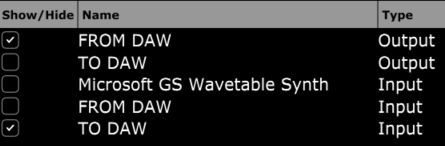 in the default preset route using the MIDI Router as: 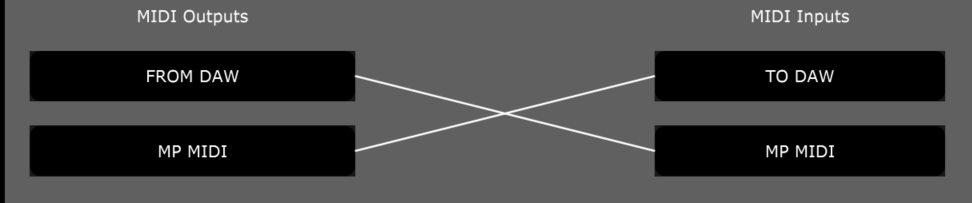 and save the default.xml (overwrite it). Then in Bitwig, select these ports in the Controllers section: 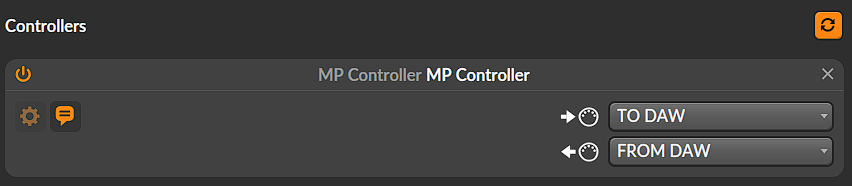 Close settings and add a device in Bitwig Studio, the MP Controller will sync to the device and load the device preset in the MP MIDI app. If you are experiencing strange behavior when using in the same project the MPMIDI plugin and MPH Multi host plugin make sure have this setting in Bitwig 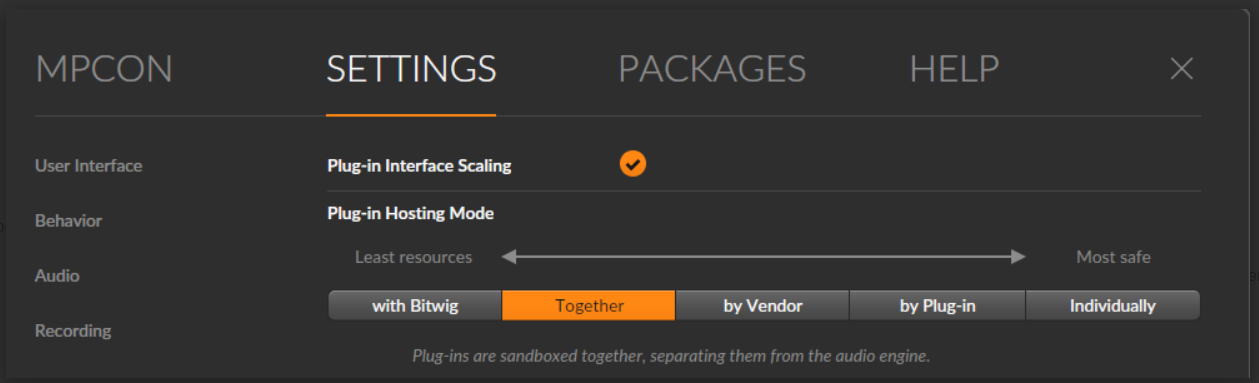 --- ##### Using it in parallel with the MP Host The MP MIDI app can be used in parallel with the MP Host plugins. When using the MP MIDI plugin the plugin panel will be available to use as well (the plugin panel is not available in the MP MIDI standalone app). --- ##### Limitations Please note the following limitations on devices and the have been reported to Bitwig so that they can be fixed. The device On/Off is mapable but does not send or receive. Audio Receiver. Mapped but not send or receive parameters. Channel Filter. Nothing to map. Compressor+. Does not send parameters. Channel Map. Nothing to map. DC Offset. Mapped but not send or receive parameters. Drum Machine. Mapped but not send or receive parameters.Only 1 parameter to be mapped. Dual Pan. Mapped but not send or receive parameters. Filter+. Mapped different parameters but only the "MIX" was working ok. FM-4. The "Glide" parameter is mapped but it does not send or receive parameters. Freq Shifter. Mapped but not send or receive parameters. fx-grid. Mapped but not send or receive fx-layer. Mapped but not send or receive parameters. fx-selctor. Mapped but not send or receive parameters. Harmonic Split. Mapped but not send or receive parameters. Harmonize. Nothing to map. HW Clock Out. Mapped but not send or receive parameters. HW CV Instrument. Mapped but not send or receive parameters. HW CV Out. Mapped but not send or receive parameters. HW FX. Mapped but not send or receive parameters. HW Instrument. Mapped but not send or receive parameters. Instrument Layer. Nothing to map. Instrument Selector. Nothing to map. Key Filter. Mapped but not send or receive parameters. Loud Split. Mapped but not send or receive parameters. Mid-Side Split. Mapped but not send or receive parameters. MIDI CC. Mapped but not send or receive parameters. MIDI Program Change. Mapped but not send or receive parameters. MIDI Song Select. Mapped but not send or receive parameters. Multiband FX-2. Mapped but not send or receive parameters. Multiband FX-3. Mapped but not send or receive parameters. Note Delay. Mapped but not send or receive parameters. Note Filter. Mapped but not send or receive parameters. Note FX Layer. Nothing to map. Note FX Selector. Nothing to map. Note Grid. Mapped but not send or receive parameters. Note Length. Mapped but not send or receive parameters. Note Receiver. Nothing to map. Note Repeats. Mapped but not send or receive parameters. Organ. Mapped but the "Vibrato" section does not send or receive parameters. Peak-Limiter. Mapped but not send or receive parameters. Phase-4. Mapped but "Glide" parameter is not working. Pitch Shifter. Mapped but not send or receive parameters. Polymer. Mapped but not send or receive parameters. Polysynth. The "glide" parameter does not send or receive parameters. Resonator Bank. Mapped but not send or receive parameters. Sampler. The "glide" parameter does not send or receive parameters. Stereo Split. Mapped but not send or receive parameters. Sweep. Mapped but not send or receive parameters. Test Tone. Mapped but not send or receive parameters. Time Shift. Mapped but not send or receive parameters. Transient Control. Mapped but not send or receive parameters. Transient Split. Mapped but not send or receive parameters. Transpose Map. Mapped but not send or receive parameters. Velocity Curve. Mapped but not send or receive parameters. XY FX. Mapped but not send or receive parameters. XY Instrument. Mapped but not send or receive parameters. --- ##### Mac OS Installer Permissions The Mac OS will prompt you to allow the installer to run. 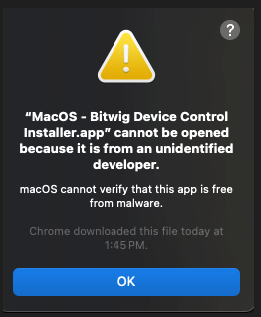 After you run the installer and get this notice, click OK and go to Privacy & Security and choose Open Anyway  In the next prompt, click OK 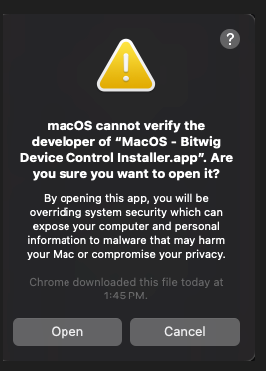 --- ##### Presets not loading automatically on the Mac If the device presets do not load automatically in the MP MIDI app you may need to set the permissions on the MP Host folder. Open terminal on MacOS. Paste the following: sudo chmod -R 777 ~/Library/Application\\ Support/MP/Host  Press Enter. It will ask for your password. Type it and press enter. The permissions are now set. Close and open the MP MIDI app. --- # 5. MP MIDI App - September 2024 Update In the update MPMIDI -v1.0-9d00f78--H2024-09-18--B2024-09-19 (or later version) we have introduced some exciting new features. **This update** - Sends keyboard keys. Option placed under each button's Push Options. - Joker Encoder. Click and control any variable parameter on anything (not just plugins). - Allows you to select to not send CC per button (dropdown of button function). - When running the plugin version, it displays the tray(Win)/topbar(Mac) icon for easy access. --- - [Windows Send Keys documentation](https://kb.mpmidi.com/books/mp-controller-documentation/page/6-windows-mp-midi-app-sending-keyboard-keys) - Windows Joker Encoder ([Windows ](https://kb.mpmidi.com/books/mp-controller-documentation/page/7-windows-mp-midi-app-using-the-joker-encoder)& [MacOS](https://kb.mpmidi.com/books/mp-controller-documentation/page/10-macos-mp-midi-app-using-the-joker-encoder)) - [Mac Send Keys documentation](https://kb.mpmidi.com/books/mp-controller-documentation/page/8-mac-os-mp-midi-app-sending-keyboard-keys) # 6. Windows - MP MIDI App - Sending keyboard keys In the September 2024 update we have introduced this functionality under the button Push Options. It provides the ability to send keyboard keys (or keyboard shortcuts) to any application running in Windows. 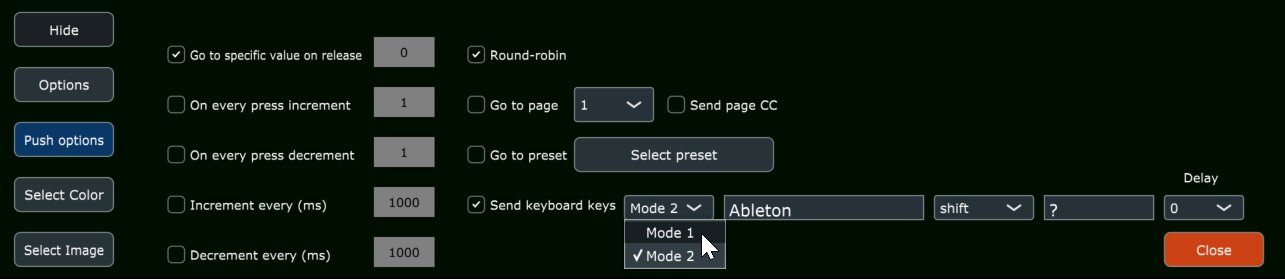 The first field "Window name" selects the target application to send the keyboard shortcut. It does that by finding the target application by window name. The app window name you are targeting to send keyboard keys should contain name typed here. Letter case does not matter. For example, when you want to target Ableton Live, on Windows it shows as:  Typically apps display their window name on the top bar. You can just type the word Ableton and it will find the Ableton Live. The MP MIDI app searches for apps that **contain** that window name. You can [use AutoHotKey Spy app](https://stackoverflow.com/questions/35071472/how-to-determine-title-and-additional-infos-from-an-open-window-for-use-with-aut) to find easily window names of apps.The target DAW/App must not be minimized. The window of the targeted DAW/App must be open when sending keyboard keys. It will not open a minimized application.
--- The drop down shows a list of available key modifiers, the third field is the key you want to send and the last drop down is a delay value that will be triggered after the targeted application has been selected by the MP MIDI app. This delay gives time for the application to come to focus (if needed) and then send the keyboard keys to it. This delay is optional and should be used only when needed. 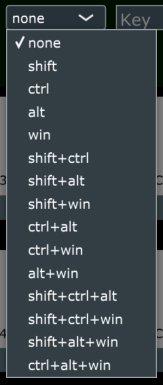 --- You can disable sending CC when you have chosen to send keyboard shortcuts in the Push options dropdown. 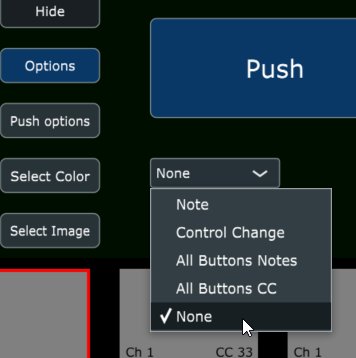 --- You can type in the names of the following keys when you need to send these: backspace space delete escape tab up down left right F1 F2 F3 F4 F5 F6 F7 F8 F9 F10 F11 F12 home end pageup pagedown for example:  The key names must be typed exactly as listed here and letter casing matters.  --- **Modes** There are 2 operational modes on Windows, 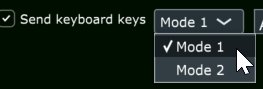 Some applications (DAWs) interpret keys in a different way, therefore we offer 2 different methods so that this feature can be compatible with many applications. For example, Ableton Live works well with mode 1. Cubase works with mode 1 on some keys, like for example "space" but if we send "up" (for up arrow) it does not work with mode 1, it works with mode 2. You can try which mode works best in your DAW or other application. --- Optionally, you can define the keycode definitions or even add new definitions by editing the MPMIDI.properties file under [~/MP/Host](https://kb.mpmidi.com/books/mp-controller-documentation/page/4-show-preset-folder-go-to-the-mphost-properties-folder) folder. When this file is edited the MP MIDI app/plugin needs to be restarted for changes to take effect. If you make a mistake during edits and the MP MIDI app does not work correctly you can just delete the file and run the MP MIDI app to create a new one. 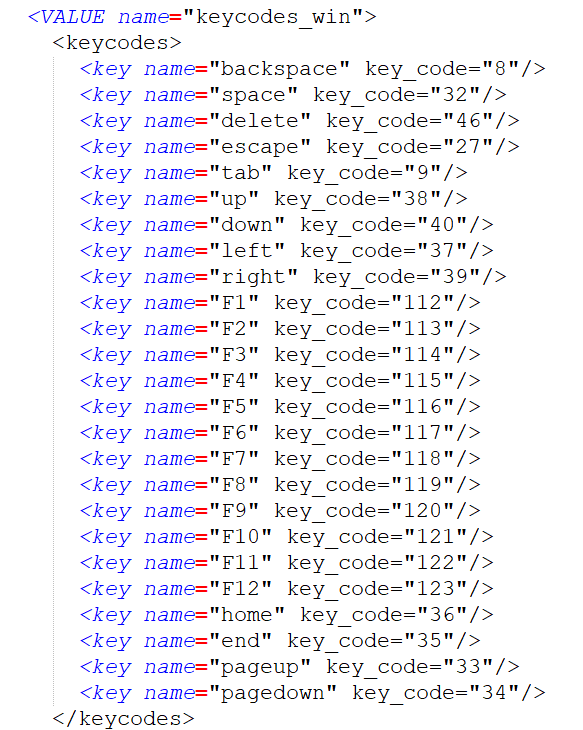 To add a new one, just copy a line and place it as a new line and then save the file. The start the MP MIDI app. You can also edit the existing ones, both the name and key code.To get key codes from your keyboard use a free app like: Windows - [KeyboardKeyInfo](https://dennisbabkin.com/kbdkeyinfo/) (uncheck show in Hex) and for the Mac [Key Codes](https://apps.apple.com/us/app/key-codes/id414568915?mt=12)
# 7. Windows - MP MIDI App - Using the joker encoder The MP MIDI app update in October 2024, includes a new functionality where one encoder can be set as a joker encoder. This encoder, controls mouse cursor movements, while performing a click and drag. This is useful because you can control any variable parameter/component by just clicking on it.The Joker Encoder is only available in the MP MIDI app, not the MP Host plugins.
Video tutorial [here](https://youtu.be/xB3bcVQQurk) [See a video](https://drive.google.com/file/d/1CoxqZtTj7B4rvug1K2KCsCj9apm_B7U_/view?usp=sharing) on how to control a mixer fader in Ableton Live
Click on a parameter and then move the encoder which was previously set as a joker encoder. The mouse will perform a click and drag using vertical cursor movements. To switch between horizontal and vertical mouse cursor movements, double right click anywhere. The app will detect the double right click and it will switch the direction of the control of the mouse cursor. You will notice that as soon you stop moving the encoder, the mouse cursor returns to the position you clicked last (left click). This is important because when you move the encoder again, the mouse cursor will be on top of the selected parameter, therefore controlling that parameter. **How it works** The way it works is simple. You left click on a location and the coordinates of that location are recorded by the Joker Encoder app. When you move the encoder (previously selected as joker encoder) on the MP controller the mouse cursor performs a click and drag operation starting from the recorded position. After you stop moving the encoder, the mouse cursor will return to the recorded position so you can use it again on that parameter. It important that you don't use the mouse or move the mouse elsewhere when you use the joker encoder to control a parameter because it will not be able to control the mouse cursor. The joker encoder can be used anywhere not just plugins. You can use it to control your mixer or anything you want to control with an encoder. --- **How to activate/deactivate the joker encoder** Click and hold at the center of any encoder. The encoder will show the joker icon. This is now the joker encoder in all pages of the MP MIDI app. Note that when an encoder is set to be a joker encoder it will not send CC messages to any other MIDI port. It will only work as a joker encoder. 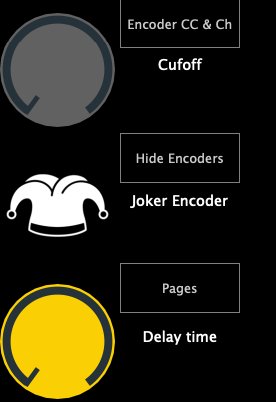 To deactivate the joker encoder, click once at the center of the encoder. The joker encoder will be saved in the MP MIDI app presets.When you close the MP MIDI window, the Joker Encoder will stop working. The Joker Encoder works only when the MP MIDI window is open.
--- **Setup the virtual MIDI port** The Joker Encoder needs a virtual MIDI port to work on Windows. Create a virtual MIDI port named: jokerencoder The name should be exactly that. 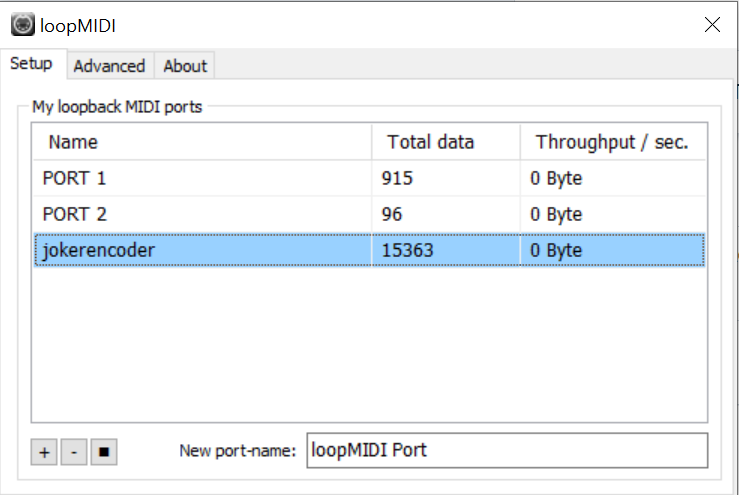 --- # 8. Mac OS - MP MIDI App - Sending keyboard keys In the September 2024 update we have introduced this functionality under the button Push Options. It provides the ability to send keyboard keys (or keyboard shortcuts) to any application running in MacOS.Tutorial video [here](https://youtu.be/VgY_Tcge2v0)
--- ##### Installation of SendKeysMP and Mac OS Permissions required The [MP MIDI app](https://kb.mpmidi.com/books/mp-controller-documentation/page/1-the-mp-midi-controller-application) uses a small utility program called SendKeysMP to send keyboard keys. This functionality was not embedded in the MP MIDI app due to restrictions of the Mac OS. Mac OS does not allow sending keyboard keys via a plugin, therefore we had to separate this feature in an app.Install SendKeysMP (get the MP MIDI installer from your account. SendKeysMP is included) and then set the permissions on MacOS as described [here](https://kb.mpmidi.com/books/mp-controller-documentation/page/9-mac-os-permissions-to-send-keyboard-keys-via-the-mp-midi-app) before moving further in this article.
SendKeysMP is installed in /Applications/SendKeysMP folder. --- ##### Sending Keys To send a key to an app enter the app name. In certain cases, the app window name needs to be defined as well. 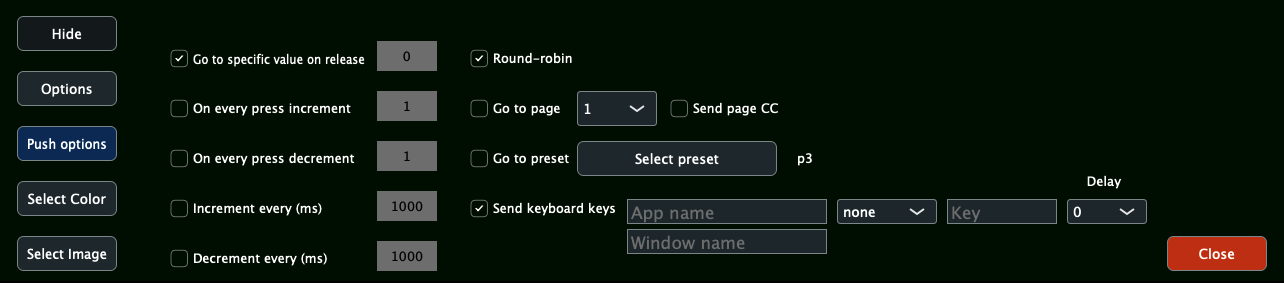 **Name of the DAW/App** This should be entered as it shows in the Mac OS Activity Monitor. For example Ableton Live, it is Live. **Name of the Window** On the Mac when working with applications that have multiple windows (like plugins), for sending certain keys, it may be necessary to define the main application window name. This is important because the keys need to be sent on specific windows. The window name does not have to be match exactly, the app will check if a window exists that contains the given text. Here is an example to send the key combination to create a track.  **Here are some main window names to use of popular DAWs:** Ableton Live: name of the project as it appears on the top bar of the Live app. You can use a keyword like "Ableton" os something else when you save your project so that it matches on every new project. Bitwig: Name of the project or word (keyword) included in the name of the project. Cubase: Cubase Logic Pro: logicx Pro Tools: Edit Reaper: REAPER Studio One: Studio --- ##### Key Modifiers The drop down shows a list of available key modifiers, the third field is the key you want to send and the last drop down is a delay value that will be triggered after the targeted application has been selected by the MP MIDI app. This delay gives time for the application to come to focus (if needed) and then send the keyboard keys to it. This delay is optional and should be used only when needed. 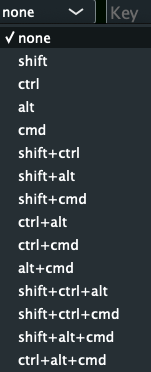 --- ##### Stop sending CCs when sending keyboard keys You can disable sending CC for a button, when you have chosen to send keyboard shortcuts in the Push options dropdown. 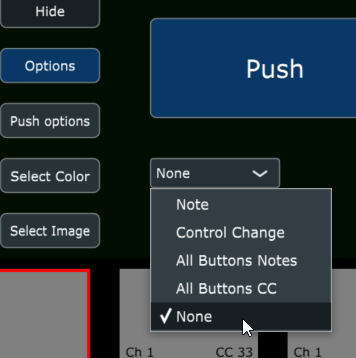 --- ##### Sending predefined keys: You can type in the names of the following keys when you need to send these: backspace space delete escape tab up down left right F1 F2 F3 F4 F5 F6 F7 F8 F9 F10 F11 F12 home end pageup pagedown for example:  The key names must be typed exactly as listed here and letter casing matters.  --- ##### Custom keycode definitions Optionally, you can define the keycode definitions or even add new definitions by editing the MPMIDI.properties file under ~/MP/Host folder. When this file is edited the MP MIDI app/plugin needs to be restarted for changes to take effect. If you make a mistake during edits and the MP MIDI app does not work correctly you can just delete the file and run the MP MIDI app to create a new one.  To add a new one, just copy a line and place it as a new line and then save the file. The start the MP MIDI app. You can also edit the existing ones, both the name and key code. To get key codes from your keyboard use a free app like [KeyCodes](https://apps.apple.com/us/app/key-codes/id414568915?mt=12) To monitor keys sent from the MP MIDI app,you can use[ KeyCodes](https://apps.apple.com/us/app/key-codes/id414568915?mt=12). Set as target app as Key Codes and target Window as Key Codes. Whatever you send from the MP MIDI app will be displayed there. --- ##### Troubleshooting SendKeysMP requires port 5005 to be free on the Mac. If you encounter issues while running it, open a terminal and paste: sudo lsof -i :5005 It will ask for your password. Type it in and press Enter. It should not produce any output. If it does produce output, it means some other app is using that port. That app should be terminated so that the port is free to be used by the SendKeysMP app. Under the COMMAND header, you will see the name of the app using the port 5005.  # 9. Mac OS Permissions to send keyboard keys via the MP MIDI app With the September 2024 of the MP MIDI App update and the feature to send keyboard keys, Mac OS needs the following permissions on the small utility app we have created for sending keyboard keys.Documentation of SendKeysMP is **[here](https://kb.mpmidi.com/books/mp-controller-documentation/page/8-mac-os-mp-midi-app-sending-keyboard-keys)**
The SendKeysMP app needs to run along with the MP MIDI app. It does not matter which you run first, the MP MIDI app or SendKeysMP. You can set SendKeysMP to run automatically when you start your Mac (see the last section for instructions).  Run the SendKeysMP installer follow the steps below to provide the necessary permissions.Please note that you need to follow the steps exactly as they are described below. The MacOS asks for permissions twice, so we need to start and stop the app twice to complete the permission's process. Adding the SendKeys app to the System Settings manually will not work.
1\. Navigate to the Applications > SendKeysMP folder and double click on SendKeysMP.app. This application does not have a window. 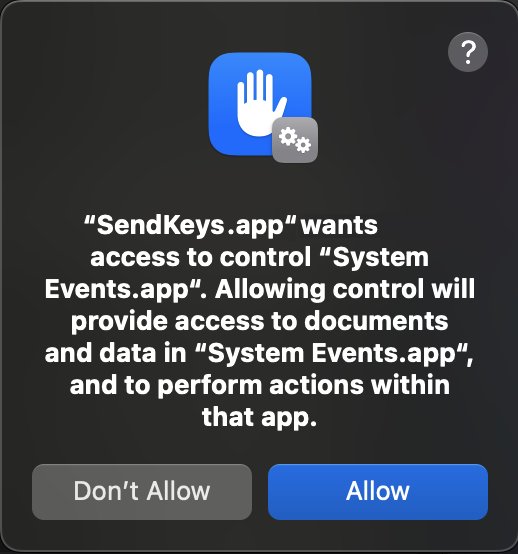 Click Allow 2. Double click on the stop the app run the **StopSendKeysMP.app** from the Applications > SendKeysMP folder. This application does not have a window.  3. Run the SendKeysMP.app again. You will be prompted with this message. Choose to Open System Settings. 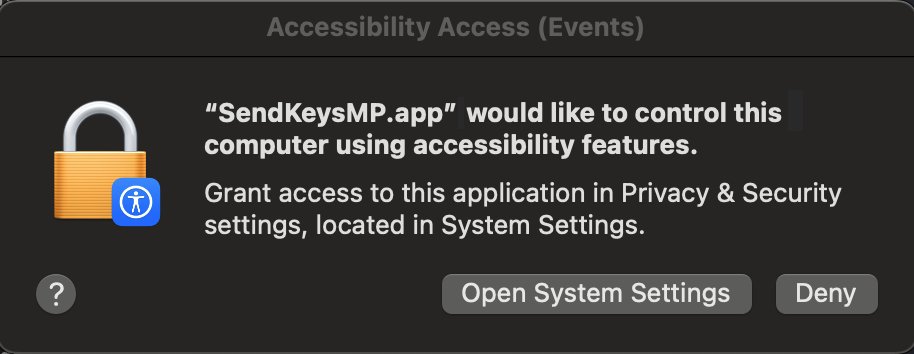 4\. Select Privacy & Security  Then from within Privacy and Security, choose Accessibility  Enable the SendKeysMP.app switching it to enabled from the right slide button.  5. Double click on the stop the app run the **StopSendKeysMP.app** from the Applications > SendKeysMP folder. This application does not have a window.  Run the SendKeys.app again. Now it has access to send keys to your apps.Optionally, after the prior steps, you can add the SendKeysMP.app to Login items in System Settings to start automatically when you start your Mac computer. This will way you don't have to run SendKeysMP every time you want to send keyboard keys from the MP MIDI app.
 # 10. MacOS - MP MIDI App - Using the joker encoder The MP MIDI app update in October 2024, includes a new functionality where one encoder can be set as a joker encoder. This encoder control mouse cursor movements while preforming a click and drag. This is useful because you can control any variable parameter by just clicking on it.The Joker Encoder is only available in the MP MIDI app, not the MP Host plugins. Note that the JokerEncoder app needs to run along with the MP MIDI app. It does not matter which app you run first. You can optionally add the JokerEncoder.app in your Login items so that it runs automatically when you start your Mac.
Left click on a parameter for vertical mouse cursor movements and right click on a parameter for horizontal mouse cursor movements. If the parameter you want to control is controlled with vertical mouse movements then you should left click on the parameter to select it. If the parameter you want to control is controlled with horizontal mouse movements then you should right click on the parameter to select it. For example, left click at the center (or anywhere) of the Dry parameter. Move the joker encoder and it controls the Dry parameter with vertical mouse cursor movements.. Right click at the center (or anywhere) on the Color parameter. Move the joker encoder and it controls the Color parameter with horizontal mouse cursor movements. 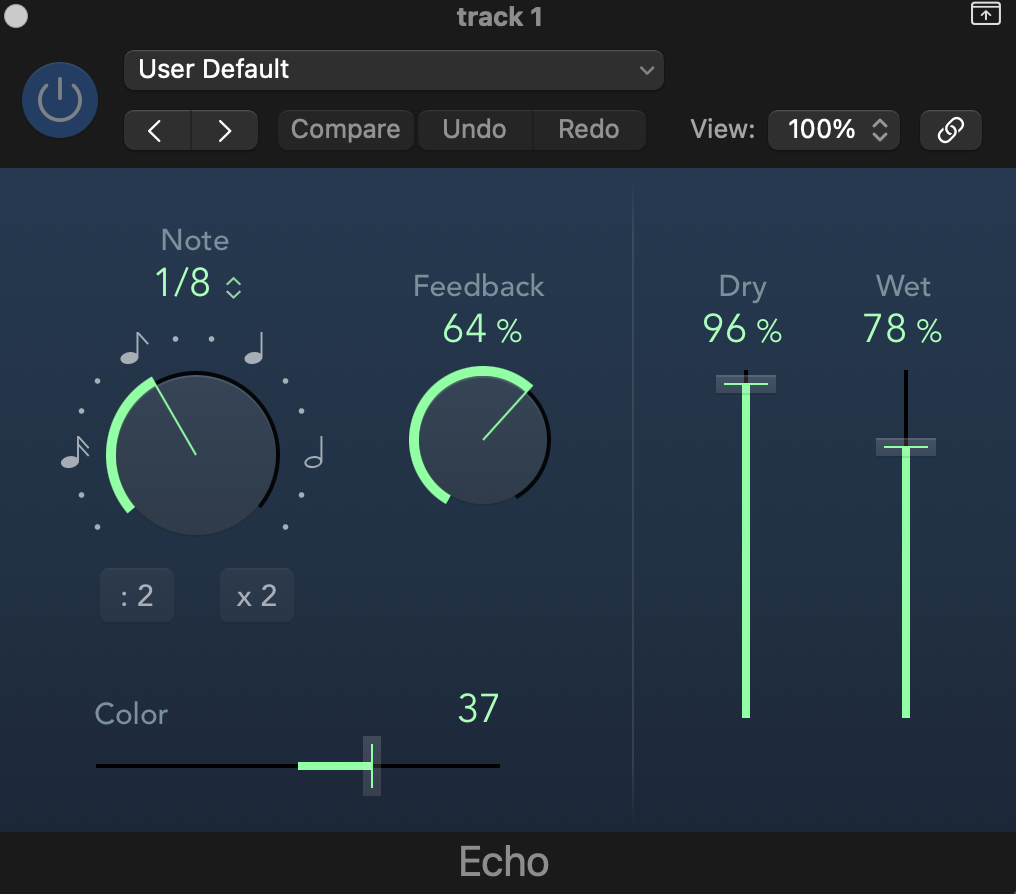 You will notice that as soon you stop moving the encoder, the mouse cursor returns to the position you clicked last. This is important because when you move the encoder again, the mouse cursor will be on top of the selected parameter, therefore controlling that parameter. The way it works is simple. You click on a location and the coordinates of that location are recorded by the Joker Encoder app. When you move the joker encoder on the mp controller the mouse cursor performs a click and drag operation starting from the recorded position. After you stop moving the encoder, the mouse cursor will return to the recorded position so you can use it again on that parameter. It important that you don't use the mouse or move the mouse elsewhere when you use the joker encoder because it will not be able to control the mouse cursor. The joker encoder can be used anywhere not just plugins. You can use it to control your mixer or anything you want to control with an encoder.Video tutorial [here](https://www.youtube.com/watch?v=CGW0Kcz04YA)
--- ##### How to activate/deactivate the joker encoder Click and hold at the center of any encoder. The encoder will show the joker icon. This is now the joker encoder in all pages of the MP MIDI app. Note that when an encoder is set to be a joker encoder it will not send CC messages to any other MIDI port. It will only work as a joker encoder.  To deactivate the joker encoder, click once at the center of the encoder.Note that the joker encoder is saved in the MP MIDI app presets.
--- **Joker Encoder Always On Option** In the options menu, there is an option to have the Joker Encoder Always On. 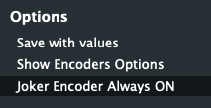 When enabled it will keep on using the encoder to control the mouse cursor even when the MP MIDI window is closed. Use this option with caution especially when using the MP Host because when turning that encoder will control both a parameter on the MP Host and the mouse cursor. --- ##### ##### Installation and Permissions. Due to strict restrictions on Mac OS, we created a separated app that runs in the background. Run the JokerEncoderMP installer (included in the MP MIDI app zip download file) and allow it to run from the Privacy & Security settings in Mac OS. It will install in the Applications folder, within a new folder named JokerEncoderMP the app.  Run the JokerEncoder.app once and you will be prompted to allow it in the Privacy & Security > Accessibility settings. Quit the JokerEncoder.app from the topbar icon  Open the Settings of MacOS and go to  In the list under Privary & Security choose Accessibility 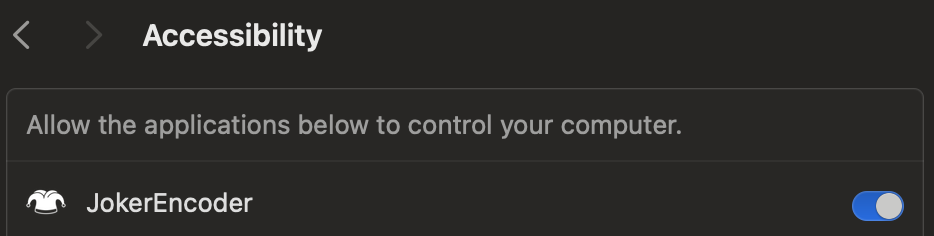 Enable the JokerEncoder. Then go to Privary & Security and choose Input Monitoring  Click on the plus symbol  Enter your password and Select the JokerEncoder.app from the Applications folder. 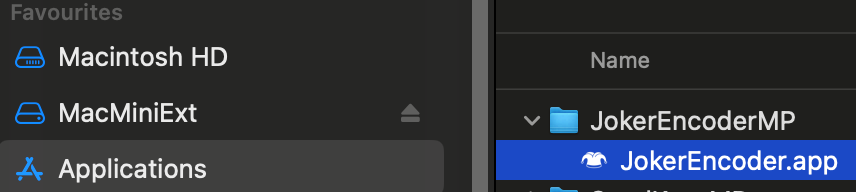 Then enable it 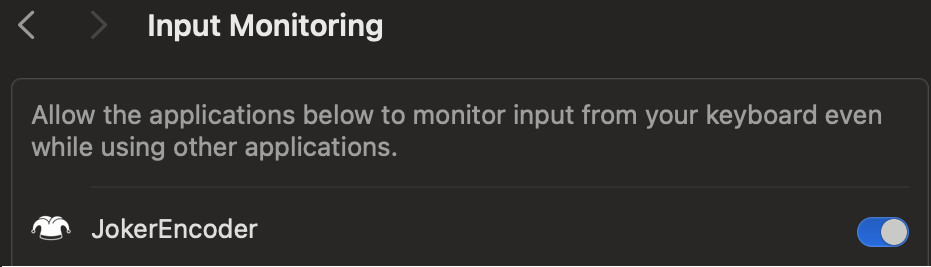 This is it. Now the JokerEncoder app has the necessary permissions to run. ---Troubleshooting
Joker Encoder requires port 5006 to be free on the Mac. If you encounter issues while running it, open a terminal and paste: sudo lsof -i :5006 It will ask for your password. Type it in and press Enter. It should not produce any output. If it does produce output, it means some other app is using that port. That app should be terminated so that the port is free to be used by the Joker Encoder app. Under the COMMAND header, you will see the name of the app using the port 5006.  # 11. Controlling DaVinci Resolve with MIDIGrade software We have a created a MIDI APP Preset that enables you to control the most common parameters of the Color Page in DaVinci Resolve. See promo video [**here**](https://youtu.be/OOZDNhWYsBM?si=pIddA8BiFHHYzIww)You need to purchase and install MIDIGrade to control DaVinci Resolve.
##### How it works: The MP MIDI app will send MIDI messages to MIDIGrade. Upon turning a knob, MIDIGrade will translate the MIDI messages into mouse movements that correspond to DaVinci Resolve Parameters in the Color page. (It uses the mouse cursor to control parameters) MIDIGrade Website: [https://www.midigrade.com/](https://www.midigrade.com/) MIDIGrade Manual: [https://www.midigrade.com/MIDIGrade%20manual.pdf](https://www.midigrade.com/MIDIGrade%20manual.pdf) --- **Downloads and Dependencies:** Make sure you have everything that is listed below installed on your system before you proceed to the configuration. 1. Download & Install [MP MIDI APP](https://kb.mpmidi.com/books/mp-controller-documentation/page/1-the-mp-midi-controller-application) as explained in the article. 2. Download the zip file for [MIDI APP Preset, Preset Images & DaVinci Resolve Preset](https://drive.google.com/drive/folders/1KIe0UeAyvyu95FiUtHTZIVUC6rvAcsA_?usp=sharing) and unzip it. 3. Download & Install [loopMIDI](https://www.tobias-erichsen.de/software/loopmidi.html) **(Windows Only)** 4. Download & Install [MIDIGrade](https://www.midigrade.com/) 5. Download & Install [DaVinci Resolve](https://www.blackmagicdesign.com/products/davinciresolve) --- **Configuration:** After everything is installed, follow the next steps. **Step 1:** From the unziped file, drag and drop the "Color.xml" into the **[MP Host folder](https://kb.mpmidi.com/books/mp-controller-documentation/page/3-mp-host-properties-and-config-files):** (create the DavinciResolve folder) **Windows: ** C:\\Users\\%username%\\AppData\\Roaming\\MP\\Host\\MP MIDI Presets\\DavinciResolve Mac: /Users/USER/Library/Application Support/MP/Host/MP MIDI Presets/DavinciResolve or ~/Library/Application Support/MP/Host **Step 2:** **From the unzipped file, open the "images" folder and drag and drop all the images into: ** ~MP\\Host\\MP MIDI Presets\\Images **Step 3: *(Windows Only - Mac users go to step 4)*** Open loopMIDI and add a port, name it "PORT 1", then add another port and name it "PORT 2" 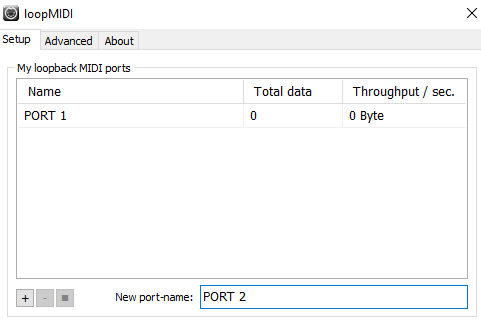 ### 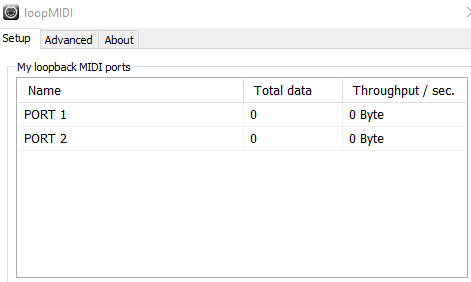 **Step 4:** For more detail configuration & Troubleshooting on MIDIGrade software, please advice the MIDIGrade Manual: [https://www.midigrade.com/MIDIGrade%20manual.pdf](https://www.midigrade.com/MIDIGrade%20manual.pdf) Open MIDIGrade and set up the settings according to your DaVinci Resolve configuration: 1. Set the MIDI input device 2. Select your screen resolution that DaVinci Resolve will be open 3. Select your DaVinci Resolve Version "19/18/17" 4. Select DaVinci Resolve "Studio" or "Free" 5. Select "Dual Screen" if you have enabled the Dual Screen Mode in DaVinci Resolve 6. Select between the three options according to how it is set up in yourDaVinci Resolve  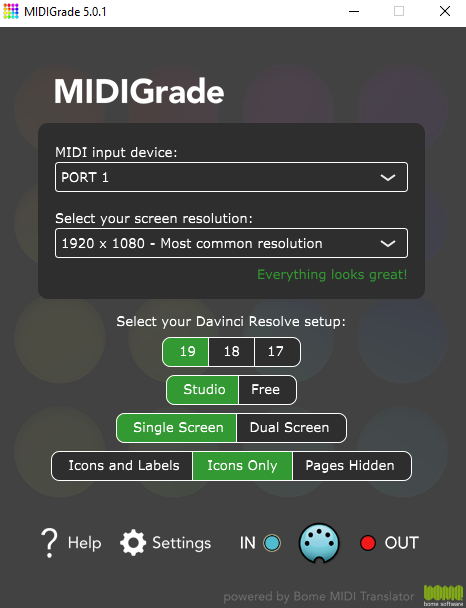 Mac Users use port "**MP MIDI"** **Step 5:** Open DaVinci Resolve & press "Ctrl + Alt + K" shortcut on your keyboard to open the Keyboard "Customization" window. Next click on the three dots top-right corner and click on "Import Preset": 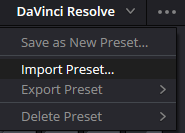 Then open the "DaVinci MP Controller.txt" file. **Step 6:** Restart the computer. **Step 7:** Now in order to use it, you just have to open, loopMIDI, the MP MIDI APP, open MIDIGrade, and load your DaVinci Resolve project you want to work on. Navigate to the Color page and you are ready to control what you want. --- ##### Dolby Vision: The Dolby Vision license for DaVinci Resolve is a software license that enables the use of Dolby Vision technology within DaVinci Resolve. Dolby Vision is an advanced HDR (High Dynamic Range) format developed by Dolby Laboratories, which provides improved color, contrast, and brightness, delivering high-quality visuals. The license allows you to create, edit, and export Dolby Vision HDR content, including the use of Dolby's proprietary tone mapping and metadata management, which ensures the best possible viewing experience across a range of devices. Even though the most important parameters of Dolby Vision can be controlled, the Dolby Vision license usually requires a separate activation and involves a licensing fee, which helps cover Dolby's proprietary technology costs. In some versions of DaVinci Resolve Studio, basic Dolby Vision tools might be included, but more advanced capabilities require the full license. ##### Dolby Vision useful links: 1. [https://professional.dolby.com/licensing/](https://professional.dolby.com/licensing/) 2. [https://professional.dolby.com/content-creation/dolby-vision-for-content-creators/](https://professional.dolby.com/content-creation/dolby-vision-for-content-creators/) 3. [https://prostore.dolby.com/products/dolby-vision-individual-certification](https://prostore.dolby.com/products/dolby-vision-individual-certification) --- ##### Troubleshooting: **1.** For Windows users, make sure all of your monitors are connected on the same graphics card. If the monitors are connected on 2 different graphics cards it will not work. **2.** The CC 42 Channel 3 & 4 doesn't turn the 1st Saturation as written in MIDIGraded Manual. Instead it turns the 2nd Saturation. (This will be fixed in a future update of MIDIGrade as Julious from MIDIGrade informed us.) **3.** Dolby Vision parameters in DaVinci Resolve cannot be controlled without a Dolby Vision license.(Touto pistefko kserun to oi users tou davinci pou en pro kai en na xrisimopiisoun dolby vision.) # 12. Mixer Mode in the MP MIDI app In the November 2024 update of the MP MIDI app we have introduced a new view called Mixer Mode. See [video ](https://www.youtube.com/watch?v=8HFd1RPQmKs&ab_channel=MPMidiController)on YouTube. The view can be activated using the Mixer Mode button on the upper right corner. [](https://kb.mpmidi.com/uploads/images/gallery/2025-06/F1XFW0ci204P60fL-image.png) **The Mixer mode shows** - 8 horizontal faders which are assigned to the top row encoders. The meter starts from the center to be mapped on the pan on the DAW's mixer. - 8 vertical faders which are assigned to the bottom row encoders. These can be mapped on the DAW's mixer volume and can also be controlled via touch. - 4 buttons under each column (32 in total) assignable buttons. [](https://kb.mpmidi.com/uploads/images/gallery/2025-06/9V8TKY92iGPO71e6-image.png) **Setting CC numbers on the top encoders and faders** Right click on any fader and the option menu will appear In odd numbered pages the default CC assignments are 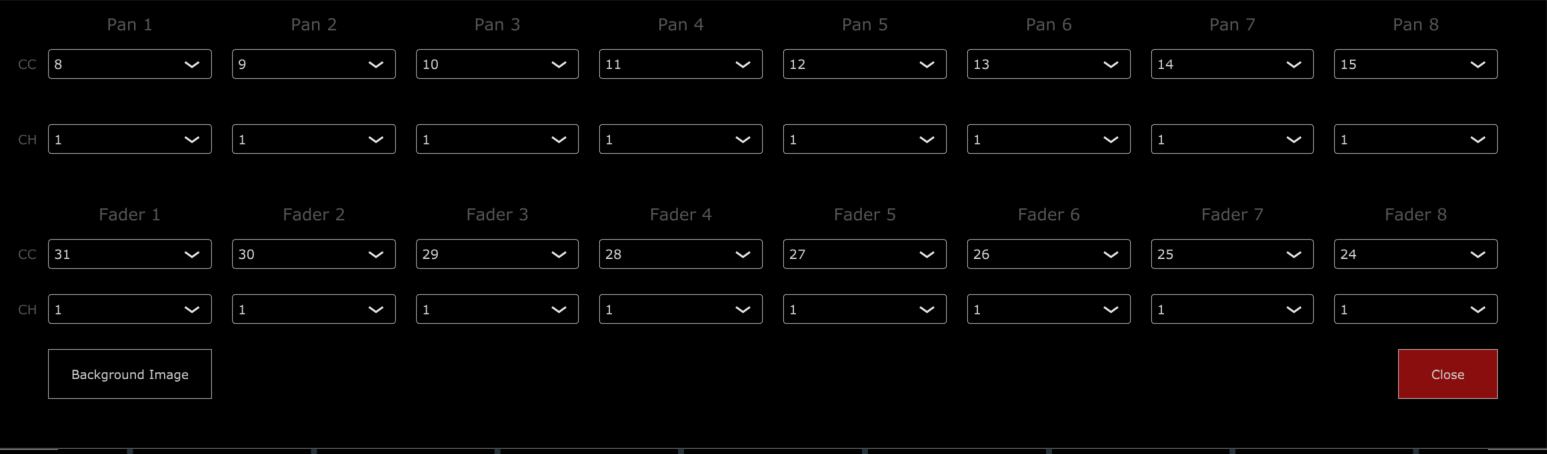 In even numbered pages the default CC assignments are 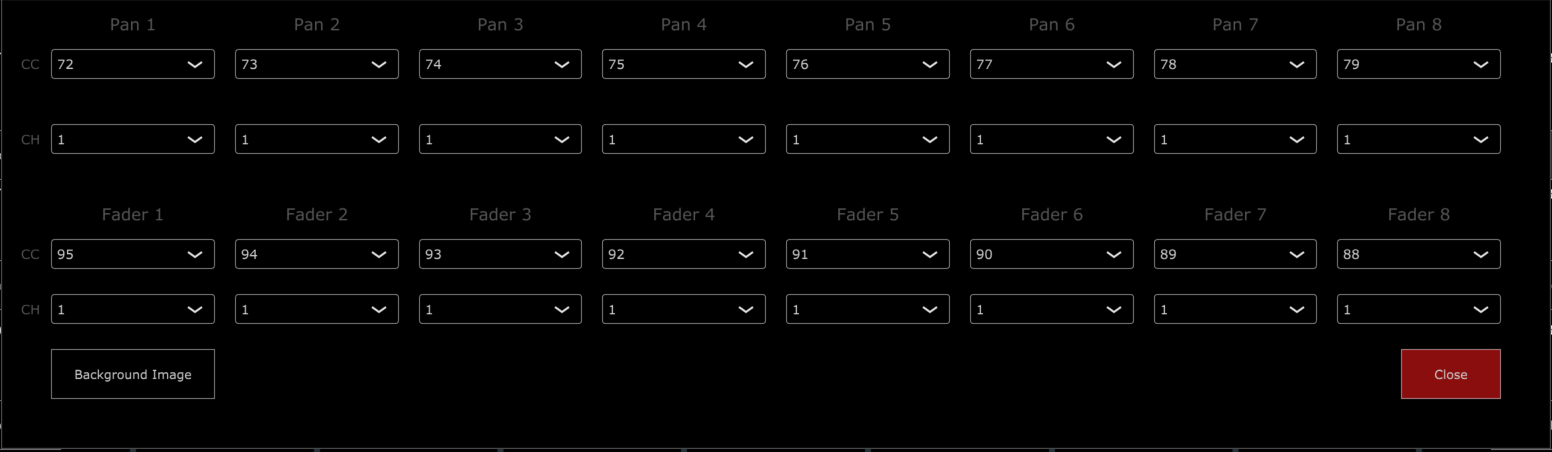 There is an option to set a background image which is ideal for showing dB values. We made images for each popular DAW to match the dB values on the mixer. To set a background image, click on the Background Image button and select an image from the ~\\MP\\Host\\MP MIDI Presets\\Images folder. You can download background images for your DAW from [**here**](https://drive.google.com/drive/folders/1tKjY2GC-t12vw_ogi78glaEkKR9upRh8?usp=sharing) and place them in the Images folder. 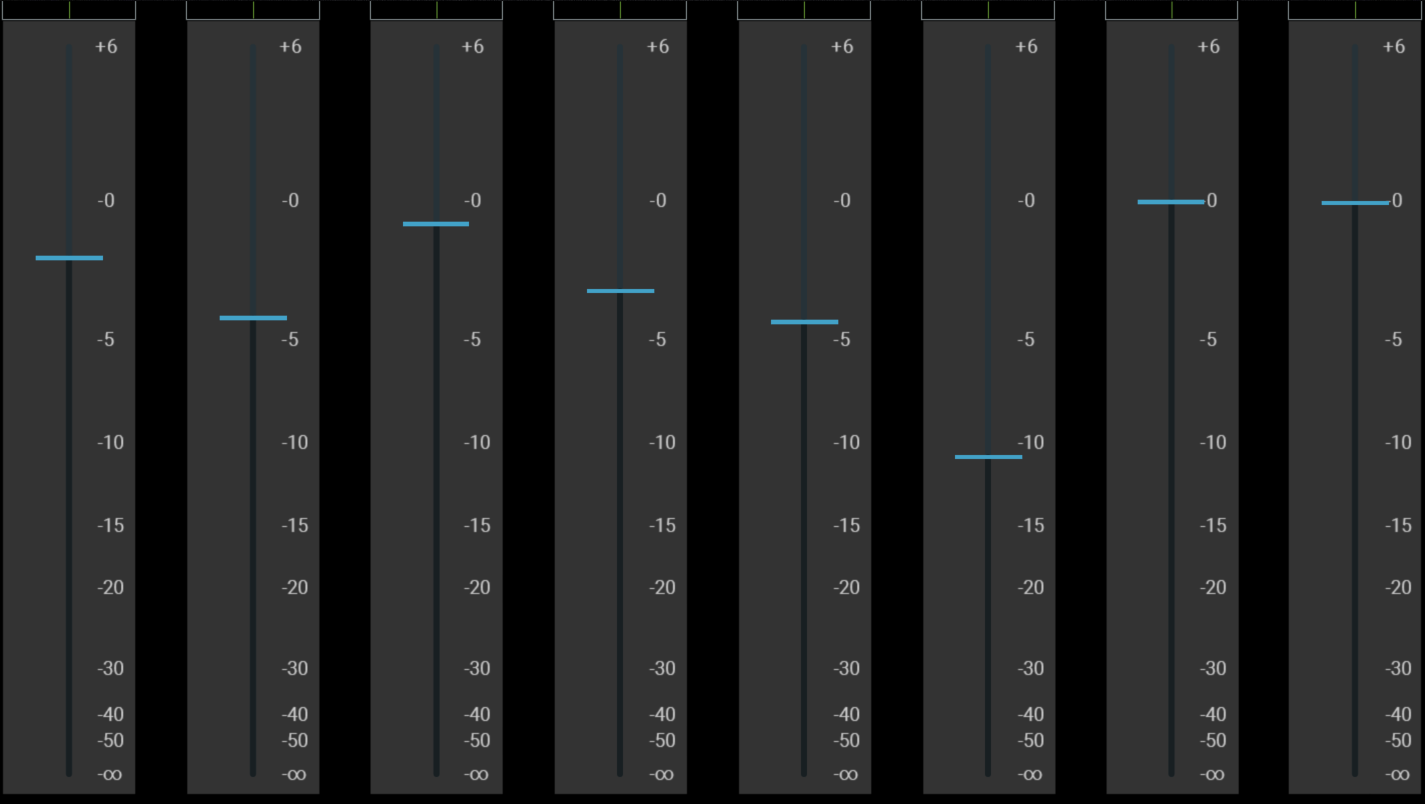 **Button Options** The button options are the same as in the rest of the centered buttons of the MP MIDI app with a couple of changes. Right click on a button and it will show the button options 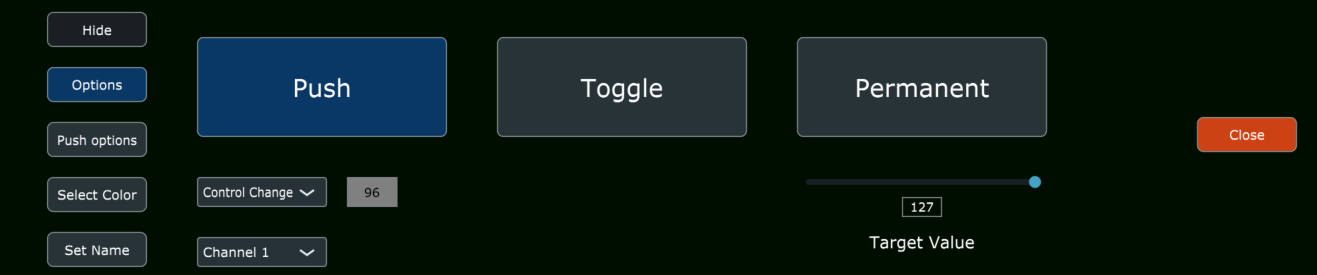 In the Set Name section, you can set the name of the button. There are 2 additional options. The Copy options to row will copy the following settings to the row of buttons: \- Name \- Colors (pressed/unpressed) \- Type of button (Push/Toggle/Permanent) The "Copy options to the same row in all pages" will copy the options to the same row in all pages.  --- ##### ****Cubase use with the MP MIDI remote script You need to download the updated Cubase-03.xml preset to use the Mixer mode. On Windows only, after loading the preset you need to route the FROM DAW and TO DAW ports in the MIDI router and save the preset.  # 13. MIDI Ports on WindowsUPDATE for up coming updates on Windows 11 MIDI Services - April 2026
The new [Windows 11 MIDI Services](https://blogs.windows.com/windowsexperience/2026/02/17/making-music-with-midi-just-got-a-real-boost-in-windows-11/) Native MIDI 2.0 support in Windows 11 is arriving through "Windows MIDI Services," rolling out to supported retail releases of Windows 11 24H2 and 25H2 starting in February 2026 and it provides the following options. To check if you have it there is a [tool by Microsoft](https://microsoft.github.io/MIDI/) here that checks if the MIDI services are installed. Make sure the option ***"Use names compatible with previous versions of the Windows MIDI APIs"*** is selected. [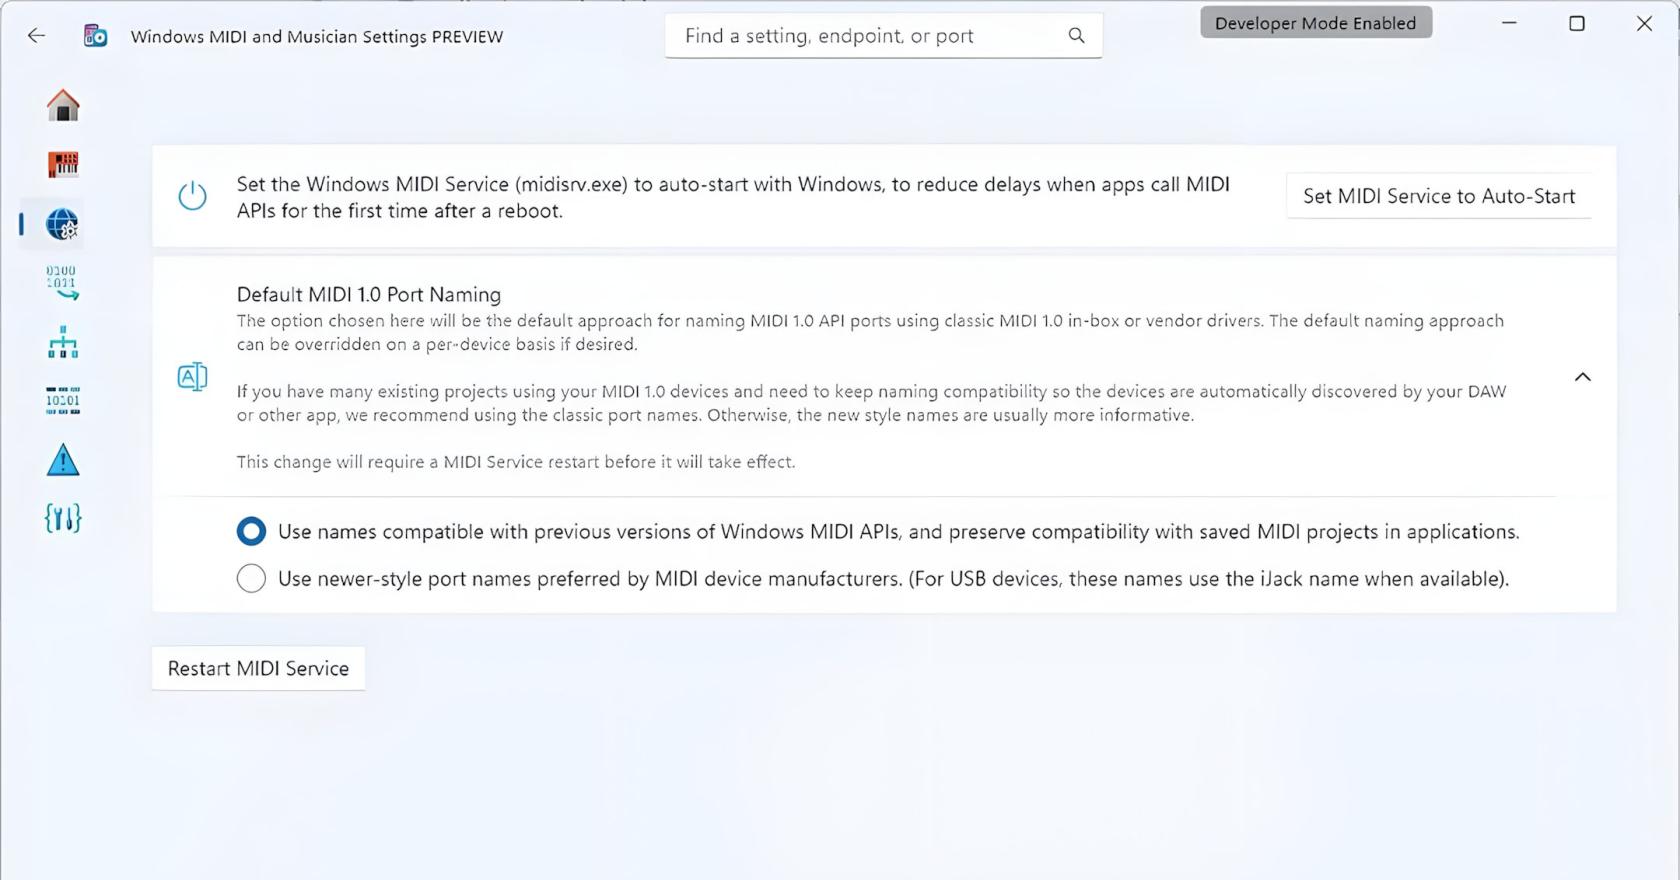](https://kb.mpmidi.com/uploads/images/gallery/2026-03/fW8Z9Z0VSACiJmVA-win11-midi-update4x.jpg) See more infomation [here](https://kb.mpmidi.com/books/mp-controller-documentation/page/11-new-midi-services-on-windows-11-2026-updates) --- ##### **Setup MIDI on Windows** To use the MP MIDI on Windows, you need to install a virtual midi port software. We recommend [**loopMIDI **](https://www.tobias-erichsen.de/software/loopmidi.html)which is a free utility software. There are others as well like [LoopBe30](https://www.nerds.de/en/loopbe30.html). LoopMIDI allows you to create multiple virtual ports you need and set custom names for each port. For the MP MIDI we need two ports, one for sending another one for receiving MIDI. After you install loopMIDI, open loopMIDI and add a port, name it "PORT 1", then add another port and name it "PORT 2" so it will look like this: 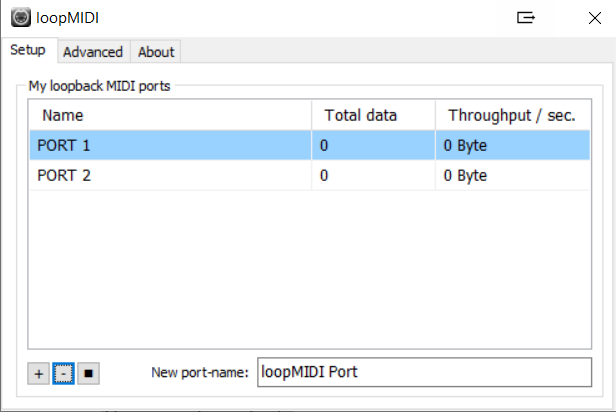 Keep in mind that each port "PORT 1" and "PORT 2" both carry MIDI inputs and outputs. Therefore, you will see them listed in both sections of the MIDI inputs and MIDI outputs of your DAW and the MP MIDI app. Run first the MP MIDI standalone app (not the VST plugin). Open its window by clicking on the small bar icon and then run your DAW. In the MP MIDI app. the button on the bottom right named MIDI devices allows you to select which MIDI devices will be visible in the MIDI router. The MP MIDI app does not use a MIDI device unless it is linked to another device in the MIDI Router. *Selecting a device makes it visible in the MIDI router, however the device will only be used (consumed on Windows) when a line is drawn from the device to another device.* 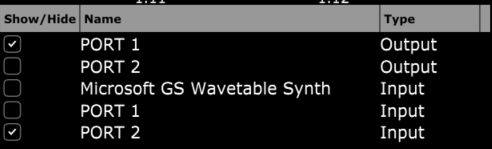 Then click on the MIDI Router button on the MP MIDI app and click and drag to create the following routing: 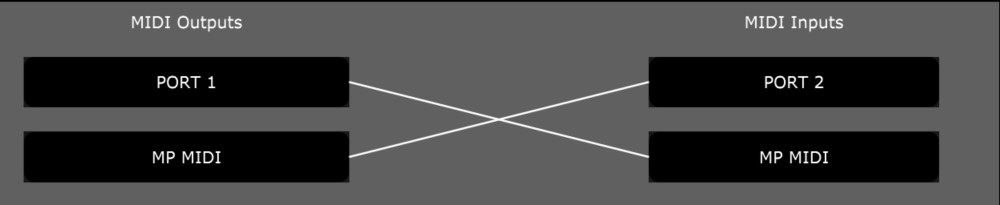 Click to close the MIDI Router and **Save the default preset, choosing to overwrite it.** In your DAW, choose the PORT1 for the MIDI IN port, and PORT2 for the MIDI OUT port. For bidirectional communication from/to the controller from/to the DAW, the DAW must be able to send out MIDI output. Ableton and Cubase do this very well. You need to check your DAWs ability to send out MIDI CC when changing a parameter with the mouse. To troubleshoot, you can see the throughput traffic displayed in loopMIDI when sending MIDI from the controller (moving an encoder) and when sending MIDI from the DAW (moving a parameter with the mouse). In this case, you can see PORT 2 displaying traffic when moving an encoder from the controller. 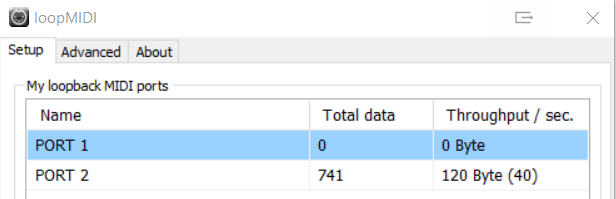 --- **Understanding MIDI ports on Windows** On Windows, MIDI ports can only be used by one application at a time. They are exclusive per app. This applies to the MIDI port IN and OUT independently. This means that one application can be using for example PORT1 MIDI IN, and another application can be using PORT1 MIDI OUT. However, PORT1 MIDI IN cannot be used by 2 application at the same time. The same applied to the MIDI OUT. The first app that gets the port's IN or OUT, will be able to use it, while any other app trying to use the port, will not be able to use it. if a MIDI port's IN or OUT is used by another application when opening an MP MIDI app preset, the connection line will show in red color, indicating that a connection cannot be made. This is important especially when running the MP MIDI plugin, because upon opening the DAW, the DAW will consume midi ports and these will not be available to be used by the MP MIDI app. If the port appears with a grey background, it means that the port is no longer visible on the system. *On Windows, to check if your midi ports are free,* *[**Midiview** ](https://hautetechnique.com/midi/midiview/)**is a free app that can tell you if a device is occupied by another app.* 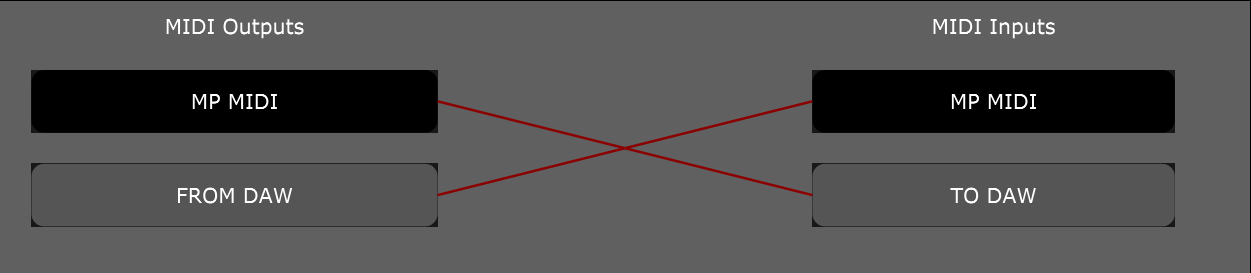 A MIDI port has both input and output. So, if you use the input on the MP MIDI, that input must not be used in the DAW. The same applies for output. Here is an example with virtual MIDI PORTS PORT 1 and PORT 2: MP MIDI APP: MIDI IN - PORT 1: ENABLED DAW: MIDI IN - PORT 1: DISABLED MP MIDI APP: MIDI OUT - PORT 1: DISABLED DAW : MIDI OUT - PORT 1: ENABLED MP MIDI APP: MIDI IN - PORT 2: DISABLED DAW : MIDI IN - PORT 2: ENABLED MP MIDI APP: MIDI OUT - PORT 2: ENABLED DAW : MIDI OUT - PORT 2: DISABLED # 14. Using 2 MP Controllers at the same time To use 2 MP Controllers, one must be used for the MP Host (Multi or Single, Instruments and FX) and the other one for the MP MIDI app and/or the Ableton MPH. The first c1-xMP1 must be used for the MP Host and the second c1-xMP1-2 for the MP MIDI app and/or Ableton MPH. When the 2 are connected you can choose the device from the right click menu of the MP MIDI app and/or Ableton MPH. The MP Host does not have an option to select a C1-xMP1 device. Only the MP MIDI app and the Ableton MPH app have this option. You cannot use 2 controllers at the same time for the MP Host (Multi or Single, Instruments and FX). It does not matter if you are using different MP Controller models. The MIDI hardware is the same on all models. --- **On Windows,** the USB port of connection to the computer matters. Depending on which port you have connected each MP Controller, one of the two controllers will be found first by the operating system. If you connect the MIDI of one controller first, then open the MP Host, and the MP Host will connect to the C1-xMP1. Then connect the MIDI of the second controller, then open the MP MIDI or Ableton MPH, select C1-xMP1-2, and the MP MIDI will get that one. If on the next computer reboot they are not assigned correctly swap the USB connection on the computer ports and that should do it. Every time you reboot, each controller will be assigned correctly. --- **On the Mac,** open the Mac MIDI Studio and set the icon view (not the list view) and disconnect all MP Controllers. Select the C1-xMP1 and delete it, from the top menu, Edit > Delete. Connect one MP Controller and it will appear in the MIDI Studio. Load up and open the MP Host and check that the MP Controller is working normally. Unload the MP Host. Then go back to the Mac Studio and connect the second MP Controller and it will also appear in the Mac Studio. Double click on the second C1-xMP1 and rename it to C1-xMP1-2. 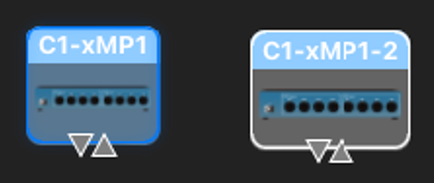 Load and open the MP MIDI app or Ableton MPH and select the second (C1-xMP1-2) on the list. Load and open the MP Host. Save your DAW project, close it and then load up it up again. The controllers should be assigned as you did when you saved the project. If they are not assigned correctly just swap names, ie as on the image above, the left should be C1-xMP1-2 and the one on the right should be C1-xMP1. Save your DAW project, close it and then load up it up again. The controllers should be assigned as you did when you saved the project. --- ##### Using the MP MIDI and Ableton MPH together on the second MP Controller You can switch between the MP MIDI app and Ableton MPH while you have the second controller connected. If you select c1-xMP1-2 on both MP MIDI and Ableton MPH, then selecting one of the two apps (from the Plugin Panel or the small window button) will automatically close the controller window of the other app. If you select c1-xMP1 (the first controller) on one of the two then it will close the app window automatically upon opening an MP Host window (from the Plugin Panel or the small window button). # 15. Controlling Logic Pro with the MP Controller Control Surface We have created a Logic Pro v11 control surface for controlling the following: 1\. Logic Pro native audio effects and virtual instruments which have been pre mapped 2\. Third party plugins (and can also be used at the same time with the MP Host for controlling third party plugins) 3\. The Mixer in Logic Pro 4\. Transport control 5\. Send keyboard commands to Logic via assignable buttons **Compatible with up to Logic Pro version 11.2.2 and Logic Pro12 (Logic Pro Creator Studio)**This Logic Pro control surface is part of the MP MIDI app/plugins, not the MP Host plugin. It is not related to the MP Host plugin which is made to control third party plugins. The control surface works in the standalone app of the MPMIDI app. You can use both the MP Host and the control surface in the same Logic Pro project or use either of them.
[Here](https://youtu.be/ia1kbx3IXEY) is a short overview video of the control surface.
**MP MIDI App version:** v1.0-e8be5c7--H2025-10-06--B2025-10-07 **Logic CS Script and Logic native devices presets updated:** October 4th, 2025 You can find the change log of the Logic Pro Control Surface [here](https://docs.google.com/document/d/1vyfhejoImLTlDEFt9HR5Bb-h2cwZrJgDnGwsITeeUWw/edit?usp=sharing)
If you install the new Logic Pro Creator Studio, it is a new bundle that is identified differently on macOS than Logic Pro. If you have just updated Logic, the app id is still the same on macOS. If you don't have the Logic Pro Creator Studio, in the MP MIDI app choose the option Logic 11 and use the Logic 11 Launcher. If you have Logic Pro Creator Studio choose Logic Pro 12 in the MP MIDI app and use the v12 Launcher app to start it.
**IMPORTANT:** Select **Logic Pro** or **Logic Pro Studio Creator** from the right click menu of the MP MIDI app. [](https://kb.mpmidi.com/uploads/images/gallery/2026-03/KtzH1HGWNWg45GO1-image.png)
**Can be downloaded from the New Releases section of the user portal.** (It requires to install the latest MP Host first: MPH\_MAC\_INSTALLER-v1.8)
 ##### How to install - Download the zip file from portal **from the section Logic Control Surface** *(not the MP MIDI app. The Logic CS includes the MP MIDI app as well. Just use the Logic CS installer).* - Extract the MPMIDI.app from the dmg file to your Applications folder (overwrite it if you have it already) - Extract the control surface installer to a temporary location. Don't run the CS installer yet. Follow the steps below to set up.**UPDATING** If you install an update, after the installation of the update, always rebuild the control surface defaults in Logic[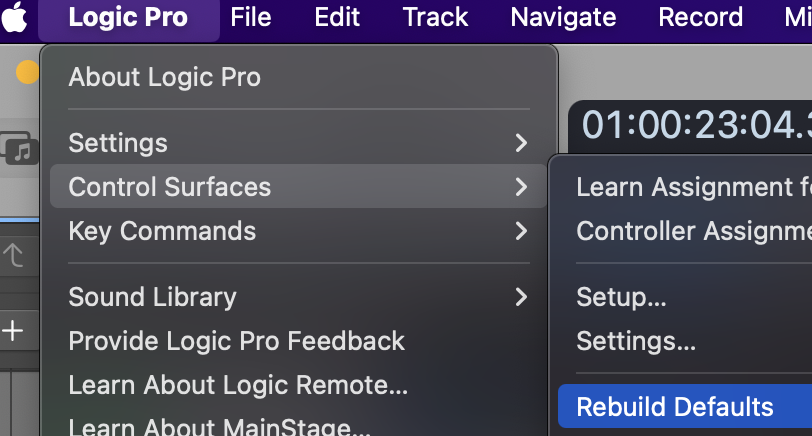](https://kb.mpmidi.com/uploads/images/gallery/2025-05/iVggbDsRYsZ9cDIQ-image.png)
 ##### Configure Logic Pro 1. Open Logic Pro 2. Go to MIDI Settings 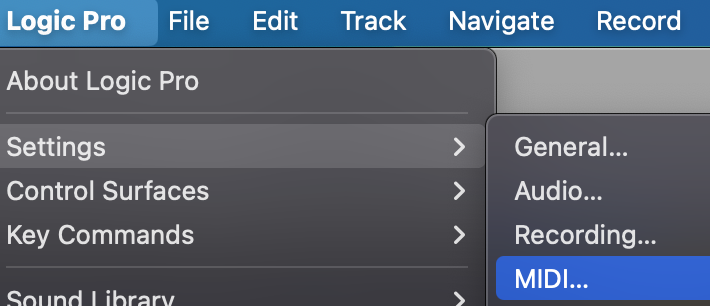 Go to Inputs and ensure the C1-xMP1 is checked 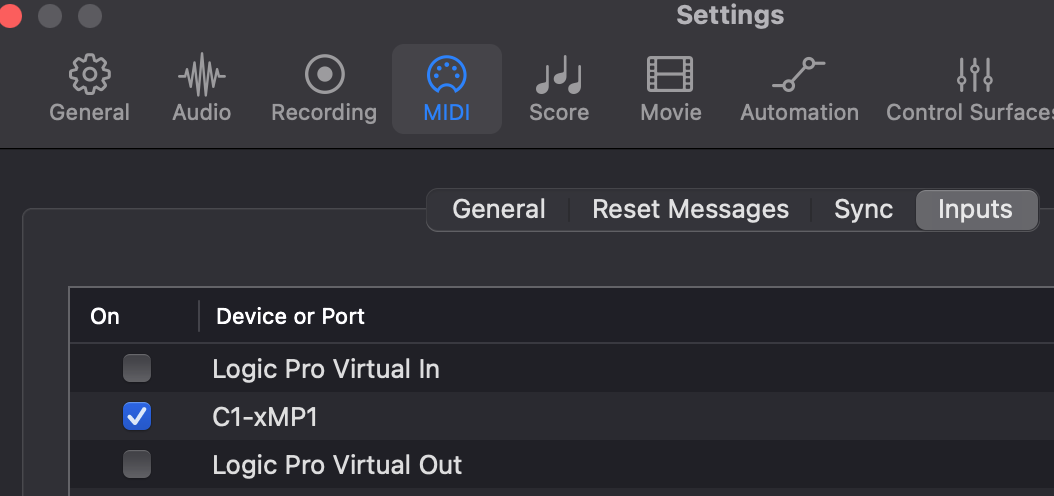 go to MIDI Settings > General and disable MIDI 2.0 (Uncheck the box) 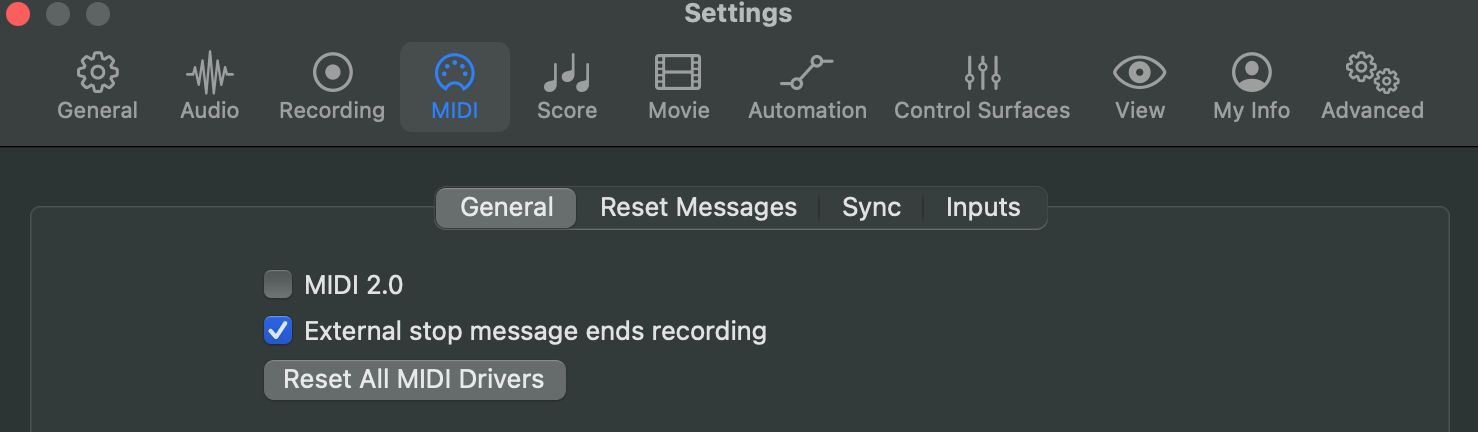 Then quit Logic Pro.  ##### Configuring the MPMIDI App The Logic pro control surface is part of the MP MIDI app.Note that you should only use the standalone MP MIDI app from /Applications for the control surface, **not** the MP MIDI AU plugin.
Open the MP MIDI app from the Applications folder. You may get a warning 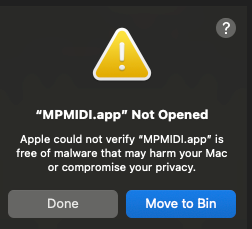 Click Done. Go to Apple menu > System Settings, click Privacy & Security and choose Open Anyway  run the MP MIDI app again. If you get this message, click Open Anyway. 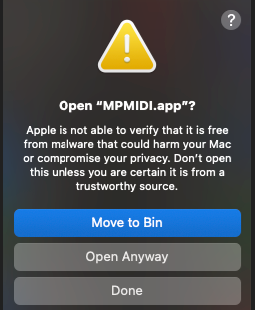 It will ask: [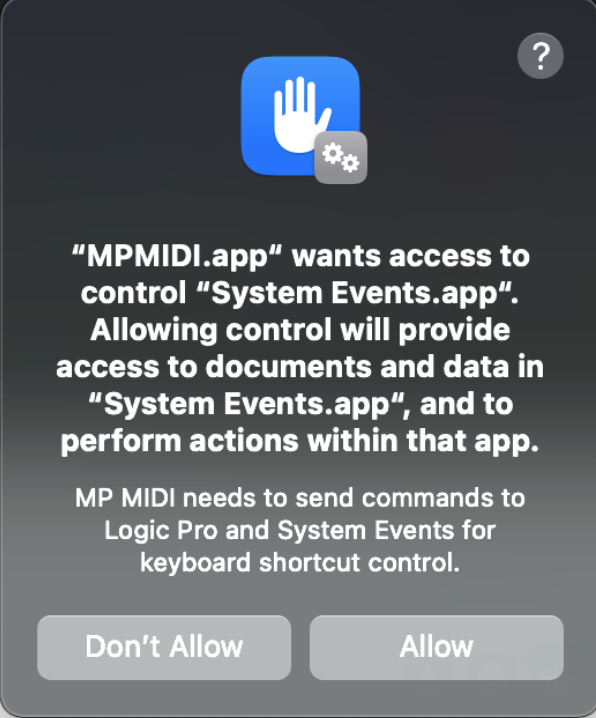](https://kb.mpmidi.com/uploads/images/gallery/2026-02/SfyXDvrCjCxjBQJU-image.png) Click Allow. Once the MP MIDI app is open it will display an icon on Mac's top bar.Clicking on the Mac's top bar MPMIDI icon will open or close the main window
 Right click on the empty black area between the top encoders and you will see the right click menu.  Select the target monitor of the MP Controller and it will be moved automatically to the MP controller's display. If you have multiple monitors, the MP Controller is typically the last monitor in the list.  Right click on the empty area and click on Logic Pro from the Options so that a checkmark appears. 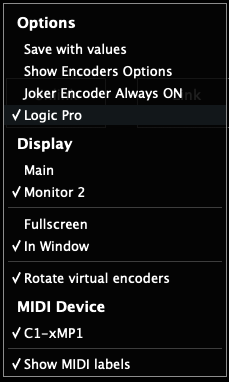 If you are using the latest version of the Logic CS, it also shows the Logic Pro Creator Studio option: [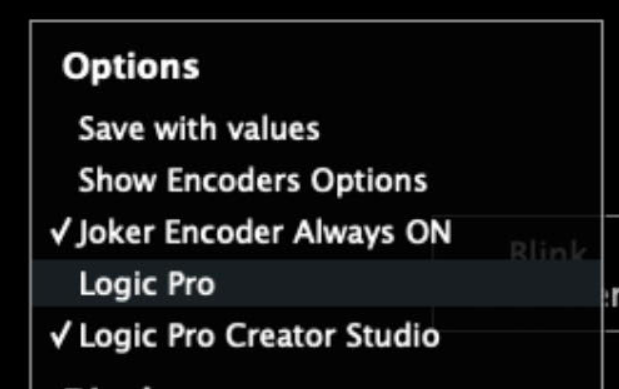](https://kb.mpmidi.com/uploads/images/gallery/2026-02/Zzfvlt7tqosguQbH-image.png) **Now quit the MP MIDI app.** To quit it, right click on the top bar icon and select quit. A pop up window will be displayed on top of the MP MIDI app and click OK. 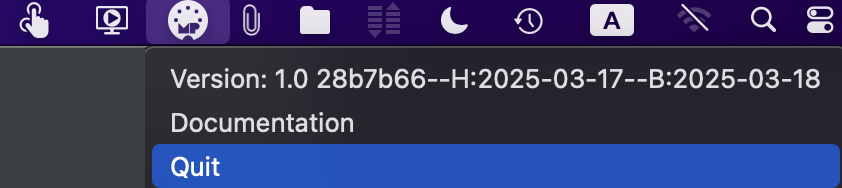   ##### Install the Presets and Control Surface script for Logic Pro Open the "Logic CS Installer for the MP Controller". You will get the following message: 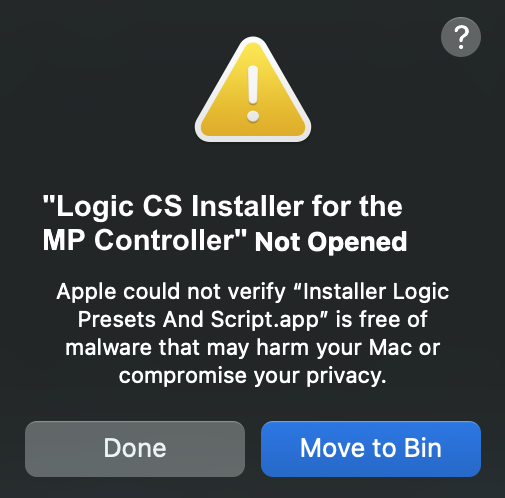 Click Done Go to System Settings > Privacy and Security and choose Open Anyway 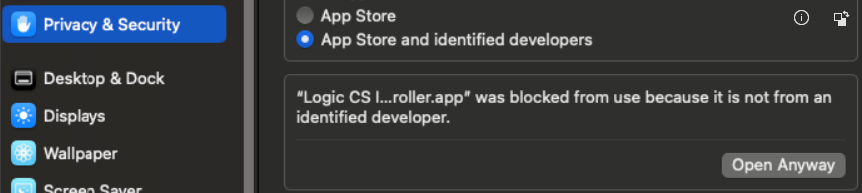 Then open the Logic CS Installer app and choose Open Anyway again 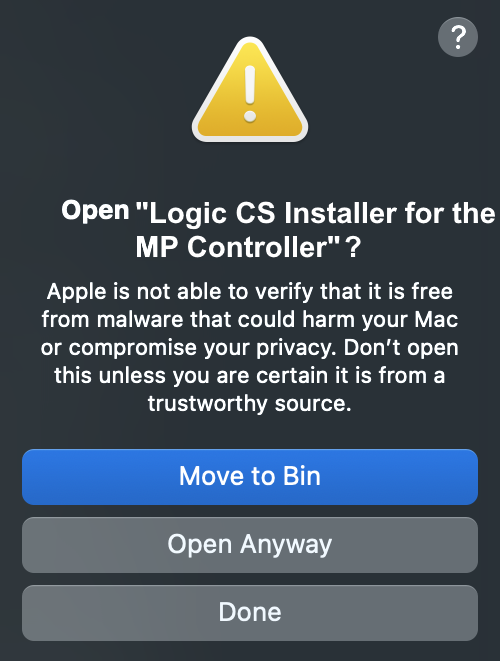 Enter your password and click OK 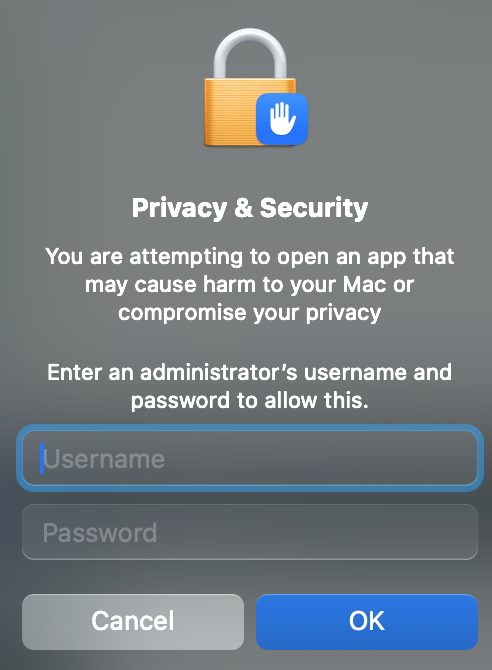 It will ask for the password one more time in order to run the installer. You will see the following message and click Quit 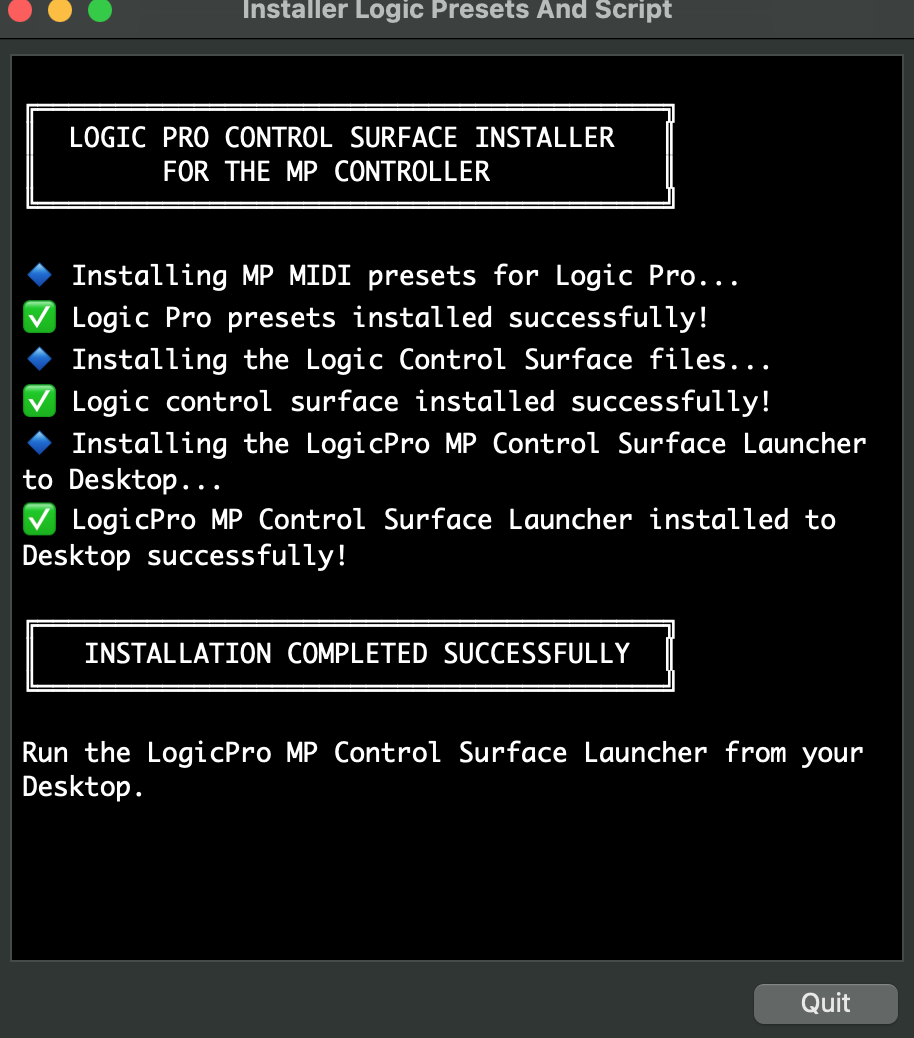 Open Logic and it will prompt you with this popup window: 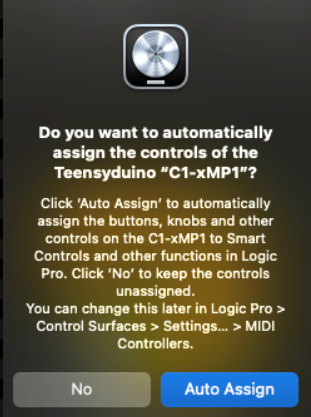 Choose Auto Assign You will then see Logic's control surface setup page and you can close it. It should look like the image below and no configuration is needed. Close the window. 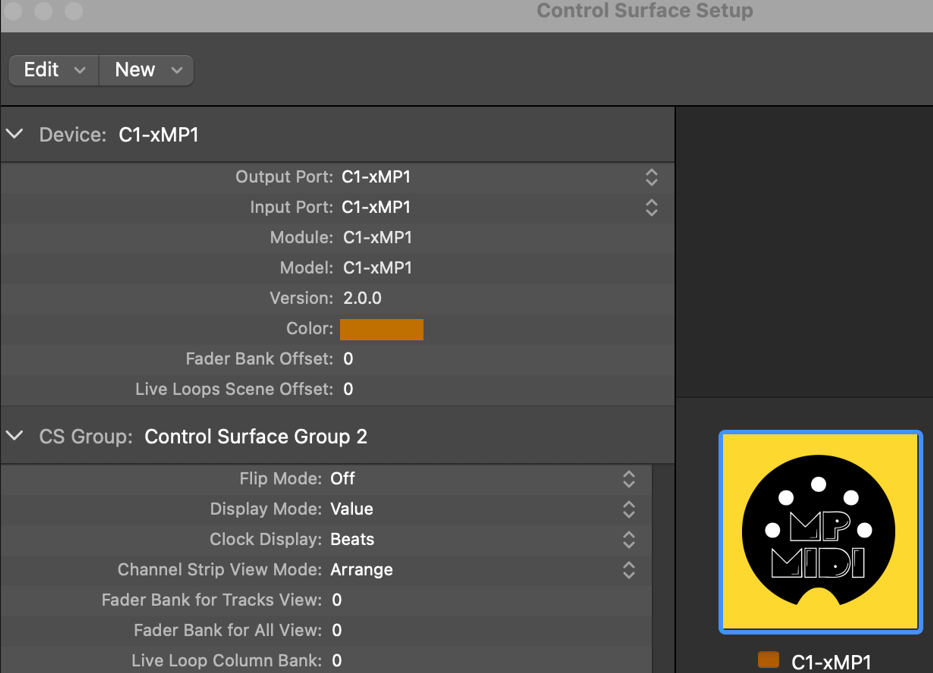 Quit Logic.  ##### Running it for the first time Run the MP Control Surface Launcher app from your Desktop  The Launcher will open the MP MIDI app and then Logic Pro.If the Launcher does not open Logic and the MP MIDI app, go to System Preferences/Settings > Privacy & Security > Full Disk Access, then add Terminal.app to the list of allowed applications. Try running the following command in the terminal: **open -a "Logic Pro"** it should open Logic. This is the same command that the Launcher app is using to open Logic.
If you don't want to use the Launcher, the MP MIDI standalone app needs to be used for the Logic Pro Control Surface, not the MP MIDI plugin.
The MP MIDI app should always be started before Logic Pro, otherwise it will not work.Alternatively, if you open Logic first and then the MP MIDI app, select Rebuild Defaults from the control surfaces in Logic and it will work normally. If you have other control surfaces, when rebuilding the defaults will reset other control surfaces as well. 
The MPMDI app has also an AU plugin version, but you should **not** use it in the Logic Pro because the control surface script cannot communicate with Logic when it runs as an AU plugin. You should use the standalone MPMIDI.app. The launcher on the desktop will open the MPMIDI standalone automatically.
--- ##### Setting the permissions needed for the MP MIDI app to send keyboard keys to Logic Click on the Button's Page.  Press the Play button.  It will pop up a message about the permissions needed. Click allow or Open System Settings. In System Settings, Privacy & Security > Accessibility and give the permission to MP MIDI by enabling it as shown:  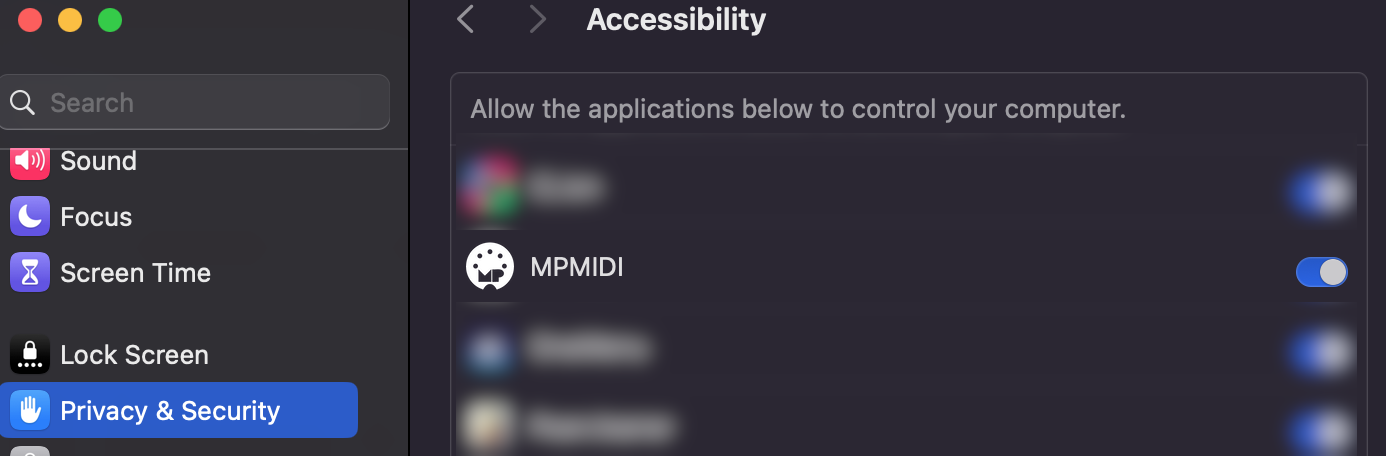 It should now send keys when using the buttons in the Button's Page.  ##### Views of the Logic Pro control surface **1. The Default view (plugin control)** This is the default view that will be displayed when opening the app. This view shows a virtual fader of the currently selected track in Logic Pro along with a pan control where the encoder on top of the fader can control the pan and the encoder below the fader can control the volume. The rest of the encoders control the selected plugin of the slot that is selected on the right side of the page, except encoders 29,30 and 31 where these control the horizontal zoom level, vertical zoom level and traverse the timeline in Logic Pro. At the center, there are buttons which are hidden by default and can be accessed by right clicking on the area of the hidden button. The buttons can be linked to parameters like encoders. 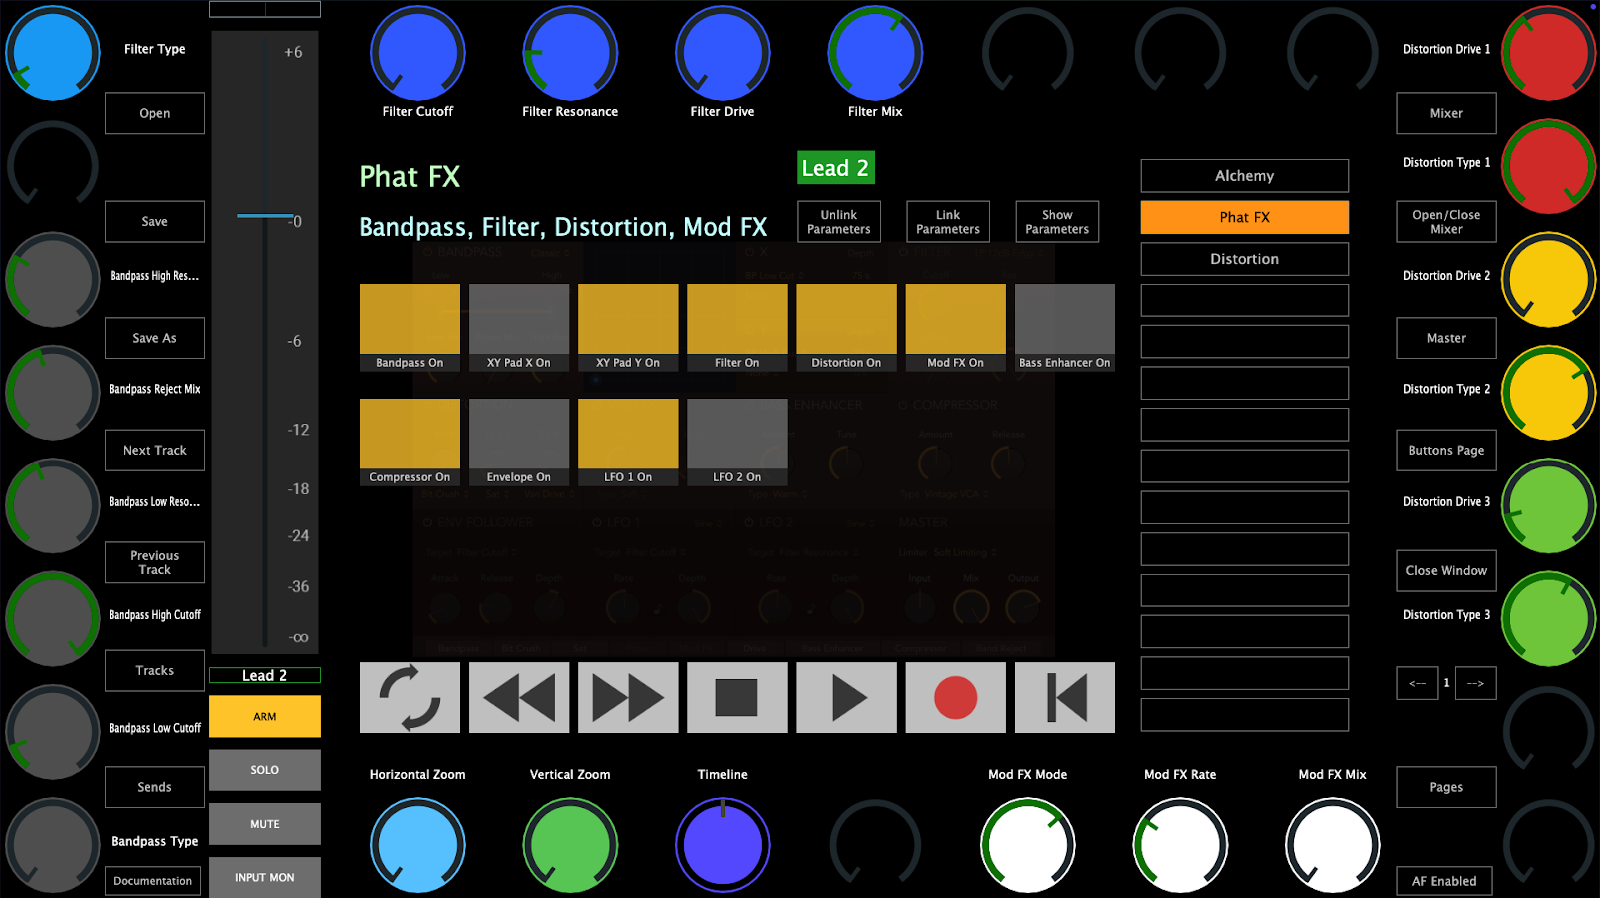 **2. The Mixer view** This view shows the mixer controls of 8 tracks per page. It is easy to navigate to other tracks using the "TRACKS" button or the arrow buttons where they will display the next/previous 8 tracks. The "SENDS" buttons will display the level of the sends of the currently selected track. 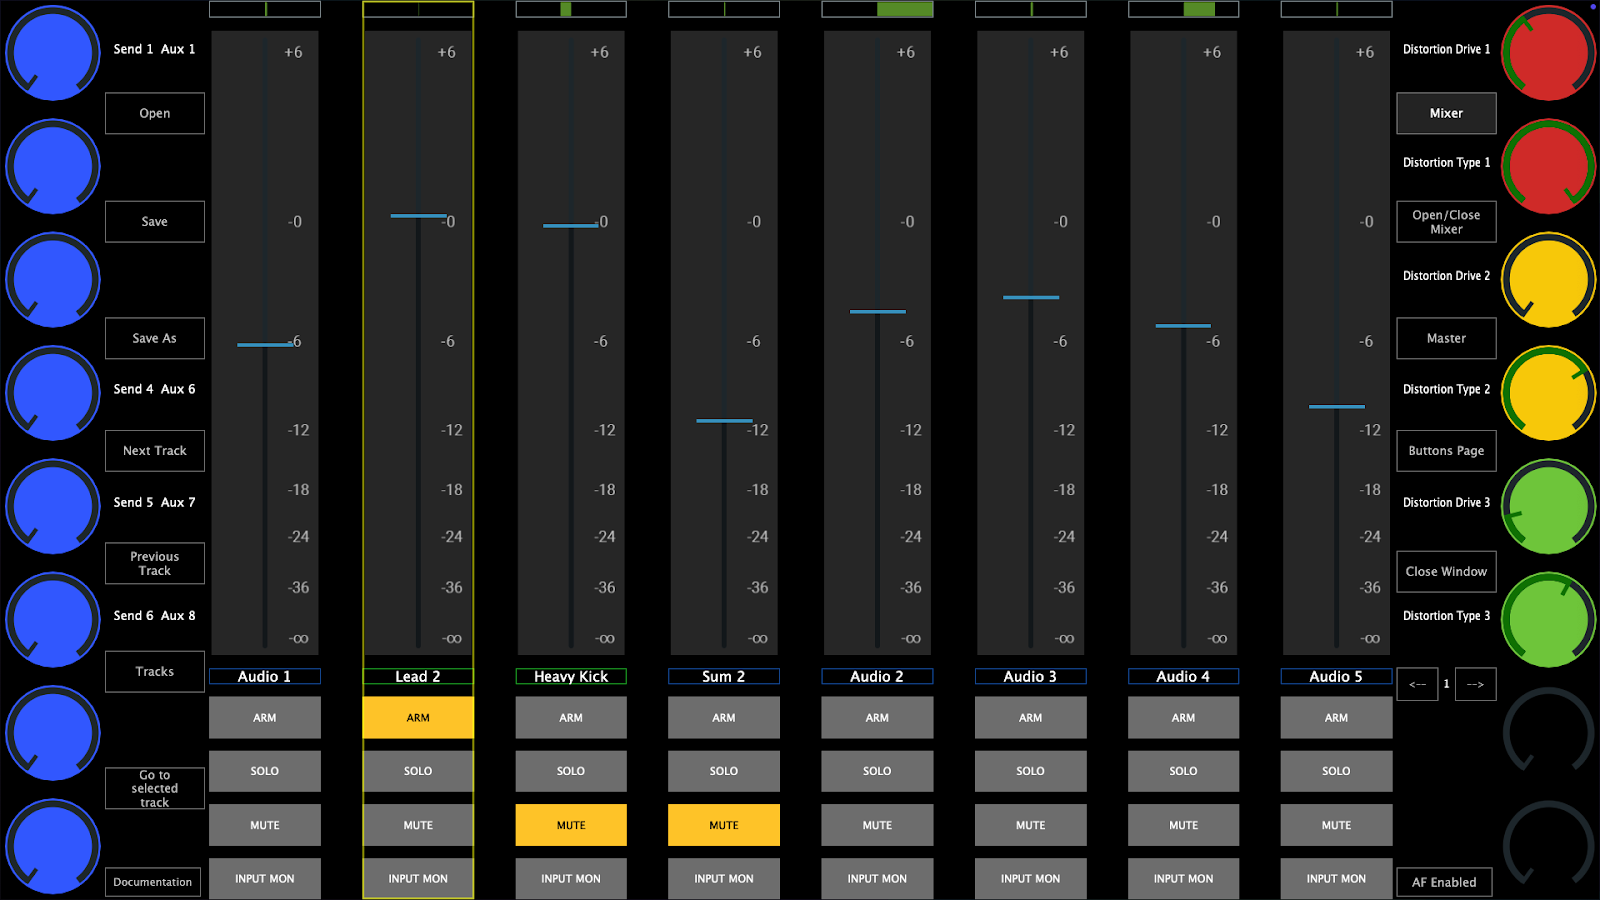 **3. The Buttons view** This is dedicated view to assignable buttons so that you can make your own control surface of your favorite Logic Pro shortcuts. MacOS is quite strict about allowing to send keyboard keys to other applications. See the section below to set the permissions needed so that the MP MIDI app can send keyboard keys to Logic. 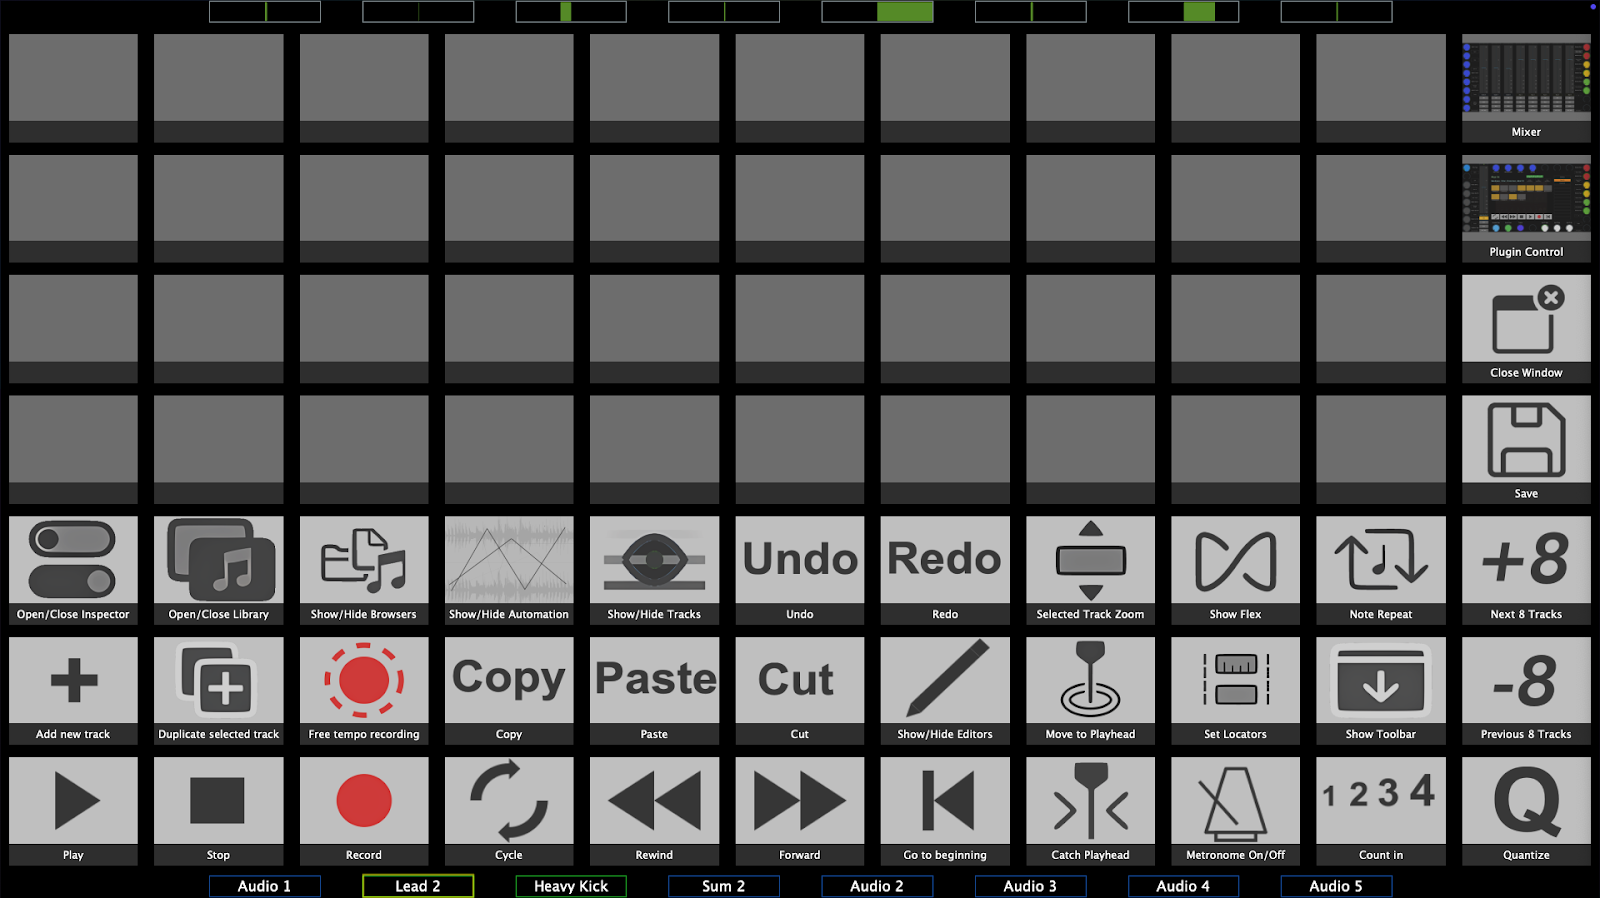  ##### Track and Device/Plugin Selection (opening plugin windows) The control surface follows Logic in the track selection process. When you select a track on Logic you will see the same track selected on the MP Controller. You can also select a track from the controller using the Tracks button from the plugin control page and the mixer page. However, the controller surface will not select a track when you open a plugin from Logic. For example, if you are on Track 1 and you open from Logic a plugin on Track 2, the control surface will remain on Track 1. The app displays the plugin slots of the selected track and the device name in each slot. Click/touch a slot to open a device.Devices/plugins that are opened in Logic using the mouse, will not be opened on the MP MIDI app as well. A device/plugin must be opened from the MP MIDI app so it can be controlled from the MP controller.
--- ##### Automatic plugin window open **The Logic Control Surface opens plugins when a track is selected based on the following rules** 1\. Switching from an audio track to another audio track will open the same plugin position. If you have plugin #2 open on the current track and switch a track, it will open plugin #2 on the newly selected track. 2\. Switching from an audio track to an instrument track will open the instrument plugin. 4\. Switching from an audio track to another audio track that does not have plugins or does not have a plugin in the same position as the previous track, will open a small empty plugin window. 5\. If you select a higher-numbered plugin slot (e.g., the second plugin) and then navigate to a track with fewer plugins, the system will automatically open the first plugin. **Example**: If you have plugin slot #2 selected on one track, then switch to a track with only one plugin, that plugin will automatically open.**Preventing plugin windows from opening automatically when switching tracks** Select the first plugin on an audio track and close its window. You can navigate to any other audio track and it will not open any plugin windows. If you navigate to an instrument track, it will open the instrument plugin window. If you then navigate to an audio track from an instrument track it will open the first plugin window. If you close that first plugin window, it will not open the first plugin again when you navigate to another audio track.
You can adjust the bank size of the tracks which affects the speed that Logic loads plugins. The default bank size is 64 which works well with most computers and projects. See at the bottom of the page on how to adjust the bank size.
 ##### Presets There are 2 types of presets in the MP MIDI app for the Logic Pro control surface. **1. Logic native device and third party plugin presets.** These are the xml presets saved in ~/Library/Application Support/MP/Host/MP MIDI Presets/LogicPro/ folder (this is the default presets folder) and when a device/plugin is selected from the controller will automatically load the preset that matches the name of the device. For example, if you select Logic's Alchemy instrument, it will automatically load ~/Library/Application Support/MP/Host/MP MIDI Presets/LogicPro/Alchemy.xml The same applies to third party plugins. You can create xml presets for third party plugins and these will be loaded automatically if the name of the plugin matches the name of the preset.xml. For instance, if you load plugin UADx LA-2A  Save As, the preset as UADx LA-2A in the LogicProUserPresets folder, then it will be loaded automatically when you press the slot button on the controller.[See a short video](https://drive.google.com/file/d/1x3sd9gr1gOimCvuG_LpLZo5cC08Ey77p/view?usp=sharing) the automatic preset loading of Logic's native devices and third party plugins.
Logic's Audio devices and Instruments have been mapped by our team and are installed when running the installer. You can edit and save these presets in the ~/Library/Application Support/MP/Host/MP MIDI Presets/LogicProUserPresets folder using the Save As button. Do not save them in the default ~/Library/Application Support/MP/Host/MP MIDI Presets/LogicPro folder because when you install an update, these will be overwritten. When you run the installer of the Control Surface it will make a zip file backup of the MP MIDI Presets/LogicPro folder here ~/Library/Application Support/MP/Host/MP MIDI Presets/ and then overwrite LogicPro folder. You can create your own presets and the app will ask you to Save As in the folder ~/Library/Application Support/MP/Host/MP MIDI Presets/LogicProUserPresets The installer creates a backup of only the MP MIDI Presets/LogicPro folder just in case you saved your own presets in the default LogicPro folder. **2. Buttons.xml preset file** This is just one file that holds the data of the buttons view. This is the reference to keys, images and names of buttons. Do not overwrite the default.xml preset in the /MP MIDI Presets/LogicPro folder. If you have saved another preset as default.xml preset, delete it in Finder and reopen the MP MIDI app to automatically recreate the default.xml  ##### Automap The automap function is controlled by the Automap button. This option is global. When enabled and it will map automatically and instantly all the available parameters of plugins or native devices as long a preset does not exist. If a preset for a plugin or device exists, it will load the preset.  ##### Preset files and folders located at Users/USERNAME/Library/Application Support/MP/Host/ If you save a Logic device preset in the LogicProUserPresets folder then it will be loaded automatically when that device is selected, instead of the default preset. The LogicProUserPresets has priority over the default preset folder. If you want to replace the default presets, do a Save As on the preset and it will ask you to save it in the LogicProUserPresets folder. Background images should be placed in the LogicProUserPresets and button images assigned to a preset buttons you created will be copied in LogicProUserPresets when selected.| **Folder Path** | **Type** | **Description** |
| /MP MIDI Presets/LogicPro | Default | Device/Plugin xml presets |
| /MP MIDI Presets/LogicPro/devices\_images | Default | Device/Plugin preset background image files |
| /MP MIDI Presets/LogicPro/Button Images | Default | Device/Plugin preset button image files |
| /MP MIDI Presets/LogicPro/buttons.xml | Default | Buttons page default preset |
| /MP MIDI Presets/LogicProUserPresets/ | User | Device/Plugin xml presets |
| /MP MIDI Presets/LogicProUserPresets/devices\_images | User | Device/Plugin preset background image files |
| /MP MIDI Presets/LogicProUserPresets/Button Images\* | User | Device/Plugin preset button image files |
| /MP MIDI Presets/LogicProUserPresets/buttons.xml | User | Buttons page user preset |
[What is the difference between the /Library and ~/Library folders on a Mac?](https://nektony.com/reviews/difference-between-library-folders-on-mac)
 ##### Buttons in the Plugin control view and Mixer view Open, Save and Save As buttons will open and save presets for Logic's pro devices and third party plugins. The default Open and Save As buttons location is /Users/USERNAME/Library/Application Support/MP/Host/MP MIDI Presets/LogicPro Next/Previous Track buttons: will select the next/previous track in Logic **Tracks:** Opens a list of existing project tracks and a track can be selected. This depends on the bank size which by default is set to 64. This means that it will display the 64 tracks maximum at a time. If your project has 100 tracks and you select track 1, you will see the first 64 tracks. If you select track 50, it will display track 50 to 100. See more information on Bank Size below. The bank size also affects the mixer track selection. **Sends:** Syncs and displays the left column of encoders to the first 8 send volume parameters of the selected track (beginning from the top encoder) Mixer: Open the mixer page on the MP Controller Open/Close Mixer: Opens/Closes the Mixer in Logic Pro Stereo Out: This is a special assignable button. By default when pressed it selects the Stereo Out track. However, it can be assigned to open any track. Left click on the button and will allow you to type in the name of the target track. The name must be typed in exactly as is and it is case sensitive. This is a global option and it is auto saved in the mpmidi.properties file so it will be used every time you open Logic and the MP Controler Surface. **Buttons page:** Open the buttons page **Close Window:** Closes the controller window and to open it again it must be done from the top bar icon. <-- 1 --> buttons: Change the page of the preset. Each preset has 32 pages. Each page can have a page title. The title can by edited by double clicking under the preset name.  **Pages:** It displays the buttons of the 32 available pages per preset. To edit the page title (under the preset name), double click in the area under the preset name and the editor text box will appear. [](https://kb.mpmidi.com/uploads/images/gallery/2025-07/yy01lnFgcFvPwAIn-image.png) **AF Enabled:** This button is enabled by default and it passes the keyboard focus to Logic after you click on the MP MIDI app. This is done to ensure that your keyboard stays focused on Logic. If disabled will stop passing the keyboard focus to Logic after a click action is completed on the MP MIDI app. **Unlink Parameters:** It unlinks a linked parameter **Link Parameters:** It links a parameter to the selected encoder. If another parameter is clicked on a device, it will link the next encoder. **Show Parameters:** It shows the parameters of the selected device  ##### Controlling and Linking Parameters The MP MIDI app must be open to control any parameters. There 28 available encoders per page to control device parameters and 21 buttons per page to control device parameters. The MP MIDI app can control up to 256 parameters of a device/plugin. Opening a device from the MP MIDI app will display the window of the device. You will notice that the link icon is highlighted in purple. This means that upon selection of any other device the window of this device will close and the newly selected device will open its window. You can click to disable this option.  However, opening the device from the MP MIDI app will enable the link option automatically. This auto-enable of the link option cannot be disabled and as it is automatically set by Logic when using a control surface. You can open a device window from a device slot on the MP MIDI app but the device window cannot be closed from the MP MIDI app. Linking Parameters You can link the parameters of a Logic device or third party AU plugin and create a preset with the device name so that it is loaded automatically every time that device is opened in Logic. These presets should be saved in the /MP MIDI Presets/LogicProUserPresets/ folder. See [this presentation](https://docs.google.com/presentation/d/1fM9TU5SbTrrKMTjSvnSECFr1uhC3rMOg/edit#slide=id.p1) that explains in detail how to link parameters of a device or plugin and create a preset.  ##### Logic Native Devices Missing Parameters Logic Pro’s built-in plugins do not normally expose all of their internal parameters to external control surfaces (MIDI controllers, Mackie Control, Logic Remote, etc.). These .plist files tell Logic which parameters of each plugin should be made available to the control surface system. See [here ](https://docs.google.com/document/d/1X849BnNMYhSOjBaibvZoi1scP52PxekQW6eSgzGTi2k/edit?tab=t.0)for more information.  ##### Buttons View - Keyboard Keys Assignments In this view there are pre assigned buttons to control Logic, however you can edit these buttons and create your own preset. There 40 unassigned buttons which can be assigned to send any keyboard command to Logic. The right column of buttons cannot be edited. The encoders in this page have the same function as when in the Mixer page. The right column of encoders control the send volumes of the selected track. The top encoders control the pan of the 8 tracks that appear on the Mixer. The bottom encoders control the volume of the 8 tracks that appear on the Mixer. The right column of encoders will control the selected device parameters which are linked to these encoders. **Button Options** Left click on a button for the options menu to appear on the top side of the app. The selected button will be highlited in red. 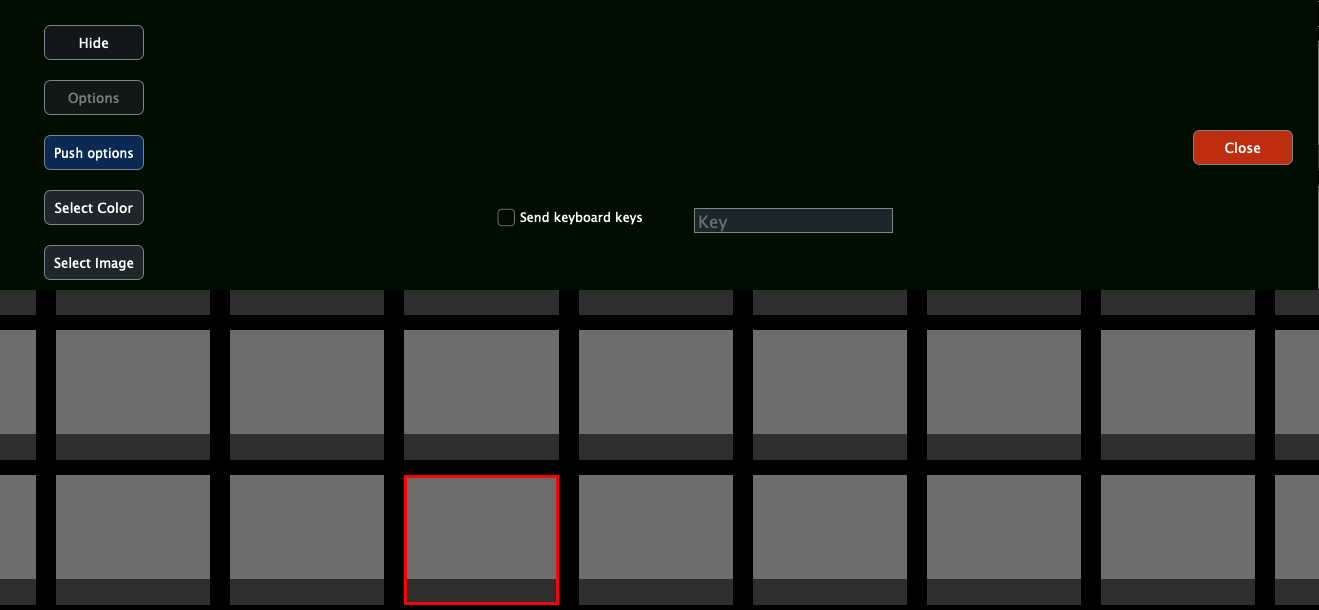 By checking the Send Keyboard keys will enable the function of that button to send a key to Logic Pro (given you have performed the permission's settings described above). Click on the Key window and press a key on your keyboard. It will be recorded and you can close the menu. Every time you click/touch that button will send that key to Logic. Optionally you change the color of the pressed/unpressed state of the button and assign an image to the button. Image files should be png files with dimensions 278 x 196 px or bigger size files with the same px ratio. Double left click on a button to set a name to the button: 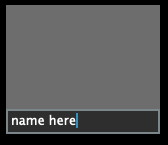After you edit any button you should click on the Save button to save the buttons.xml in /MP MIDI Presets/LogicProUserPresets/buttons.xml [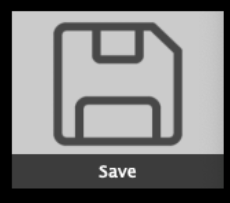](https://kb.mpmidi.com/uploads/images/gallery/2025-05/JiRyHZcoVOVs3Ftr-image.png) The first time you will get a message that from now on the app will load the user buttons.xml instead of the default one.
 ##### Mixer View In this page the 8 tracks control the mixer of Logic. The volume can be controlled by the encoder or the touch screen using the on screen fader. The fader can be controlled using the mouse and/or mouse wheel. The right column of encoders control the send volumes of the selected track. The top encoders control the pan of the 8 tracks that appear on the Mixer. The bottom encoders control the volume of the 8 tracks that appear on the Mixer. The right column of encoders will control the selected device parameters which are linked to these encoders. Pressing Mute on a track will also select that track. The mixer controls 64 tracks per bank. If you have more than 64 tracks in a project, when selecting track 65 the mixer will control the next 64 tracks and so on. Note that the mute of the Aux tracks cannot be controlled from the MP MIDI app.  ##### Follow Logic button This button enables following Logic's Pro track selection and updates the mixer view. It is enabled by default. When disabled you can select any track on Logic and the mixer will stay on the selected view. This is useful when you want to select other tracks in Logic but you want the view to stay in that view. For example, viewing the Master track and tracks before that, while you navigate other tracks. This button affects only the Mixer view.  ##### Troubleshooting **Control Surface does not synchronize with Logic** If you don't see the popup window from Logic Pro when you run Logic Pro for the first time after the CS installation, asking to Auto assign the C1-xMP1, then check this folder and ensure you have the following folder and files: /Library/Audio/MIDI Device Scripts 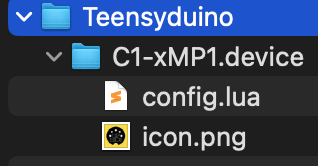 If you see the files, right click on the Teenseyduino folder and choose "Get Info" Ensure you see these permissions at the bottom: 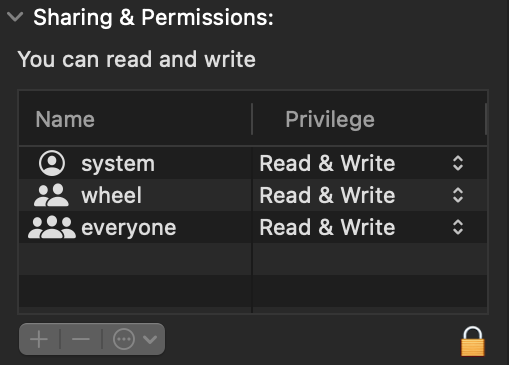 When Logic and the MP MIDI app are running, go to MIDI settings and ensure the both the MP MIDI and C1-xMP1 ports are checked as shown below. 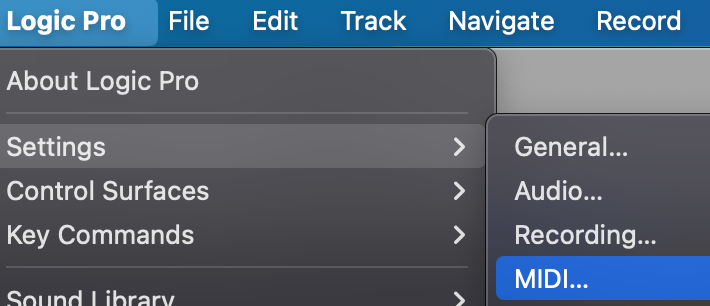 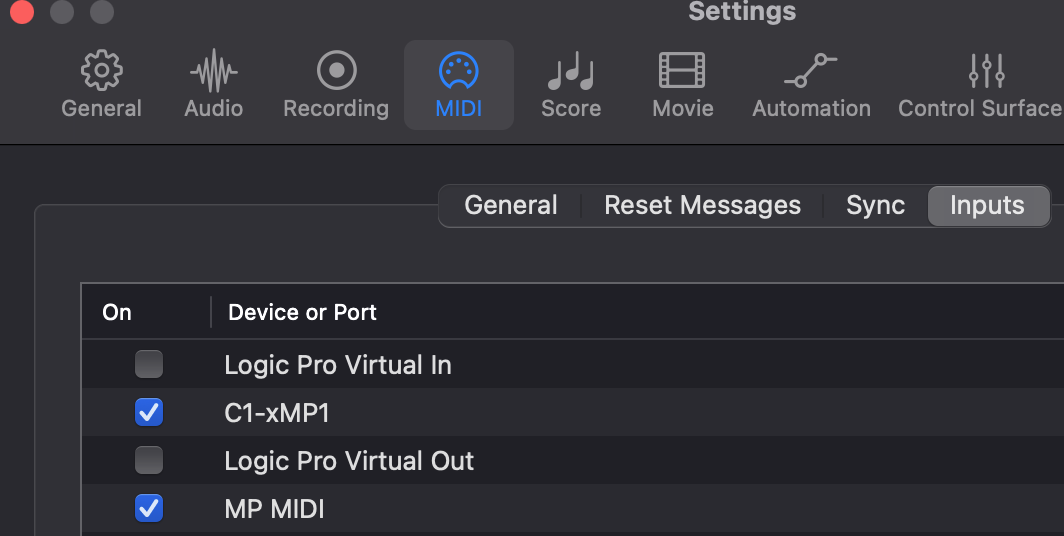 --- ##### The launcher does not open Logic Pro The laucher issues 2 simple commands to MacOS to open the MP MIDI app first and then Logic Pro. The command that is issued to open Logic is: ``` open -a "Logic Pro" ``` You can try this command in a terminal to see if it works on your computer by pasting it in a terminal and press enter. It should open Logic. If it opens Logic, it means that the Launcher does not have the proper permissions to run.Try in a terminal the command: **sudo chmod -R 777 ~/Desktop/LogicPro\\ MP\\ Control\\ Surface\\ Launcher.app/** and press enter. It should ask for your password. Enter it and press enter. It should not produce any output. Try the Launcher again.
If the command open -a "Logic Pro" did **not** open Logic, it means that MacOS cannot find Logic on your system because it is not properly registered. You can try to do a clean install again and see if the command opens it.A great fee app for uninstalling software from the Mac is [Perlceaner](https://github.com/alienator88/Pearcleaner)
Alternatively you can edit the launcher script to point it to open Logic from the actual location it is placed. Right click on the launcher. Click Show Package Contents and navigate to Resources. [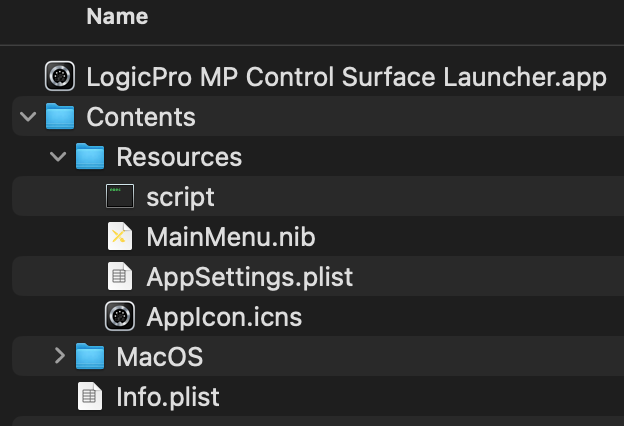](https://kb.mpmidi.com/uploads/images/gallery/2025-05/0RByyqozgYDkGSpT-image.png) Open the file "script" by dragging it on a text editor like Sublime. ``` #!/bin/bash # Script to open MPMIDI.app followed by Logic Pro # Created on March 15, 2025 echo "Starting MPMIDI.app..." open /Applications/MPMIDI.app echo "Starting Logic Pro..." open -a "Logic Pro" echo "Both applications have been launched." ``` You can commend out the line 10 by placing a # at the beginning. so it will be *\#open -a "Logic Pro"* Try placing your own open command like: **open /Applications/Logic\\ Pro.app** You can try your command in the terminal to see if it opens Logic. Save the script file and try the launcher again. --- ##### Checking the permissions needed for the MPMIDI app to send keyboard keys to Logic Check that it was added in the Automation section  In System Settings, Privacy & Security > Accessibility and give the permission to MP MIDI by enabling it as shown  ---How to reset the MP MIDI app Privacy permissions on Mac OS. See [here](https://docs.google.com/document/d/15Y-EEtop9Hsfr3W6jeTet0I8raWQlPU_5f-ywf4nDPM/edit?usp=sharing)
 ##### Setting the Track Bank Size The bank size is the number of tracks that Logic syncs with a control surface. It starts on the selected track and it shows a colored like at the bottom of the track. For example Orange: [](https://kb.mpmidi.com/uploads/images/gallery/2026-02/dvgBDmGt5ln3ZrRc-image.png) Selecting a track 10 for example it will display the colored line up to track 74, which means it syncs with the control surface from track 10 to 74.The bank size is directly related to how fast Logic reacts (shows plugins when changing tracks etc). The bigger the bank size, the slower Logic gets (depending how big your project is, how many devices it has etc) This is something that is completely governed by Logic and there is no way to change it. The bank size we have set by default is 64, which is fairly big.
It will work when using lower or higher numbers but using a large bank size number like 256 will probably make Logic a bit slower to display plugins when switching tracks, depending how many plugins and devices the project has. We found out that 64 is a good number to have and there is no lag on recent Mac Apple Silicon models. Using a bank size of 64, will display 64 tracks in the Track List of the MP MIDI app. The tracks listed depend on which track you have selected. If your project has 100 tracks, and you have track 1 selected, then the bank has tracks from 1 to 64. If you have selected track 10, you will see tracks 10 to 74 and so on.Logic automatically switches banks when you select a track from the main Logic window or the mixer at the bottom of the tracks. Tracks have a small orange bar highlighted at the beginning showing the bar selection
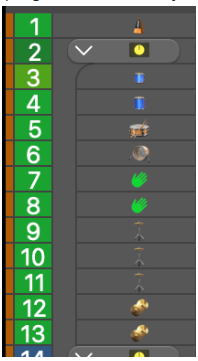 If you find the project to be slowing down, you can change the bank size to a number that suits your project or workflow. **Chaning the bank size:** Close Logic and the MP MIDI app. Go to folder  open config.lua in a text editor. It is a single line file. Search for: **bank\_size=64** Change the value to something you want, 8, 16, 64, 128, 256 or a number that suits you.  Make sure you only change the number and nothing else. Save it and close the text editor. Run the Launcher to reopen Logic and the MPMIDI app. If you are receiving conflicting MIDI CC messages in instruments or audio effects from C1-xMP1, for example when you move an encoder something else is being affected in Logic, like an instrument or the mixer or even another parameter in the plugin you are controlling with the MP Host, see [here](https://kb.mpmidi.com/books/mp-controller-documentation/page/16-blocking-c1-xmp1-midi-input-cc-messages-in-logic-pro) how to prevent this.
# 16. Blocking C1-xMP1 MIDI Input CC Messages in Logic Pro When the Logic Control Surface is enabled, it requires the C1-xMP1 to be enabled as a MIDI input device in Logic Pro. This, depending on your Logic configuration, may cause some components in Logic or devices/plugins to be listening on MIDI CC messages coming from the C1-xMP1. For plugins, there should be an option to disable these MIDI CC mappings (listenning on MIDI Channel 1) or disable MIDI CC IN completely so that it does not conflict with MIDI controllers. Alternatively, you can do the following in Logic, if the plugin is listening to CC coming from Logic and not directly from other MIDI ports. If you disconnect a specific MIDI device from the `Sequencer Input` in Logic’s Environment, it blocks *all* MIDI data from that device, including: - MIDI CC (Control Change) - Note On/Off - Pitch Bend - Aftertouch - Program Change - Anything else sent via standard MIDIThis is useful if you notice that instruments or audio effects in Logic receive conflicting MIDI CC messages from C1-xMP1.
##### Guide to block the C1-xMP1 MIDI Device from sending MIDI to Logic Instruments and effects. 1\. **Open the Environment (Cmd+0)** Go to the **Click & Ports** layer. [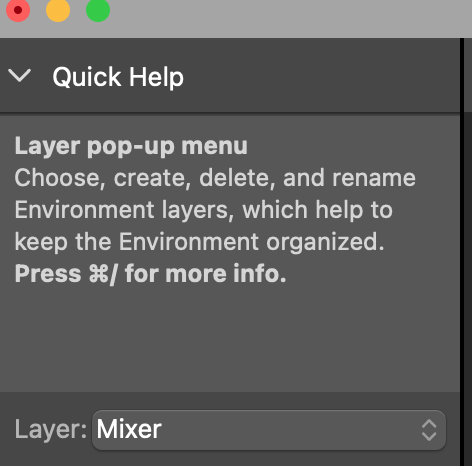](https://kb.mpmidi.com/uploads/images/gallery/2026-02/DJfemEcovjvRaqjX-image.png) [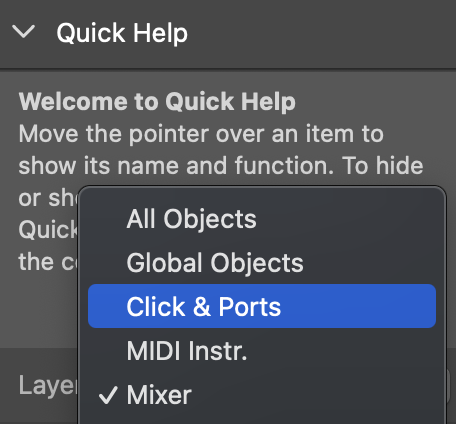](https://kb.mpmidi.com/uploads/images/gallery/2026-02/eg3eTQgRf51ej5cs-image.png) 2\. **Identify the C1-xMP1 Device in "Physical Input"** You'll see ports like “All”, “IAC Driver”, “C1-xMP1”, etc. 3\. **Disconnect the Device** - Disconnect the cable from the device you want to block (e.g., "MP Controller") so that it **does not connect to the "Sequencer Input"**. Click on the C1-xMP1 cable and it will be highlighted [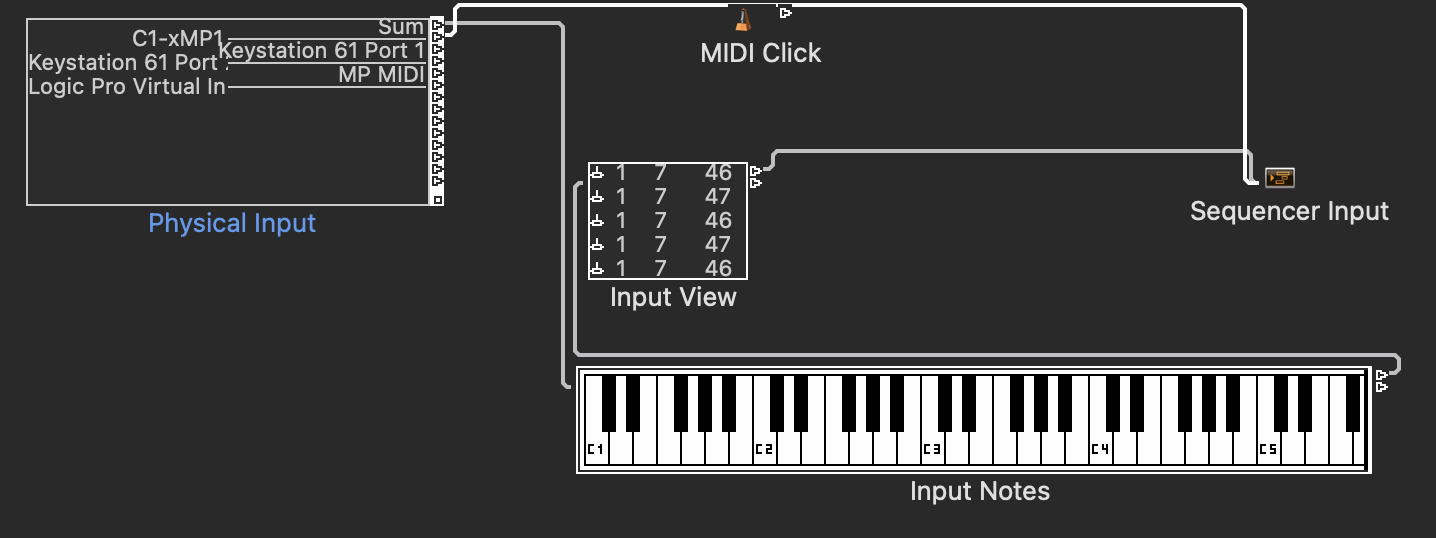](https://kb.mpmidi.com/uploads/images/gallery/2026-02/djUpOpxx2szWIQCQ-image.png) The from the Edit dropdown select Clear Cables only [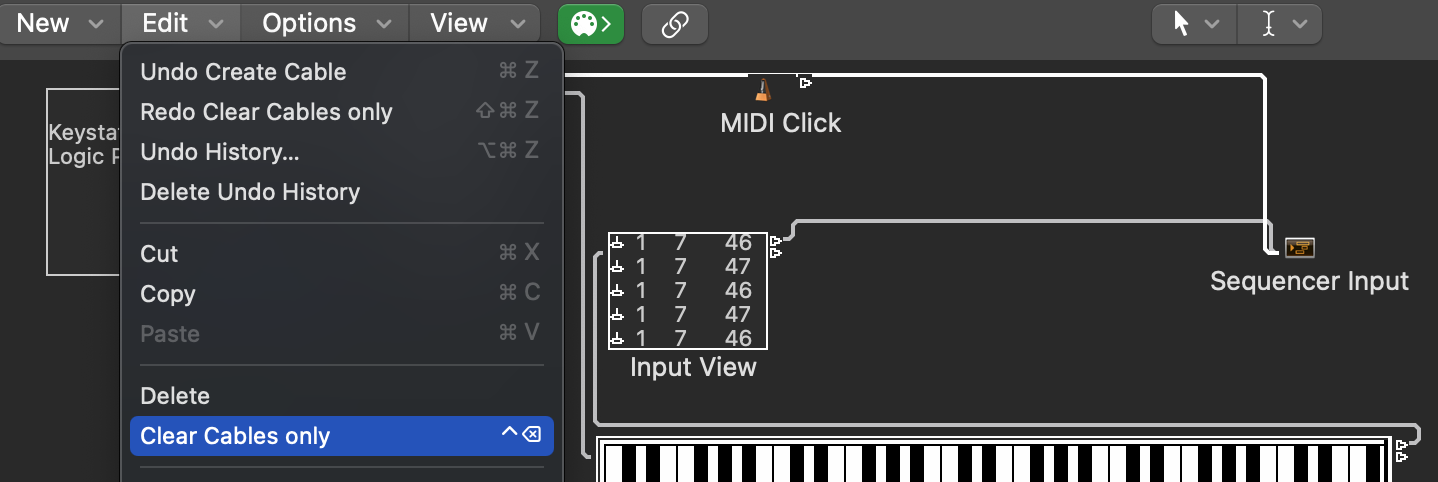](https://kb.mpmidi.com/uploads/images/gallery/2026-02/9iyOr7VmNr1Eze1g-image.png) The cable is removed, so now Logic does not receive MIDI CC from C1-xMP1 [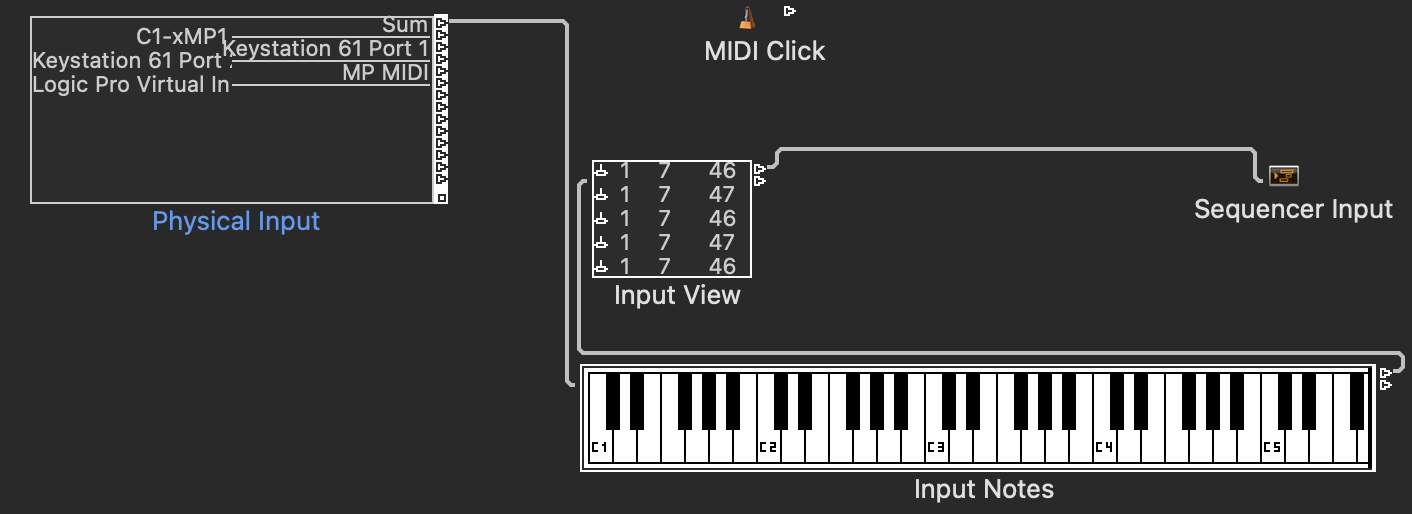](https://kb.mpmidi.com/uploads/images/gallery/2026-02/dyxZi68lKCS7IbRY-image.png) This means Logic will not receive *any MIDI input* from that device in instrument tracks. 4\. *(Optional)* **Route the Device Elsewhere** If you want to still use the device to control Logic through custom scripts or MIDI routing: - Route the device to a **Monitor** or **Transformer** object instead. - You can then filter, transform, or reroute the data to Logic’s control surface system, MIDI FX plugins, or external apps without affecting Logic Instruments. 5\. Close the Logic Environment window. # 17. Controlling external hardware via NRPN using the MP MIDI app ##### NRPN (Non-Registered Parameter Number) NRPN is a protocol built on top of CC (not a separate message type). It is useful for hardware synths to expose thousands of parameters and NRPN uses multiple CC to increase the resolution. There are 2 modes for NRPN in the MP MIDI application. 1. Global - both encoders and buttons operate with NRPN instead of CC 2. Specific - choose which encoders and buttons to use NRPN instead of CC The global NRPN mode is stored in the MP MIDI properties file , which is an application-wide setting. It persists across sessions but is not saved per preset. The per-encoder NRPN flag (is\_nrpn on each encoder) IS stored in presets. To activate the Global option use the right click menu: [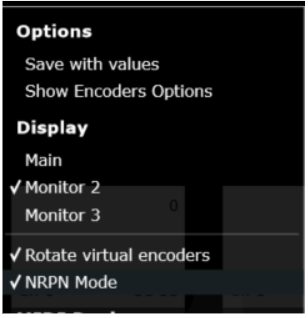](https://kb.mpmidi.com/uploads/images/gallery/2026-03/aSvYYfzZIYtNTtNK-image.png) When the global NRPN mode is enabled the Encoders can be modified from the “Encoder CC & Ch” window and from the Encoder Options view (the Encoder Options view affects the physical encoder signal). [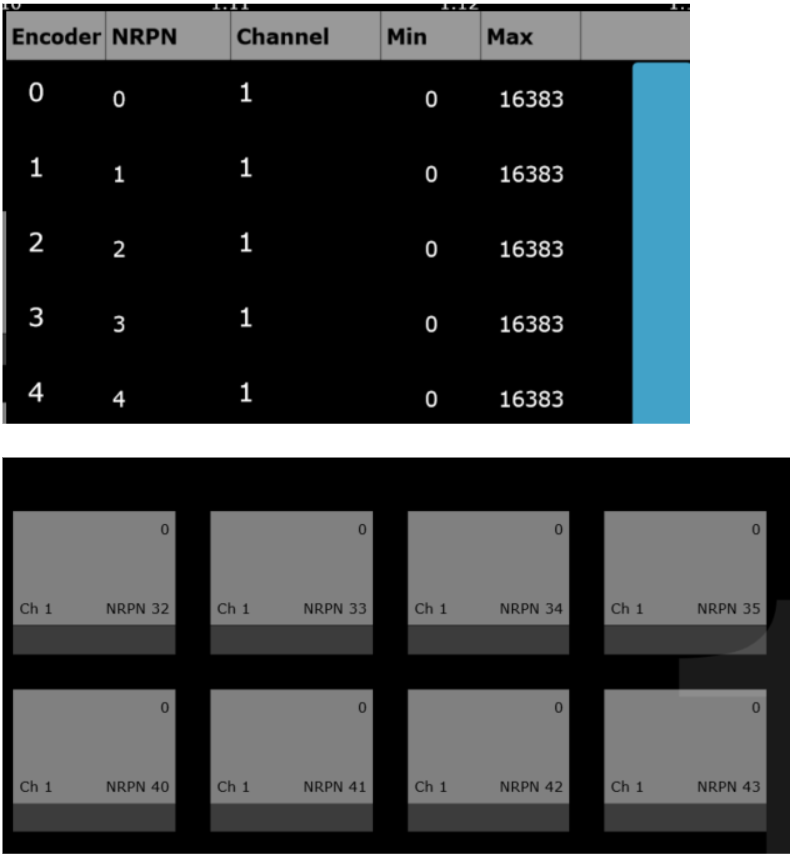](https://kb.mpmidi.com/uploads/images/gallery/2026-03/Zlk9G7LLBQAflE3F-image.png) ##### Setting specific buttons to use NRPN To set a button to use NRPN right click on the button and select NRPN from the drop down menu. [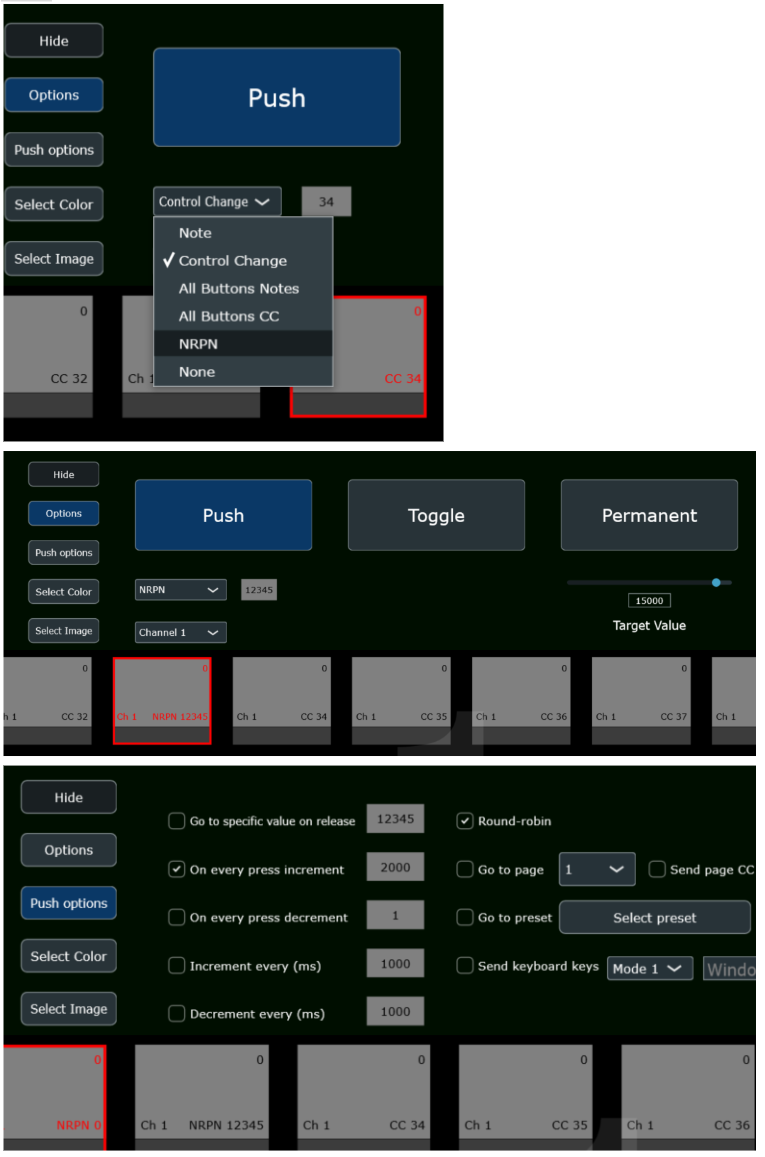](https://kb.mpmidi.com/uploads/images/gallery/2026-03/EZdbSBg1pCD2bUdx-image.png) [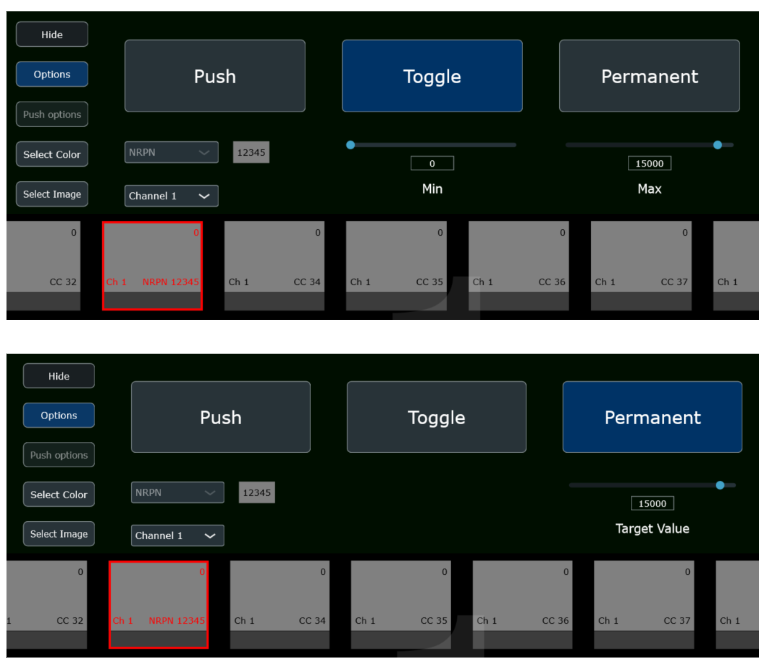](https://kb.mpmidi.com/uploads/images/gallery/2026-03/SeKd0Kd2BYfOzkdK-image.png) ##### Setting NRPN per encoder while in CC mode (default mode). Open the Encoder CC & Ch window and choose which encoders to use NRPN instead of CC. [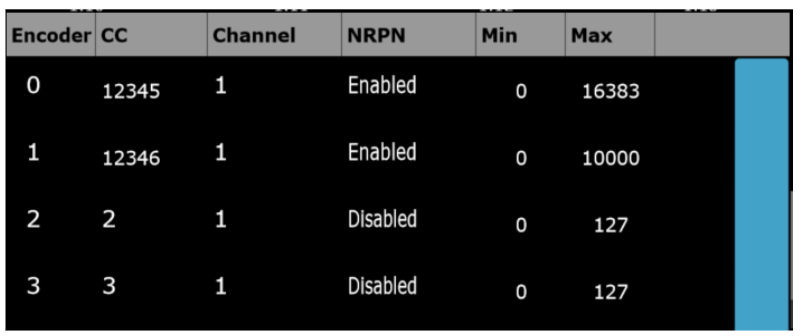](https://kb.mpmidi.com/uploads/images/gallery/2026-03/FUYVwBGHieUIkoad-image.png) ##### Internal CC usage in NRPN mode. Note: NRPN uses CCs 6, 38, 98, 99 internally. if any button or encoder is assigned to those CC numbers on a channel that also has NRPN, the incoming messages will be consumed by the NRPN tracker and won't reach the button or encoder. Here is an example with an encoder with NRPN parameter 1 on channel 1, sending 14-bit values as the slider is dragged. Multiple 4-message NRPN sequences are sent as the value changes. That's expected signal behavior during a continuous encoder movement:B0 63 00 → CC 99, ch 1, NRPN MSB = 0 B0 62 01 → CC 98, ch 1, NRPN LSB = 1 → NRPN parameter = (0 << 7) | 1 = 1 B0 06 3C → CC 6, ch 1, Data MSB = 60 B0 26 5A → CC 38, ch 1, Data LSB = 90 → 14-bit value = (60 << 7) | 90 = 7770
--- # 12. Account Transfer Learn how to transfer your account to a new owner. # Transferring your MP Controller account There are two types of transfers: 1\. Transfers from the original owner (purchased new) 2\. Transfers of second-hand units (when the seller is *not* the original owner) Please read the section that applies to your situation. --- ##### **1. Selling a Unit You Purchased New (Original Owner)** If you are the original owner and wish to transfer your MP Controller account to a new owner, we will process the transfer manually. **Transfer fee:** **€15.00** **Payment via Paypal:** Payment link: [https://www.paypal.com/paypalme/mpmidiAccTransfer](https://www.paypal.com/paypalme/mpmidiAccTransfer) Or send payment to **We do **not** transfer or sell licenses for used MP Controllers unless the current registered owner submits a written transfer request to us. If you purchase a used unit without the original owner's cooperation, you will **not** be able to obtain a license or use of the MP Controller's software. Before buying a used MP Controller, please ensure that the original owner is available to request the license transfer.
# 13. Reason Control Surface Documentation for the Reason Control Surface # 1. Reason Control Surface Installation We have created a control surface to control Reason's native devices, extension devices and plugins. [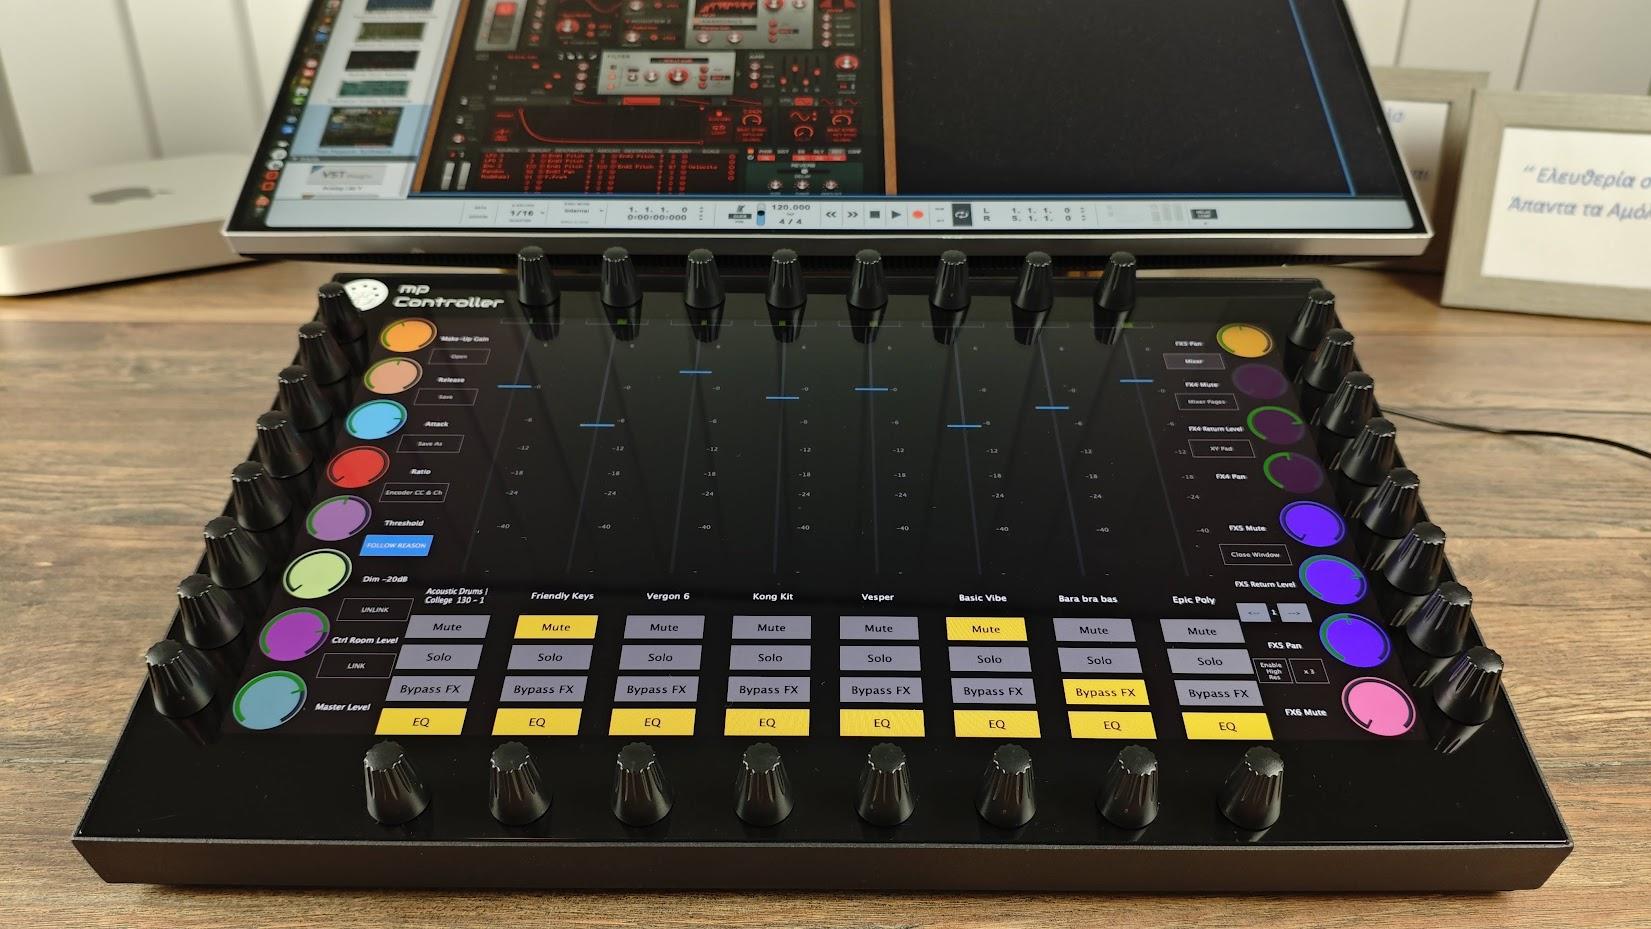](https://kb.mpmidi.com/uploads/images/gallery/2025-10/r0F8SHeW25qljneM-img-20251029-191505.jpg) Download the installer from the user portal and run the installer on MacOS or Windows and it will install the following: 1. The Reason Control Surface app. **Mac:** Applications folder and **Windows:** Program Files/MP Reason Control Surface 2. The Reason Control Surface launcher on your Desktop 3. The presets for Reason native devices in the [/MP/Host/](https://kb.mpmidi.com/books/mp-controller-documentation/page/3-mp-host-properties-and-config-files)MP Reason CS Presets 4. The Reason Control Surface scripts and remotemap file in **Mac OSX:** ~/Library/Application Support/Propellerhead Software/Remote/Codecs/Lua Codecs **Windows:** C:\\Documents and Settings\\All Users\\Application Data\\Propellerhead Software\\Remote\\Codecs\\Lua Codecs **Mac OSX:** ~/Library/Application Support/Propellerhead Software/Remote/Maps **Windows:** C:\\Documents and Settings\\All Users\\Application Data\\Propellerhead Software\\Remote\\MapsNote that the MP Controller must be connected for the Control Surface app to work
--- ##### Installation and Control Surface configuration on MacOS: The first time, run the Reason Control Surface app from the Applications folder. MacOS will ask for your permission. See [this page](https://kb.mpmidi.com/books/mp-controller-documentation/page/3-reason-cs-mac-os-installation-permissions "Reason CS Mac OS Installation Permissions") on setting the permissions and then continue with the rest of this article. Run the Reason Control Surface launcher from your Desktop. Repeat the same for the permissions needed as above. [](https://kb.mpmidi.com/uploads/images/gallery/2025-10/Guu6nEhj8CVkkTB9-image.png) and it will start the control surface app and Reason.The launcher app is made for Reason 13 and requires Reason to be in the Applications folder. If it does not start the Control Surface app and Reason, it is probably an issue with the permissions required.
Open Reason > Preferences and add the control surface. Click on "Add Manually" and select the MP Controller and the available MIDI ports. [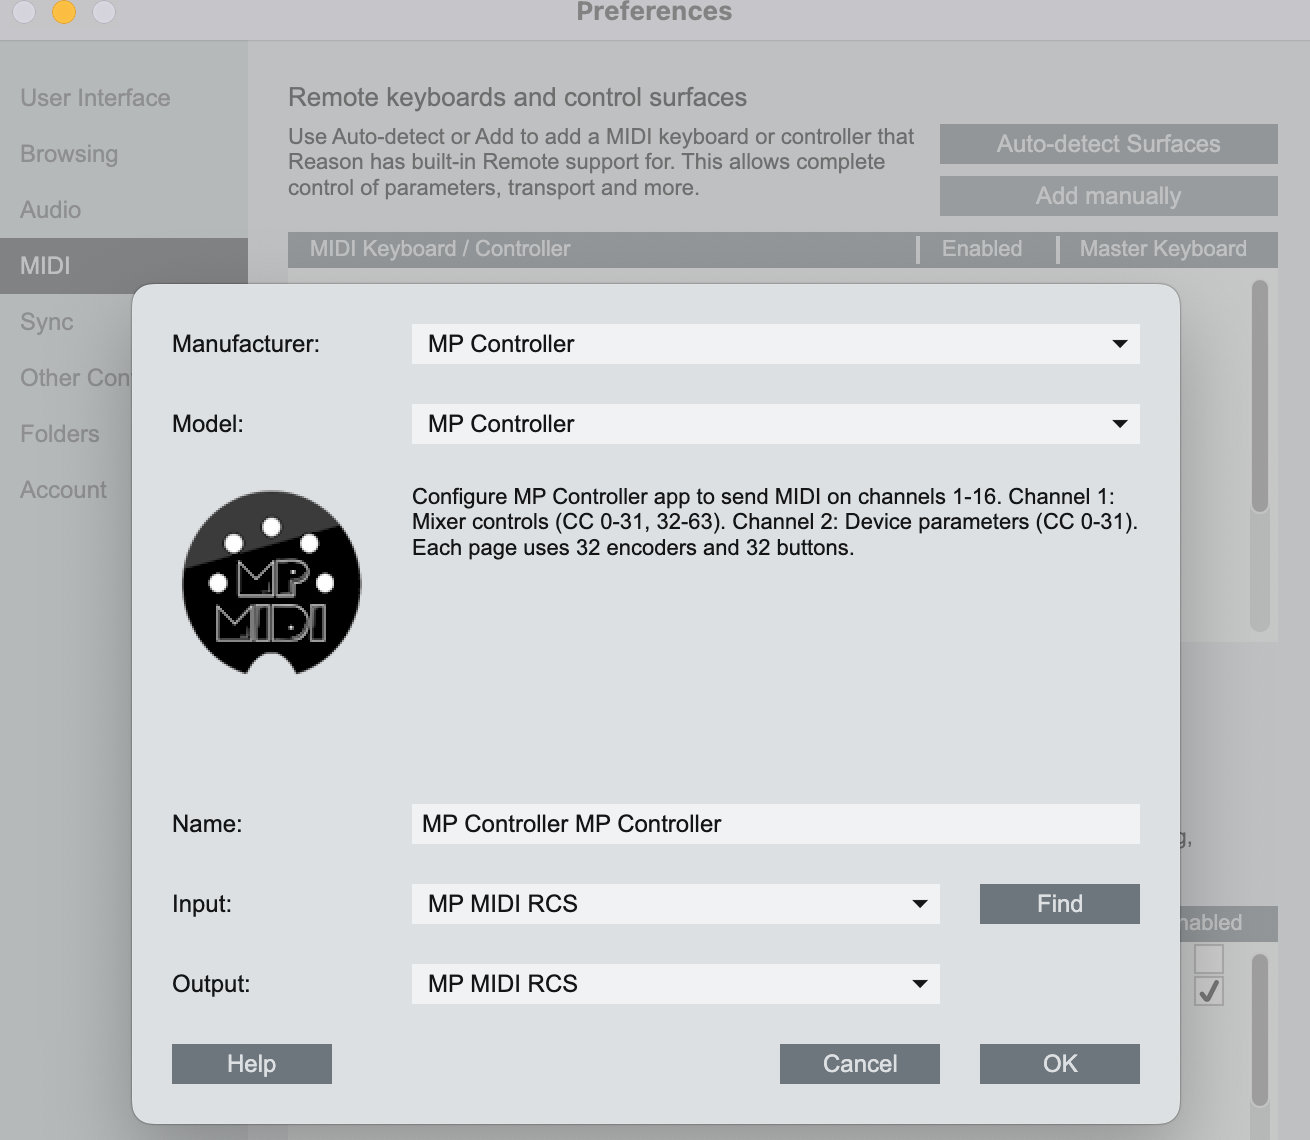](https://kb.mpmidi.com/uploads/images/gallery/2025-10/WsHPnFRemUJH8QXH-image.png) [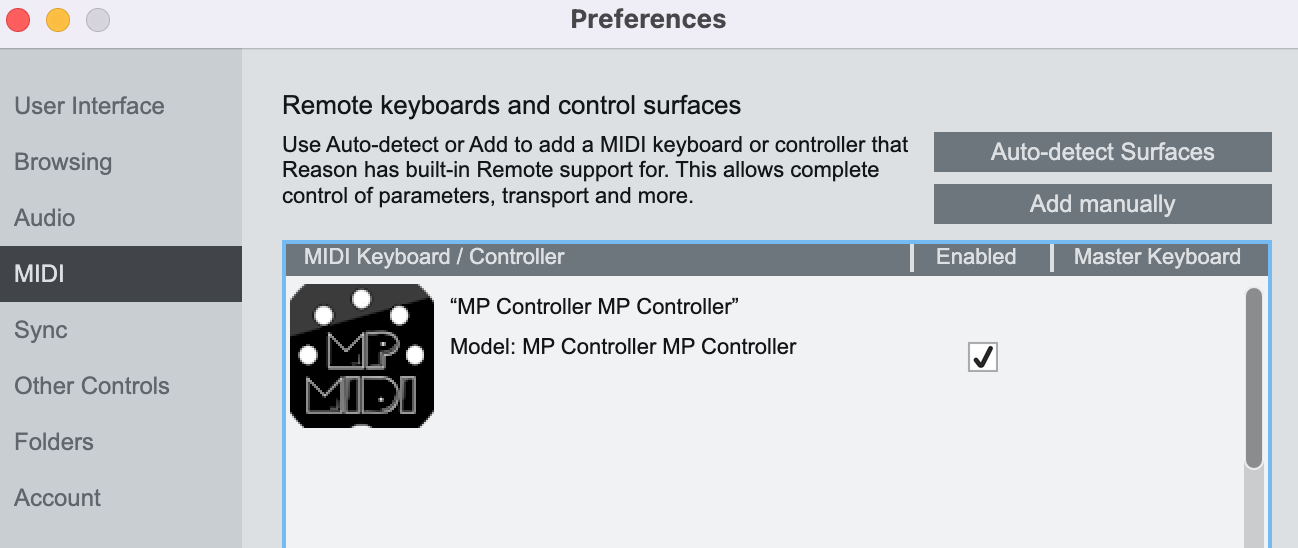](https://kb.mpmidi.com/uploads/images/gallery/2025-10/rzrPjEfwp8Fmg4LP-image.png) When you close Reason, the control surface app will quit as well after a couple of seconds. When running the Launcher it takes a few seconds for Reason to send all the necessary data to the control surface. You can then select any device or track to control it.On Mac the Reason Control Surface app must start before Reason so that it finds its MIDI ports.
--- ##### Installation and Control Surface configuration on Windows: To use the MP MIDI on Windows, you need to install a virtual midi port software. We recommend [loopMIDI ](https://www.tobias-erichsen.de/software/loopmidi.html)which is a free utility software. There are others as well like [LoopBe30](https://www.nerds.de/en/loopbe30.html). LoopMIDI allows you to create many virtual ports you need and set custom names for each port. For the Reason Control Surface we need two ports, one for sending MIDI CC and another one for receiving MIDI CC messages. After you install loopMIDI, open loopMIDI and add a port, name it "FROM REASON CS", then add another port and name it "TO REASON CS" [](https://kb.mpmidi.com/uploads/images/gallery/2025-10/8koaTvb0gkKh4TMJ-image.png) [](https://kb.mpmidi.com/uploads/images/gallery/2025-10/BqQhAmGELKf4UEon-image.png) so it will look like this: [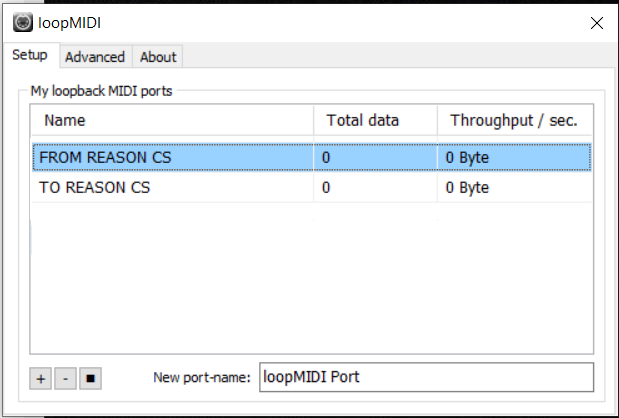](https://kb.mpmidi.com/uploads/images/gallery/2025-10/QGr1ZIUZ0V9227Vj-image.png) We have created a launcher app to start Reason and the MP Controller Reason Control Surface. Create a shortcut from C:\\Program Files\\Propellerhead\\Reason 13\\Reason.exe (or any version of Reason) to your Desktop named **Reason.app** [](https://kb.mpmidi.com/uploads/images/gallery/2025-10/VZXXhhFZjLK5Iw6U-image.png)The launcher uses this shortcut to launch Reason so when you update Reason to another future version, you just need to recreate the desktop shortcut.
Run the Reason Control Surface launcher from your Desktop and it will start the control surface app and Reason. [](https://kb.mpmidi.com/uploads/images/gallery/2025-10/KlU8d2WVTEWW7BJv-image.png) Open Reason > Edit > Preferences > MIDI and add the control surface. [](https://kb.mpmidi.com/uploads/images/gallery/2025-10/GE58maQyM7Am9YPt-image.png) Select the MP Controller from the list Select the available MIDI ports. Select **TO REASON CS** as the **input port** and **FROM REASON CS** as the **output port**. It should look like this and click OK. [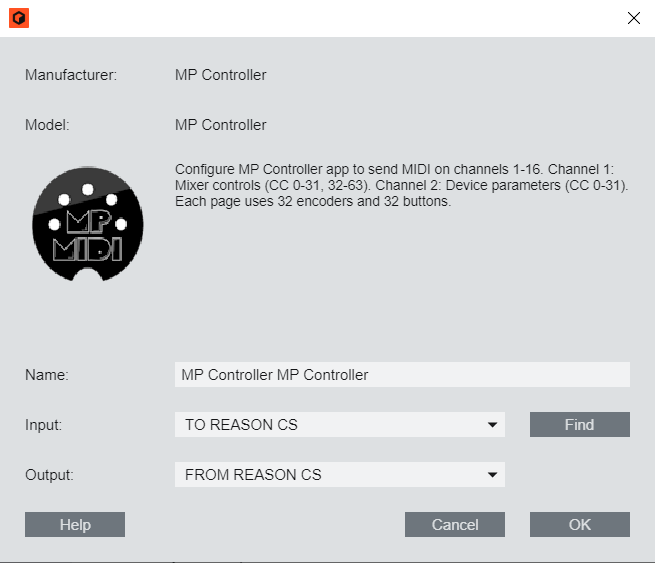](https://kb.mpmidi.com/uploads/images/gallery/2025-10/vszudMMasFenxysR-image.png)No other application should be using these virtual MIDI ports.
When you run the Launcher app to start the apps and then you close Reason, the control surface app will quit as well after a couple of seconds.
--- To view the version or quit of the Reason Control Surface right click on the bar icon [](https://kb.mpmidi.com/uploads/images/gallery/2025-10/whdwUtcLNmDYacLV-image.png) To quit click OK on the popup window: [](https://kb.mpmidi.com/uploads/images/gallery/2025-10/tktZ13iA9uX8zi3C-image.png) ---When running the Launcher it takes a few seconds for Reason to send all the necessary data to the control surface. You can then select any device or track to control it.
--- Next: [Documentation](https://kb.mpmidi.com/books/mp-controller-documentation/page/2-reason-control-surface-documentation) of the Reason Control Surface --- # 2. Reason Control Surface Documentation ##### How it works Reason uses a lua script and a remotemap file for communicating with control surfaces. The lua script defines the logic of communication and the remotemap file defines the available parameters mapped onto available control surface controls. We have created presets for each device in Reason, including the Mixer Channel and Master Section. To control a device select it by clicking on the side arrow [](https://kb.mpmidi.com/uploads/images/gallery/2025-10/ABk5jqF4lQWfHaGu-image.png) in the Rack view (including the Master Section). [](https://kb.mpmidi.com/uploads/images/gallery/2025-10/5kO7zC7cGyvelZxU-image.png) Reason sends a message to the mp controller that the device is selected and it loads the corresponding device preset along with the values of parameters. The control is synced with the parameters of the device and you can control the device.The only way to select a device is using the mouse from within Reason.
This architecture allows controlling only one device at a time. This means you cannot control parameters of other devices while you have selected a device. Reason is made that way so that only one device at a time can be controlled. The control surface consists of 64 pages, each carrying 32 encoders, that is 2048 CC available for 16 MIDI channels. Each page has 32 encoders and each encoder has a CC id assigned to it starting from Channel 1 CC0 up to Channel 16 CC127. The mp controller device presets have been mapped to the parameters of the Reason device. Each page has a different set of parameters and you can switch to different pages via the on screen page buttons. Highlighted pages with a green border color are pages that carry mapped parameters. If the page is not highlighted, shows that it does not carry mapped parameters, with the exception of the Reason Master Section that has mapped parameters up to page 16, but from 7 and onwards are not highlighted because these are parameters mapped onto the Mixer buttons. [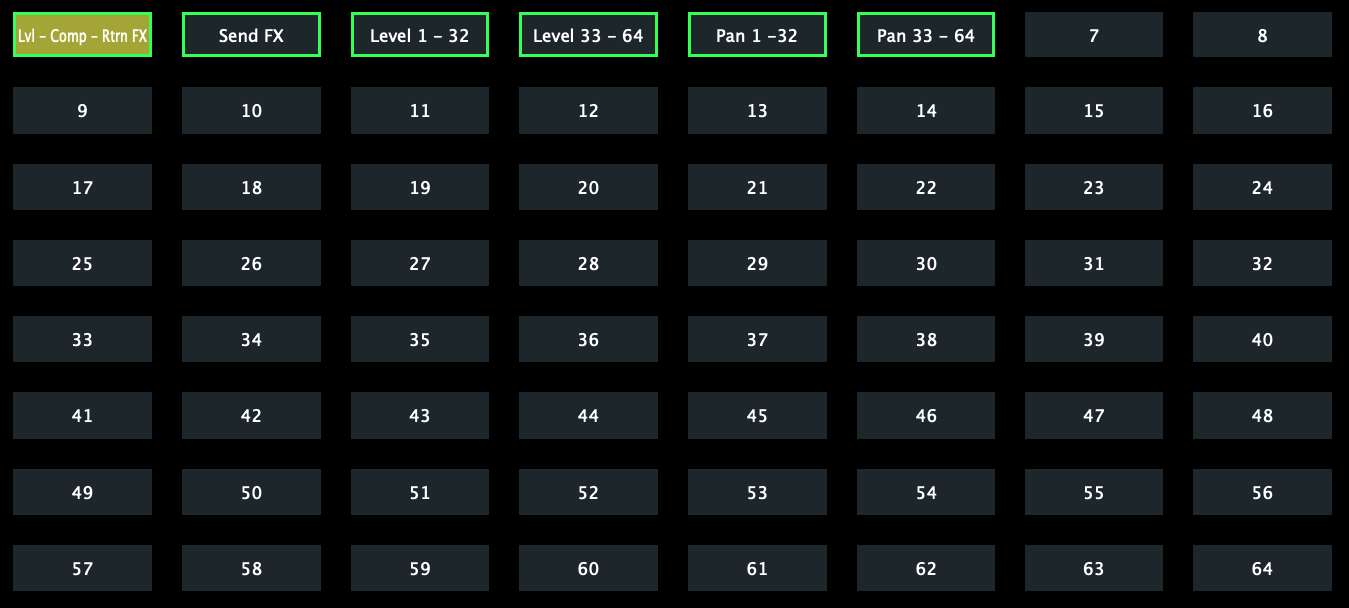](https://kb.mpmidi.com/uploads/images/gallery/2025-10/elce8dRt0HMscV7d-image.png) Double right click on a page button to rename it. Saving a preset will save the button name. To control a Reason channel track you need to select an audio track from the rack view or Mixer view. It loads a preset Reason Main Channel and it controls that selected channel. **Page Navigation** The first time when opening the Reason project it will land on the last page of the preset that has mapped parameters as it receives all the parameters from Reason. Thereafter, it will always open on the last selected page. For example, if you are on Subractor page 3 and you select MClass Compressor and then go back to Subractor, it will land on page 3 because that was the last Subtractor page open. --- ##### Device ID name - Device name - Device Patch name The controller displayed the Device ID name on the left and the Device name on the right. Some devices get the Preset name from the loaded patch. If the Device name name is the same as the Patch name, then it will only display it once. [](https://kb.mpmidi.com/uploads/images/gallery/2025-10/gW8PTpRy5uLExfzK-image.png) ##### Follow Reason [](https://kb.mpmidi.com/uploads/images/gallery/2025-10/6yFA94SswOmUHMKr-image.png) This button will blink a parameter on the controller when you move a parameter of the selected device in Reason. If the parameter is on a different page, it will go automatically to that page. If you turn Follow Reason off, then the controller will not change to the page of the mapped parameter. --- ##### Preset buttons: [](https://kb.mpmidi.com/uploads/images/gallery/2025-10/KilomfMxhyAtU3YH-image.png) The top row of buttons has the ability to open a preset. This is useful when you have created other presets for the selected device. The Reason Control Surface App will always open by default the preset that matches the device name. If you have created other presets you can open them using these buttons. There are 8 buttons and each can open a different preset. Right click on a button, click the box “Active” and this will set the button color to yellow. Select the preset you want to be opened when clicking the button. Click Close to close the menu. Save the current preset. You need to repeat the process for each preset to program it for opening other presets. If you have for example 3 presets for a device, you need to set the buttons on each preset. [](https://kb.mpmidi.com/uploads/images/gallery/2025-10/GfA89TUtQ9UgiTRd-image.png) --- ##### Creating Presets for devices To create another preset for a device, unlink the parameters using the unlink button or use the “Clear Page mappings” from the right click menu. You can then link parameters by enabling the Link mode and moving parameters with the mouse. The Ink mode will continue to link the next encoder when you move another parameter with the mouse. Clicking on any encoder on the page will continue linking from that encoder. Click the Link button again to exit the Link mode. The linked encoder will inherit the name and color as it was linked in the default preset. You can change the color of an encoder by right clicking on it and the color selector will appear. You can change the name of an encoder by double clicking the name label area of an encoder. Note that each parameter can only be linked to one encoder per preset.If you create another preset for the Reason Master Section, place it in another subfolder and name it Reason Master Section. If you name it differently it will not work correctly. The name must always be Reason Master Section for any preset controlling the Master Section.
--- ##### Mixer Mode This view is only available for the Reason Master Section, the Mixer 14:2 and the Line Mixer 6:2. The mixer view will control the volume level using the button encoders and the pan using the top encoders. Additionally, the on-screen faders control the volume level. [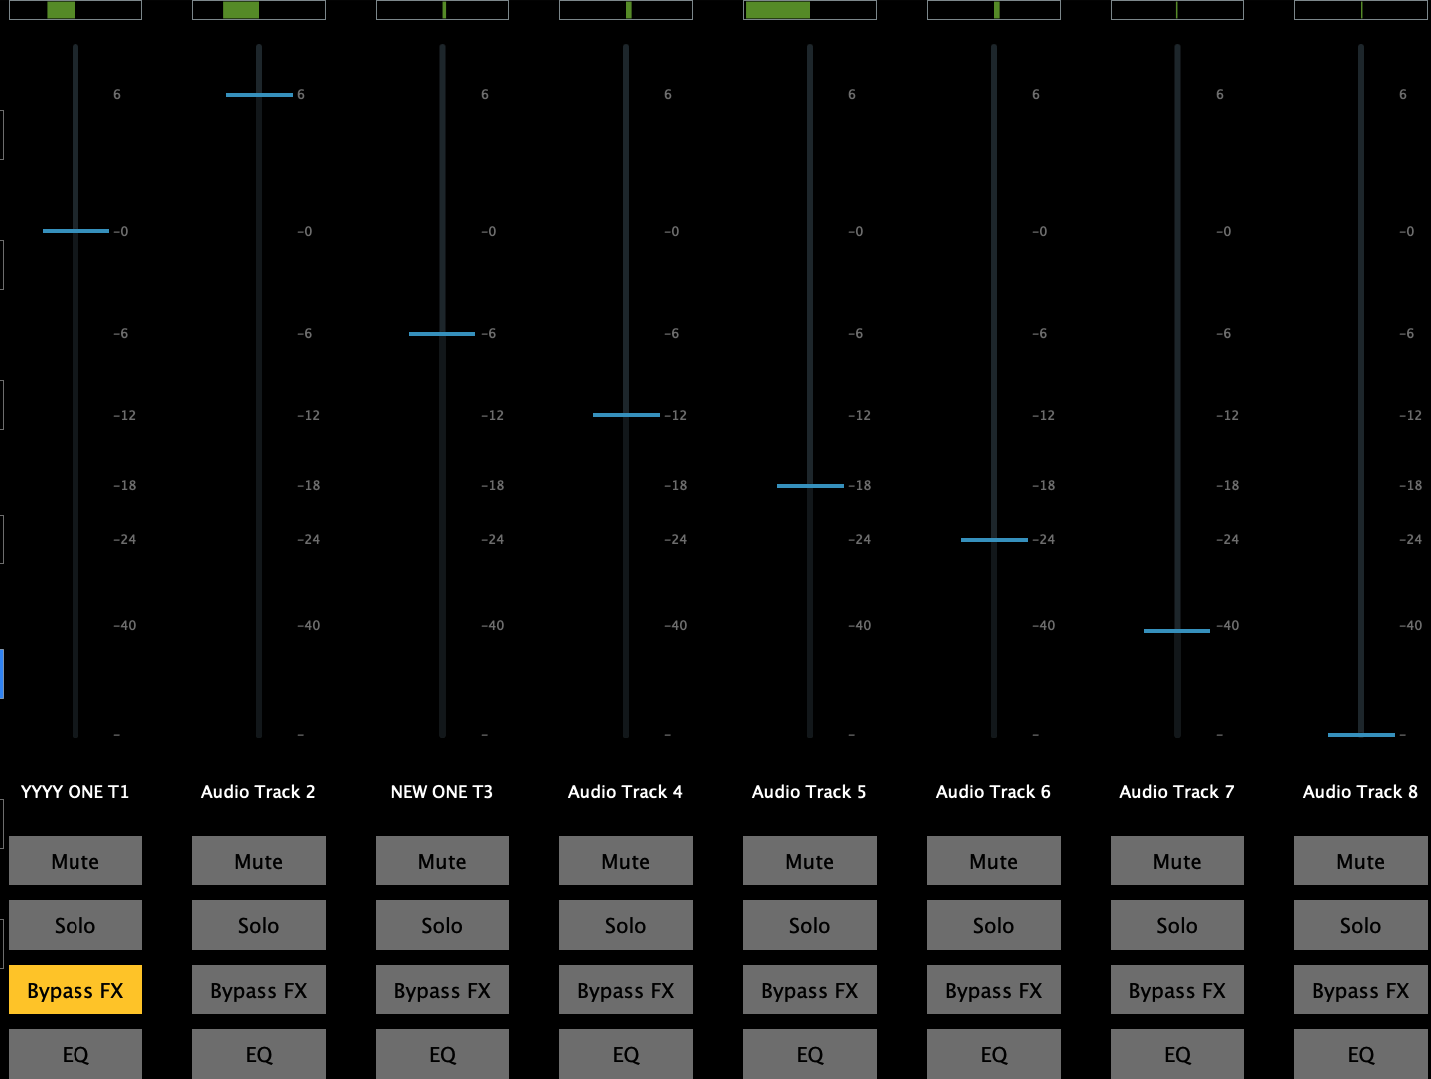](https://kb.mpmidi.com/uploads/images/gallery/2025-10/YeFj8TpErEXq0SJo-image.png) In the Reason Master Section, there is another button named Mixer Pages and it allows you to navigate to the 8 different Mixer pages. Each page can control 8 channels and Reason can control a maximum of 64 channels per Remote Base. The Remote Base can be set by clicking at the button of the channel in the Mixer view of Reason. [](https://kb.mpmidi.com/uploads/images/gallery/2025-10/AtHC9GUPDaHM044w-image.png) When you enable the mixer mode, the buttons for Next and Previous page become highlighed and they now control the mixer page navigation instead of the preset page navigation: [](https://kb.mpmidi.com/uploads/images/gallery/2025-10/c1dZEHmwEghF9OBQ-image.png) If you have a project with 128 tracks and the Remote Base is set to the first track, the control surface will control tracks 1 to 64. If you set the Remote Base to track 64, it will control tracks 64 to 128. Right click on a track and select the Remote Base. Doing so, will resend the track names to the control surface. [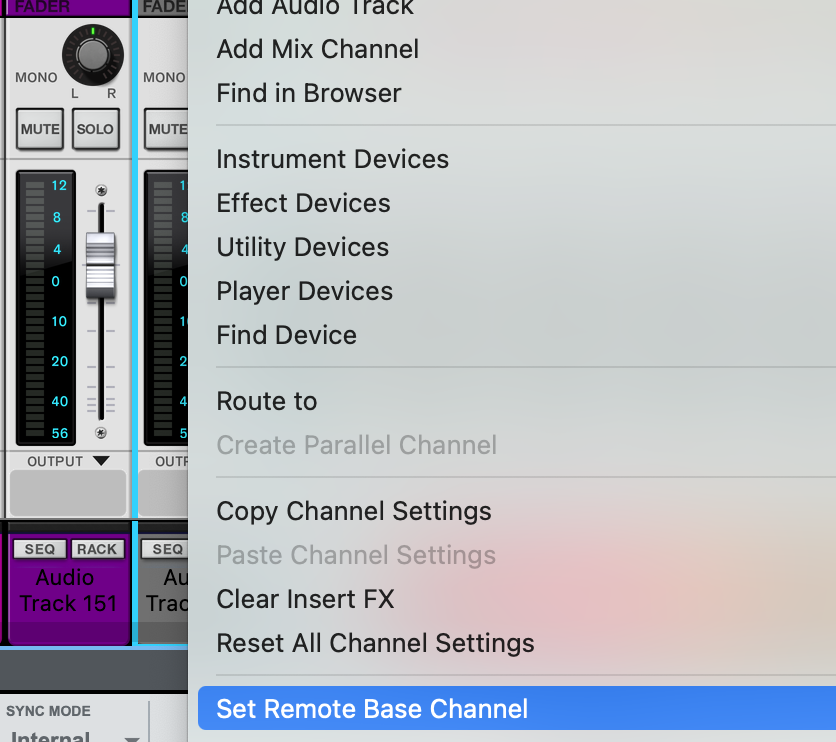](https://kb.mpmidi.com/uploads/images/gallery/2025-10/jvURG90tU9DinpIP-image.png) --- ##### Set encoder IDs on the Mixer Right click on the Faders and the top menu will open that allows to select other CCs and Channels. This is not essential and should only be used if you want to use the mixer components. [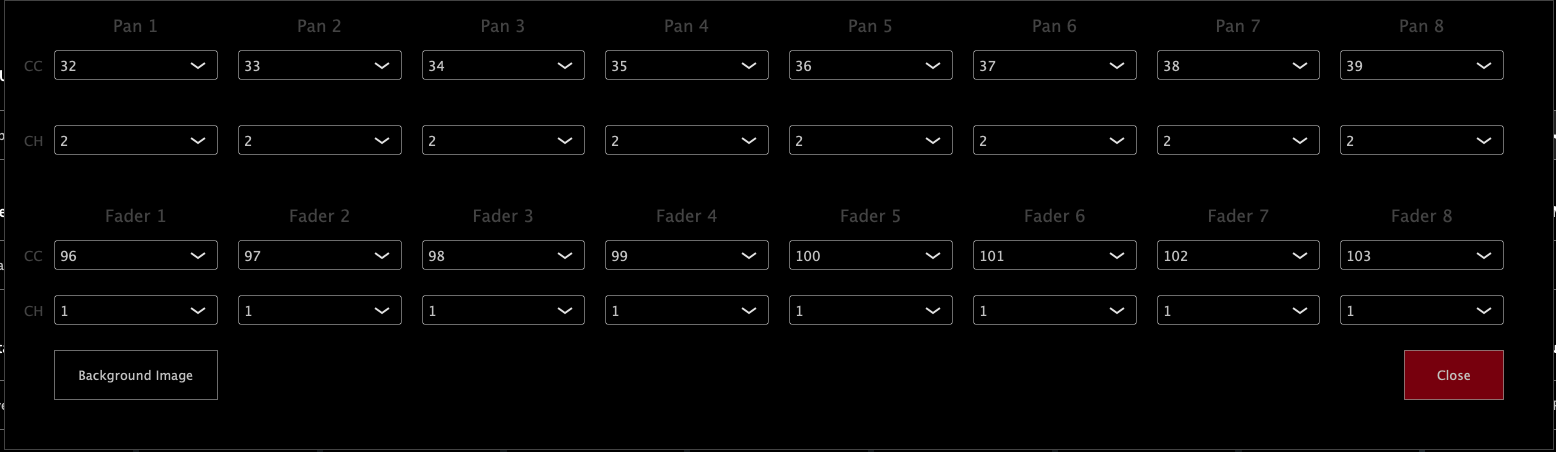](https://kb.mpmidi.com/uploads/images/gallery/2025-10/Vu2iCvjE6Y2mvRJy-image.png) --- ##### Locking the Control Surface to a device When you right click on a device or the Reason Master Section (on the Mixer main channel area) you will see the option: [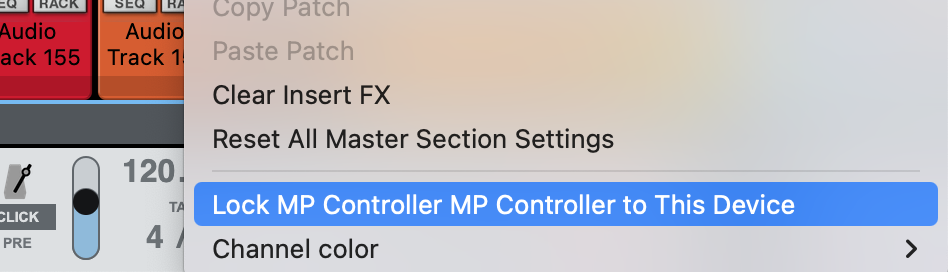](https://kb.mpmidi.com/uploads/images/gallery/2025-10/mF3SGhs5qsKC9Ayr-image.png) If select to Lock the CS to a device it will not be available to use on other devices even if you click on the side arrow. Note that some small Reason devices that are half rack size like the DDL-1 Digital Delay Line require to lock the CS on them as they don't have the option to select them. --- ##### How to add a new device in the control surface via the Preset ToolThis tool is experimental and has been created as an internal tool to help controlling other devices. Use with cauiton.
Download the tool for Mac and Windows from [here ](https://drive.google.com/drive/folders/1vdbKXQJvLrG_FleZI3DUin3O7h7Kv7wr?usp=sharing) Extract the zip file of the Preset Tool in a folder anywhere you like on your computer. Reason provides the available list of parameters of a device via an export function from the File menu. Select a device and then export the Remote Info file for that device. Place the file in the extracted zip folder of the Preset Tool and run it once. All files (Preset tool files, default.xml and the Remote Info.txt file) should be in the same folder.Use only one Remote Info.txt file every time. if you have other Remote files delete them.
**Windows file to run:** ReasonPresetPipeline.bat **Mac file to run:** Reason Preset Pipeline.command Check the logs on the screen to see if everything worked properly.The tool will create a backup of the lua script and the remotemap file every time you run it.
It will then add the device in the list of devices in the lua script and add at the end of the remote map file the mappings. Last, it will create a preset for the device and place it in the Presets folder of the Reason Control Surface. Disable and enable the Control Surface from the Reason’s Preferences and give it a few seconds to sync up. Select the device you have mapped and it will load the mp controller preset and sync up with the values. The lua script and remotemap files can be edited in text editors like Sublime and you can troubleshoot adding new devices by opening these files and comparing the additions made to the files with the original backup files. To restore the backup files, delete the new lua and remotemap files and rename the backup files by removing the .backup extension from the file name.Please note that adding too many devices with a large number of parameters to the lua and remotemap files will affect Reason’s performance and start time. This is how Reason works with all control surfaces. There is also a limit to 127 devices. We have added 62 Reason devices.
# 3. Reason CS - Mac OS Installation Permissions When opening the installer you will be prompted to allow it from the System Settings [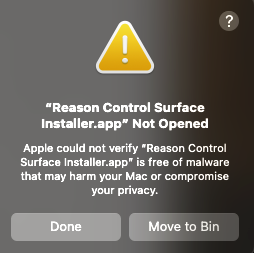](https://kb.mpmidi.com/uploads/images/gallery/2025-10/Yev6wcNG3yCSZaJl-image.png) click Done and go to System Settings > Privacy and Security and scroll down [](https://kb.mpmidi.com/uploads/images/gallery/2025-10/32OVCrkDuELp6xJe-image.png) Click Open Anyway [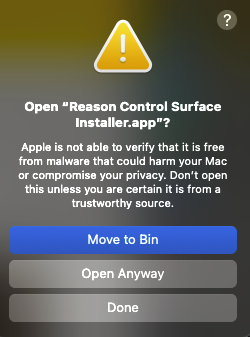](https://kb.mpmidi.com/uploads/images/gallery/2025-10/knUTJnDnqvh3PeMI-image.png) Click Open Anyway Enter your password [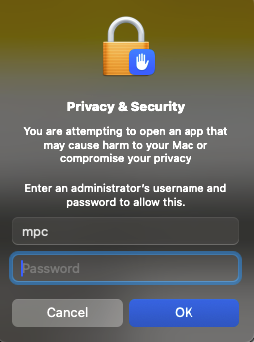](https://kb.mpmidi.com/uploads/images/gallery/2025-10/wu2Mg2BkLQmbXG7t-image.png) and you will be prompted to enter your password again so that the installer has the necessary permissions to install the files. [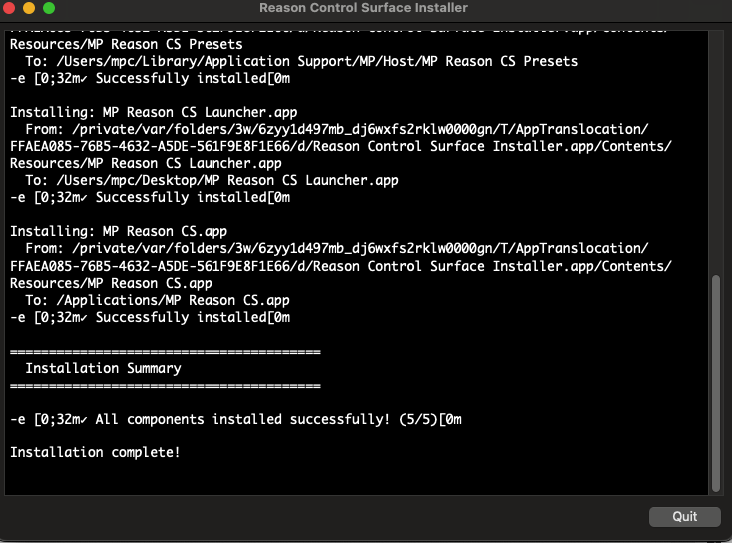](https://kb.mpmidi.com/uploads/images/gallery/2025-10/k7C8WmlVPFmneVV4-image.png) Click on Quit Go to Applications folder and run the Reason CS.app [](https://kb.mpmidi.com/uploads/images/gallery/2025-10/vGZNrYixr08N4Dfr-image.png) It may ask for permissions, if it does not then close it and go to the desktop Close Reason if it is running. Click on the [](https://kb.mpmidi.com/uploads/images/gallery/2025-10/ajW6lmJrdS8Frf3D-image.png) It will start the control surface app and Reason. When you quit Reason, it will automatically quite the control surface app, after a couple of seconds. --- Set the permissions on the Remote scripts folder: open a Terminal and copy/paste the following. It will ask for your password, enter it and hit enter. It should not produce any output. ***sudo chmod -R 777 ~/Library/Application\\ Support/Propellerhead\\ Software/Remote/*** Continue with the installation guide. # 14. Cockos Reaper Control Surface A control surface for Cockos Reaper # 1. Cockos Reaper Control Surface Documentation ##### Tutorial video A [tutorial video ](https://youtu.be/SzxPzSqivQc)showcasing the capabilities of the control surface. The control surface can control and sync with Reaper for mixer, transport, device/plugins control. ##### Installation Download and run the ReaperCS installer from the user portal under the "New Releases" section. The installer installs the ReaperCS Launcher on your Desktop so that you can start it with Reaper. Once you quit Reaper it will quit the ReaperCS and quit the laucher app automatically.The installer copies the following: - The ReaperCS app and ReaperCS Launcher app in Applications on the Mac and in C:\\Program Files\\ReaperCS on Windows. - It creates a shortcut for the ReaperCS Launcher on your Desktop. - The bridge Reaper control surface integration plugin in **/Users/USERNAME/Library/Application Support/REAPER/UserPlugins/reaper\_csbridge.dylib** on the Mac and in **C:\\Users\\USERNAME\\AppData\\Roaming\\REAPER\\UserPlugins\\reaper\_csbridge.dll** on Windows.
Then run the ReaperCS Launcher from your Desktop. It will start Reaper and the ReaperCS app which is the control surface app. [](https://kb.mpmidi.com/uploads/images/gallery/2026-01/hkMyIO711LLEufNz-image.png) To uninstall, run the included uninstaller.IMPORTANT: If you are using UPDD with the "Reset Keyboard Focus" option enabled, disable it as it will conflict with the automatic keyboard focus that the ReaperCS has. ReaperCS takes the keyboard focus back to Reaper automatically.
--- ##### Views There are 3 views in ReaperCS: 1\. The main view for controlling Reaper devices and plugins [](https://kb.mpmidi.com/uploads/images/gallery/2026-01/m4KO1A4Q5hlqw0ma-image.png) 2\. The Mixer view for controlling the mixer [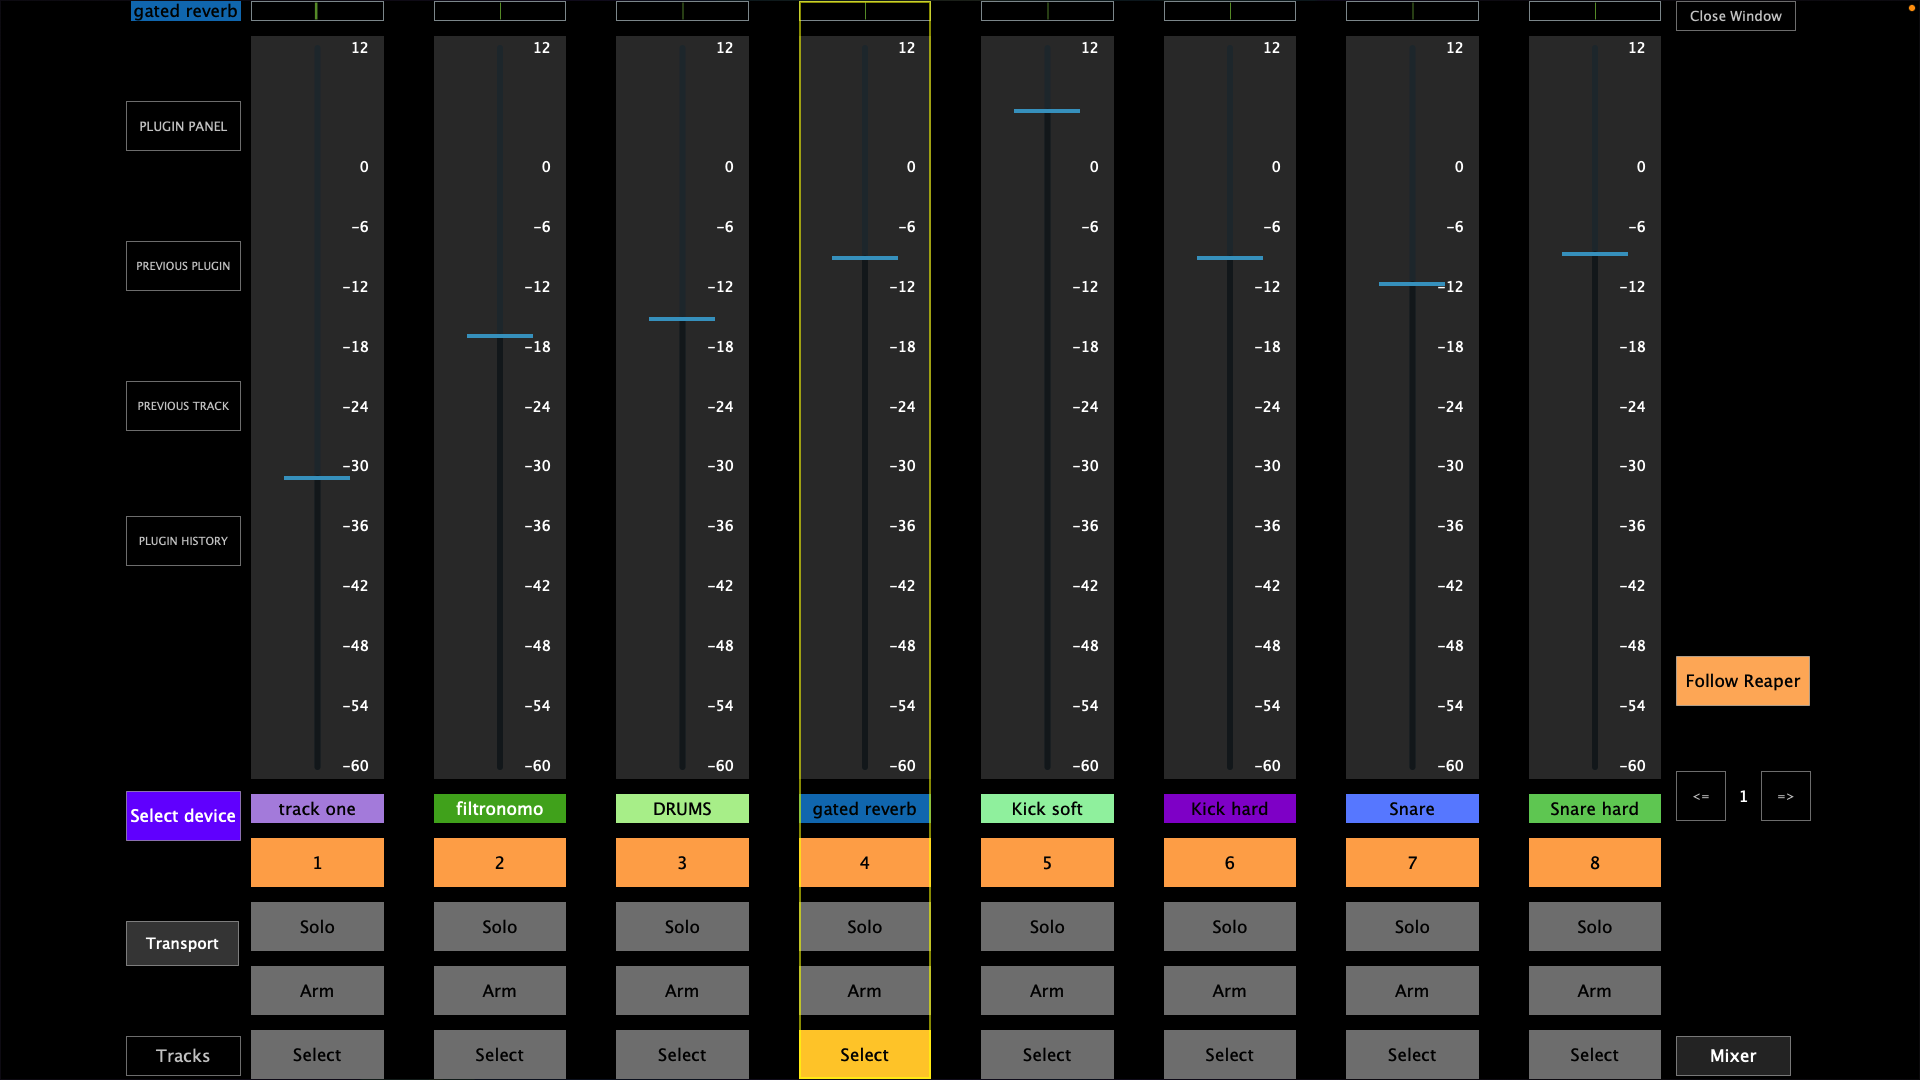](https://kb.mpmidi.com/uploads/images/gallery/2026-01/OLjrvjwaIOTmRpJF-image.png) 3\. The Selected Device view for selecting the device you want to control from the current track [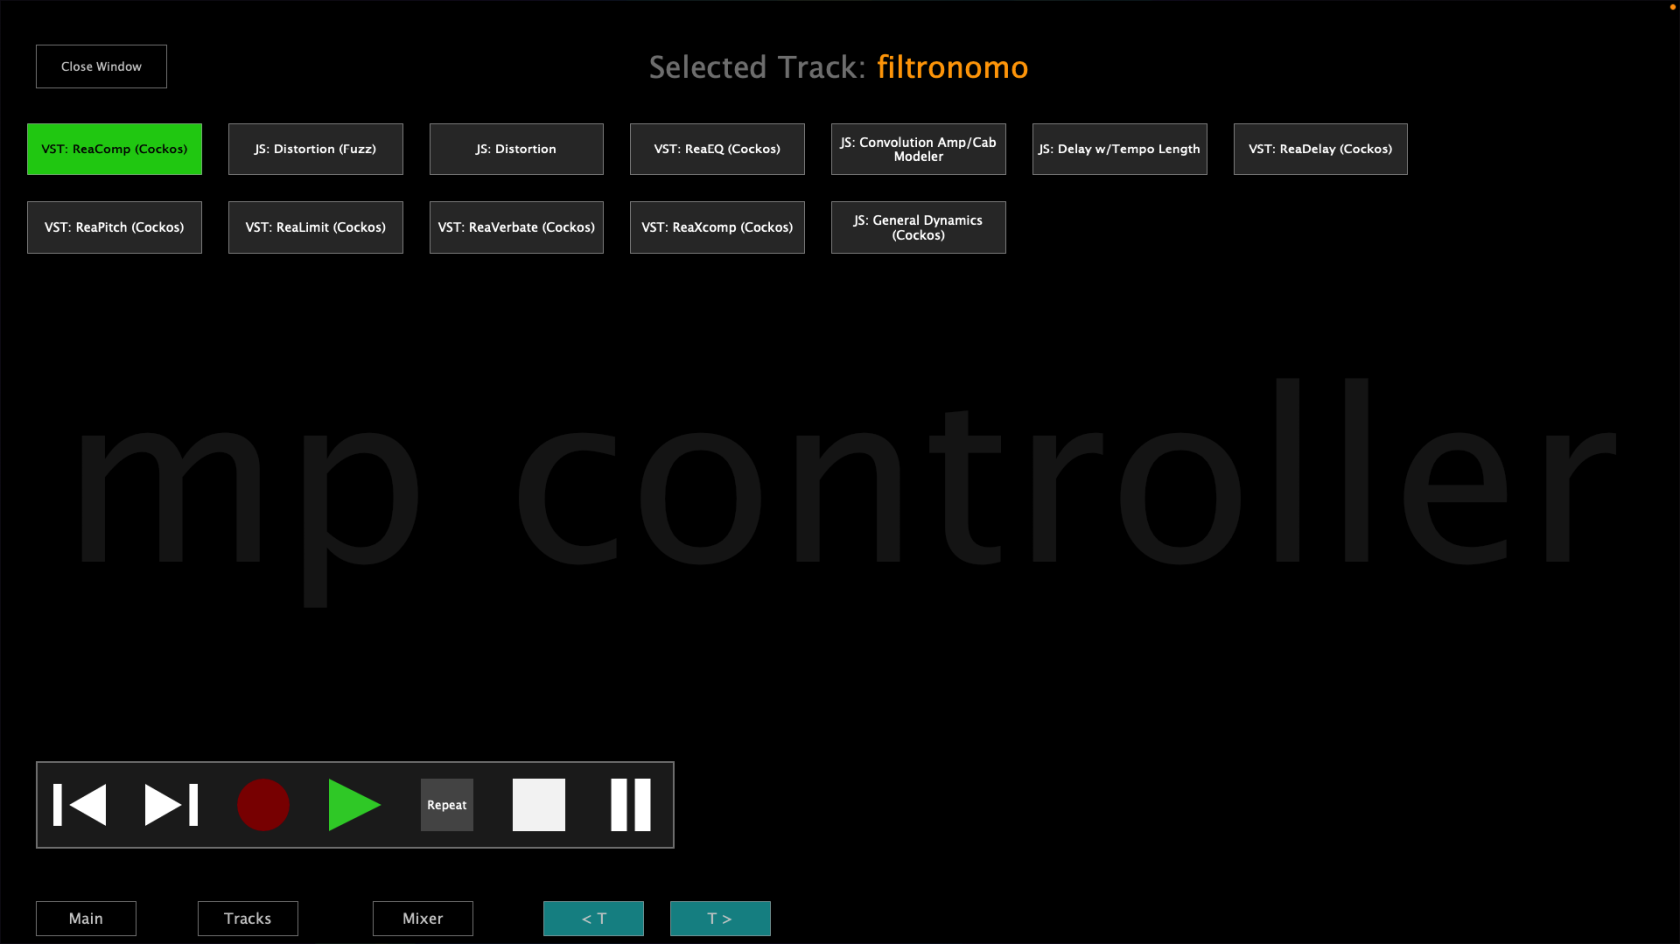](https://kb.mpmidi.com/uploads/images/gallery/2026-01/NZdn5P7GFyitn08p-image.png) Each view has the option to control the transport controls and on the Select Device view the trasport controls are shown permanently while on the other views the transport control window shows/hides when the Transport button is pressed. --- ##### Selecting and controlling devices You can control devices by selecting any device from Reaper or by selecting a device from the Select Device view or by using the Previous/Next device buttons in the main view. [](https://kb.mpmidi.com/uploads/images/gallery/2026-01/RGyvYPMNYc1Y4RMf-image.png) When the Auto mode is enabled (default) and you select different devices in Reaper it follows the selection of devices and syncs with the device selected (in Focus in Reaper). Setting the Auto mode to manual will stop following the selection of devices in Reaper and will keep controlling the device that is currently being controlled. In manual mode a button shows "Go to selected device", when pressed it will sync and control the device currently selected in Reaper. **Device button colors** In the Select Device view, the device buttons may have the following background colors: Green: The device is being controlled by the control surface and its window is open in Reaper. Yellow: The device is being controlled by the control surface and its window is closed in Reaper. --- ##### Switching Tracks When you switch tracks from Reaper, all 3 views follow Reaper track selection. In the main view, when selecting a different track does not select another device on the selected track. In the main view it shows: The track name of the device being controlled > the name of the device being controlled | the name of the selected track in Reaper. [](https://kb.mpmidi.com/uploads/images/gallery/2026-01/0H2iaPp0avul62T0-image.png) You can switch tracks using the Previous/Next buttons in the Main view and the Select Device view [](https://kb.mpmidi.com/uploads/images/gallery/2026-01/8D46t6RHrQ1Ftt69-image.png) or using the Tracks button [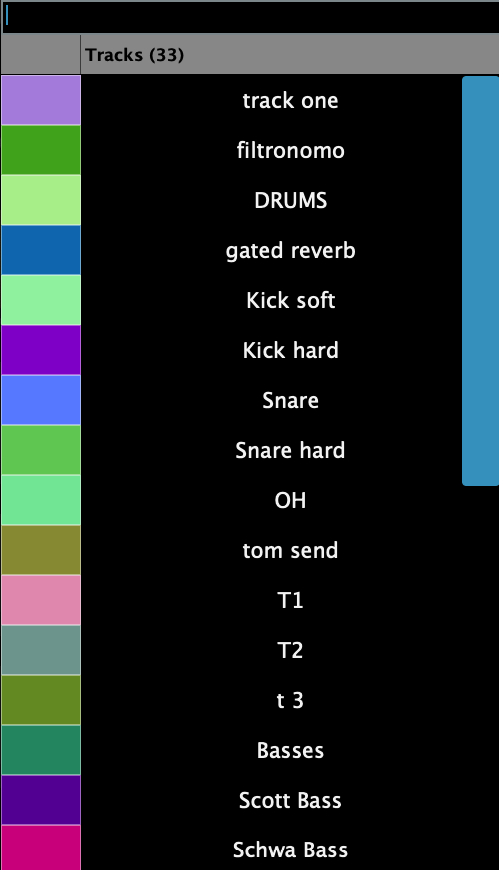](https://kb.mpmidi.com/uploads/images/gallery/2026-01/OzYkat1W5mQQOyCE-image.png) In the Mixer view you can select tracks by clicking anywhere on the virtual fader or using the Select button --- ##### Device Control A device can be controlled by 256 encoders and 256 buttons. There are 8 pages with 32 encoders and 32 buttons per device. Once a device is selected, ReaperCS automaps the available parameters to encoders if they are continous and non-continous parameters are mapped to buttons. The order of mapping is given from Reaper as it provides the list of parameters. The on-screen encoders receive a color and if the next encoder's name is similar to the previous encoder's name it will assign the same color. For example: Delay rate, Delay amount will both get the same color. When moving a parameter from a device in Reaper it will cause the mapped parameter on ReaperCS to blink twice. If the parameter is mapped on a different page it will go to that page automatically and blink the parameter. This is done so that mapped parameters are easy to identify. The same principle applies to buttons and they blink with a green color. **Mapping Parameters Manually** If you want to change the automatic mapping it is possible using the LINK button which sets ReaperCS in a linking mode. Click on the LINK button and then click on an encoder. The encoder will get a yellow circle around it, marking it that is ready to be linked. Move the parameter you want to map in Reaper on the device being controlled and it will unlink it from its current encoder and link it to the selected encoder. The yellow circle will be applied on the next encoder and stop at the last encoder of the current page. To exit the linking mode press the LINK button again. To link a button, right click on the button and it will show the button's option menu. Click on the Link button and then move the parameter you want to link. It will unlink it if it is linked on another button or encoder and link it to that button. It will automatically exit the linking mode after linking the parameter. **Unmapping Parameters** To remove the mapping from parameters click on the UNLINK button. It will go in a continous unlinking mode. Then select the encoder you want to remove the mapping from. It will show a red circle around the encoder. Click the encoder again and it will unmap the encoder and the red circle will go on the next encoder. Clicking on that encoder will unlink it as well and so on. To ecit the unlinking mode click on the UNLINK button. The same applies to buttons but it will only unlink one button at a time. Click on the UNLINK button, then click the button you want to unlink and it will remove the currently linked parameter. **Saving Presets** If you have created your own mapping and want to use them every time that device is selected click on the "Save as default" button. It will save a preset in the /Users/USERNAME/Library/Application Support/MP/Host/ReaperPresets/default/PRESET\_NAME.xml and it will be automatically loaded every time that device is selected, in this or any other project. You can also save as using another name and load it manually if you want to use a different preset for that device. Note that if you have made custom mappings and you switch to another device prior to saving them, they not be retained and they will be reset to the automatic mapping when you go back to that device. --- ##### Plugin Panel The plugin panel allows you to switch to another MP Host device and it works the same way as the plugin panel in the MP Host. The buttons are the bottom of the main view and on the left in the Mixer view are for selecting MP Host plugin instances: [](https://kb.mpmidi.com/uploads/images/gallery/2026-01/inAoC10WvDOyAauj-image.png) If you are on the MP Host, you can switch to ReaperCS using the ReaperCS button in the bottom row. --- ##### The Mixer view The Follow Reaper button will select automatically the track selected in Reaper. If you want to stay in the current mixer page, you can disable the Follow Reaper button. The pages buttons on the right will change the ReaperCS mixer page. The on screen faders are calibrated to the Reaper's default mixer configuration. You can control the volume of each track using the bottom row of physical encoders or the on screen faders using touch and drag. Touching a fader will only select the track. The top physical encoder control the panning of each track. The buttons below each on-screen fader are for controlling: Mute, Solo, Arm and Selecing the track. If you select a track on the mixer view and go to any other view, that track will be selected as well. --- ##### Controlling Reaper native devices You will notice that when controlling some parameters on Reaper's native devices there may be intervals that jump when controlling these parameters. This is because the parameters change exponentially instead of linear. To have more fine control you can enable the [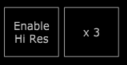](https://kb.mpmidi.com/uploads/images/gallery/2026-01/JAk8CMFJCSWtdaHK-image.png) Here is an enample of a parameter jumping to the next value when being controlled. [](https://kb.mpmidi.com/uploads/images/gallery/2026-01/JrsYqwLFYKBIWSNp-20260105-152508-edit1.gif) --- ##### Plugin Panel The [Plugin Panel](https://kb.mpmidi.com/books/mp-controller-documentation/page/34-switching-to-other-plugins-via-the-plugin-panel) allows you to switch to any other MP Host (Single or Multi) when running the latest version that works with the MPBridge switching system. Note that the buttons: Previous Plugin, Previous Track, Plugin History are for the MP Host plugins (Not the Reaper plugins) [](https://kb.mpmidi.com/uploads/images/gallery/2026-01/877SfHZNR6QBhjud-image.png) # 15. The MP Sequencer/Arpeggiator The MP Controller has a a sequencer/arpeggiator. It is available as a standalone app and VST3/AU/AAX plugin. # MP Sequencer/Arpeggiator Documentation #### COMING SOON! As a standalone app and VST3/AU/AAX plugin. *32 sequencers and arpeggiators, route them to any midi port and channel, multiple trigger styles,* *split chords or steps to midi channels and program Scenes! Send MIDI to your DAW and external hardware!* If you own an mp controller and want to join the Beta program of the MP Sequencer/Arpeggiator [send us a message](https://mpmidi.com/contactus) *In this video we apply different LFOs to Note Velocity, Length and Humanize Timing parameters.* --- ##### Modes The MP SEQ is a sequencer and arpeggiator plugin and standalone app that consists of 32 sequencers and 32 arpeggiators. Furthermore, there are Scenes where you can set to play the sequences as you like. The sequencer has a main central grid where its cells can be drawn using the mouse of the touch screen of the mp controller. Each page is a separate sequencer or arpeggiator and each has its onw MIDI device configuration so it is possible to send out each sequence to different MIDI ports, including hardware synthesizers which are connected to your computer via USB (give they support MIDI). There are 2 ways to play the sequencer, via its drawn cells or by triggering each sequencer using a MIDI keyboard. **There are 2 Sequencer Modes:** **SEQ -** this mode simply plays the cells of the grid/page you are current on when you press Play. It also plays the grid and transposes it when a midi note is received and set to a mode (Trigger, ReTrigger, Latch, Play). [](https://kb.mpmidi.com/uploads/images/gallery/2026-04/qYTtWvLqHF654PYe-image.png) **G. SEQ -** stands for Global Sequencer mode. It plays the grid of all pages and transposes it when a midi note is received and set to a mode (Trigger, ReTrigger, Latch, Play). Pages needs to be set to Enabled and have the same MIDI input port (MIDI Devices button) for the MIDI keyboard you are using. If a Page is set to Disabled then G.SEQ will not trigger Play/Stop. This means you can play a note on your MIDI keyboard and play at the same time 32 sequences where you can send each to a differen MIDI Channel and/or Port. You can send MIDI to your DAW and filter via MIDI port and Channel, and in combination you can send it to other hardware like Synths, Drum Machines etc. **ARP -** The Arpeggiator will play different patterns which have be selected using Encoder 32. The rate of the pattern can be selected using Encoder 31. [](https://kb.mpmidi.com/uploads/images/gallery/2026-04/qcvvfiAaLPJFtTWM-image.png) **ARP L -** The Arpeggiator latches (holds) the notes so you don't have to hold them on your keyboard and when you play the next notes it switches, like a standard arpeggiator. **G. ARP** - In this mode the arpggiator will play all pages that are set to ARP and have a pattern selected using Encoder 32. This mode does not need pages to have the same MIDI input device. **G. ARP L** - Is the same as G. ARP however the notes latch (hold) so you don't have to hold them on your keyboard.See tutorials [here](https://kb.mpmidi.com/books/mp-controller-documentation/page/mp-sequencerarpeggiator-tutorials)
--- #### Here are some routing examples of the MP Sequencer/Arpeggiator [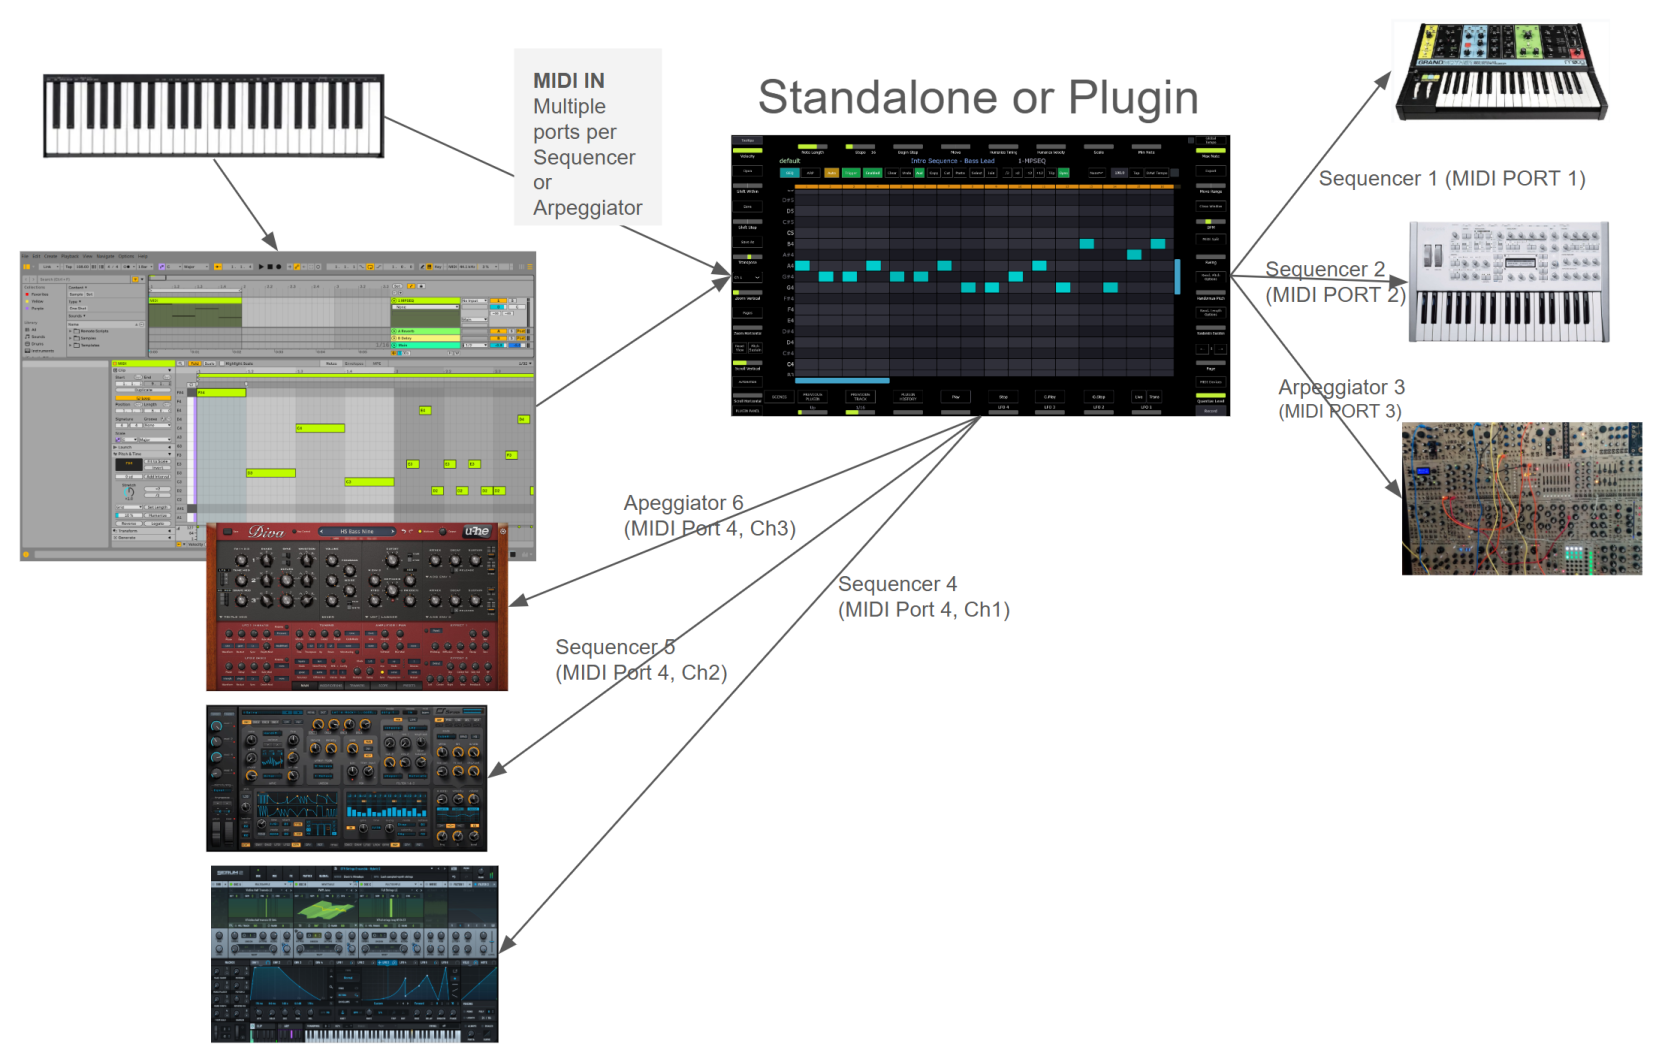](https://kb.mpmidi.com/uploads/images/gallery/2026-04/8ZeK0skhYxPH1a7G-image.png) ##### DAW Modes (when running it as a plugin): **Mode Play and Stop Notes:** DAW transport drives playing / \_stop (existing). DAW MIDI notes feed pages and trigger play and stop **Mode Notes Only:** DAW transport does not trigger Play/Stop. DAW MIDI notes still feed pages. **Mode Standalone:** DAW transport AND DAW MIDI completely disabled. Thru forced off, only the per-page midi input devices (via midi router) drive playback - same behavior as in standalone app. --- #### Names There are 3 names above the sequencer grid. The first name is the preset. The second name is the page title. When you hover over the area of the page title it will show a text box where you can write the page name. The third name is the DAW track name and receives that automatically from the DAW. It appears on when the MPSEQ is running as a plugin. [](https://kb.mpmidi.com/uploads/images/gallery/2026-04/nBNUb7FSpXxnEbC7-image.png) --- ##### Files and Presets The presets and the mpseq.properties files are located in the standard ~\\MP\\Host\\ folder. The properties file holds the global options of the MP Sequencer. The tooltips.txt file has the documentation of the Tooltips and it can be edited in a text editor. --- ##### The Grid Each Sequencer page has its own grid. It is possible to copy and paste cells from one grid to another. Click or touch any cell to draw a cell. Click again to delete it. Ctrl + Click to select cells. Selected cells have a yellow background. Holding shift select multiple cells, vertically and horizontally. Click the Select button and then click on any cell to select it. Alt Click and drag/up down, left/right changes the velocity and length of the cell. [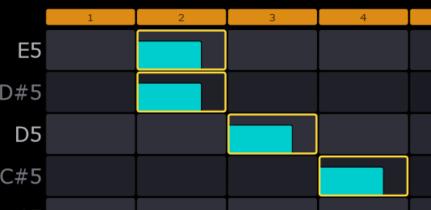](https://kb.mpmidi.com/uploads/images/gallery/2026-04/KpetzIWha75fP1Us-image.png) The grid steps are on the top row and the step length of the sequencer can be set by Encoder 10 - Steps. [](https://kb.mpmidi.com/uploads/images/gallery/2026-04/qzFR5prIWFVdqkGq-image.png) You can also devide or double the steps by 2 using these buttons [](https://kb.mpmidi.com/uploads/images/gallery/2026-04/u2ssX5EZHMfJ0akZ-image.png) If you use these buttons to change the size while playing, the new size will take effect on the next cycle of the sequencer. You can control the scroll and zoom of the grid using the first 4 encoders. The **Reset View** button sets the view of the grid to the default size and shows the area with the drawn cells. The Note names on the left can be renamed which is useful when you want to assign a row to a sampler cell, ie when programming drums. [](https://kb.mpmidi.com/uploads/images/gallery/2026-04/lOAqc2kv1F7zKefk-image.png) Clicking on the top step cell disables the step column and its cells will not play, although it will cycle through them. It just mutes/disables the cells in that column. [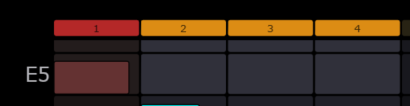](https://kb.mpmidi.com/uploads/images/gallery/2026-04/qrkaWmZCmsqJDjaV-image.png) --- ##### MIDI Input and Output The Channel dropdown allows you to select the output MIDI channel [](https://kb.mpmidi.com/uploads/images/gallery/2026-04/DzYk7Bdth9iqdypG-image.png) The MIDI Devices button open the window that lists the input and output MIDI devices. This is a per page/sequencer setting and you can navigate to other pages while the MIDI Devices menu is open using the pages buttons on the right. This allows you to send MIDI to a different port and Channel per page/sequencer/arp. You can program different tracks/instruments in your DAW to receive MIDI from different pages. [](https://kb.mpmidi.com/uploads/images/gallery/2026-04/rcmPoOwvm4KjcpKS-image.png) For example: Page 1 ➞ OUT MIDI PORT A, Ch1 ➞ DAW Instrument Track 1 Page 2 ➞ OUT MIDI PORT A, Ch2 ➞ DAW Instrument Track 2 Page 3 ➞ OUT MIDI PORT B, Ch1 ➞ Hardware Instrument 1 Page 4 ➞ OUT MIDI PORT C, Ch1 ➞ Hardware Instrument 2 and so on up to 32 pages.Ableton Live users, it is not possible to select a MIDI input channel from a plugin in another track. If you want to send MIDI to different tracks from the same MPSEQ plugin, select a loopMIDI out port from each page and select a different MIDI Channel. See example [here](https://kb.mpmidi.com/books/mp-controller-documentation/page/sending-midi-to-different-tracks-in-ableton-live-from-the-mpseq).
On the Mac, there is a virtual MIDI port named MPSEQ where you can use it to send/receive MIDI to your DAW.
On Windows, you can use [loopMIDI](https://kb.mpmidi.com/books/mp-controller-documentation/page/13-midi-ports-on-windows) or other virtual MIDI ports to send/receive MIDI to your DAW.
**Metronome:** You can select an output MIDI device to send a short note to a synthesizer for example, so it acts as a metronome. Note that the MIDI input just reads notes played from MIDI keyboards (does not listen to CC messages from other controllers) --- ##### Play and Stop **Play/Stop:** Plays this page. Stops this page. Press a second time when already stopped to scroll the view back to step 1. **G. Play and G. Stop:** Global - Plays every enabled page at the same time, starting them all in sync. Stops every page that is currently playing. Press twice when already stopped to scroll back to step 1. **Live:** Live mode - when you click a different page, MPSEQ waits for the current loop to finish before switching. **Trans:** Transition mode - solo a different page for one cycle, then automatically come back to where you were.**How MPSEQ receives Play / Stop from the DAW** When MPSEQ is loaded as a plugin (VST3 / AU / AAX), it automatically reads the host DAW's transport state, whether the DAW is playing or stopped, on every audio block. You don't have to configure anything for MPSEQ to know the DAW state. When in G.SEQ mode, Play/Stop from the DAW trigger G.Play/G.Stop and all pages set to G.SEQ will play/stop with the DAW. **To have MPSEQ react to Play / Stop, enable one of these two options:** - AUTO button (on the transport bar): when on, MPSEQ's currently-visible page follows the DAW's transport. Pressing Play in the DAW starts the page; pressing Stop stops it. - External Play / Stop Global (right-click → External Play/Stop Global): when on, pressing Play in the DAW triggers MPSEQ's Global Play (every enabled page starts at once). Pressing Stop triggers Global Stop. Both options are independent. The first syncs the active page only and the second drives the whole grid globally. **In Standalone mode** there is no host transport, so Play / Stop must come from MPSEQ's own buttons or receive a Play/Stop signal from the DAW. The MPSEQ will react to Play/Stop MIDI signals received on any enabled MIDI Input port. You can configure your DAW to send out Play/Stop signals to a selected MIDI port. The MPSEQ will trigger G.Play when it receives such a signal which affects all sequencers. See [here](https://kb.mpmidi.com/books/mp-controller-documentation/page/mpsequencer-sending-playstop-to-the-standalone-mpseq-app) to enable this in your DAW.
--- ##### Recording [](https://kb.mpmidi.com/uploads/images/gallery/2026-04/Ru9l9UrZ9ctIy0C5-image.png) There are 2 modes of recording. Step recording and Normal recording. To record from a MIDI keyboard, set the input port in the MIDI devices. **Step Rec:** Step recorder - each note you play writes to the next cell. Chords played together land in the same step. The following options affect Step Recording and Normal Recording: **Record:** Realtime record - writes cells into the grid as you perform them on the keyboard. **Rec ND:** Non-destructive record, it keeps existing cells and adds new on every recording cycle. **Replace Rec:** It replaces cells in columns with new ones when played. **Rec. Distr:** Distructive Recording - It erases the existing cells on the grid on every recording cycle. **Takes:** When in Rec Distr. mode, on every new recording it stores the recorded grid in Take slots. There are 8 slots and get populated in round robin. Takes are saved in presets. **Loop Mode:** The Loop mode affects both Step Recording and Normal Recording. Click to cycle Once/Cycle/Next. Once stops at the end of the grid, Cycle loops, Next moves to the next page when the loop wraps. **Auto Metro:** Metronome plays only while you are recording or playing. Mutually exclusive with Metro. The Metronome output port is set in MIDI Devices. **Metro:** Metronome ticks continuously while on, even when the sequencer is stopped. Mutually exclusive with Auto Metro. **Count In:** Plays a 4-beat countdown before starting realtime recording so you know exactly when to play. **Quantize:** Snaps every note's timing offset to its step boundary. Great for cleaning up a just-recorded take. **Q. Record:** Automatically quantizes the recorded cells. **Pitch bend and Sustain** [](https://kb.mpmidi.com/uploads/images/gallery/2026-04/4VDfKbJaC5VtaPvZ-image.png) The Pitch/Sustain button opens the window to view and edit. Click on the Pitch step to enter a pitch event. Click anywhere will move the event to that position. Double clicking on a dot will reset the pitch bend to the center. Double click on a Sustain event to delete it. Right click shows the menu [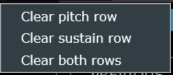](https://kb.mpmidi.com/uploads/images/gallery/2026-04/AmUsRT69Euq1uzx2-image.png) --- ##### Scenes Scenes mode has its own grid where each row is dedicated to a Page/Sequencer. Scene data is saved in the preset. The top row shows the steps of the Scene sequencer. Clicking on any step sets the active steps. [](https://kb.mpmidi.com/uploads/images/gallery/2026-04/na8GCC6WdSye6GTd-image.png) Scenes can be named. [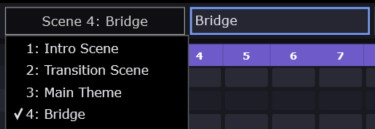](https://kb.mpmidi.com/uploads/images/gallery/2026-04/lgeQlOnZ1pVLT5Ns-image.png) When you switch to a difference scene while a scene is playing, it will reach at the end of the scene playing before switching to the new scene. **Aud:** Audition mode for the Scenes grid. When on, clicking a cell triggers the target page once so you can preview it before committing. **Steps/Cell:** Sets how many sequencer steps each scene cell plays. Click to set all columns at once, or edit each column individually in the row below. **Cycle**: Loops the active scene instead of stopping when it reaches the end of its active length. **Continue:** Advance to the next scene at end of cycle. With Cycle on, if the next scene has no cells drawn, playback wraps back to the scene you started from. --- ##### Pages The Pages button opens a grid style window where you can trigger individual sequencers [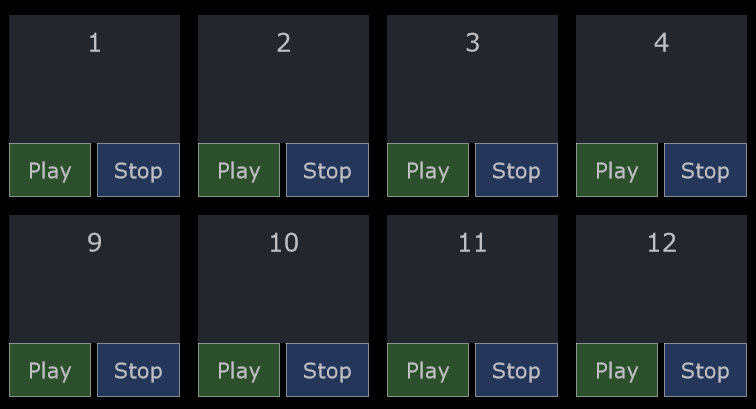](https://kb.mpmidi.com/uploads/images/gallery/2026-04/iiaHU9kdnwZf6k6u-image.png) When you press play while another sequencer(s) is playing it will wait to start at the next iteration of the longest sequence. --- ##### Scale You can select the scale of the current sequencer: [](https://kb.mpmidi.com/uploads/images/gallery/2026-04/PlIFNJHwe33TGcxD-image.png) and to take effect, you need to select a pitch for the scale from the dropdown. [](https://kb.mpmidi.com/uploads/images/gallery/2026-04/XjGADRtB5LXFX16C-image.png) --- ##### Automation The following parameters can be automated, per sequencer. [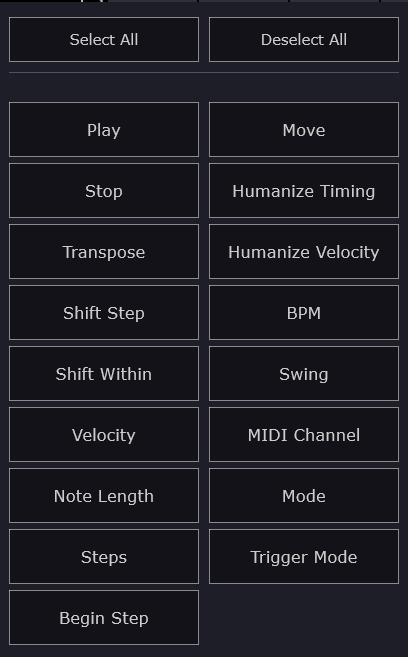](https://kb.mpmidi.com/uploads/images/gallery/2026-04/0xd0zzQkRl9Wae4H-image.png) --- ##### LFOs Click on any LFO encoder and the following window will open [](https://kb.mpmidi.com/uploads/images/gallery/2026-04/3crMOlZ8IVq3OvV3-image.png) You can choose which LFO parameter. Only one LFO per parameter can be assigned. If you check the first box "Control LFO Rate", the encoder controls the LFO rate. [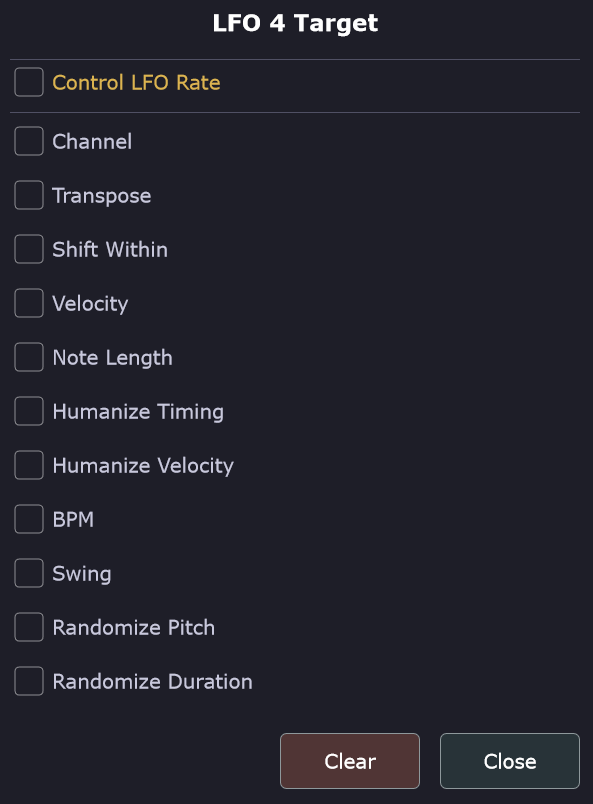](https://kb.mpmidi.com/uploads/images/gallery/2026-04/Venogd3CyqCv2Evt-image.png) --- ##### MIDI Split Spreads this page's notes across multiple MIDI output channels so they can hit different sounds on a multitimbral instrument. **In Sequencer mode:** the notes drawn on the grid are distributed across channels. **In Arpeggiator mode:** each arpeggiated note is distributed across channels. **Options:** **Enabled:** master on/off for MIDI Split on this page. **MIDI channel change on next step:** each successive step sends on the next channel (1, 2, 3...). **Step count:** how many channels to cycle through before looping back. Default uses the sequence length. You can create interesting phrasing effects when using other values that the Default as it will cycle the different instruments. **Split chords to MIDI channels:** each note of a chord plays on a different channel, lowest note first. **Start on Channel:** when on, the channel counter resets to the chosen channel at the start of every cycle. [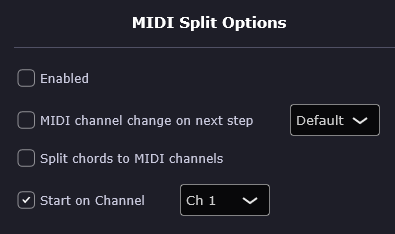](https://kb.mpmidi.com/uploads/images/gallery/2026-04/Xmbm6cf9243C4hWm-image.png) --- ##### MIDI Export and Import The Export button allows you to export .mid files of the sequencer current page or export all sequencers as separate .mid files. Click and Drag the Export button allows to drop the .mid file anywhere, even onto your DAW. Drag a .mid file to the sequencer and a pop up will allow you to choose how to import the file. [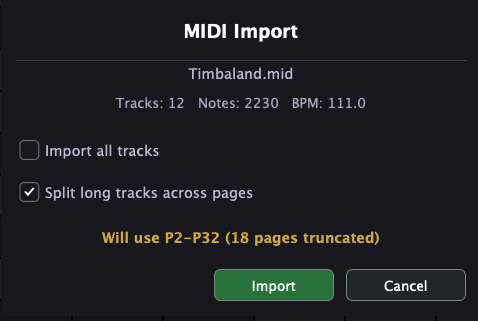](https://kb.mpmidi.com/uploads/images/gallery/2026-04/5buW0D9d9via5xcL-image.png) The option "Split long tracks across pages" will populate the sequencers with the notes of the first track, then second track and so on. --- ##### TEMPO When running as a plugin, it gets the tempo automatically from the DAW. Chaning the DAW tempo will automatically pass the tempo to the MPSEQ. Click on the tempo box and a large horizontal slider will open that enables to control the tempo. The /2, x2 buttons devide and multiple the tempo by 2 every time they are pressed. [](https://kb.mpmidi.com/uploads/images/gallery/2026-04/VC1VCxk1s0dE7tgr-image.png) [](https://kb.mpmidi.com/uploads/images/gallery/2026-04/ZnW383X1nP0KHsSh-image.png) --- ##### Notes Routing When enabled, it will route each note played to the next Page/sequencer/arpeggiator. For example, if I play C4,E4,G4 (either on a MIDI keyboard or from the DAW) it will send C4 to trigger P1, E4 to trigger P2 and G4 to trigger P3. If all notes are played as a chord, it will still route them to each page, so timing of play does not matter, but order matters. This mode bypasses the Global Sequencer and Arpeggiators and ignores the MIDI input devices selected in MIDI Devices. The page will send MIDI out to the selected port and channel. This is a great way to trigger different sequences from a MIDI keyboard. [](https://kb.mpmidi.com/uploads/images/gallery/2026-04/8ICbsrAWhvH0Q7bL-image.png) --- # MP/Sequencer - Sending Play/Stop to the standalone MPSEQ app Here is some documentation for your reference to send Play/Stop signals from your DAW to the MPSEQ application when it runs in standalone mode. Check the documentation of you DAW for more information or up to date documentation. ##### Ableton Live 1. Open Live Preferences. 2. Go to Link, Tempo & MIDI. 3. In MIDI Ports, find the Output port connected to your external gear. 4. Enable Sync for that Output port. 5. Click the Link button on the top bar, before the Tap button. 6. Press Play in Live. Live will send MIDI Clock and transport start/stop to that port. ##### Bitwig Studio 1. Open Dashboard. 2. Go to Settings. 3. Open Synchronization. 4. In MIDI Sync OUT, find the Output port connected to your external gear. 5. Enable MIDI Clock. 6. Enable MIDI Clock Start/Stop messages. 7. Press Play in Bitwig. Bitwig will send clock and transport start/stop to that port. ##### Logic Pro 1. Open File > Project Settings > Synchronization. 2. Open the MIDI tab. 3. Enable Transmit MIDI Clock. 4. Select the MIDI Output port connected to your external gear. 5. Press Play in Logic. Logic will send MIDI Clock and transport start/stop to that port. ##### Cubase 1. Open Transport > Project Synchronization Setup. 2. Go to MIDI Clock Destinations. 3. Enable MIDI Clock for the Output port connected to your external gear. 4. Enable Always Send Start Message if available. 5. Press Play in Cubase. Cubase will send MIDI Clock and transport start/stop to that port. ##### FL Studio 1. Open Options > MIDI Settings. 2. In Output, select the MIDI port connected to your external gear. 3. Enable Send master sync. 4. Close MIDI Settings. 5. Enable Options > Enable MIDI master sync. 6. Press Play in FL Studio. FL Studio will send clock and transport start/stop to that port. ##### Studio One 1. Open Studio One > Options > External Devices. On macOS, open Studio One > Preferences > External Devices. 2. Click Add. 3. Select New Instrument. 4. Set Send To to the MIDI port connected to your external gear. 5. Enable Send MIDI Clock. 6. Enable MIDI Clock Start. 7. Click OK. 8. Press Play in Studio One. Studio One will send clock and transport start/stop to that port. ##### Reaper 1. Open Options > Preferences. 2. Go to Audio > MIDI Devices. 3. Find the MIDI Output port connected to your external gear. 4. Right click the Output port. 5. Select Enable output. 6. Right click the Output port again. 7. Select Send clock/SPP to output. 8. Press Play in Reaper. Reaper will send MIDI Clock and transport start/stop to that port. ##### Reason 1. Open Edit > Preferences. On macOS, open Reason > Settings or Preferences. 2. Go to Sync. 3. Set MIDI Clock Sync to Send MIDI Clock. 4. Select the MIDI Output port connected to your external gear. 5. Press Play in Reason. Reason will send MIDI Clock and transport start/stop to that port. # Sending MIDI to different tracks in Ableton Live from the MPSEQ Here is how to send MIDI to different tracks in Ableton Live from a single instance of the MP Sequencer (plugin and standalone MPSEQ). The same principle applies to other DAWs. Create a virtual port in [loopMIDI](https://kb.mpmidi.com/books/mp-controller-documentation/page/13-midi-ports-on-windows#bkmrk-setup-midi-on-window), named TO DAW. Select this port in the MIDI out of the sequencer pages you want to use. Then select the MIDI channel to send MIDI output. [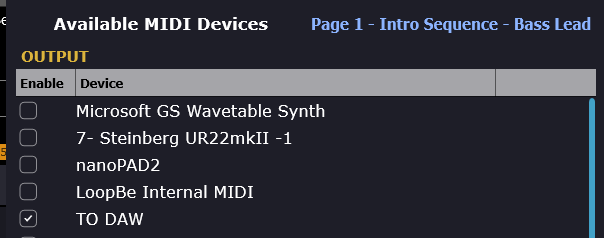](https://kb.mpmidi.com/uploads/images/gallery/2026-04/lxsEaRivJOqyju8y-image.png) [](https://kb.mpmidi.com/uploads/images/gallery/2026-04/NkVEJNB9H8ntBxN4-image.png) [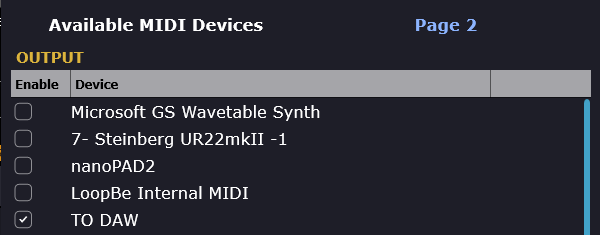](https://kb.mpmidi.com/uploads/images/gallery/2026-04/HUNK7eDst5GKRrM4-image.png) [](https://kb.mpmidi.com/uploads/images/gallery/2026-04/MjLJwmpcBGiNd8B2-image.png) Set the Input port in Ableton Live settings, Track - checked [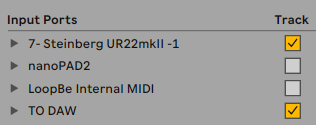](https://kb.mpmidi.com/uploads/images/gallery/2026-04/S5iFxrHiaZuPKGC3-image.png) Select the MIDI IN port and Channel on the Ableton Live track [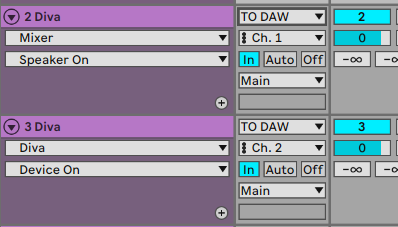](https://kb.mpmidi.com/uploads/images/gallery/2026-04/xmvCp3UfMAB5yIQl-image.png) Ensure that all pages are set to Enabled in MPSEQ [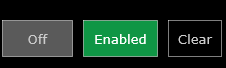](https://kb.mpmidi.com/uploads/images/gallery/2026-04/NwCwOEp2NTadKbUB-image.png) Press G.Play and your instrument tracks will play. [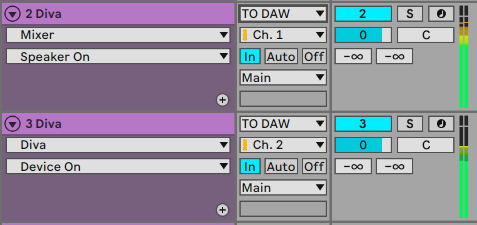](https://kb.mpmidi.com/uploads/images/gallery/2026-04/6uOyMgTGRuHZcLWs-image.png)In case you are using the standalone MPSEQ, to enable Play/Stop from the DAW see [here](https://kb.mpmidi.com/books/mp-controller-documentation/page/mpsequencer-sending-playstop-to-the-standalone-mpseq-app)
# MP Sequencer/Arpeggiator Tutorials ##### Running it as a plugin in the DAW The MPSEQ is an Instrument plugin therefore it should be added to an Instrument track in the DAW. In most DAWs you can only have on instrument and since it does not produce audio, the goal is to send MIDI from the MPSEQ to other instruments in the DAW. **Triggering Input.** The MPSEQ can receive MIDI notes from the DAW and these in turn will trigger wither the Sequencer events on the grid, or the Arpeggiator, depending which mode you have chosen. It can also receive live notes played from your MIDI keyboard via the DAW. Set it to SEQ or ARP mode and to **Trigger** and **Enabled**. You should see the transposed notes show on the grid as it receives MIDI. [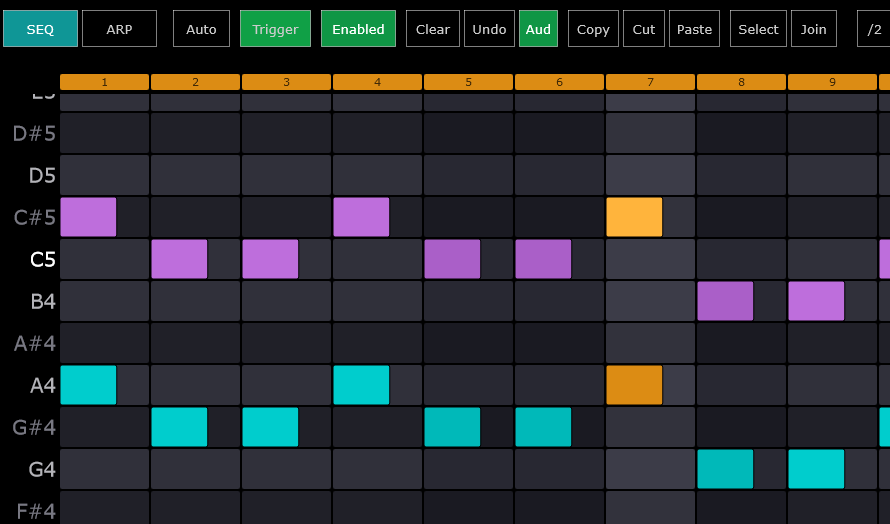](https://kb.mpmidi.com/uploads/images/gallery/2026-04/RtV1XZJXRrP7bvjg-image.png) If you have notes in the DAW, these will trigger the Sequencer. When it receives MIDI input, the MIDI indicator also lights up [](https://kb.mpmidi.com/uploads/images/gallery/2026-04/ciQZsYnVbBYmxLFg-image.png) **MIDI Output** Once you have the the MIDI input setup, you can route your MIDI output. You can route it via the DAW or via a virtual MIDI port, depending which DAW do you use the the routing you want to make. In Ableton Live for example, you can select a Track as an input device on an instrument. In this example, we select the track 1 MPSEQ to be the input device for track 2 Diva. The principle is the same in all DAWs. [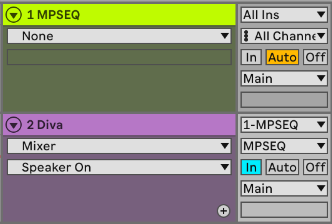](https://kb.mpmidi.com/uploads/images/gallery/2026-04/3Ra1SBZvigAeHwkx-image.png) **Alternatively**, you can route the output to a virtual MIDI port on the MPSEQ. In the example, we are using the TO DAW MIDI port (on the Mac the MPSEQ has its own virtual MIDI port named MPSEQ) [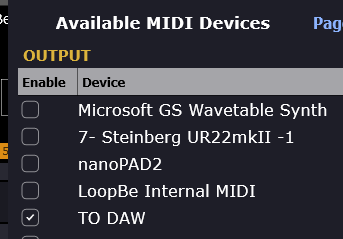](https://kb.mpmidi.com/uploads/images/gallery/2026-04/5ECn9U27uuxXphkl-image.png) and in the DAW set the MPSEQ track to NO INPUT to avoid MIDI feedback loop [](https://kb.mpmidi.com/uploads/images/gallery/2026-04/PbadNUabkovgBX0c-image.png) Choose the TO DAW port and Ch 1 to be the input. This way we can have each page of the MPSEQ to trigger different tracks in Ableton Live. [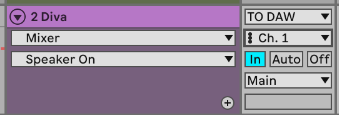](https://kb.mpmidi.com/uploads/images/gallery/2026-04/7zemoKeuEz2OUyVO-image.png) --- ##### Standalone mode --- ##### Live Performance and looping ---