1. Connections
Understanding the ports and connection options of the MP Controller
- 1. Understanding the MP MIDI Controller Ports
- 2. Additional HDMI Port Options and USB-C docking stations
- 3. MIDI Connectivity (C1-xMP1)
- 4. Mac M4 display connection options
- 5. Initial Setup Guide - How to setup the mp controller the first time
- 6. Recommended stands for the MP Controller
1. Understanding the MP MIDI Controller Ports
Model 1A/1A+
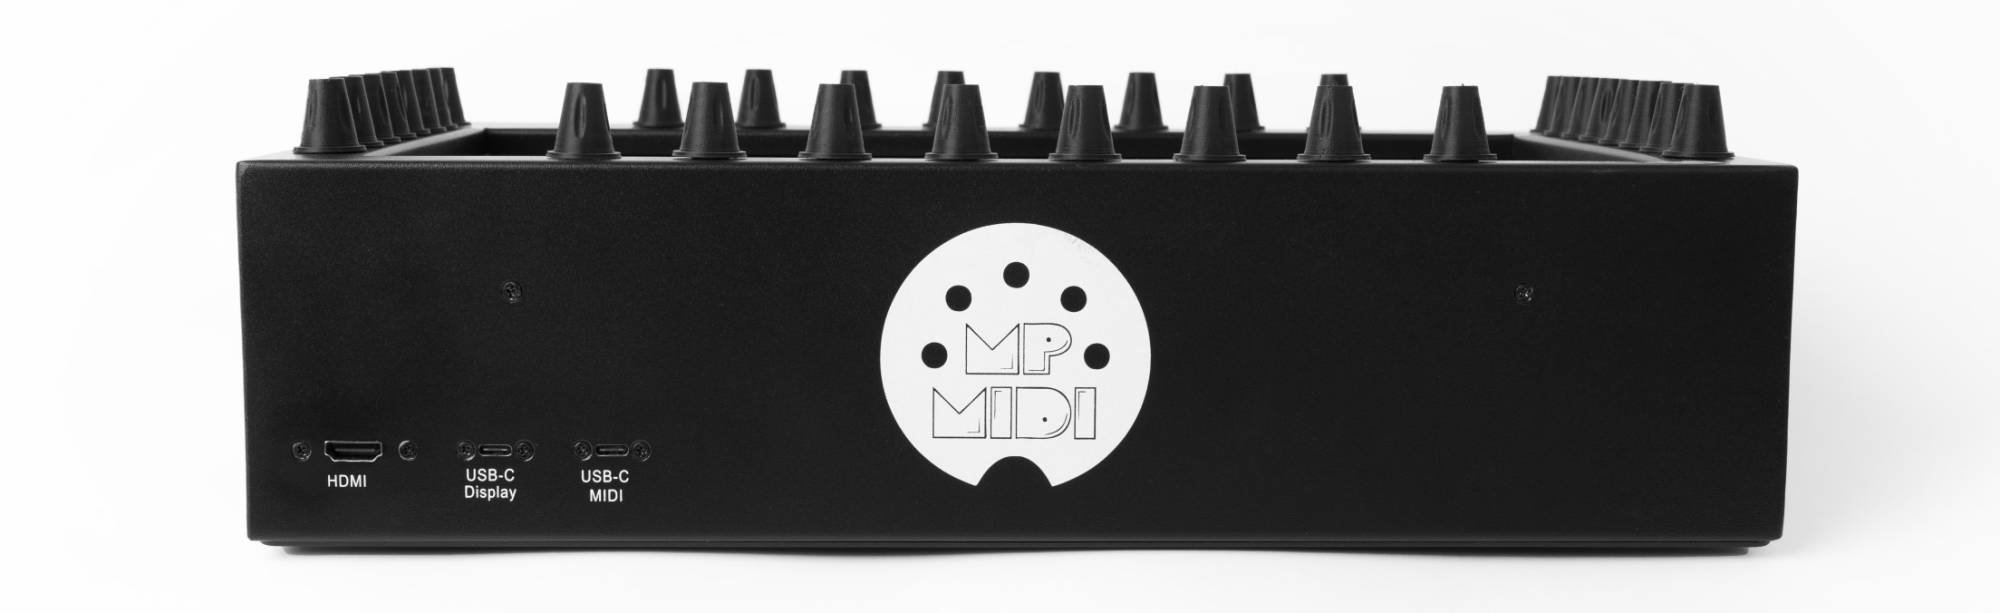
Port 1. The HDMI provides a video signal to the display, however it does not provide power. When the HDMI is not connected (but it has power) the display will go to sleep within 2 seconds.
On a Mac or PC with thunderbolt, it is possible to connect a Thunderbolt cable on the USB-C Display port of the controller, instead of HDMI, but not both.
Port 2. The USB-C Display port is used to provide power to the monitor and it is also used to send touch data to the computer from the monitor.
If your monitor flickers (does not stay on) you can use the Y-cable to provide power and touch data.
It’s recommended to use the Y-cable in any case, because it will lessen the power load on the computer’s USB port. It is also recommended to connect this port directly on the computer and not via a hub.
Port 3. The USB-C MIDI port is used to send/receive MIDI data (MIDI Controller) to/from the computer. The hardware is listed as C1-xMP1 on both Mac OS and Windows.
On this port you can use longer usb cables if you need to. Connect only with a USB-C to USB-A cable (not USB-C to USB-C).

Model 2A
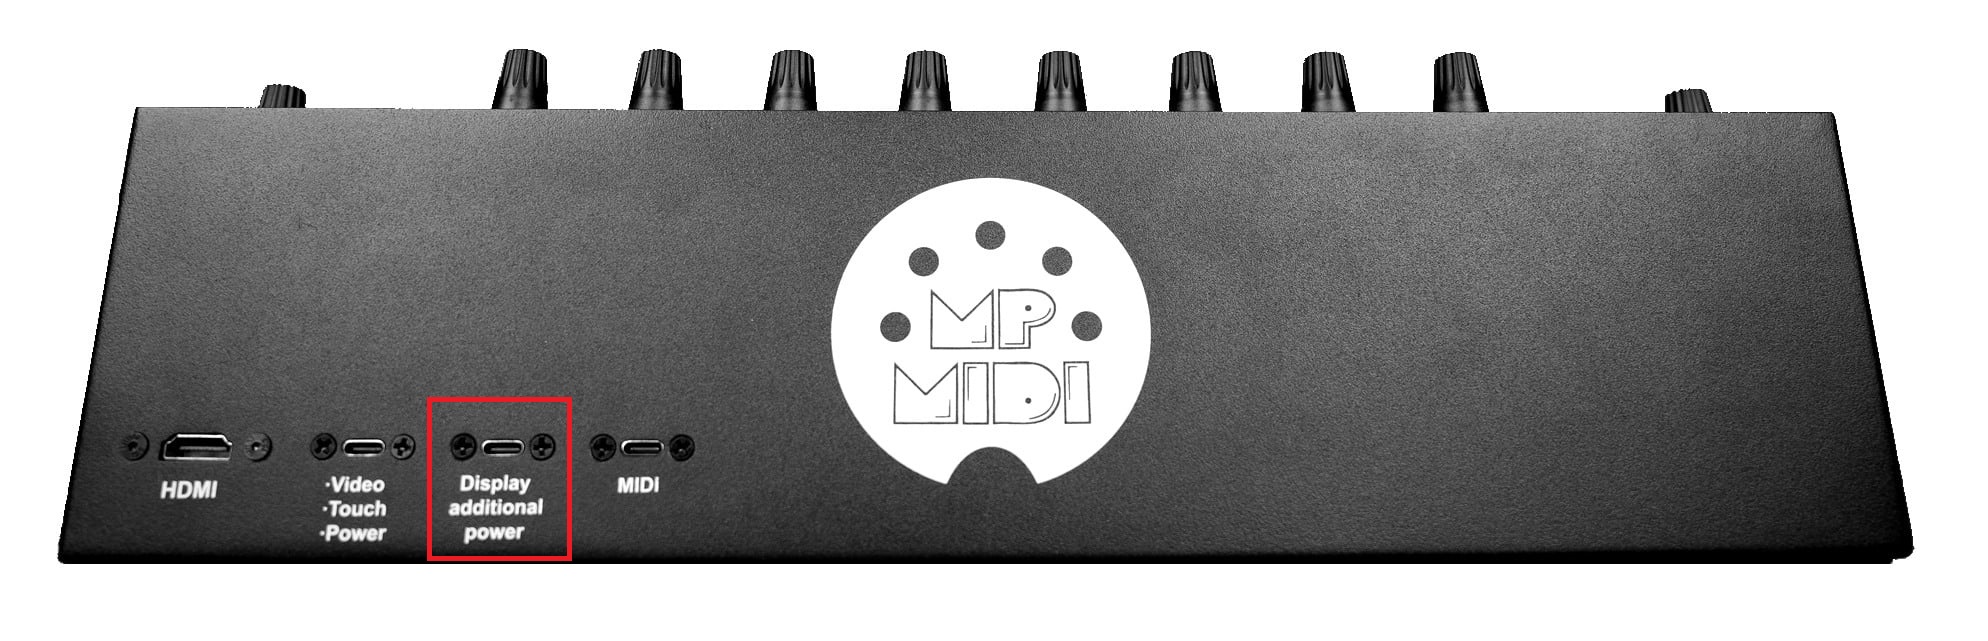
Port 1. The HDMI provides a video signal to the display, however it does not provide power. When the HDMI is not connected (but it has power) the display will go to sleep within 2 seconds.
On a Mac or PC with thunderbolt, it is possible to connect a Thunderbolt cable on the USB-C Display port of the controller, instead of HDMI, but not both.
Port 2. The USB-C Display port is used to provide power to the monitor and it is also used to send touch data to the computer from the monitor.
On Macs, Thunderbolt ports almost always support DisplayPort Alternate Mode (DP Alt Mode) over USB-C, so a display connected through a Thunderbolt/USB-C cable can output video directly. For M4 or later Macs see here.
On Windows PCs, it depends heavily on the hardware:
Not all Thunderbolt ports on PCs carry DisplayPort video. Some motherboards or laptops wire the Thunderbolt controller only for data/PCIe without a DP passthrough.If the GPU is not routed to that Thunderbolt controller, no video signal can be sent.
Some systems require Intel Graphics / NVIDIA/AMD GPU drivers and Thunderbolt drivers/software for video over USB-C to function.
On desktops, the Thunderbolt add-in card must be cabled internally to the GPU’s DisplayPort output to carry video through the USB-C connector. Without that DP link, the port only does data.
Macs are wired universally to provide DP Alt Mode via Thunderbolt, while on PCs it’s optional and depends on motherboard/GPU integration.
Port 3. Additional power port for the display which it can be connected on external power adapter. This port should be connected only when there is not enough power provided by the computer’s USB port for the display. However, it is a good practice and we recommend to connect this port to a wall adapter (5v/2A) so that it lessens the power load on the computer's USB port.
Port 4. The USB-C MIDI port is used to send/receive MIDI data (MIDI Controller) to/from the computer. The hardware is listed as C1-xMP1 on both Mac OS and Windows.
On this port you can use longer usb cables if you need to. Connect only with a USB-C to USB-A cable (not USB-C to USB-C).

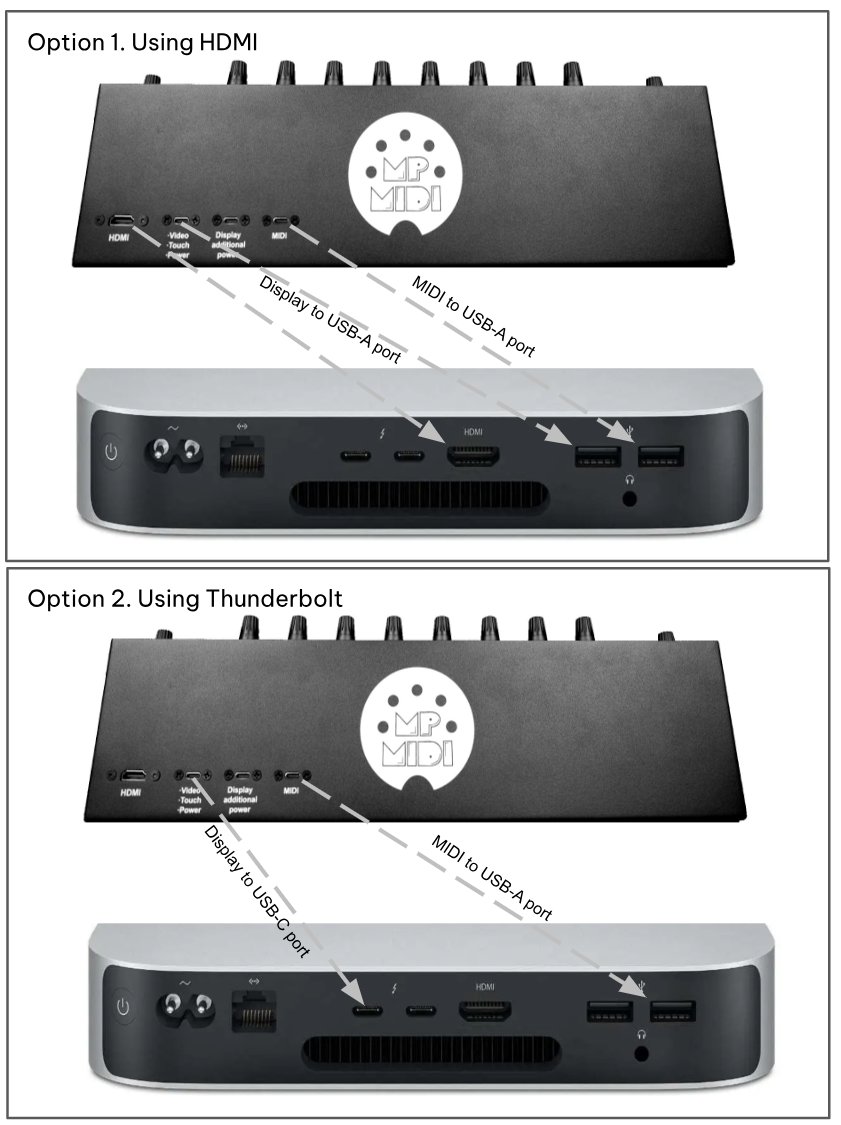
Common connection diagram for all models
2. Additional HDMI Port Options and USB-C docking stations
HDMI and powering the display
If your computer don’t have an HDMI port available but has other digital graphics connections, you can use an adapter for a digital connection such as DVI or Display port.
First, connect the USB-C ports to power the display and then connect the HDMI.
Windows only: the controller’s display also works when connected via a USB to HDMI adapter in case you are on a laptop or computer with limited HDMI outputs.
If your Mac has reached the maximum number of displays it can output video to, this adapter will allow you to add more displays. For example the Mac Mini M1 allows only 2 displays.
The Wavlink Model: WL-UG7602HC USB-A/USB-C to Dual HDMI 4K@60Hz Display Adapter works on the Mac (Apple Silicon) and Windows and it is generally available from online marketplaces.
Note for WL-UG7602HC: Download the InstantView display application with UI.
Support macOS 15 Sequoia, 14 Sonoma, and 13 Ventura, including MacBook Air/Pro (M1/M2/M3/M4 & Intel powered)
from https://www.siliconmotion.com/downloads/
Do not use a USB-C to USB-C (thunderbolt) cable to connect the display on a thunderbolt port on the computer and connect an HDMI at the same time. It will cause the computer to see the controller’s monitor twice and will create conflicts. You can connect either the HDMI or a thunderbolt, but not both.
USB-C docking station recommendations for Macs
For newer Macs with few or no USB ports or HDMI ports, we recommend getting a USB-C docking station, here are some suggestions.
Amazon.com
- Reborn USB C Hub 5-in-1 for MacBook Pro/Air, 4K HDMI Multiport Adapter with 100W Power Delivery, 3*USB A Data Ports, USBC Dongle for Dell, HP, ASUS, Acer and Other Type C Laptops
- UGREEN Revodok Pro 7 in 1 Docking Station Dual Monitor, USB C Hub Dual 4K@60Hz HDMI Display, 10Gbps USB-A/C Data Ports, 100W PD, Aluminum Laptop Docking Station for HP, Thinkpad, Dell and More
- Anker USB C Hub, 5-in-1 USBC to HDMI Splitter with 4K Display, 1 x Powered USB-C 5Gbps & 2×Powered USB-A 3.0 5Gbps Data Ports for MacBook Pro, MacBook Air, Dell and More
Amazon.de
- UGREEN Revodok 105 USB C Hub PD100W, 4K HDMI, 3 x USB A Data Ports USB C Adapter Multiport Adapter Compatible with iPhone 17/16, Galaxy S24, Surface, MacBook Pro/Air
- Baseus USB C Docking Station Dual Display, 9 in 1 USB C Dock 2 4K HDMI Dual Monitor, Gigabit Ethernet, 100W PD, SD/TF Card Reader, 3 USB, USB C Multiport Adapter for MacBook/Dell/HP/Surface/Lenovo
- USB C Hub, Dockplug 5-in-1 DD0008 Dock USB C Adapter with 4K 60Hz HDMI, 100W PD, 3 USB 3.0, for MacBook Pro/Air M1/M2, iPad Pro, iPad Mini 6, Surface Pro, XPS 13 and More Type C Devices
- USB C Docking Station Dual Display, 9 in 1 USB C Hub 2 HDMI Dual Monitor, Gigabit Ethernet, USB 3.0 & USB 2.0, 100W PD, SD/TF, Compatible with MacBook Pro, MacBook Huawei, Dell XPS Tablet Type C etc
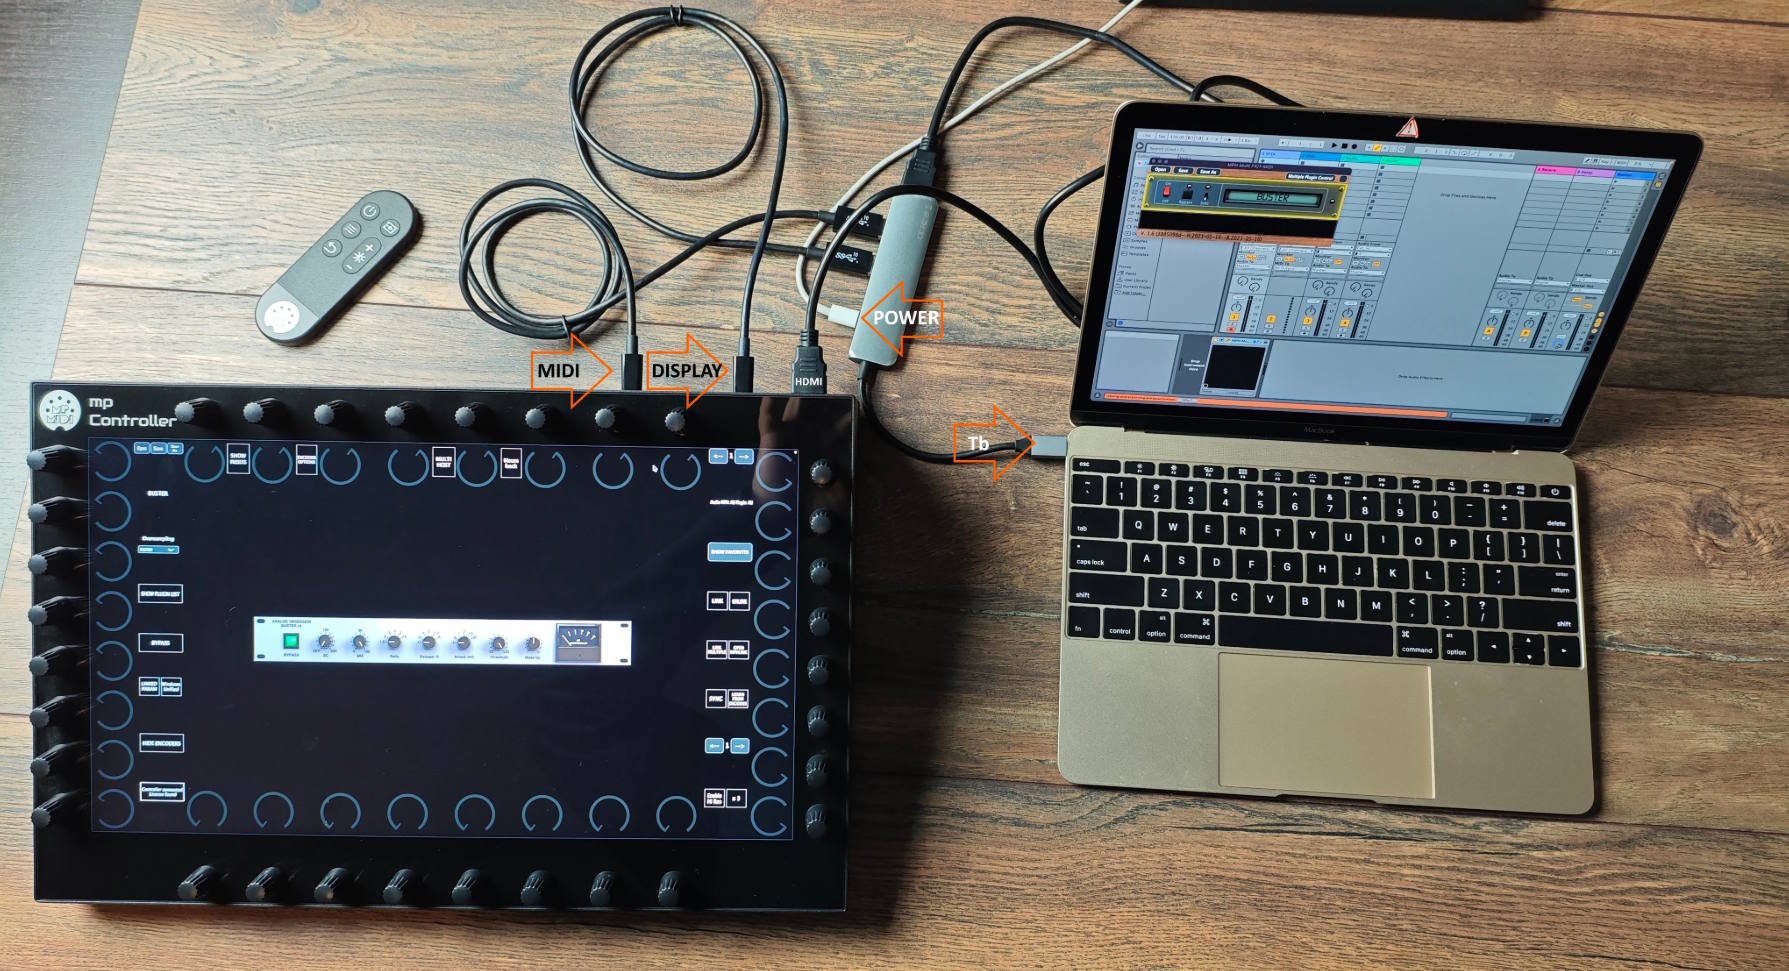
Connection example using a powered docking station on a Macbook
In this example we are using a Satechi multiport docking station
The docking station provides power to the MP Controller and at the same time it charges the Macbook
3. MIDI Connectivity (C1-xMP1)
|
IMPORTANT: For Mac and Windows, disable the MIDI IN/OUT for the C1-xMP1 in your DAW Do not rename the C1-xMP1 in MIDI Studio on the Mac |
MacOS
System Report > USB Tree
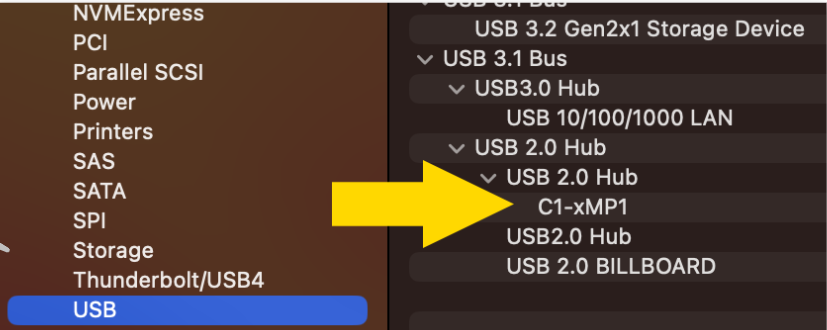
If the C1-xMP1 does not show in the System Report check this guide
MIDI Studio
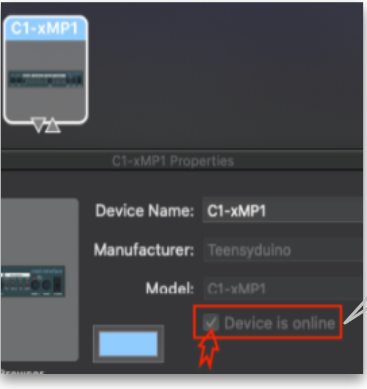
If C1-xMP1 shows in the midi studio but it is not online disconnect the MIDI cable from the controller, delete the C1-xMP1 icon and connect it again.
It should appear online. If it does not appear online, see this guide
Windows
Device Manager
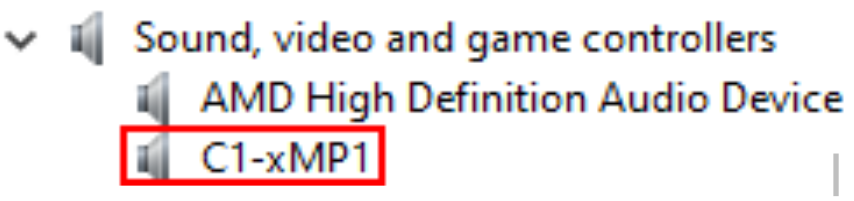
If the C1-xMP1 does not show in the Device Manager, check this guide
4. Mac M4 display connection options
Apple has changed the Thunderbolt on the M4 Macs and it seems that is not 100% Thunderbolt backwards compatible, causing many devices to not work as they did with previous Apple Silicon Macs.
The MP Controller's display does not receive a video signal when using Thunderbolt USB-C on the M4 as it did on previous Apple Silicon Macs.
You should use an HDMI connection for video signal and USB-C (USB-C or USB-A if using a docking station) for the touch data and for providing power to the display.
You can optionally (recommended on Model 2A) also use the additional power port using a wall adapter to provide power to the display so that it draws less power from your Mac.
If you need an additional HDMI ports you can use a USB-C docking station like these offered on Amazon.
5. Initial Setup Guide - How to setup the mp controller the first time
To setup your MP Controller the first time, you need to follow the initial guide sent by email when you had purchased the MP Controller.
That initial guide covers the important steps in order on how to connect the MP Controller, register the controller on the portal, download the MP Host plugins and generate the needed license.
Do not begin your setup using the knowledge base only. You need to follow the initial guide first. This knowledge base offers information on the functionality of the MP Controller, how to setup control surfaces for DAWs and how to troubleshoot.
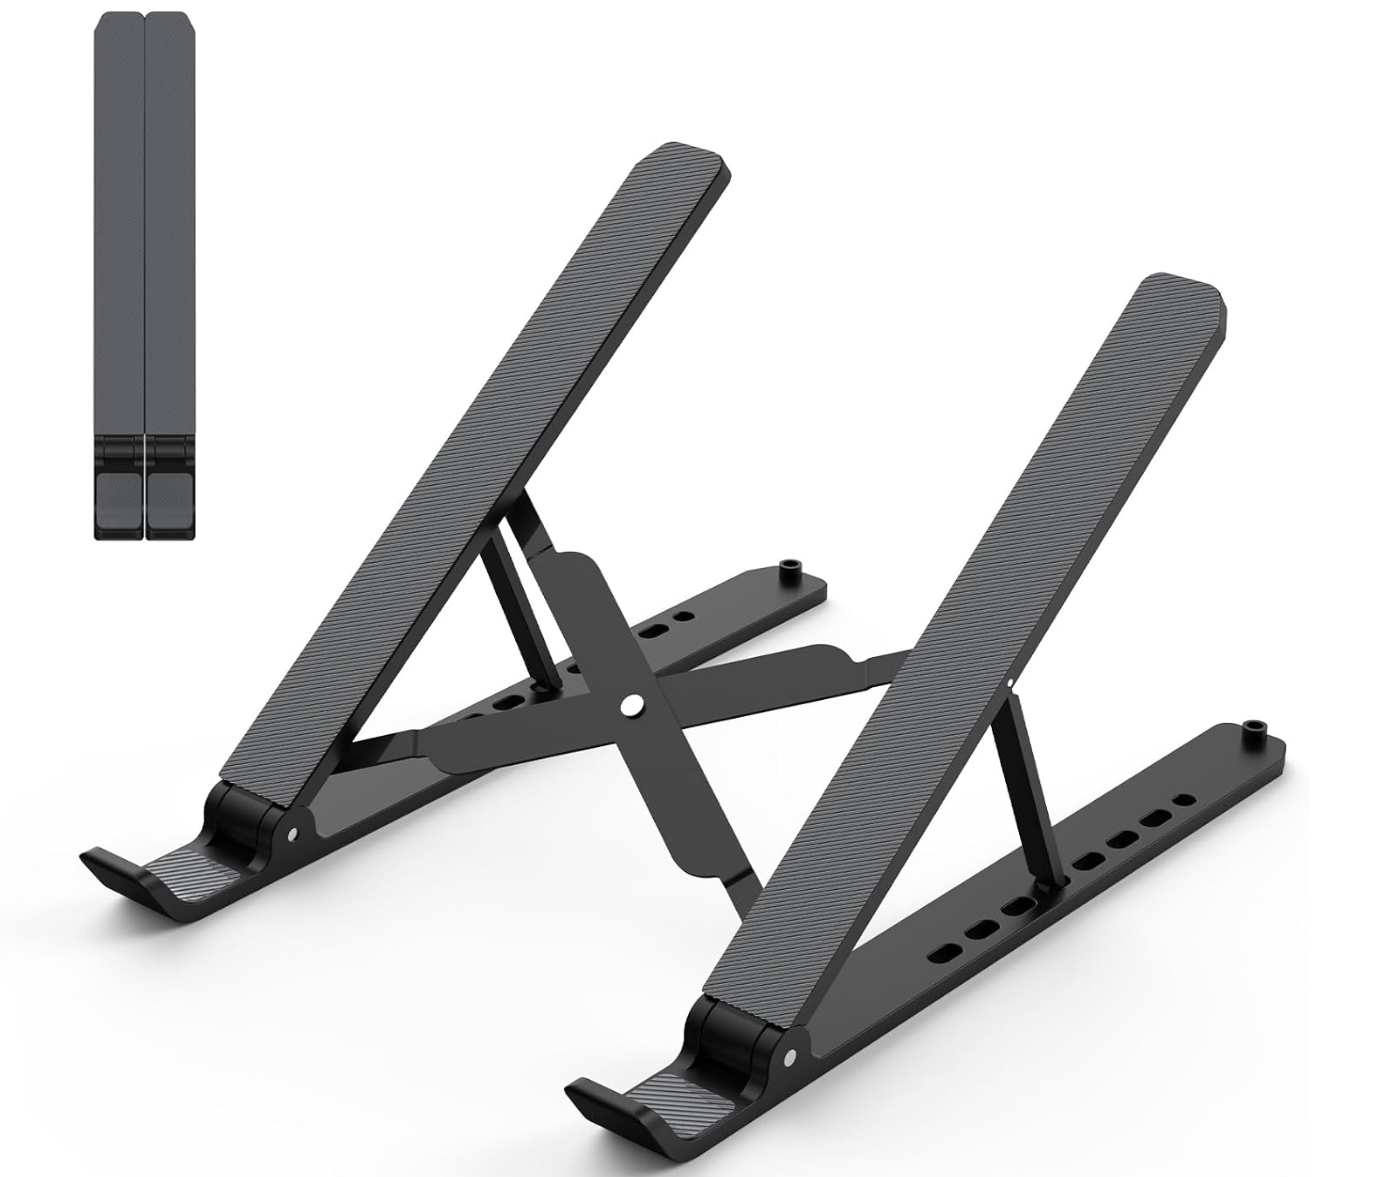
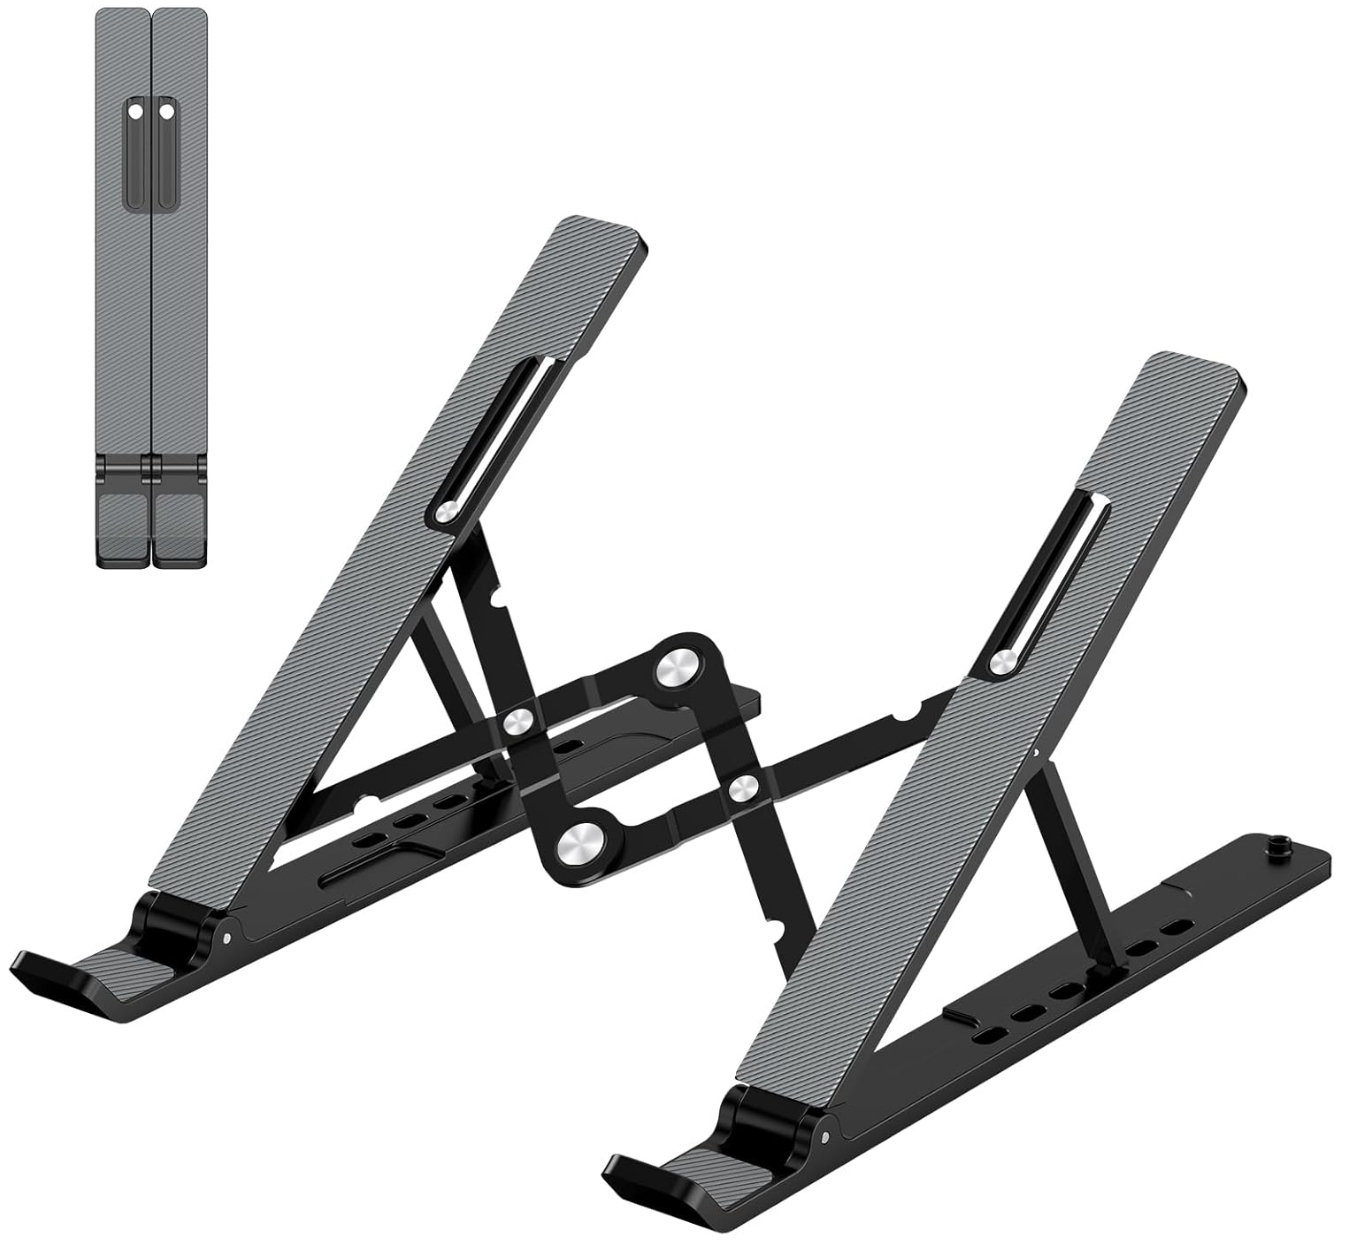
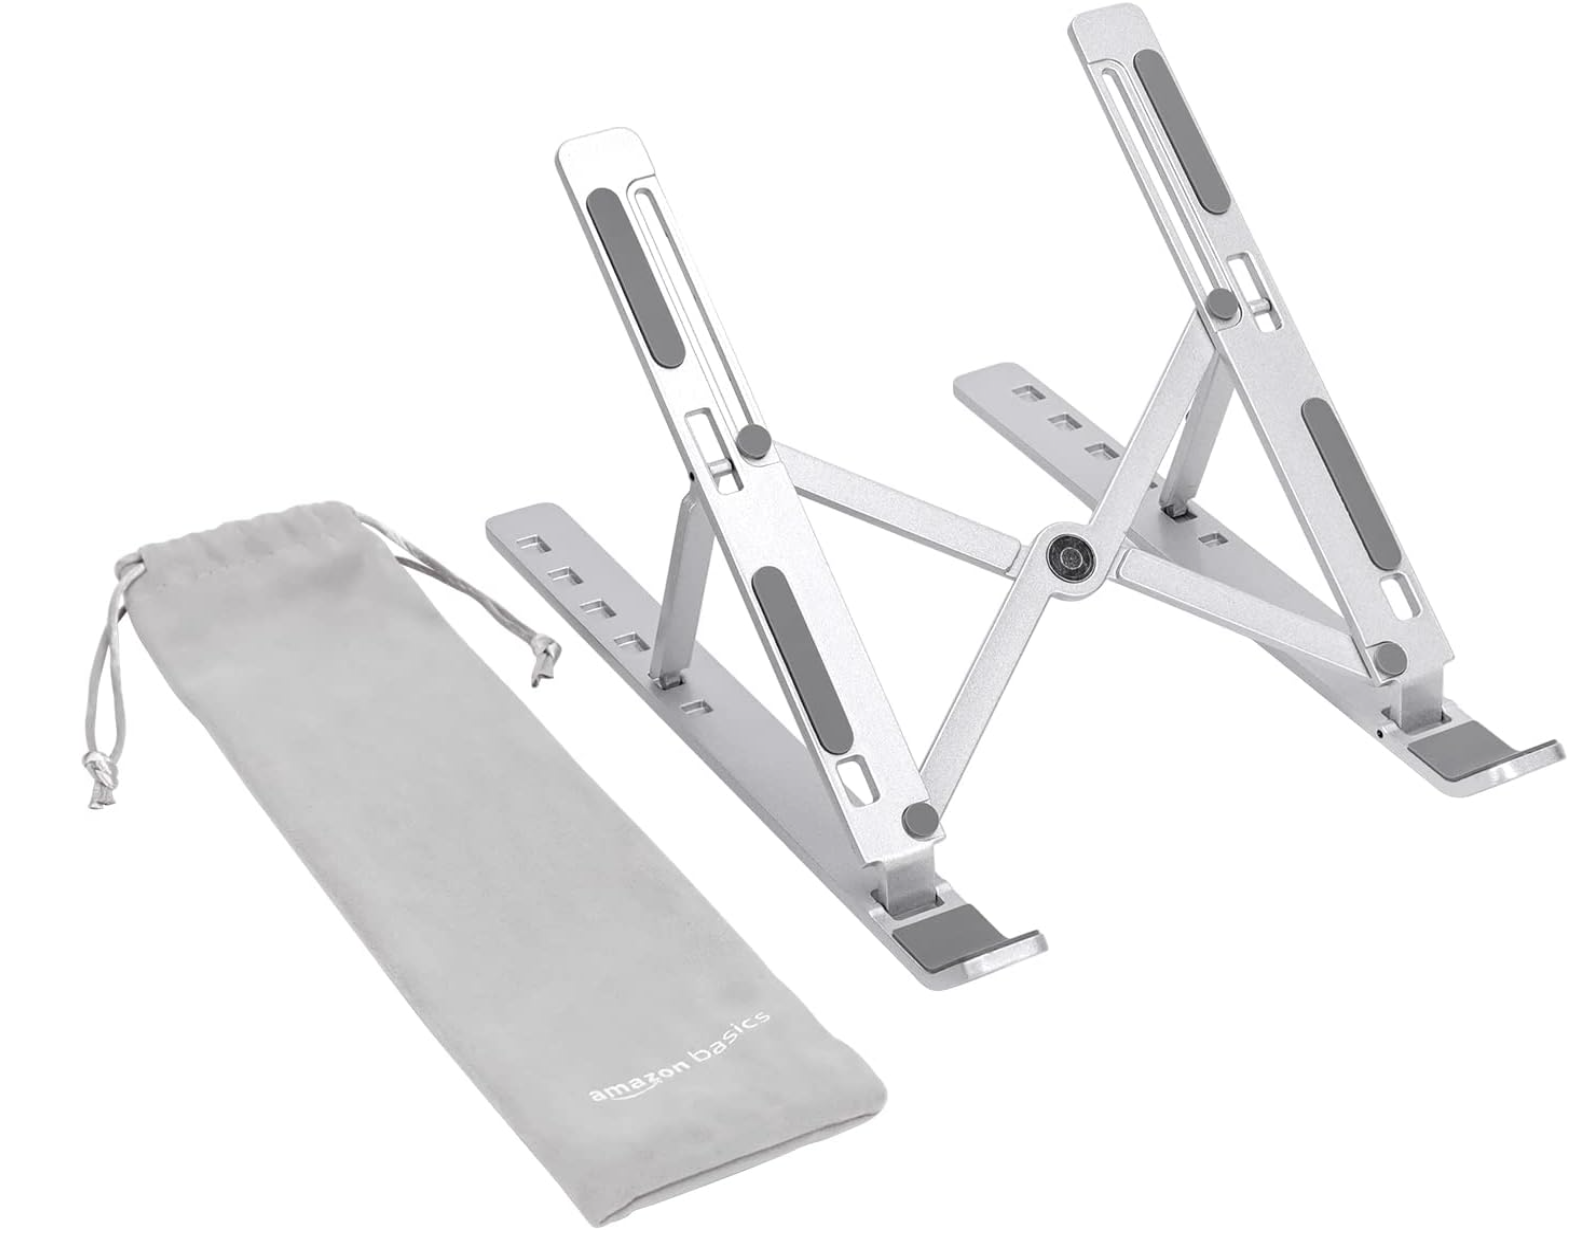
6. Recommended stands for the MP Controller
Here are some recommendations for stands that allow you to adjust the viewing angle of the MP Controller.
Since the MP Controller is approximately the size of a standard laptop, most laptop stands will work well.
Using an adjustable stand can also help reduce the display brightness required for comfortable viewing. Lower brightness settings not only improve viewing comfort in many environments, but can also help maximize the lifespan of the display. While the controller is designed to operate at full brightness, we generally recommend using the lowest comfortable brightness level for your workspace.
From Amazon.com
From Amazon.com
From Amazon.de
From Amazon.co.uk
From Amazon.fr