1. Cockos Reaper Control Surface Documentation
Installation
Download and run the ReaperCS installer from the user portal.
The installer installs the ReaperCS Launcher on your Desktop so that you can start it with Reaper. Once you quit Reaper it will quit the ReaperCS automatically.
The installer copies:
- The ReaperCS Launcher on your Desktop
- The ReaperCS app in Applications on the Mac and in C:\Program Files\ReaperCS on Windows
- The bridge Reaper control surface integration plugin in /Users/USERNAME/Library/Application Support/REAPER/UserPlugins/reaper_csbridge.dylib on the Mac.
Then run the ReaperCS Launcher from your Desktop. It will start Reaper and the ReaperCS app which is the control surface app.
To uninstall, run the uninstaller.
Views
There are 3 views in ReaperCS:
1. The main view for controlling Reaper devices and plugins
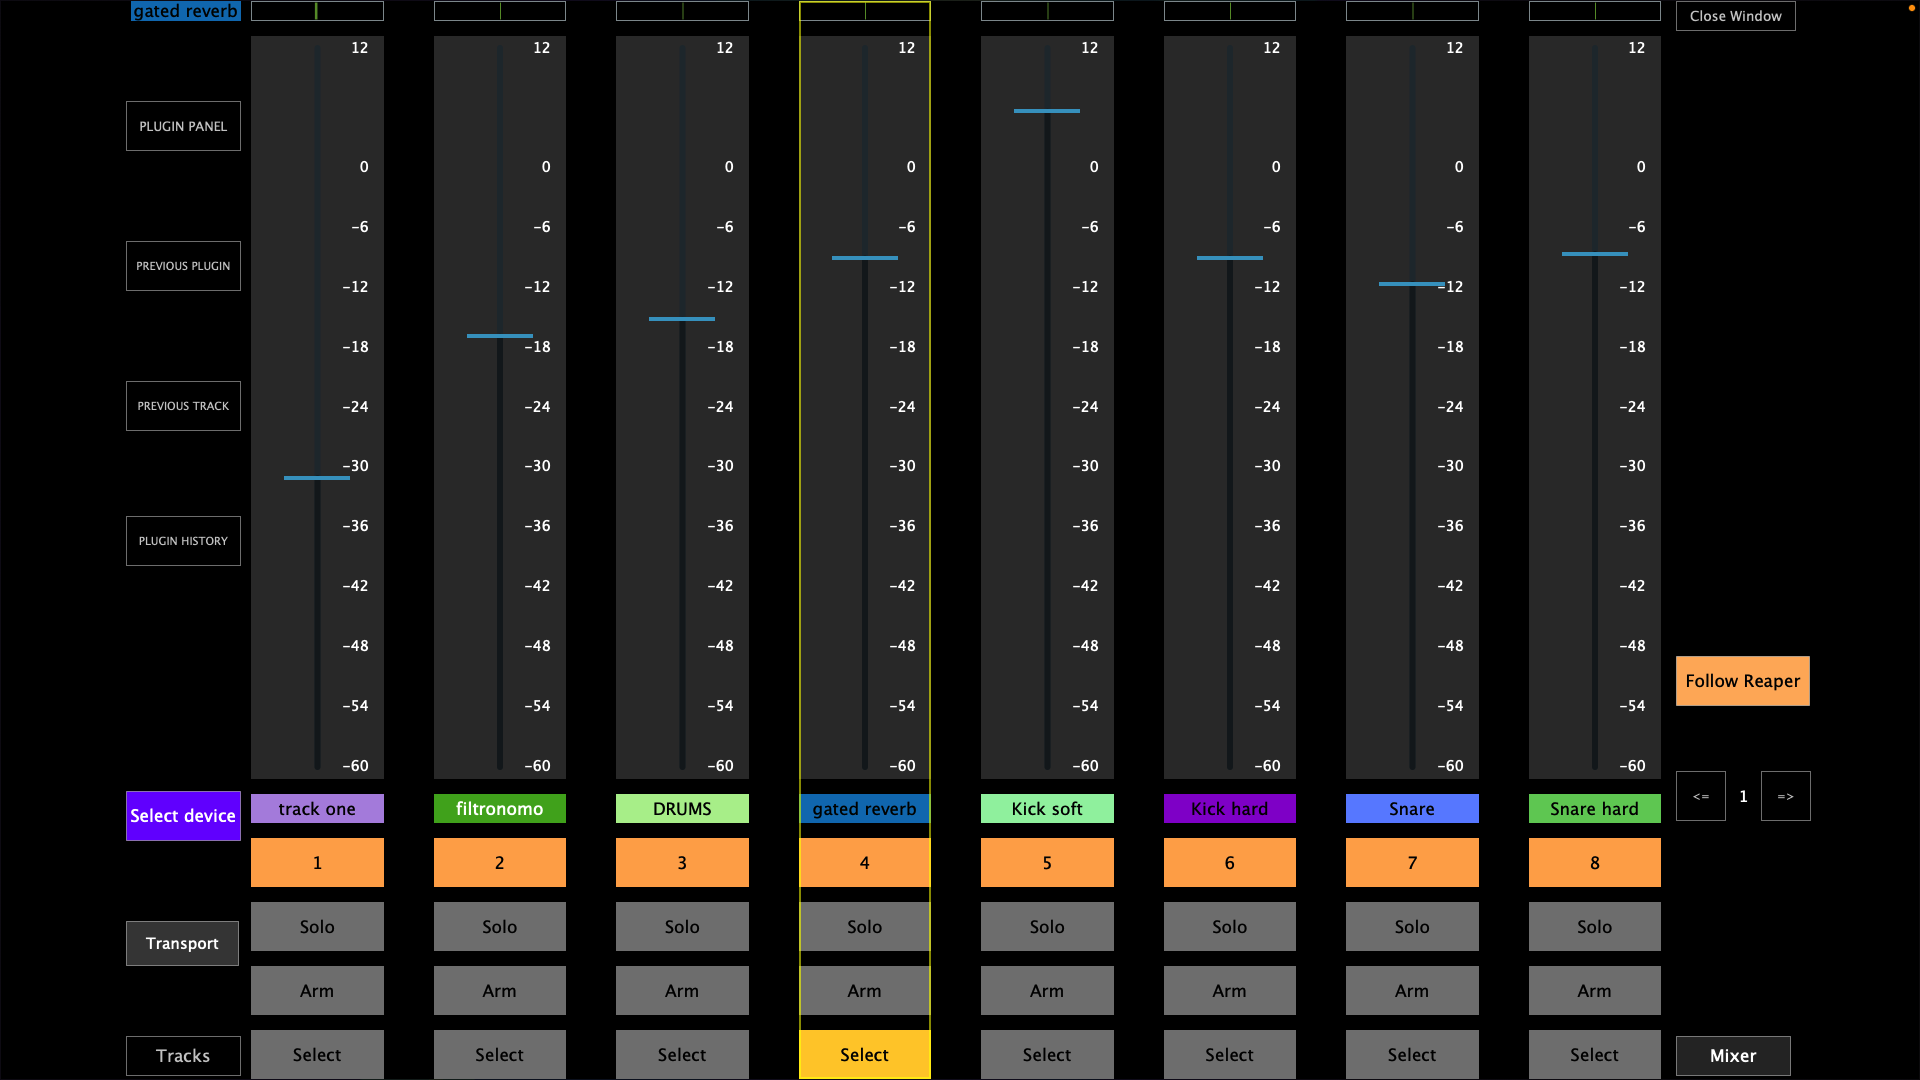
2. The Mixer view for controlling the mixer
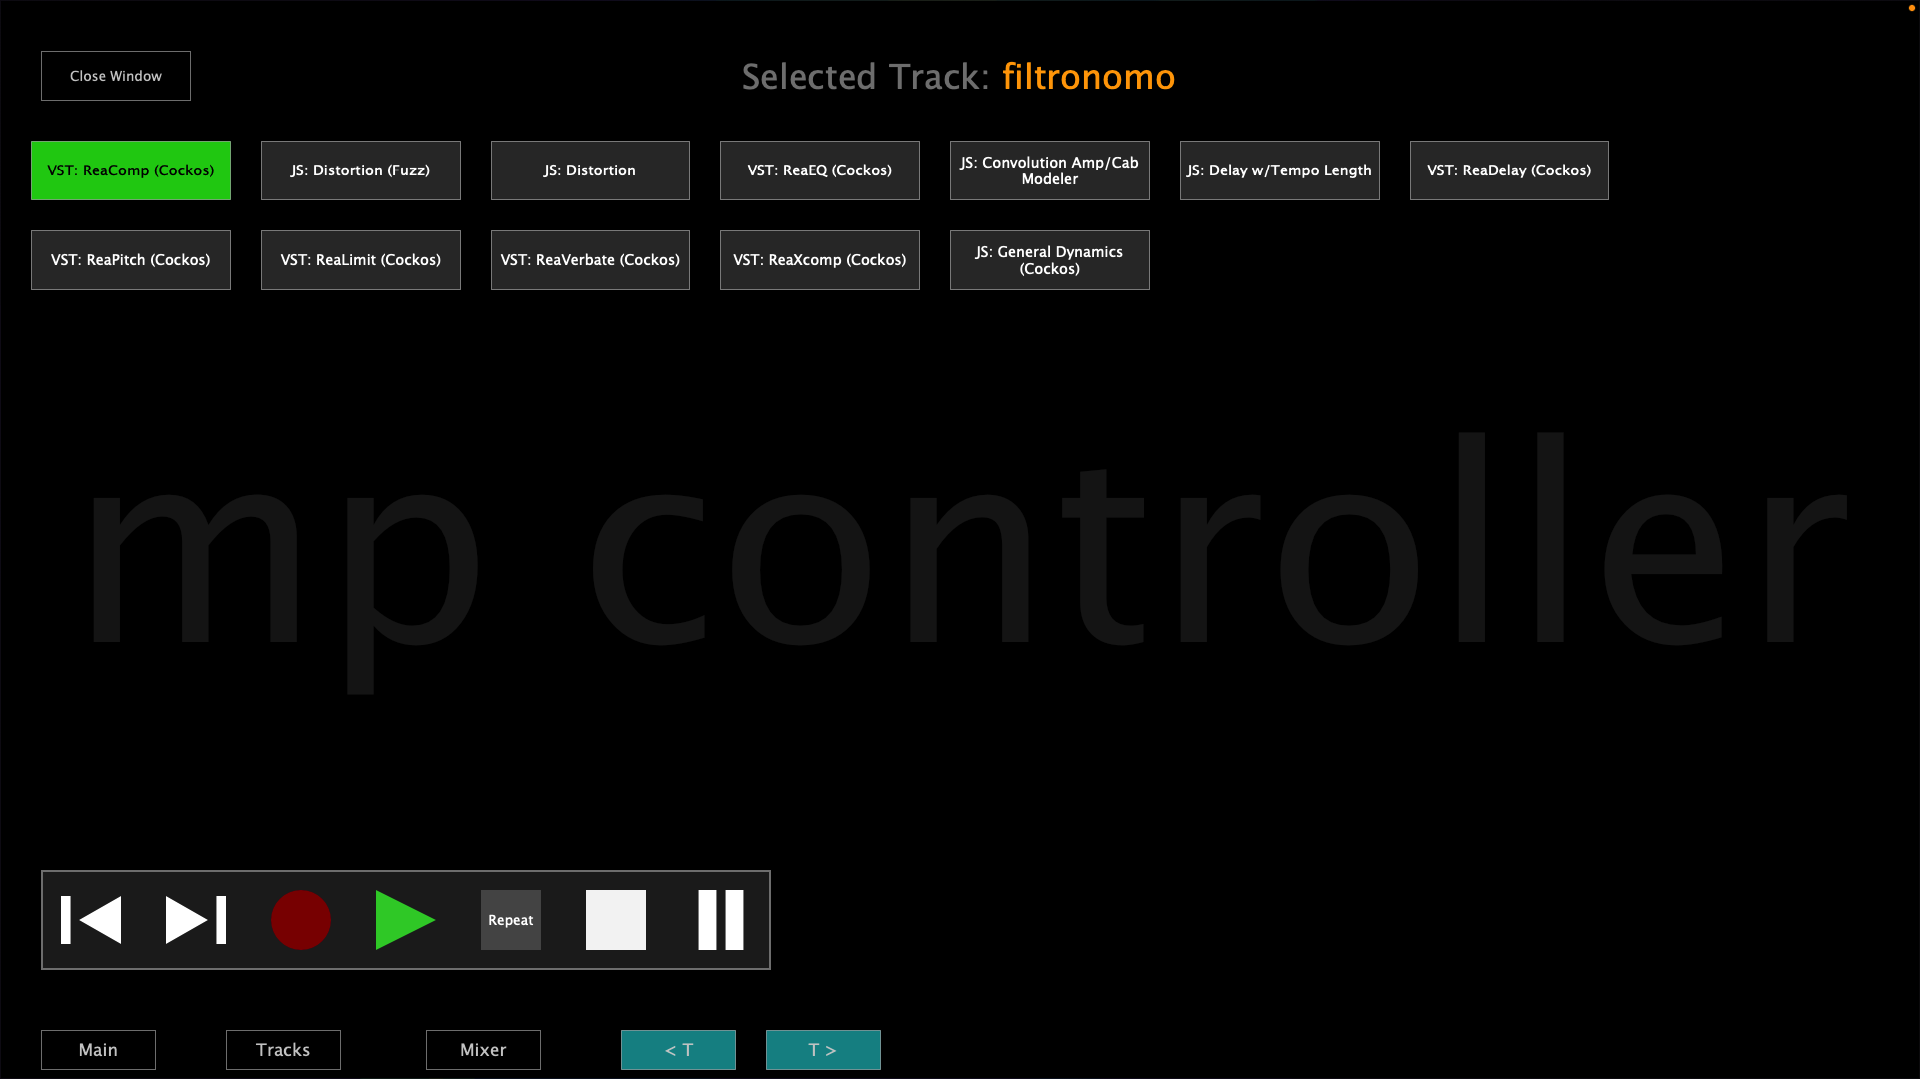
3. The Selected Device view for selecting the device you want to control from the current track
Each view has the option to control the transport controls and on the Select Device view the trasport controls are shown permanently while on the other views the transport control window shows/hides when the Transport button is pressed.
Selecting and controlling devices
You can control devices by selecting any device from Reaper or by selecting a device from the Select Device view or by using the Previous/Next device buttons in the main view.

When the Auto mode is enabled (default) and you select different devices in Reaper it follows the selection of devices and syncs with the device selected (in Focus in Reaper). Setting the Auto mode to manual will stop following the selection of devices in Reaper and will keep controlling the device that is currently being controlled. In manual mode a button shows "Go to selected device", when pressed it will sync and control the device currently selected in Reaper.
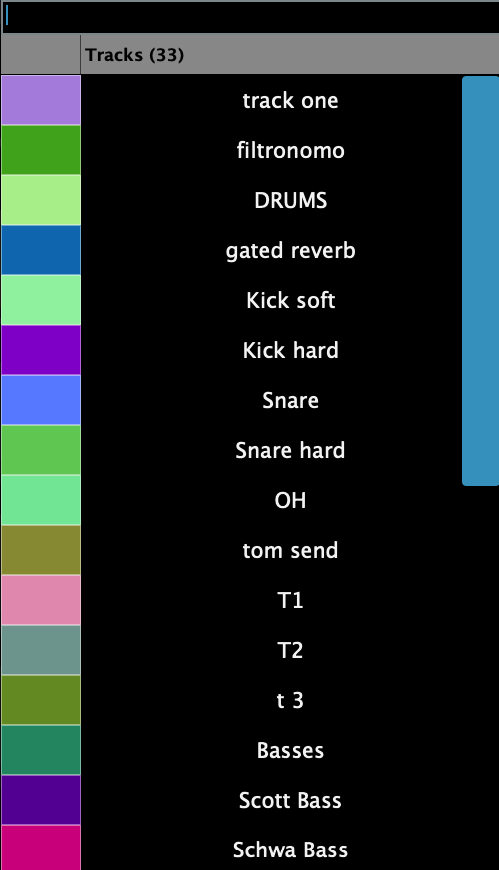
Switching Tracks
When you switch tracks from Reaper, all 3 views follow Reaper track selection. In the main view, when selecting a different track does not select another device on the selected track. In the main view it shows:
The track name of the device being controlled > the name of the device being controlled | the name of the selected track in Reaper.

You can switch tracks using the Previous/Next buttons in the Main view and the Select Device view

or using the Tracks button
In the Mixer view you can select tracks by clicking anywhere on the virtual fader or using the Select button
Device Control
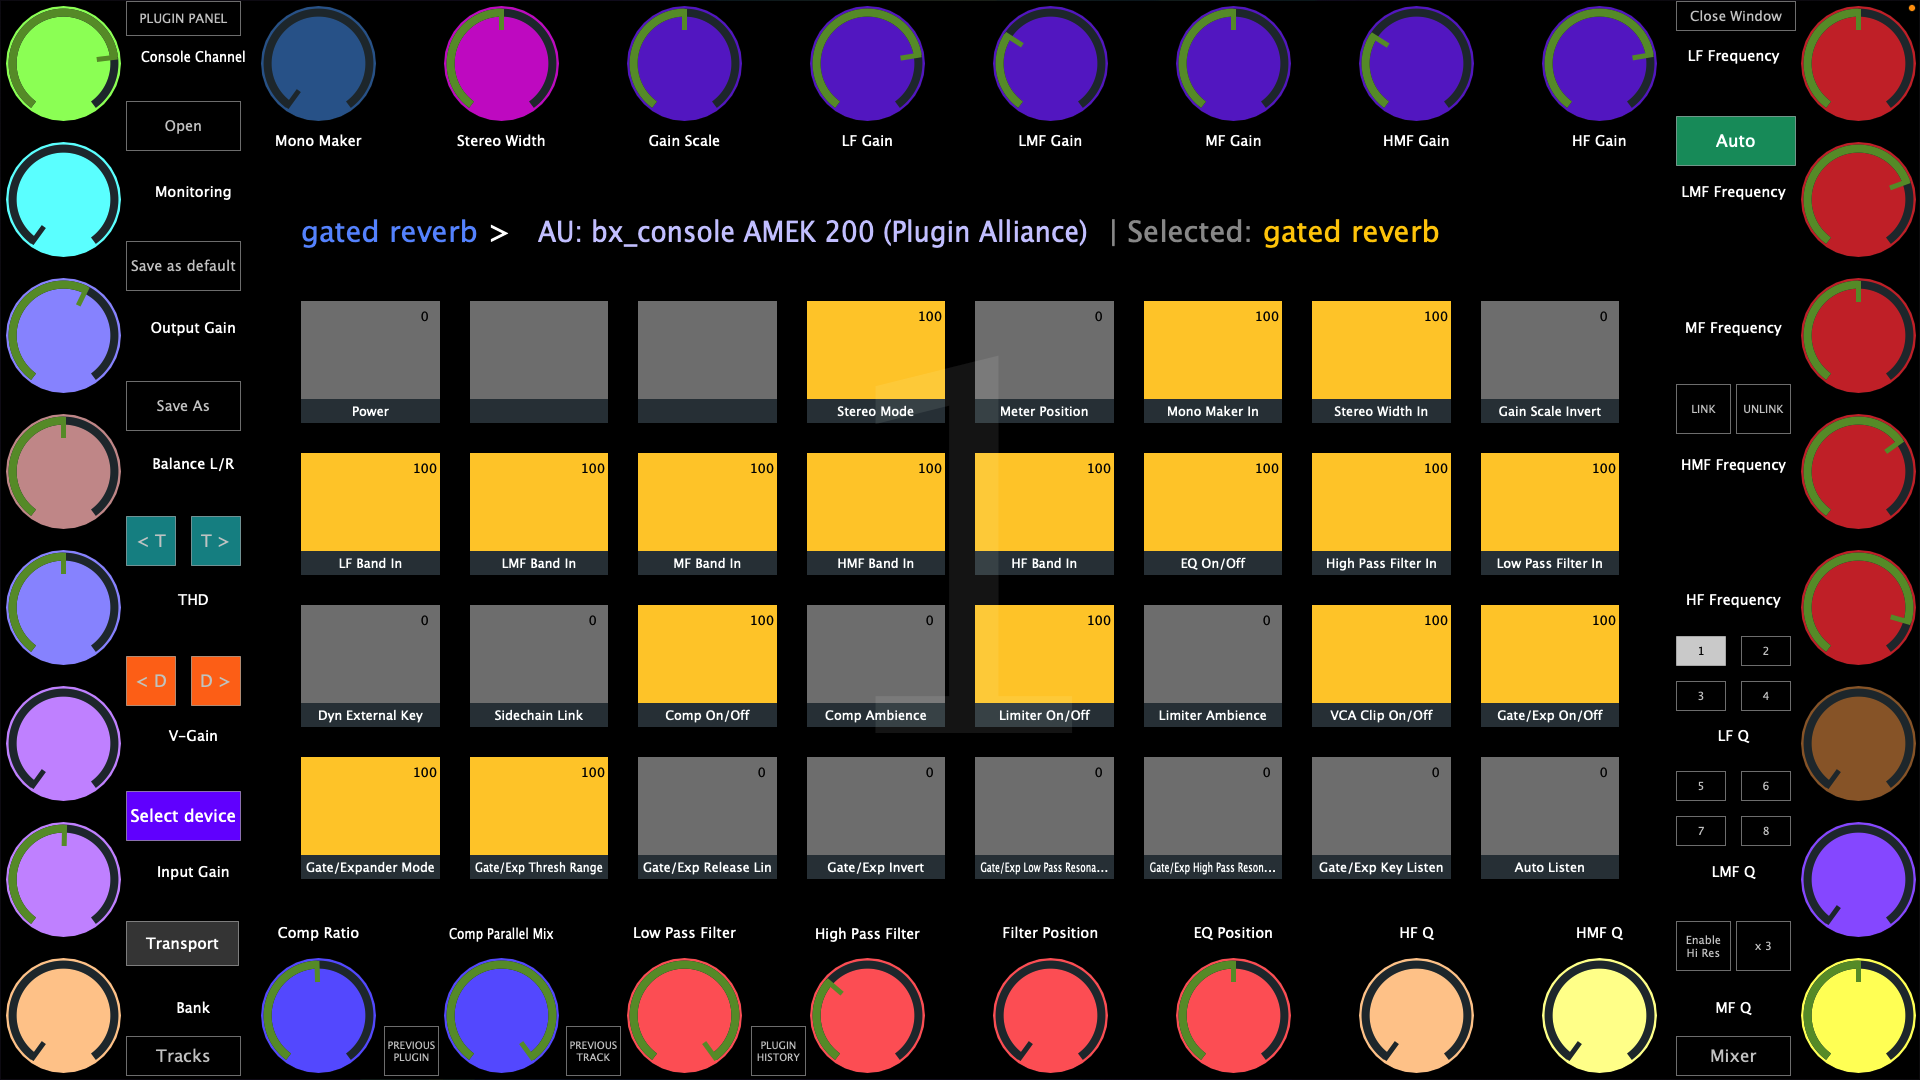
A device can be controlled by 256 encoders and 256 buttons. There are 8 pages with 32 encoders and 32 buttons per device.
Once a device is selected, ReaperCS automaps the available parameters to encoders if they are continous and non-continous parameters are mapped to buttons. The order of mapping is given from Reaper as it provides the list of parameters. The on-screen encoders receive a color and if the next encoder's name is similar to the previous encoder's name it will assign the same color. For example: Delay rate, Delay amount will both get the same color.
When moving a parameter from a device in Reaper it will cause the mapped parameter on ReaperCS to blink twice. If the parameter is mapped on a different page it will go to that page automatically and blink the parameter. This is done so that mapped parameters are easy to identify. The same principle applies to buttons and they blink with a green color.
Mapping Parameters Manually
If you want to change the automatic mapping it is possible using the LINK button which sets ReaperCS in a linking mode.
Click on the LINK button and then click on an encoder. The encoder will get a yellow circle around it, marking it that is ready to be linked. Move the parameter you want to map in Reaper on the device being controlled and it will unlink it from its current encoder and link it to the selected encoder. The yellow circle will be applied on the next encoder and stop at the last encoder of the current page. To exit the linking mode press the LINK button again.
To link a button, right click on the button and it will show the button's option menu. Click on the Link button and then move the parameter you want to link. It will unlink it if it is linked on another button or encoder and link it to that button. It will automatically exit the linking mode after linking the parameter.
Unmapping Parameters
To remove the mapping from parameters click on the UNLINK button. It will go in a continous unlinking mode. Then select the encoder you want to remove the mapping from. It will show a red circle around the encoder. Click the encoder again and it will unmap the encoder and the red circle will go on the next encoder. Clicking on that encoder will unlink it as well and so on. To ecit the unlinking mode click on the UNLINK button.
The same applies to buttons but it will only unlink one button at a time. Click on the UNLINK button, then click the button you want to unlink and it will remove the currently linked parameter.