MP Sequencer/Arpeggiator Documentation
COMING SOON! As a standalone app and VST3/AU/AAX plugin.
32 sequencers and arpeggiators, route them to any midi port and channel, multiple trigger styles,
split chords or steps to midi channels and program Scenes! Send MIDI to your DAW and external hardware!
If you own an mp controller and want to join the Beta program of the MP Sequencer/Arpeggiator send us a message
In this video we apply different LFOs to Note Velocity, Length and Humanize Timing parameters.
Modes
The MP SEQ is a sequencer and arpeggiator plugin and standalone app that consists of 32 sequencers and 32 arpeggiators. Furthermore, there are Scenes where you can set to play the sequences as you like.
The sequencer has a main central grid where its cells can be drawn using the mouse of the touch screen of the mp controller.
Each page is a separate sequencer or arpeggiator and each has its onw MIDI device configuration so it is possible to send out each sequence to different MIDI ports, including hardware synthesizers which are connected to your computer via USB (give they support MIDI).
There are 2 ways to play the sequencer, via its drawn cells or by triggering each sequencer using a MIDI keyboard.
There are 2 Sequencer Modes:
SEQ - this mode simply plays the cells of the grid/page you are current on when you press Play. It also plays the grid and transposes it when a midi note is received and set to a mode (Trigger, ReTrigger, Latch, Play).

G. SEQ - stands for Global Sequencer mode. It plays the grid of all pages and transposes it when a midi note is received and set to a mode (Trigger, ReTrigger, Latch, Play). Pages needs to be set to Enabled and have the same MIDI input port (MIDI Devices button) for the MIDI keyboard you are using. If a Page is set to Disabled then G.SEQ will not trigger Play/Stop.
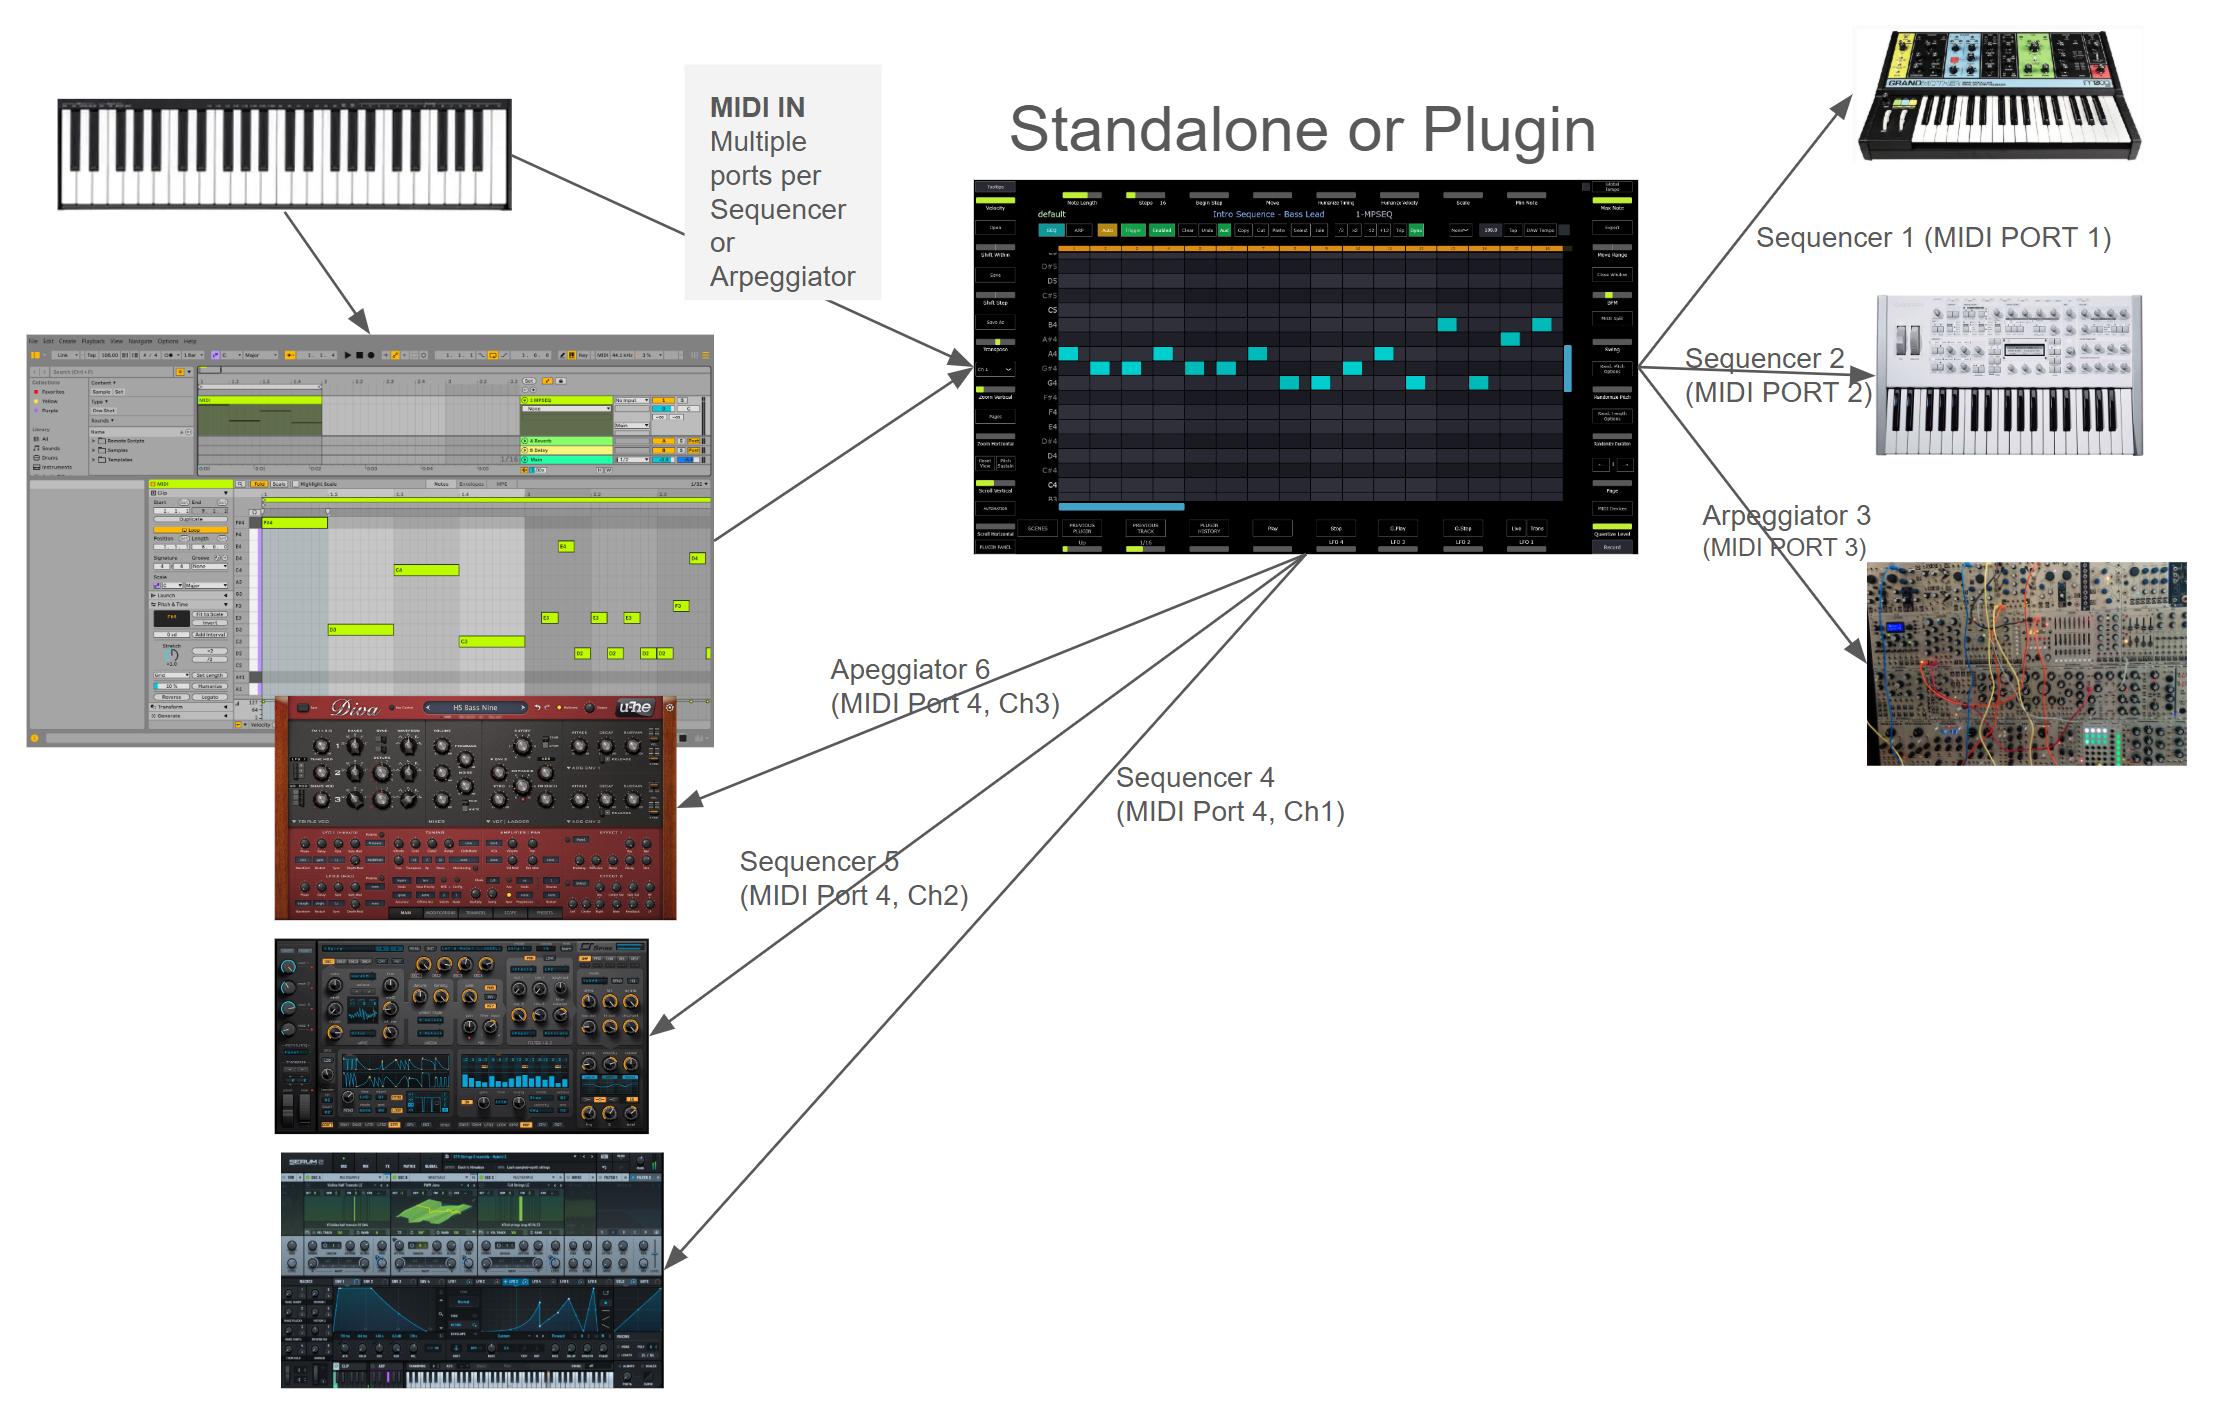
This means you can play a note on your MIDI keyboard and play at the same time 32 sequences where you can send each to a differen MIDI Channel and/or Port. You can send MIDI to your DAW and filter via MIDI port and Channel, and in combination you can send it to other hardware like Synths, Drum Machines etc.
ARP - The Arpeggiator will play different patterns which have be selected using Encoder 32. The rate of the pattern can be selected using Encoder 31.

ARP L - The Arpeggiator latches (holds) the notes so you don't have to hold them on your keyboard and when you play the next notes it switches, like a standard arpeggiator.
G. ARP - In this mode the arpggiator will play all pages that are set to ARP and have a pattern selected using Encoder 32. This mode does not need pages to have the same MIDI input device.
G. ARP L - Is the same as G. ARP however the notes latch (hold) so you don't have to hold them on your keyboard.
See tutorials here
Here are some routing examples of the MP Sequencer/Arpeggiator
Names
There are 3 names above the sequencer grid. The first name is the preset. The second name is the page title. When you hover over the area of the page title it will show a text box where you can write the page name. The third name is the DAW track name and receives that automatically from the DAW. It appears on when the MPSEQ is running as a plugin.

Files and Presets
The presets and the mpseq.properties files are located in the standard ~\MP\Host\ folder. The properties file holds the global options of the MP Sequencer.
The tooltips.txt file has the documentation of the Tooltips and it can be edited in a text editor.
The Grid
Each Sequencer page has its own grid. It is possible to copy and paste cells from one grid to another.
Click or touch any cell to draw a cell. Click again to delete it.
Ctrl + Click to select cells. Selected cells have a yellow background.
Holding shift select multiple cells, vertically and horizontally.
Click the Select button and then click on any cell to select it.
Alt Click and drag/up down, left/right changes the velocity and length of the cell.
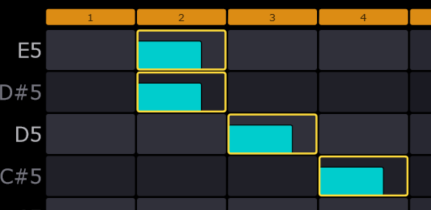
The grid steps are on the top row and the step length of the sequencer can be set by Encoder 10 - Steps.

You can also devide or double the steps by 2 using these buttons 
If you use these buttons to change the size while playing, the new size will take effect on the next cycle of the sequencer.
You can control the scroll and zoom of the grid using the first 4 encoders. The Reset View button sets the view of the grid to the default size and shows the area with the drawn cells.
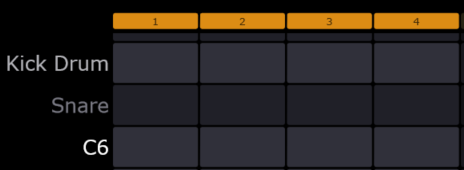
The Note names on the left can be renamed which is useful when you want to assign a row to a sampler cell, ie when programming drums.
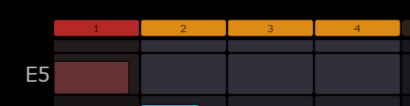
Clicking on the top step cell disables the step column and its cells will not play, although it will cycle through them. It just mutes/disables the cells in that column.
MIDI Input and Output
The Channel dropdown allows you to select the output MIDI channel 
The MIDI Devices button open the window that lists the input and output MIDI devices. This is a per page/sequencer setting and you can navigate to other pages while the MIDI Devices menu is open using the pages buttons on the right. This allows you to send MIDI to a different port and Channel per page/sequencer/arp. You can program different tracks/instruments in your DAW to receive MIDI from different pages.
For example:
Page 1 ➞ OUT MIDI PORT A, Ch1 ➞ DAW Instrument Track 1
Page 2 ➞ OUT MIDI PORT A, Ch2 ➞ DAW Instrument Track 2
Page 3 ➞ OUT MIDI PORT B, Ch1 ➞ Hardware Instrument 1
Page 4 ➞ OUT MIDI PORT C, Ch1 ➞ Hardware Instrument 2
and so on up to 32 pages.
Ableton Live users, it is not possible to select a MIDI input channel from a plugin in another track. If you want to send MIDI to different tracks from the same MPSEQ plugin, select a loopMIDI out port from each page and select a different MIDI Channel. See example here.
On the Mac, there is a virtual MIDI port named MPSEQ where you can use it to send/receive MIDI to your DAW.
On Windows, you can use loopMIDI or other virtual MIDI ports to send/receive MIDI to your DAW.
Metronome: You can select an output MIDI device to send a short note to a synthesizer for example, so it acts as a metronome.
Note that the MIDI input just reads notes played from MIDI keyboards (does not listen to CC messages from other controllers)
Play and Stop
Play/Stop: Plays this page. Stops this page. Press a second time when already stopped to scroll the view back to step 1.
G. Play and G. Stop: Global - Plays every enabled page at the same time, starting them all in sync. Stops every page that is currently playing. Press twice when already stopped to scroll back to step 1.
Live: Live mode - when you click a different page, MPSEQ waits for the current loop to finish before switching.
Trans: Transition mode - solo a different page for one cycle, then automatically come back to where you were.
How MPSEQ receives Play / Stop from the DAW
When MPSEQ is loaded as a plugin (VST3 / AU / AAX), it automatically reads the host DAW's transport state, whether the DAW is playing or stopped, on every audio block. You don't have to configure anything for MPSEQ to know the DAW state. When in G.SEQ mode, Play/Stop from the DAW trigger G.Play/G.Stop and all pages set to G.SEQ will play/stop with the DAW.
To have MPSEQ react to Play / Stop, enable one of these two options:
- AUTO button (on the transport bar): when on, MPSEQ's currently-visible page follows the DAW's transport. Pressing Play in the DAW starts the page; pressing Stop stops it.
- External Play / Stop Global (right-click → External Play/Stop Global): when on, pressing Play in the DAW triggers MPSEQ's Global Play (every enabled page starts at once). Pressing Stop triggers Global Stop.
Both options are independent. The first syncs the active page only and the second drives the whole grid globally.
In Standalone mode there is no host transport, so Play / Stop must come from MPSEQ's own buttons or receive a Play/Stop signal from the DAW. The MPSEQ will react to Play/Stop MIDI signals received on any enabled MIDI Input port. You can configure your DAW to send out Play/Stop signals to a selected MIDI port. The MPSEQ will trigger G.Play when it receives such a signal which affects all sequencers. See here to enable this in your DAW.
Recording

There are 2 modes of recording. Step recording and Normal recording.
To record from a MIDI keyboard, set the input port in the MIDI devices.
Step Rec: Step recorder - each note you play writes to the next cell. Chords played together land in the same step.
The following options affect Step Recording and Normal Recording:
Record: Realtime record - writes cells into the grid as you perform them on the keyboard.
Rec ND: Non-destructive record, it keeps existing cells and adds new on every recording cycle.
Replace Rec: It replaces cells in columns with new ones when played.
Rec. Distr: Distructive Recording - It erases the existing cells on the grid on every recording cycle.
Takes: When in Rec Distr. mode, on every new recording it stores the recorded grid in Take slots. There are 8 slots and get populated in round robin. Takes are saved in presets.
Loop Mode: The Loop mode affects both Step Recording and Normal Recording. Click to cycle Once/Cycle/Next. Once stops at the end of the grid, Cycle loops, Next moves to the next page when the loop wraps.
Auto Metro: Metronome plays only while you are recording or playing. Mutually exclusive with Metro. The Metronome output port is set in MIDI Devices.
Metro: Metronome ticks continuously while on, even when the sequencer is stopped. Mutually exclusive with Auto Metro.
Count In: Plays a 4-beat countdown before starting realtime recording so you know exactly when to play.
Quantize: Snaps every note's timing offset to its step boundary. Great for cleaning up a just-recorded take.
Q. Record: Automatically quantizes the recorded cells.
Pitch bend and Sustain

The Pitch/Sustain button opens the window to view and edit.
Click on the Pitch step to enter a pitch event.
Click anywhere will move the event to that position.
Double clicking on a dot will reset the pitch bend to the center.
Double click on a Sustain event to delete it.
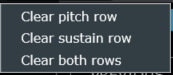
Right click shows the menu
Scenes
Scenes mode has its own grid where each row is dedicated to a Page/Sequencer. Scene data is saved in the preset.
The top row shows the steps of the Scene sequencer. Clicking on any step sets the active steps.

Scenes can be named.
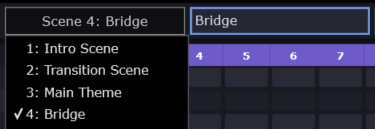
When you switch to a difference scene while a scene is playing, it will reach at the end of the scene playing before switching to the new scene.
Aud: Audition mode for the Scenes grid. When on, clicking a cell triggers the target page once so you can preview it before committing.
Steps/Cell: Sets how many sequencer steps each scene cell plays. Click to set all columns at once, or edit each column individually in the row below.
Cycle: Loops the active scene instead of stopping when it reaches the end of its active length.
Continue: Advance to the next scene at end of cycle. With Cycle on, if the next scene has no cells drawn, playback wraps back to the scene you started from.
Pages
The Pages button opens a grid style window where you can trigger individual sequencers
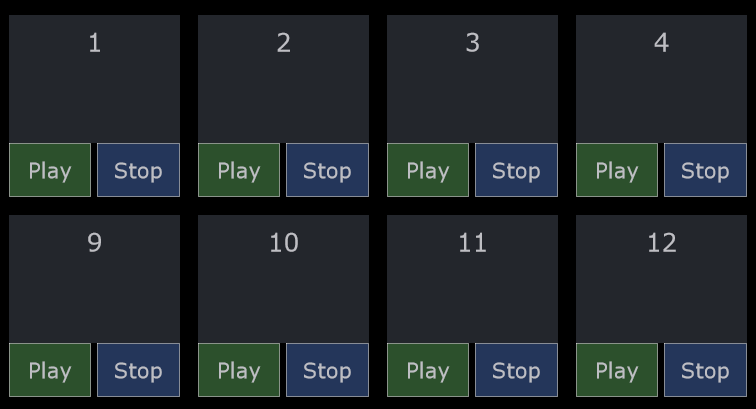
When you press play while another sequencer(s) is playing it will wait to start at the next iteration of the longest sequence.
Scale
You can select the scale of the current sequencer:
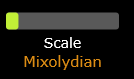
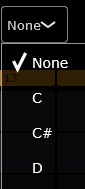
and to take effect, you need to select a pitch for the scale from the dropdown.
Automation
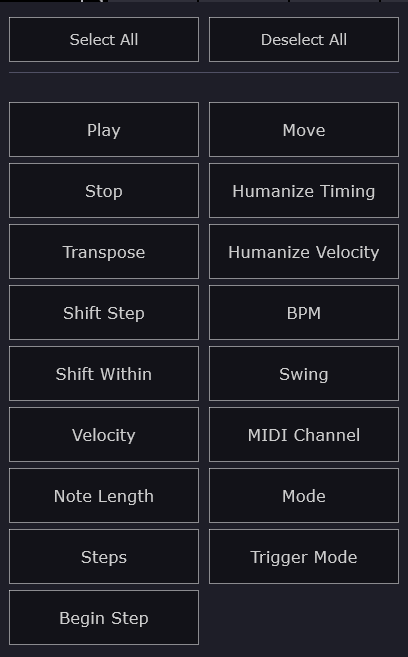
The following parameters can be automated, per sequencer.
LFOs
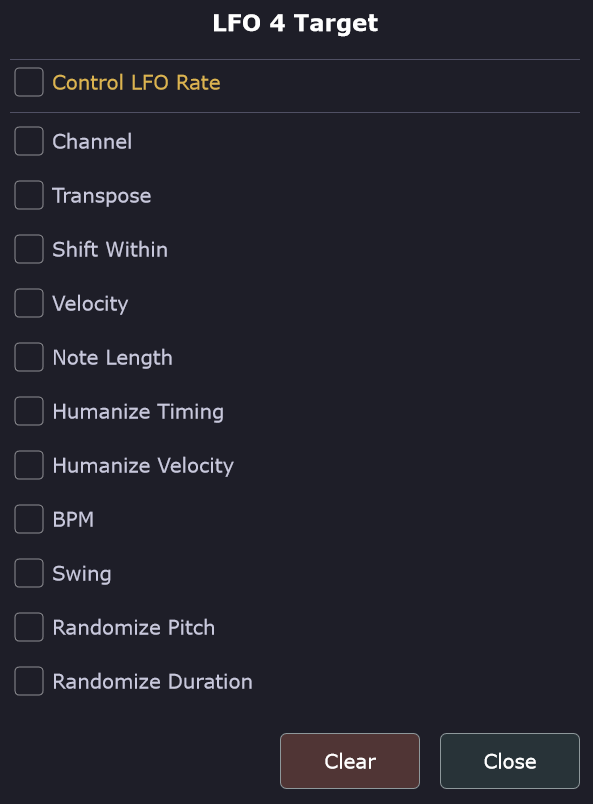
Click on any LFO encoder and the following window will open

You can choose which LFO parameter. Only one LFO per parameter can be assigned. If you check the first box "Control LFO Rate", the encoder controls the LFO rate.
MIDI Split
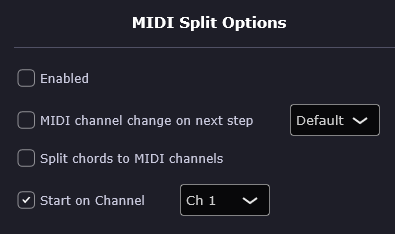
Spreads this page's notes across multiple MIDI output channels so they can hit different sounds on a multitimbral instrument.
In Sequencer mode: the notes drawn on the grid are distributed across channels.
In Arpeggiator mode: each arpeggiated note is distributed across channels.
Options:
Enabled: master on/off for MIDI Split on this page.
MIDI channel change on next step: each successive step sends on the next channel (1, 2, 3...).
Step count: how many channels to cycle through before looping back. Default uses the sequence length. You can create interesting phrasing effects when using other values that the Default as it will cycle the different instruments.
Split chords to MIDI channels: each note of a chord plays on a different channel, lowest note first.
Start on Channel: when on, the channel counter resets to the chosen channel at the start of every cycle.
MIDI Export and Import
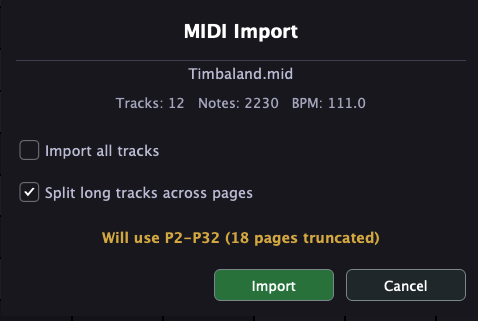
The option "Split long tracks across pages" will populate the sequencers with the notes of the first track, then second track and so on.
TEMPO
When running as a plugin, it gets the tempo automatically from the DAW. Chaning the DAW tempo will automatically pass the tempo to the MPSEQ.
Click on the tempo box and a large horizontal slider will open that enables to control the tempo.
The /2, x2 buttons devide and multiple the tempo by 2 every time they are pressed.


Notes Routing
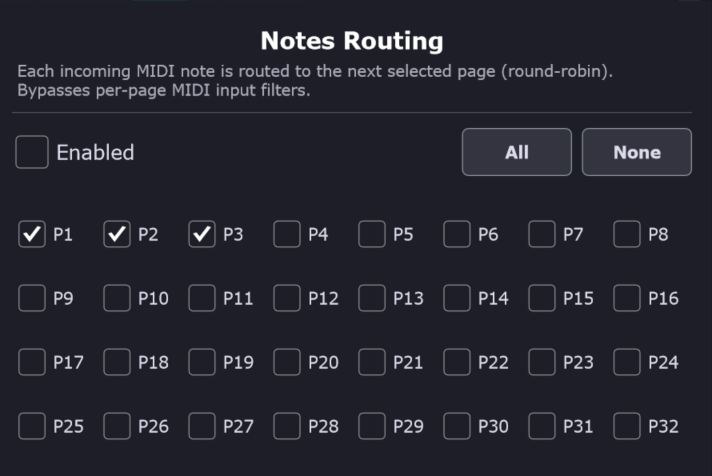
When enabled, it will route each note played to the next Page/sequencer/arpeggiator. For example, if I play C4,E4,G4 (either on a MIDI keyboard or from the DAW) it will send C4 to trigger P1, E4 to trigger P2 and G4 to trigger P3. If all notes are played as a chord, it will still route them to each page, so timing of play does not matter, but order matters.
This mode bypasses the Global Sequencer and Arpeggiators and ignores the MIDI input devices selected in MIDI Devices. The page will send MIDI out to the selected port and channel.
This is a great way to trigger different sequences from a MIDI keyboard.