MP Sequencer/Arpeggiator Tutorials
Running it as a plugin in the DAW
The MPSEQ is an Instrument plugin therefore it should be added to an Instrument track in the DAW. In most DAWs you can only have on instrument and since it does not produce audio, the goal is to send MIDI from the MPSEQ to other instruments in the DAW.
Triggering Input.
The MPSEQ can receive MIDI notes from the DAW and these in turn will trigger wither the Sequencer events on the grid, or the Arpeggiator, depending which mode you have chosen.
It can also receive live notes played from your MIDI keyboard via the DAW.
Set it to SEQ or ARP mode and to Trigger and Enabled. You should see the transposed notes show on the grid as it receives MIDI.
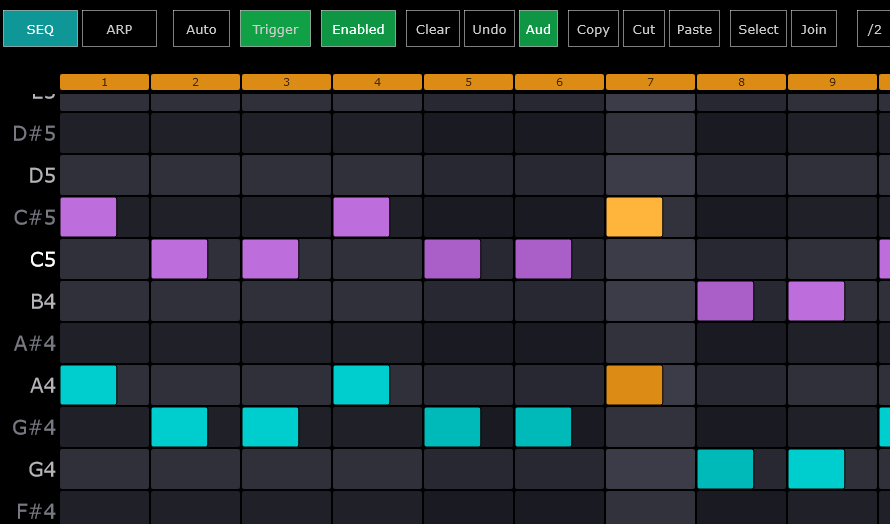
If you have notes in the DAW, these will trigger the Sequencer.
When it receives MIDI input, the MIDI indicator also lights up

MIDI Output
Once you have the the MIDI input setup, you can route your MIDI output.
You can route it via the DAW or via a virtual MIDI port, depending which DAW do you use the the routing you want to make.
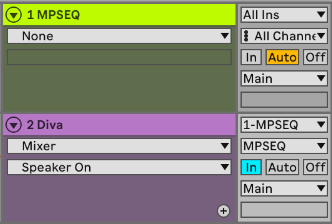
In Ableton Live for example, you can select a Track as an input device on an instrument. In this example, we select the track 1 MPSEQ to be the input device for track 2 Diva. The principle is the same in all DAWs.
Alternatively, you can route the output to a virtual MIDI port on the MPSEQ. In the example, we are using the TO DAW MIDI port (on the Mac the MPSEQ has its own virtual MIDI port named MPSEQ)
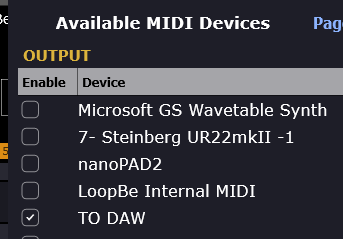
and in the DAW set the MPSEQ track to NO INPUT to avoid MIDI feedback loop

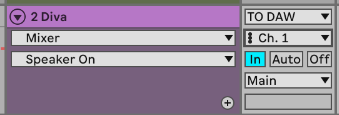
Choose the TO DAW port and Ch 1 to be the input. This way we can have each page of the MPSEQ to trigger different tracks in Ableton Live.
Standalone mode
See this tutorial showing how to configure it to send notes to different channels. The tutorial was made on a Mac where it uses the MPSEQ virtual MIDI port.
Live Performance and looping
coming soon!