15. Controlling Logic Pro with the MP Controller Control Surface
We have created a Logic Pro v11 control surface for controlling the following:
1. Logic Pro native audio effects and virtual instruments which have been pre mapped
2. Third party plugins (and can also be used at the same time with the MP Host for controlling third party plugins)
3. The Mixer in Logic Pro
4. Transport control
5. Send keyboard commands to Logic via assignable buttons
Compatible with up to Logic Pro version 11.2.2 and Logic Pro12 (Logic Pro Creator Studio)
Note, that this control surface system is not related to the MP Host which is also used to control plugins. The 2 systems (MP Host and Control Surface) can work in the same Logic Project, and switch from the control surface to the MP Host plugins and vice versa. The control surface works as a standalone app. You can use both the MP Host and the control surface in the same Logic Pro project or use either.
Here is a short overview video of the control surface.
Logic CS Version: v1.0-103eeba--H-2026-04-24--B-2026-07-13
Logic CS Script and Logic native devices presets updated: July 13th, 2026
You can find the change log of the Logic Pro Control Surface here
If you install the new Logic Pro Creator Studio, it is a new bundle that is identified differently on macOS than Logic Pro.
If you have just updated Logic, the app id is still the same on macOS.
If you don't have the Logic Pro Creator Studio, in the MP MIDI app choose the option Logic 11 and use the Logic 11 Launcher. If you have Logic Pro Creator Studio choose Logic Pro 12 in the MP MIDI app and use the v12 Launcher app to start it.
IMPORTANT: Select Logic Pro or Logic Pro Studio Creator from the right click menu of the MP MIDI app.
Can be downloaded from the New Releases section of the user portal.
(It requires to install the latest MP Host first: MPH_MAC_INSTALLER-v1.8)
![]()
How to install
-
Download the zip file from portal from the section Logic Control Surface (not the MP MIDI app. The Logic CS includes the MP MIDI app as well. Just use the Logic CS installer).
-
Extract the MPMIDI.app from the dmg file to your Applications folder (overwrite it if you have it already)
-
Extract the control surface installer to a temporary location. Don't run the CS installer yet. Follow the steps below to set up.
UPDATING
If you install an update, after the installation of the update, always rebuild the control surface defaults in Logic
![]()
Configure Logic Pro
-
Open Logic Pro
-
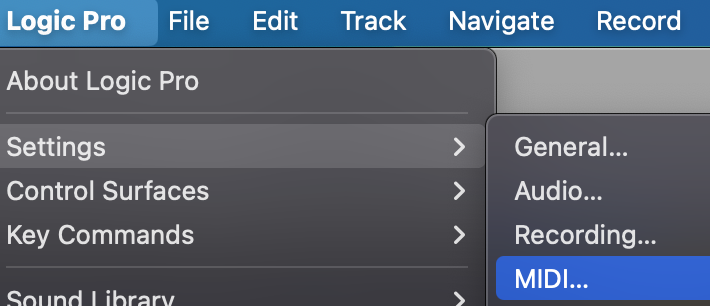
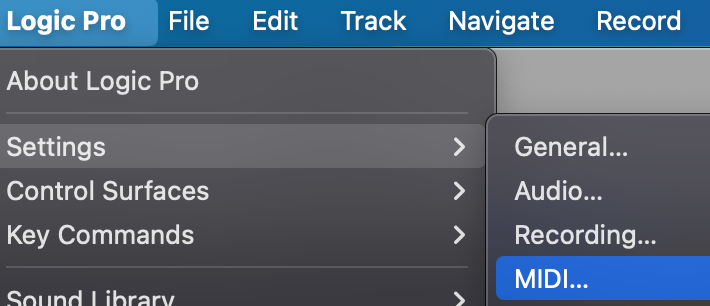
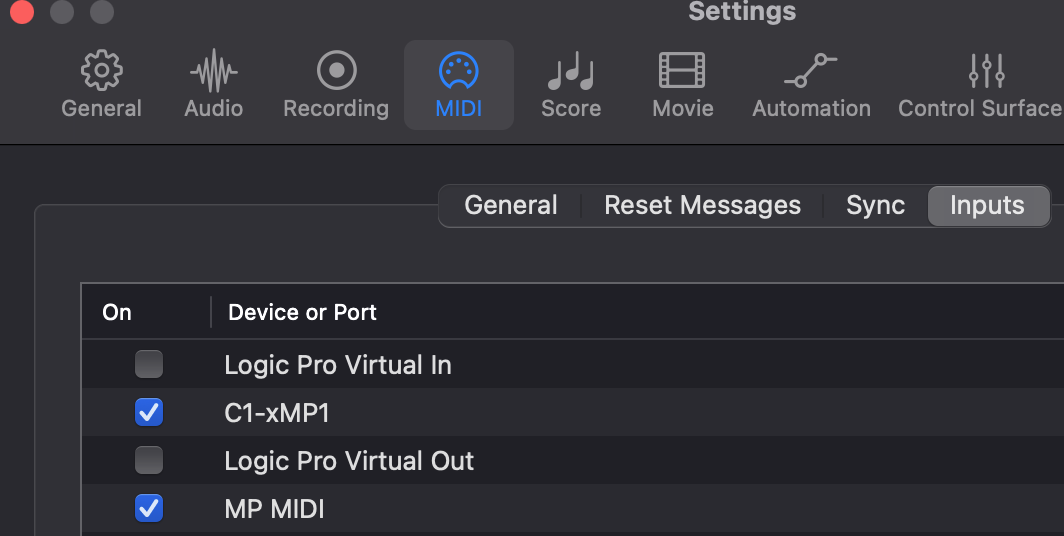
Go to MIDI Settings
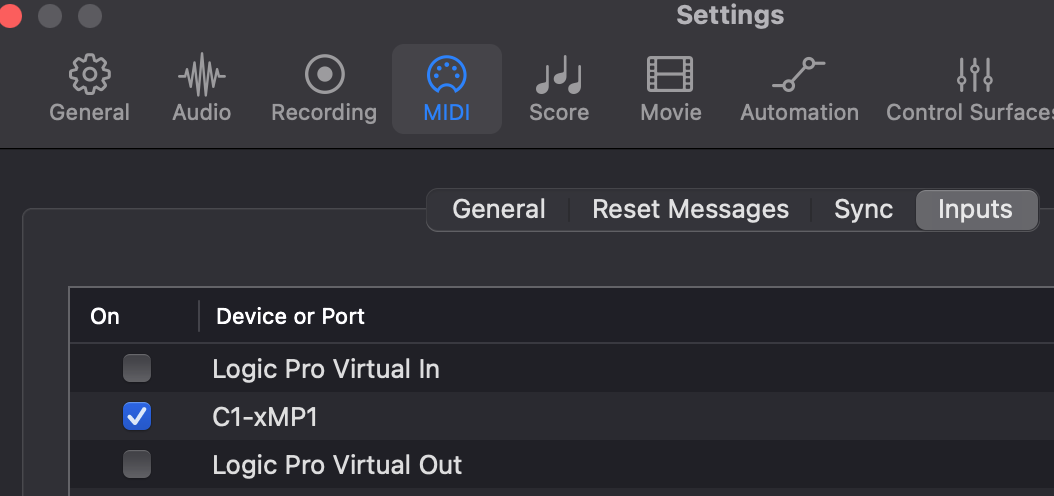
Go to Inputs and ensure the C1-xMP1 is checked
go to MIDI Settings > General and disable MIDI 2.0 (Uncheck the box)
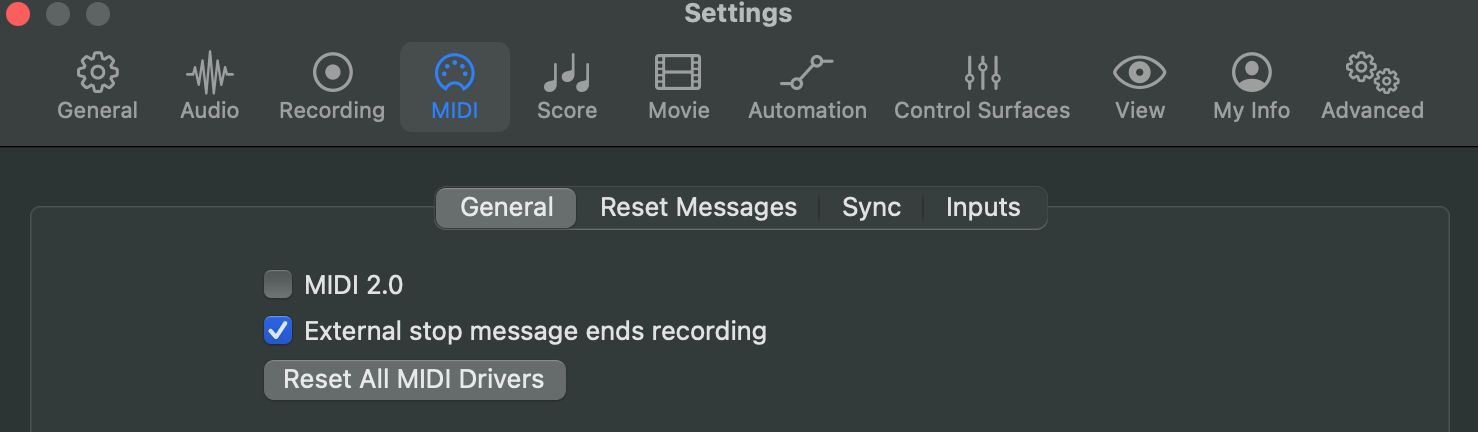
Then quit Logic Pro.
![]()
Configuring the MPMIDI App
The Logic pro control surface is part of the MP MIDI app.
Note that you should only use the standalone MP MIDI app from /Applications for the control surface,
not the MP MIDI AU plugin.
Open the MP MIDI app from the Applications folder.
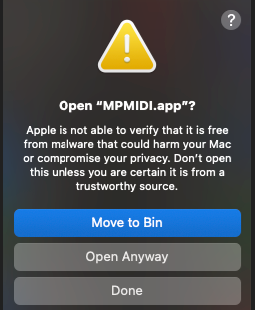
You may get a warning
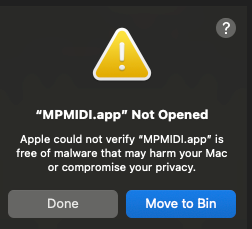
Click Done.

run the MP MIDI app again. If you get this message, click Open Anyway.
It will ask:
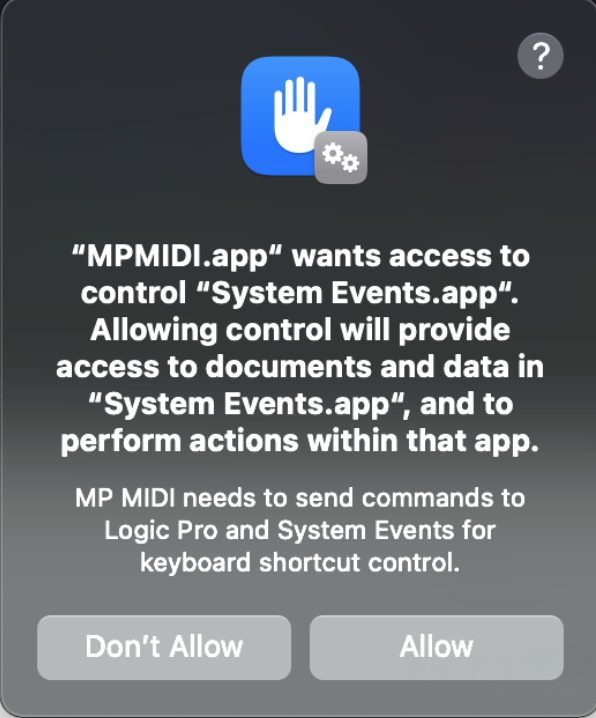
Click Allow.
Once the MP MIDI app is open it will display an icon on Mac's top bar.
Clicking on the Mac's top bar MPMIDI icon will open or close the main window
![]()
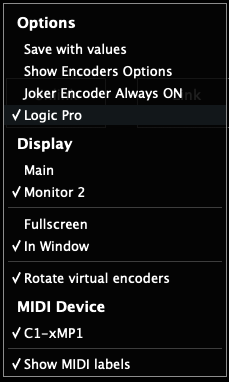
Right click on the empty black area between the top encoders and you will see the right click menu.

Select the target monitor of the MP Controller and it will be moved automatically to the MP controller's display.
If you have multiple monitors, the MP Controller is typically the last monitor in the list.

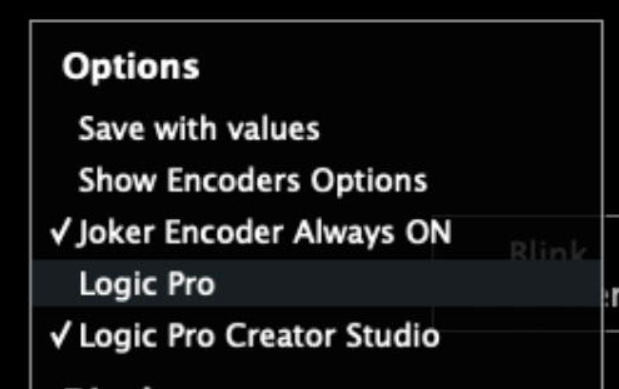
Right click on the empty area and click on Logic Pro from the Options so that a checkmark appears.
If you are using the latest version of the Logic CS, it also shows the Logic Pro Creator Studio option:
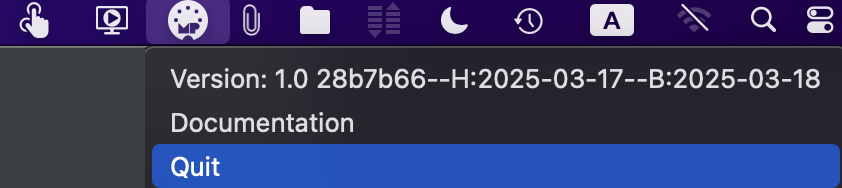
Now quit the MP MIDI app.
To quit it, right click on the top bar icon and select quit.
A pop up window will be displayed on top of the MP MIDI app and click OK.

![]()
Install the Presets and Control Surface script for Logic Pro
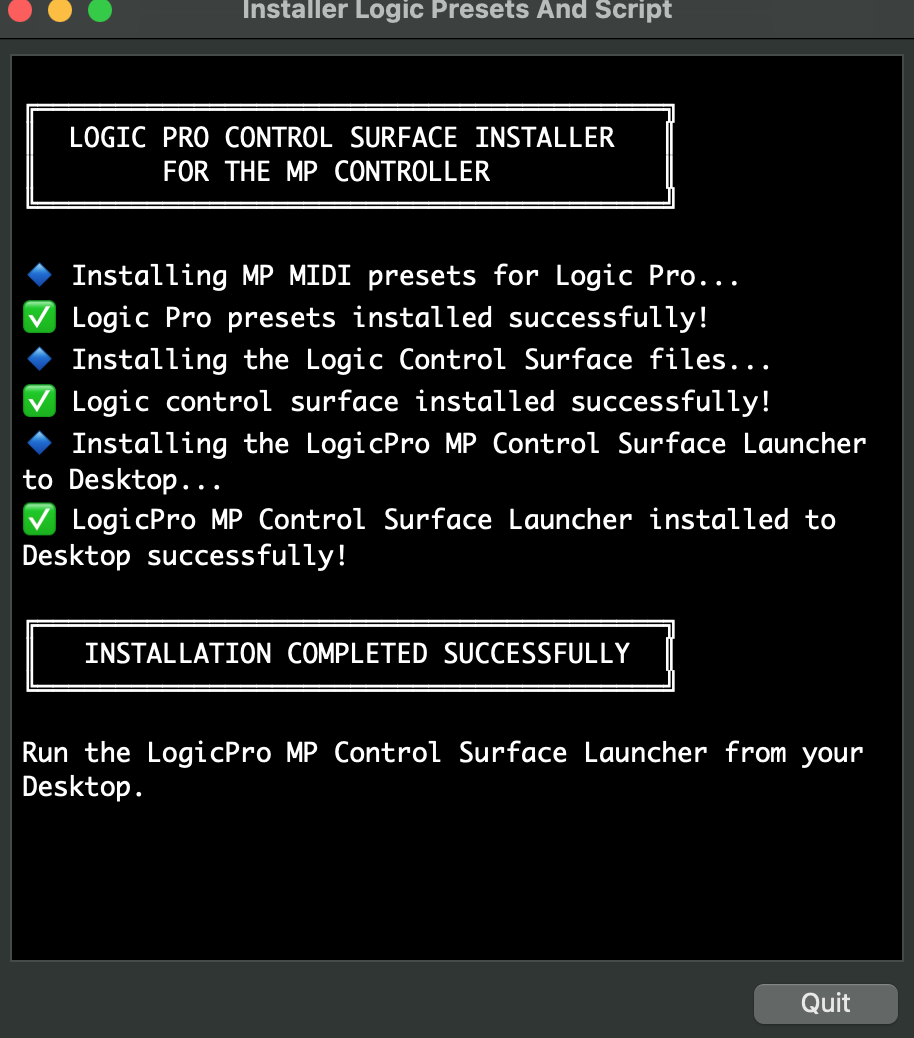
Open the "Logic CS Installer for the MP Controller".
You will get the following message:
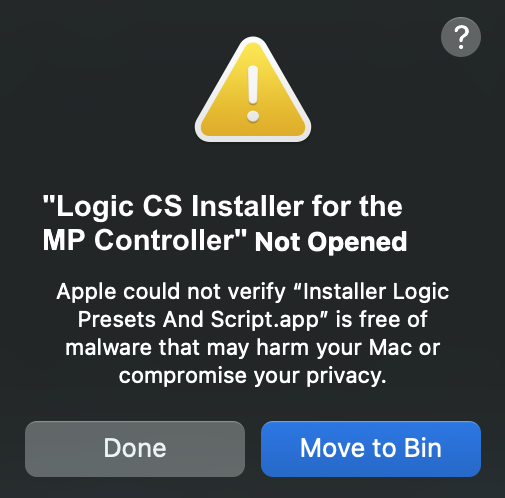
Click Done
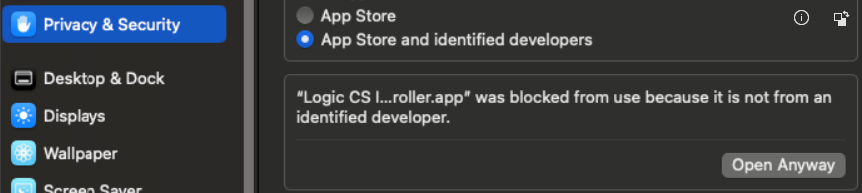
Go to System Settings > Privacy and Security and choose Open Anyway
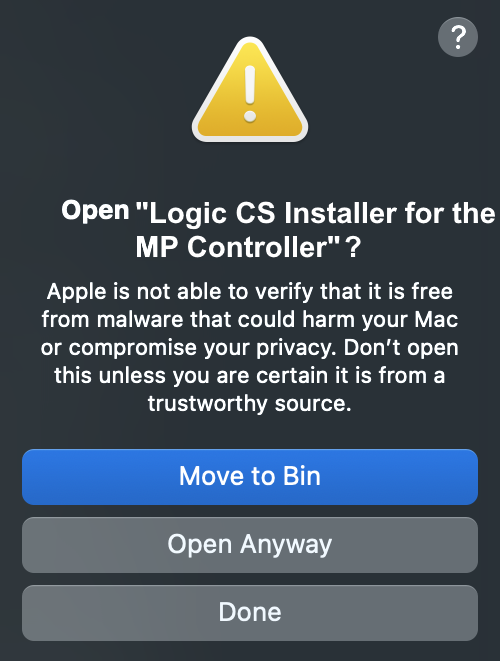
Then open the Logic CS Installer app and choose Open Anyway again
Enter your password and click OK
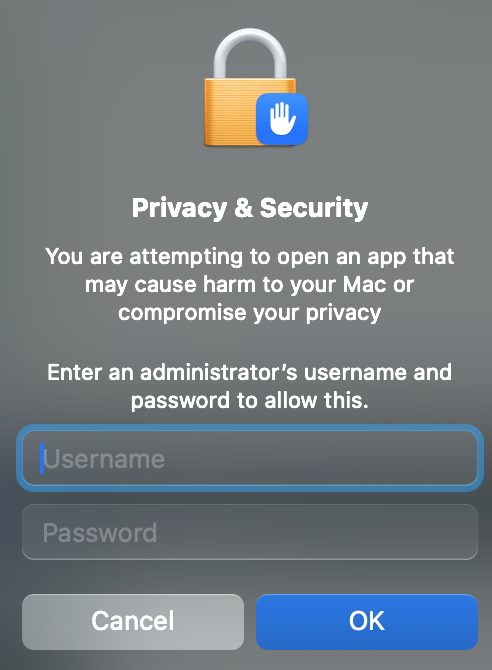
It will ask for the password one more time in order to run the installer.
You will see the following message and click Quit
Open Logic and it will prompt you with this popup window:
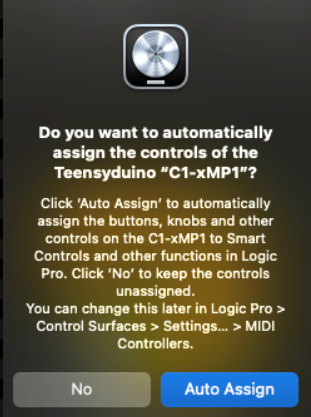
Choose Auto Assign
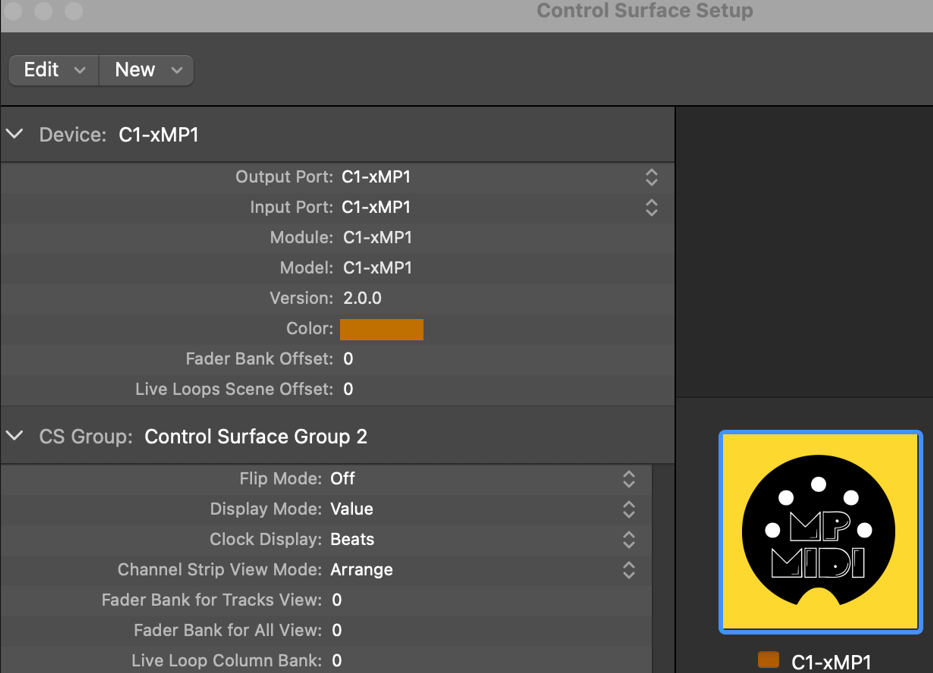
You will then see Logic's control surface setup page and you can close it.
It should look like the image below and no configuration is needed.
Close the window.
Quit Logic.
![]()
Running it for the first time
Run the MP Control Surface Launcher app from your Desktop
![]()
The Launcher will open the MP MIDI app and then Logic Pro.
If the Launcher does not open Logic and the MP MIDI app, go to System Preferences/Settings > Privacy & Security > Full Disk Access, then add Terminal.app to the list of allowed applications. Try running the following command in the terminal:
open -a "Logic Pro"
it should open Logic. This is the same command that the Launcher app is using to open Logic.
If you don't want to use the Launcher, the MP MIDI standalone app needs to be used for the Logic Pro Control Surface, not the MP MIDI plugin.
The MP MIDI app should always be started before Logic Pro, otherwise it will not work.
Alternatively, if you open Logic first and then the MP MIDI app, select Rebuild Defaults from the control surfaces in Logic and it will work normally. If you have other control surfaces, when rebuilding the defaults will reset other control surfaces as well.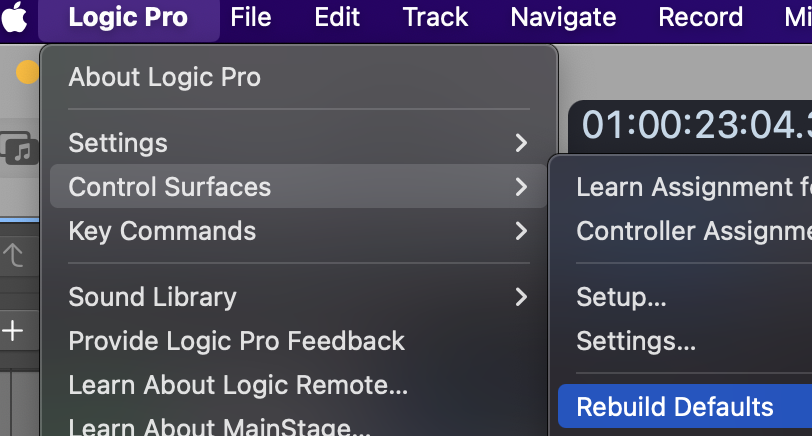
The MPMDI app has also an AU plugin version, but you should not use it in the Logic Pro because the control surface script cannot communicate with Logic when it runs as an AU plugin.
You should use the standalone MPMIDI.app. The launcher on the desktop will open the MPMIDI standalone automatically.
Setting the permissions needed for the MP MIDI app to send keyboard keys to Logic

Press the Play button.

It will pop up a message about the permissions needed. Click allow or Open System Settings.
In System Settings, Privacy & Security > Accessibility and give the permission to MP MIDI by enabling it as shown:

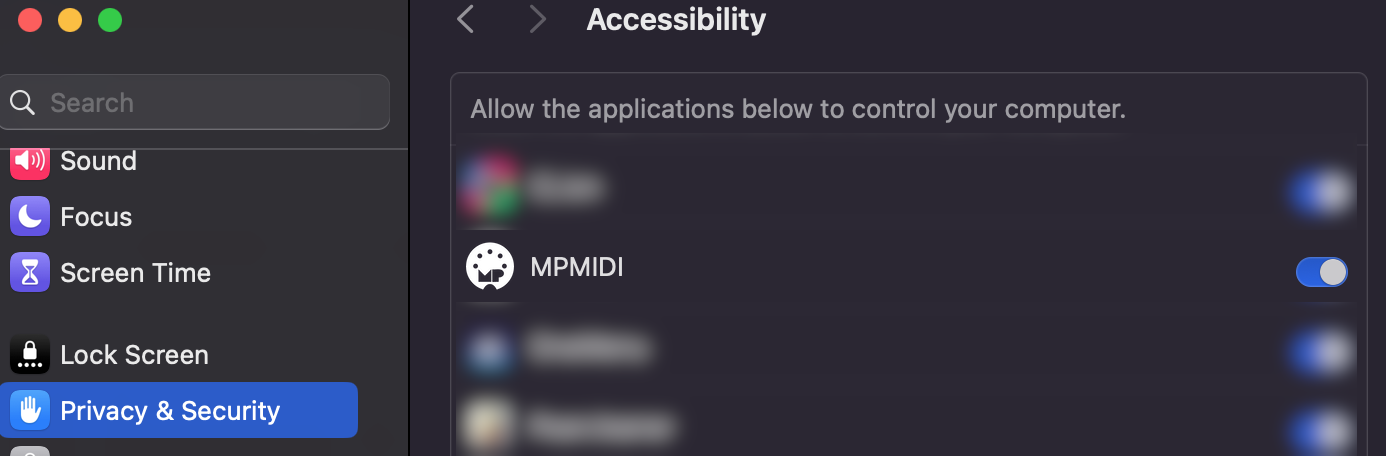
It should now send keys when using the buttons in the Button's Page.
![]()
Views of the Logic Pro control surface
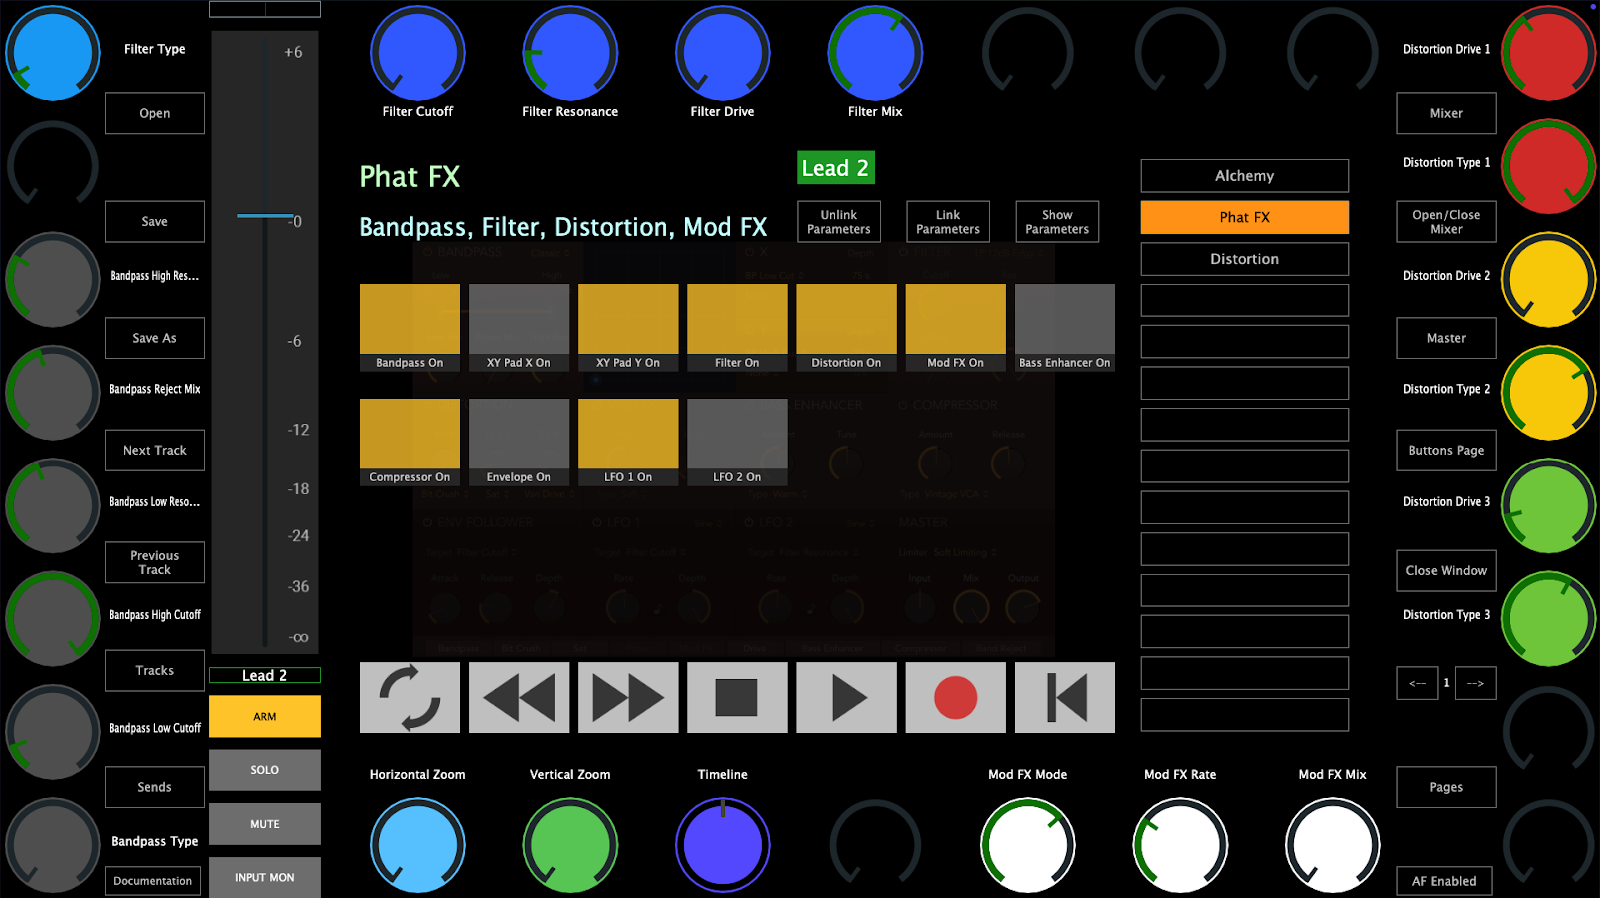
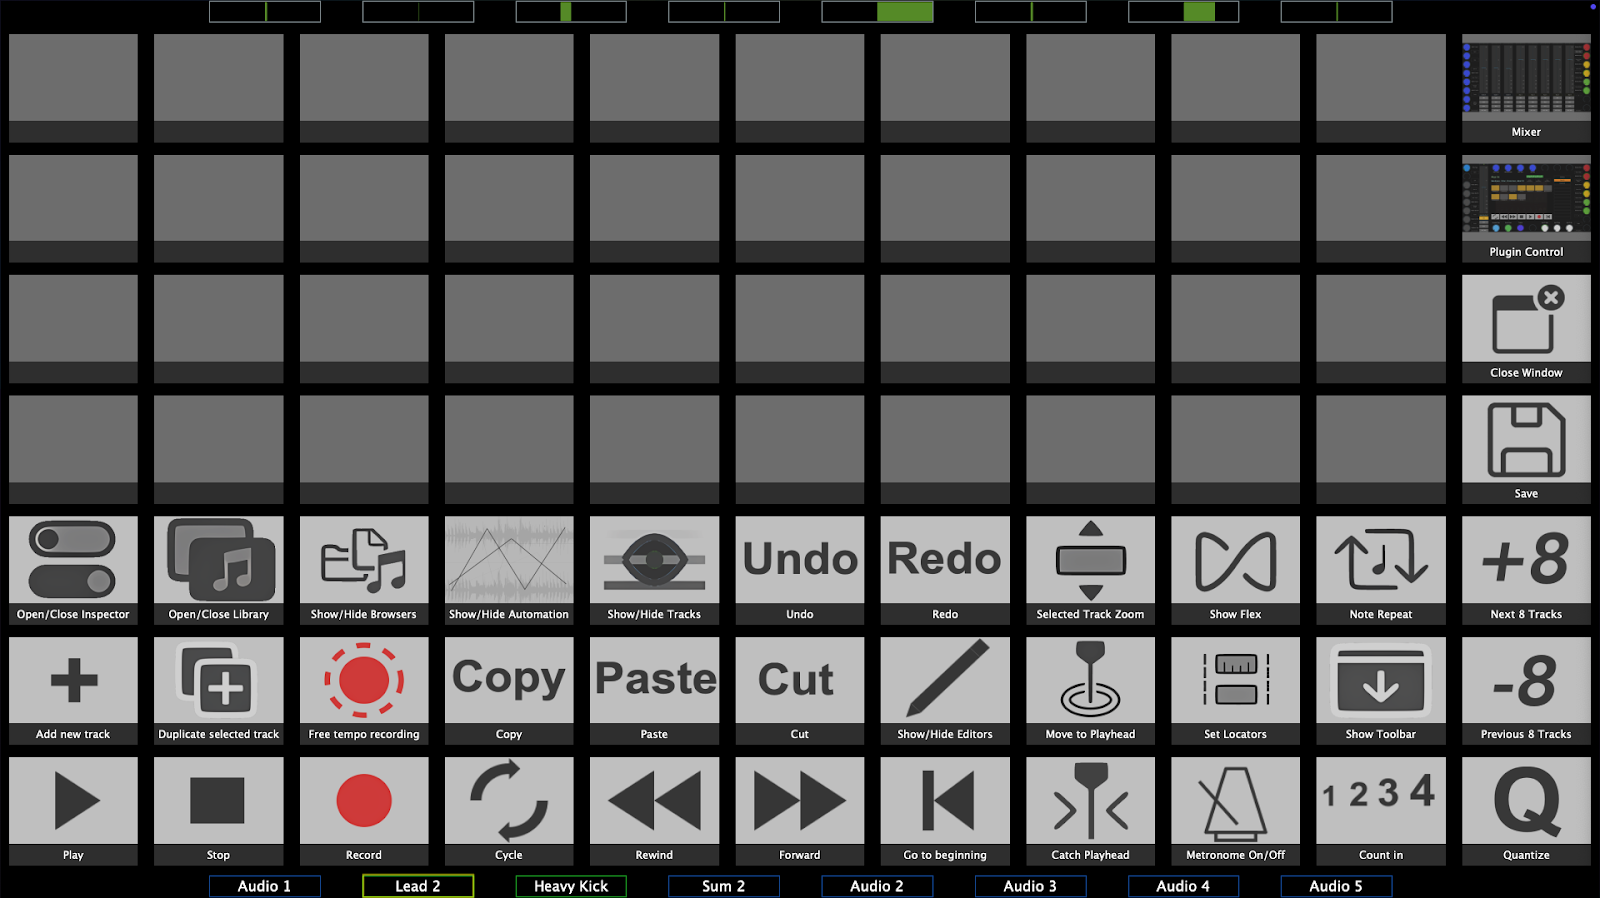
1. The Default view (plugin control)
This is the default view that will be displayed when opening the app. This view shows a virtual fader of the currently selected track in Logic Pro along with a pan control where the encoder on top of the fader can control the pan and the encoder below the fader can control the volume.
The rest of the encoders control the selected plugin of the slot that is selected on the right side of the page, except encoders 29,30 and 31 where these control the horizontal zoom level, vertical zoom level and traverse the timeline in Logic Pro.
At the center, there are buttons which are hidden by default and can be accessed by right clicking on the area of the hidden button.
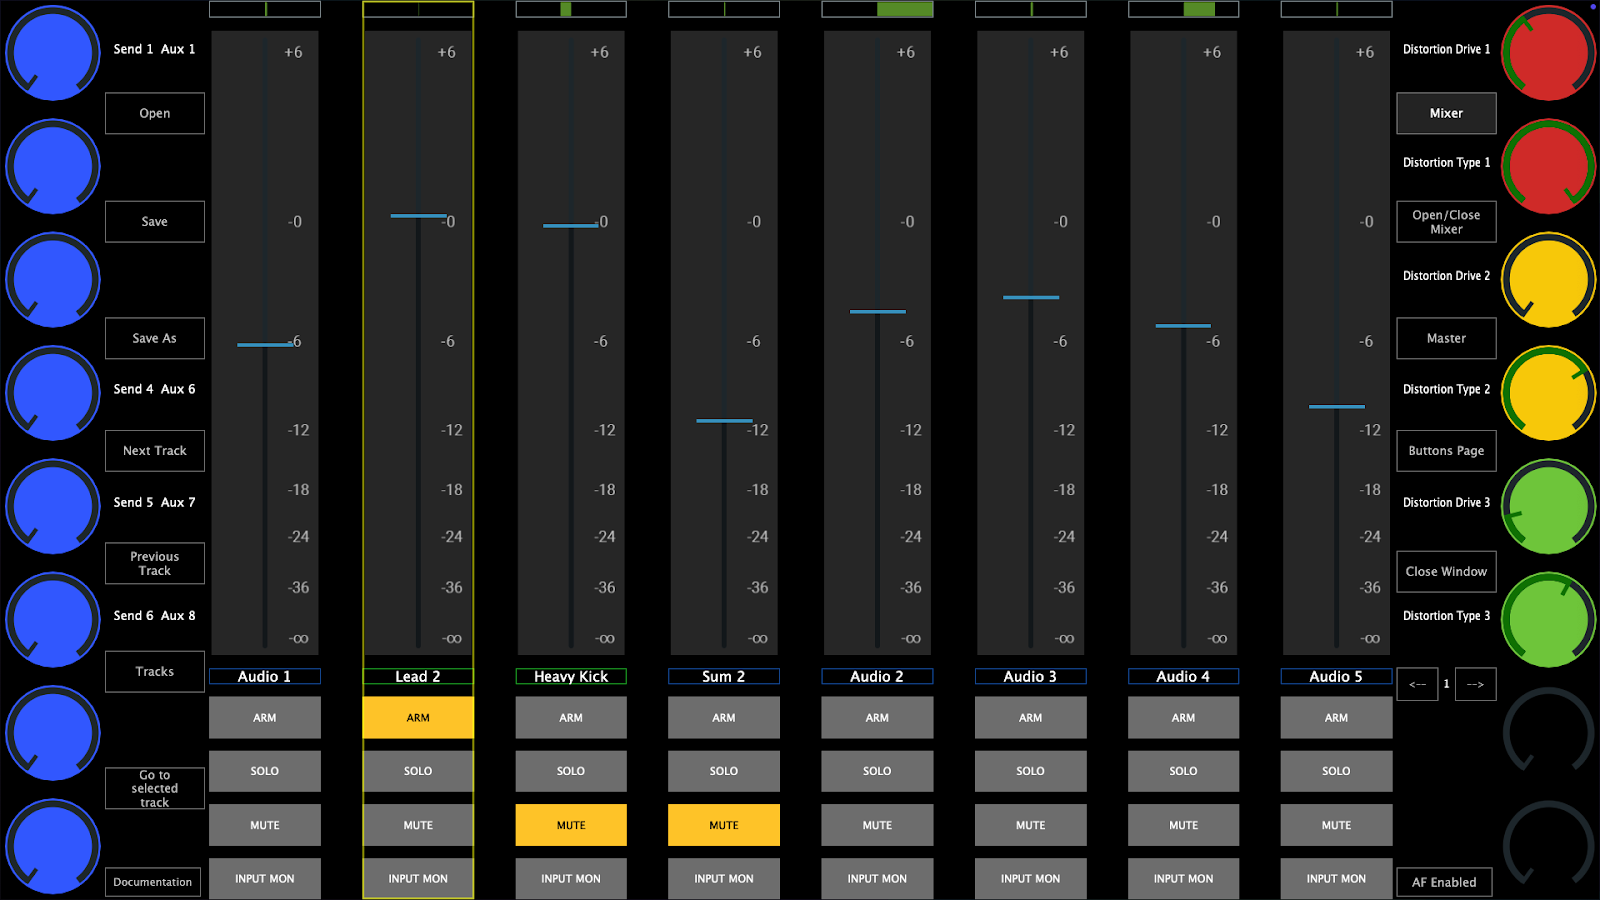
2. The Mixer view
This view shows the mixer controls of 8 tracks per page. It is easy to navigate to other tracks using the "TRACKS" button or the arrow buttons where they will display the next/previous 8 tracks.
This is dedicated view to assignable buttons so that you can make your own control surface of your favorite Logic Pro shortcuts.
MacOS is quite strict about allowing to send keyboard keys to other applications. See the section below to set the permissions needed so that the MP MIDI app can send keyboard keys to Logic.
![]()
Track and Device/Plugin Selection (opening plugin windows)
The control surface follows Logic in the track selection process.
When you select a track on Logic you will see the same track selected on the MP Controller.
You can also select a track from the controller using the Tracks button from the plugin control page and the mixer page.
However, the controller surface will not select a track when you open a plugin from Logic. For example, if you are on Track 1 and you open from Logic a plugin on Track 2, the control surface will remain on Track 1.
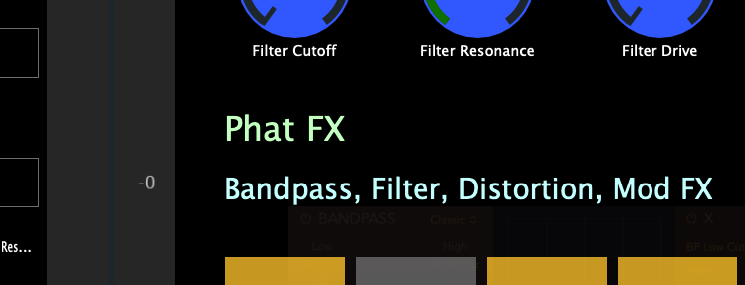
The app displays the plugin slots of the selected track and the device name in each slot. Click/touch a slot to open a device.
Devices/plugins that are opened in Logic using the mouse, will not be opened on the MP MIDI app as well. A device/plugin must be opened from the MP MIDI app so it can be controlled from the MP controller.
Automatic plugin window open
The Logic Control Surface opens plugins when a track is selected based on the following rules
1. Switching from an audio track to another audio track will open the same plugin position. If you have plugin #2 open on the current track and switch a track, it will open plugin #2 on the newly selected track.
2. Switching from an audio track to an instrument track will open the instrument plugin.
4. Switching from an audio track to another audio track that does not have plugins or does not have a plugin in the same position as the previous track, will open a small empty plugin window.
5. If you select a higher-numbered plugin slot (e.g., the second plugin) and then navigate to a track with fewer plugins, the system will automatically open the first plugin. Example: If you have plugin slot #2 selected on one track, then switch to a track with only one plugin, that plugin will automatically open.
Preventing plugin windows from opening automatically when switching tracks
Select the first plugin on an audio track and close its window. You can navigate to any other audio track and it will not open any plugin windows.
If you navigate to an instrument track, it will open the instrument plugin window.
If you then navigate to an audio track from an instrument track it will open the first plugin window.
If you close that first plugin window, it will not open the first plugin again when you navigate to another audio track.
You can adjust the bank size of the tracks which affects the speed that Logic loads plugins. The default bank size is 64 which works well with most computers and projects. See at the bottom of the page on how to adjust the bank size.
![]()
Presets
There are 2 types of presets in the MP MIDI app for the Logic Pro control surface.
1. Logic native device and third party plugin presets.
These are the xml presets saved in ~/Library/Application Support/MP/Host/MP MIDI Presets/LogicPro/ folder (this is the default presets folder) and when a device/plugin is selected from the controller will automatically load the preset that matches the name of the device.
For example, if you select Logic's Alchemy instrument, it will automatically load
~/Library/Application Support/MP/Host/MP MIDI Presets/LogicPro/Alchemy.xml
The same applies to third party plugins.
You can create xml presets for third party plugins and these will be loaded automatically if the name of the plugin matches the name of the preset.xml.
For instance, if you load plugin UADx LA-2A

Save As, the preset as UADx LA-2A in the LogicProUserPresets folder, then it will be loaded automatically when you press the slot button on the controller.
See a short video the automatic preset loading of Logic's native devices and third party plugins.
Logic's Audio devices and Instruments have been mapped by our team and are installed when running the installer. You can edit and save these presets in the ~/Library/Application Support/MP/Host/MP MIDI Presets/LogicProUserPresets folder using the Save As button.
Do not save them in the default ~/Library/Application Support/MP/Host/MP MIDI Presets/LogicPro folder because when you install an update, these will be overwritten.
When you run the installer of the Control Surface it will make a zip file backup of the MP MIDI Presets/LogicPro folder here ~/Library/Application Support/MP/Host/MP MIDI Presets/ and then overwrite LogicPro folder.
You can create your own presets and the app will ask you to Save As in the folder
~/Library/Application Support/MP/Host/MP MIDI Presets/LogicProUserPresets
The installer creates a backup of only the MP MIDI Presets/LogicPro folder just in case you saved your own presets in the default LogicPro folder.
This is just one file that holds the data of the buttons view. This is the reference to keys, images and names of buttons.
Do not overwrite the default.xml preset in the /MP MIDI Presets/LogicPro folder.
If you have saved another preset as default.xml preset, delete it in Finder and reopen the MP MIDI app to automatically recreate the default.xml
![]()
Automap
The automap function is controlled by the Automap button. This option is global.
When enabled and it will map automatically and instantly all the available parameters of plugins or native devices as long a preset does not exist. If a preset for a plugin or device exists, it will load the preset.
![]()
Preset files and folders
located at Users/USERNAME/Library/Application Support/MP/Host/
If you save a Logic device preset in the LogicProUserPresets folder then it will be loaded automatically when that device is selected, instead of the default preset. The LogicProUserPresets has priority over the default preset folder.
If you want to replace the default presets, do a Save As on the preset and it will ask you to save it in the LogicProUserPresets folder.
Background images should be placed in the LogicProUserPresets and button images assigned to a preset buttons you created will be copied in LogicProUserPresets when selected.
|
Folder Path |
Type |
Description |
|
/MP MIDI Presets/LogicPro |
Default |
Device/Plugin xml presets |
|
/MP MIDI Presets/LogicPro/devices_images |
Default |
Device/Plugin preset background image files |
|
/MP MIDI Presets/LogicPro/Button Images |
Default |
Device/Plugin preset button image files |
|
/MP MIDI Presets/LogicPro/buttons.xml |
Default |
Buttons page default preset |
|
/MP MIDI Presets/LogicProUserPresets/ |
User |
Device/Plugin xml presets |
|
/MP MIDI Presets/LogicProUserPresets/devices_images |
User |
Device/Plugin preset background image files |
|
/MP MIDI Presets/LogicProUserPresets/Button Images* |
User |
Device/Plugin preset button image files |
|
/MP MIDI Presets/LogicProUserPresets/buttons.xml |
User |
Buttons page user preset |
*The user presets Button Images folder will be created when you select an image for a button in a preset and it will automatically copy the image in the folder.
The default installer presets location is
/Users/USERNAME/Library/Application Support/MP/Host/MP MIDI Presets/LogicPro
or another way to express this path is
~/Library/Application Support/MP/Host/MP MIDI Presets/LogicPro
The default user presets is
~/Library/Application Support/MP/Host/MP MIDI Presets/LogicProUserPresets
What is the difference between the /Library and ~/Library folders on a Mac?
![]()
Buttons in the Plugin control view and Mixer view
Open, Save and Save As buttons will open and save presets for Logic's pro devices and third party plugins.
The default Open and Save As buttons location is
/Users/USERNAME/Library/Application Support/MP/Host/MP MIDI Presets/LogicPro
Next/Previous Track buttons: will select the next/previous track in Logic
Tracks: Opens a list of existing project tracks and a track can be selected. This depends on the bank size which by default is set to 64. This means that it will display the 64 tracks maximum at a time. If your project has 100 tracks and you select track 1, you will see the first 64 tracks. If you select track 50, it will display track 50 to 100. See more information on Bank Size below.
The bank size also affects the mixer track selection.
Sends: Syncs and displays the left column of encoders to the first 8 send volume parameters of the selected track (beginning from the top encoder)
Mixer: Open the mixer page on the MP Controller
Open/Close Mixer: Opens/Closes the Mixer in Logic Pro
Stereo Out: This is a special assignable button. By default when pressed it selects the Stereo Out track. However, it can be assigned to open any track. Left click on the button and will allow you to type in the name of the target track. The name must be typed in exactly as is and it is case sensitive.
This is a global option and it is auto saved in the mpmidi.properties file so it will be used every time you open Logic and the MP Controler Surface.
Close Window: Closes the controller window and to open it again it must be done from the top bar icon.
Pages: It displays the buttons of the 32 available pages per preset. To edit the page title (under the preset name), double click in the area under the preset name and the editor text box will appear.
AF Enabled: This button is enabled by default and it passes the keyboard focus to Logic after you click on the MP MIDI app. This is done to ensure that your keyboard stays focused on Logic. If disabled will stop passing the keyboard focus to Logic after a click action is completed on the MP MIDI app.
Unlink Parameters: It unlinks a linked parameter
Link Parameters: It links a parameter to the selected encoder. If another parameter is clicked on a device, it will link the next encoder.
Show Parameters: It shows the parameters of the selected device
![]()
Controlling and Linking Parameters
The MP MIDI app must be open to control any parameters.
There 28 available encoders per page to control device parameters and 21 buttons per page to control device parameters.
The MP MIDI app can control up to 256 parameters of a device/plugin.
Opening a device from the MP MIDI app will display the window of the device. You will notice that the link icon is highlighted in purple. This means that upon selection of any other device the window of this device will close and the newly selected device will open its window. You can click to disable this option.

However, opening the device from the MP MIDI app will enable the link option automatically. This auto-enable of the link option cannot be disabled and as it is automatically set by Logic when using a control surface.
You can open a device window from a device slot on the MP MIDI app but the device window cannot be closed from the MP MIDI app.
Linking Parameters
You can link the parameters of a Logic device or third party AU plugin and create a preset with the device name so that it is loaded automatically every time that device is opened in Logic.
These presets should be saved in the /MP MIDI Presets/LogicProUserPresets/ folder.
See this presentation that explains in detail how to link parameters of a device or plugin and create a preset.
![]()
Logic Native Devices Missing Parameters
Logic Pro’s built-in plugins do not normally expose all of their internal parameters to external control surfaces (MIDI controllers, Mackie Control, Logic Remote, etc.). These .plist files tell Logic which parameters of each plugin should be made available to the control surface system. See here for more information.
![]()
Buttons View - Keyboard Keys Assignments
In this view there are pre assigned buttons to control Logic, however you can edit these buttons and create your own preset.
There 40 unassigned buttons which can be assigned to send any keyboard command to Logic.
The right column of buttons cannot be edited.
The encoders in this page have the same function as when in the Mixer page.
The right column of encoders control the send volumes of the selected track.
The top encoders control the pan of the 8 tracks that appear on the Mixer.
The bottom encoders control the volume of the 8 tracks that appear on the Mixer.
The right column of encoders will control the selected device parameters which are linked to these encoders.
Left click on a button for the options menu to appear on the top side of the app.
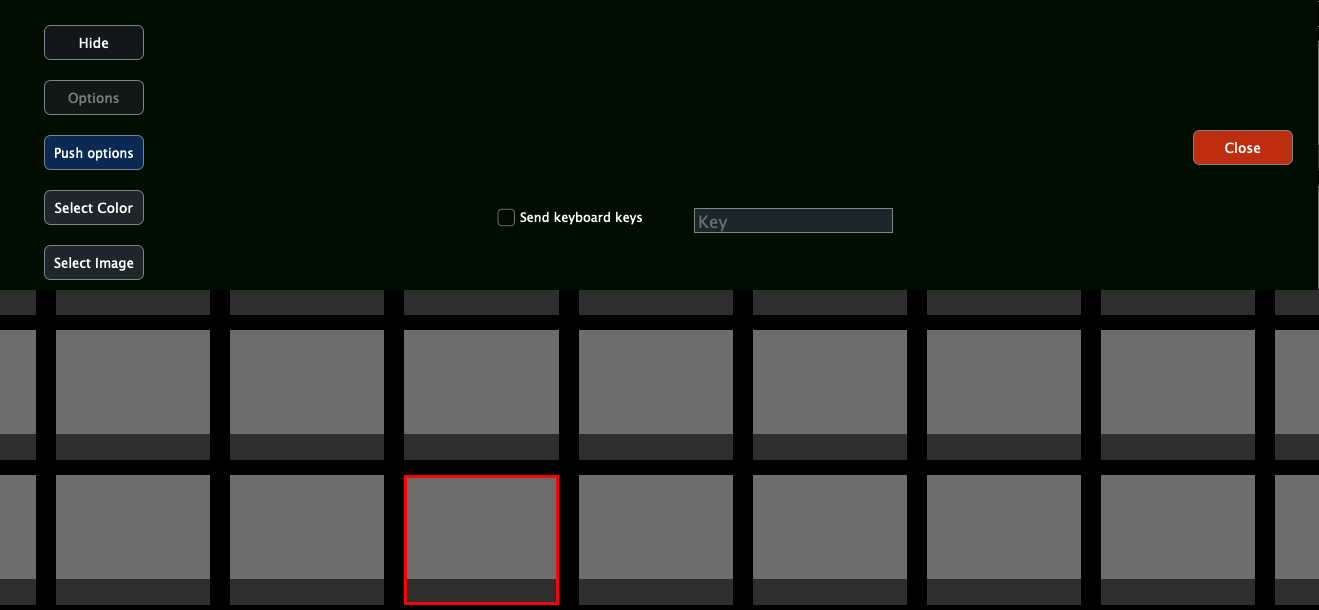
By checking the Send Keyboard keys will enable the function of that button to send a key to Logic Pro (given you have performed the permission's settings described above).
Click on the Key window and press a key on your keyboard. It will be recorded and you can close the menu.
Every time you click/touch that button will send that key to Logic.
Optionally you change the color of the pressed/unpressed state of the button and assign an image to the button.
Image files should be png files with dimensions 278 x 196 px or bigger size files with the same px ratio.
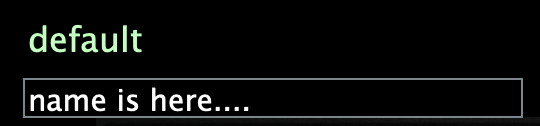
Double left click on a button to set a name to the button:
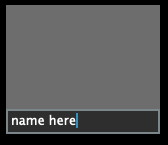
After you edit any button you should click on the Save button to save the buttons.xml in
/MP MIDI Presets/LogicProUserPresets/buttons.xml
The first time you will get a message that from now on the app will load the user buttons.xml instead of the default one.
![]()
Mixer View
In this page the 8 tracks control the mixer of Logic.
The volume can be controlled by the encoder or the touch screen using the on screen fader.
The fader can be controlled using the mouse and/or mouse wheel.
The right column of encoders control the send volumes of the selected track.
The top encoders control the pan of the 8 tracks that appear on the Mixer.
The bottom encoders control the volume of the 8 tracks that appear on the Mixer.
The right column of encoders will control the selected device parameters which are linked to these encoders.
Pressing Mute on a track will also select that track.
The mixer controls 64 tracks per bank. If you have more than 64 tracks in a project, when selecting track 65 the mixer will control the next 64 tracks and so on.
Note that the mute of the Aux tracks cannot be controlled from the MP MIDI app.
![]()
Follow Logic button
When disabled you can select any track on Logic and the mixer will stay on the selected view. This is useful when you want to select other tracks in Logic but you want the view to stay in that view. For example, viewing the Master track and tracks before that, while you navigate other tracks.
This button affects only the Mixer view.
![]()
Troubleshooting
Control Surface does not synchronize with Logic
If you don't see the popup window from Logic Pro when you run Logic Pro for the first time after the CS installation, asking to Auto assign the C1-xMP1, then check this folder and ensure you have the following folder and files:
/Library/Audio/MIDI Device Scripts
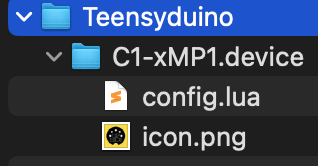
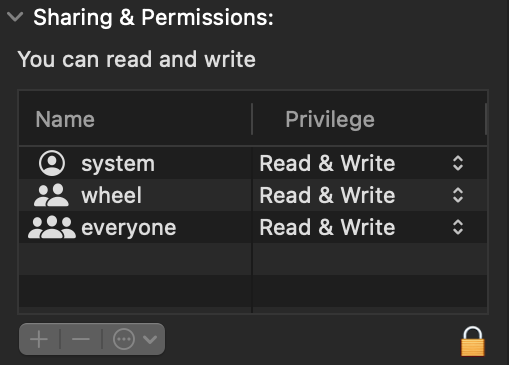
If you see the files, right click on the Teenseyduino folder and choose "Get Info"
Ensure you see these permissions at the bottom:
When Logic and the MP MIDI app are running, go to MIDI settings and ensure the both the MP MIDI and C1-xMP1 ports are checked as shown below.
The launcher does not open Logic Pro
The laucher issues 2 simple commands to MacOS to open the MP MIDI app first and then Logic Pro.
The command that is issued to open Logic is:
open -a "Logic Pro"You can try this command in a terminal to see if it works on your computer by pasting it in a terminal and press enter. It should open Logic.
If it opens Logic, it means that the Launcher does not have the proper permissions to run.
Try in a terminal the command:
sudo chmod -R 777 ~/Desktop/LogicPro\ MP\ Control\ Surface\ Launcher.app/
and press enter. It should ask for your password. Enter it and press enter. It should not produce any output. Try the Launcher again.
If the command open -a "Logic Pro" did not open Logic, it means that MacOS cannot find Logic on your system because it is not properly registered.
You can try to do a clean install again and see if the command opens it.
A great fee app for uninstalling software from the Mac is Perlceaner
Alternatively you can edit the launcher script to point it to open Logic from the actual location it is placed.
Right click on the launcher. Click Show Package Contents and navigate to Resources.
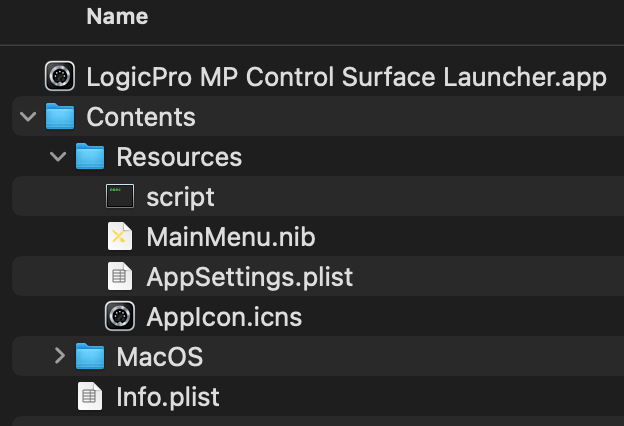
Open the file "script" by dragging it on a text editor like Sublime.
#!/bin/bash

# Script to open MPMIDI.app followed by Logic Pro
# Created on March 15, 2025

echo "Starting MPMIDI.app..."
open /Applications/MPMIDI.app

echo "Starting Logic Pro..."
open -a "Logic Pro"

echo "Both applications have been launched."
You can commend out the line 10 by placing a # at the beginning.
so it will be #open -a "Logic Pro"
Try placing your own open command like:
open /Applications/Logic\ Pro.app
You can try your command in the terminal to see if it opens Logic.
Save the script file and try the launcher again.
Checking the permissions needed for the MPMIDI app to send keyboard keys to Logic
Check that it was added in the Automation section
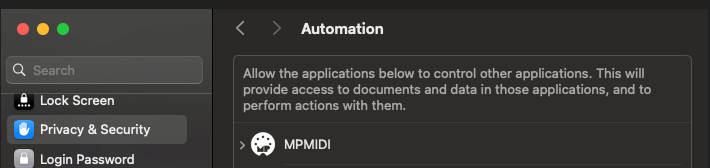
In System Settings, Privacy & Security > Accessibility and give the permission to MP MIDI by enabling it as shown

How to reset the MP MIDI app Privacy permissions on Mac OS. See here
![]()
Setting the Track Bank Size
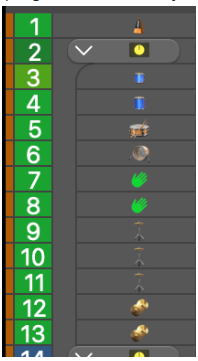
The bank size is the number of tracks that Logic syncs with a control surface. It starts on the selected track and it shows a colored like at the bottom of the track. For example Orange:

Selecting a track 10 for example it will display the colored line up to track 74, which means it syncs with the control surface from track 10 to 74.
The bank size is directly related to how fast Logic reacts (shows plugins when changing tracks etc).
The bigger the bank size, the slower Logic gets (depending how big your project is, how many devices it has etc)
This is something that is completely governed by Logic and there is no way to change it.
The bank size we have set by default is 64, which is fairly big.
It will work when using lower or higher numbers but using a large bank size number like 256 will probably make Logic a bit slower to display plugins when switching tracks, depending how many plugins and devices the project has.
We found out that 64 is a good number to have and there is no lag on recent Mac Apple Silicon models.
Using a bank size of 64, will display 64 tracks in the Track List of the MP MIDI app. The tracks listed depend on which track you have selected.
If your project has 100 tracks, and you have track 1 selected, then the bank has tracks from 1 to 64.
If you have selected track 10, you will see tracks 10 to 74 and so on.
Logic automatically switches banks when you select a track from the main Logic window or the mixer at the bottom of the tracks. Tracks have a small orange bar highlighted at the beginning showing the bar selection
If you find the project to be slowing down, you can change the bank size to a number that suits your project or workflow.
Chaning the bank size:
Close Logic and the MP MIDI app.
Go to folder

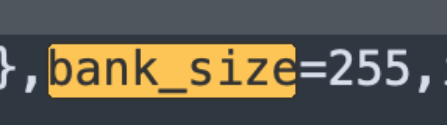
open config.lua in a text editor. It is a single line file.
Search for: bank_size=64
Change the value to something you want, 8, 16, 64, 128, 256 or a number that suits you.
Make sure you only change the number and nothing else.
Save it and close the text editor.
Run the Launcher to reopen Logic and the MPMIDI app.
![]()
If you are receiving conflicting MIDI CC messages in instruments or audio effects from C1-xMP1, for example when you move an encoder something else is being affected in Logic, like an instrument or the mixer or even another parameter in the plugin you are controlling with the MP Host, see here how to prevent this.