Controlling the Mixer in Ableton Live
In the update of June 2025 of Ableton MPH we introduced a new page to control the mixer of Ableton Live. Here is a short demo video.
If you haven't installed the AbletonMPH before, follow this guide to set it up.
Then install the beta version for:
Mac: To install the update on the Mac, run the Ableton MPH installer and then delete and replace the AbletonMPH folder in
HD/Users/[username]/Music/Ableton/User Library/Remote Scripts
Windows: To install the update on Windows, run the Ableton MPH installer and it will update the control surface script and the Ableton MPH plugin and standalone app.
As mentioned in the setup guide, it is better to run the Ableton MPH plugin instead of the standalone app because when you select any other application outside Ableton Live, it will hide plugin windows that are currently open. You just need to run one instance of the Ableton MPH plugin (AU or VST).
If you have a project with Ableton MPH loaded and you open another project with Ableton MPH loaded it will not be able to work. You need to close Ableton Live and open the project. When Ableton MPH is loaded it requires to quit Ableton in order to initialize the Ableton MPH control surface. The same applies if you remove the Ableton MPH plugin and load it again without quitting Ableton Live.
Mixer Control
Clicking on the Mixer button opens the Mixer page.
Each page carries 8 tracks. The mixer displays tracks in groups of 8 per page, counting from the first track in Ableton Live.
For example, if you select track 23, it will go and display page 3.

Each track has a Select button that selects the track and syncs its first 8 Return track volume levels on the left encoder column and the rest 4 Return track volume levels on the right encoder column, starting from 5th encoder of the column.
The side encoders will be populated with the name of the Return tracks when these are created in Ableton Live.
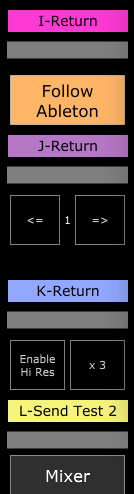
Return track names always start with a capital letter.
You can also select a track by just clicking anywhere once on the fader or the track name label.
If you click and drag the fader it will not select the track which is convenient because you can control the volume of a track with touch or the mouse without selecting it.
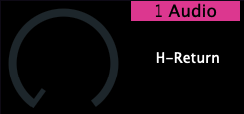
On the top left corner, the name and color of the selected track are displayed
Each track has a button to power On/Off the track, Solo and Arm for recording.
The Follow Ableton button is enabled by default and it follows the Ableton Live track selection. When you select a track in Ableton Live, it will also select and display that track. If disabled, the mixer will stay in the current page, even if tracks from other pages are selected. This is convenient when you want to keep controlling certain tracks while you navigate to other tracks in Ableton Live.
The volume of the tracks can be controlled via the physical encoders of the bottom row and the on-screen fader via touch and drag. You can touch anywhere on the fader and drag and it will not jump in value, however it is better to touch close to the current value so that you have more space to move up and down.
The pan of each track can be controlled via the top row of physical encoders.
The Enable Hi Res (High Resolution) button is a global option and it will work in the mixer page and in the devices page when enabled. This setting enables making surgical adjustments to the smallest interval step supported by Ableton Live's controlled parameter.
Please note that in the first release it is not possible to select Return and the Main tracks from the mixer, however when selected in Ableton, they will also be selected on the Ableton MPH mixer.
Virtual Encoder Views
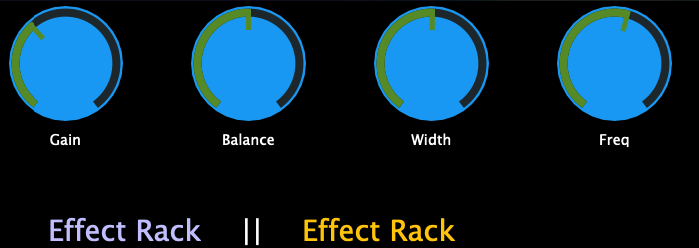
There is now an option to view the encoders as horizontal indicators. This is a global option and you can activate it via the right click menu by unchecking Show encoders.

The label and indicator will show as:
![]()
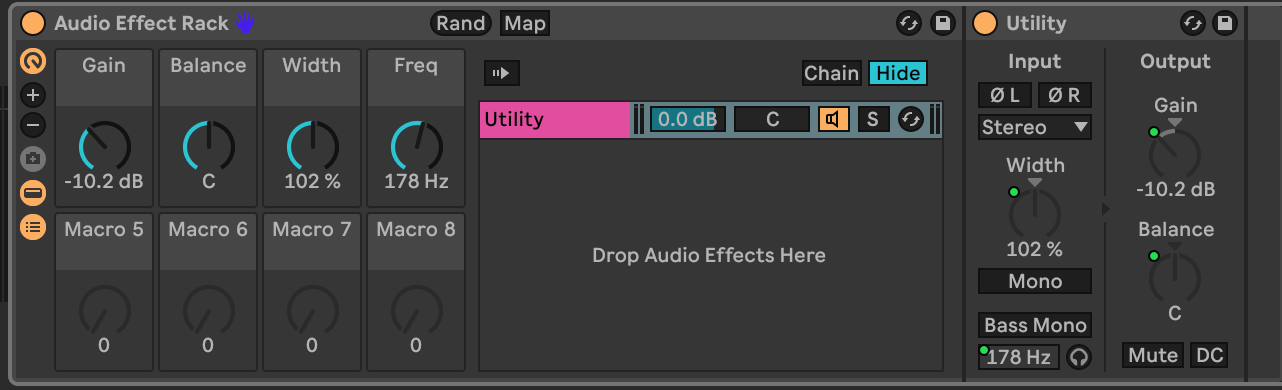
Rack Macro custom names
In this update, you also have the ability to load different Ableton Live presets for Instrument and Audio effect racks based on the device type. This means when you rename your Racks in Ableton Live and save them as Ableton Live presets, upon loading these, the Ableton MPH will sync the Macro custom names. If you just rename your Macros in a project, but not save them as presets, it will still sync and display the custom names.
Reusing the AbletonMPH plugin when opening other projects
Once you have loaded the AbletonMPH plugin it requires to restart Ableton Live for reusing it in other projects.
For example, you open Project A and it has the AbletonMPH plugin (VST3 or AU). Then you open Project B which has the Ableton MPH plugin (VST3 or AU). The AbletonMPH plugin in Project B will not work unless you restart Ableton Live.