19. MP Gain Utility - Version 2
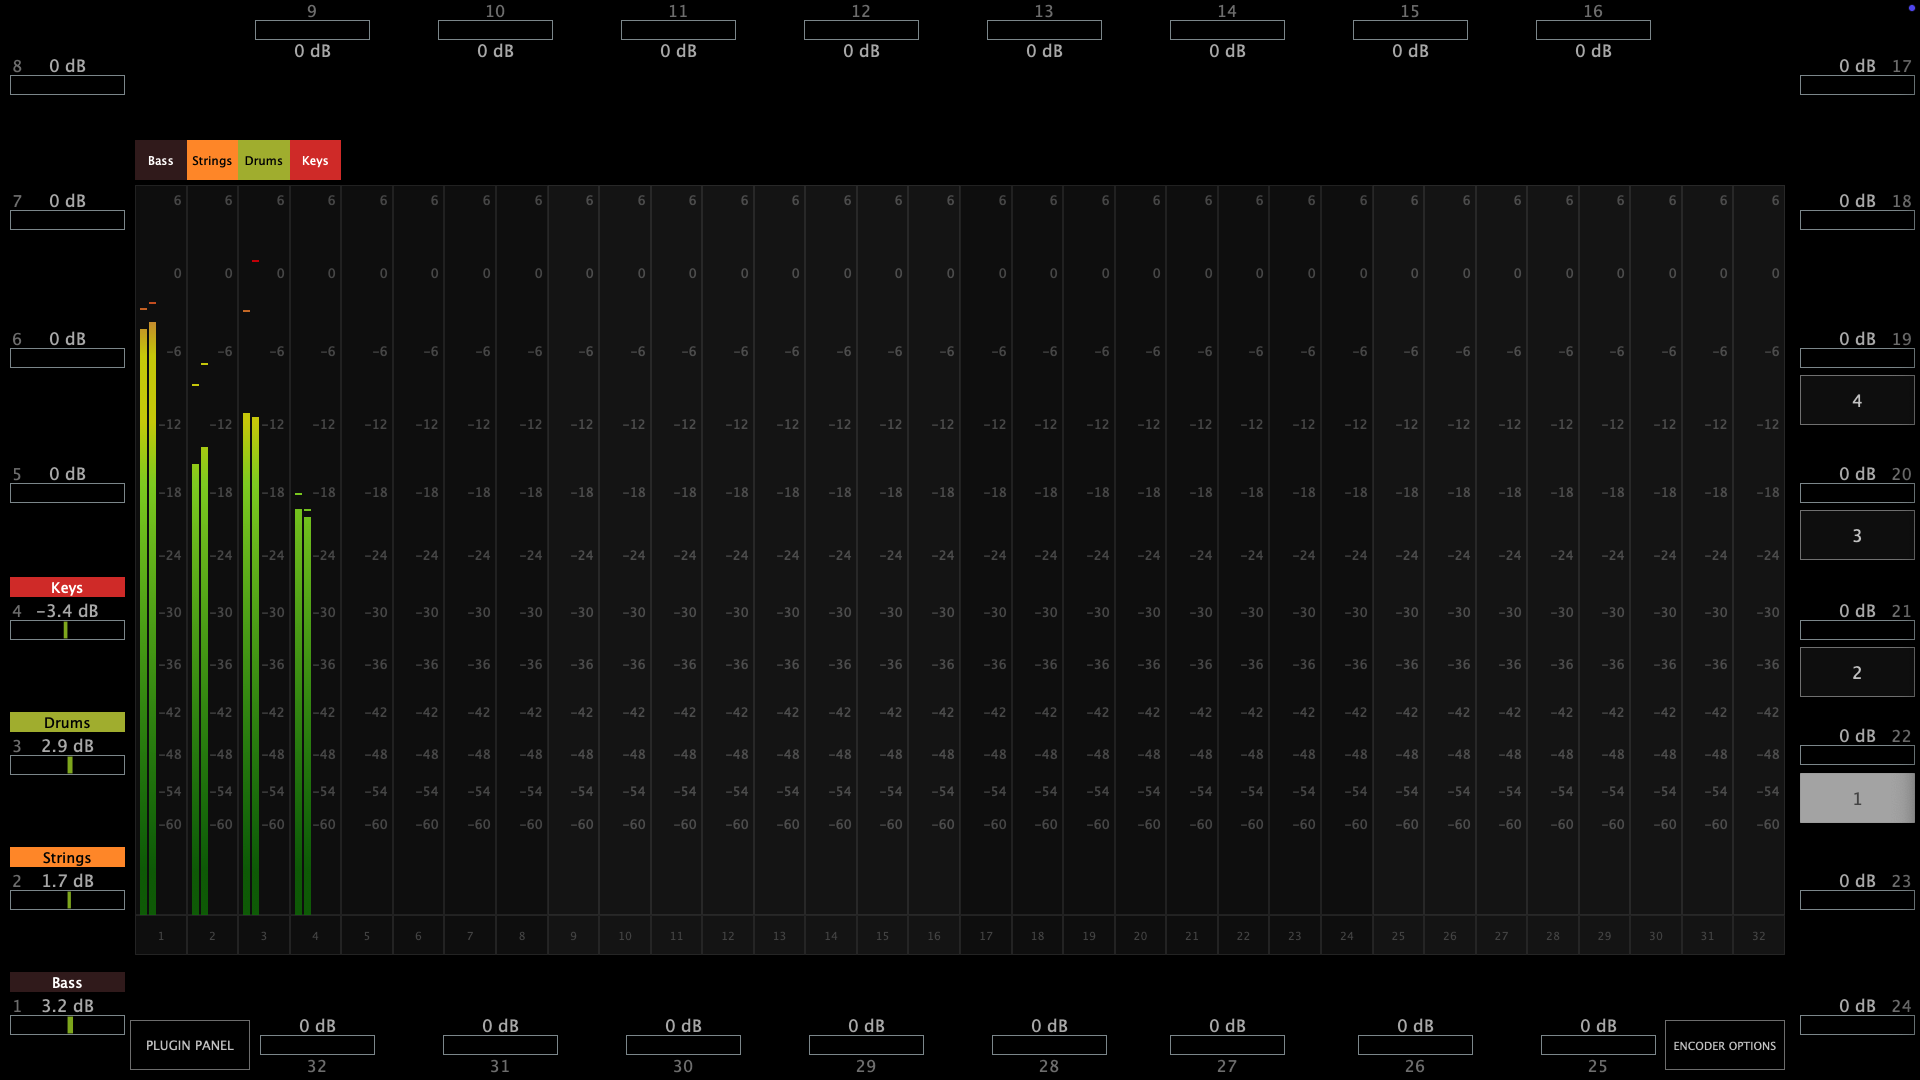
The MP Gain Utility plugin enables you to control the +/- gain on your tracks from the MP Controller. With the MPGU plugin you can control up to 128 gain utility plugins. You can use it for mixing and gain staging. It works on all DAWs and does not require any configuration.
See the short promo video
Here is a short tutorial video
Current version: v2.0-689ea7e--H2025-09-10--B2025-09-10
Download
The MPGU can be downloaded from the user portal.
How it works
The MP Gain Utility consists of two plugins.
One server plugin (displayed on the mp controller) and one client plugin (displayed on your DAW).
Both are lightweight plugins and consume negligible amounts of cpu and ram resources.
The MP Gain Utility can be found in your DAW as vendor MPUT.
You only need to load one instance of the server plugin per DAW project. The server plugin can be placed on any track in your DAW however there must be only one instance loaded.
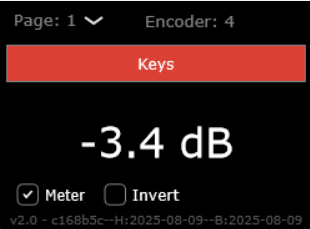
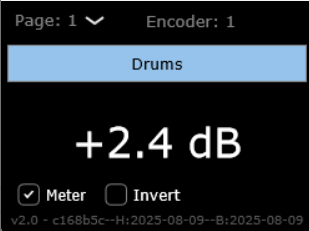
The client plugin can be placed on any track and it will act as a gain plugin controlled by the corresponding encoder shown on top. You can add up to 128 client plugins in the same DAW project.
You don't need to open the client plugin to control its gain from the mp controller.
Each client plugins maps automatically onto the next available encoder on the mp controller.
Turning an encoder to the left will reduce gain in increments of 0.1 dB, turning an encoder to the right will add gain.
The values are displayed in dBs and the range is -40 dB to +40 dB.
The Meter checkbox when checked (checked by default) sends the volume signal to the server to display it.
The Invert checkbox when checked (unchecked by default) inverts the gain on the client.
Right click on the empty black area to select the target monitor of the mp controller.
Once you load the server plugin then load a client plugin where you want.
The server plugin does not process any audio, it allows audio to pass through it unaltered. The client plugin processes audio with its only function being adding or subtracting volume to the signal.
Each client plugin carries an id starting from 01 to 32. Each id corresponds to an encoder on the server plugin and the controller per page. There are 4 pages and they can be switched from the right column of the server.
When you load the first client plugin, it will take id 01, mapped onto encoder 1 and it will be controlled by encoder 1. If you load another one it will take id 02 automatically and so on up to 32.
If you change the encoder id from the client it will be reflected on the server. If you change the page on the client the server will also go to that page.
If you have a clients in page 1 with ids, i.e. 1, 2, 7 and you add a new one, it will take id 8. When adding a new client it finds the encoder with the greatest id and adds the next one. If there are no available ids in that page it will go to the next page and take the id after an existing encoder with the greatest id.
You can load multiple client plugins on the same track. For example, you can enter a client plugin before an audio effect and one after an audio effect, on the same track to do gain staging.
Gain Staging
Add a client plugin before a plugin you want to control the gain staging, ie a compressor. Add another one after. Disable the meter on the first client and enable the meter on the second client and enable the Invert.
Turning the encoder to increase the value it will add gain feeding the the compressor (on the first client plugin) while at the same removing the same amount of signal after the compressor from the second client plugin. Your signal will remain at the same level and you will only hear the difference made by the compressor. You can apply the same principle to any plugin or set of plugins.
Do not copy and paste existing client plugins because the client will not take a new id automatically.
Always load a new client plugin
Selecting a new id for the client plugin will copy over the name, color and dB value to the new encoder, overwriting any existing client.
Naming and Coloring
Once you add a new client plugin you can enter the name in the client text box and it will send the name to the server.
Alternatively, you can write the name onto the corresponding encoder on the server plugin and it will send it to the client that has the same encoder id.
Cubase and Logic Pro have the ability to send the track name of the plugin via the VST protocol. The gain utility takes advantage of this and receives the name of the corresponding track where the client plugin(s) is placed.
In Cubase, it also receives the color of the track along with the name.
When in Cubase or Logic Pro, a checkbox appears on the client named "Track name" which is checked by default. This enables receiving the track name automatically from the DAW.
When you type a custom name in the client, the check box will automatically turn off. The same applies when changing the name or the color of the encoder from the server.
Enabling the "Track name" checkbox again will instantly receive the track name.
Assigning Colors
To assign a color to each on-screen encoder right click on the encoder and it will show the color palette window.
You can copy the lastly used color by clicking on it on the color palette:
Reset to 0 dB
Double click on the meter of the on-screen dB meter of the server next to the encoder and the value will return to 0 dB.
Identifying a meter or an encoder.
Click on the name of the encoder and it will blink the corresponding on screen meter.
Click on the meter and it will blink the corresponding encoder.
Automation
If you would like to record gain automation using the MPGU, you can do it at the track you placed the server plugin. Each encoder is automatable like in the MPH.
The client has no controllable parameters and it only displays the value in dB.
Total Recall
When you save your project, all the values and state of the server and client will be saved with your project. When you open your project everything will be recalled. If you delete the Server plugin by mistake, just load it again and it will sync up with the existing clients.
The MPGU, unlike the MPH, does not save presets.
Using it with the MPH
You can load the MPGU and the MPH in the same DAW project. The Controller Icon button works as it does on the MPH. Clicking on the button will close any open MPH instance and display the MPGU on the controller. Clicking on the Controller Icon button of the MPH, will close the MPGU window and display the MPH.
You can also switch to it from the small bar icon on your Mac or Windows or using the Plugin Panel.
Cubase meter settings
In Cubase if you are using mono tracks, ensure you have your track meters set to post fader.
Right click on the meter in Cubase and set it to Post-Fader.
How does it work and troubleshooting
The server and client use the OSC protocol to communicate and it requires port 6565 and 6566 to be open and available.
If the client and server do not communicate you can check if the port is available.
On the Mac's terminal enter this command:
lsof -i : 6565
If nothing is returned → nothing is currently using port 6565. You can check the same for port 6566.
If something is returned → it shows the process using that port.
On Windows open a cmd window and type:
netstat -ano | findstr :6565
If nothing appears → port 6565 is not currently in use. You can check the same for port 6566.
If you see output, the last column is the PID of the process using it.
If some other process is using the port you need to stop be in order to use the MP Gain Utility.
Alternatively, you can change the default port numbers from the mputility.properties file and use different ports by opening the file in a text editor.


